The Complete Visual Journey
A photographic timeline of the Corvair's transformation
Browse by Phase
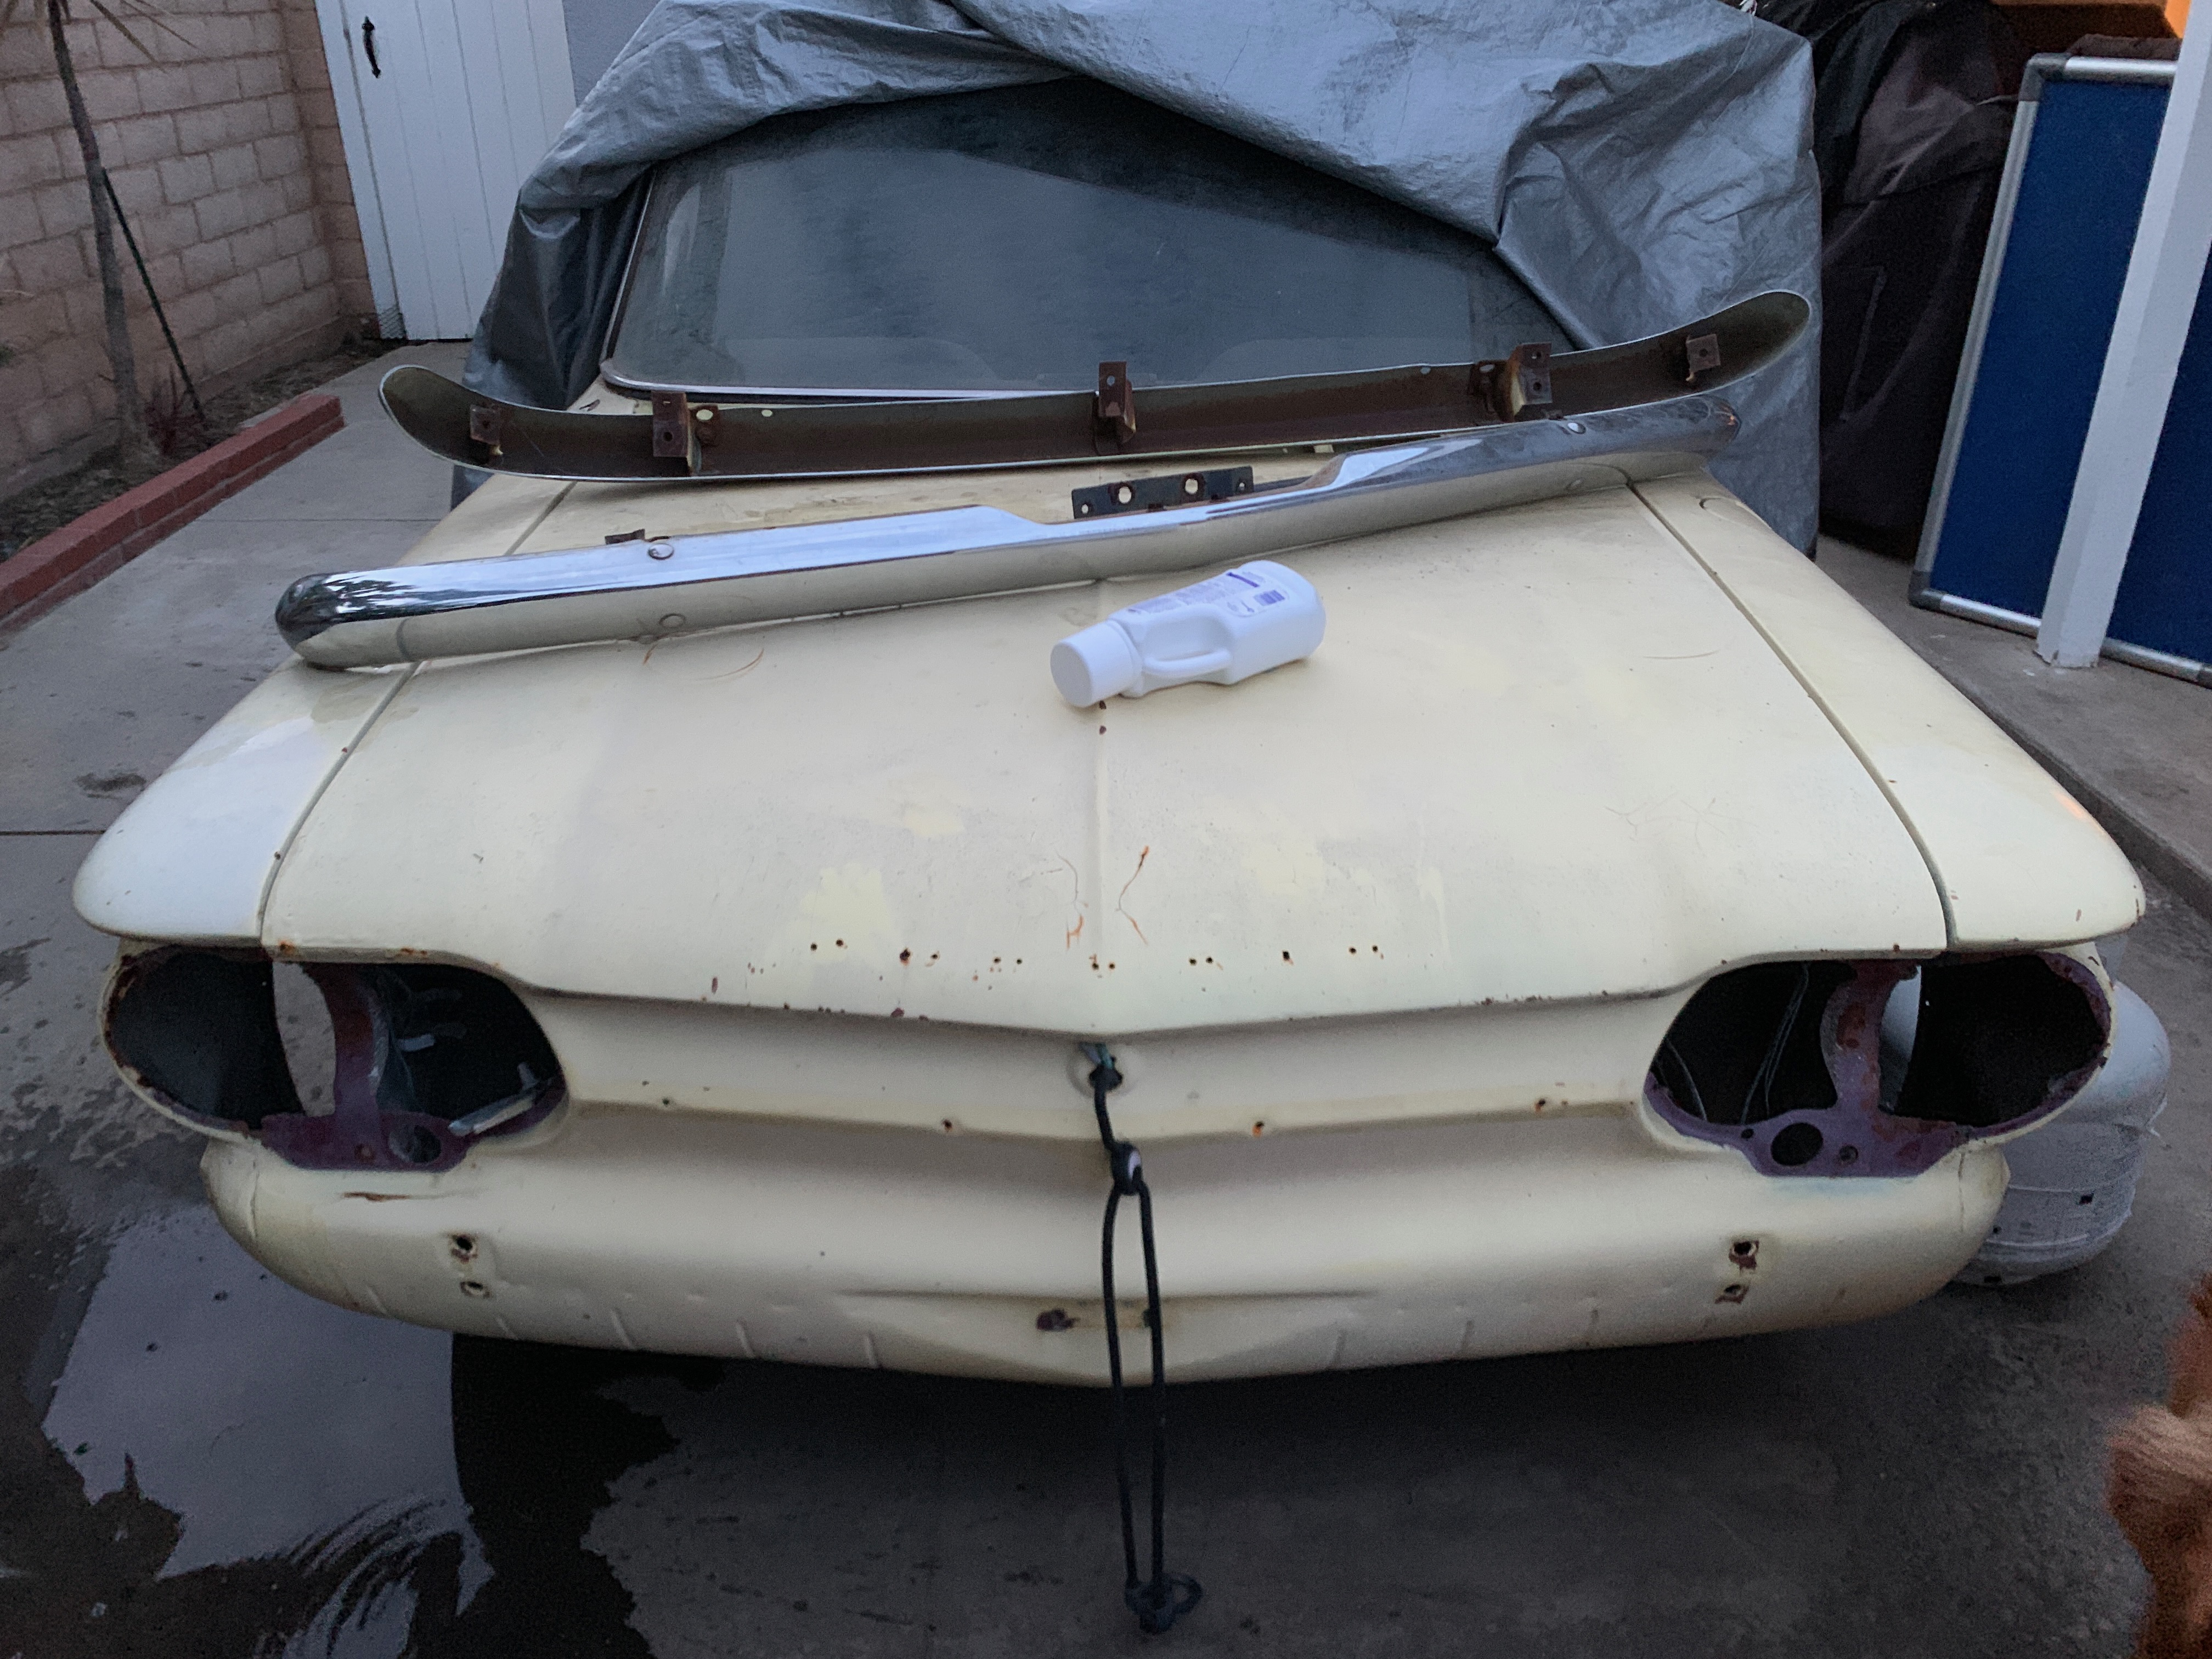
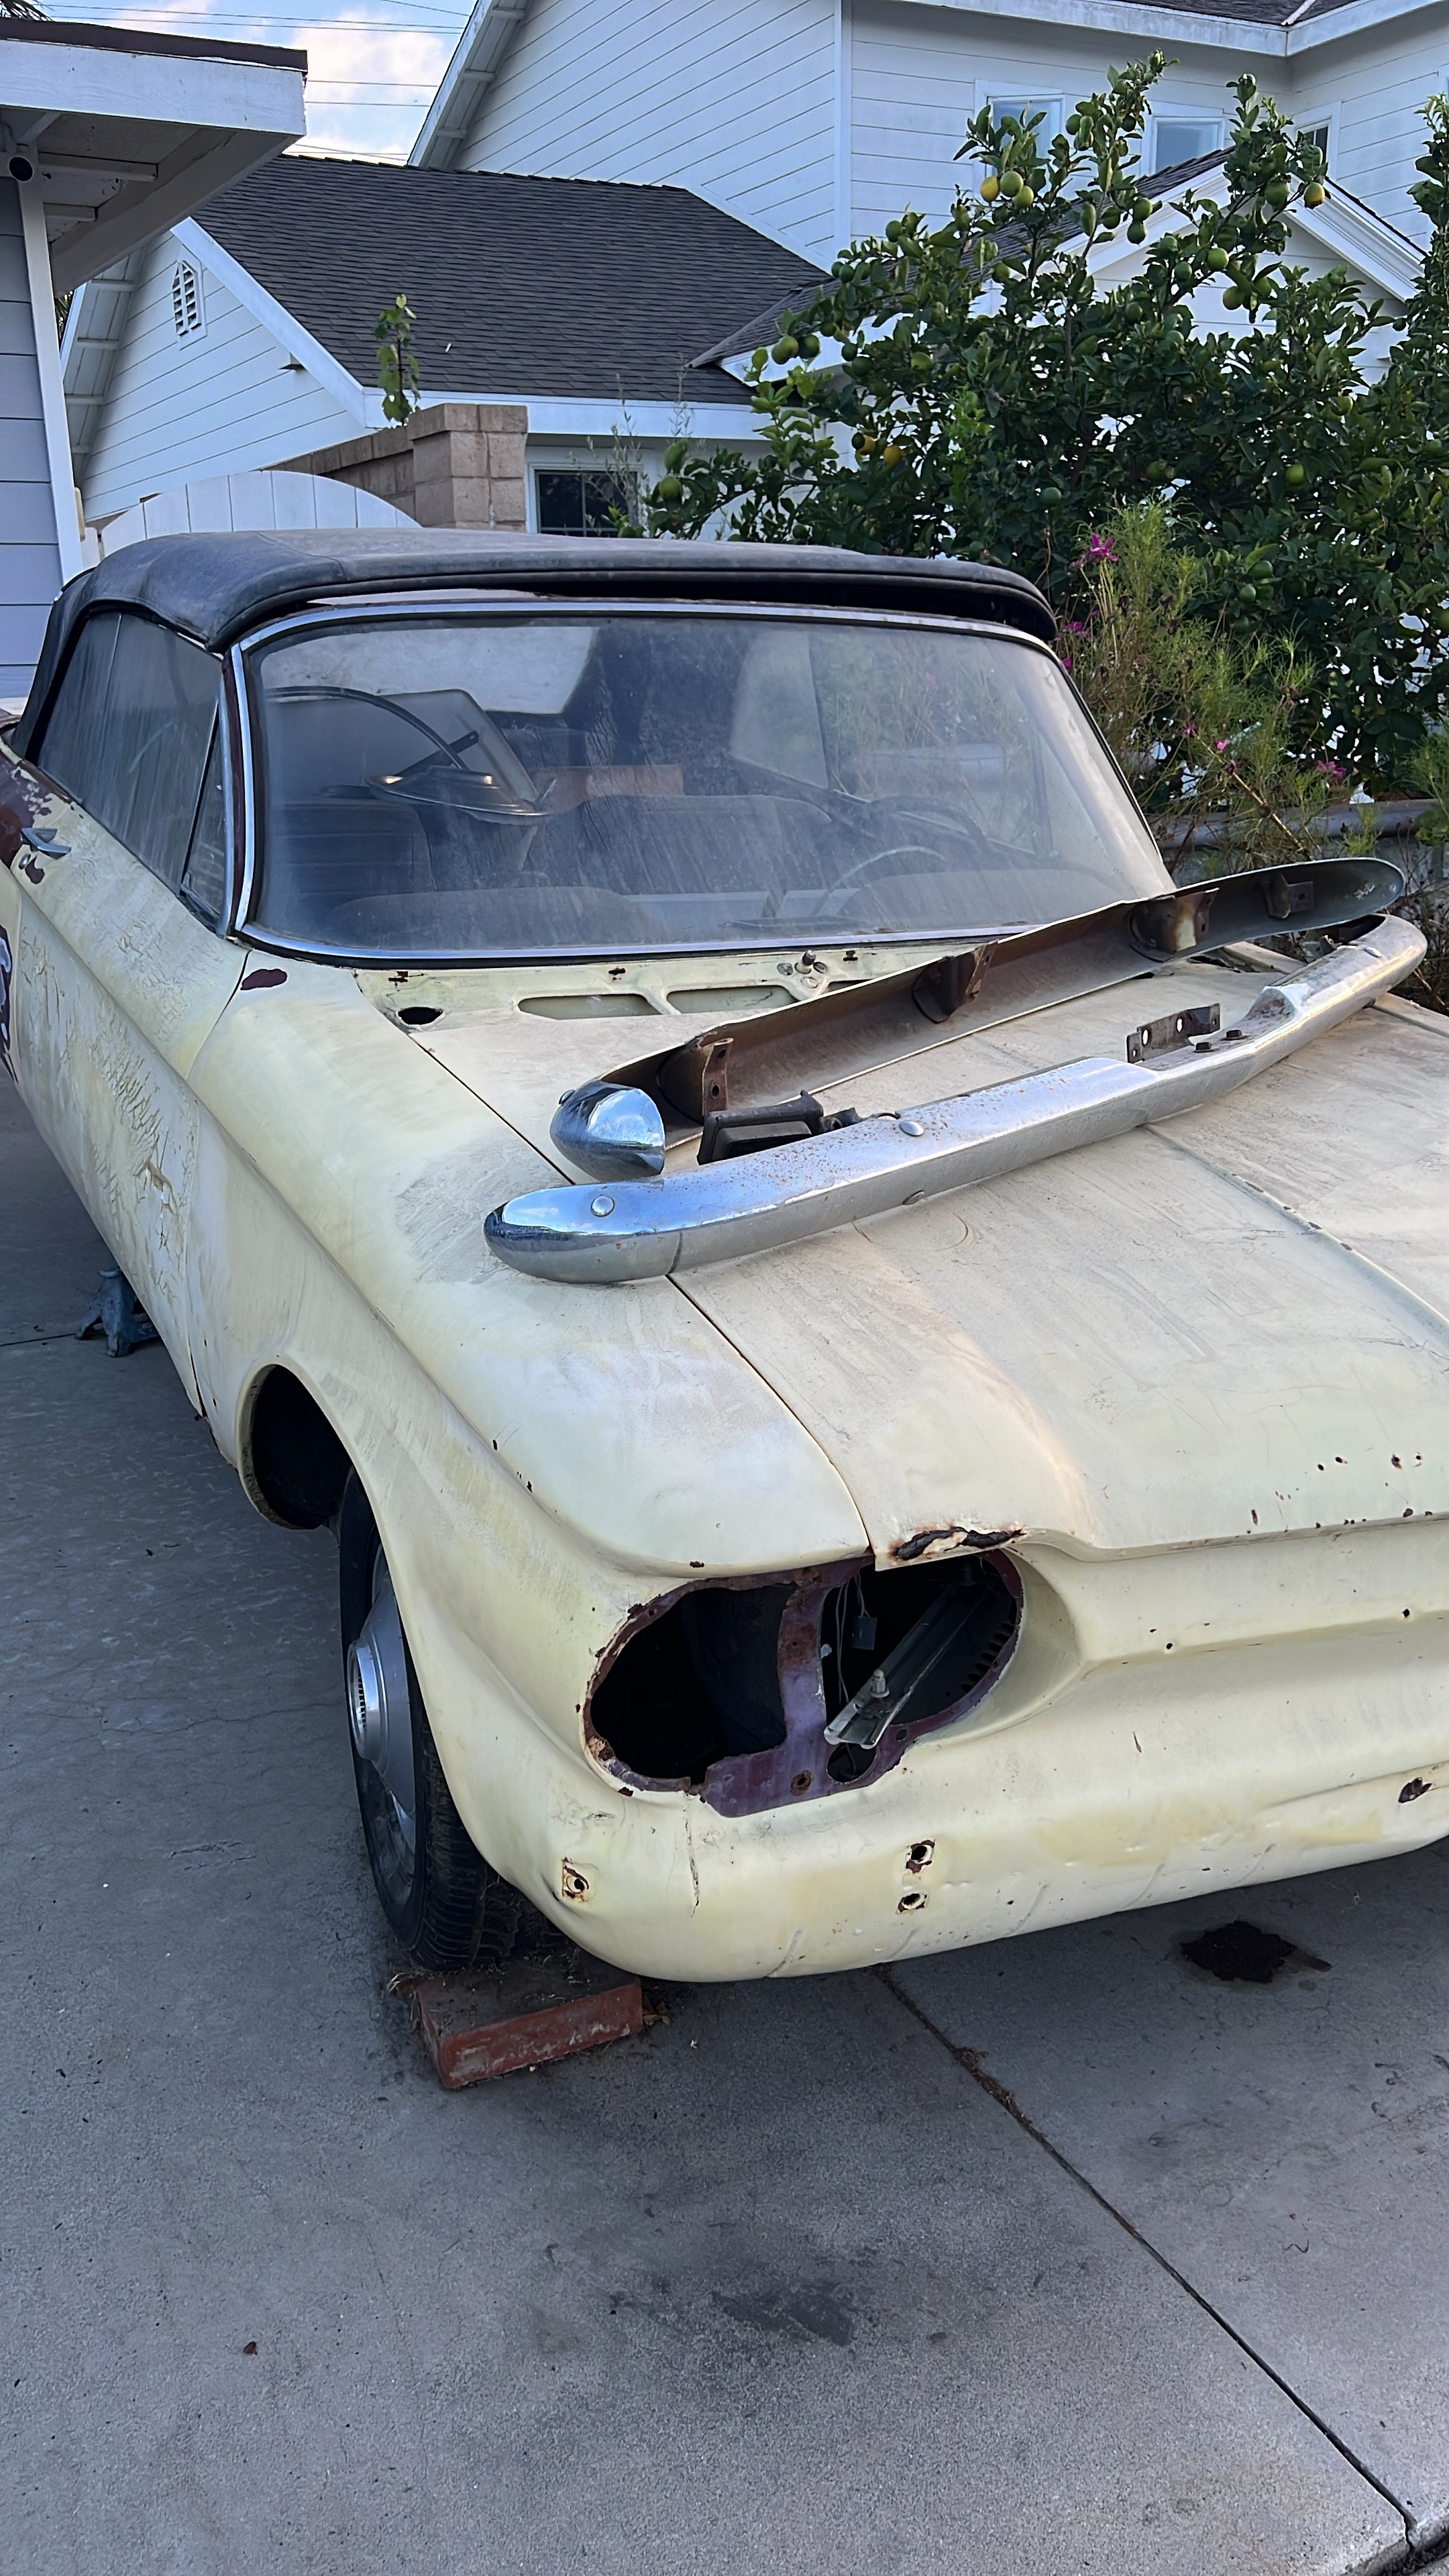
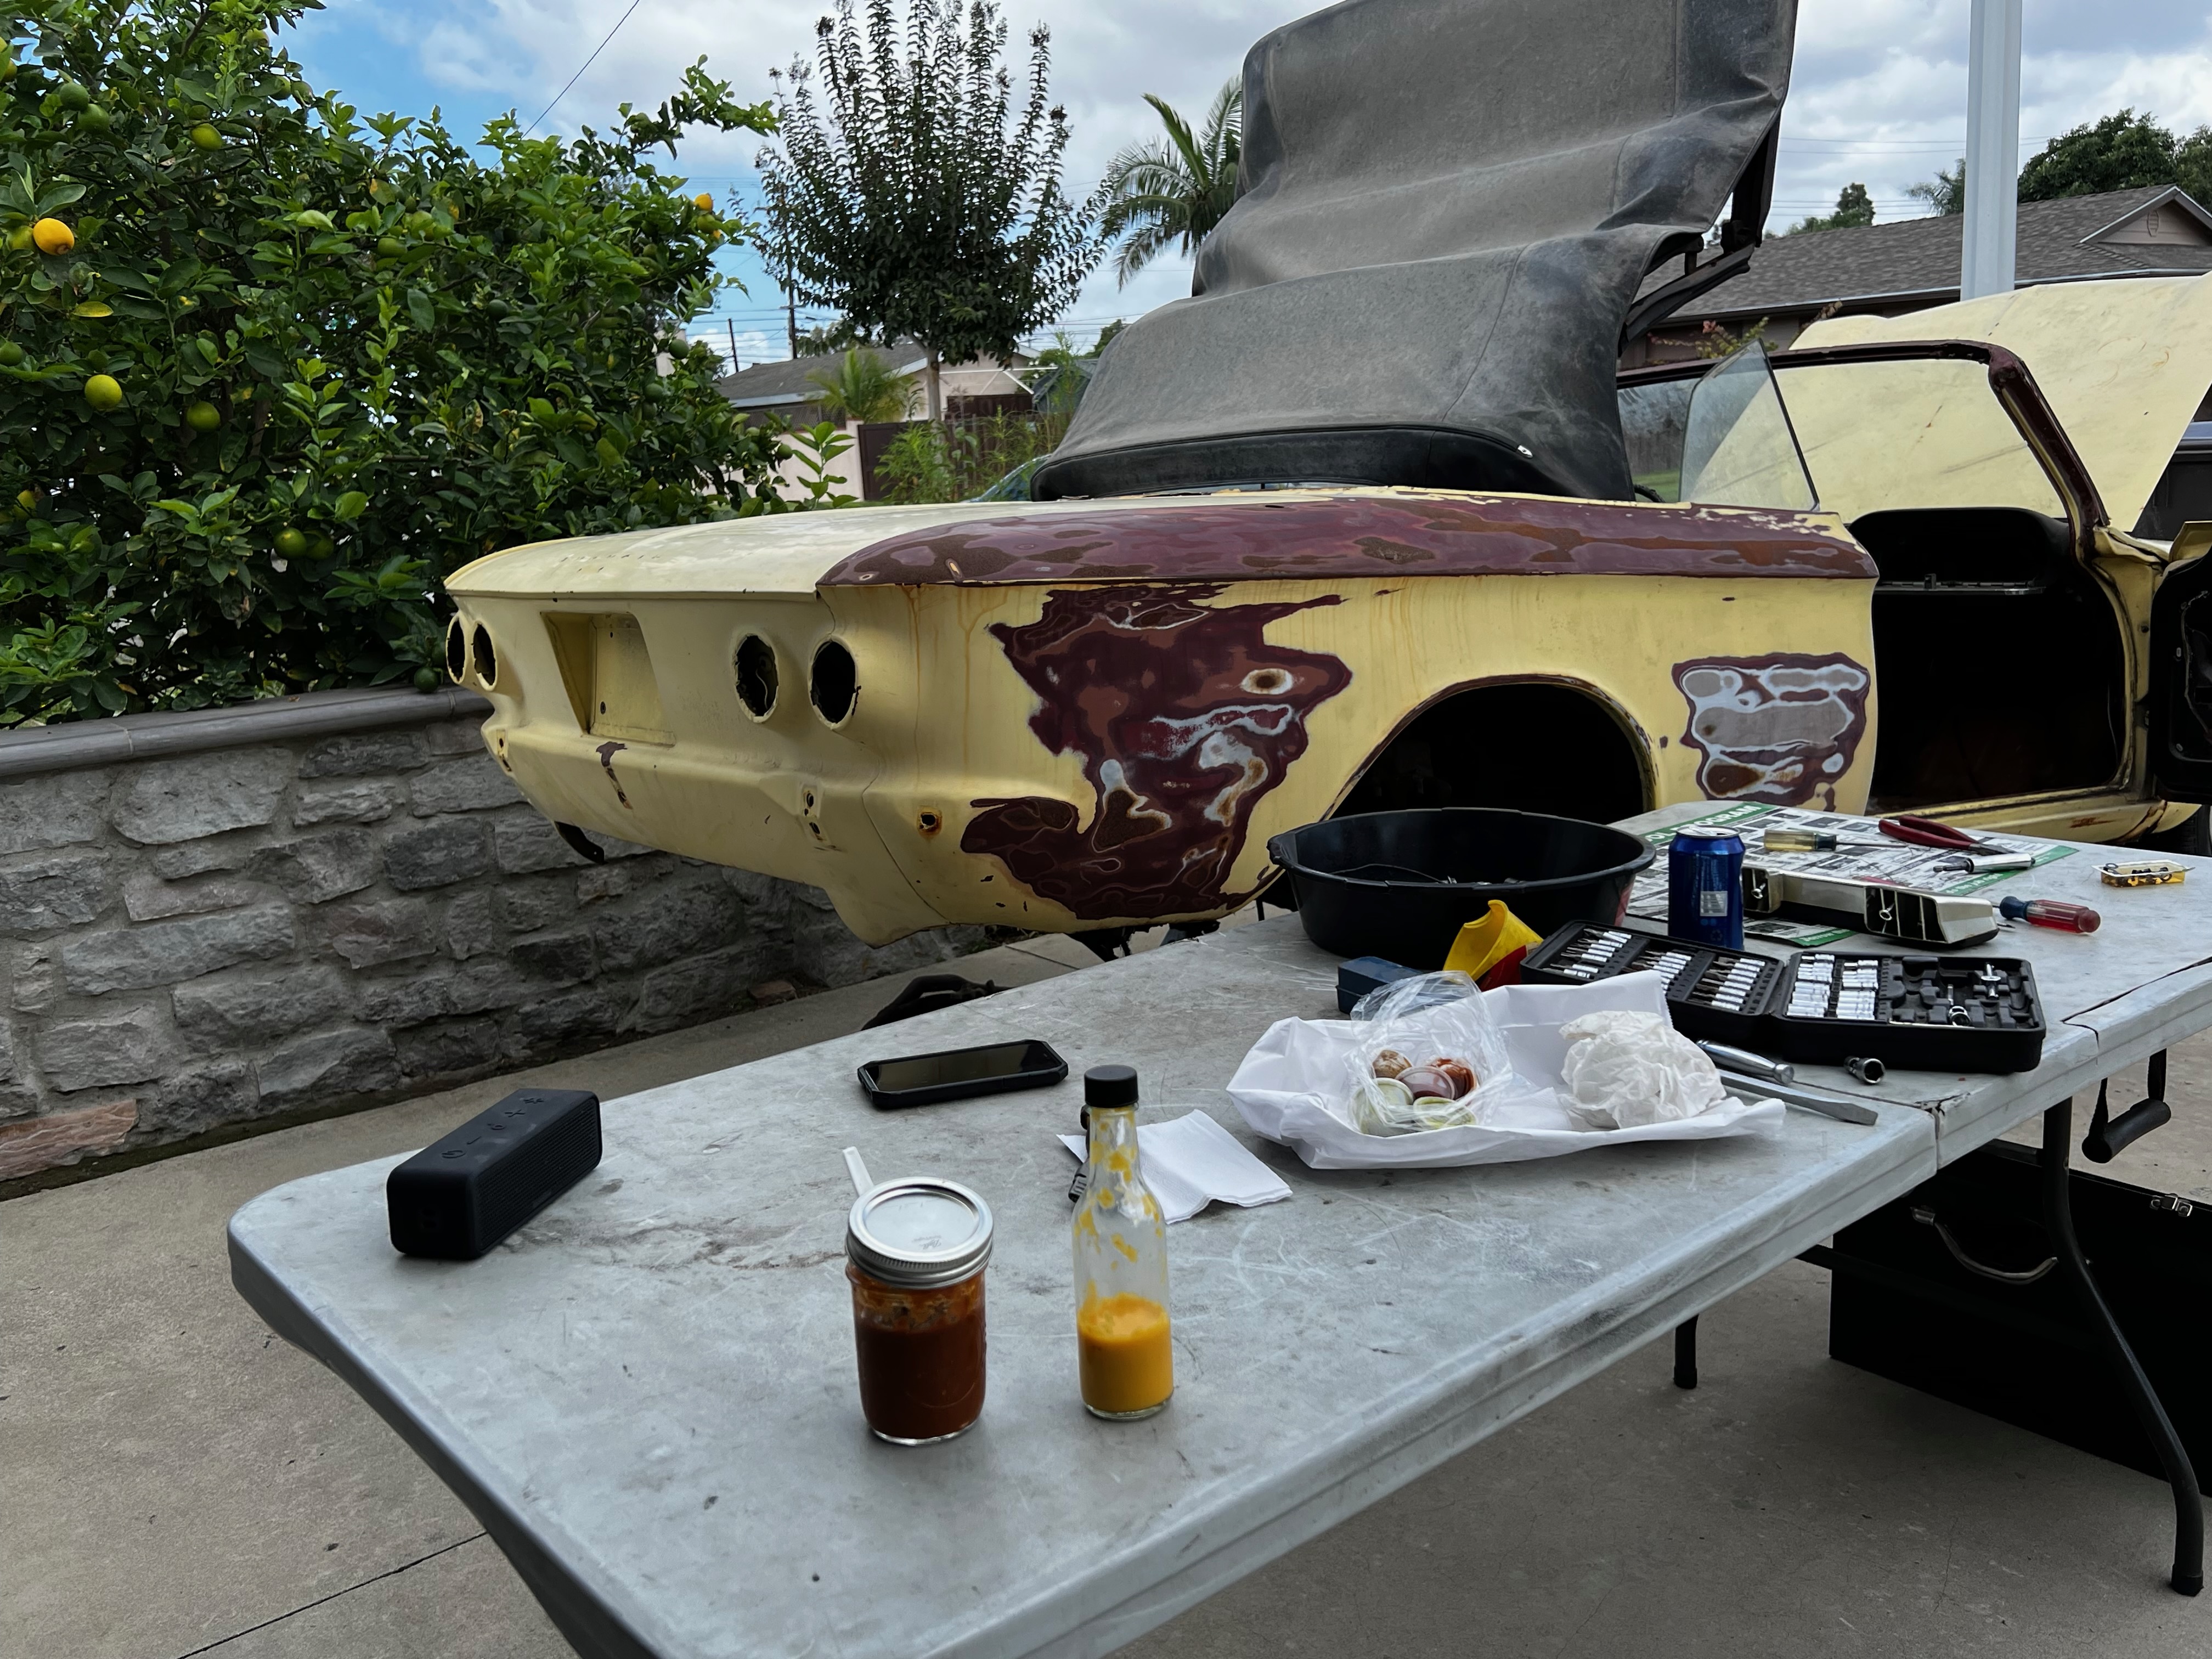
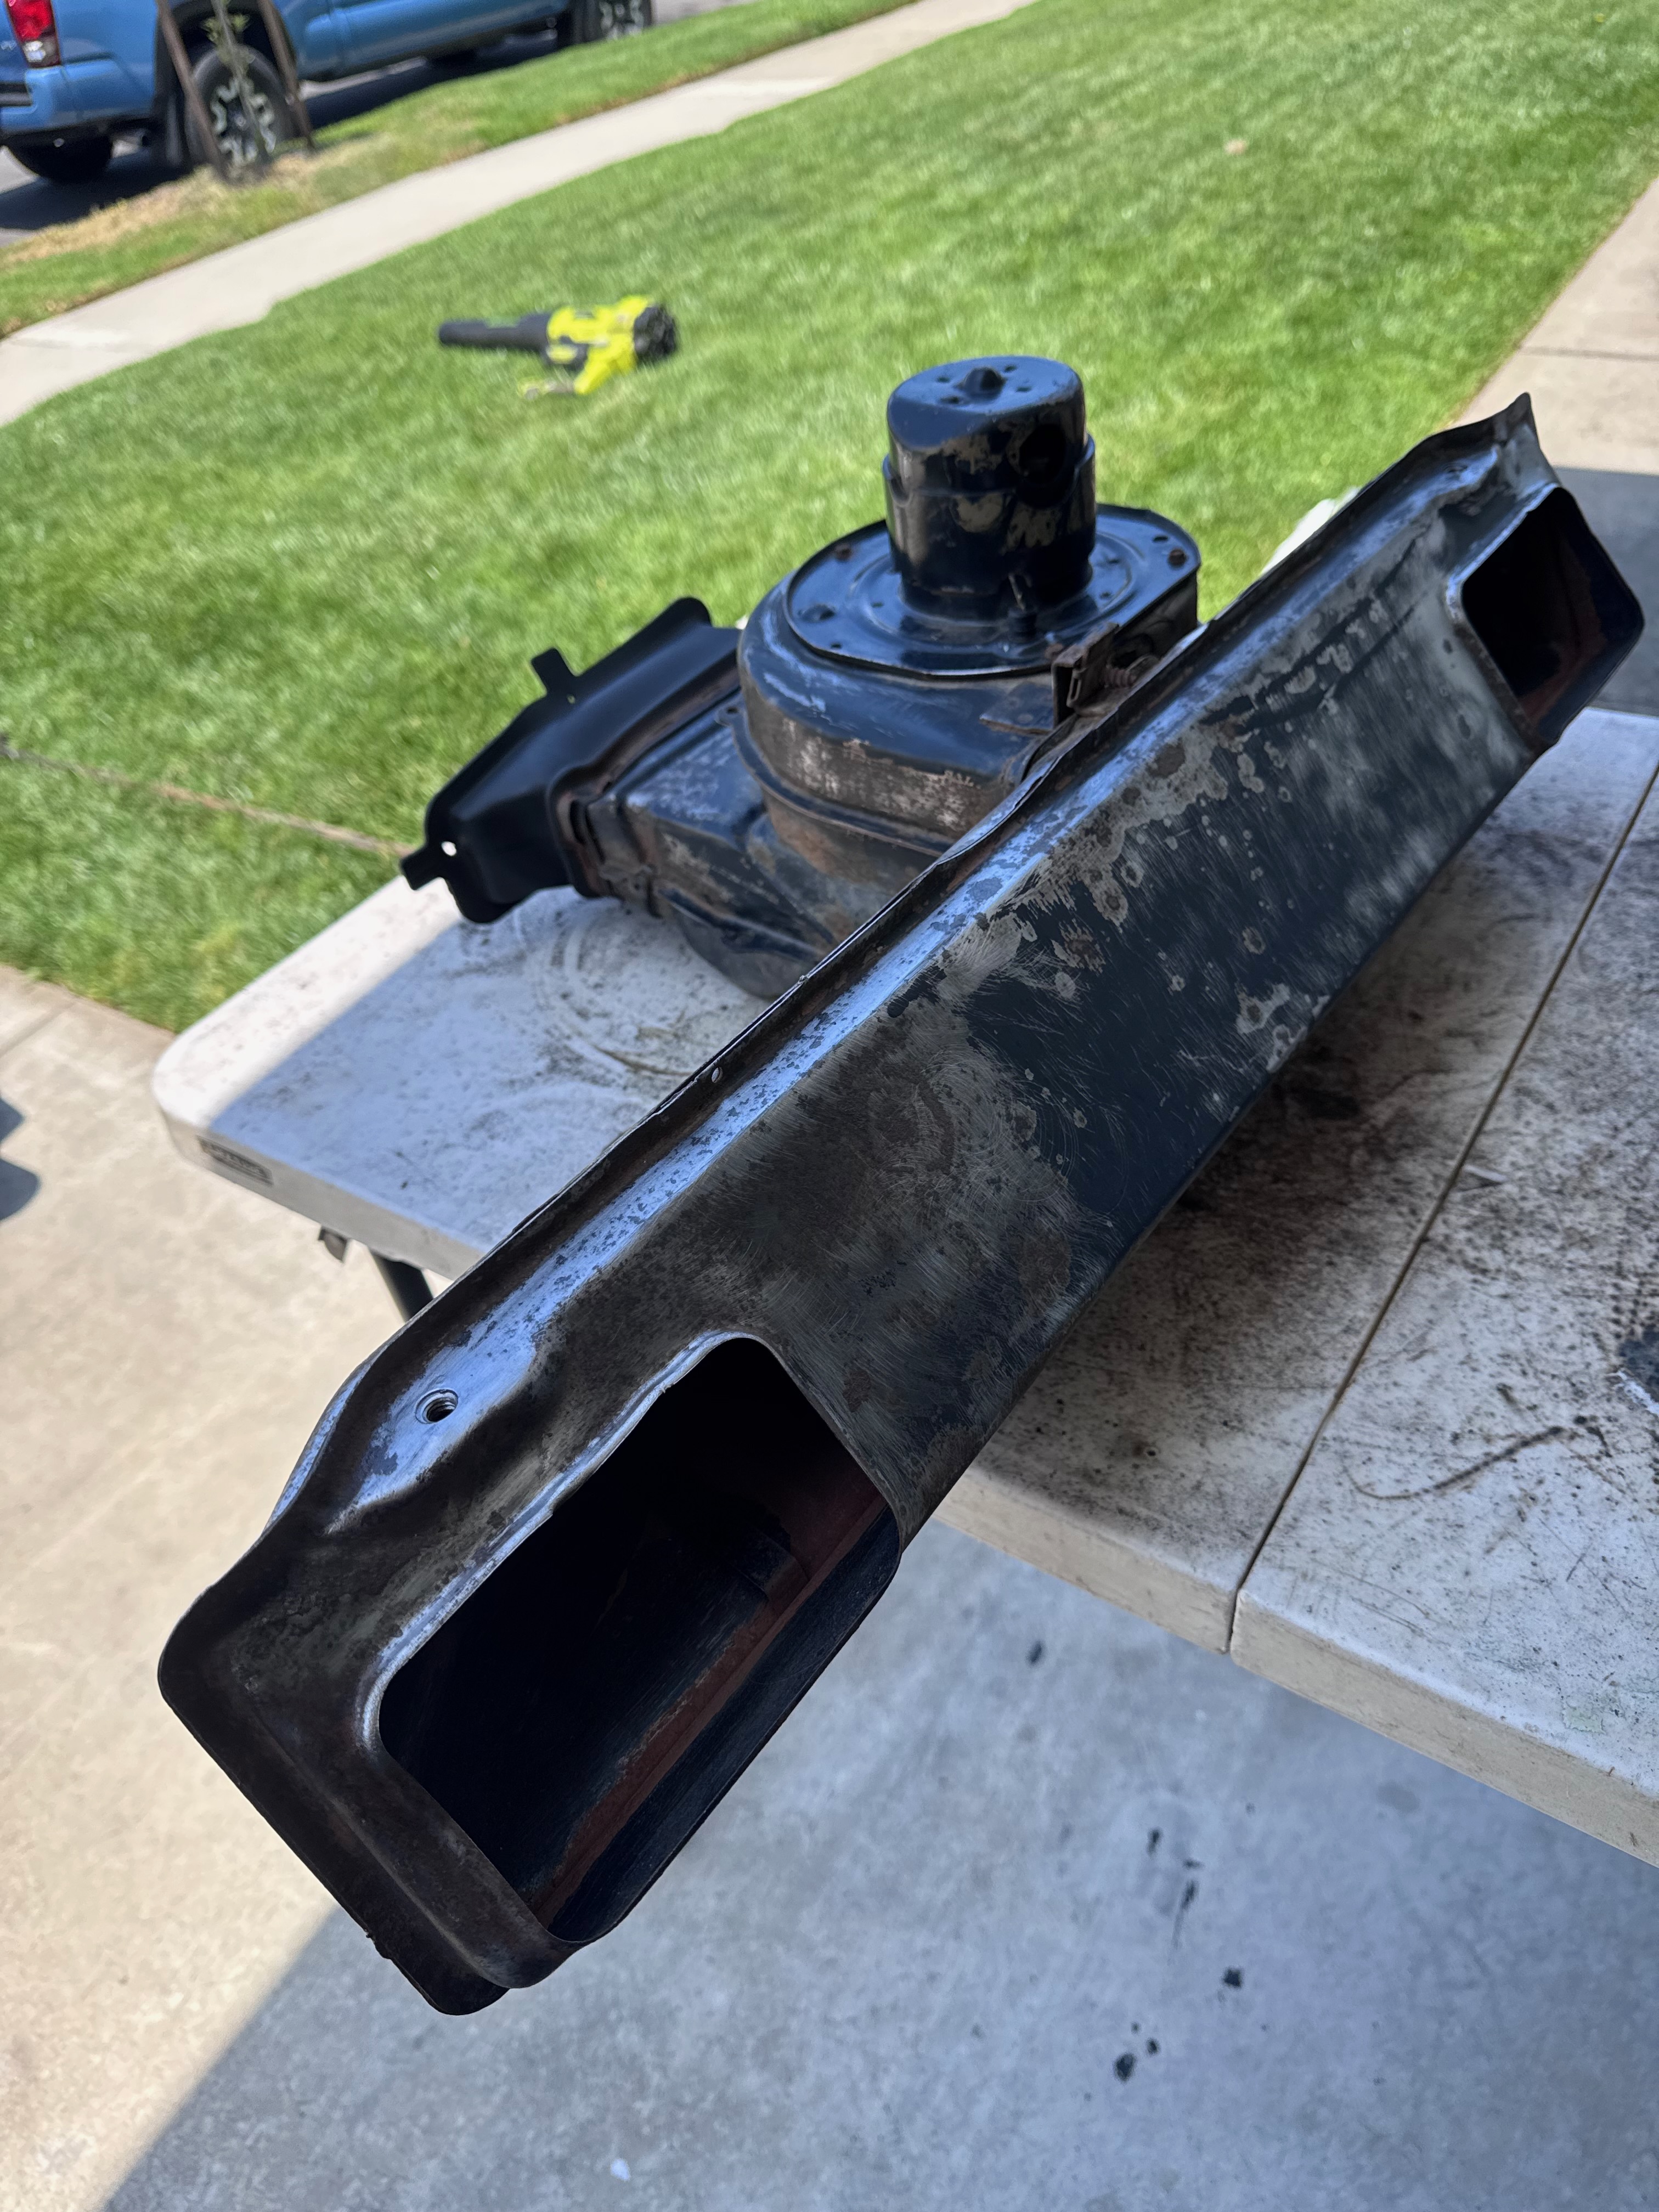
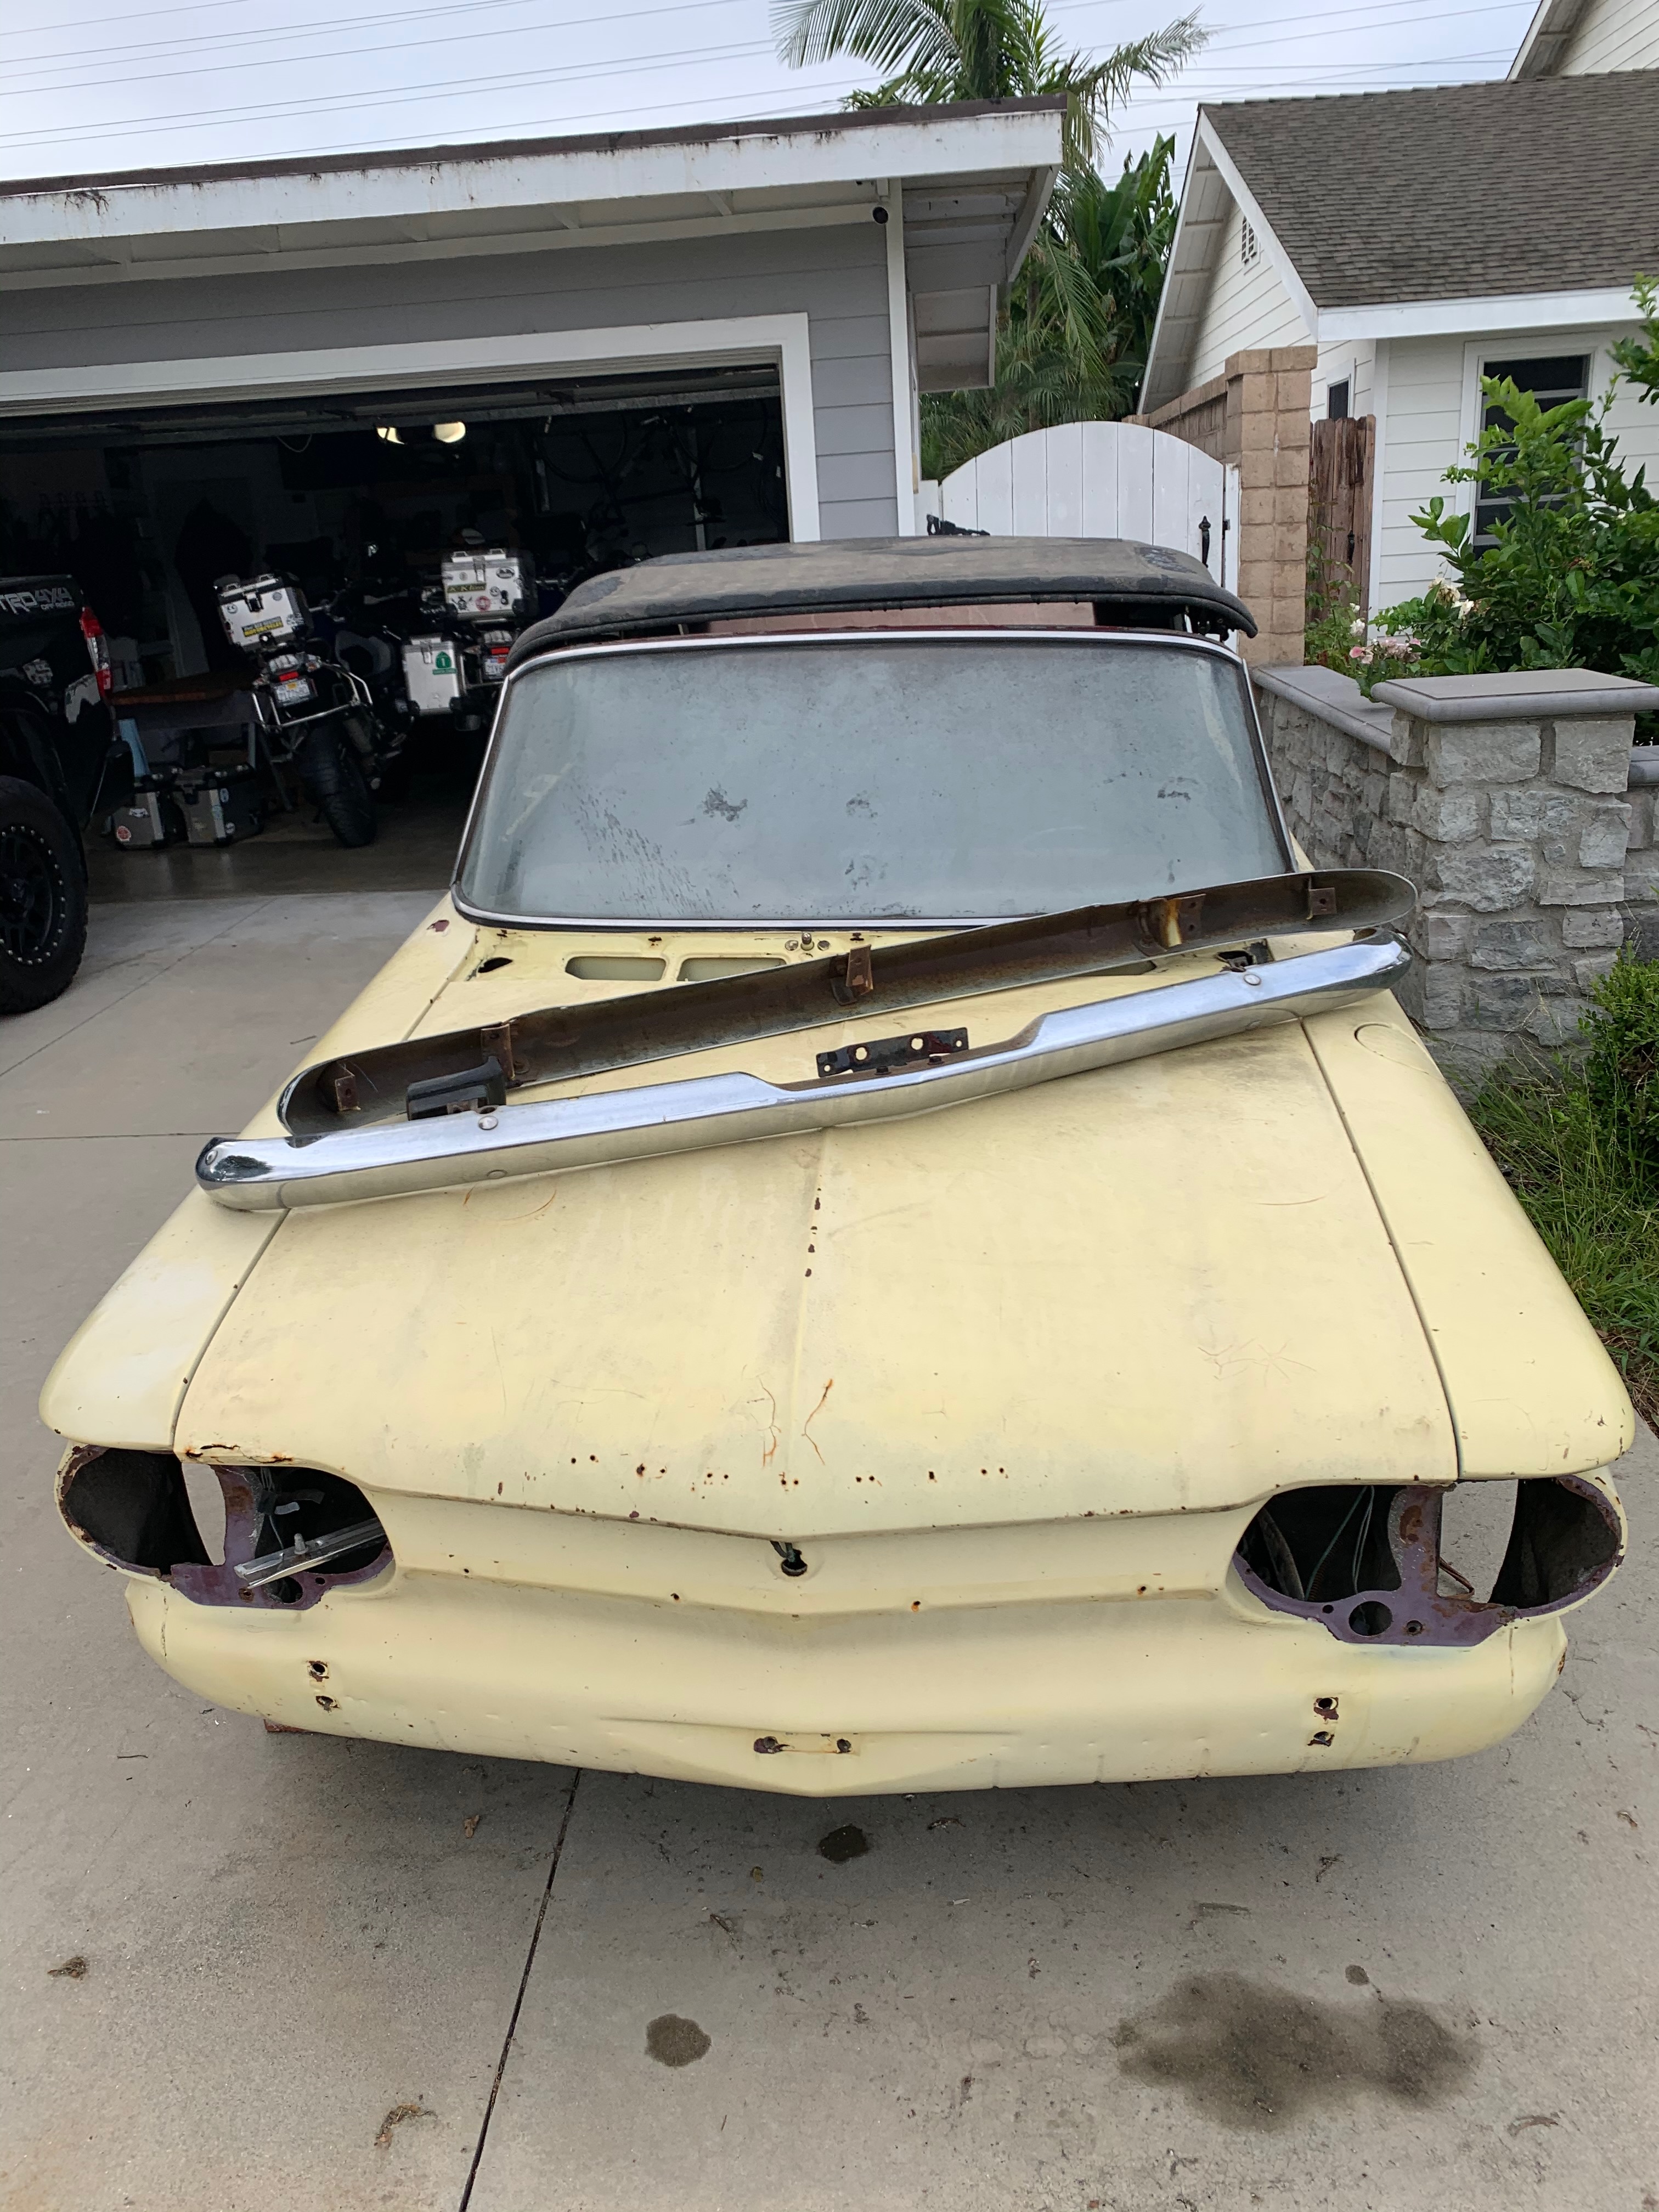
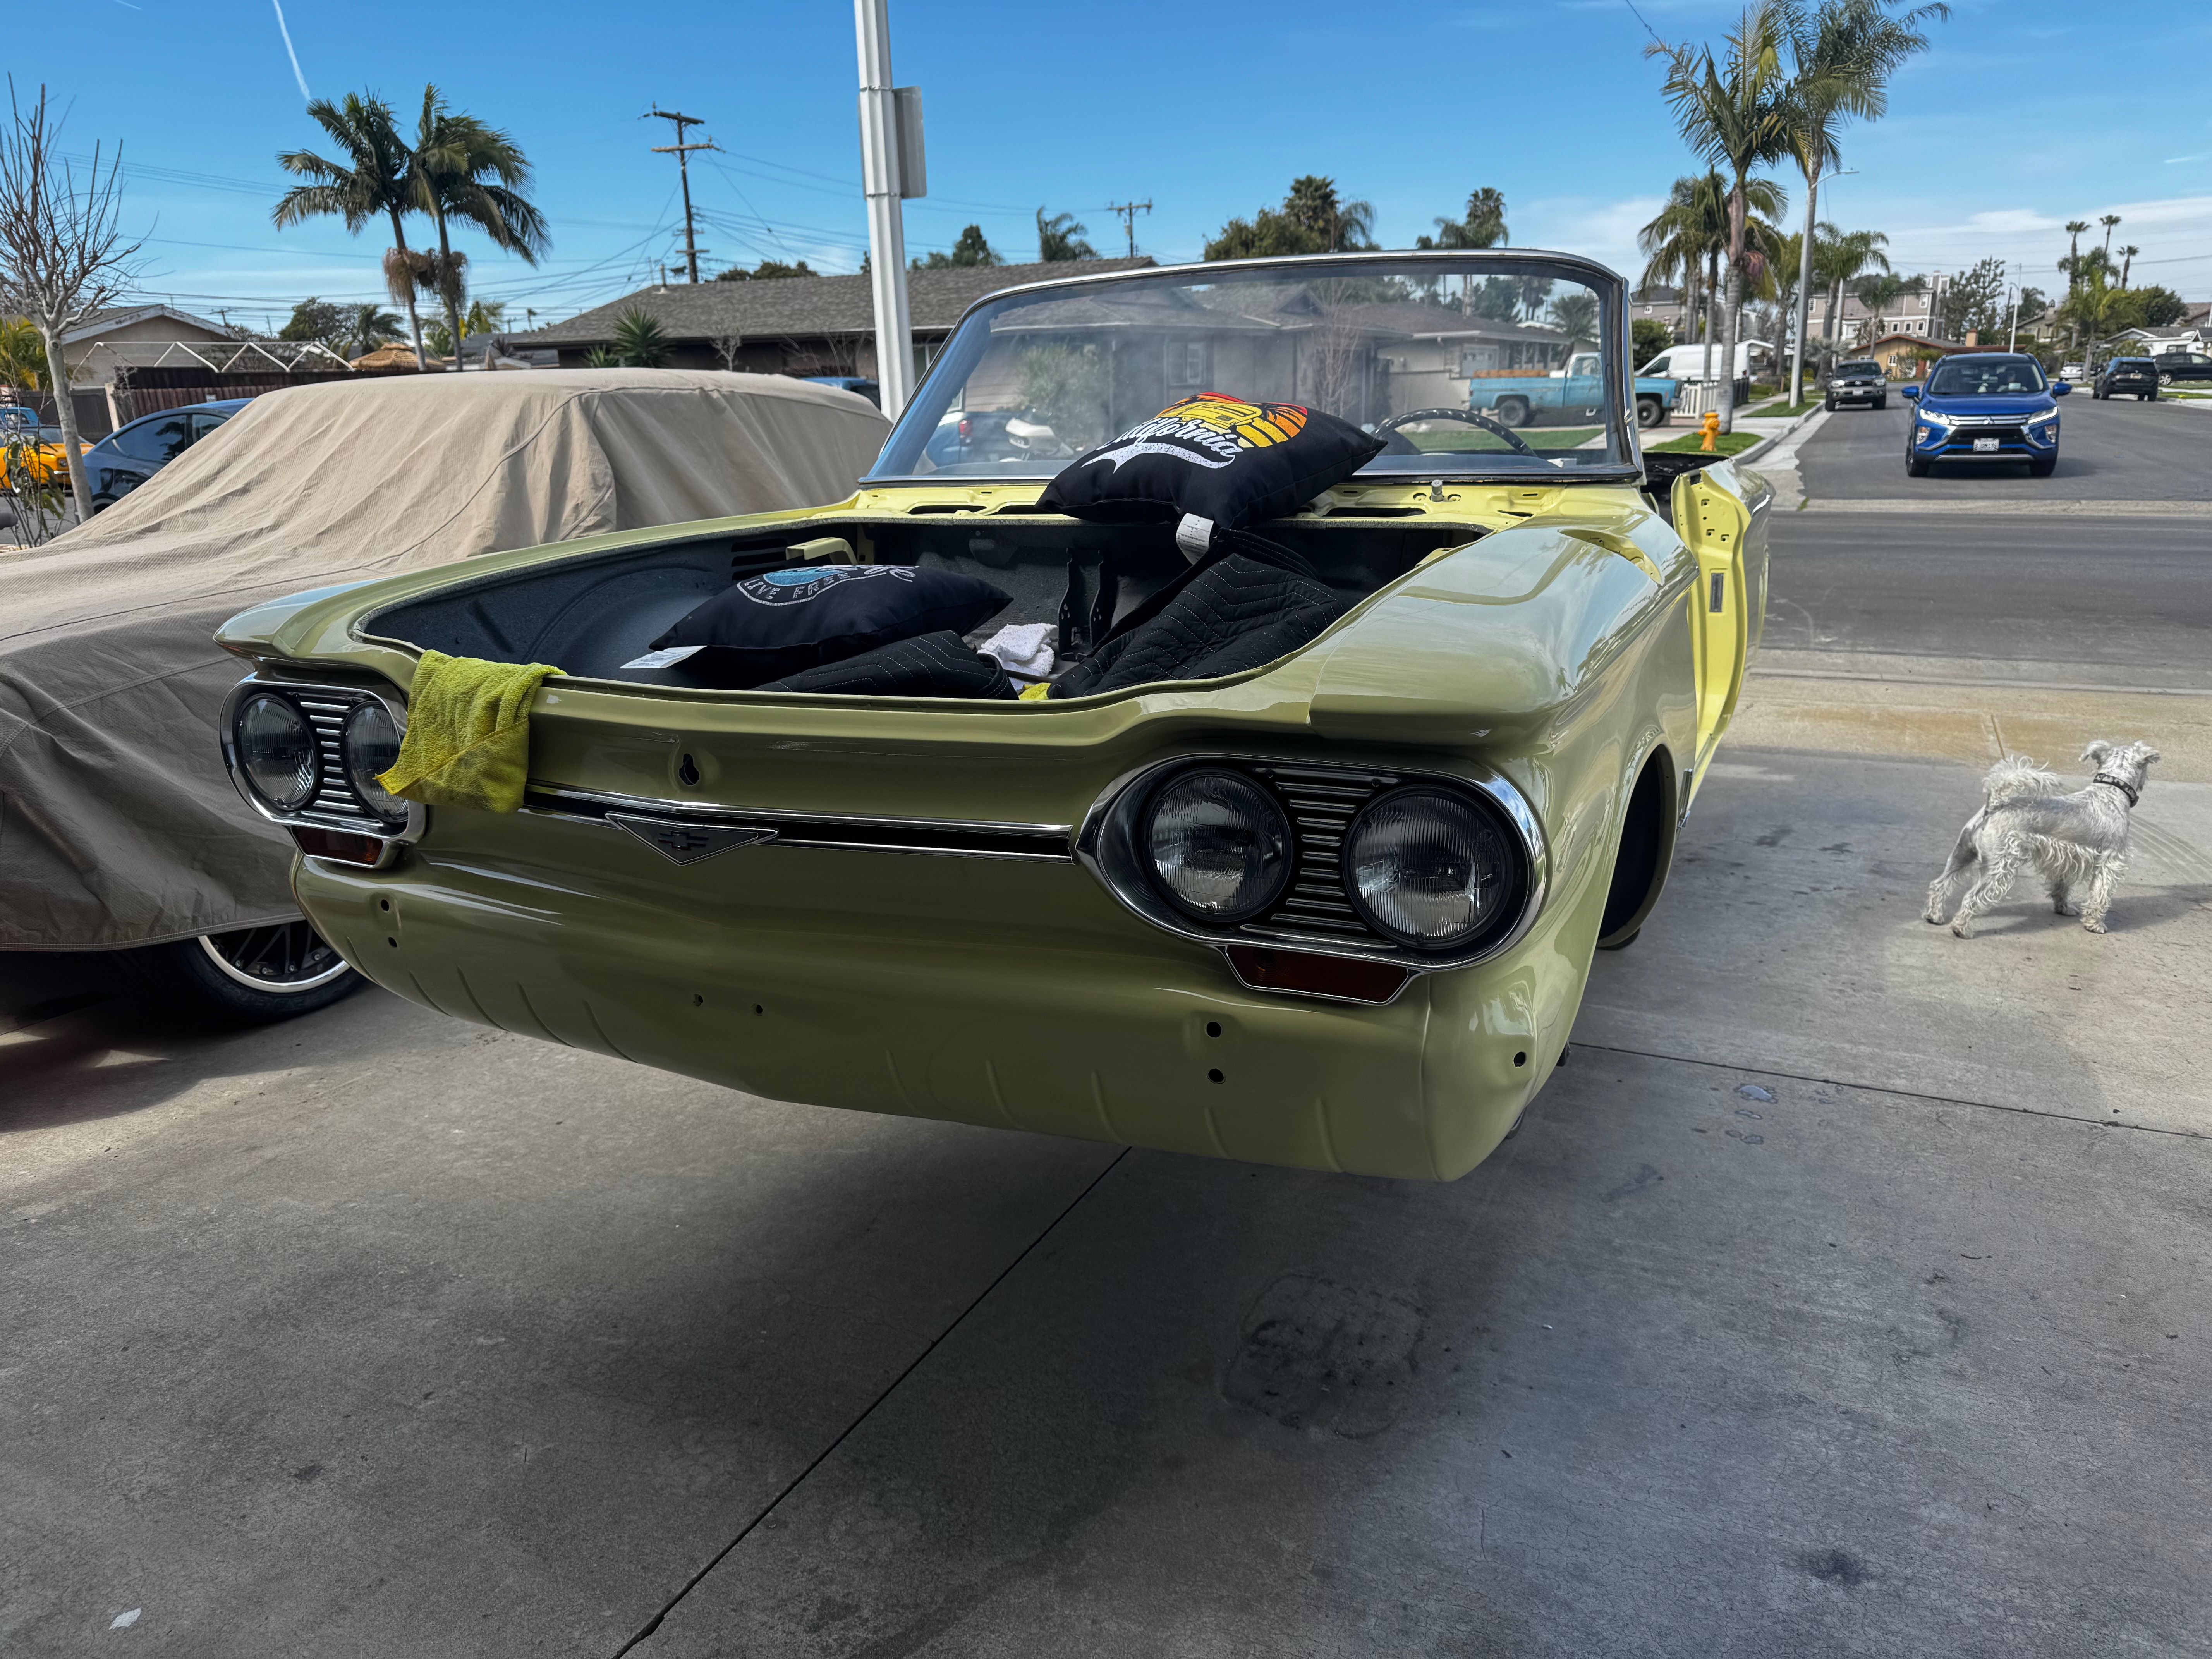
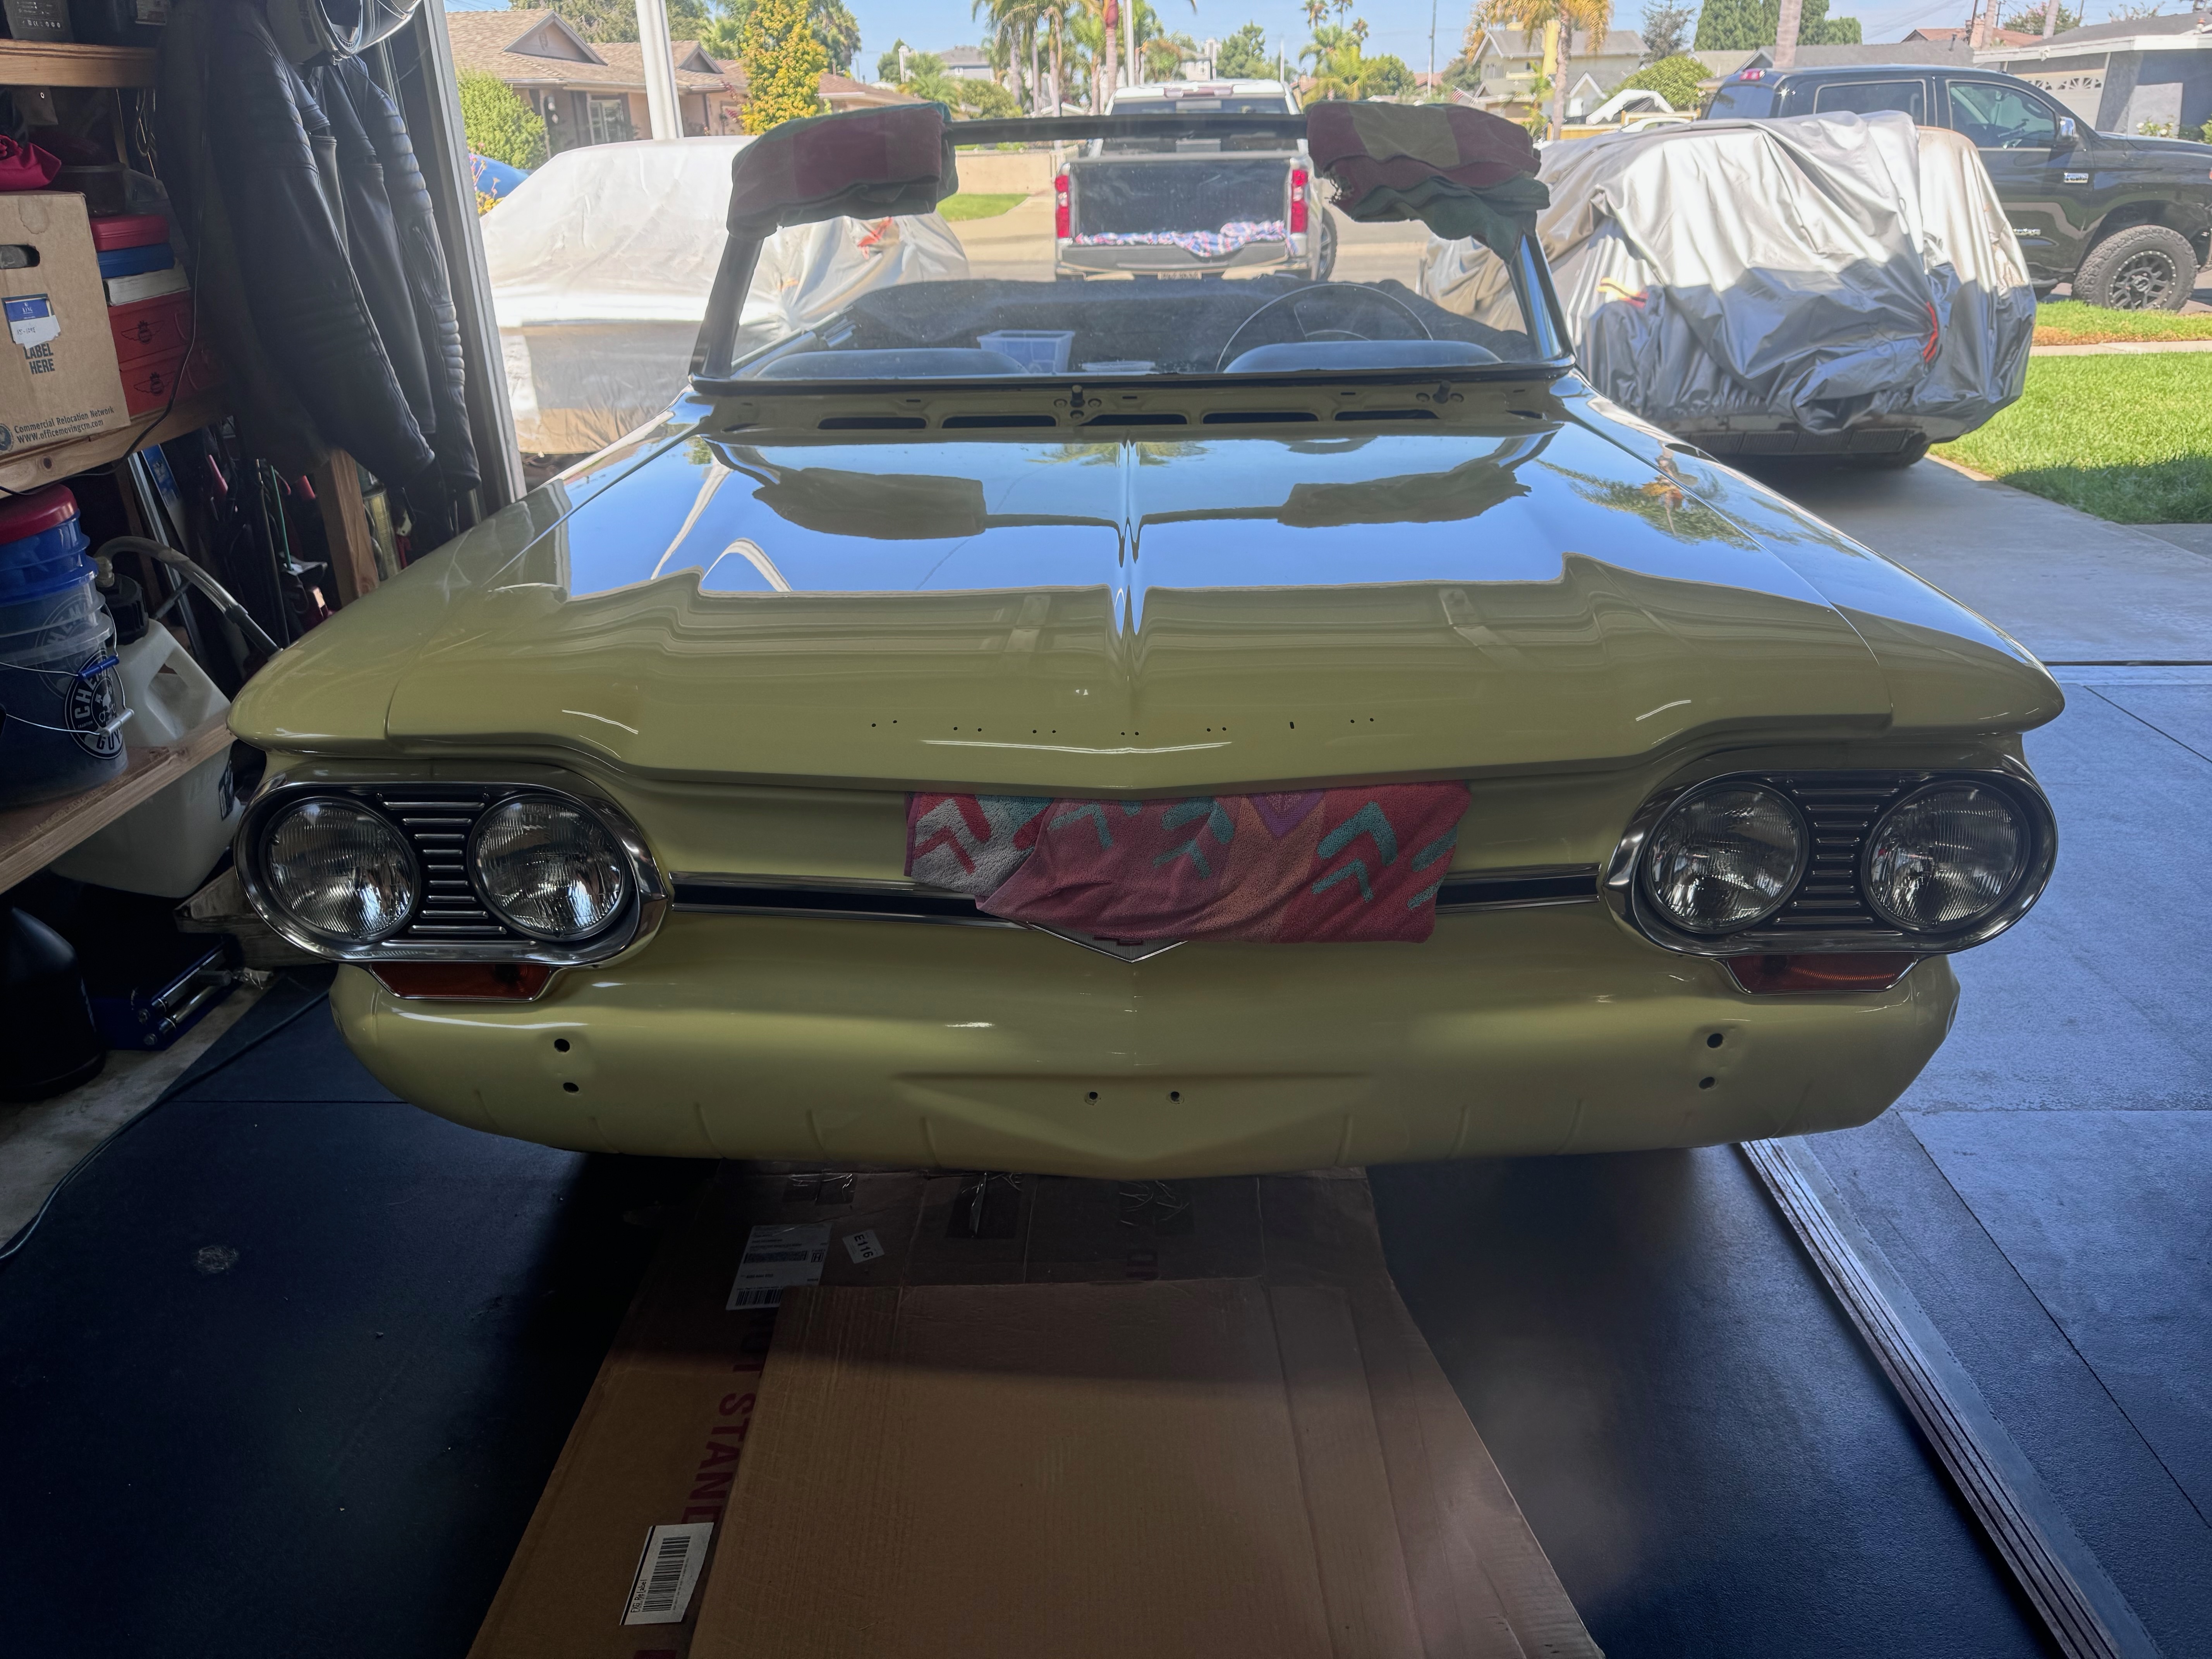
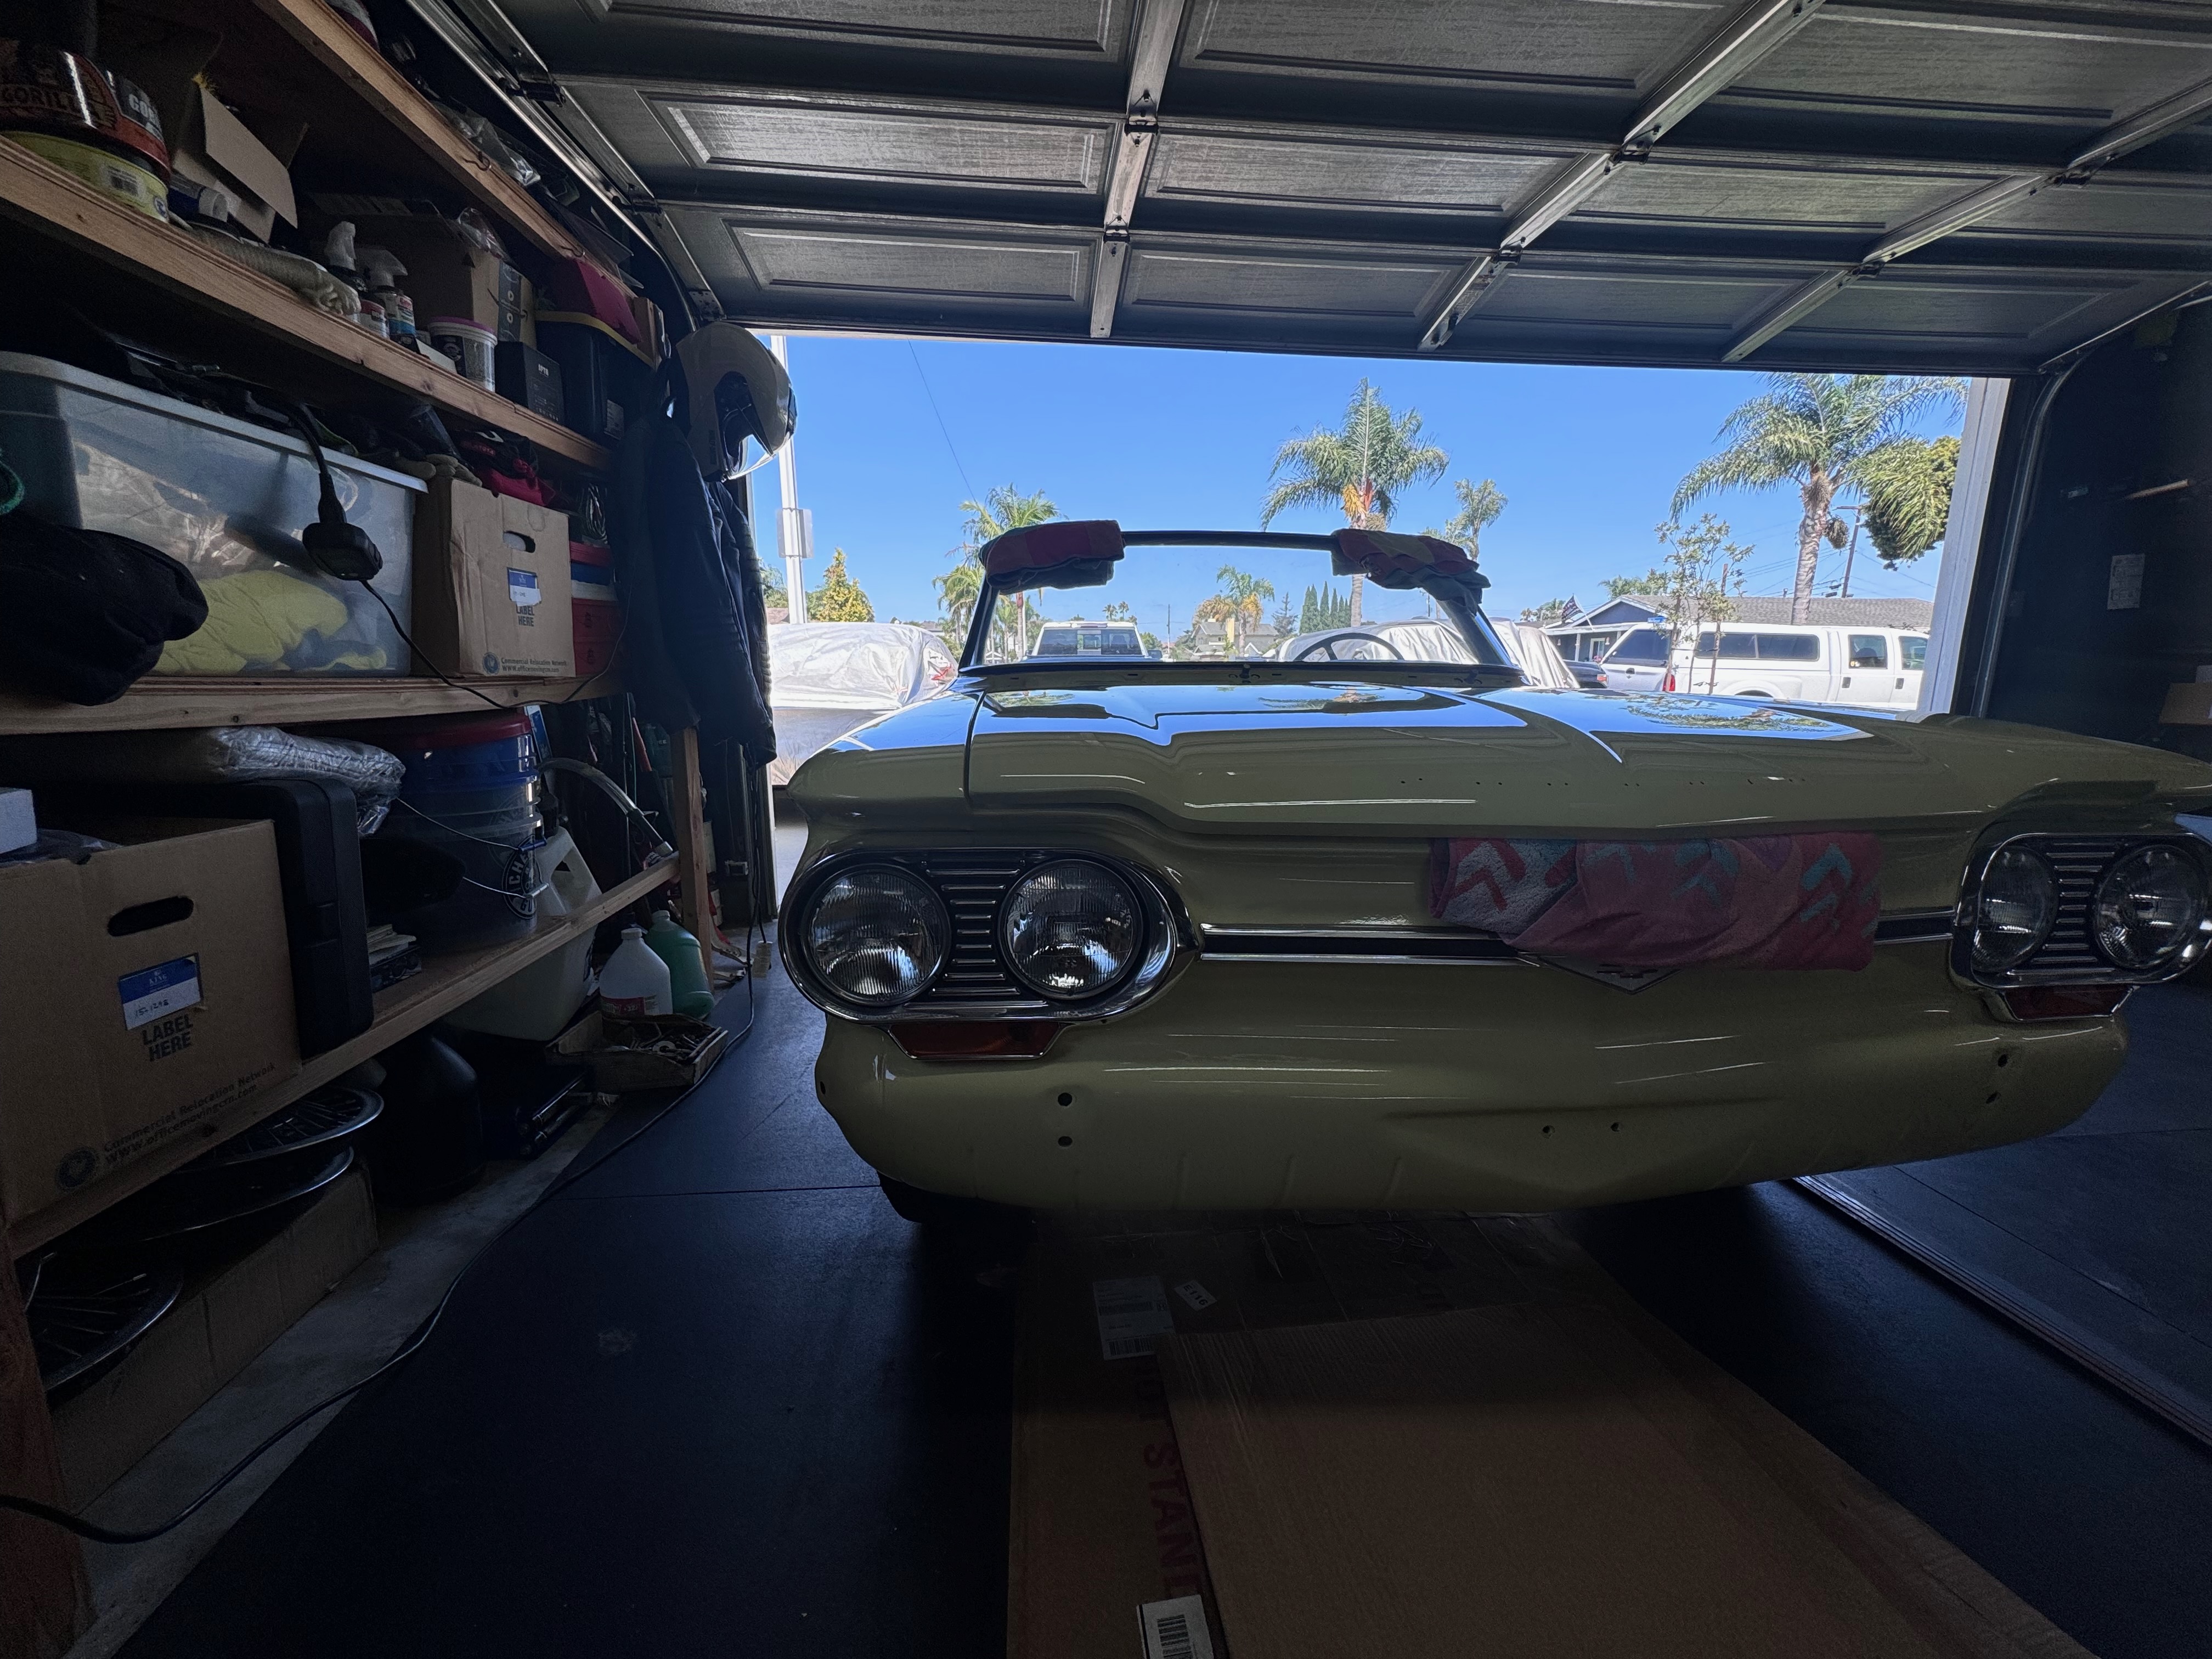
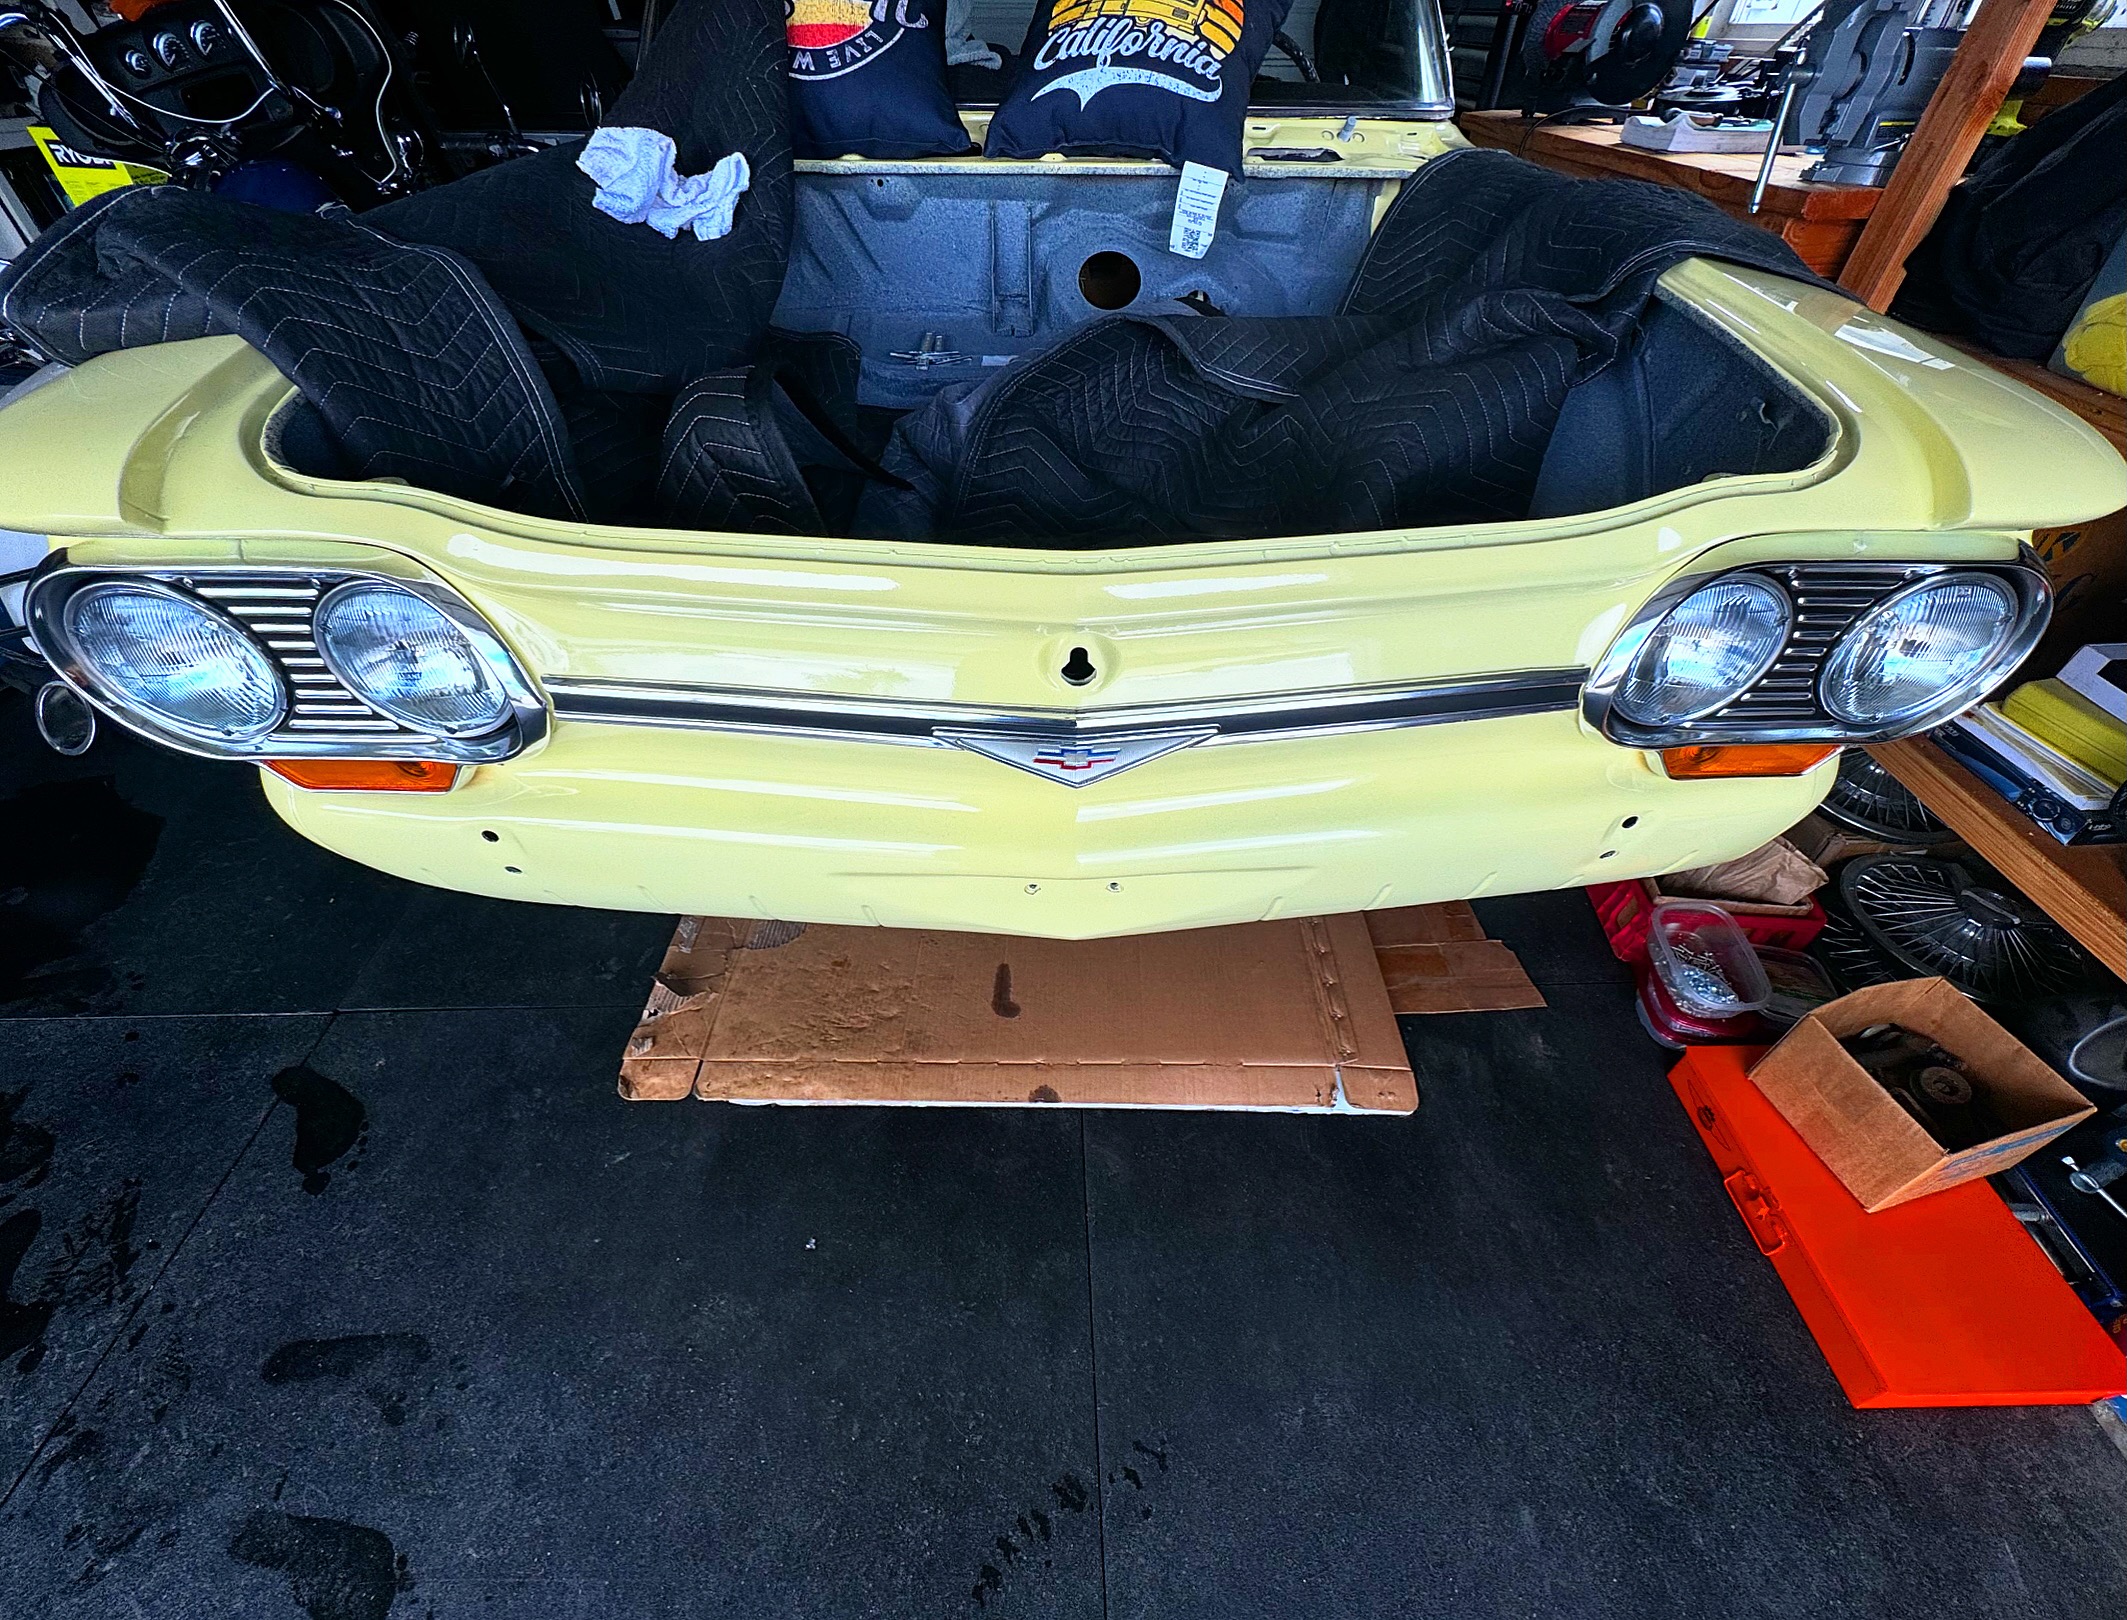
Pre-Build: Front View
The classic front trunk (frunk) of the 1964 Corvair before restoration, showing weathered paint and original condition.
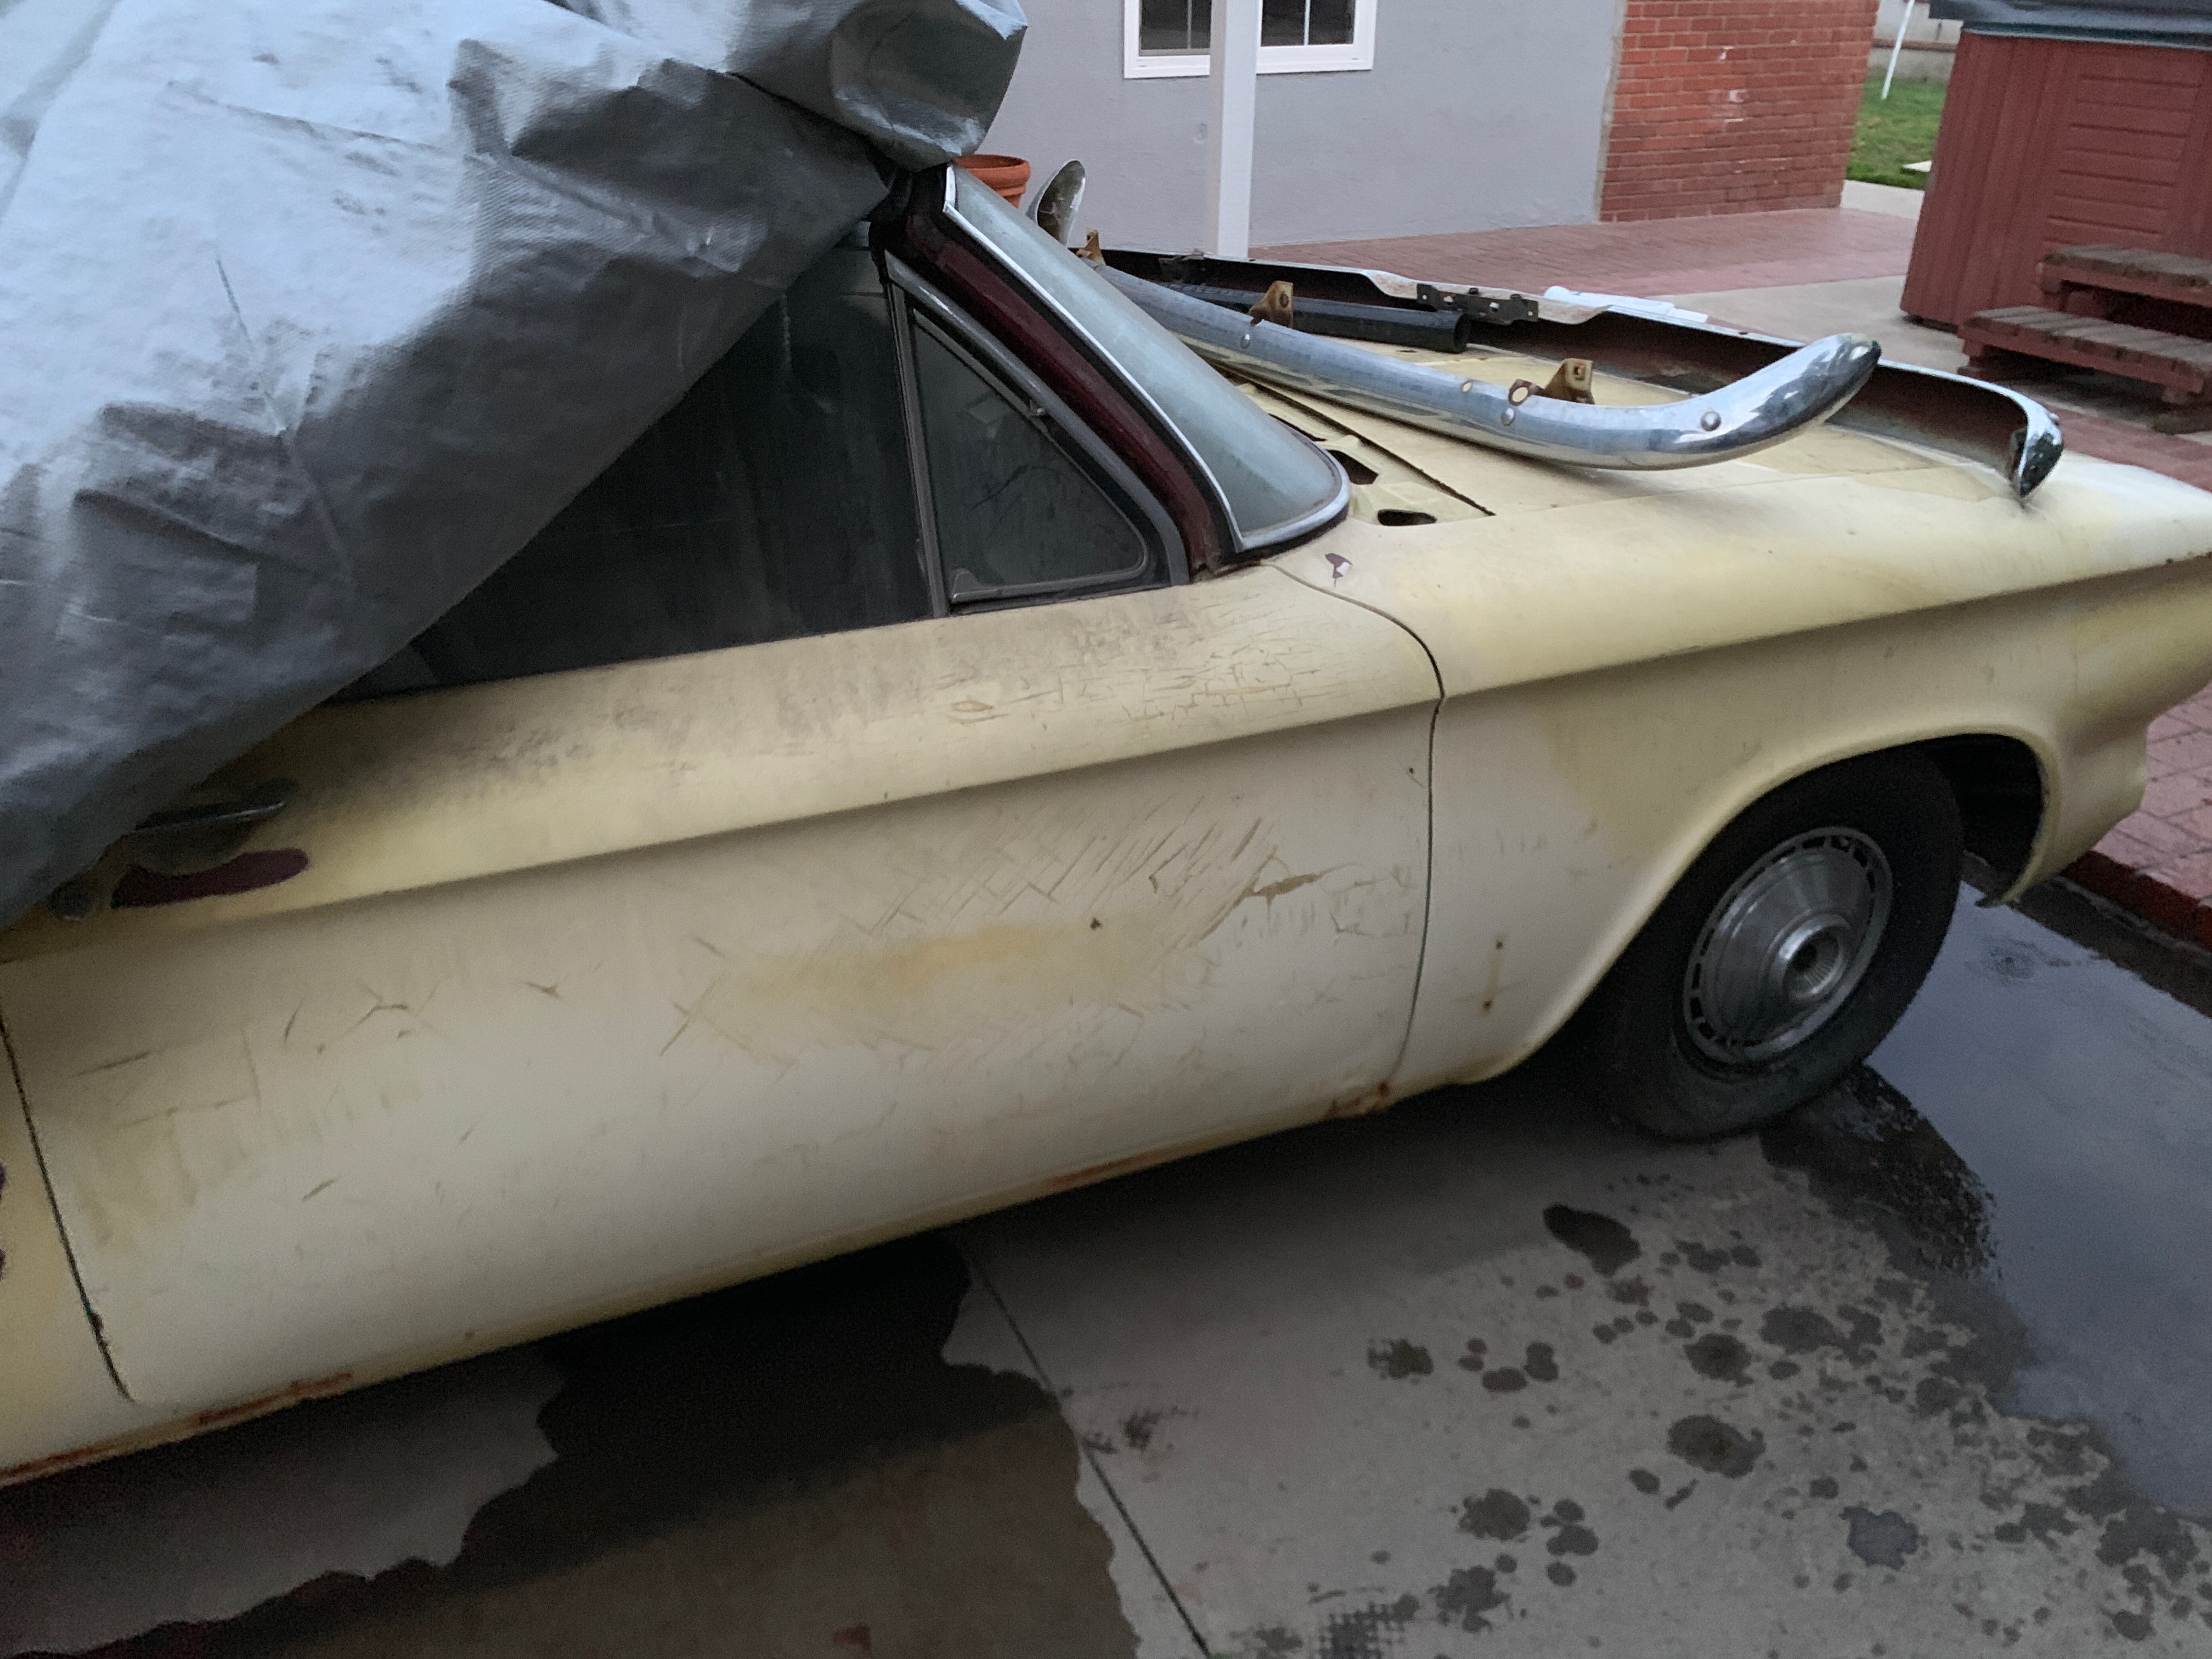
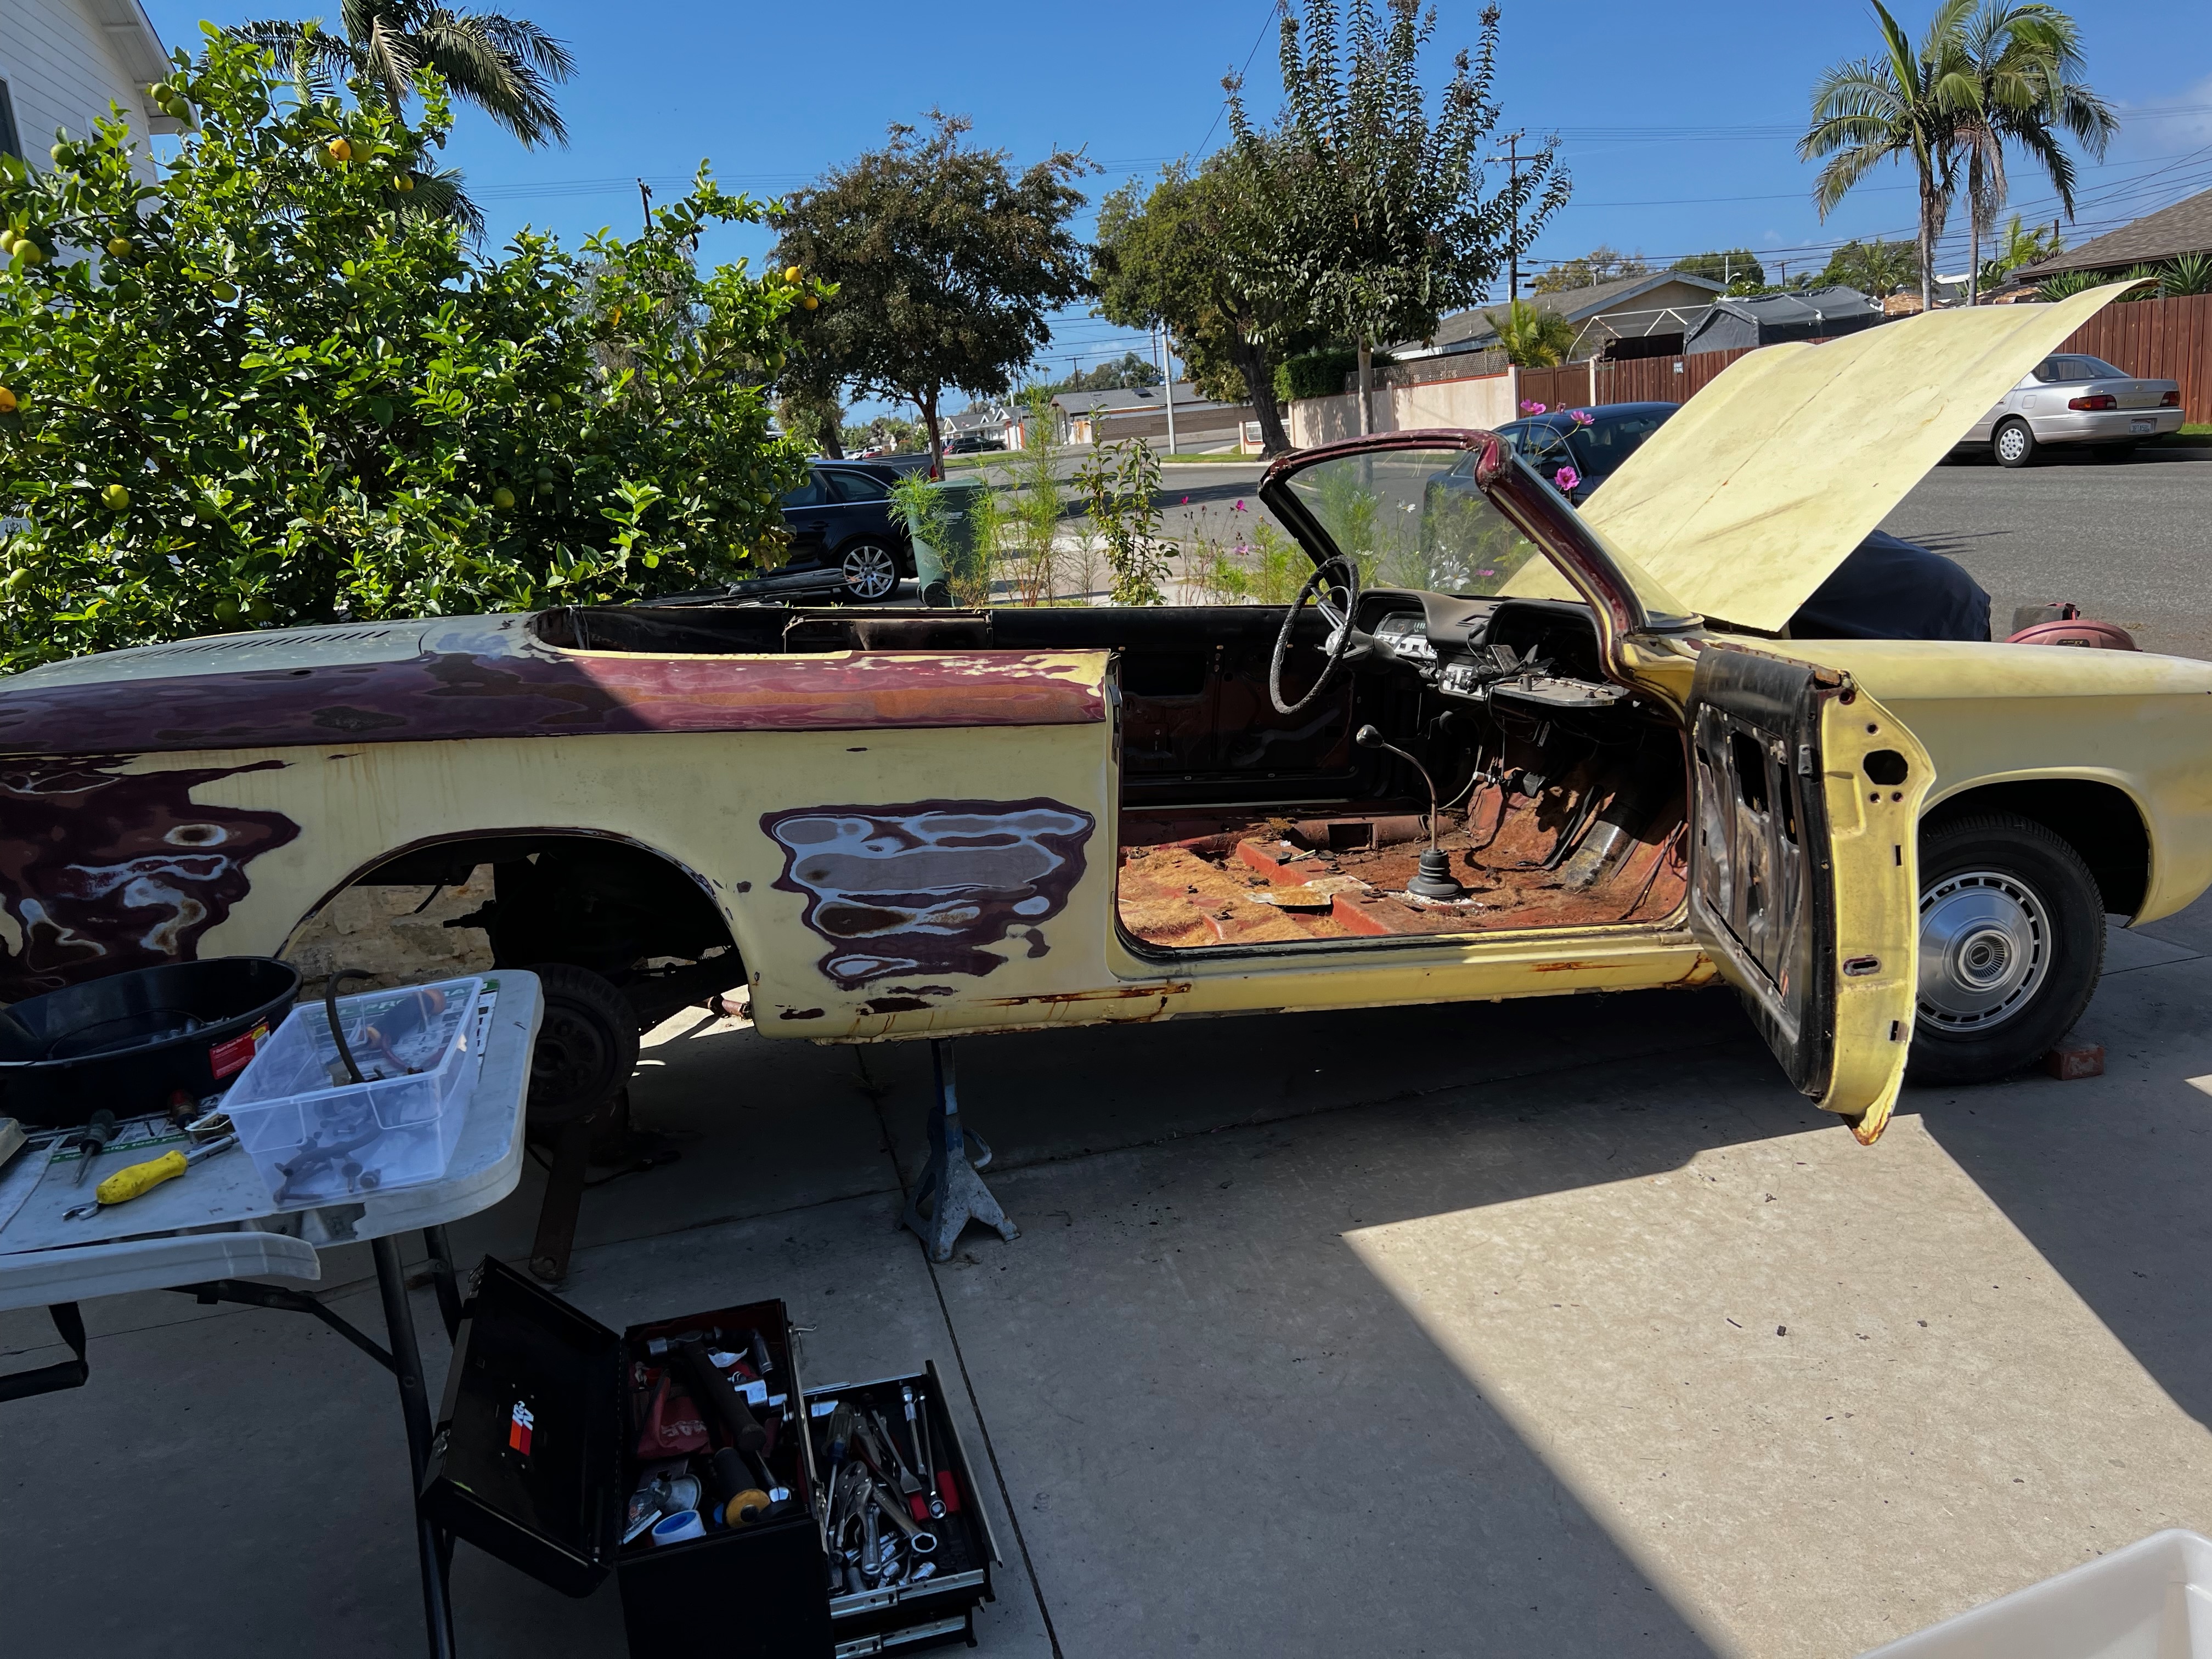
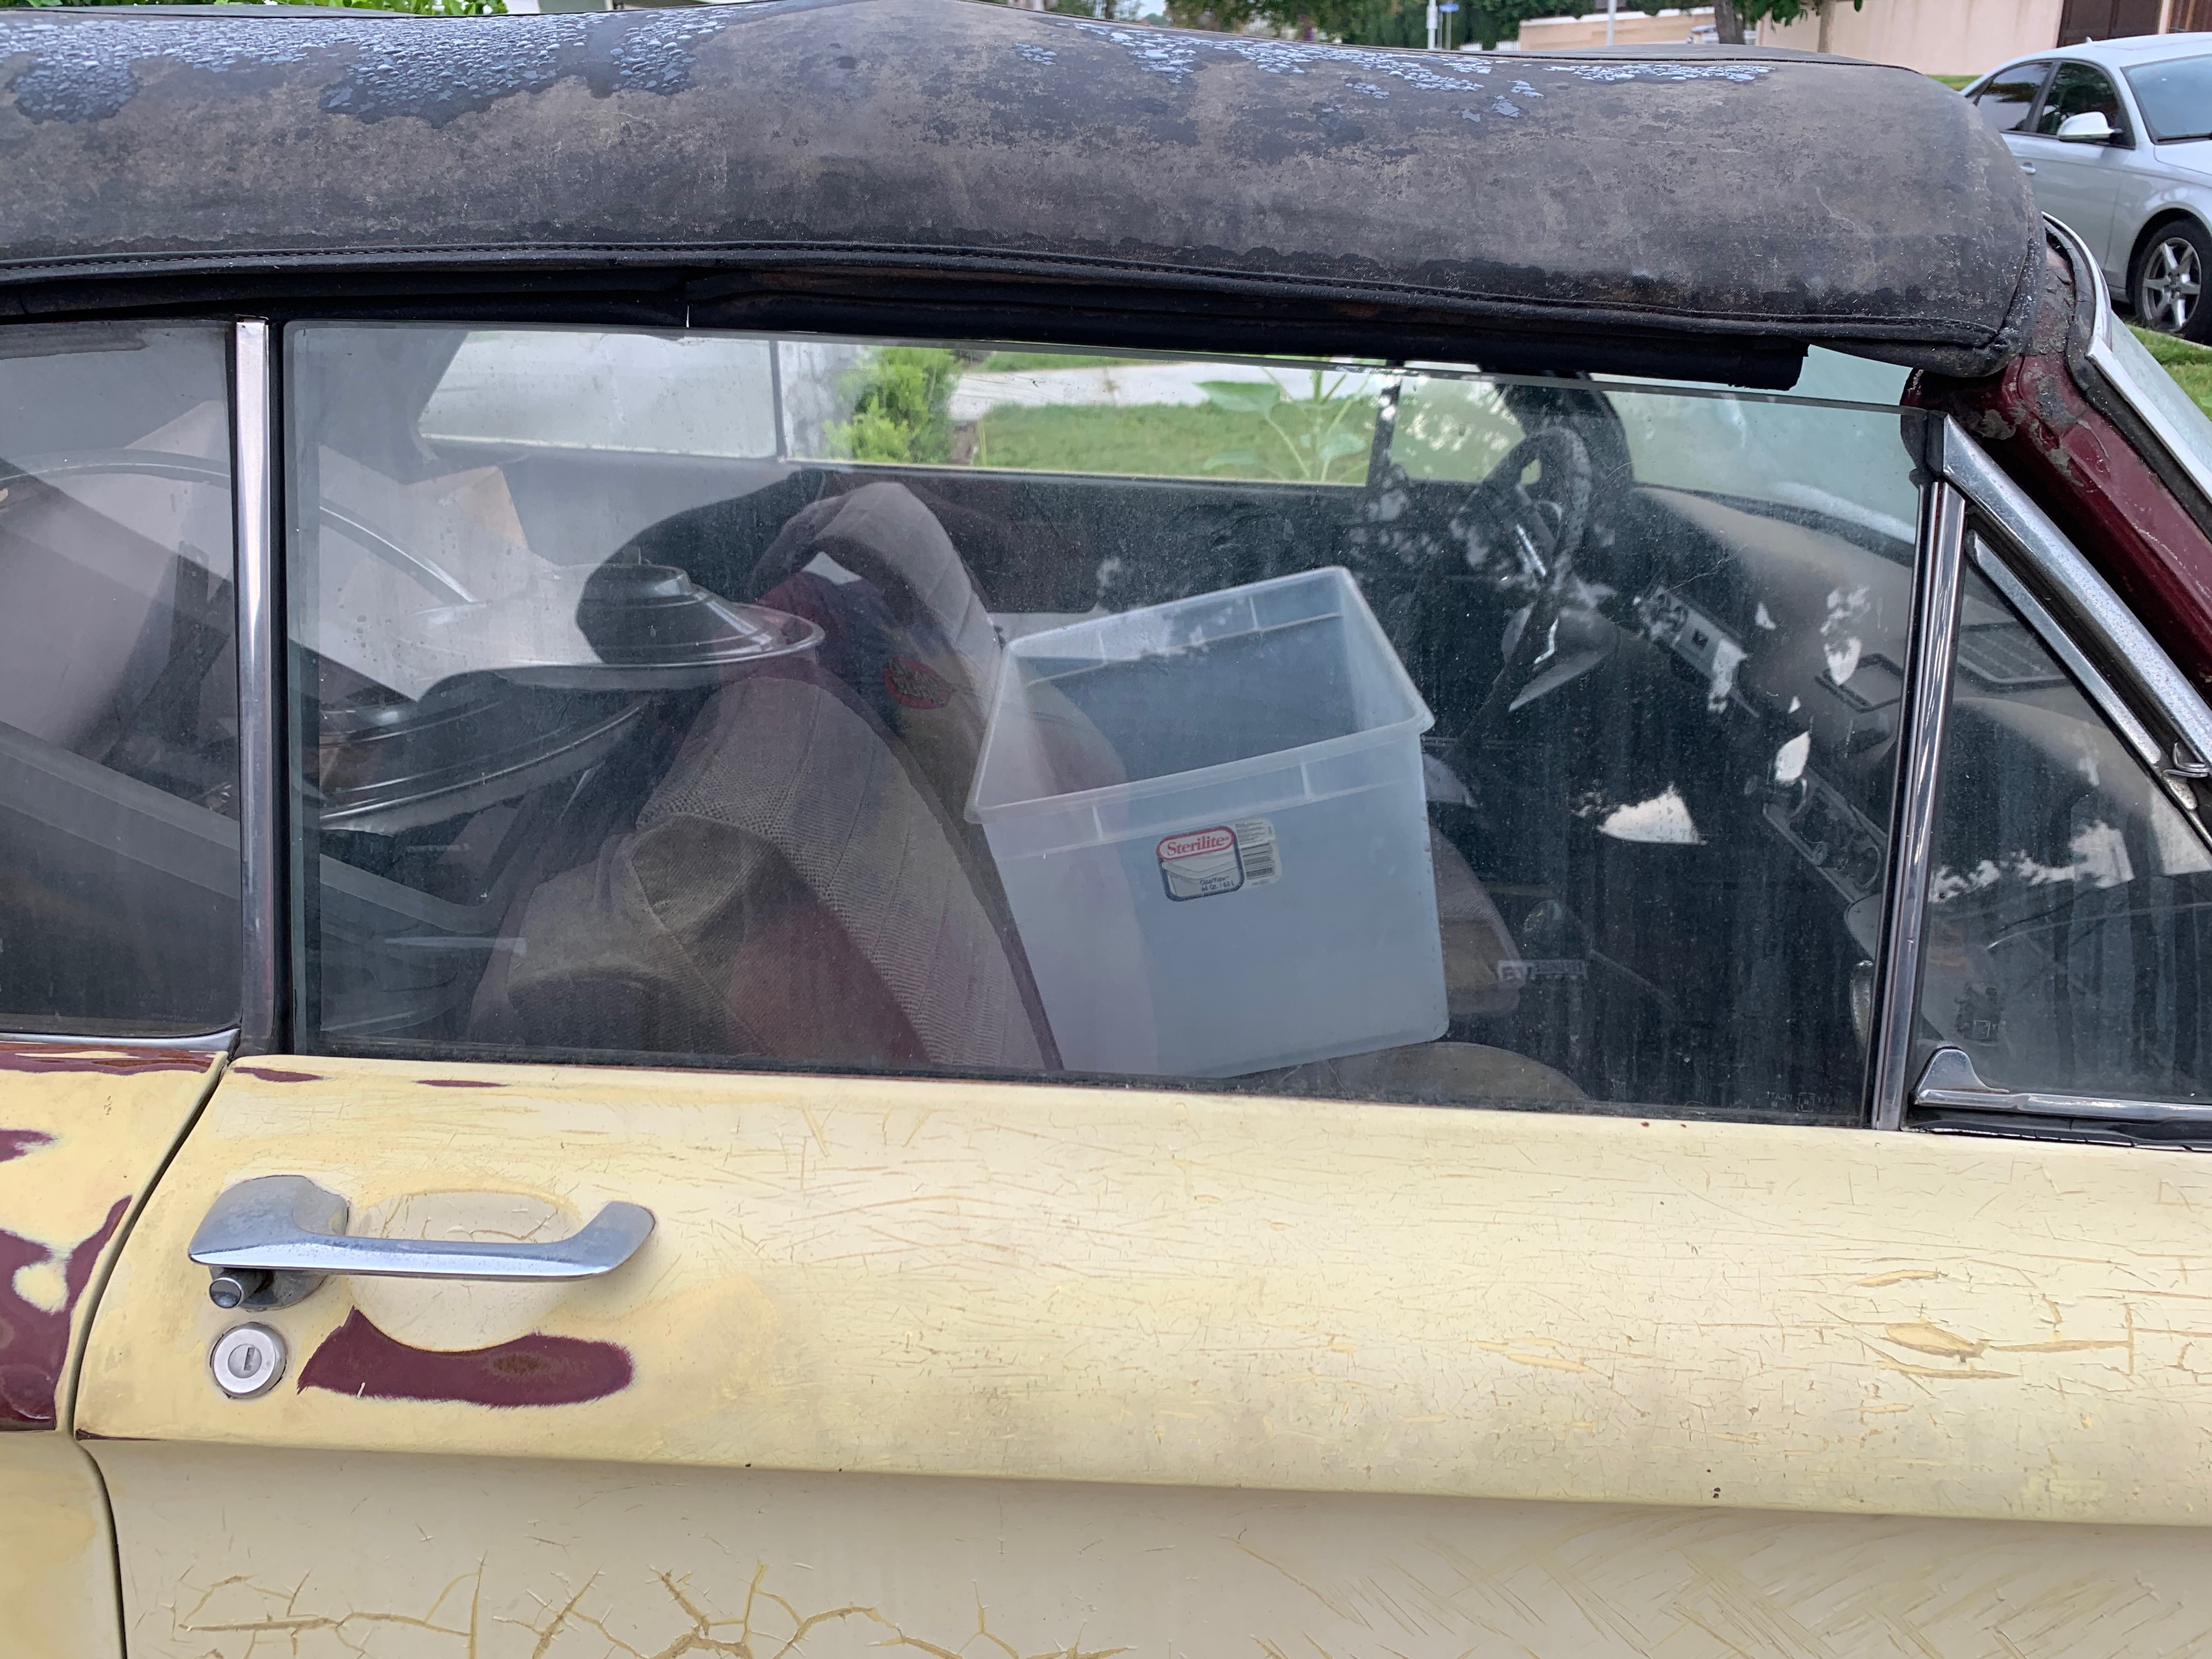
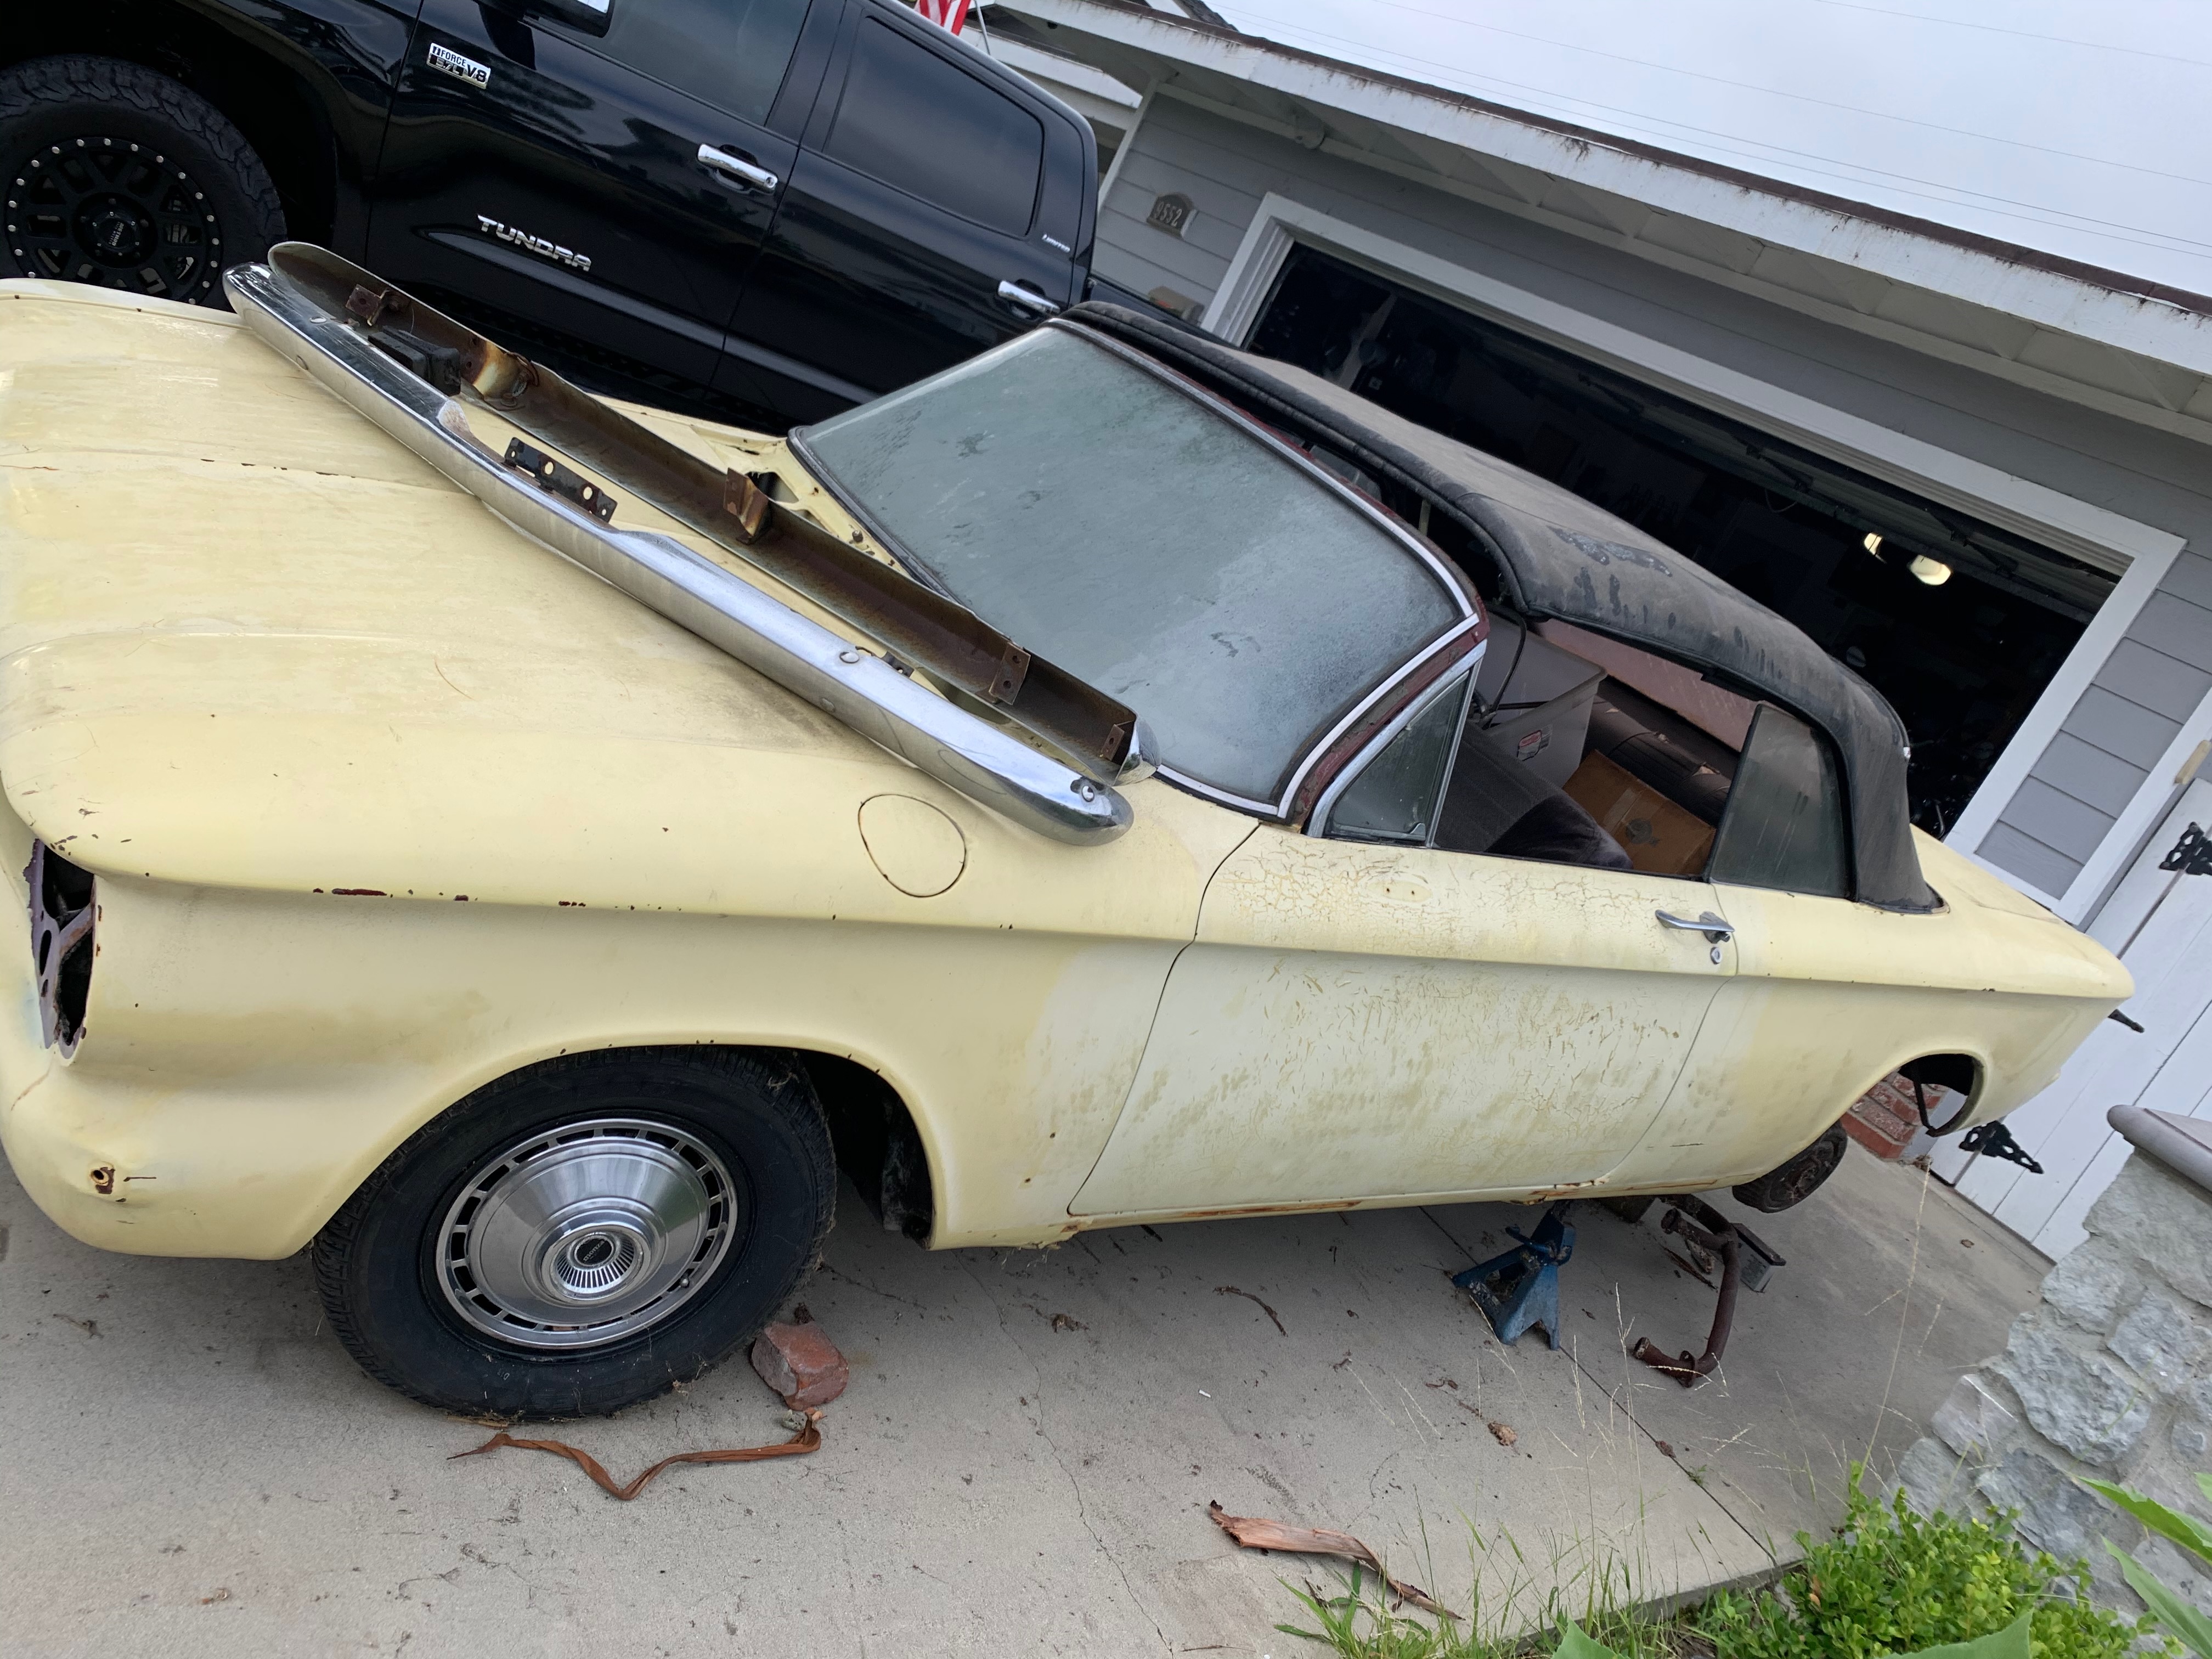
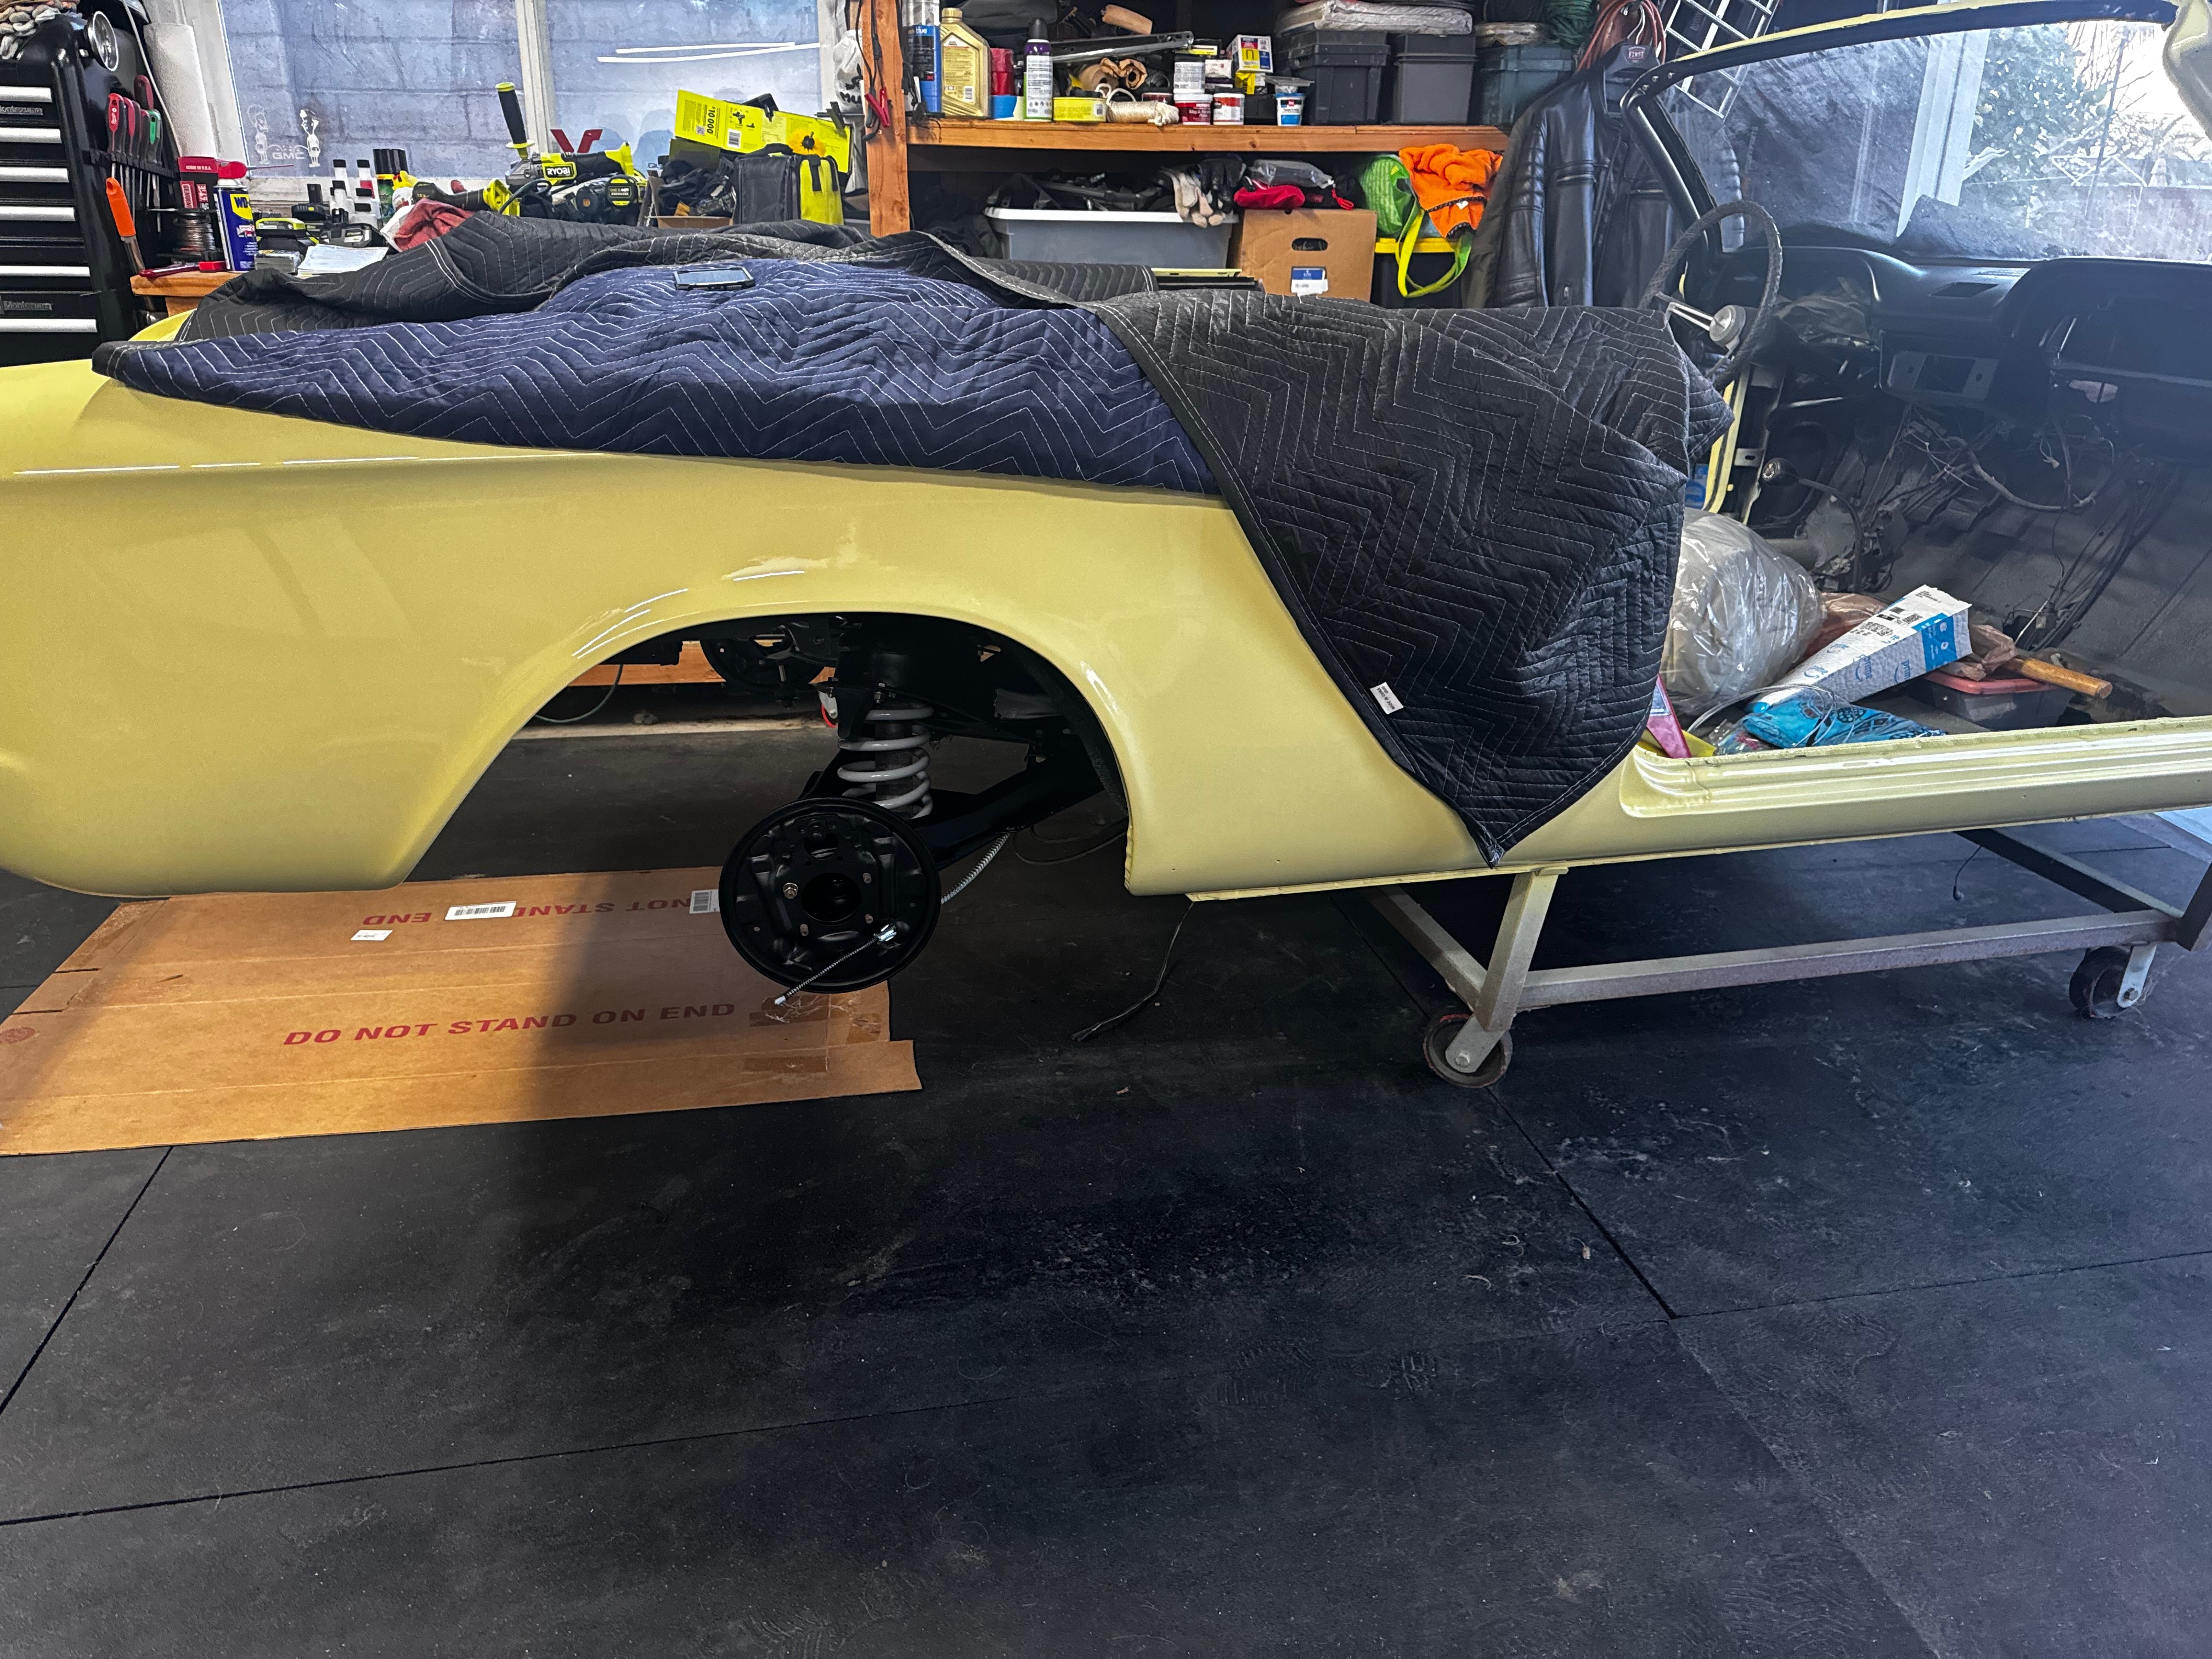
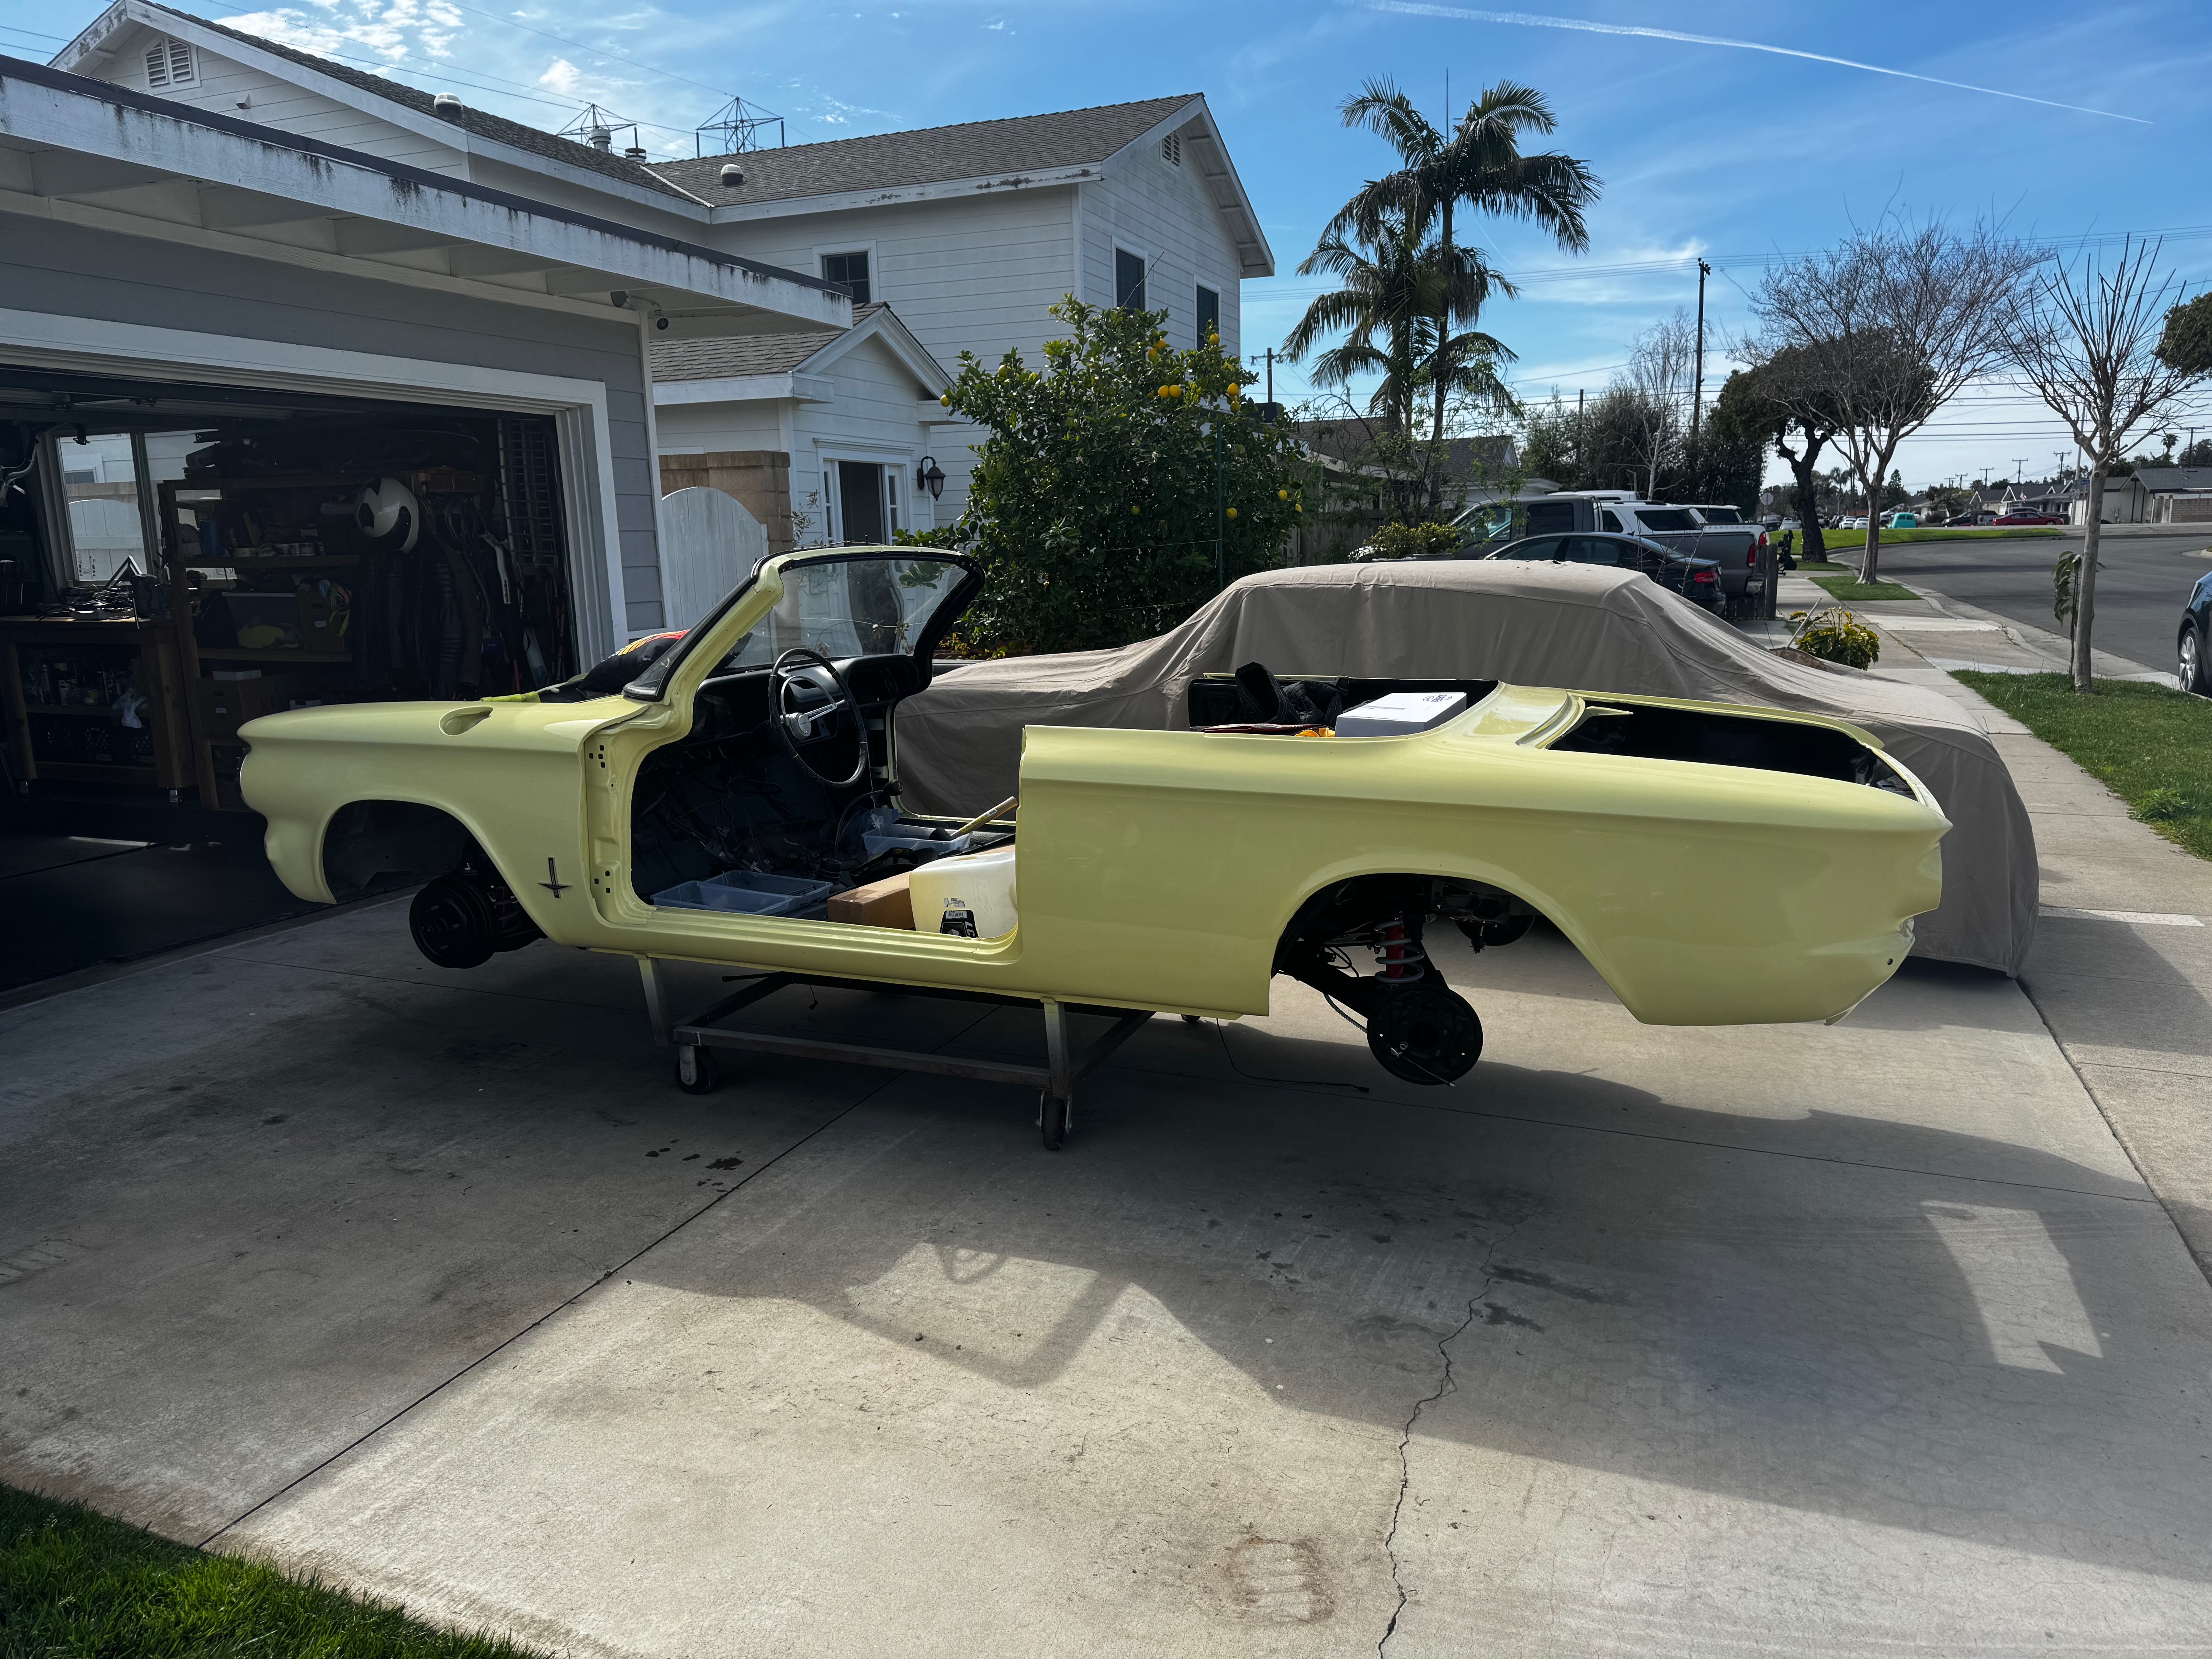
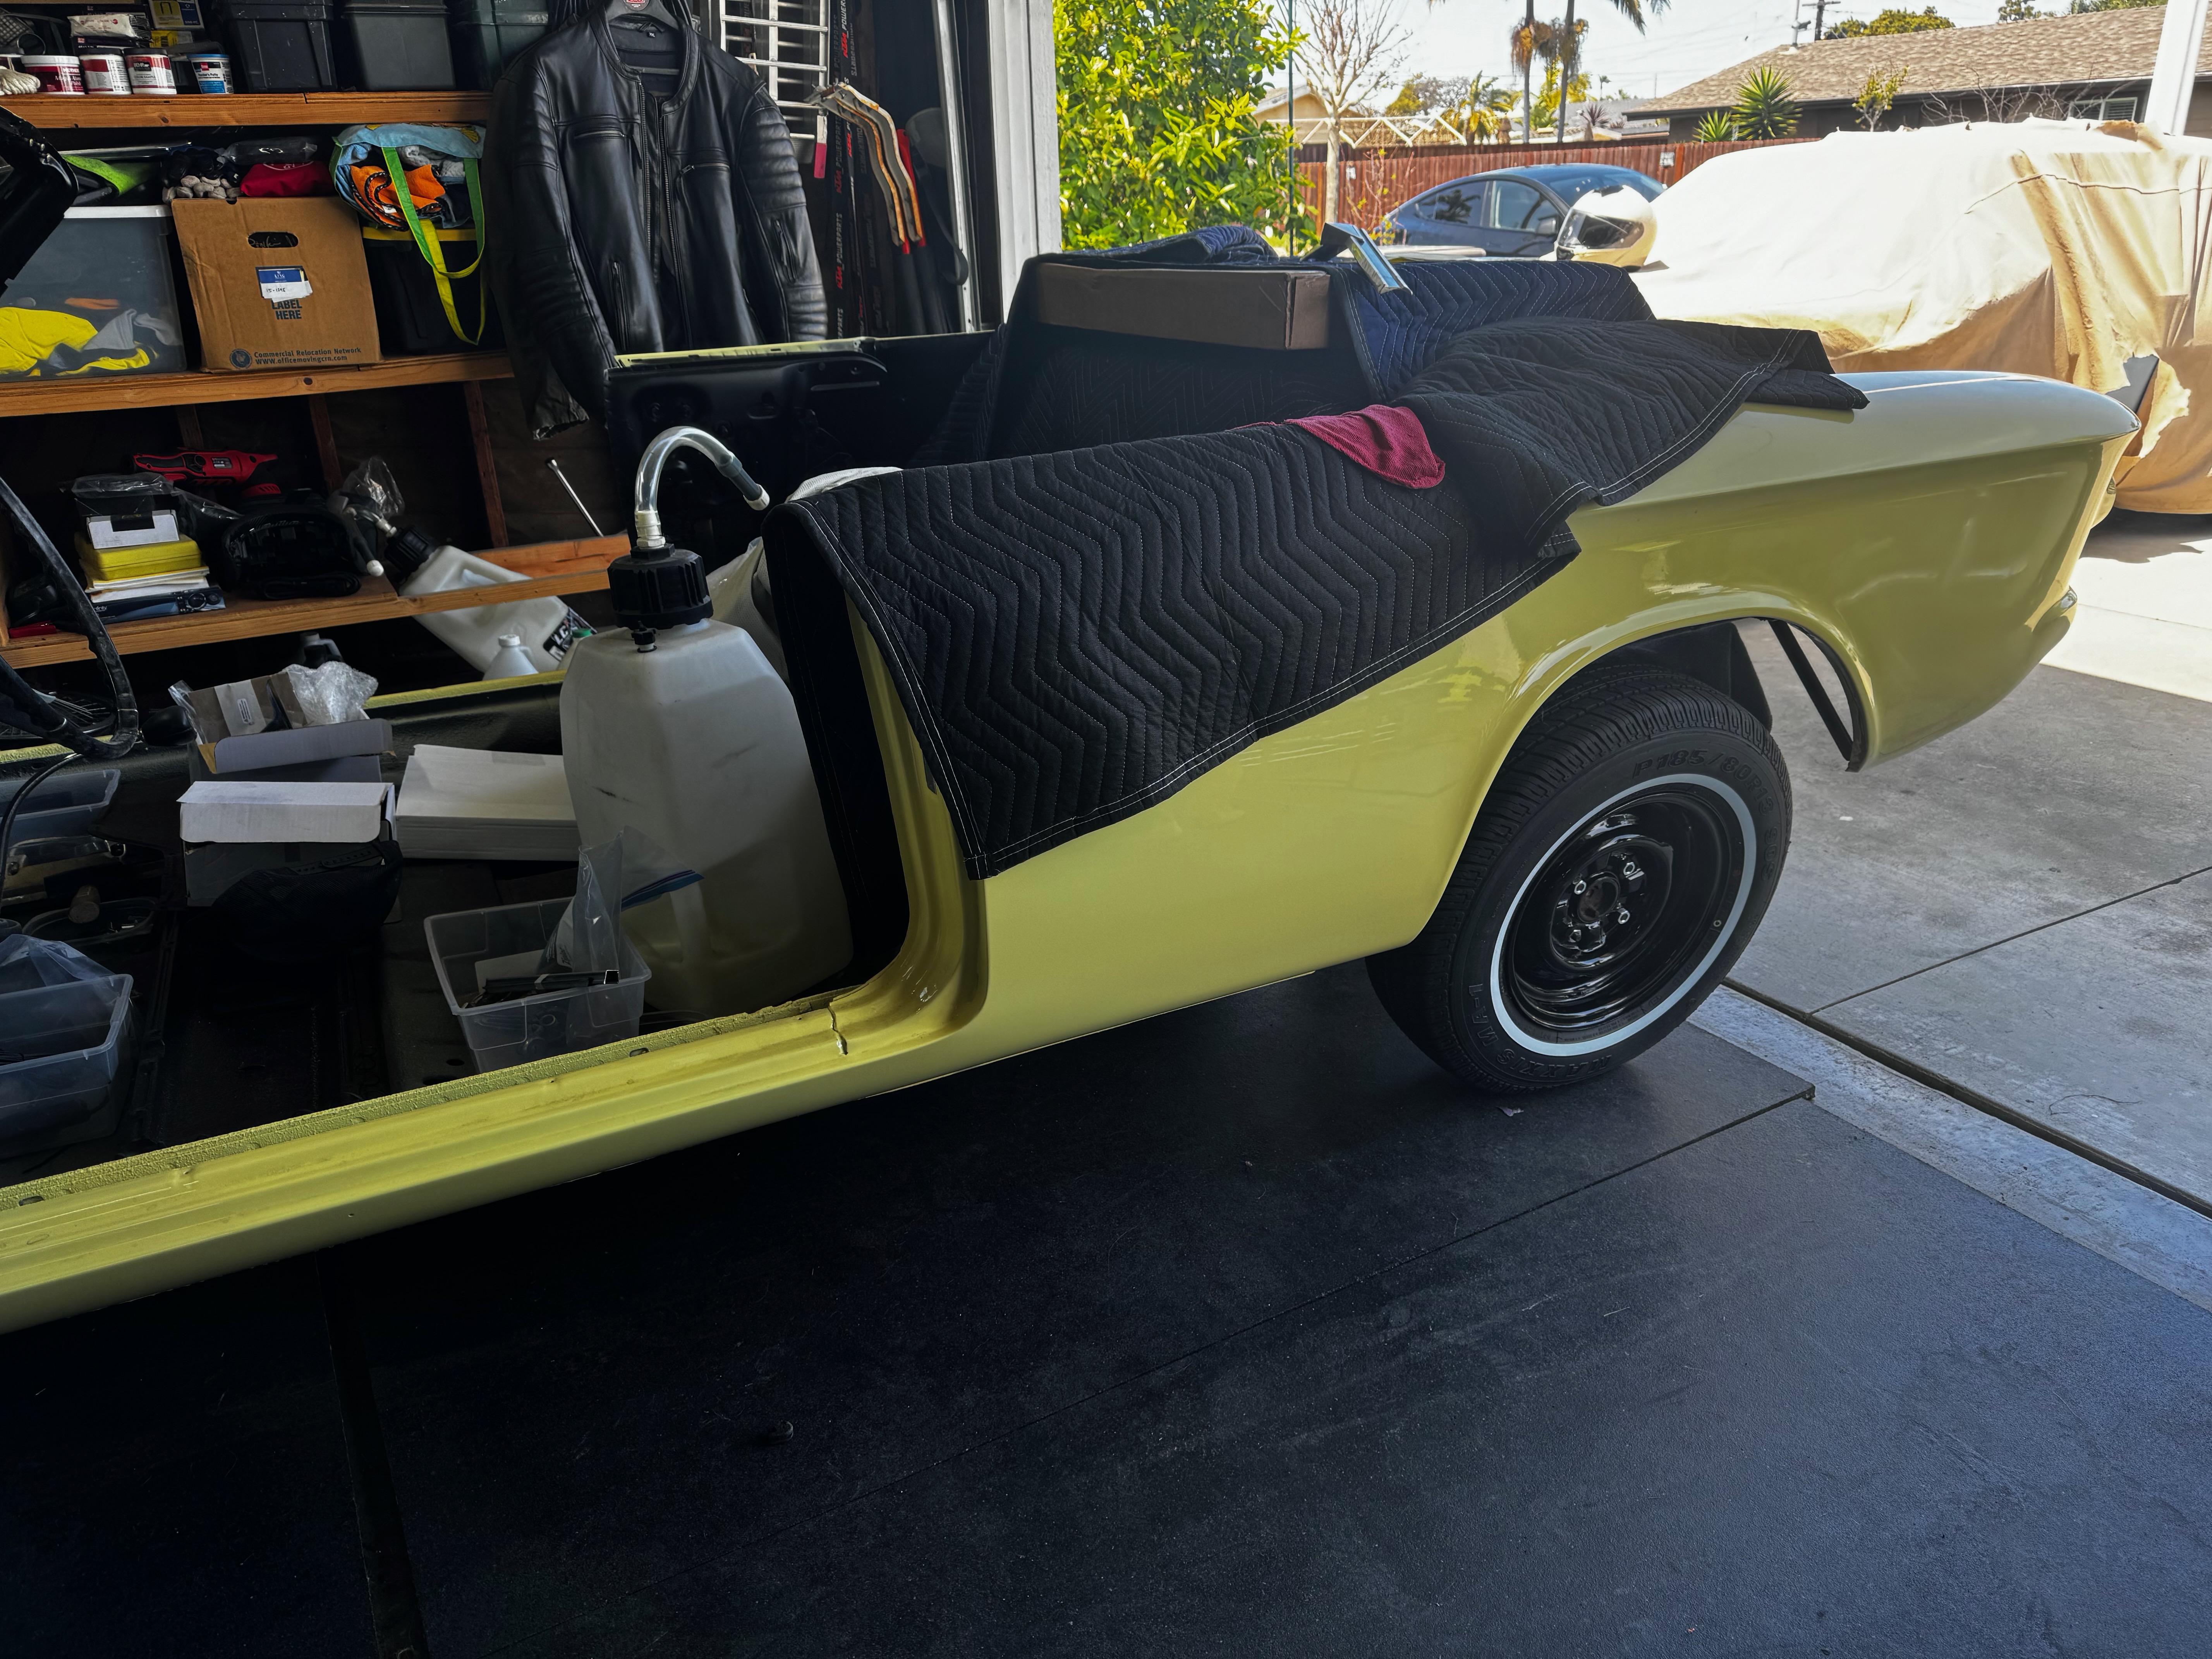
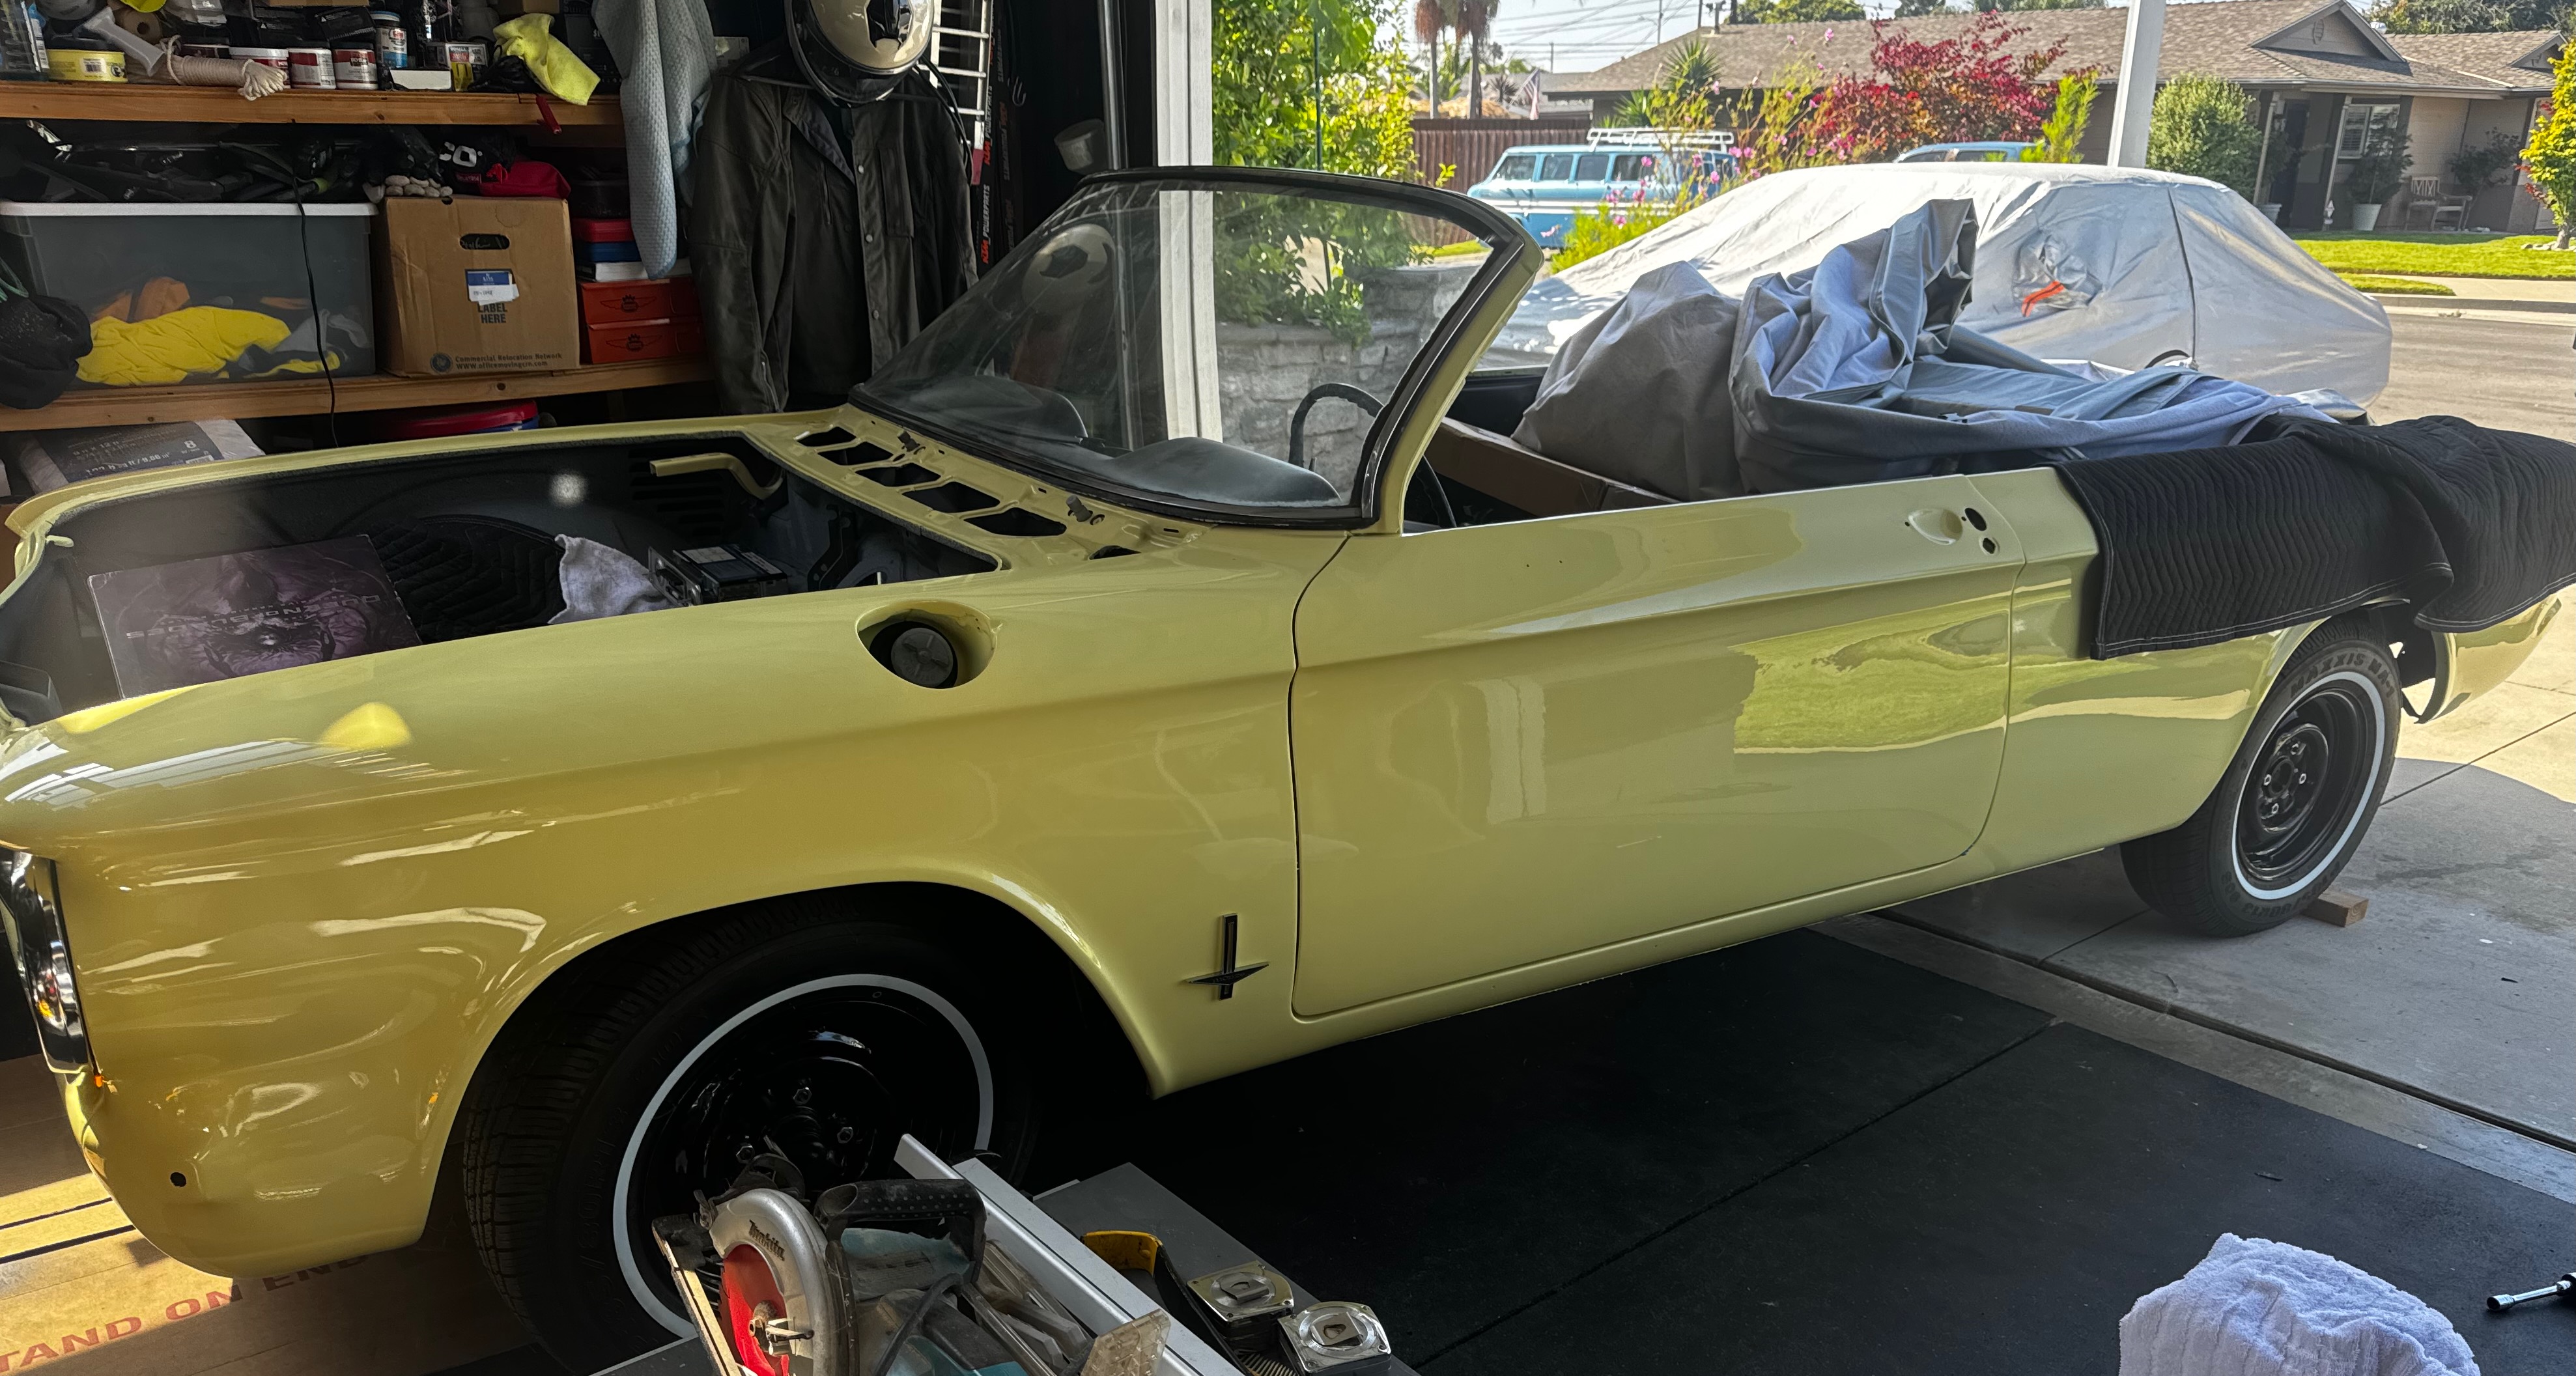
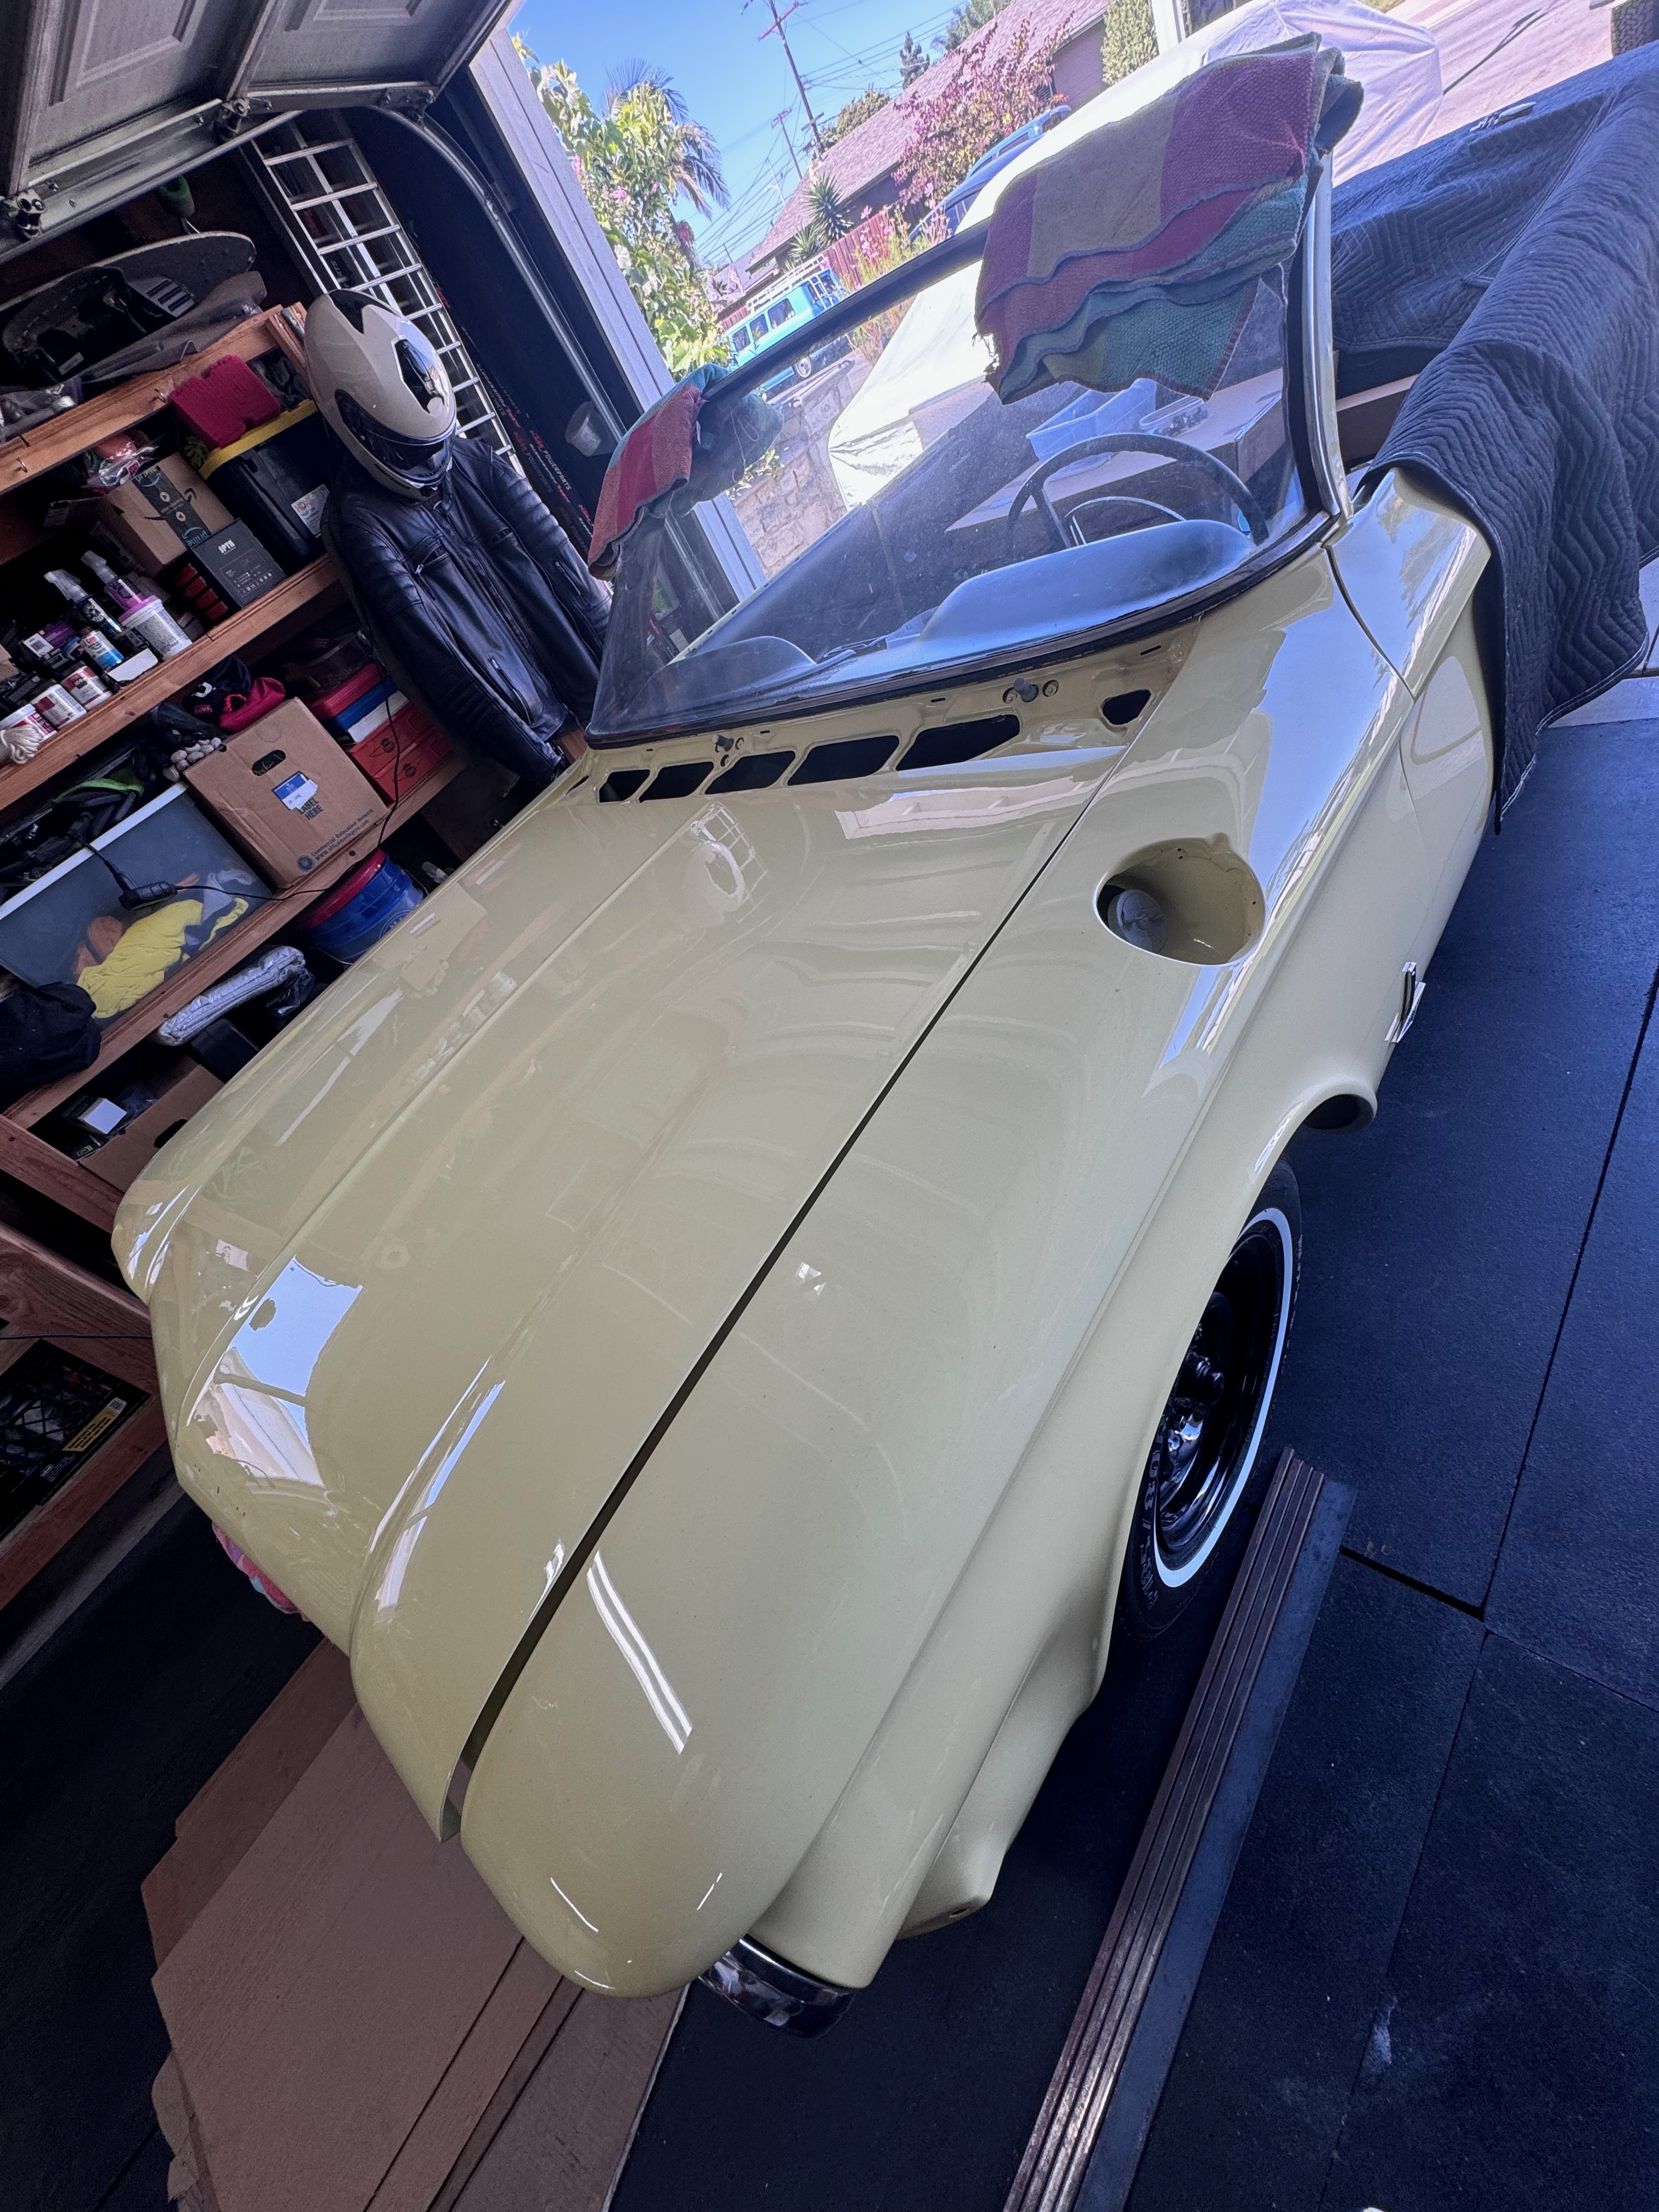
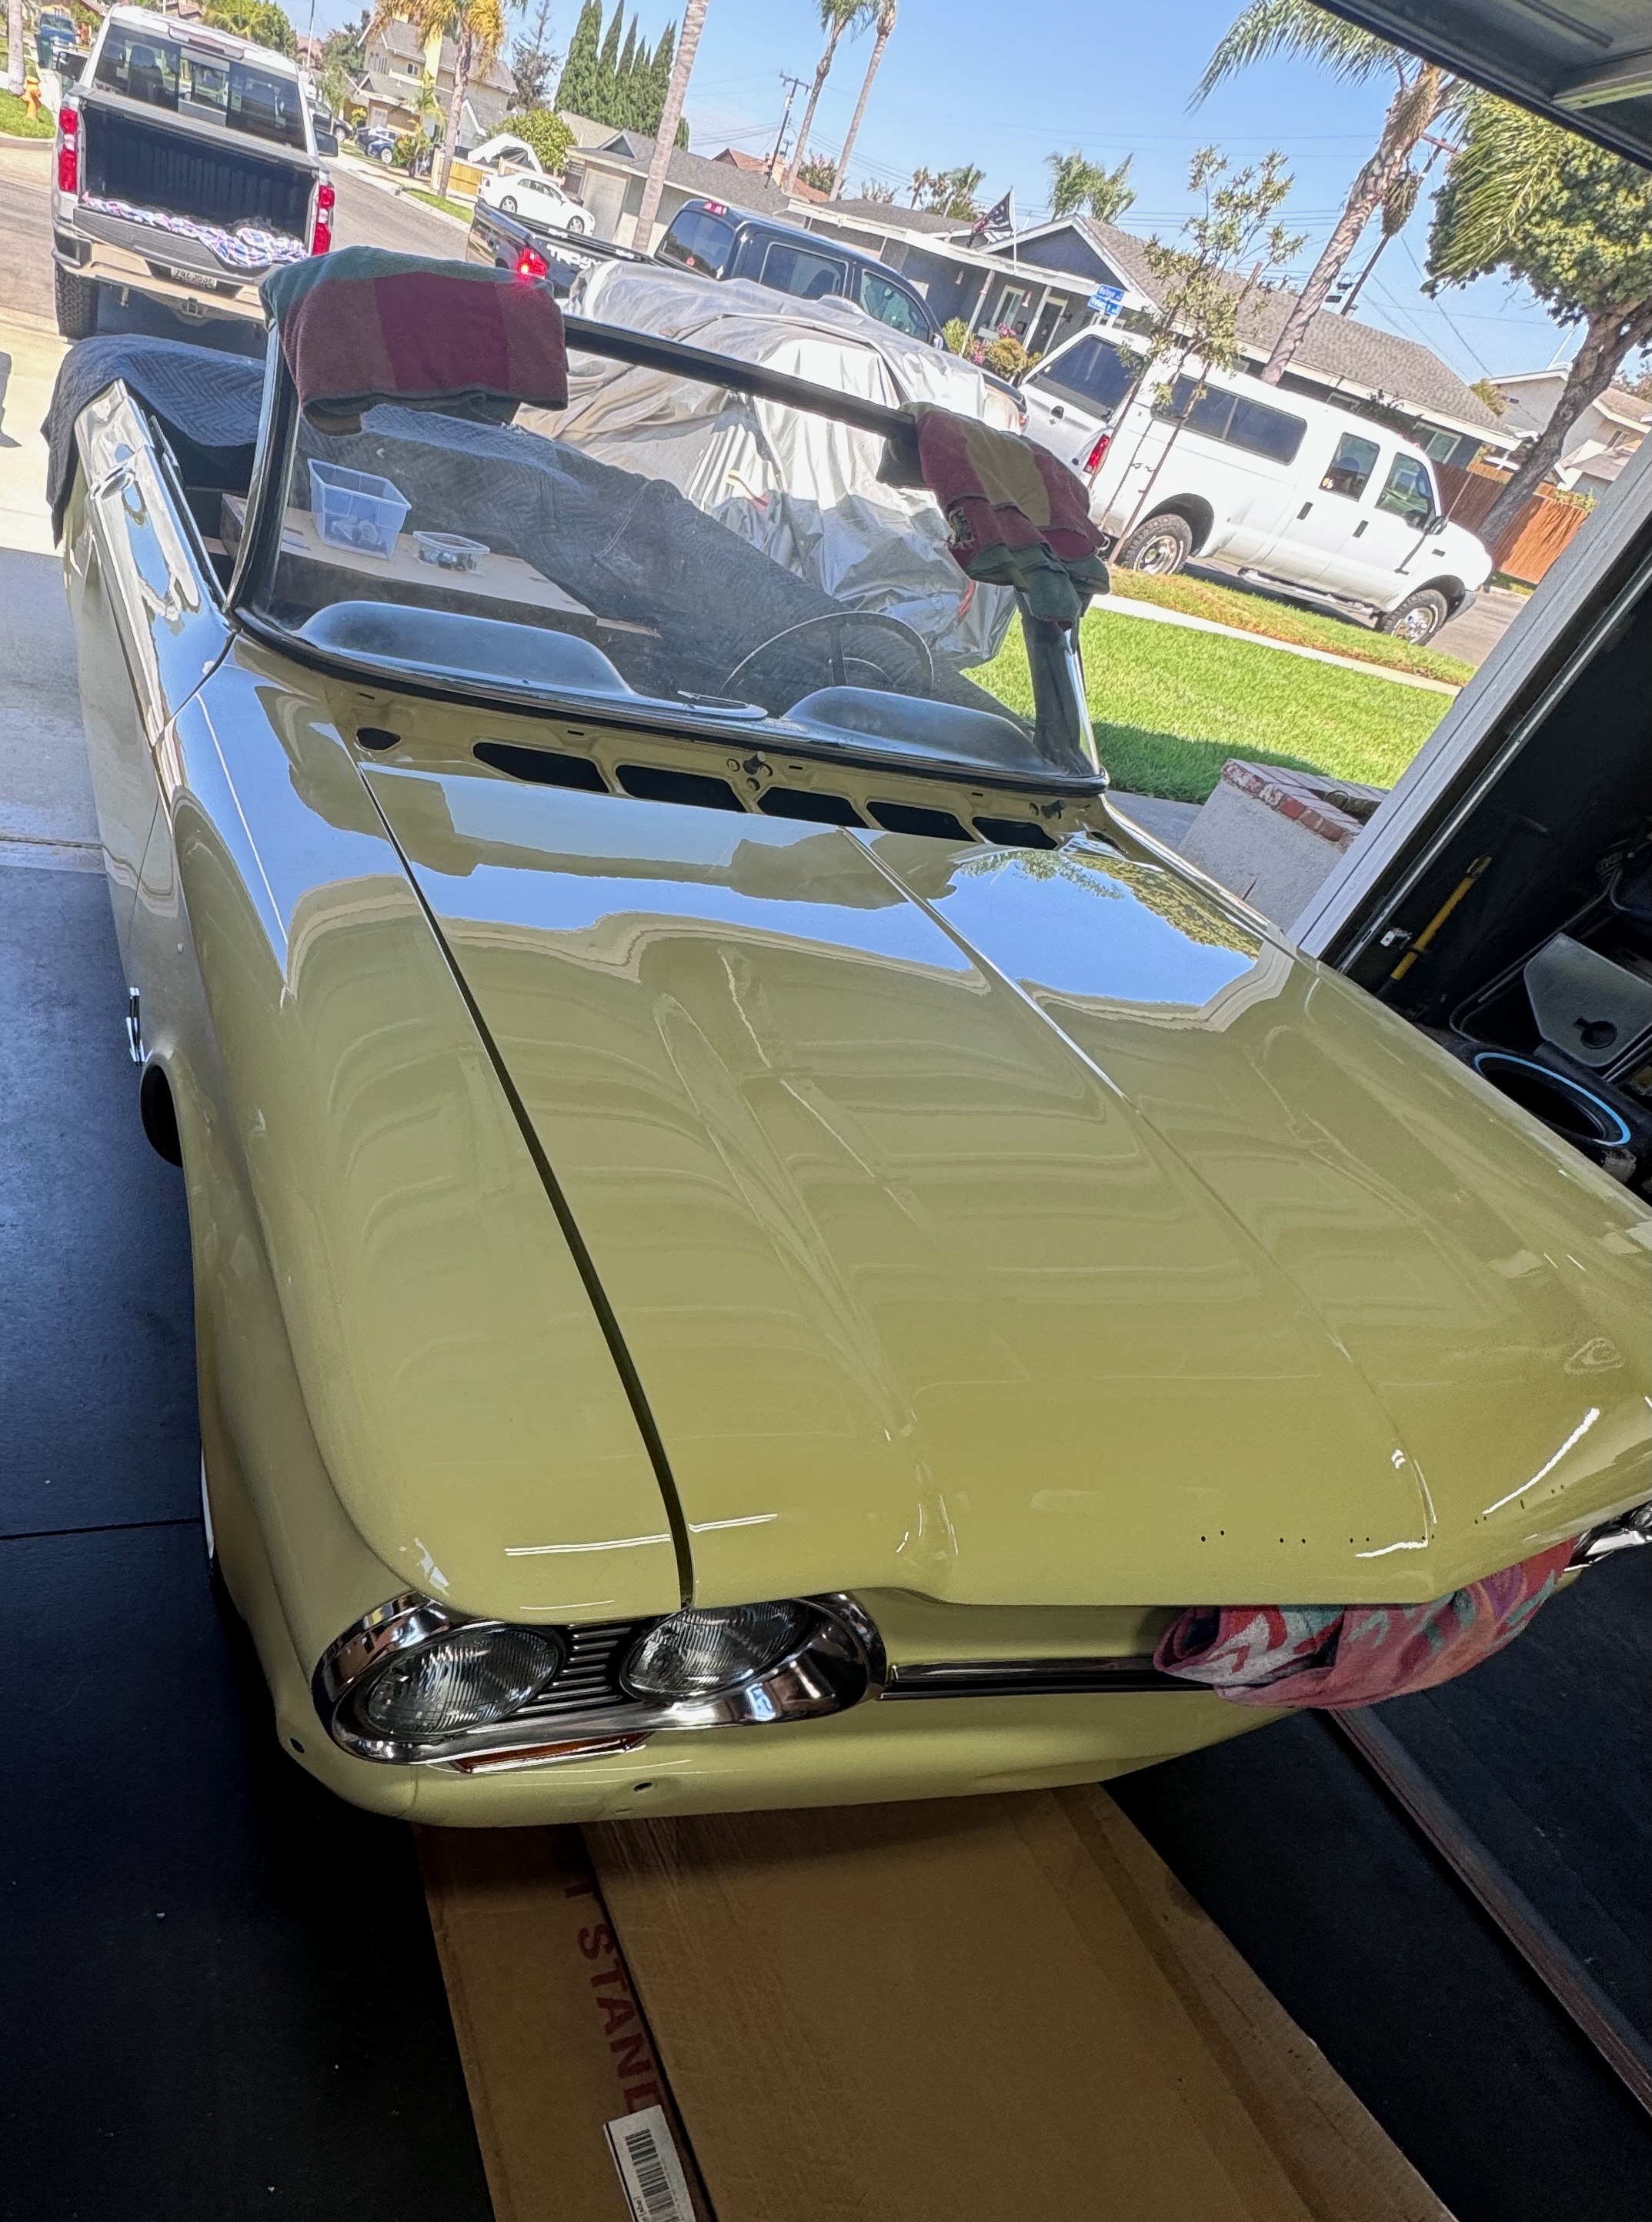
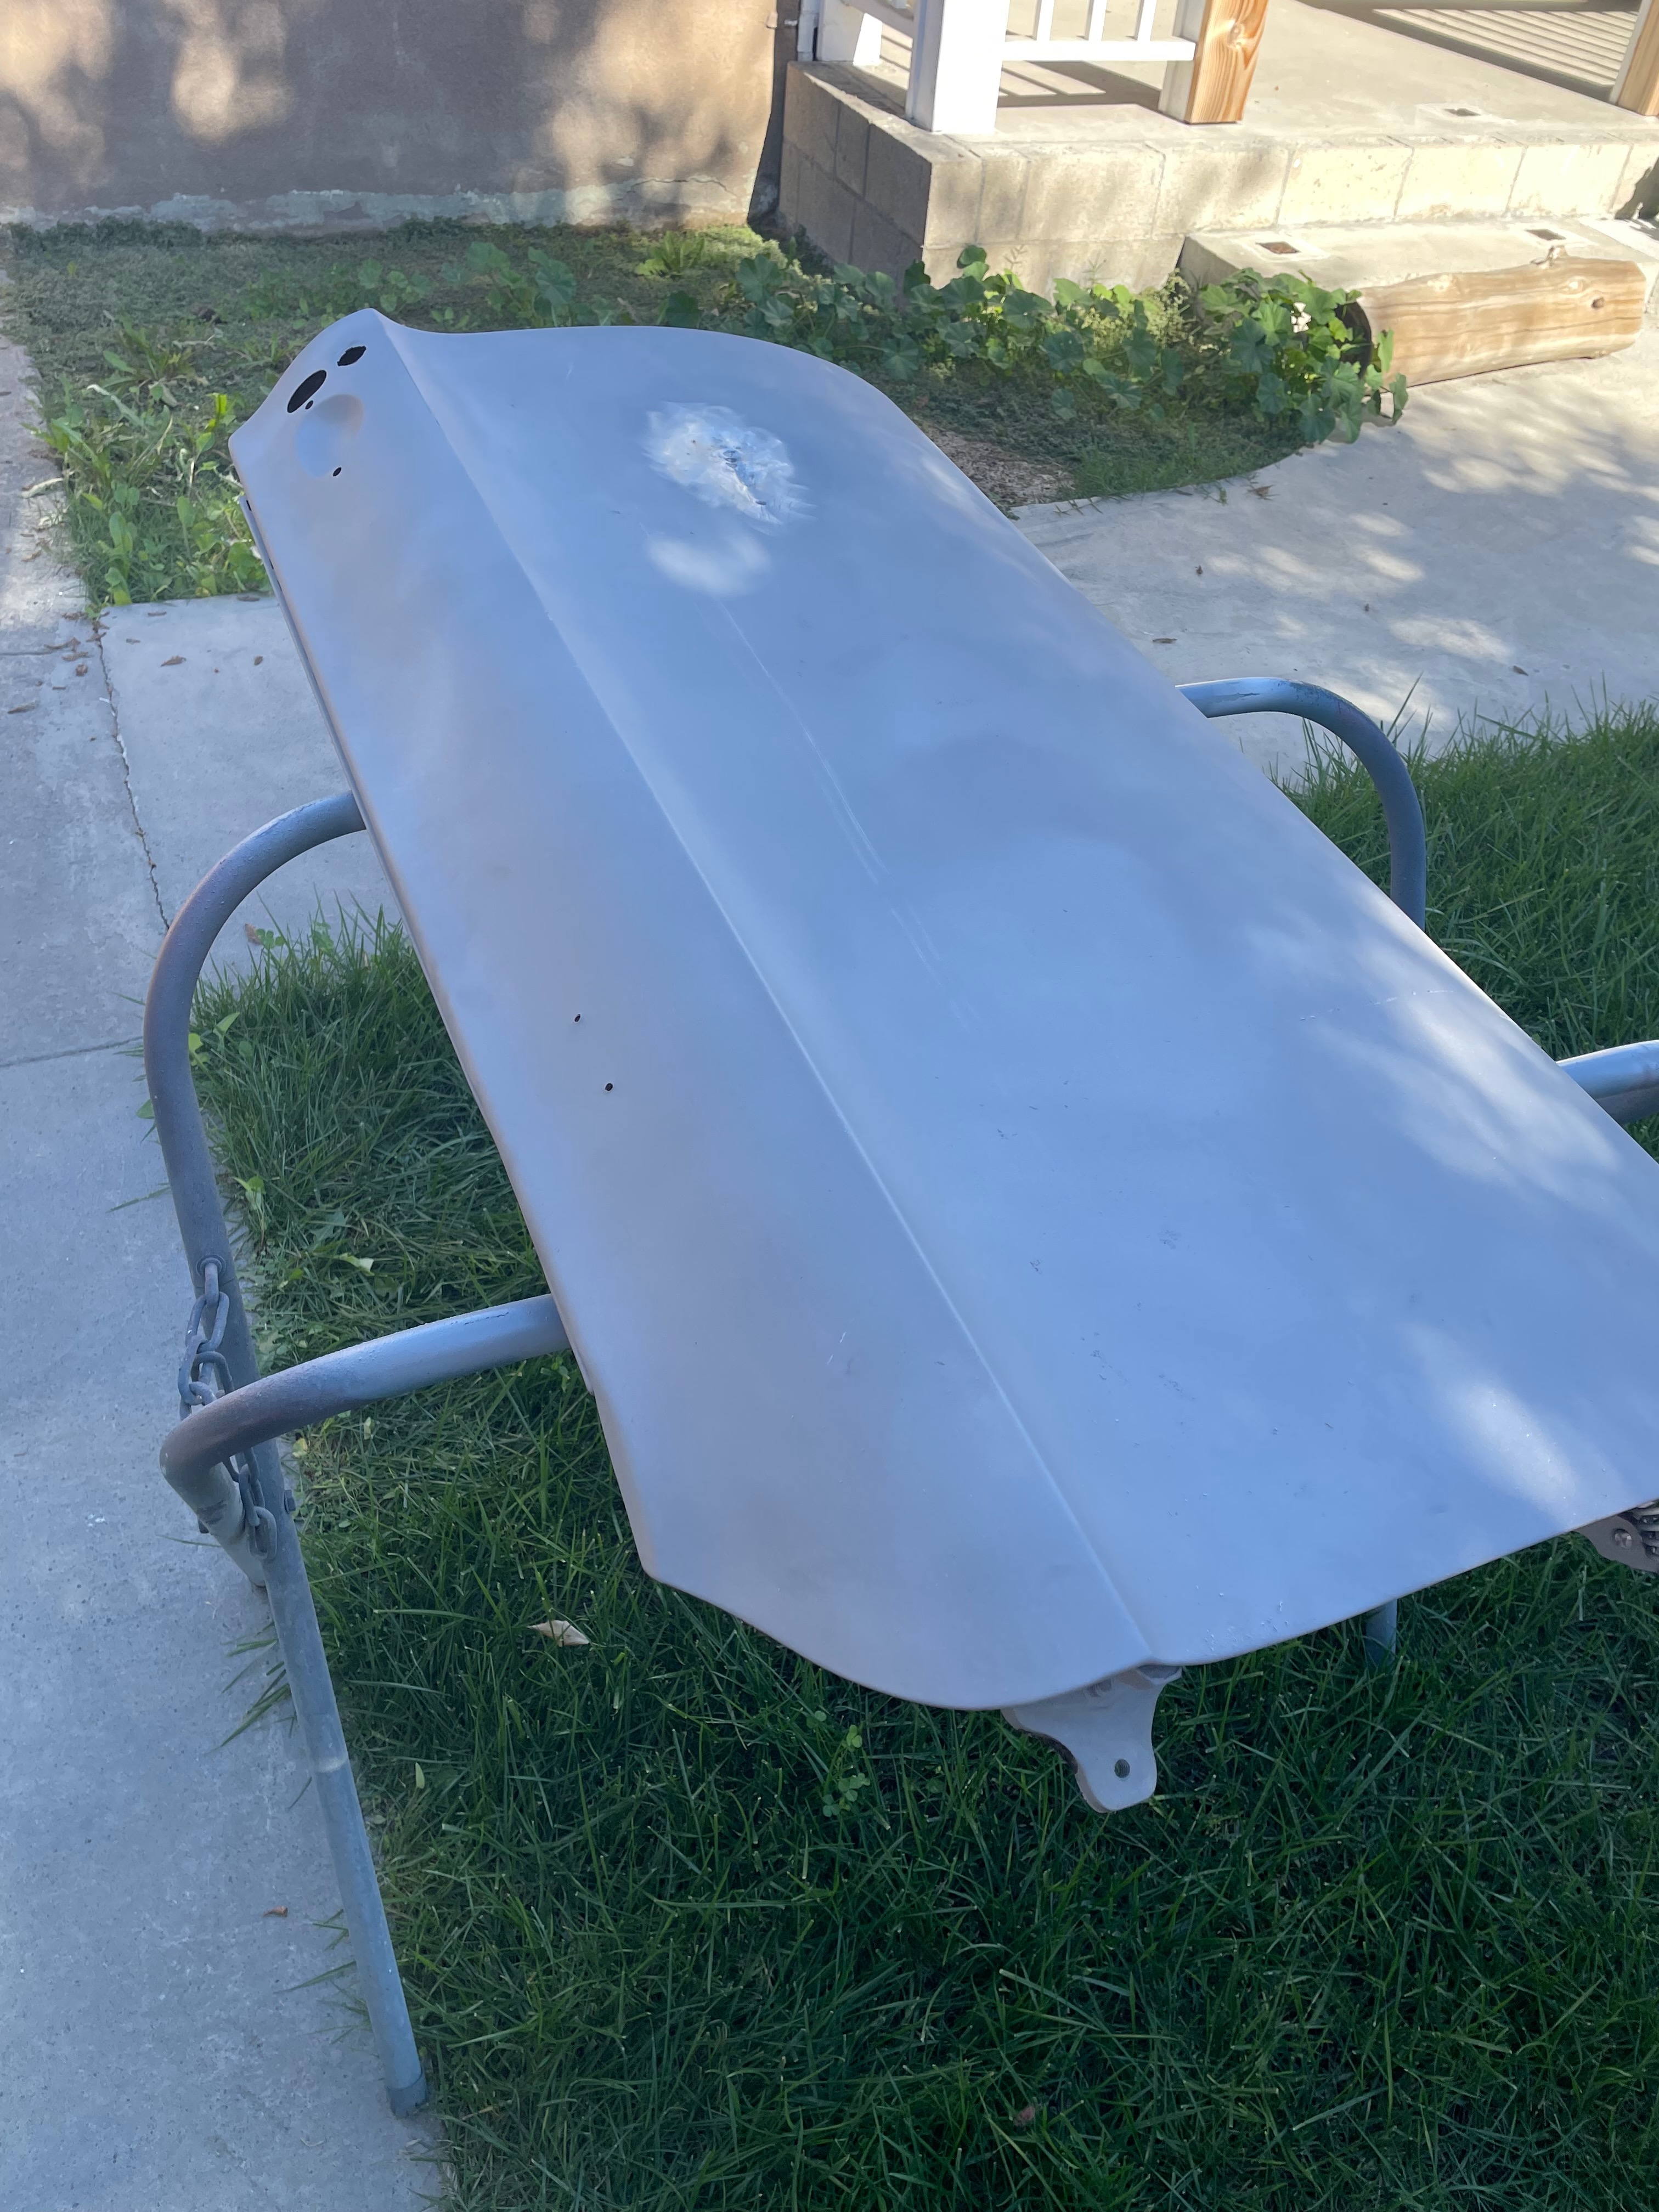
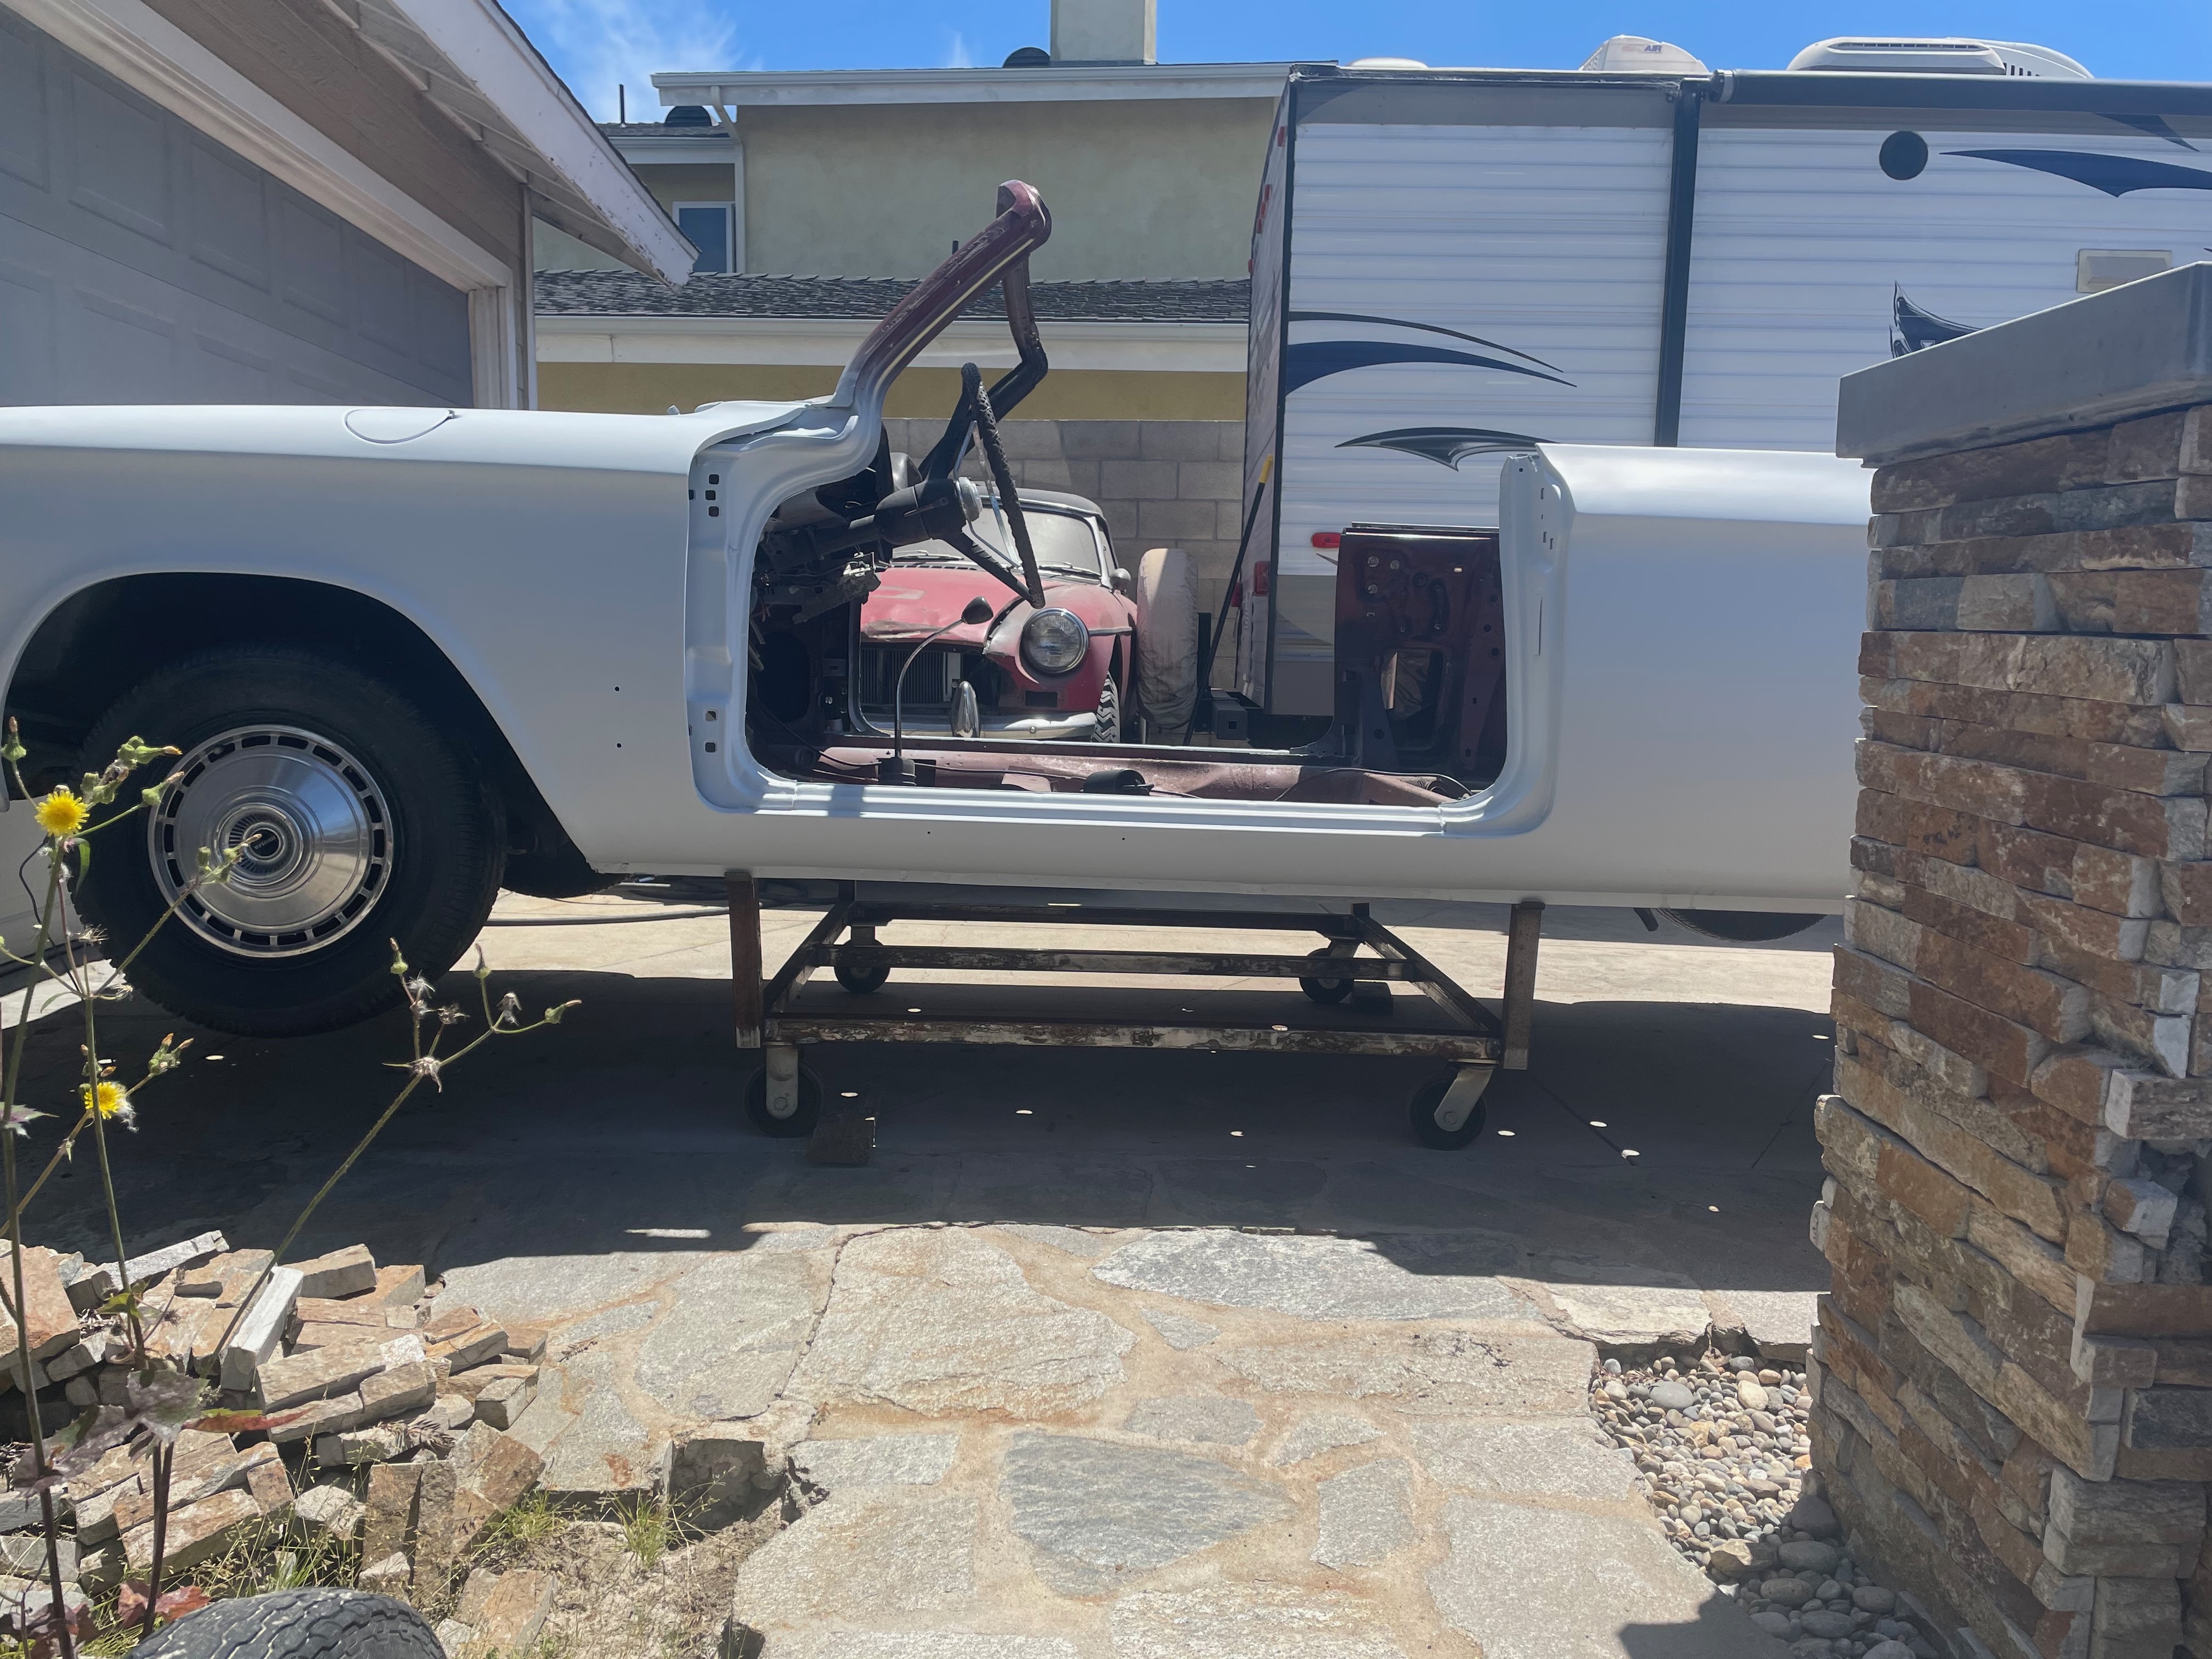
Pre-Build: Side Profile
Side view of the Corvair in its pre-restoration state, showing the original lines and weathered condition after years in the forest.
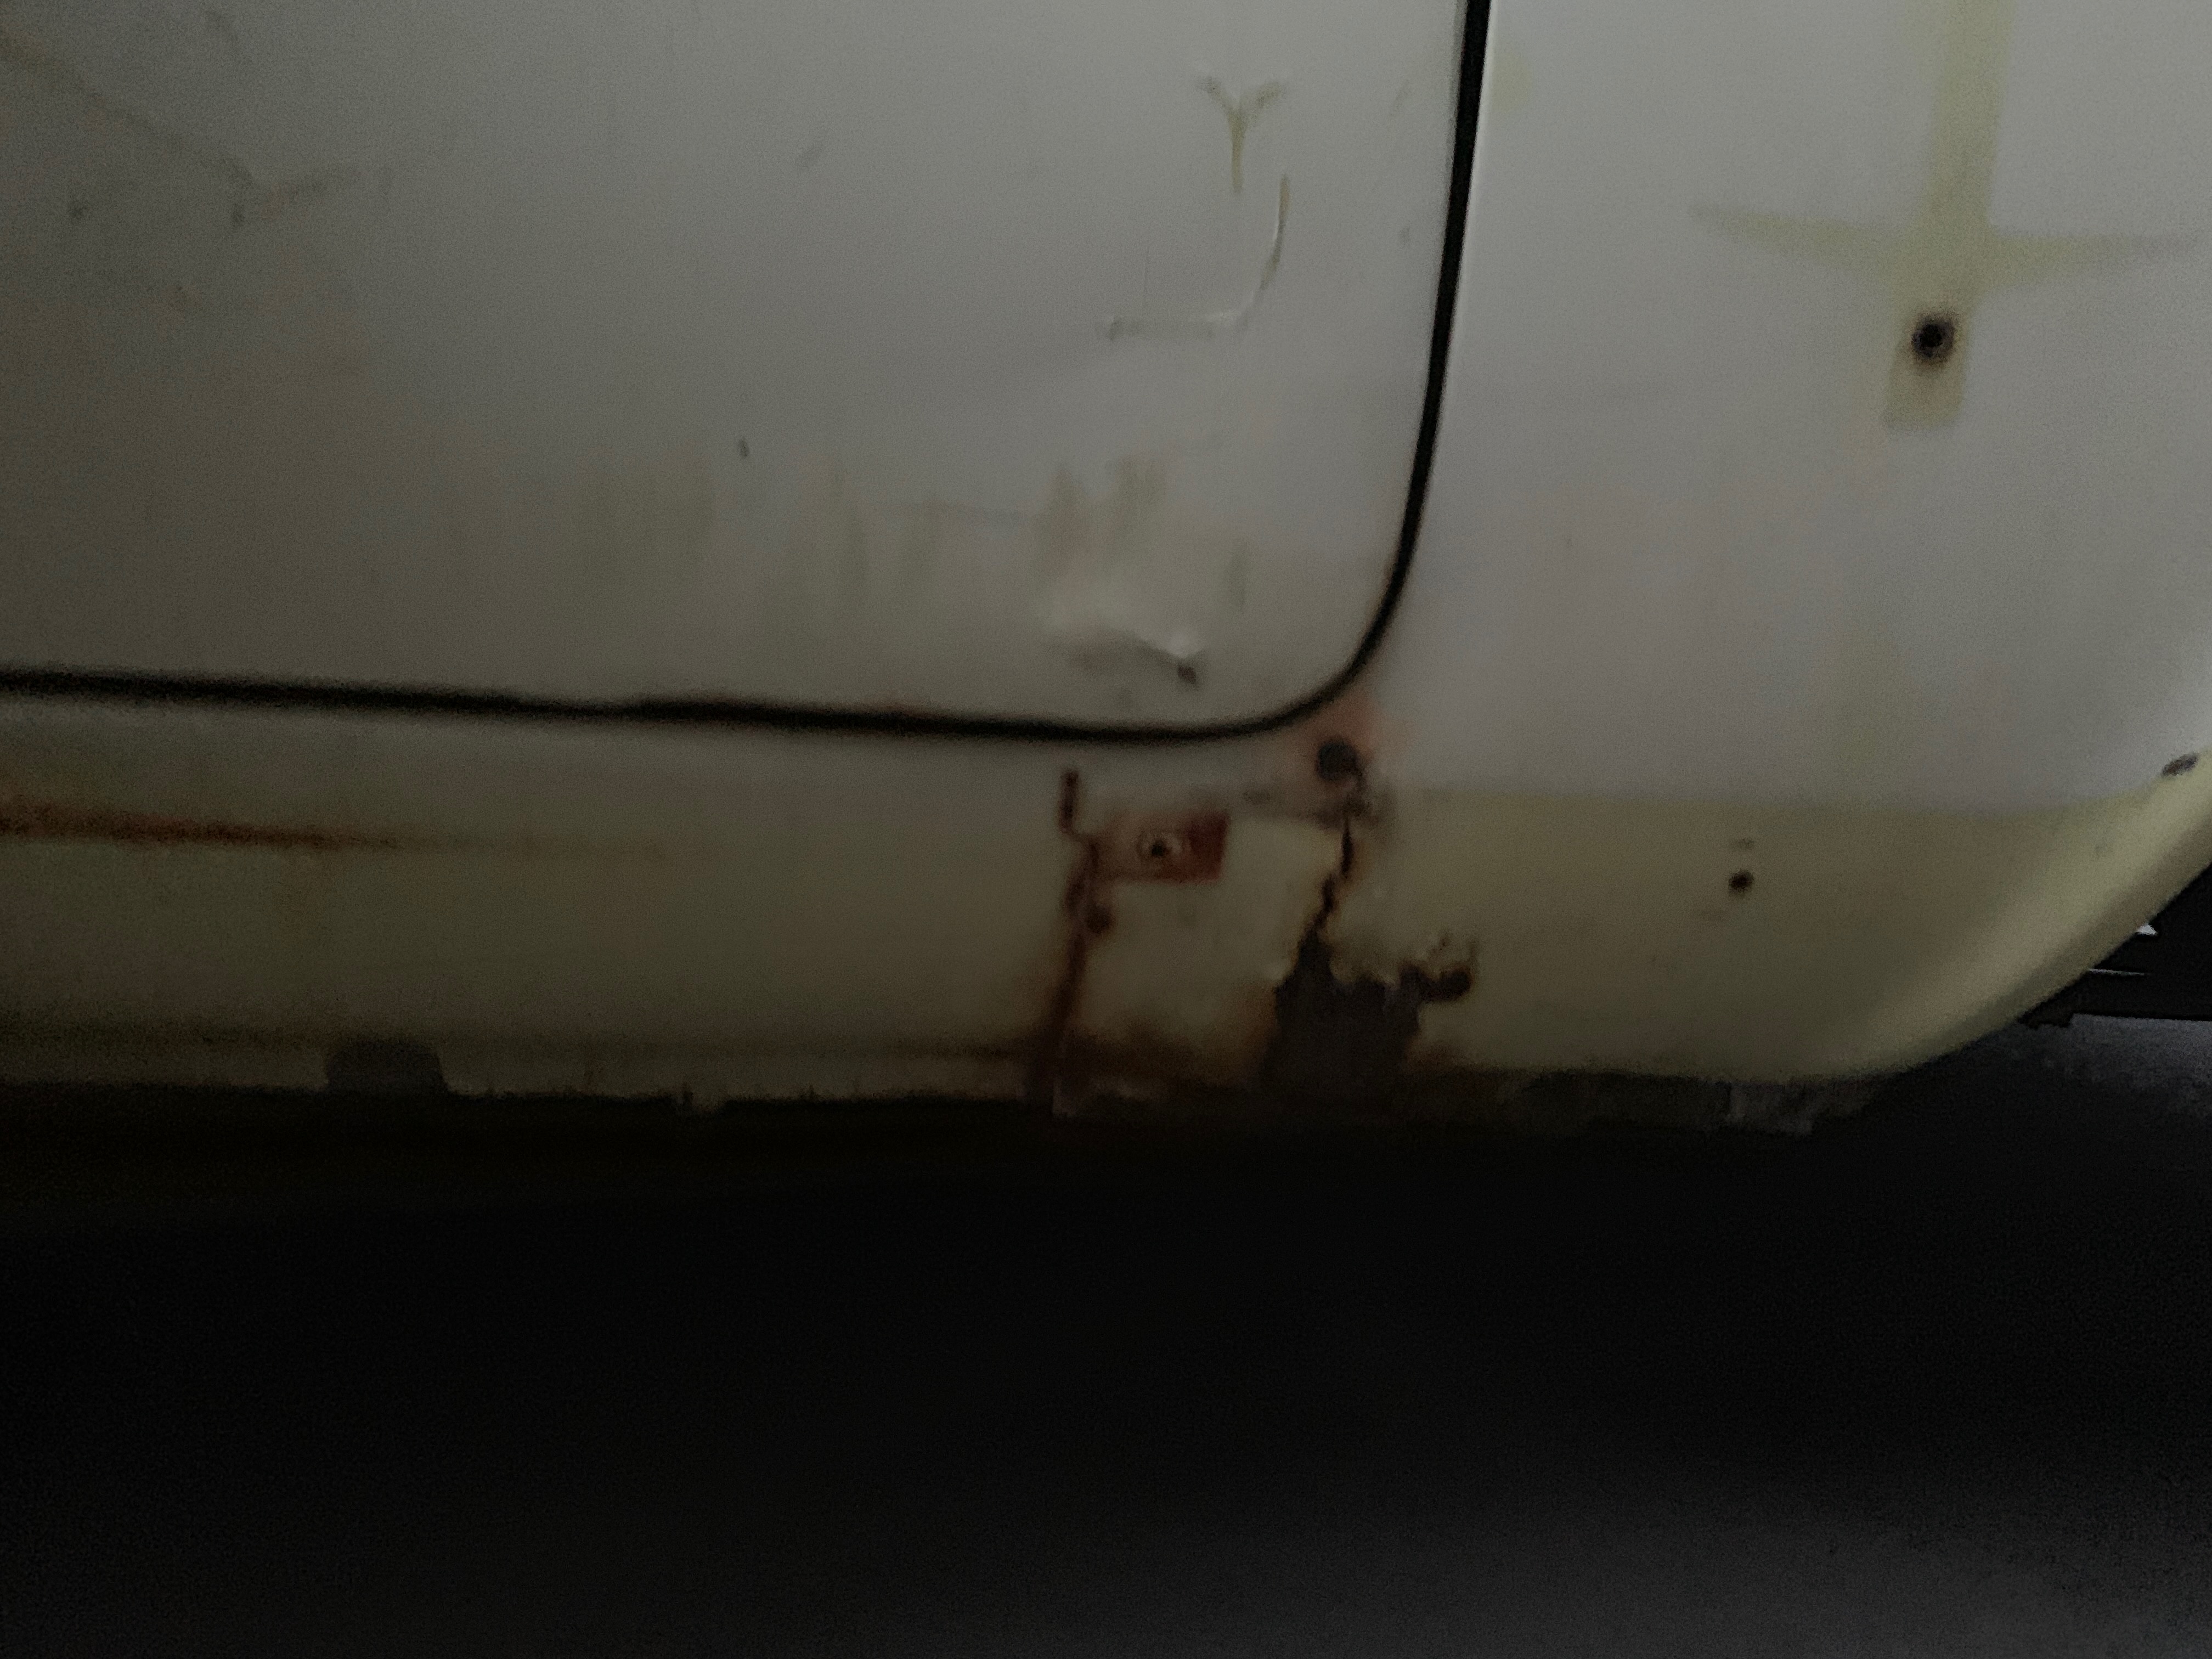
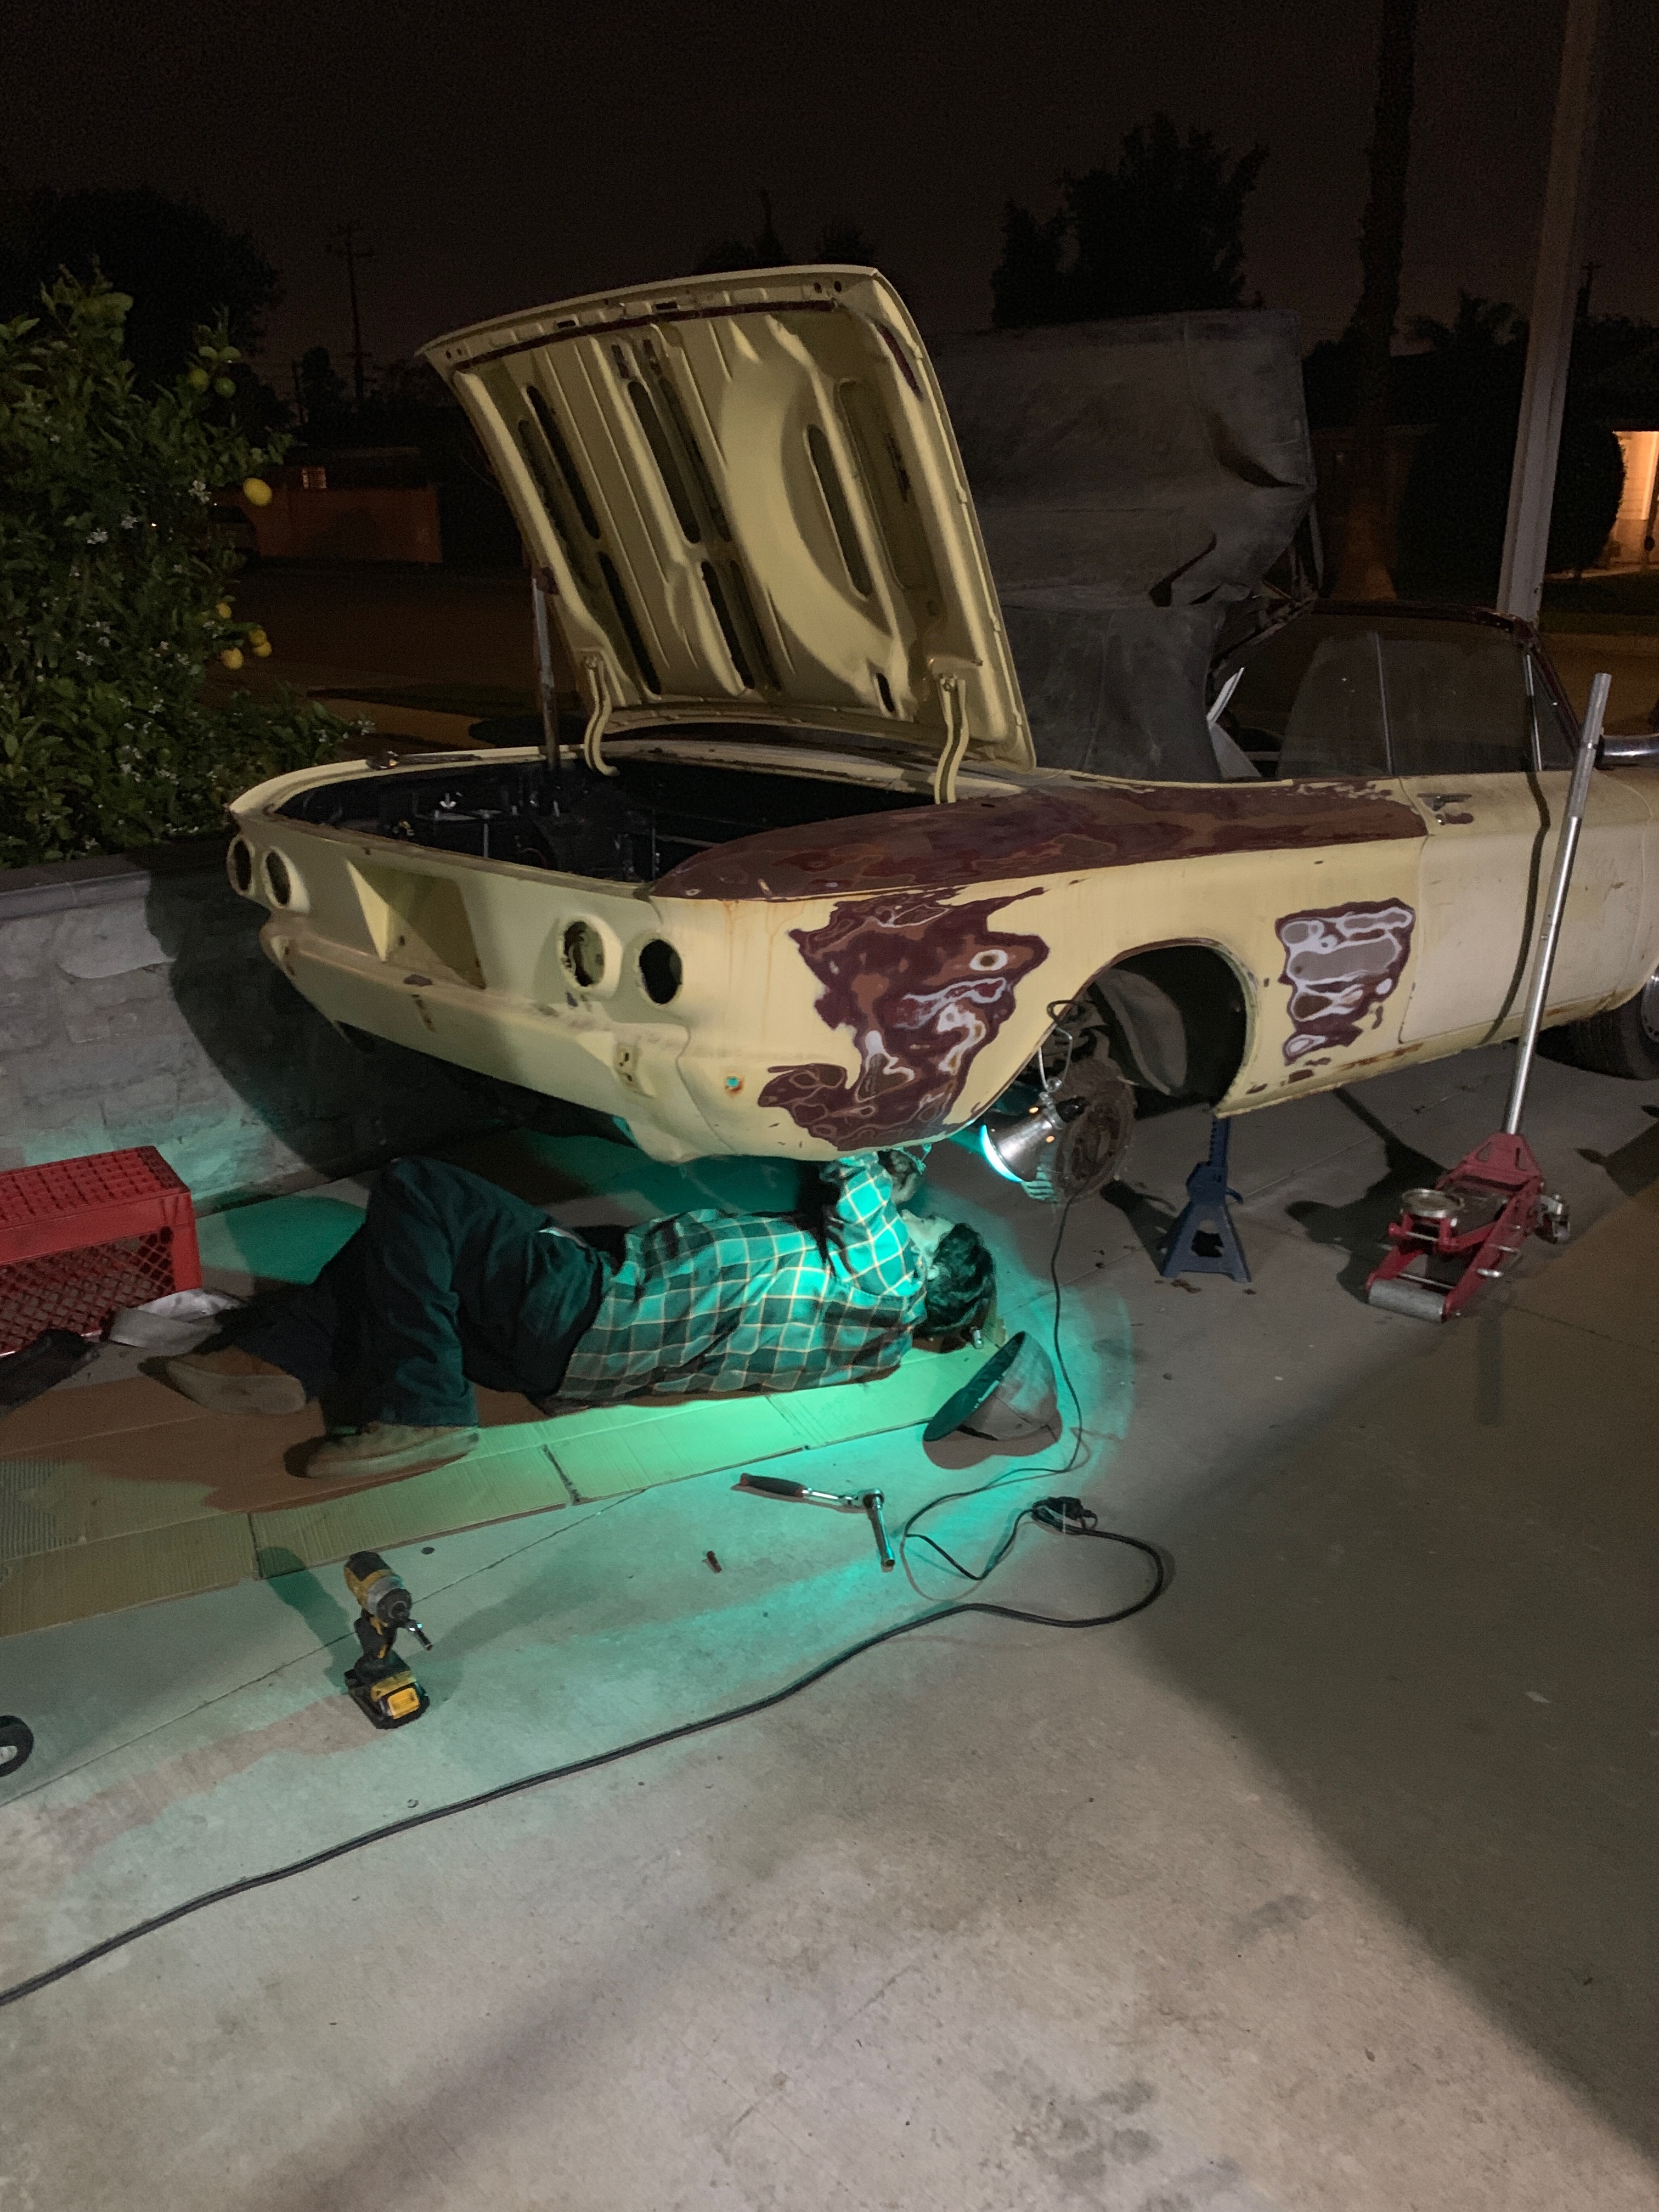
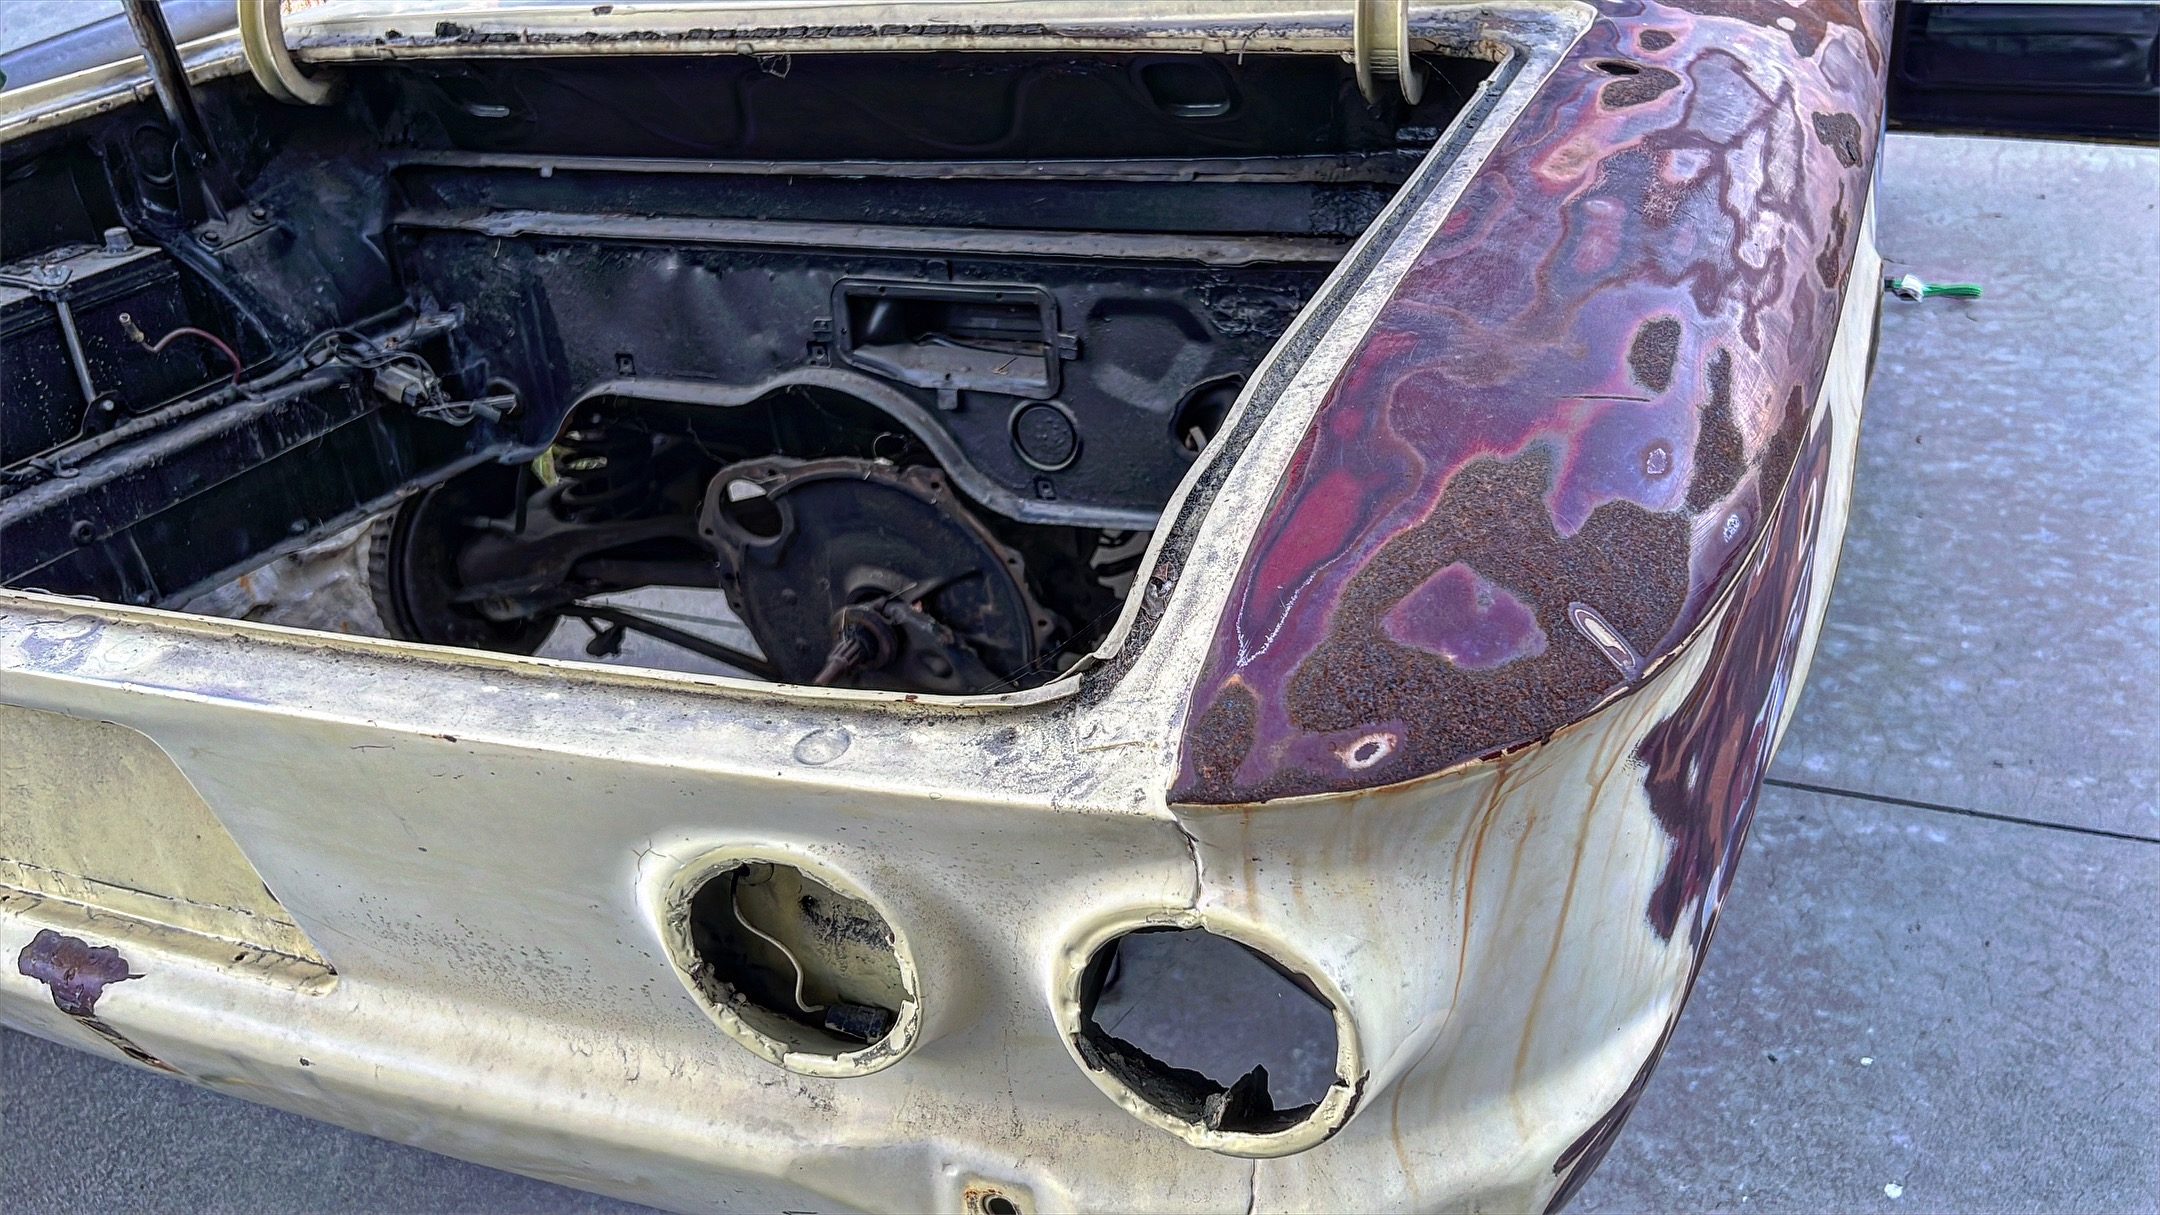
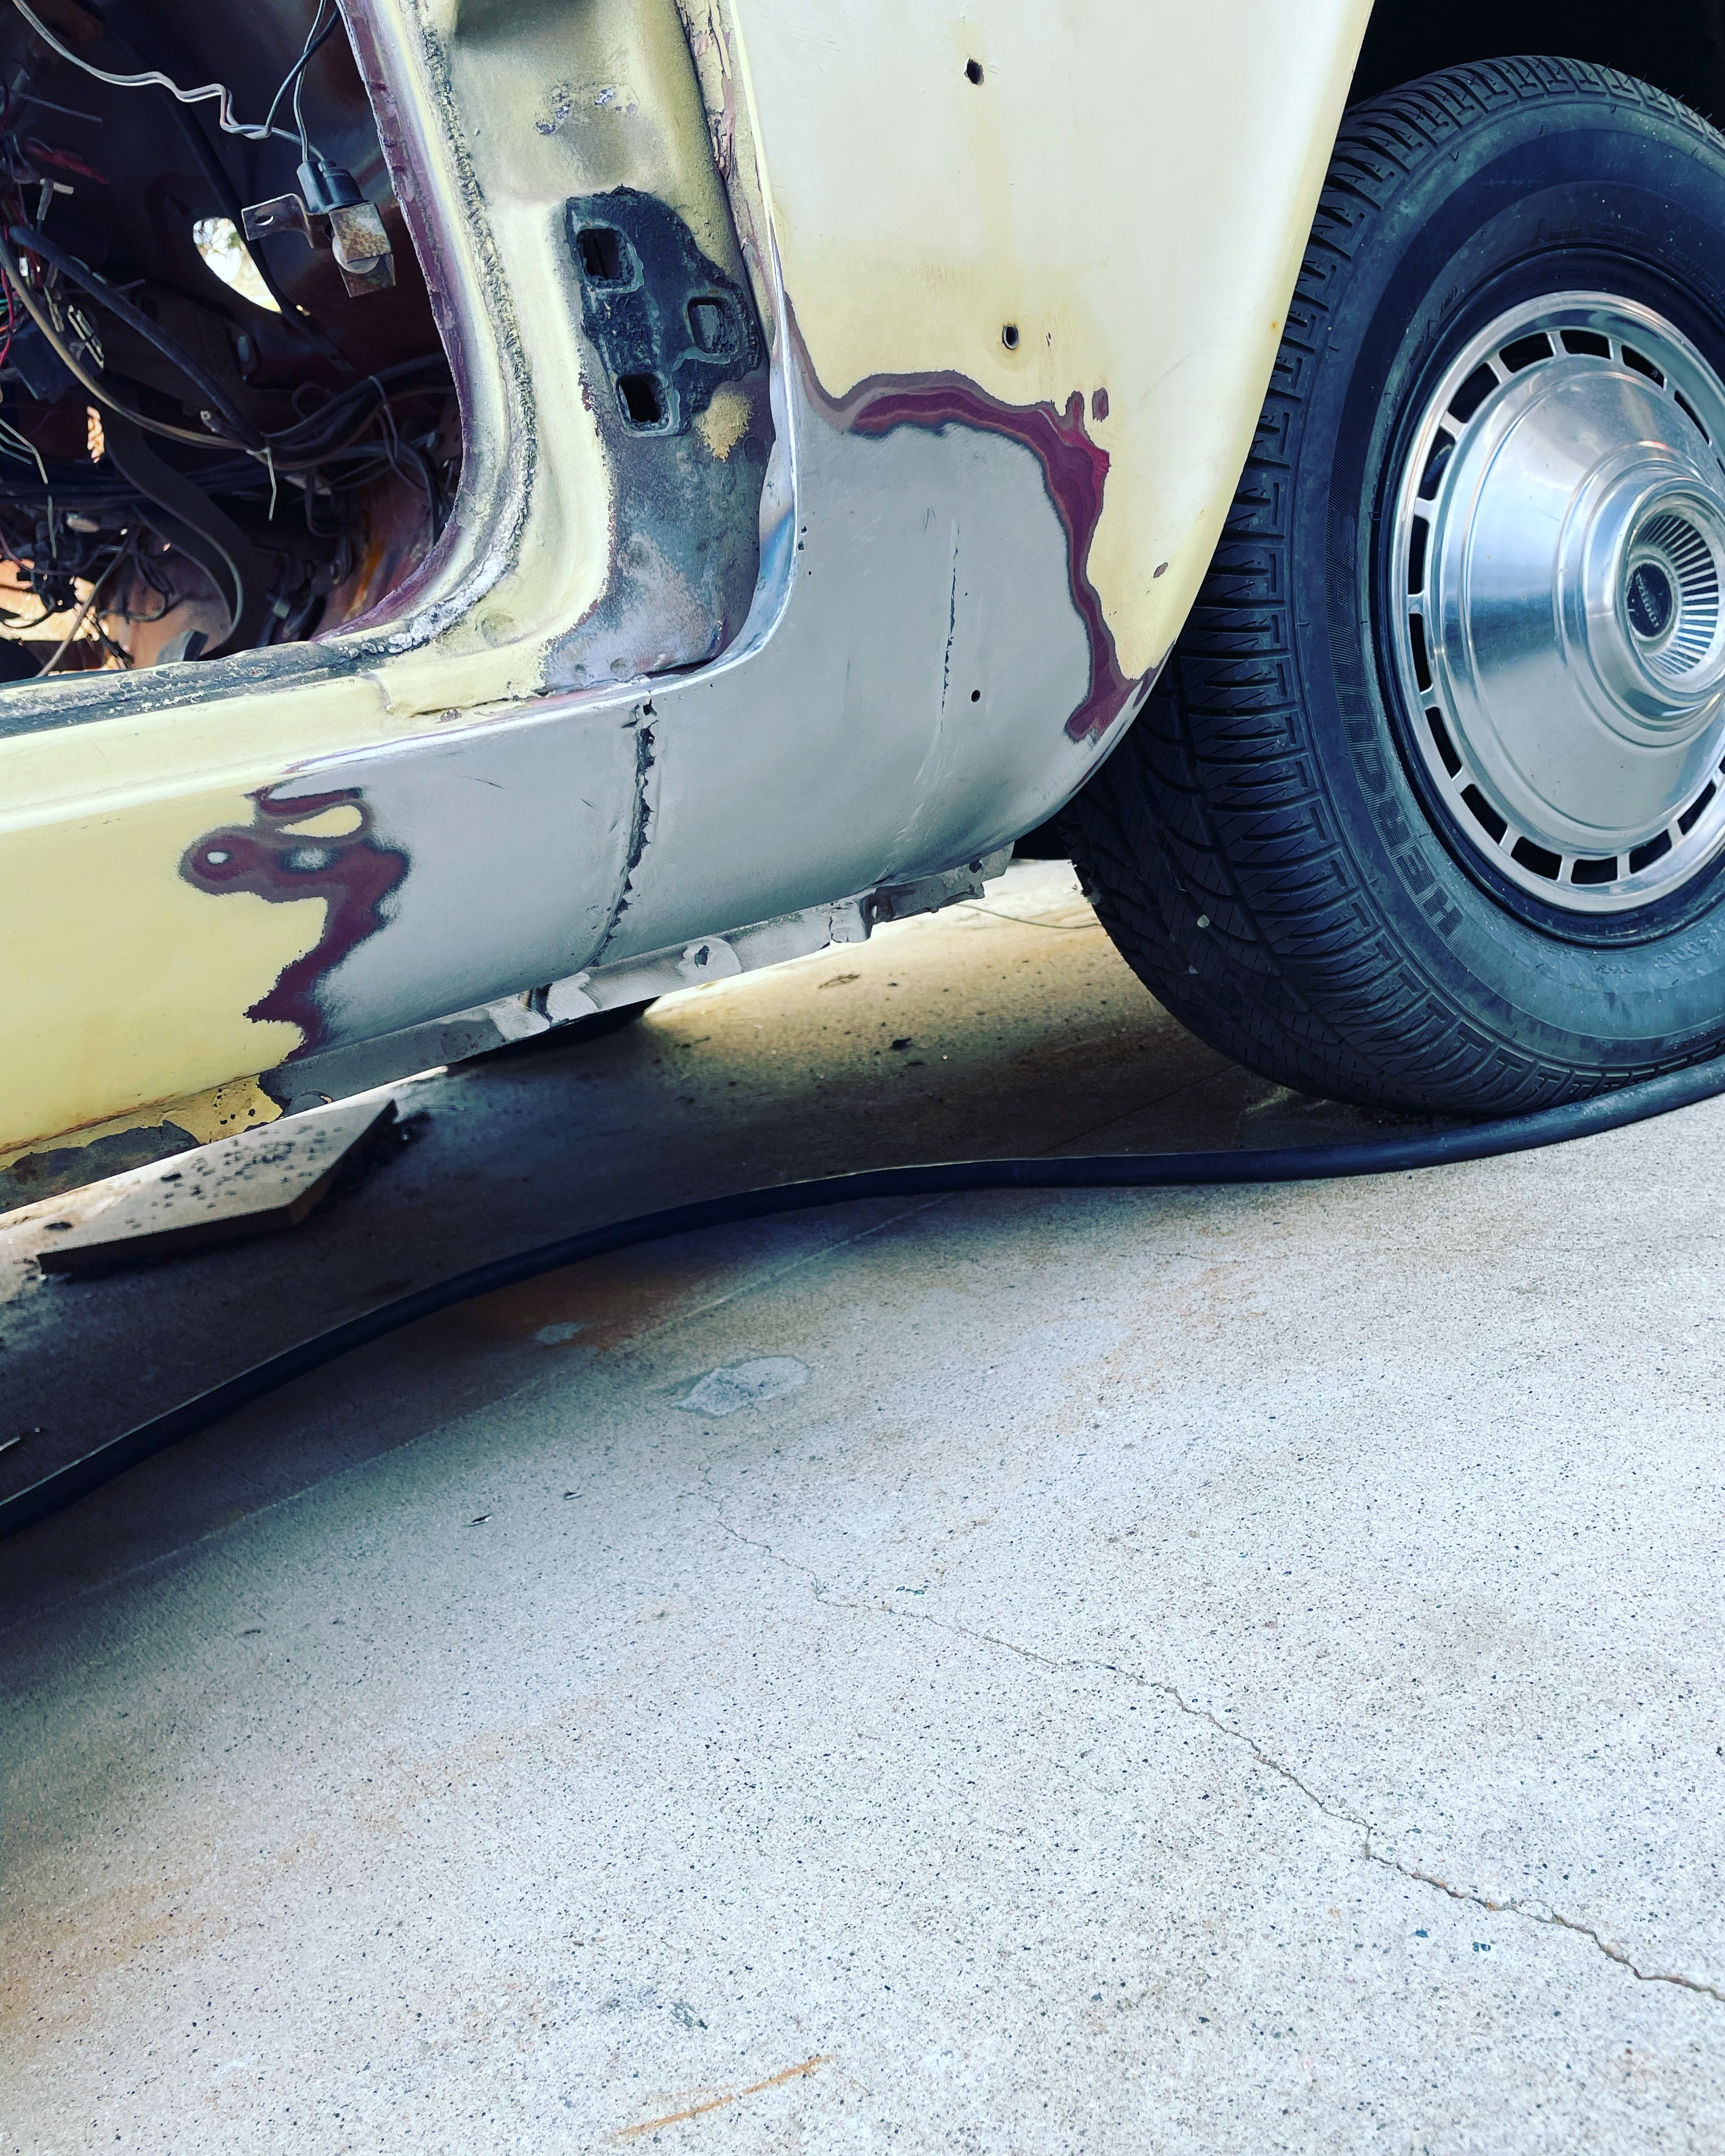
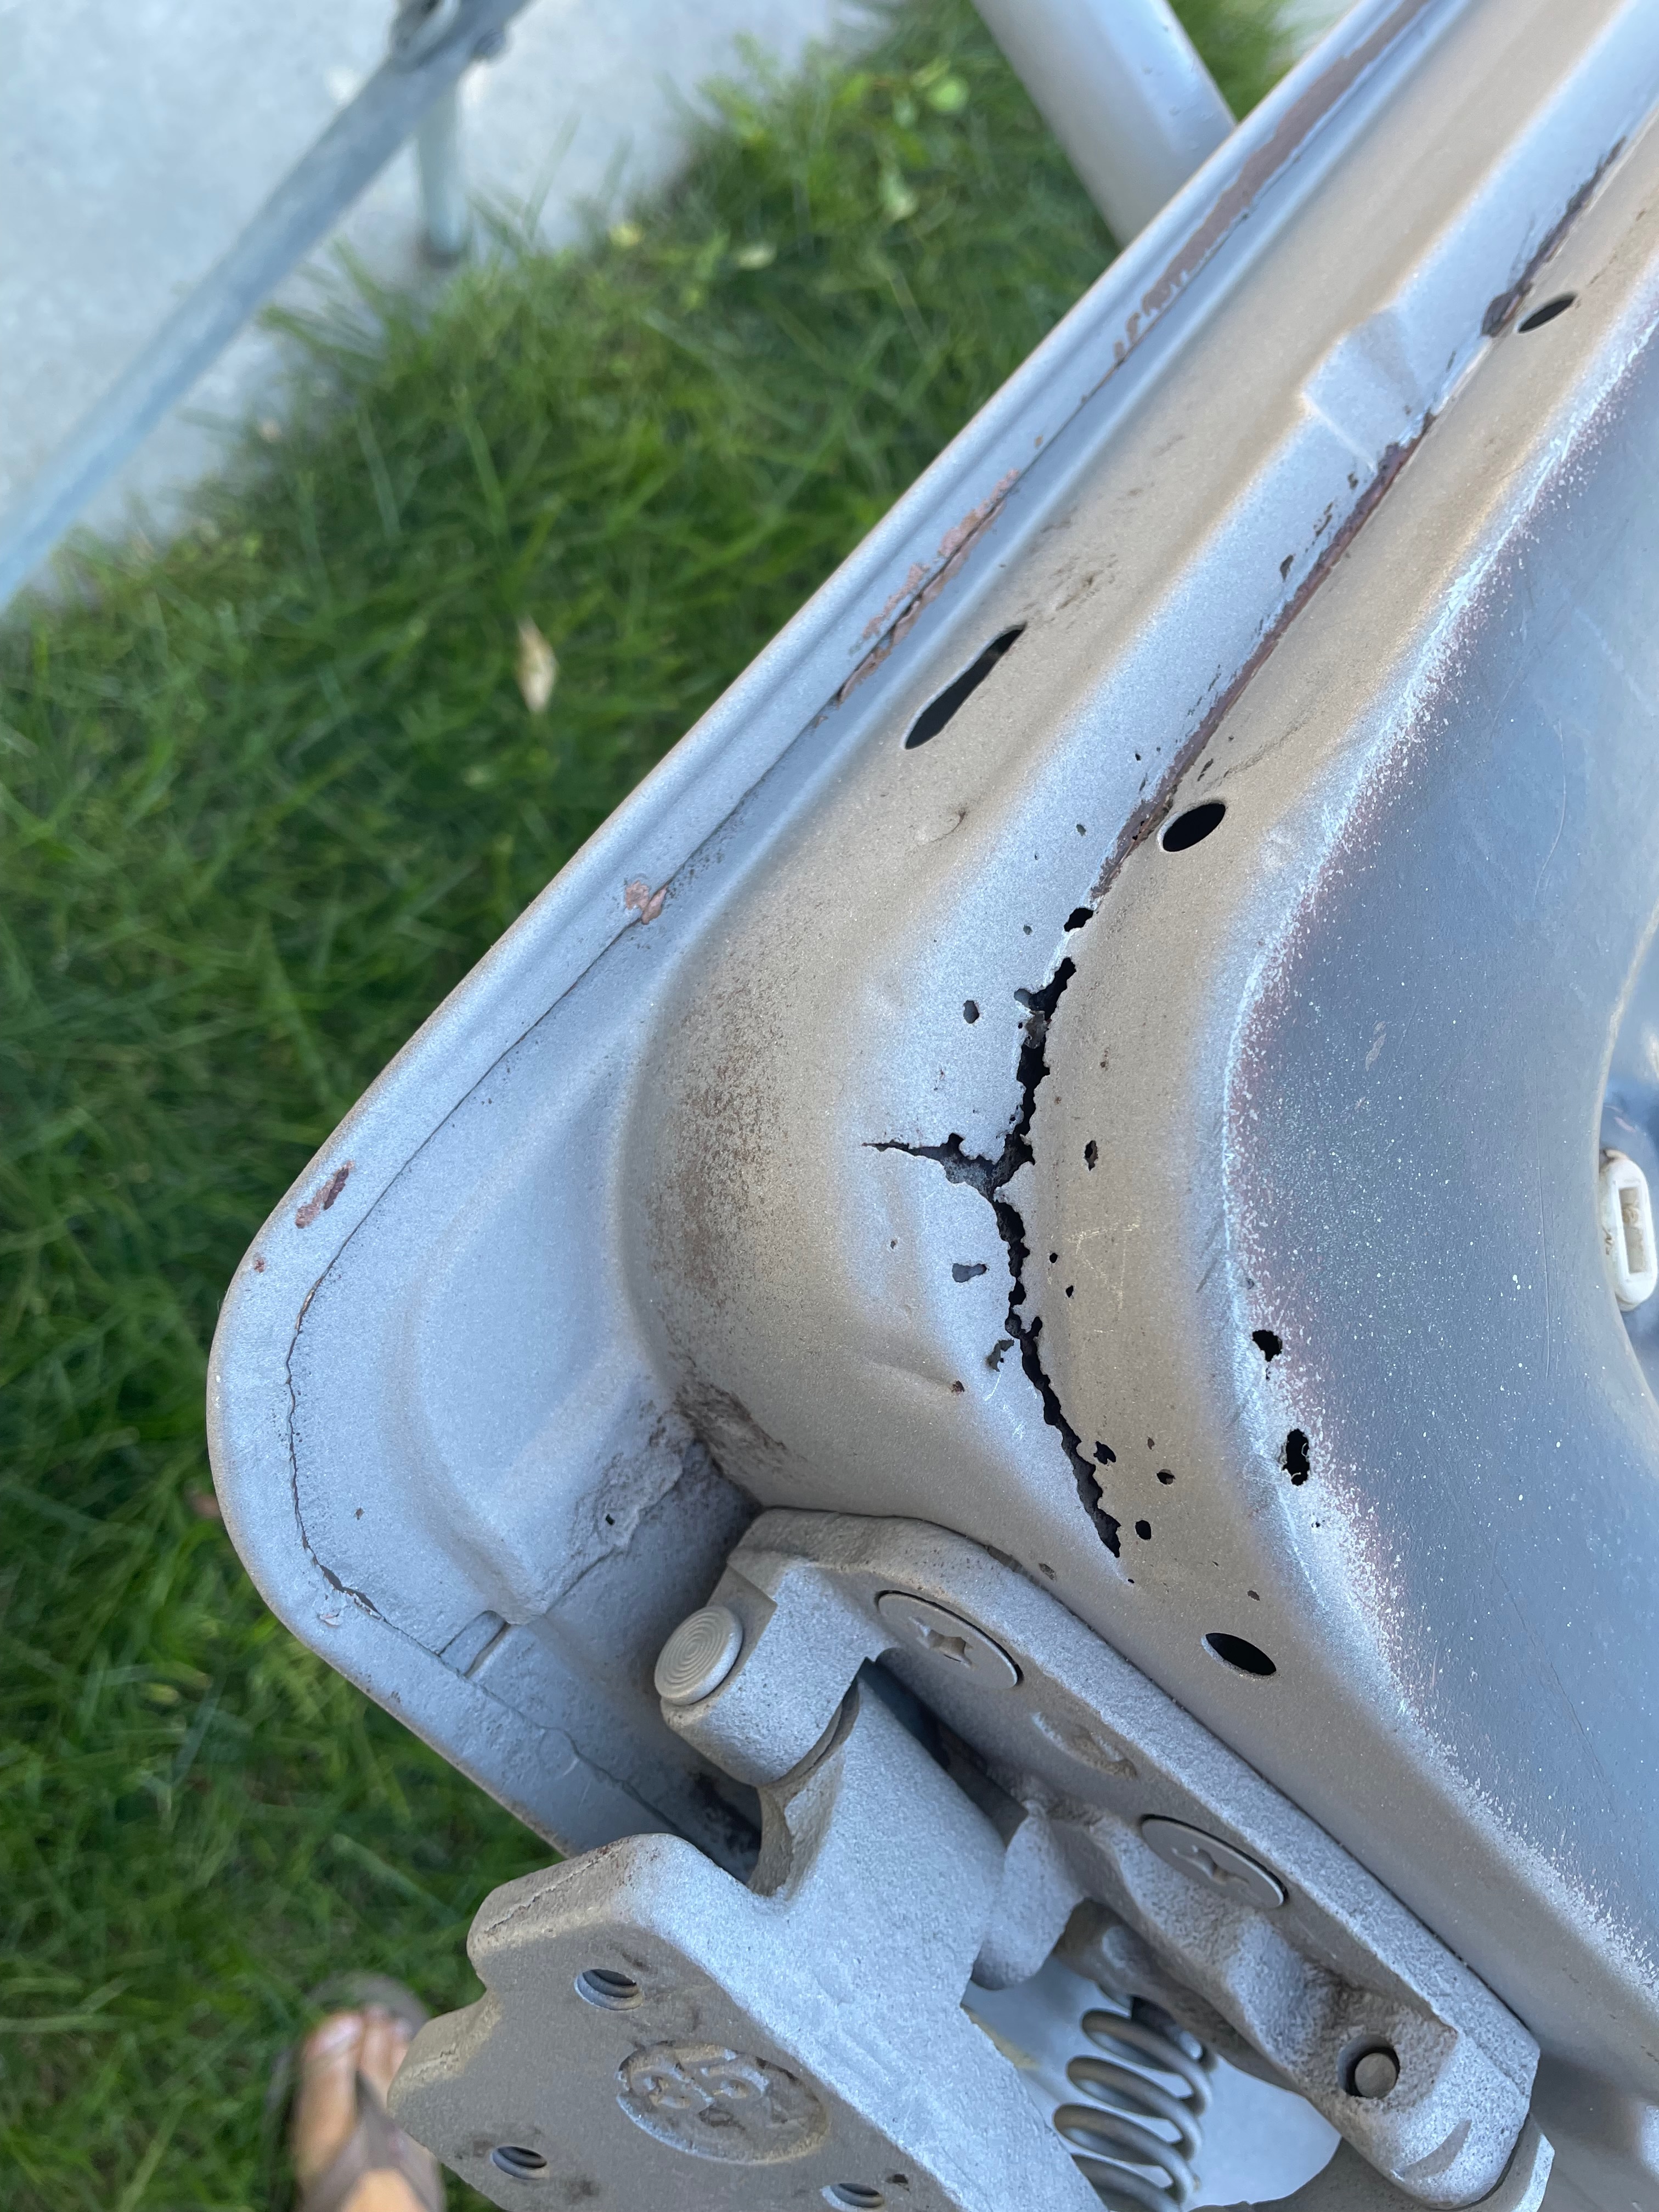
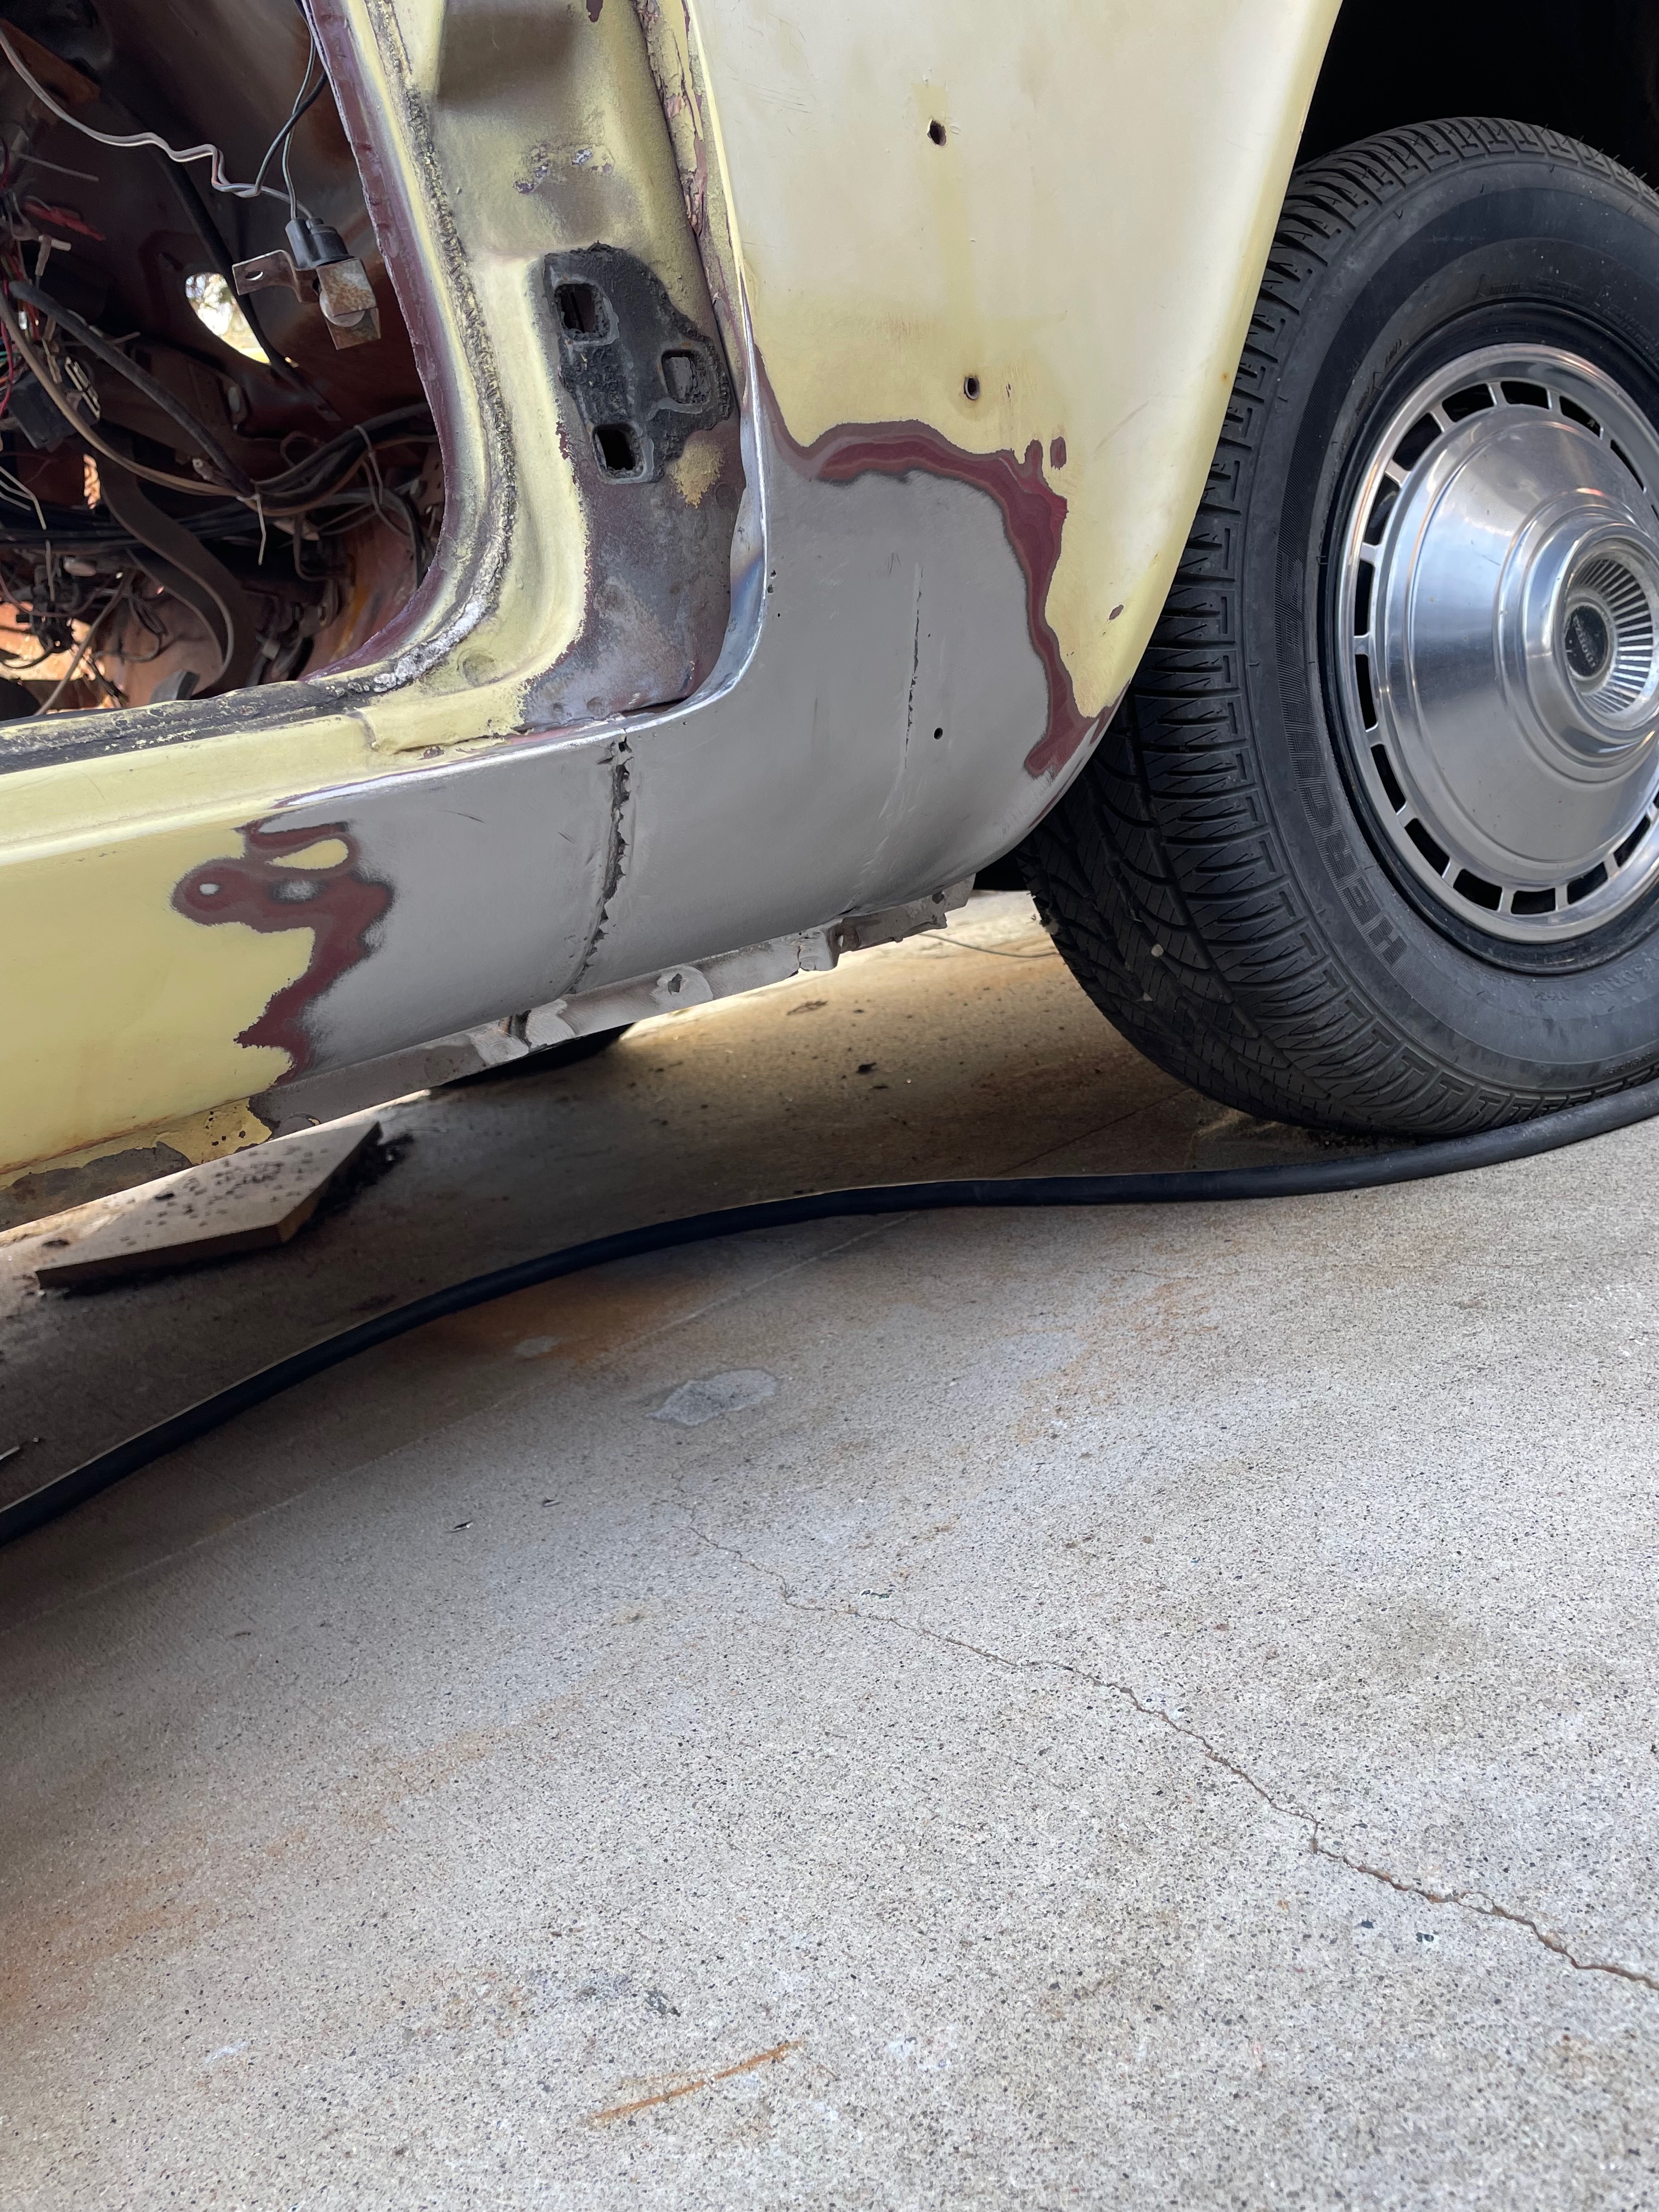
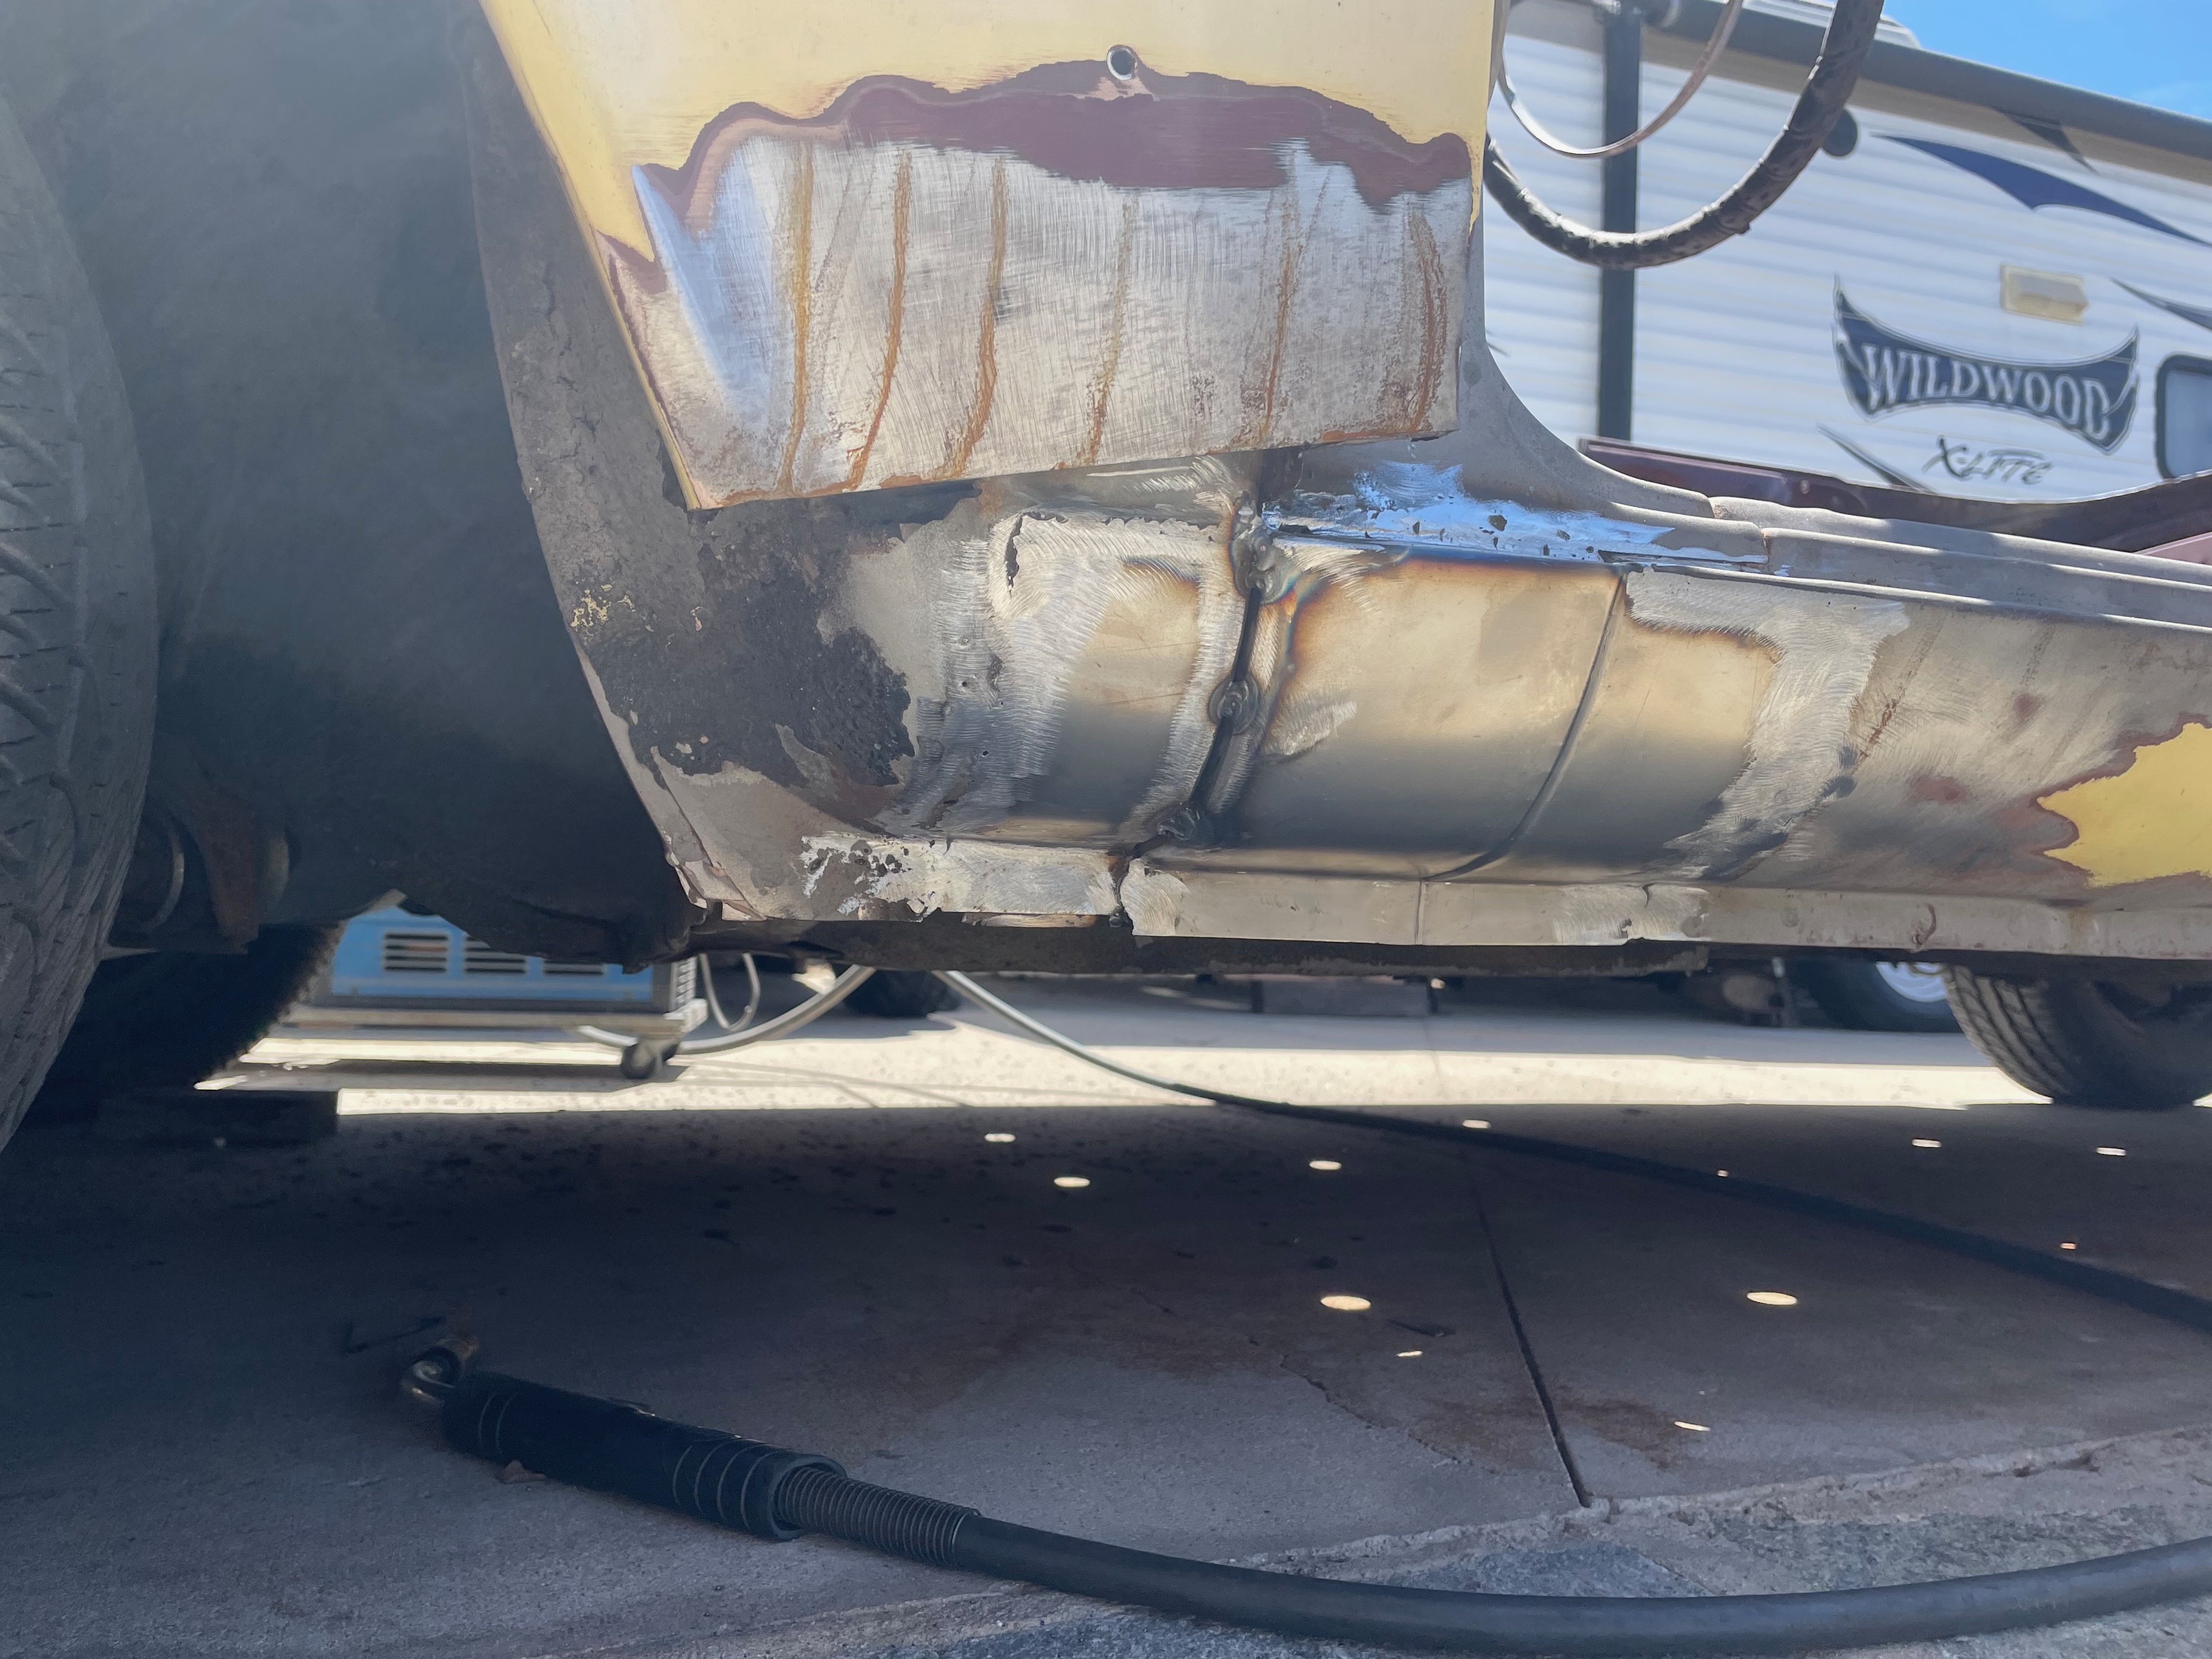
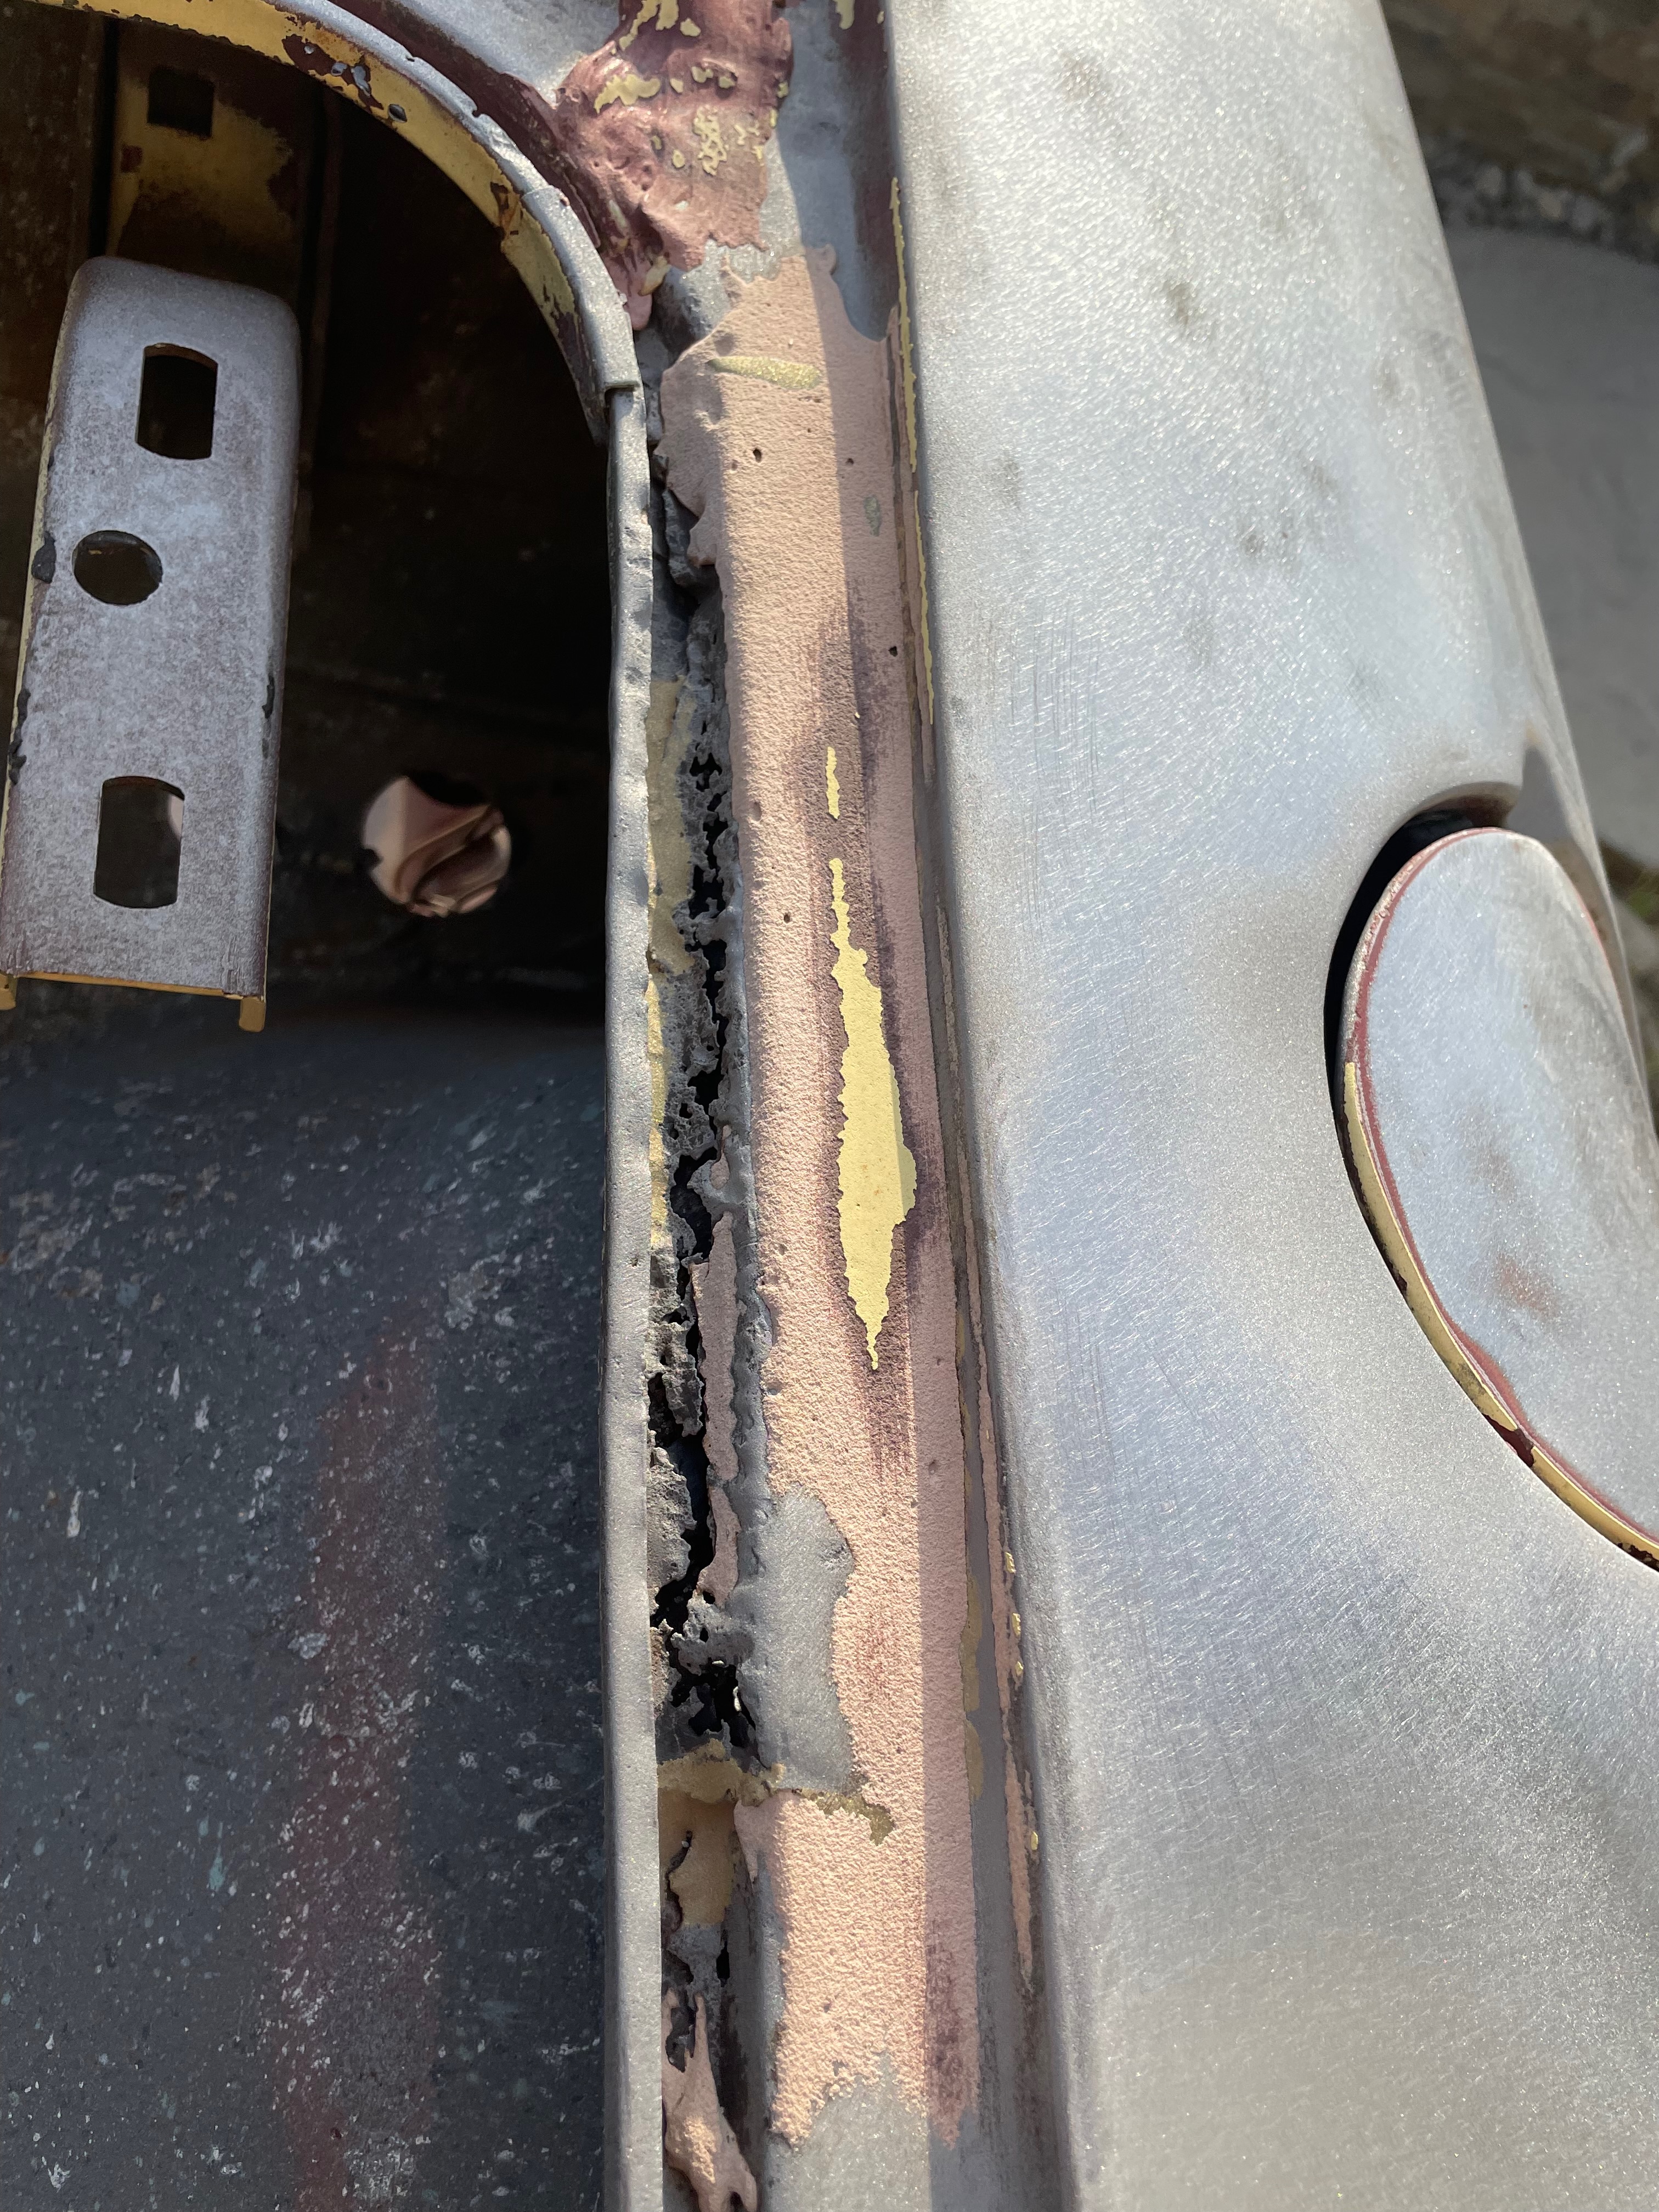
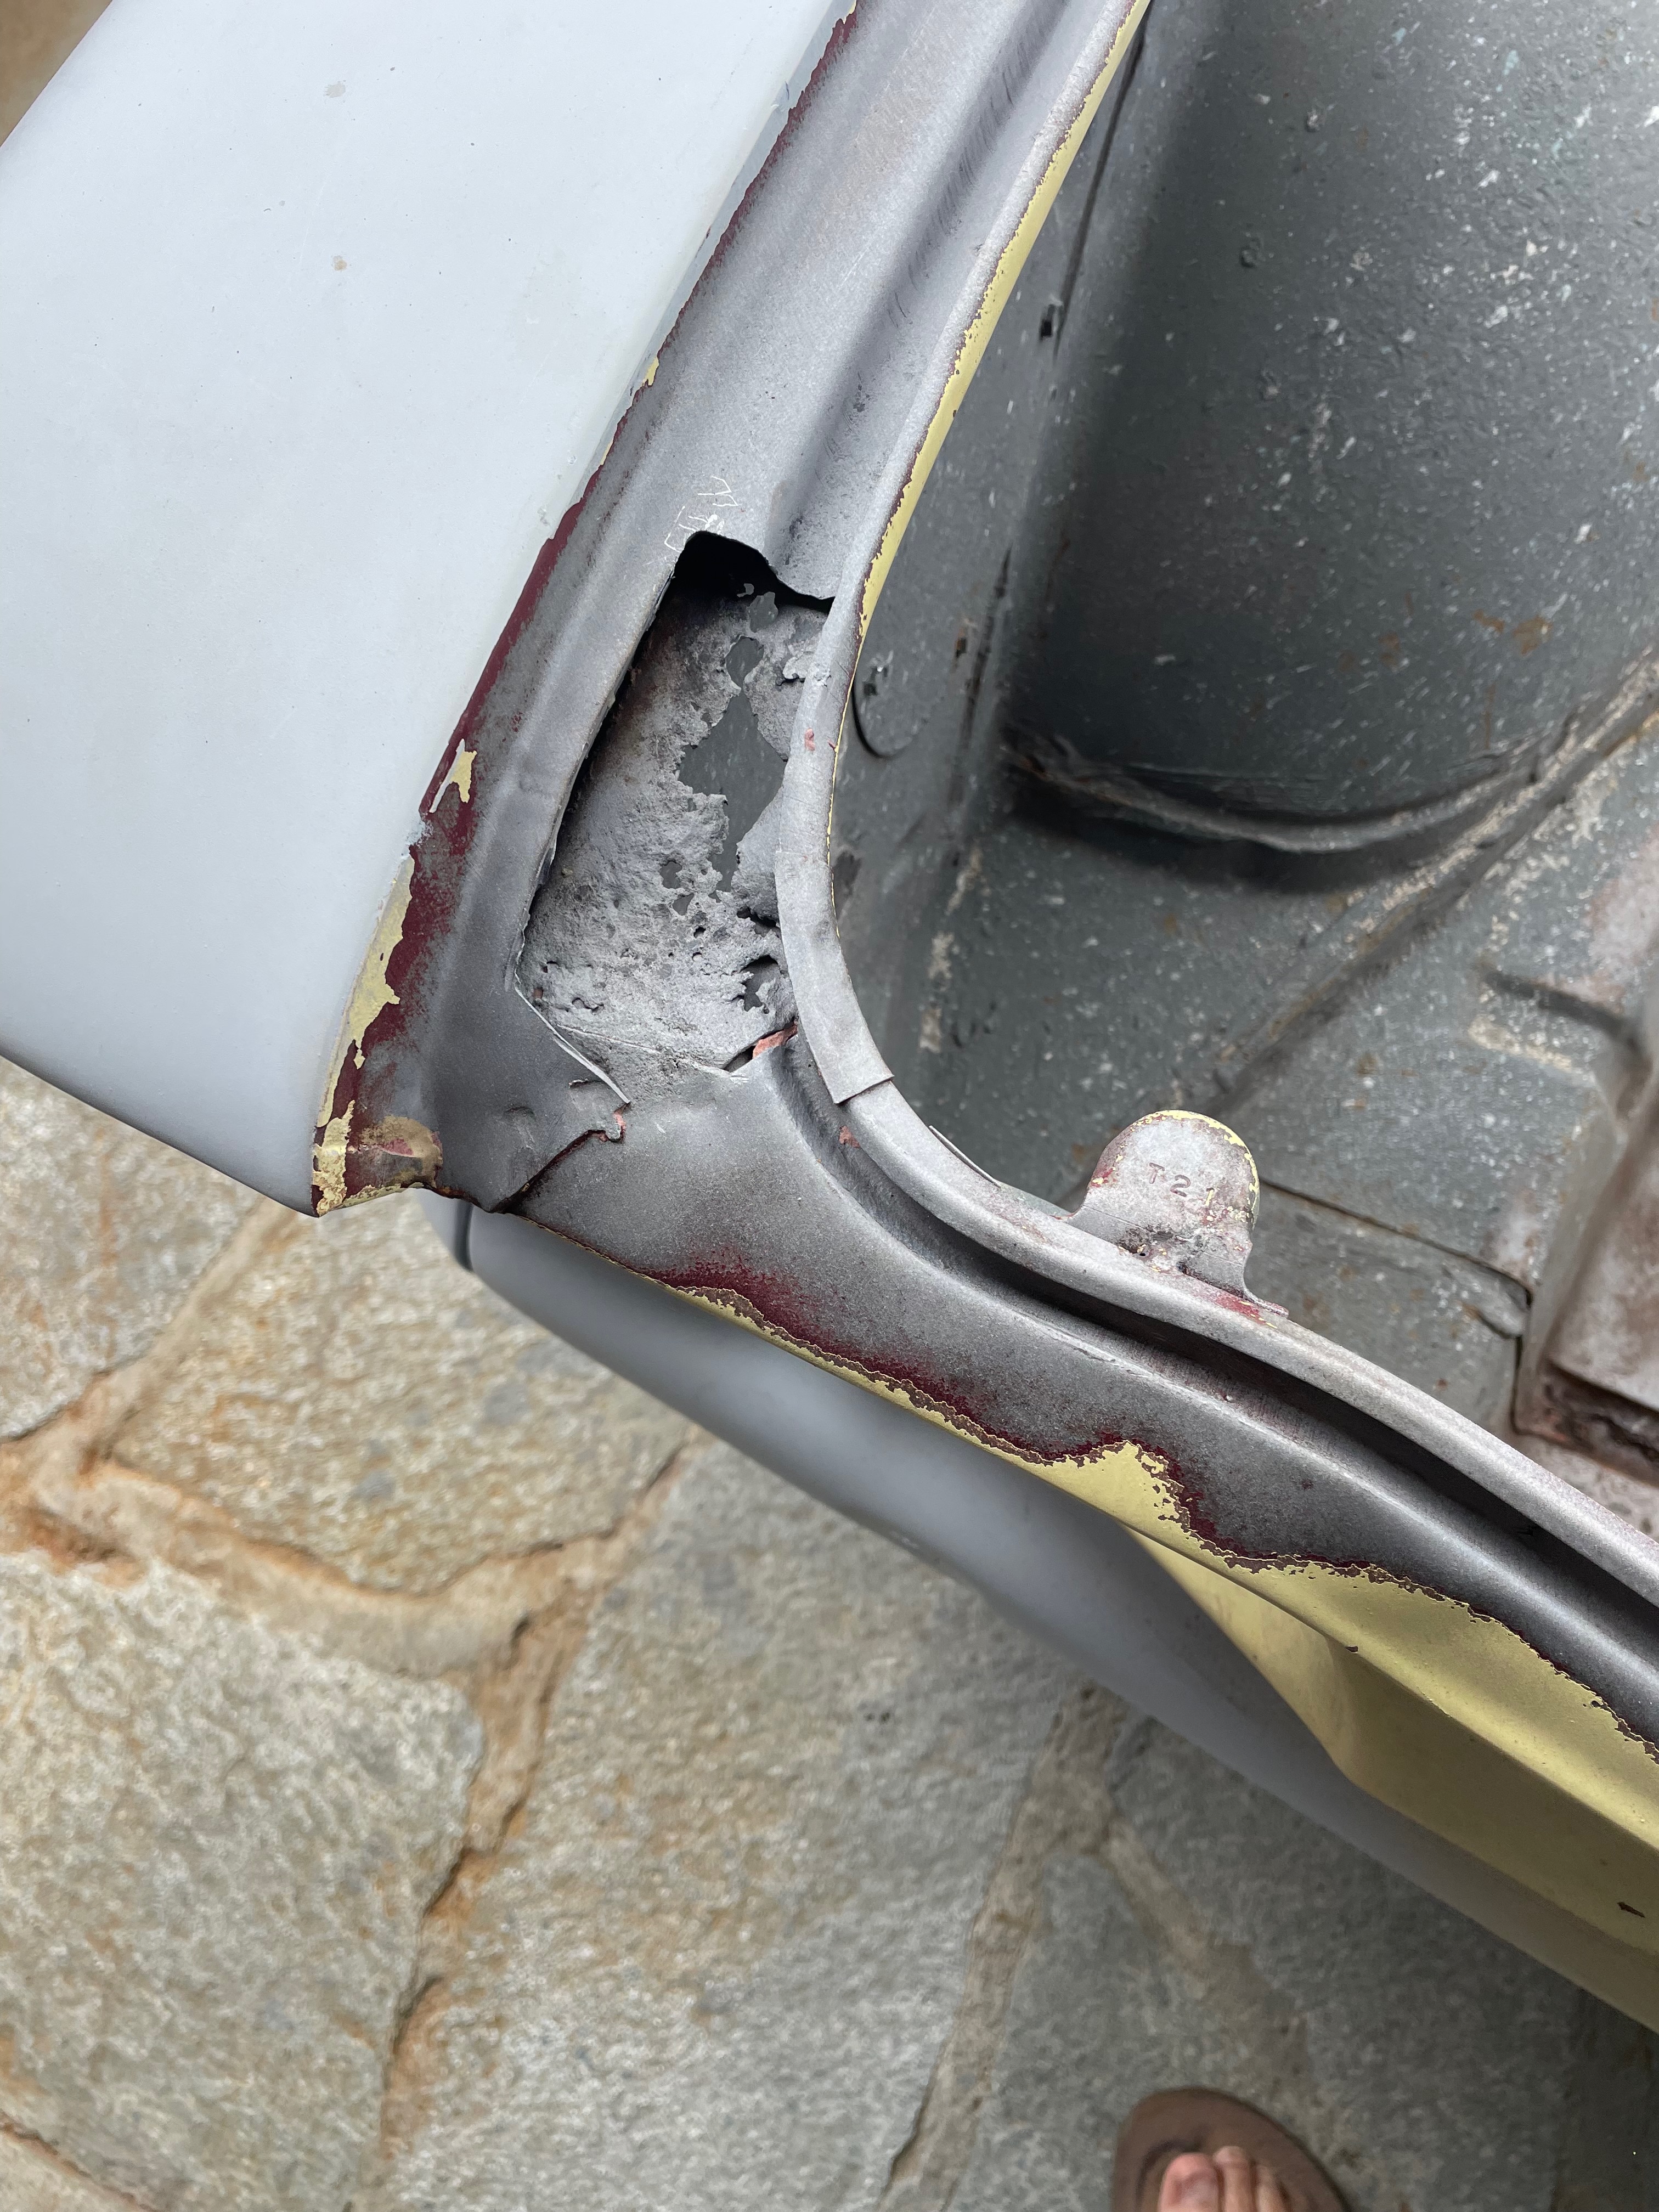
Pre-Build: Rocker Panel Condition
Close-up of the severely rusted rocker panels, a common problem area on Corvairs that would require extensive metalwork during restoration.
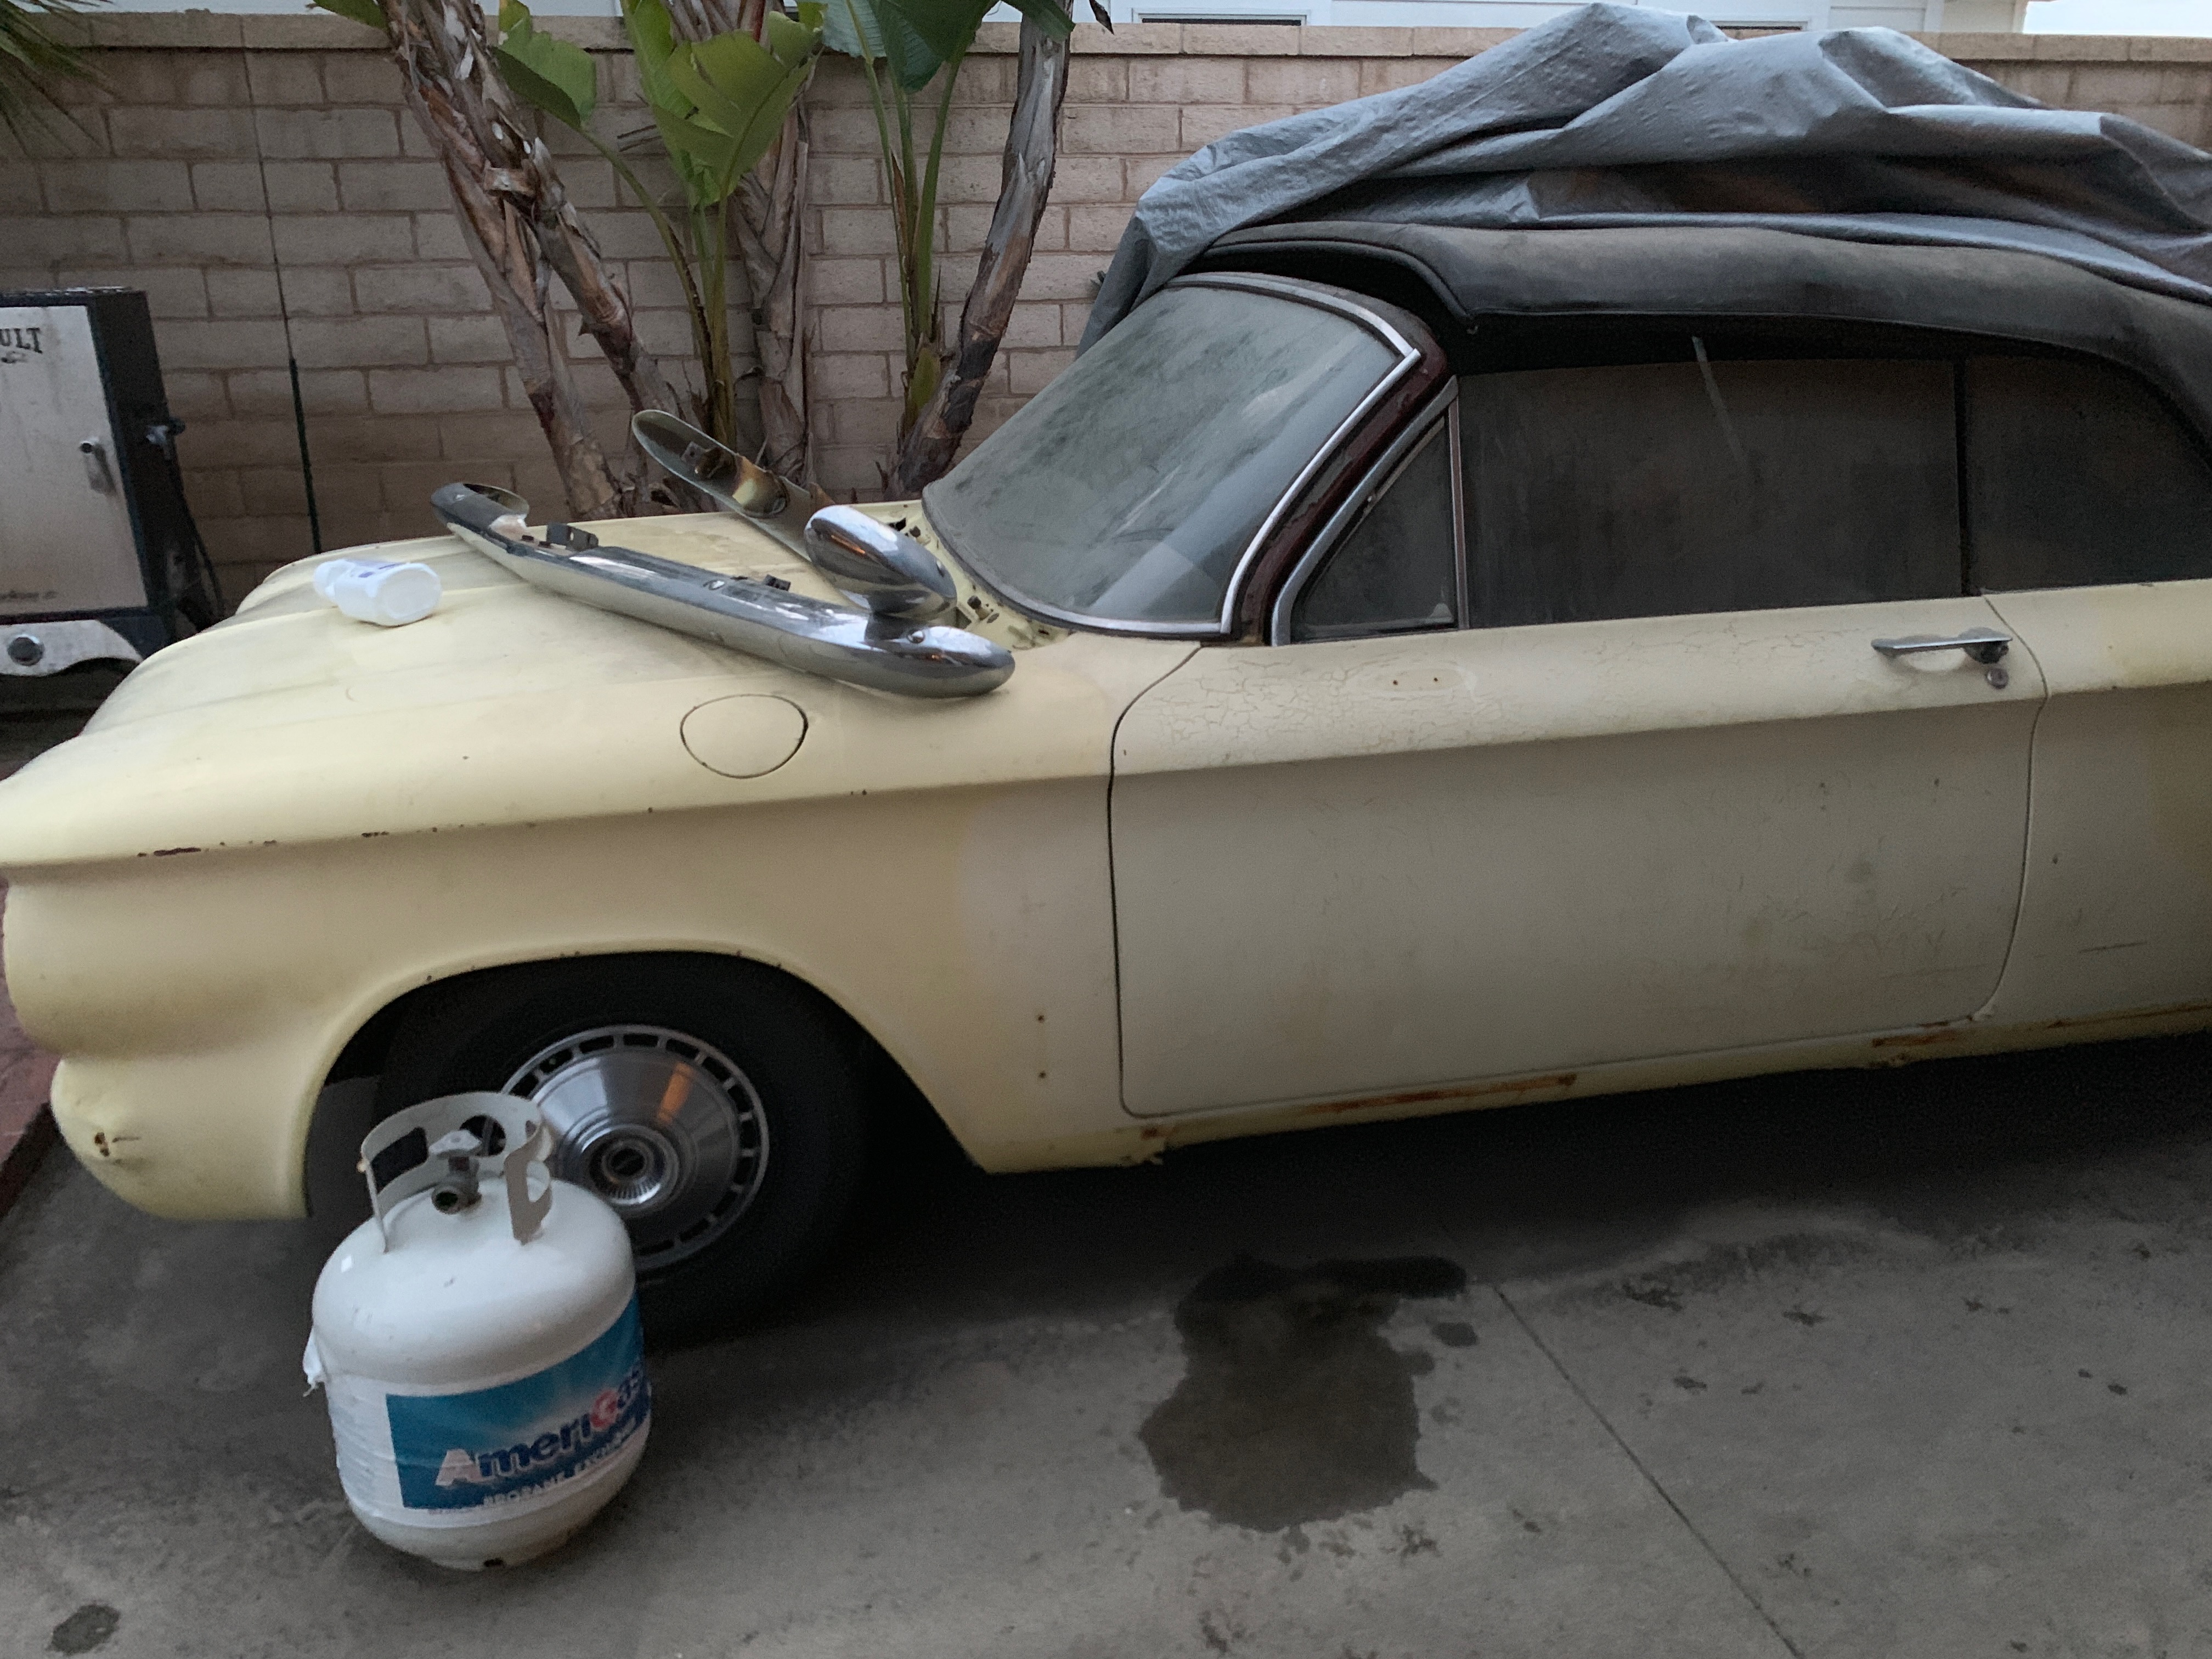
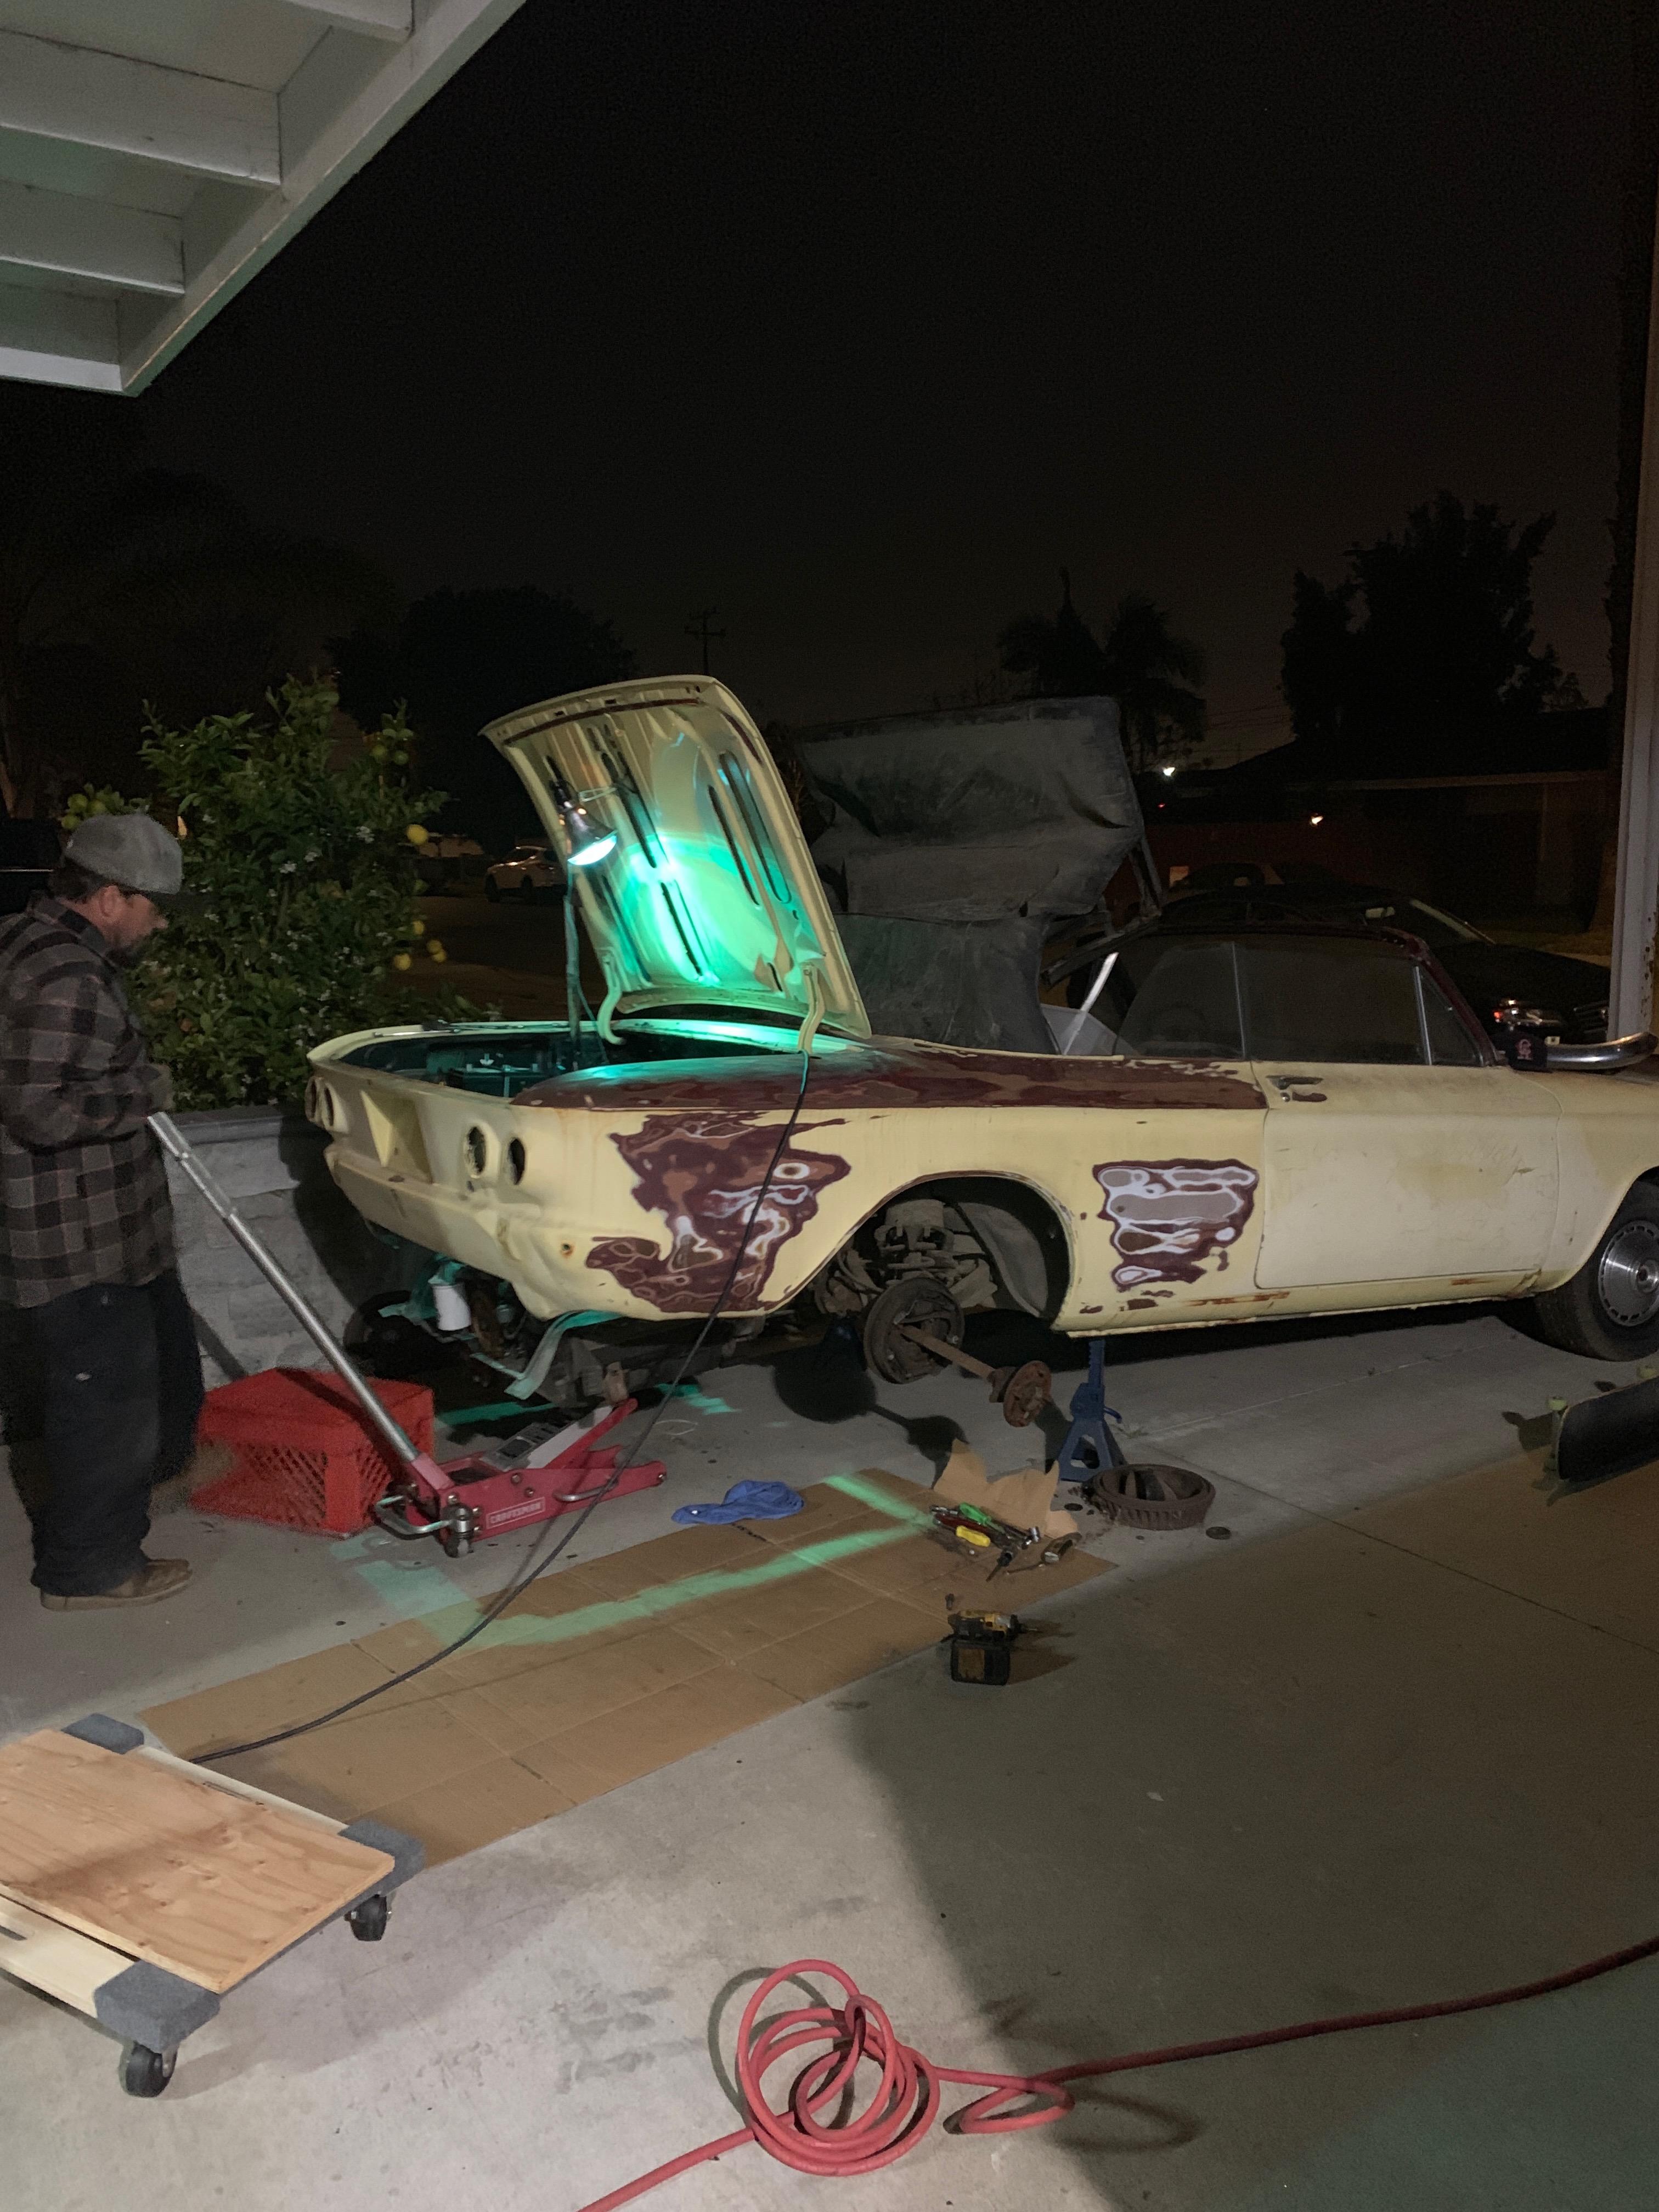
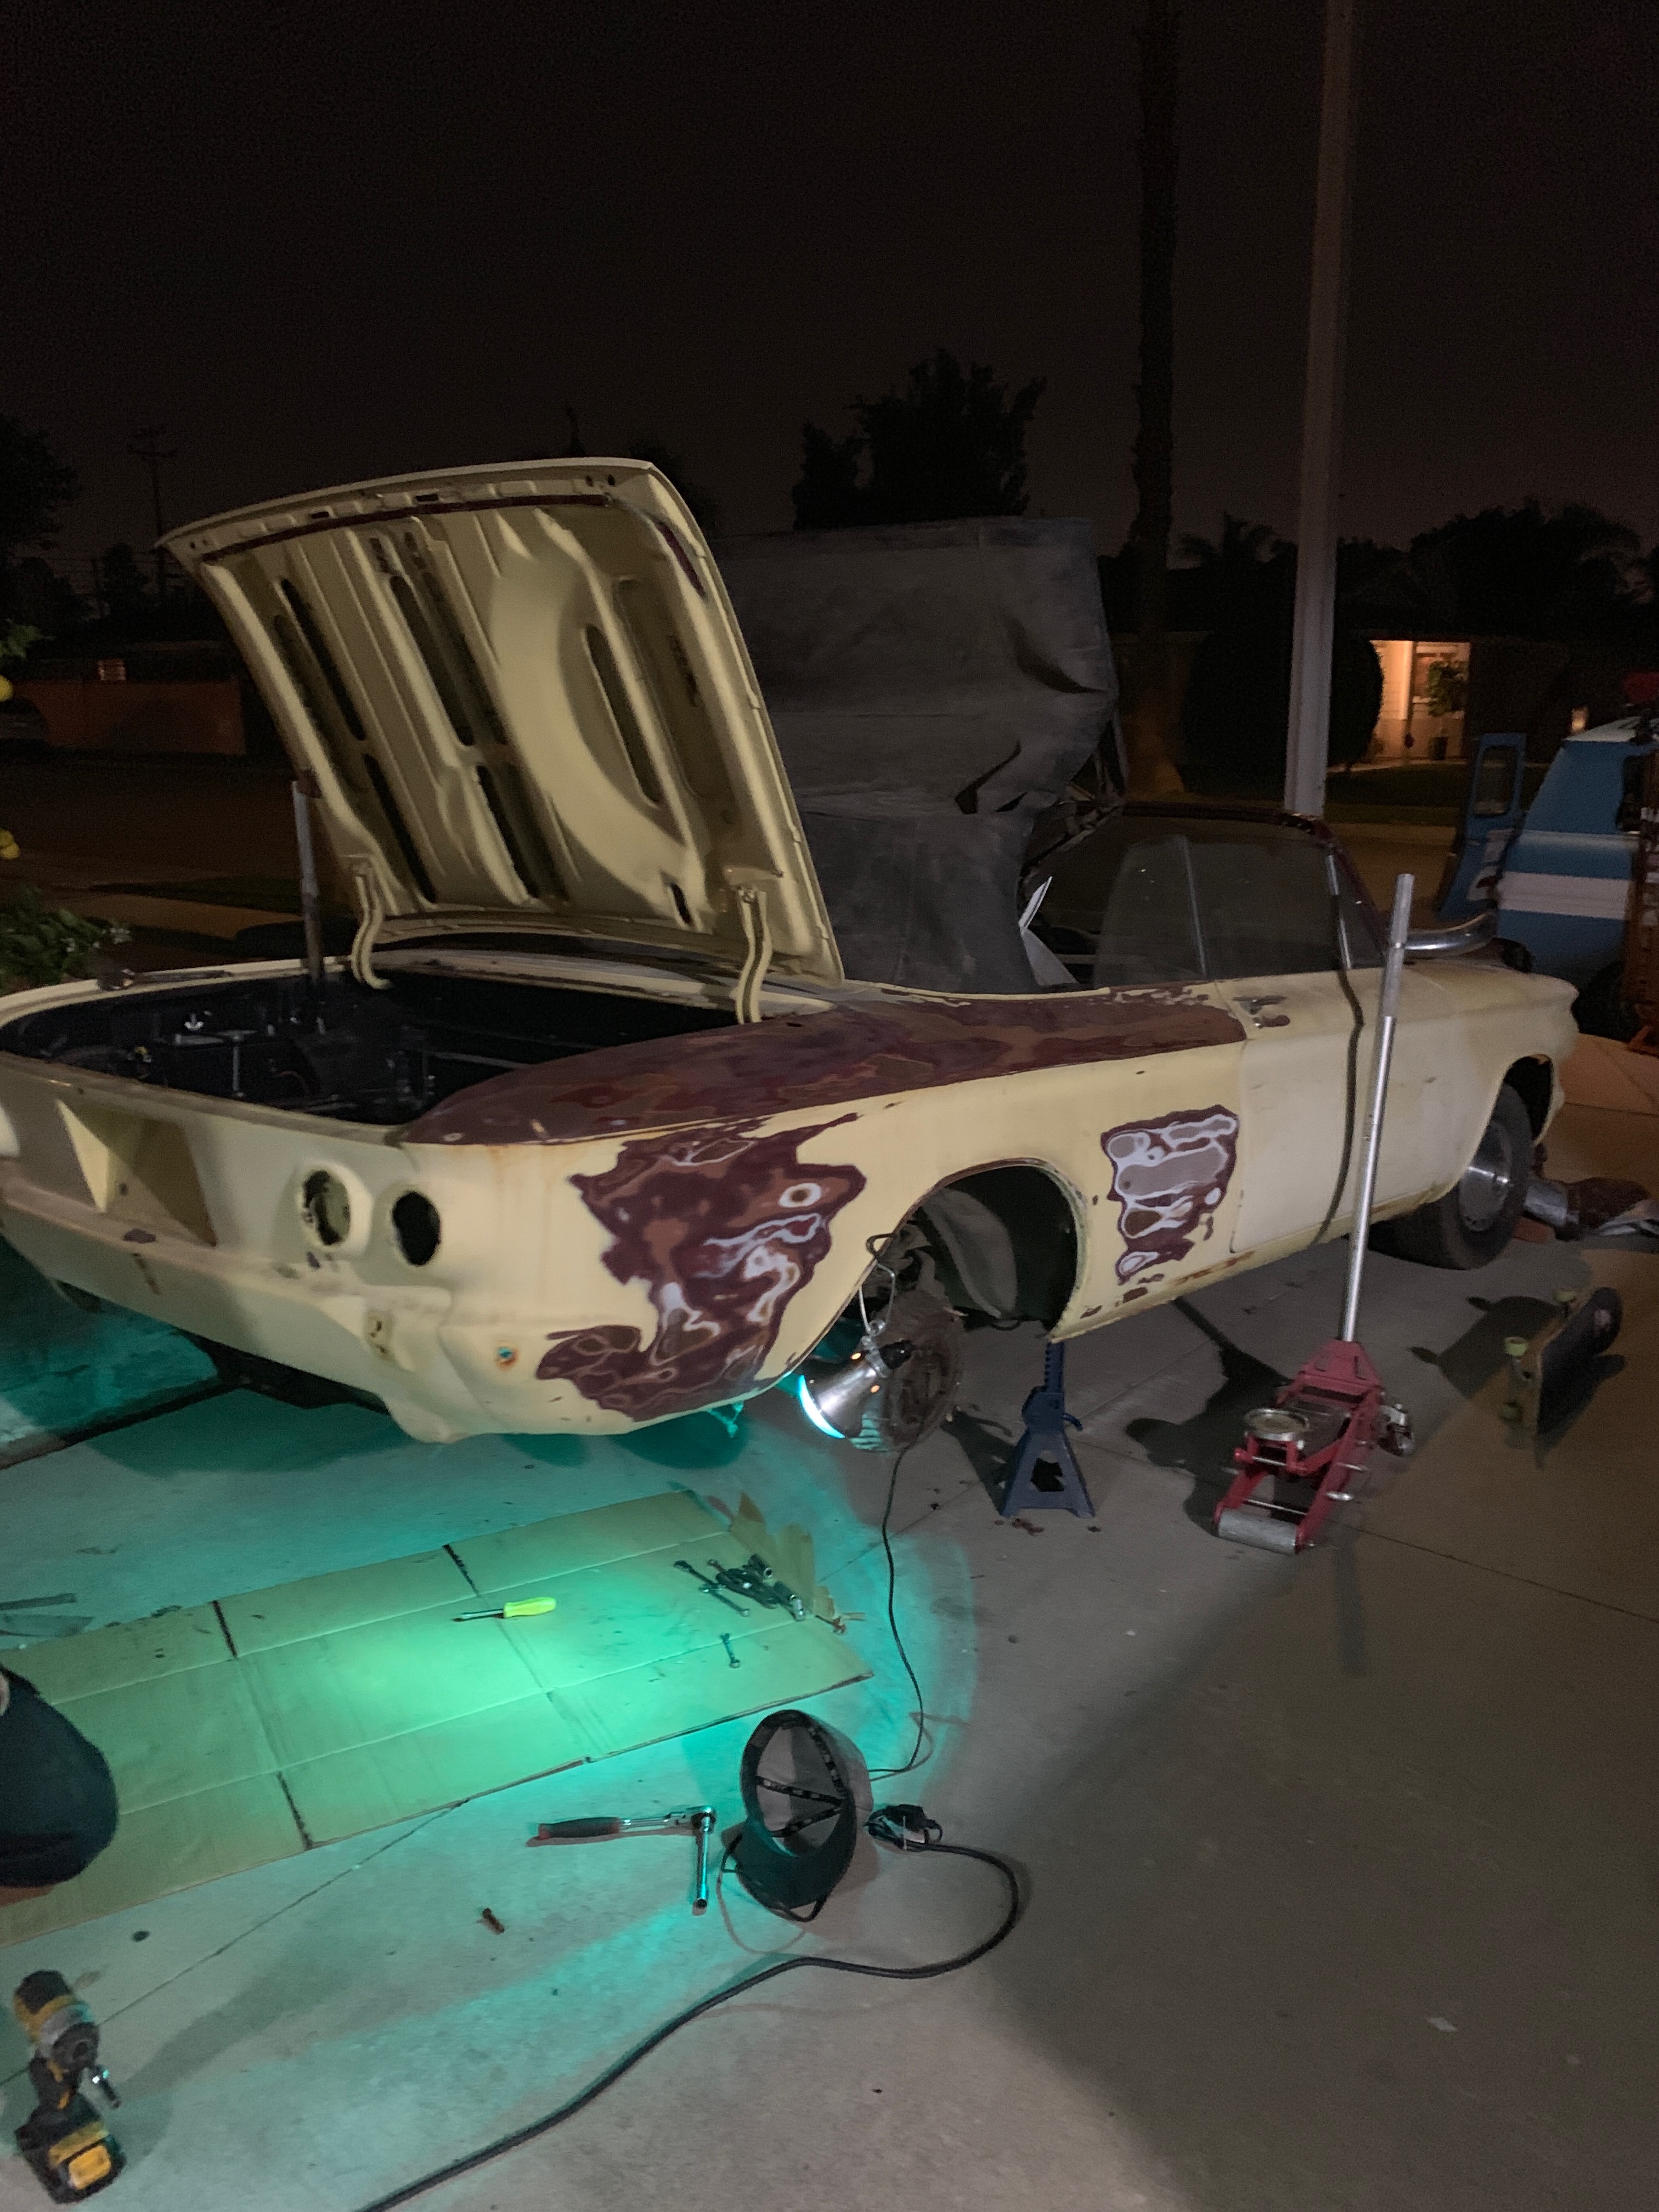
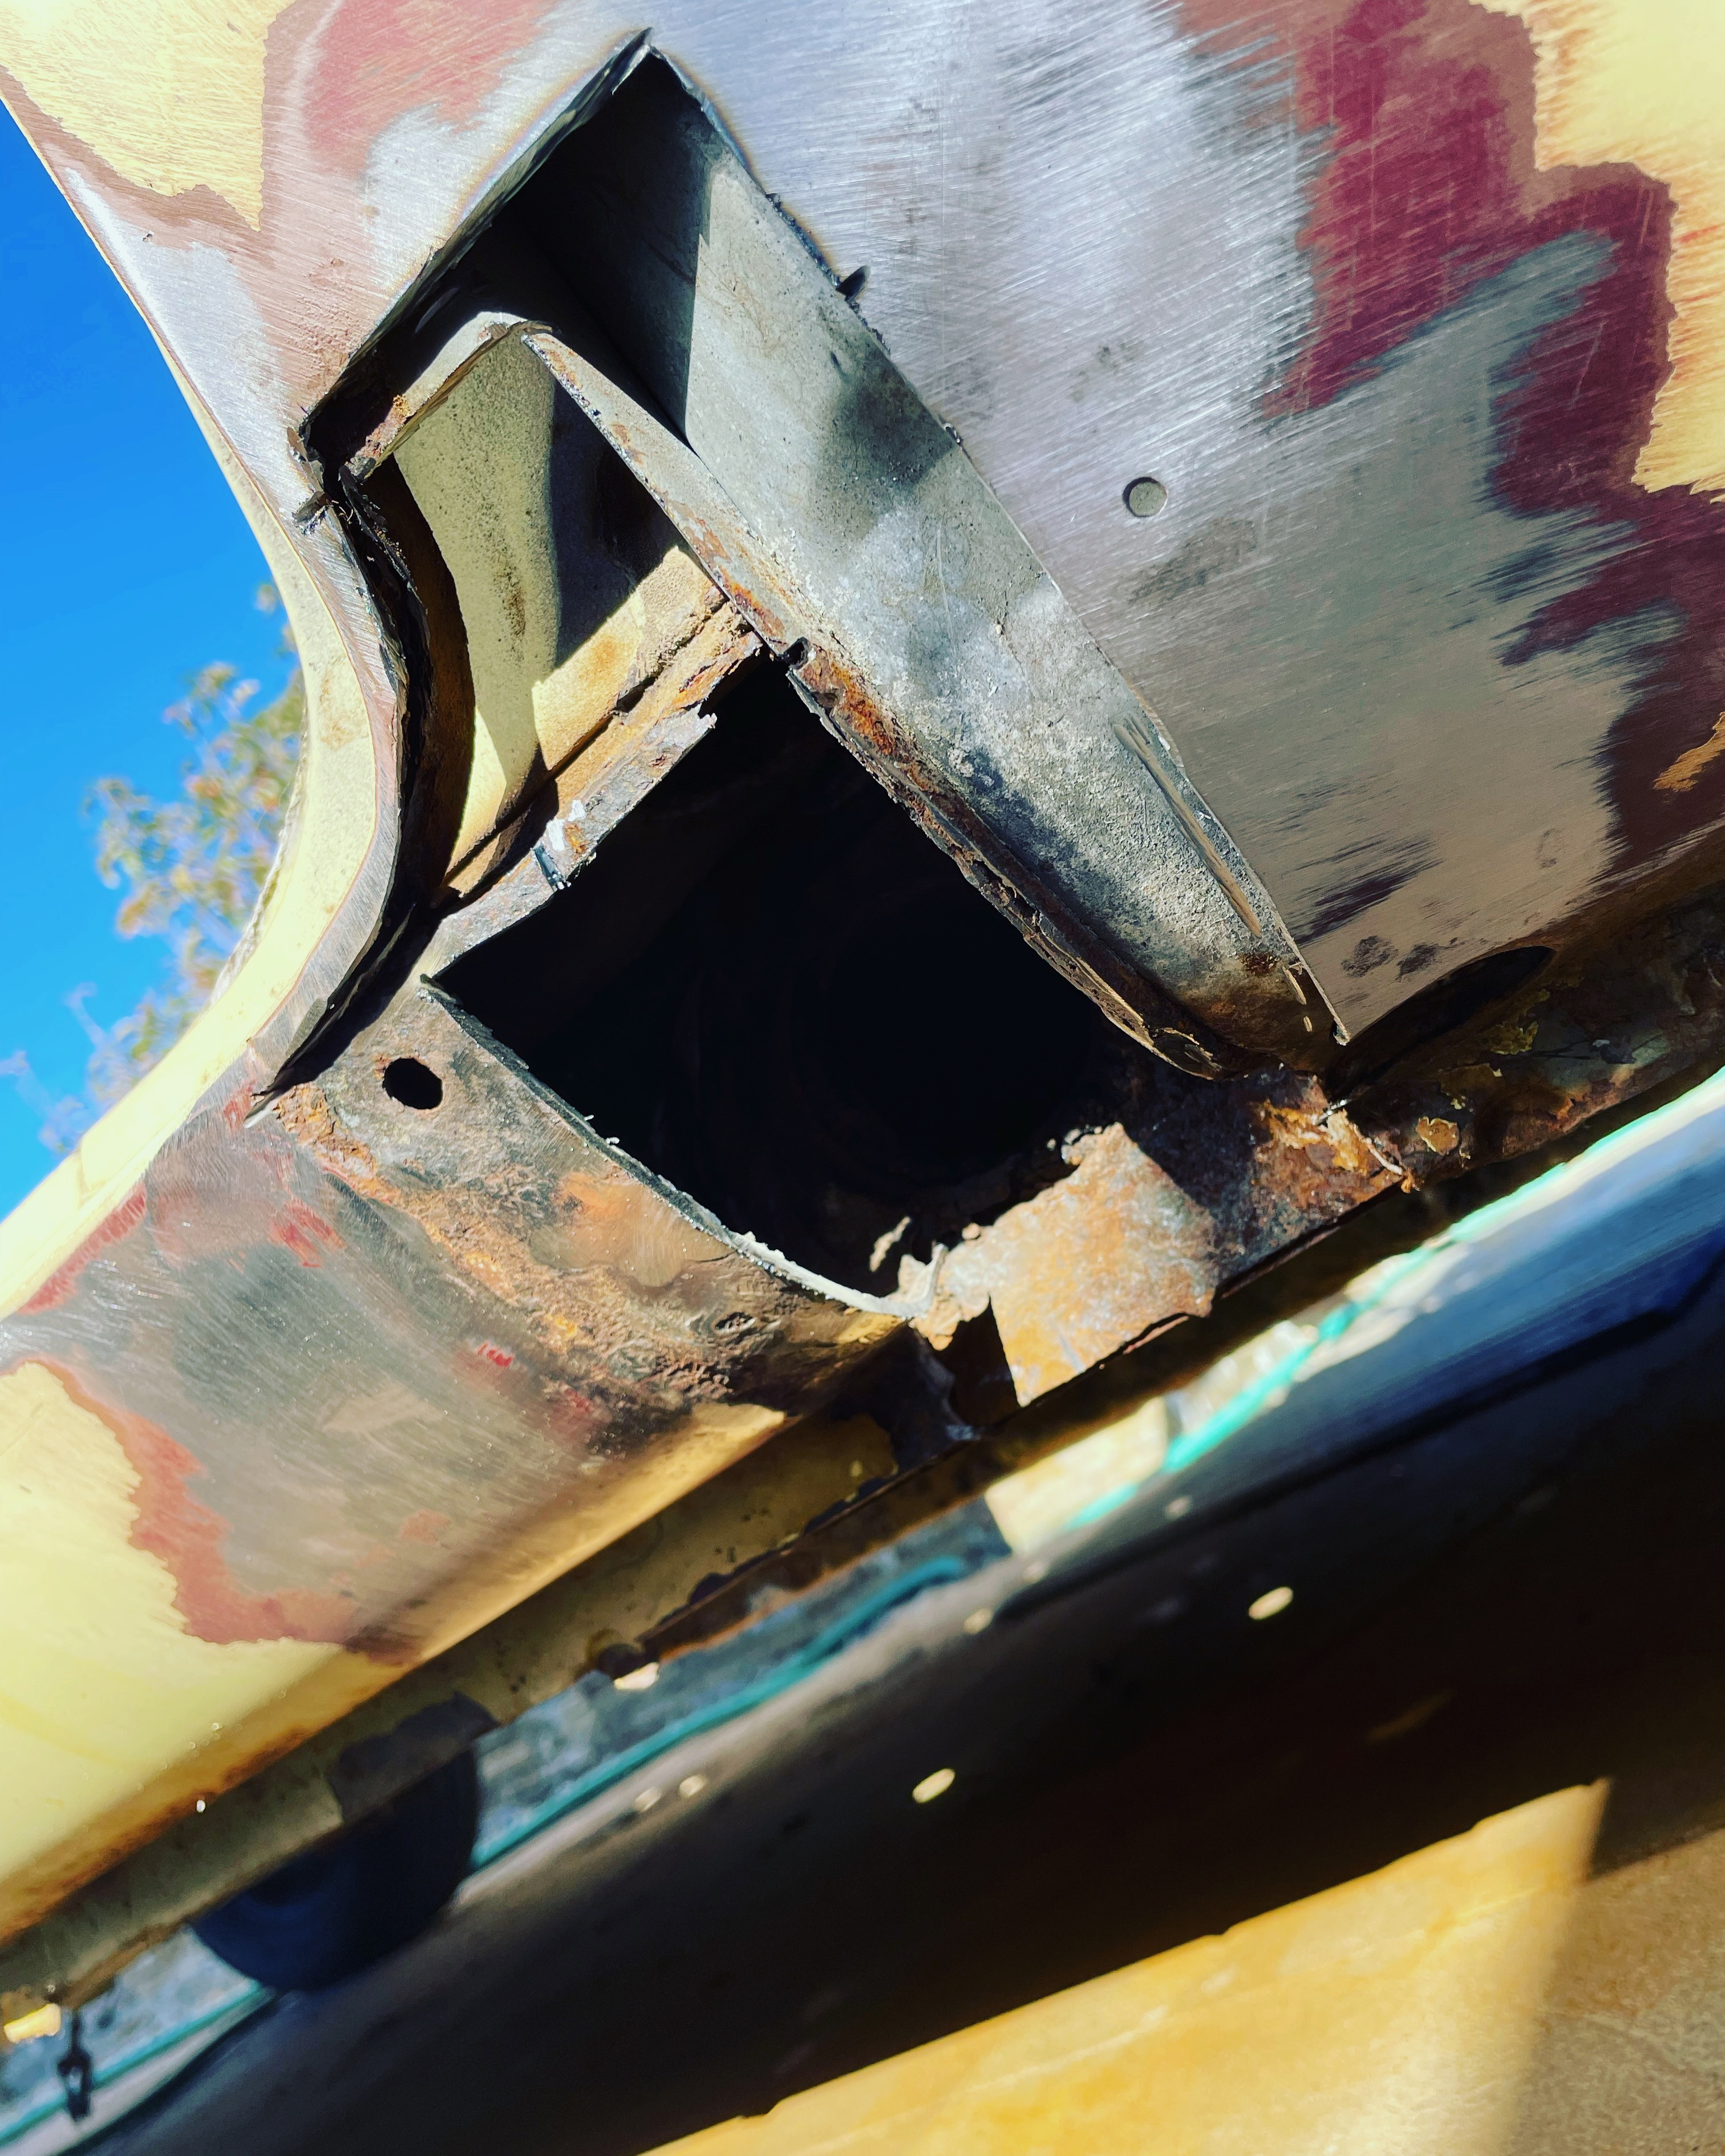
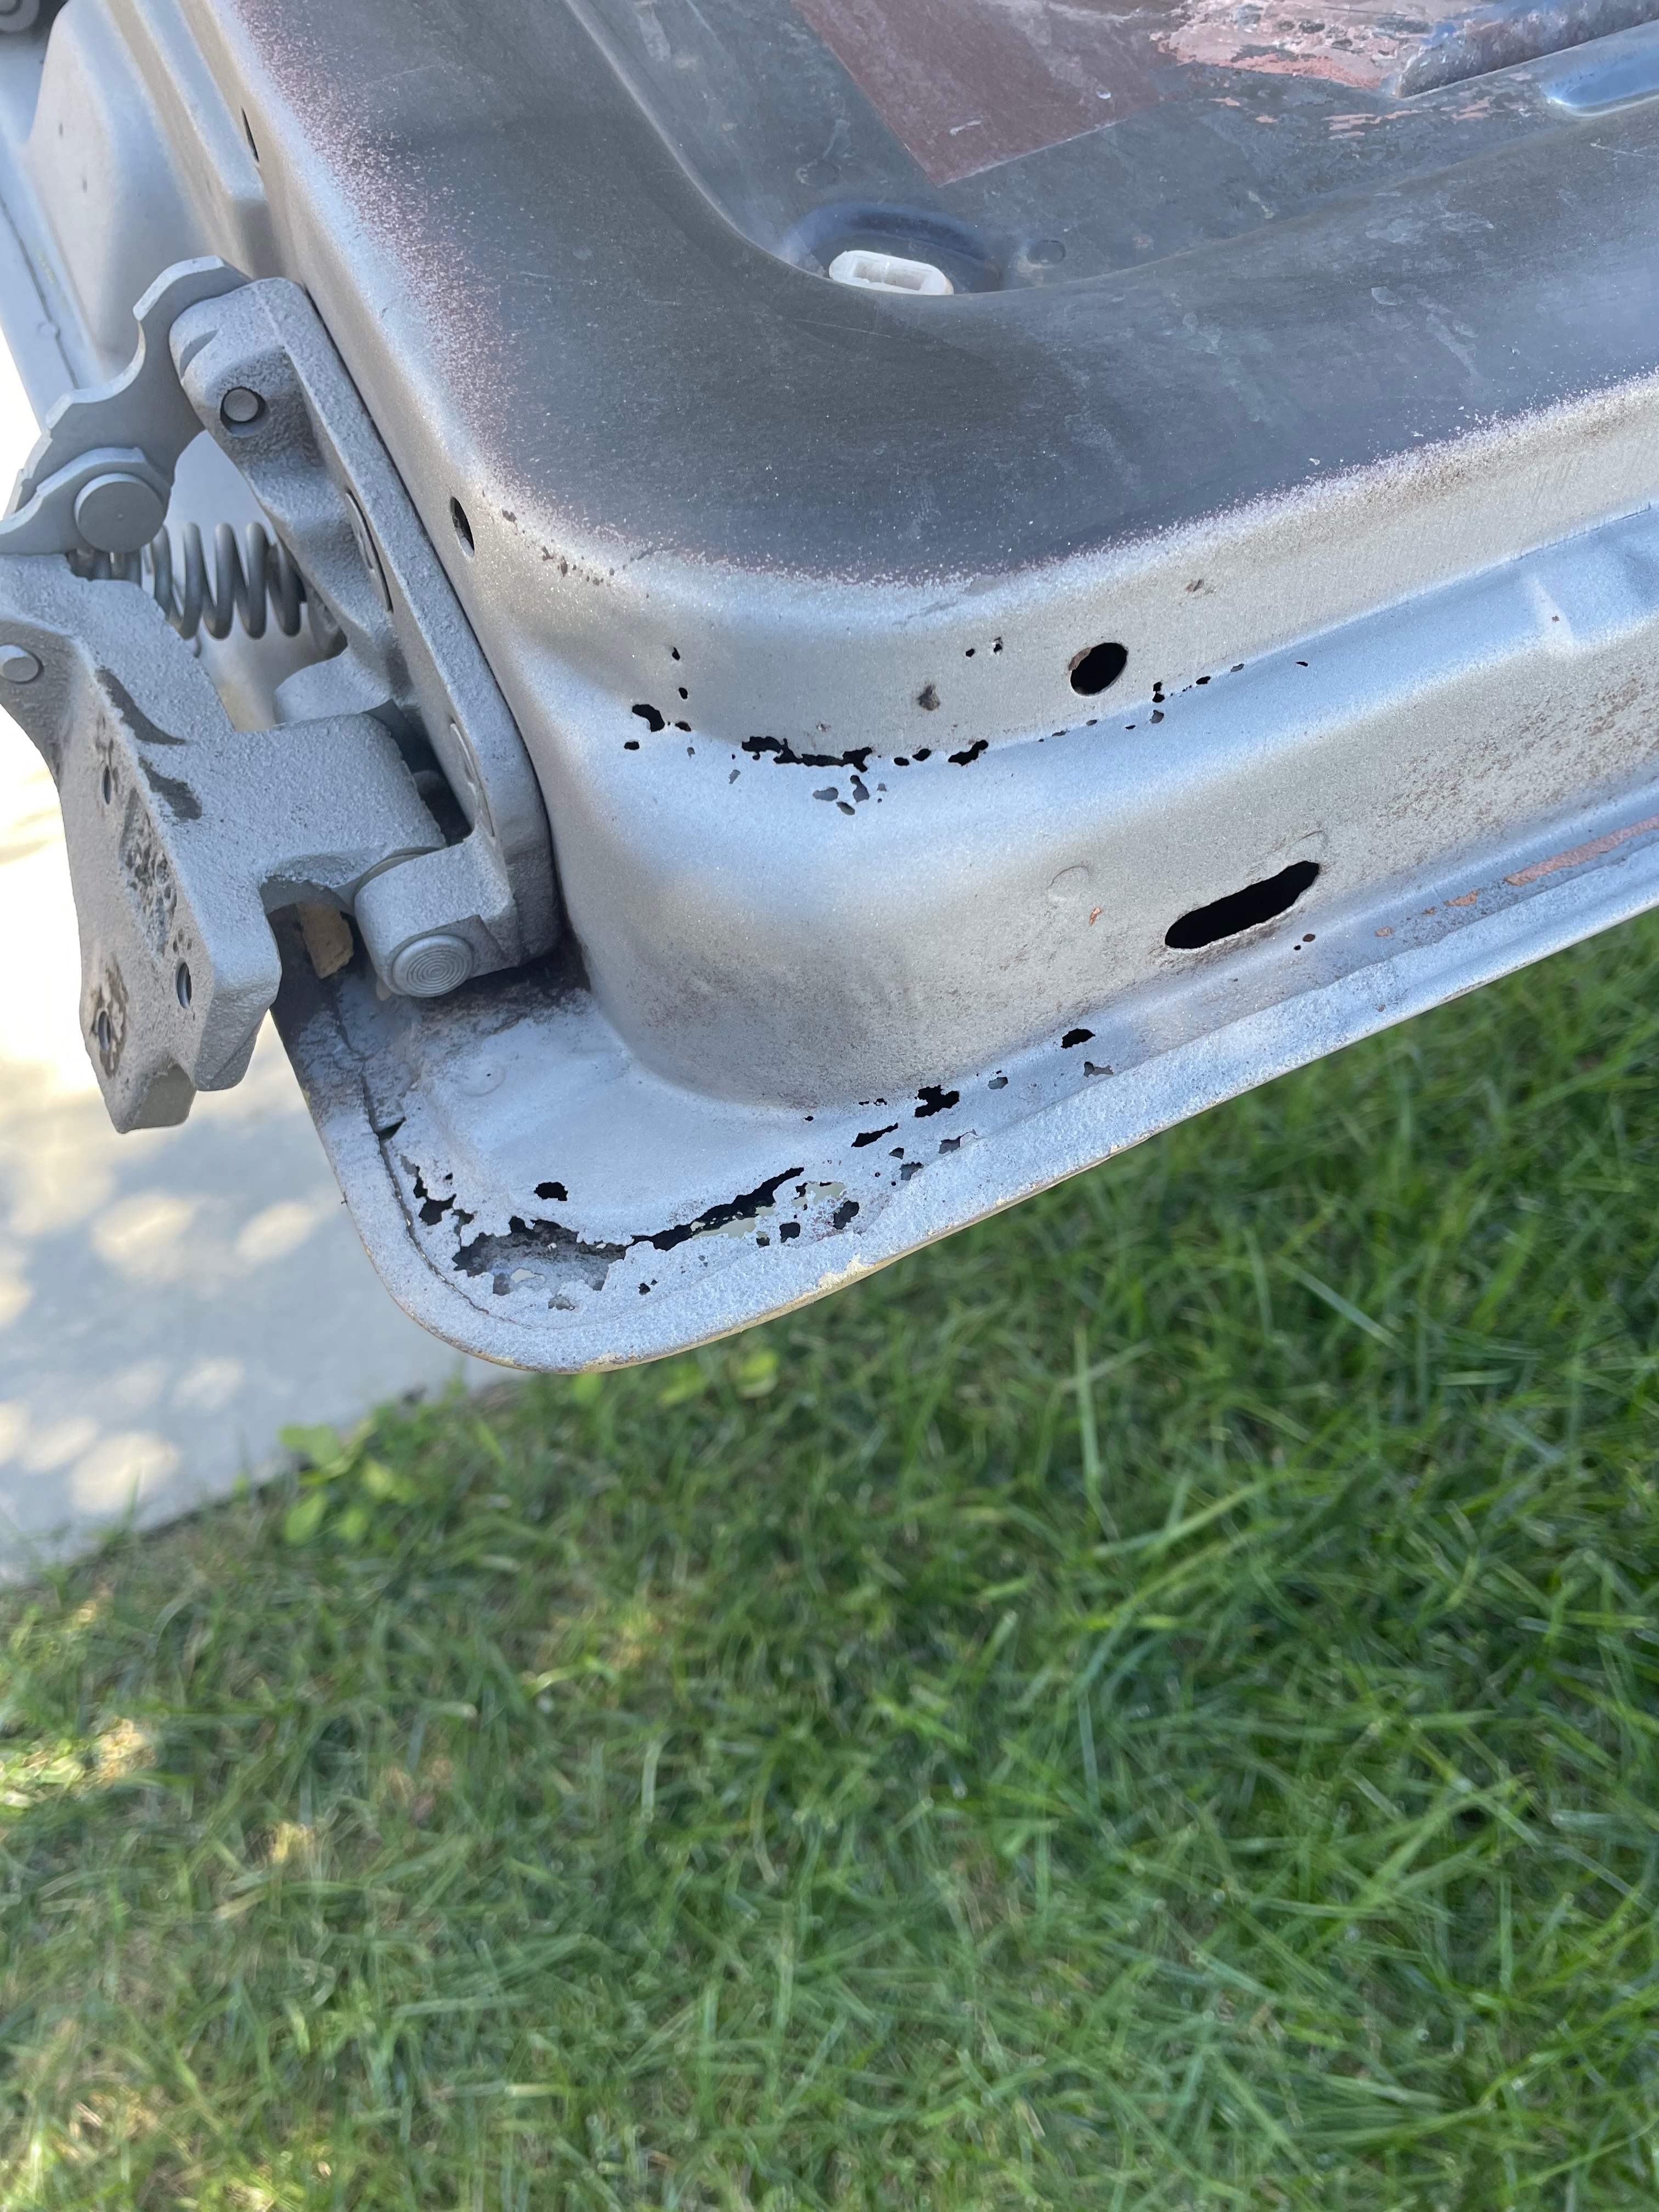
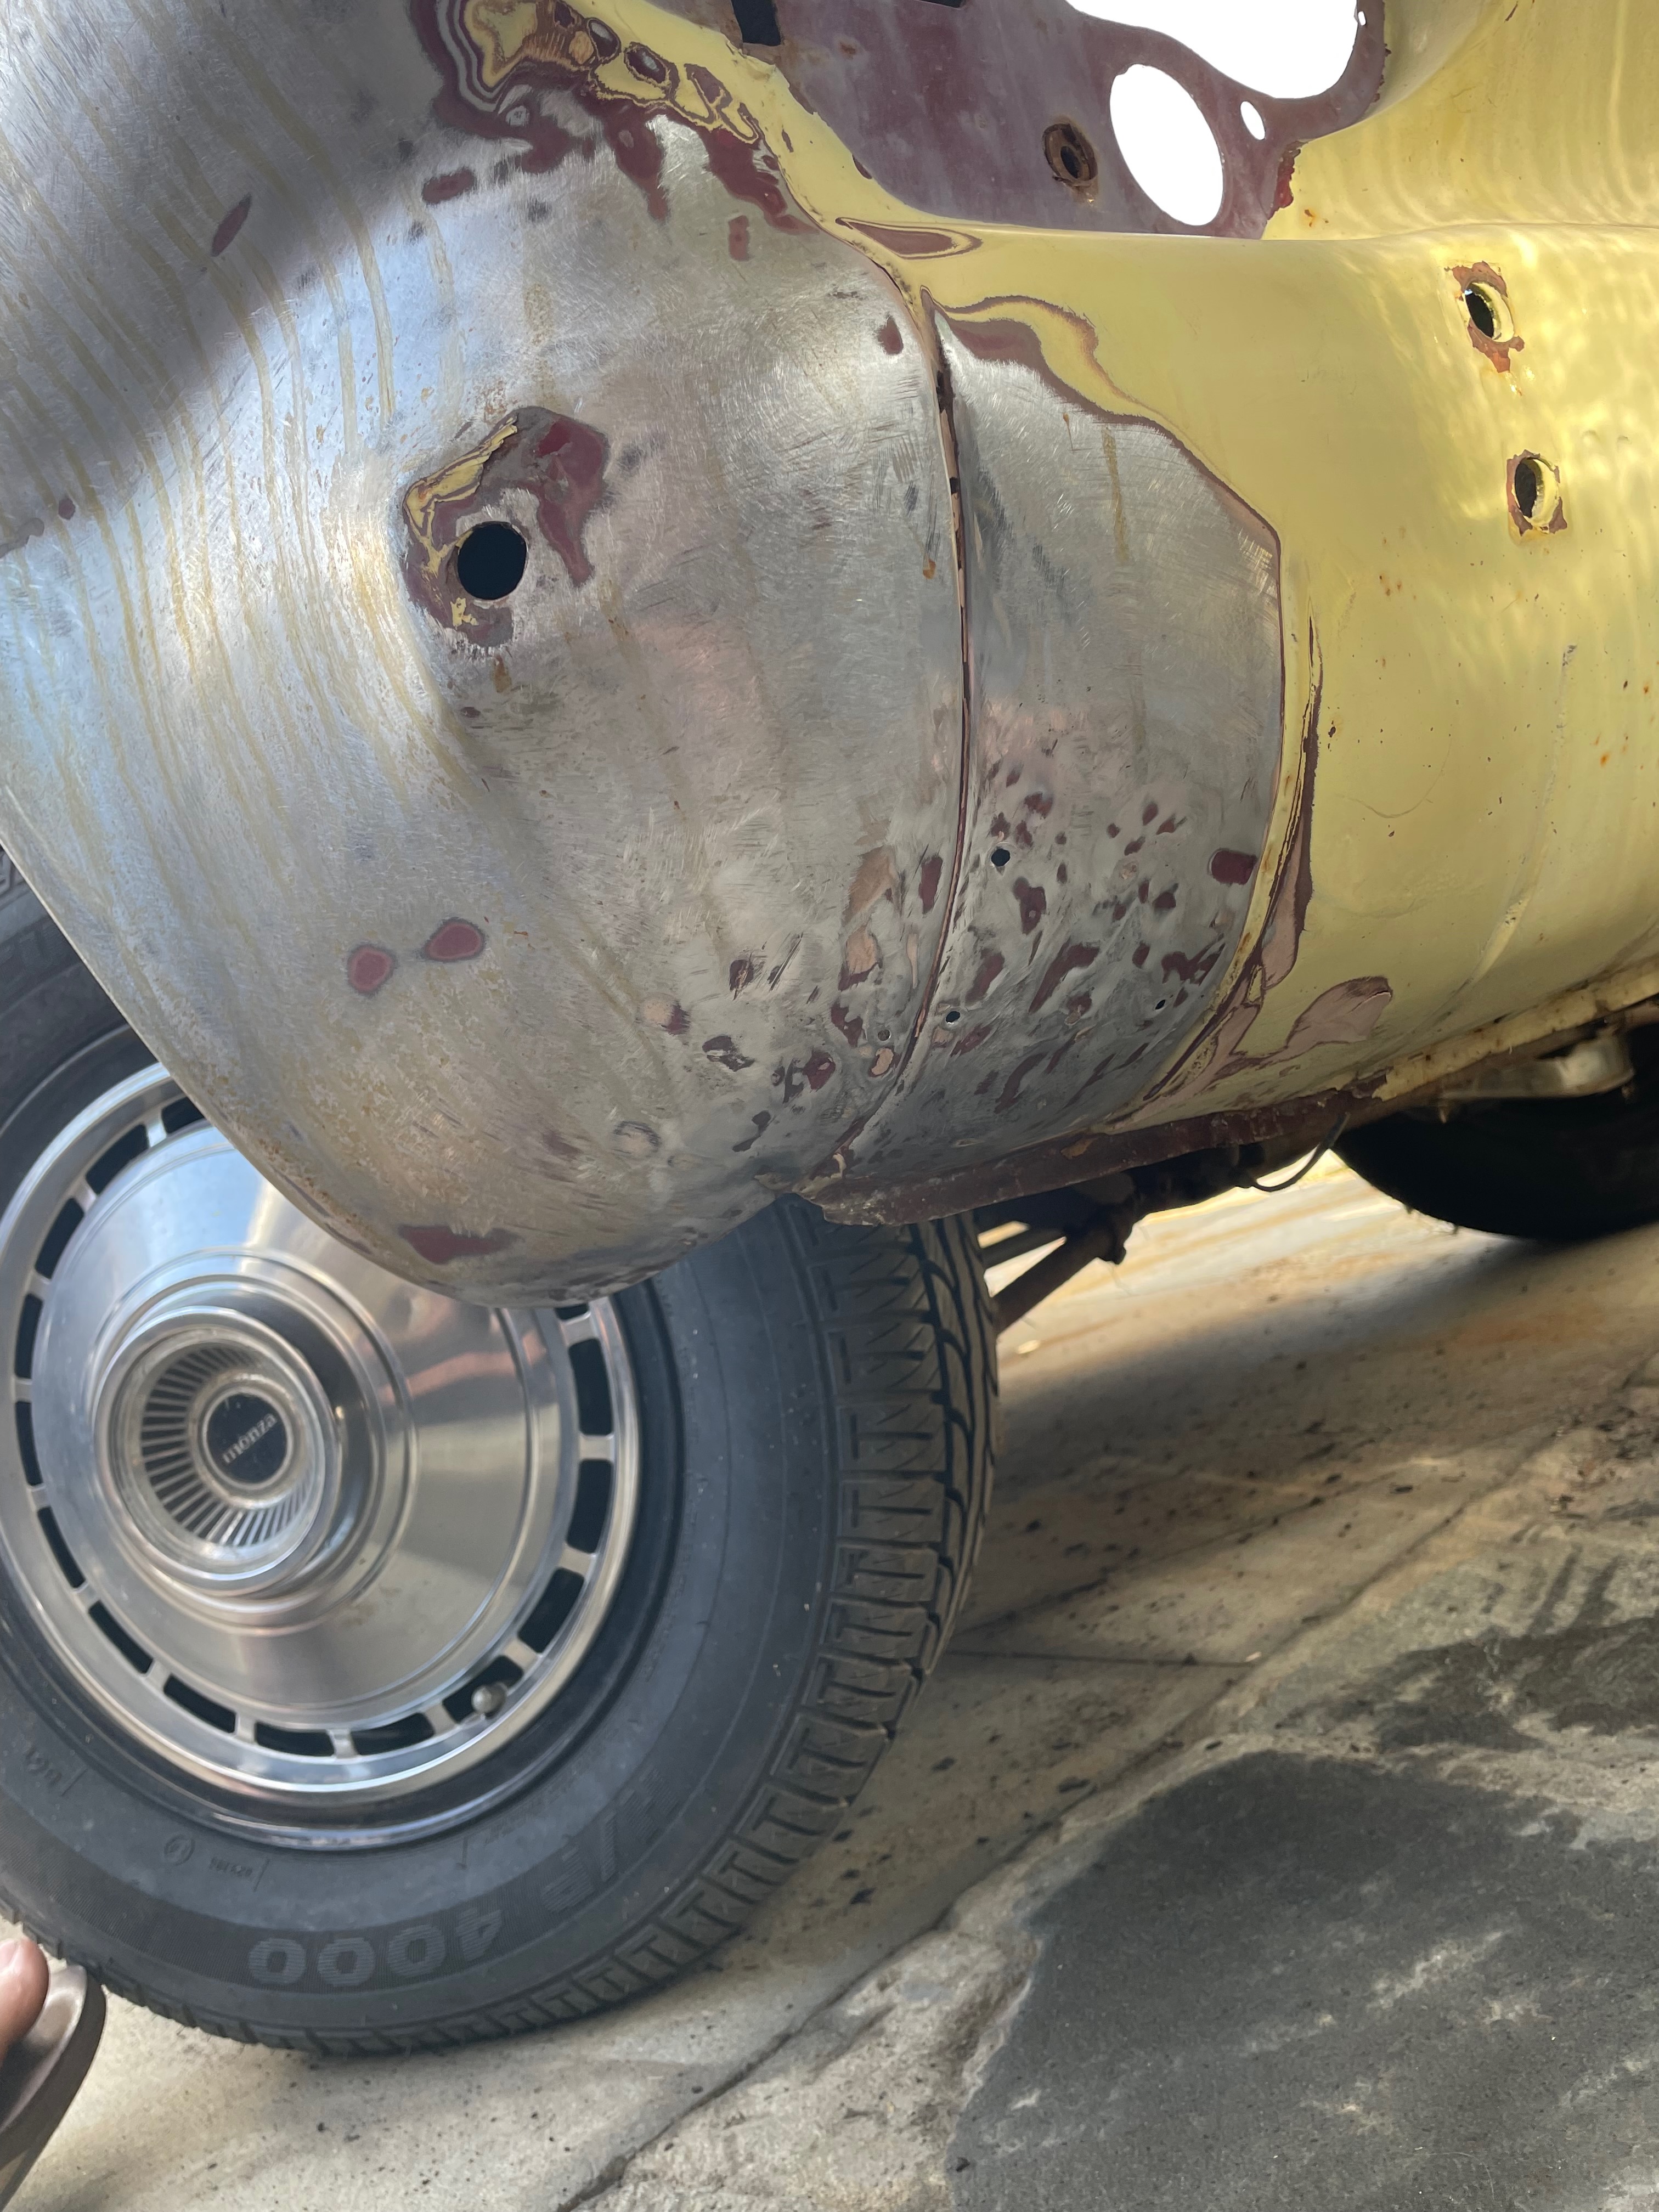
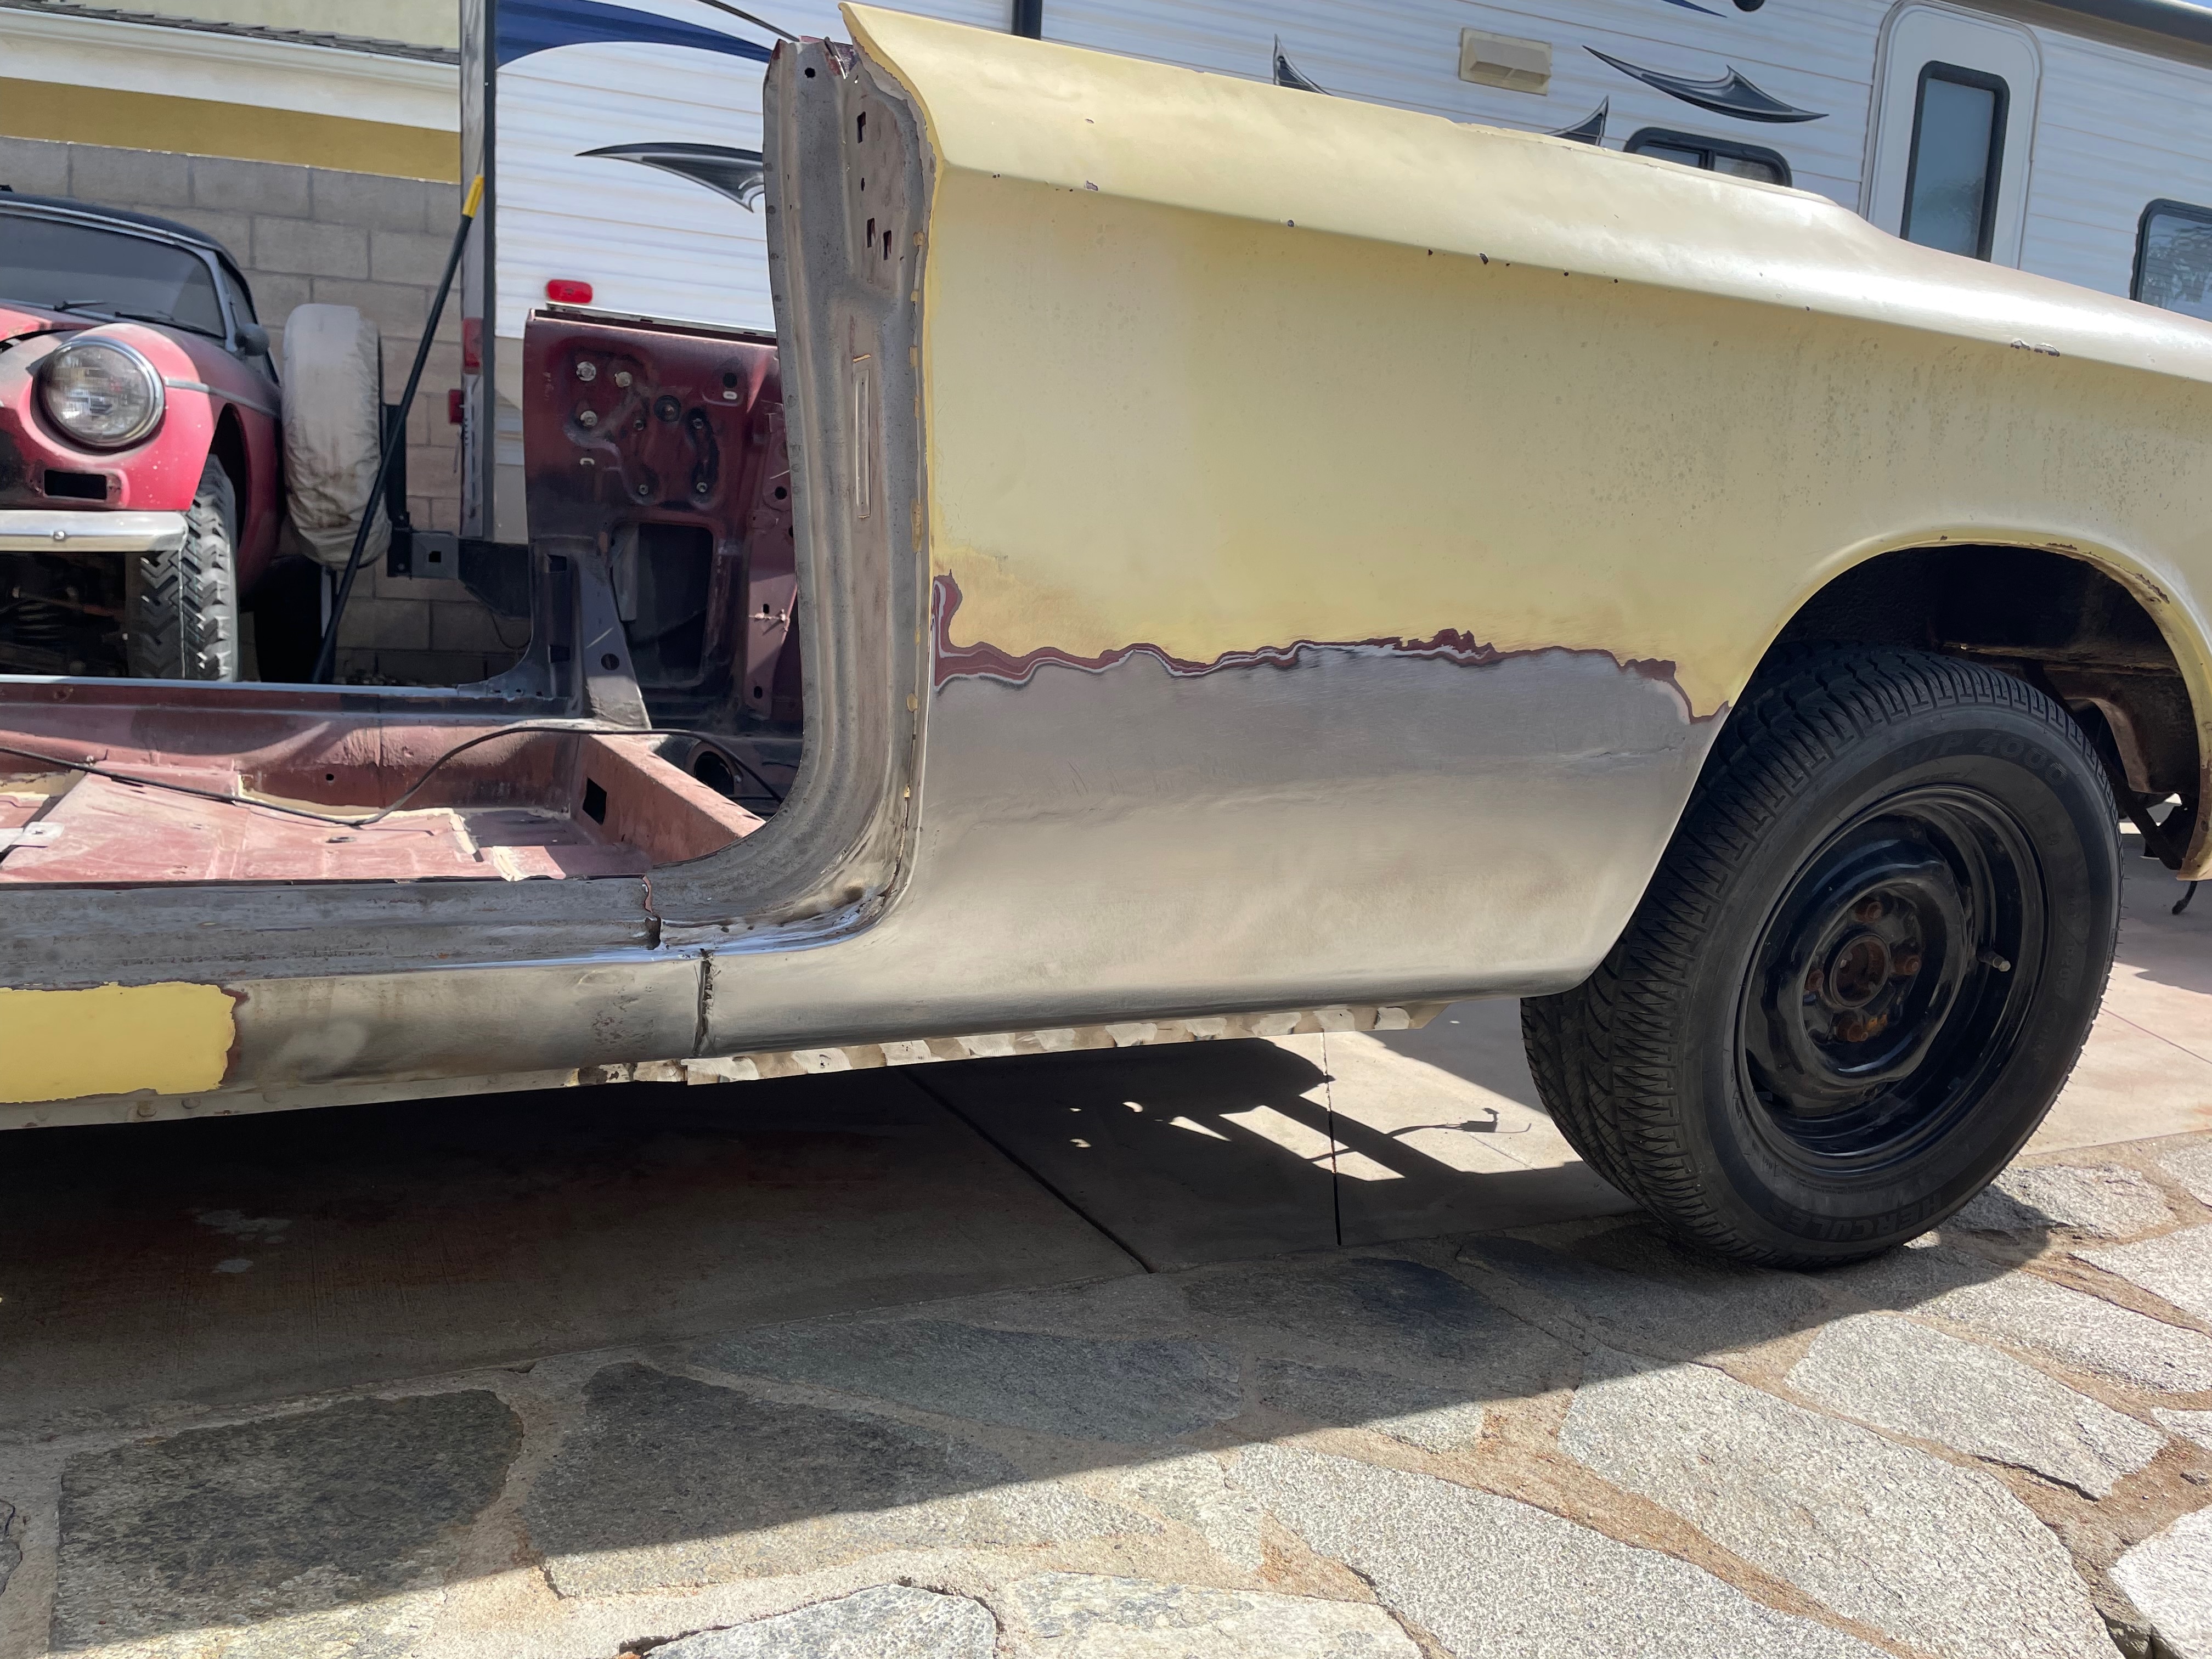
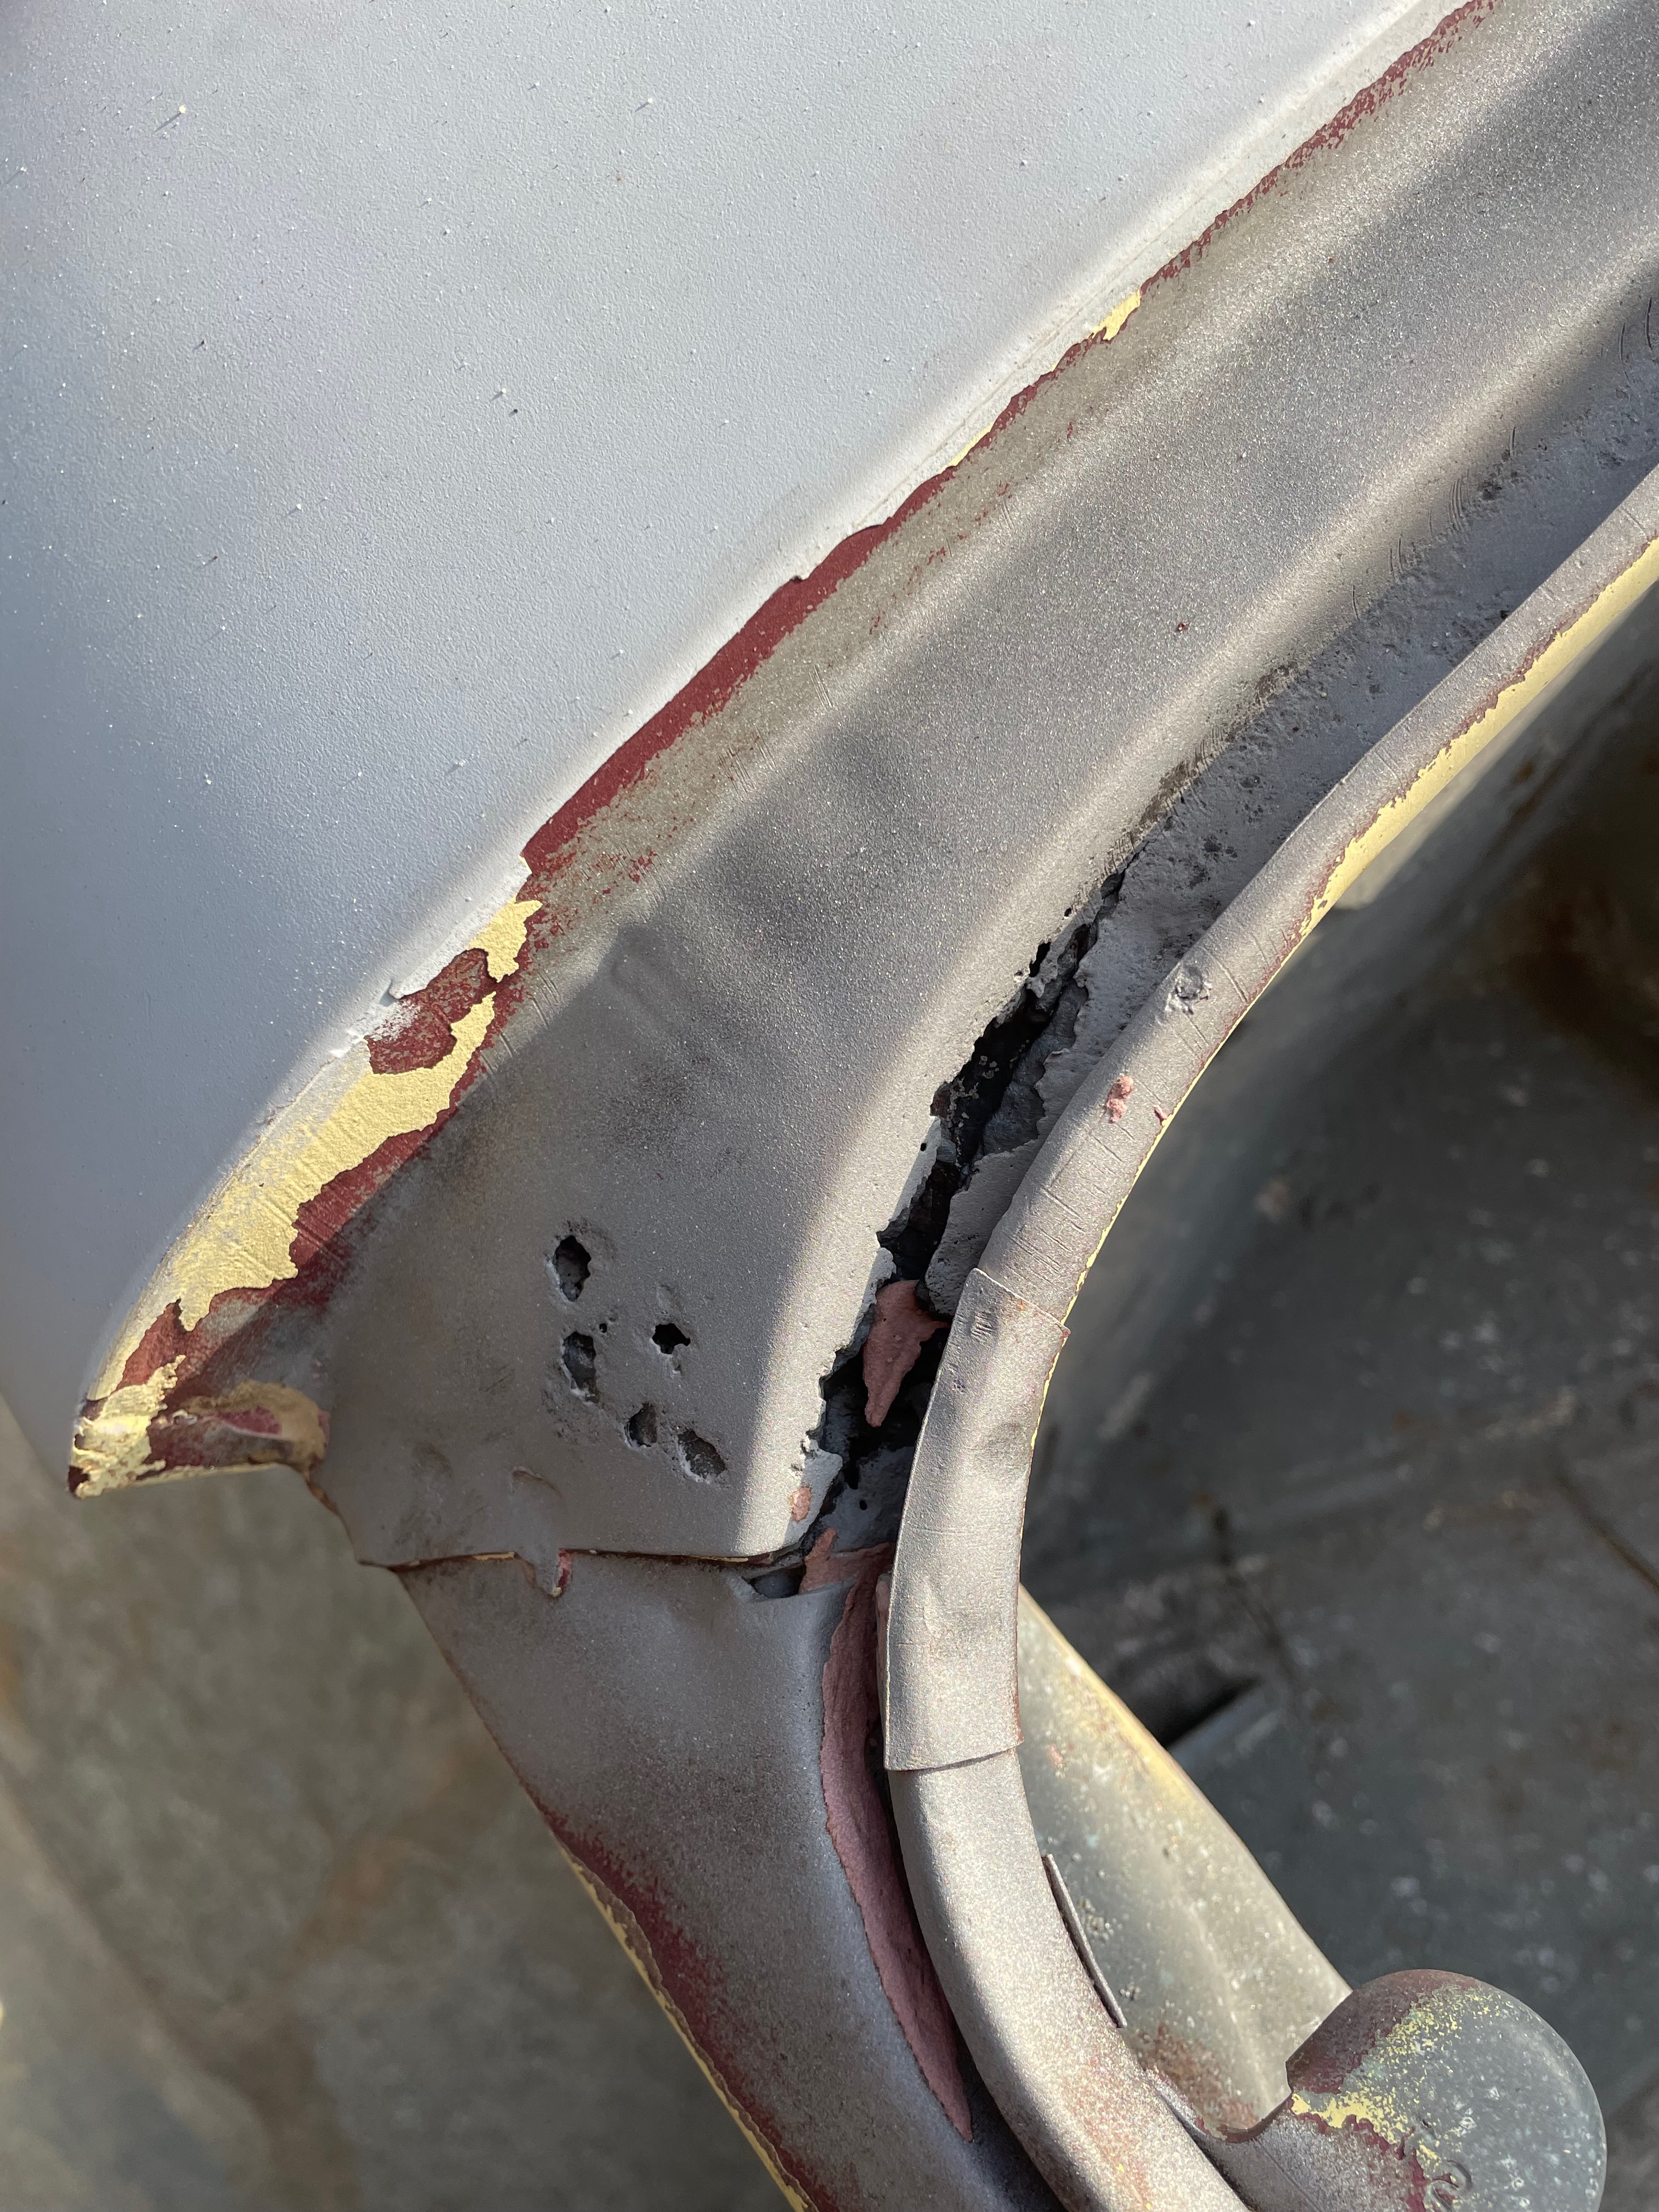
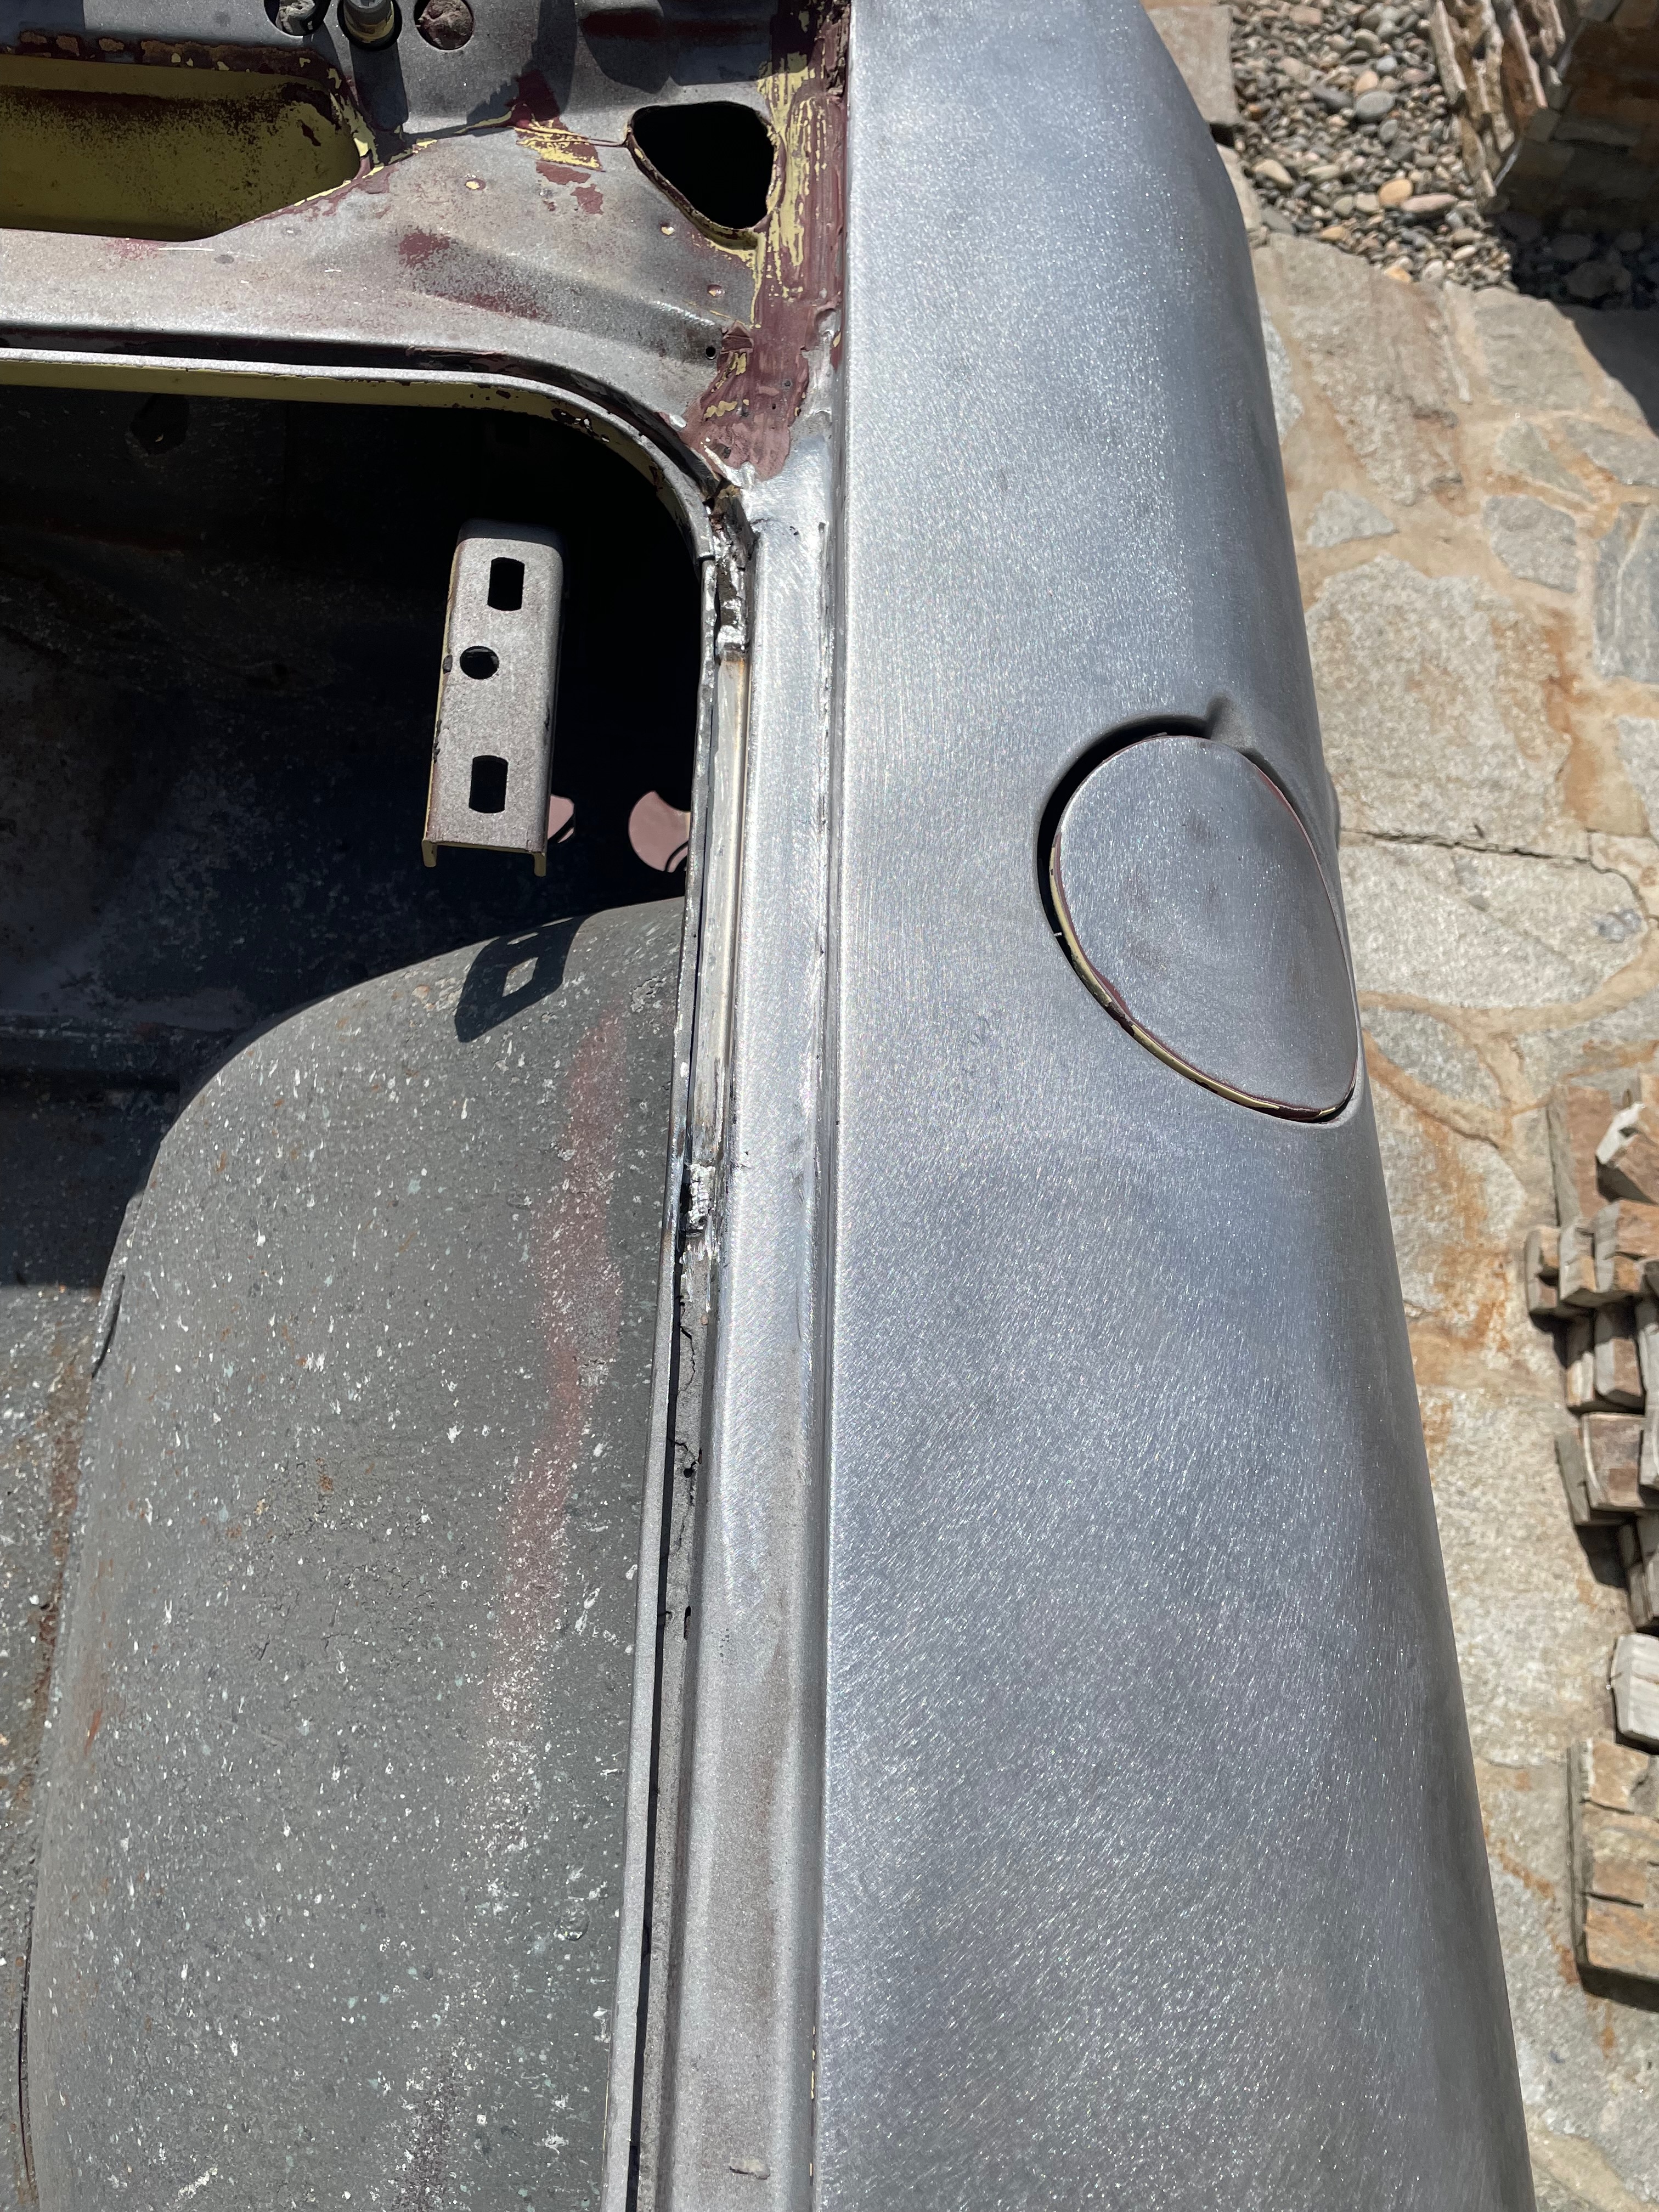
Pre-Build: Body Condition Assessment
Detailed view of the Corvair's body condition before restoration, showing the extent of rust damage that would need to be addressed in the body-paint phase.
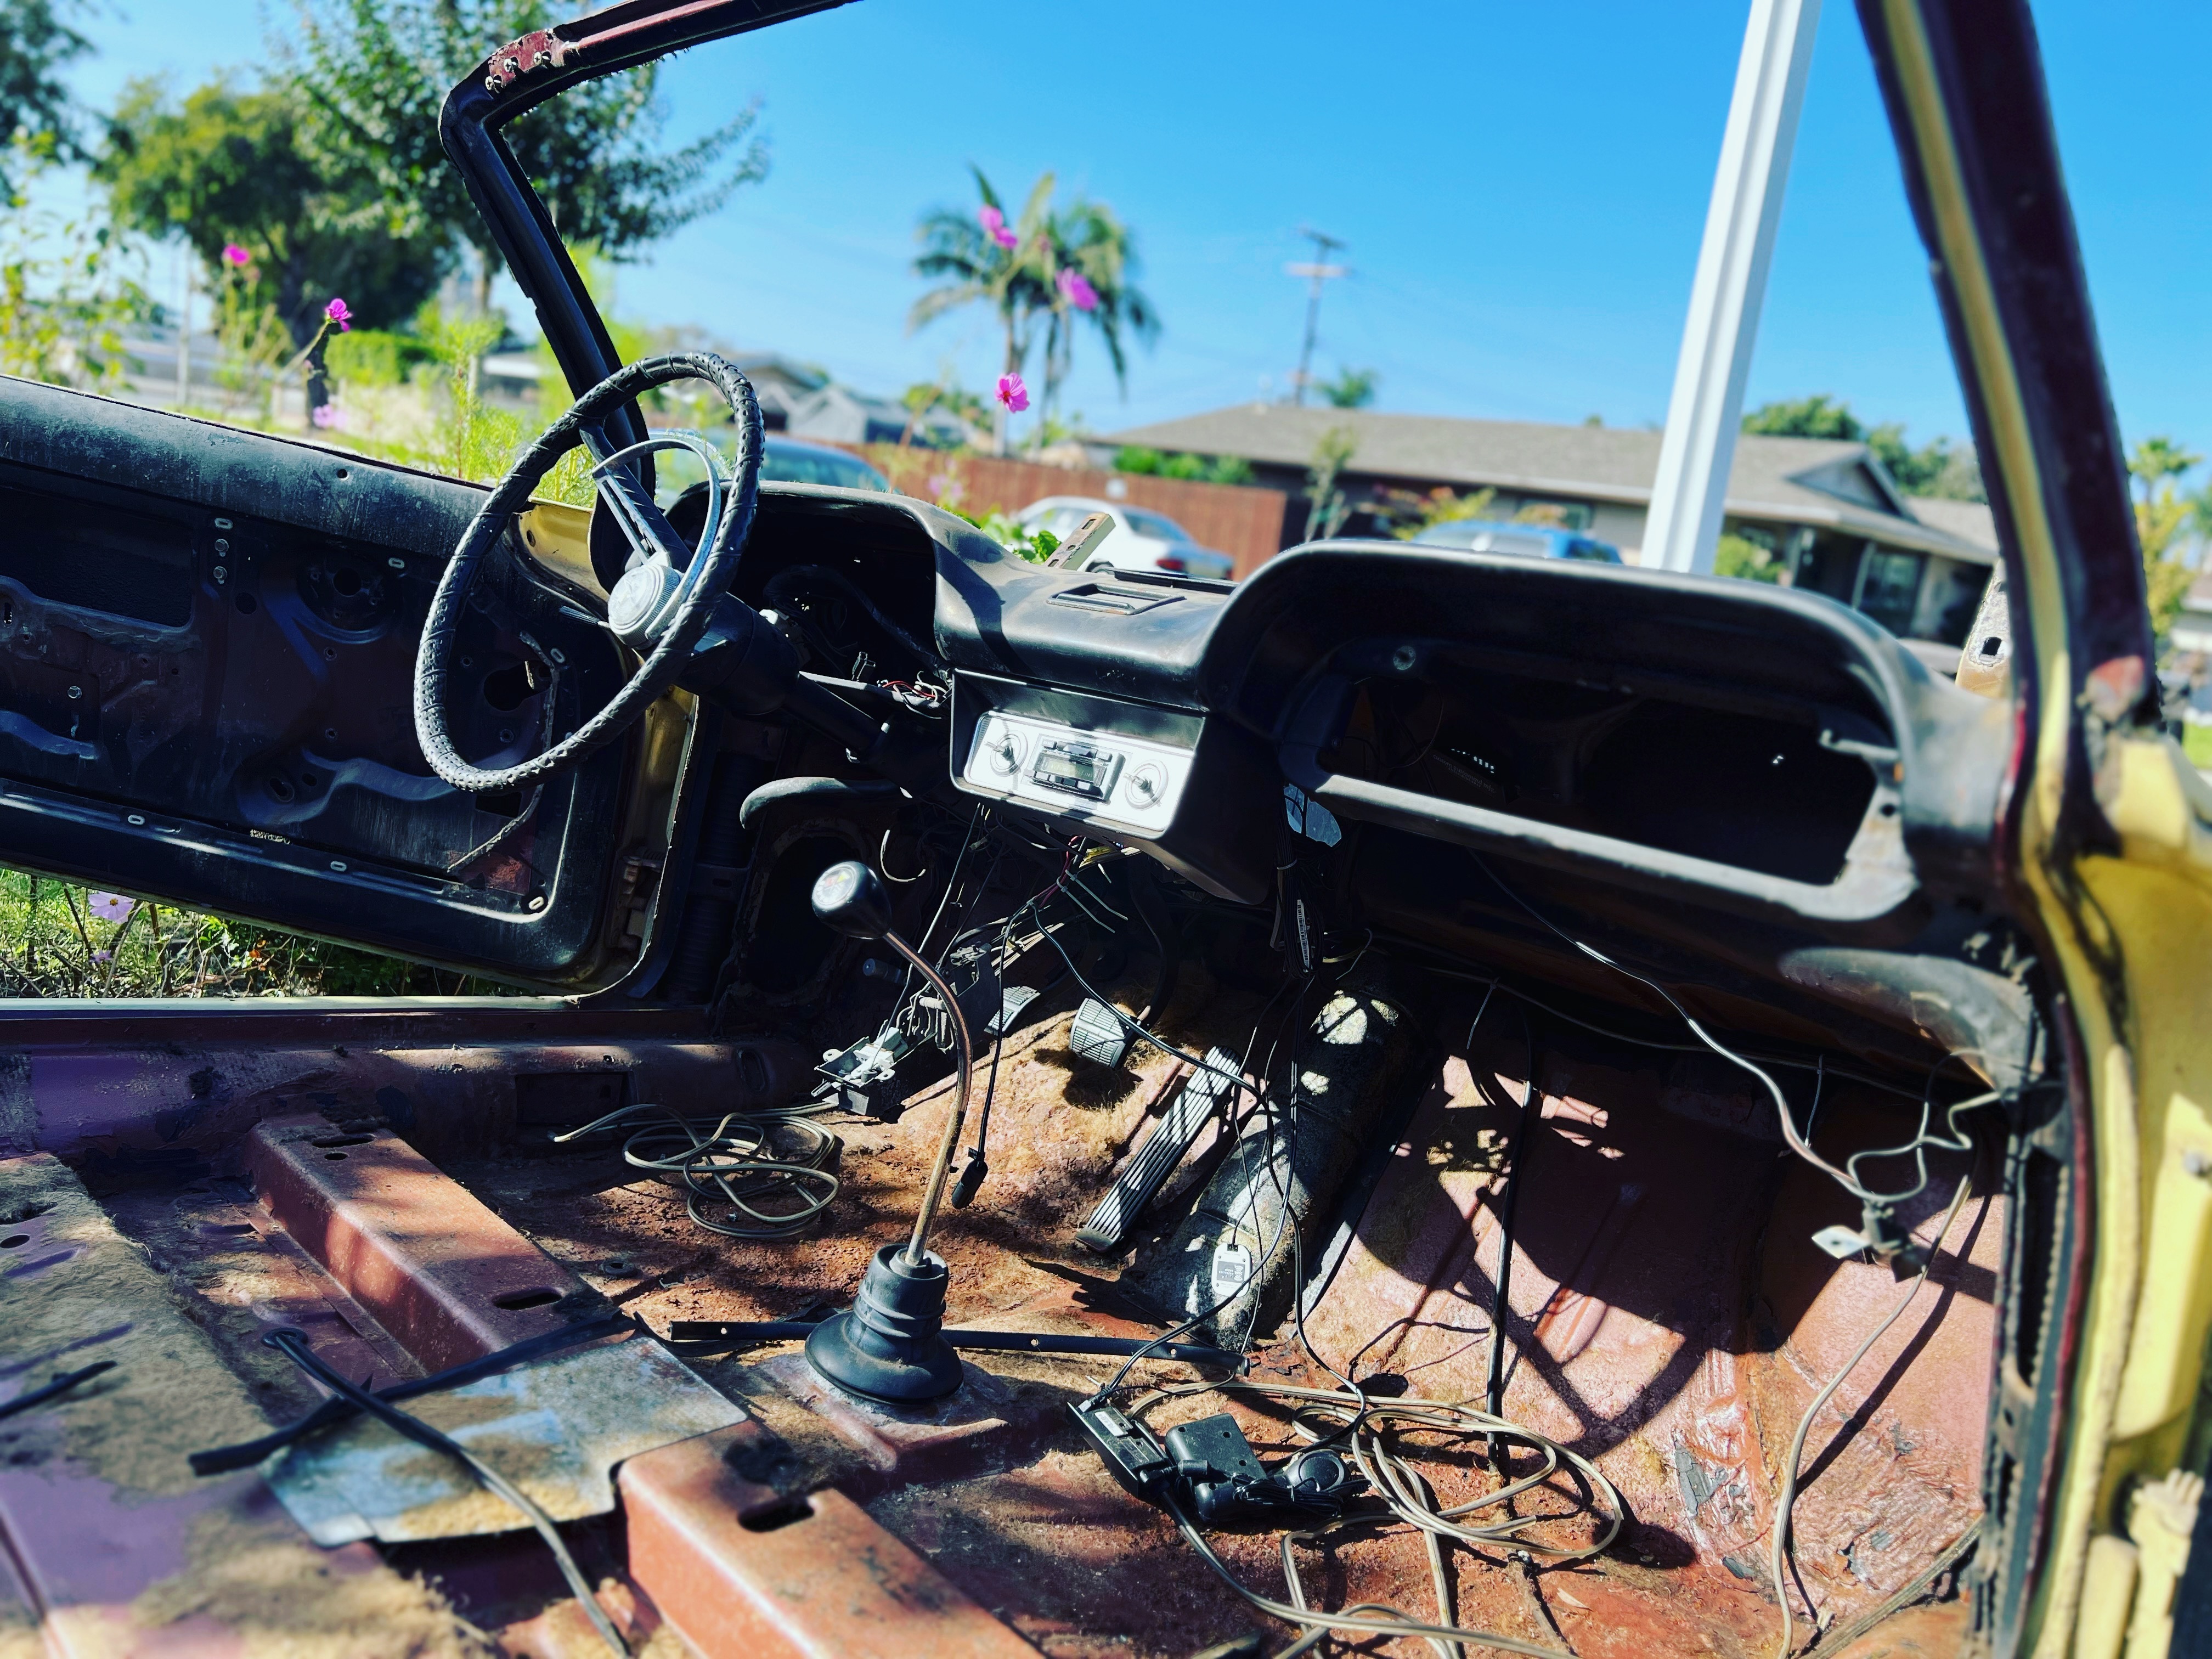
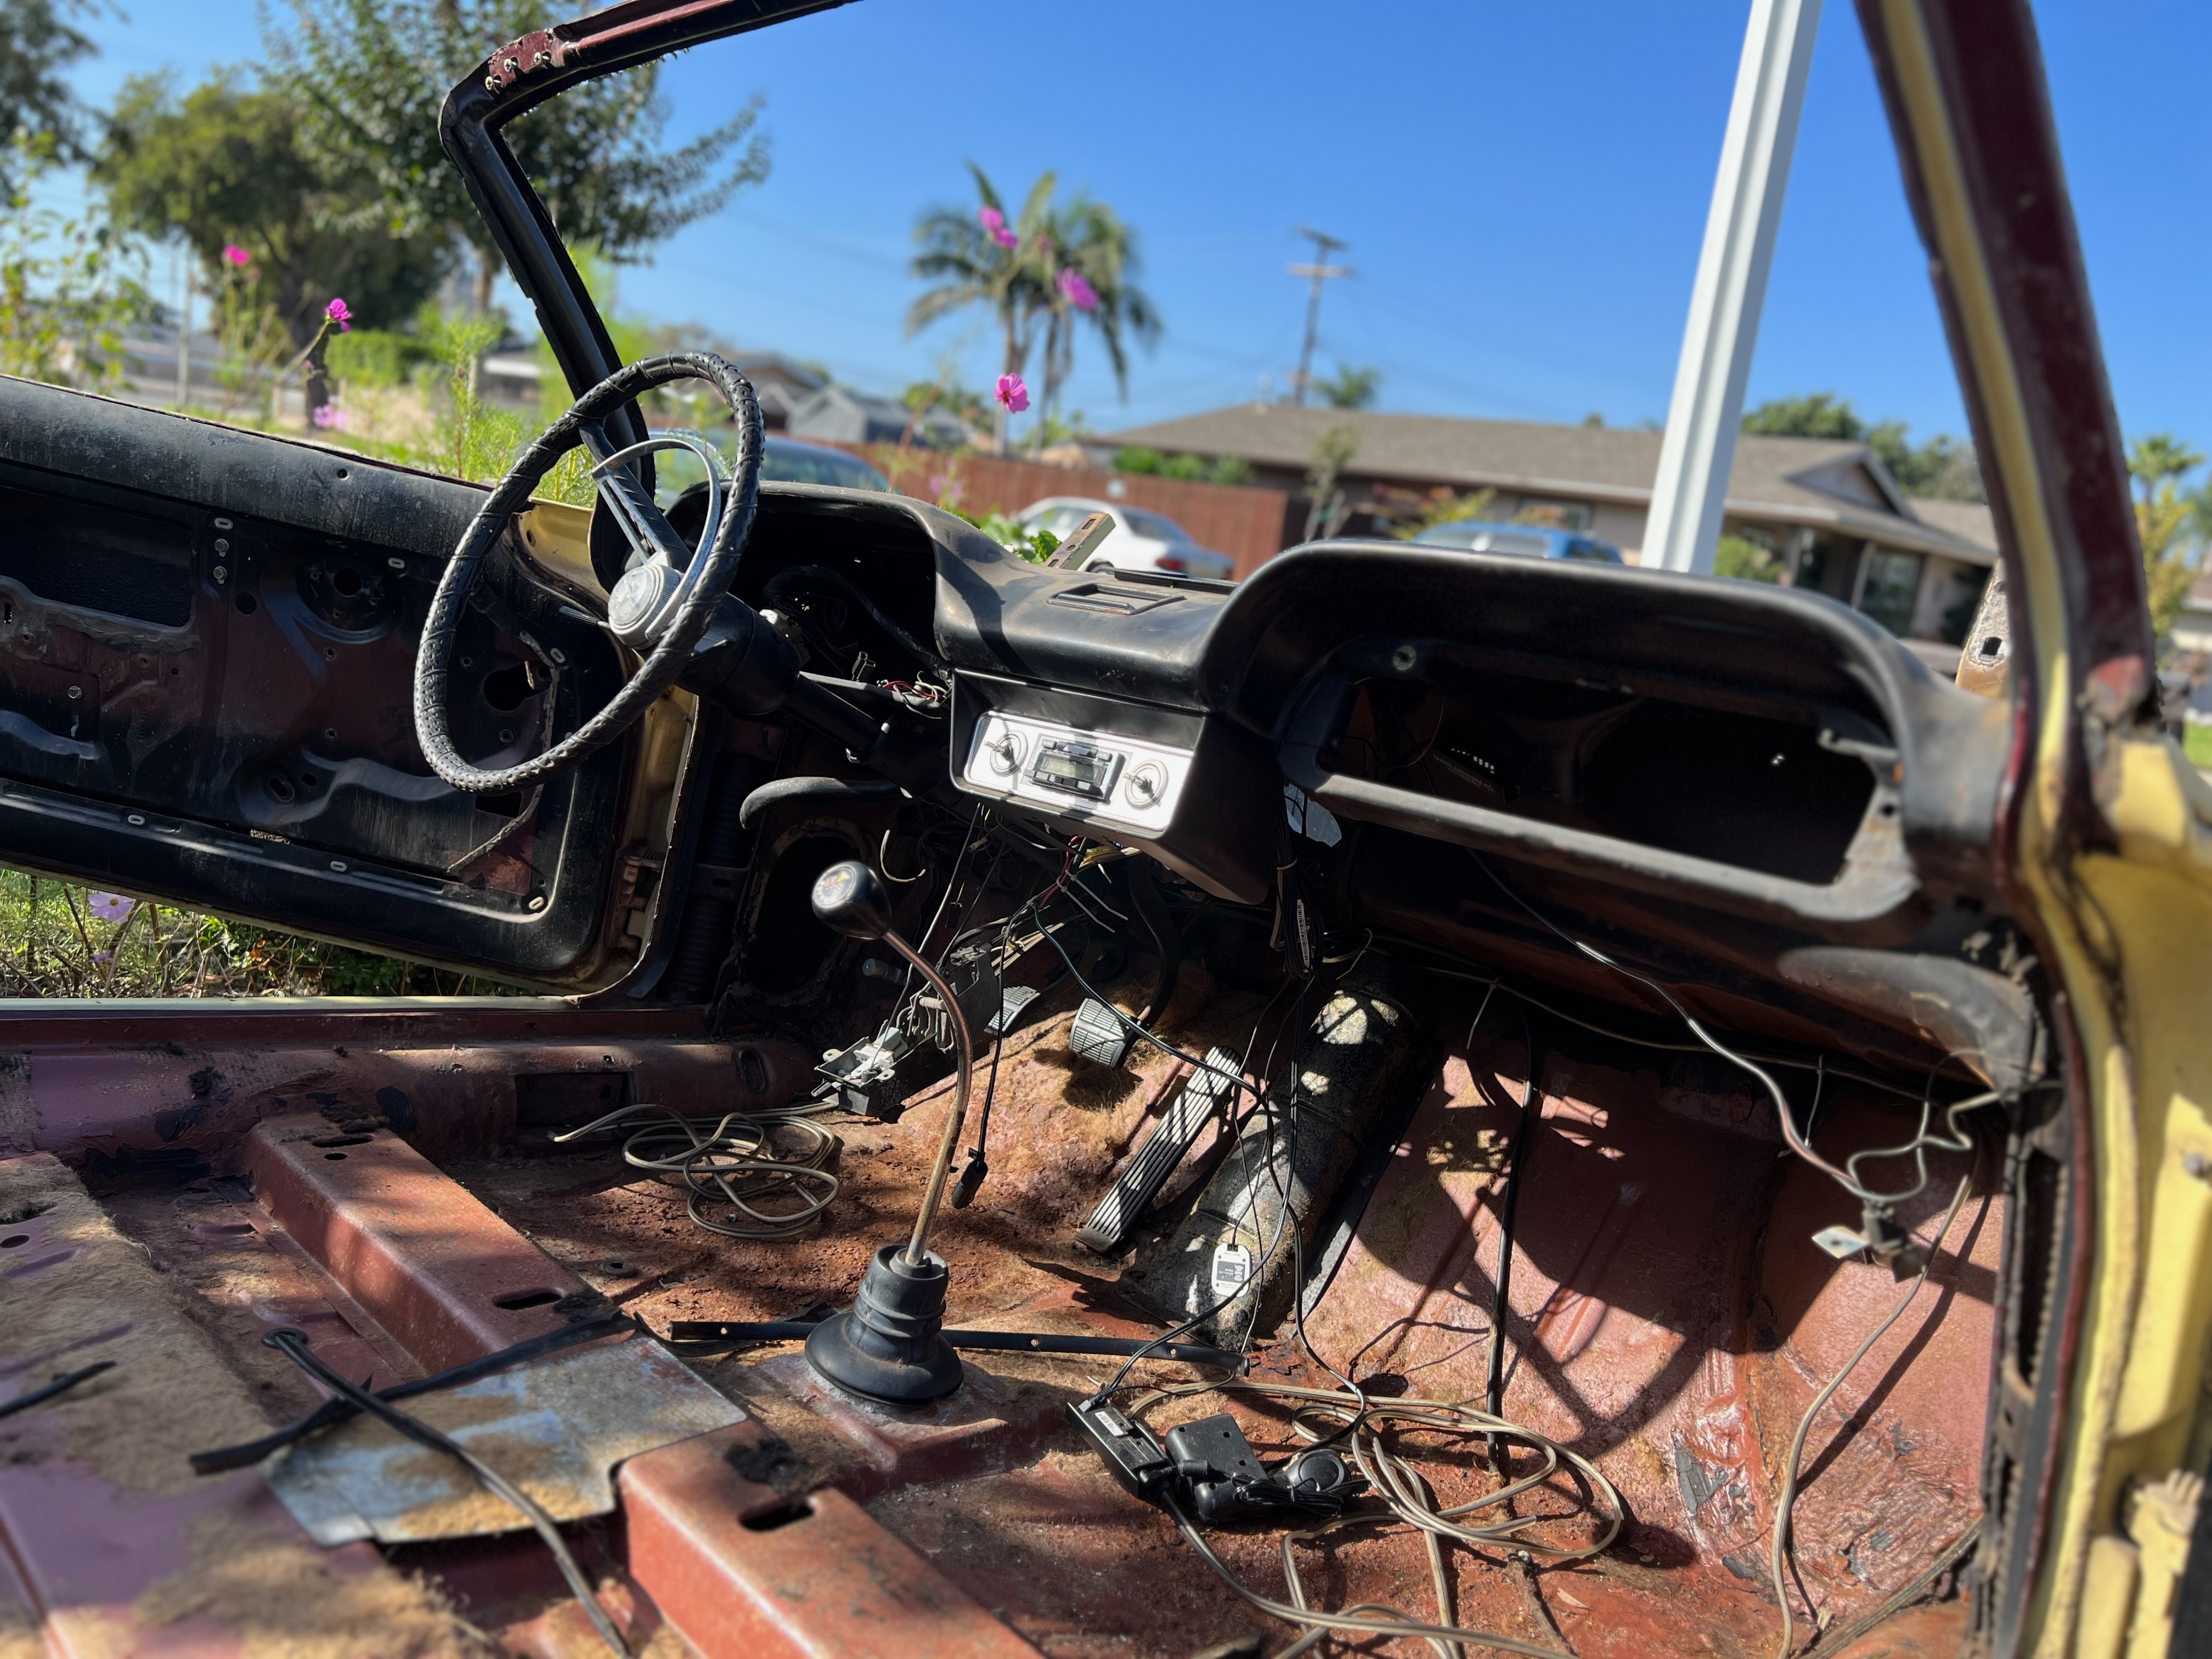
Pre-Build: Dashboard Condition
The original dashboard showing cracks, fading, and wear from decades of sun exposure and use, documenting the interior condition before disassembly.
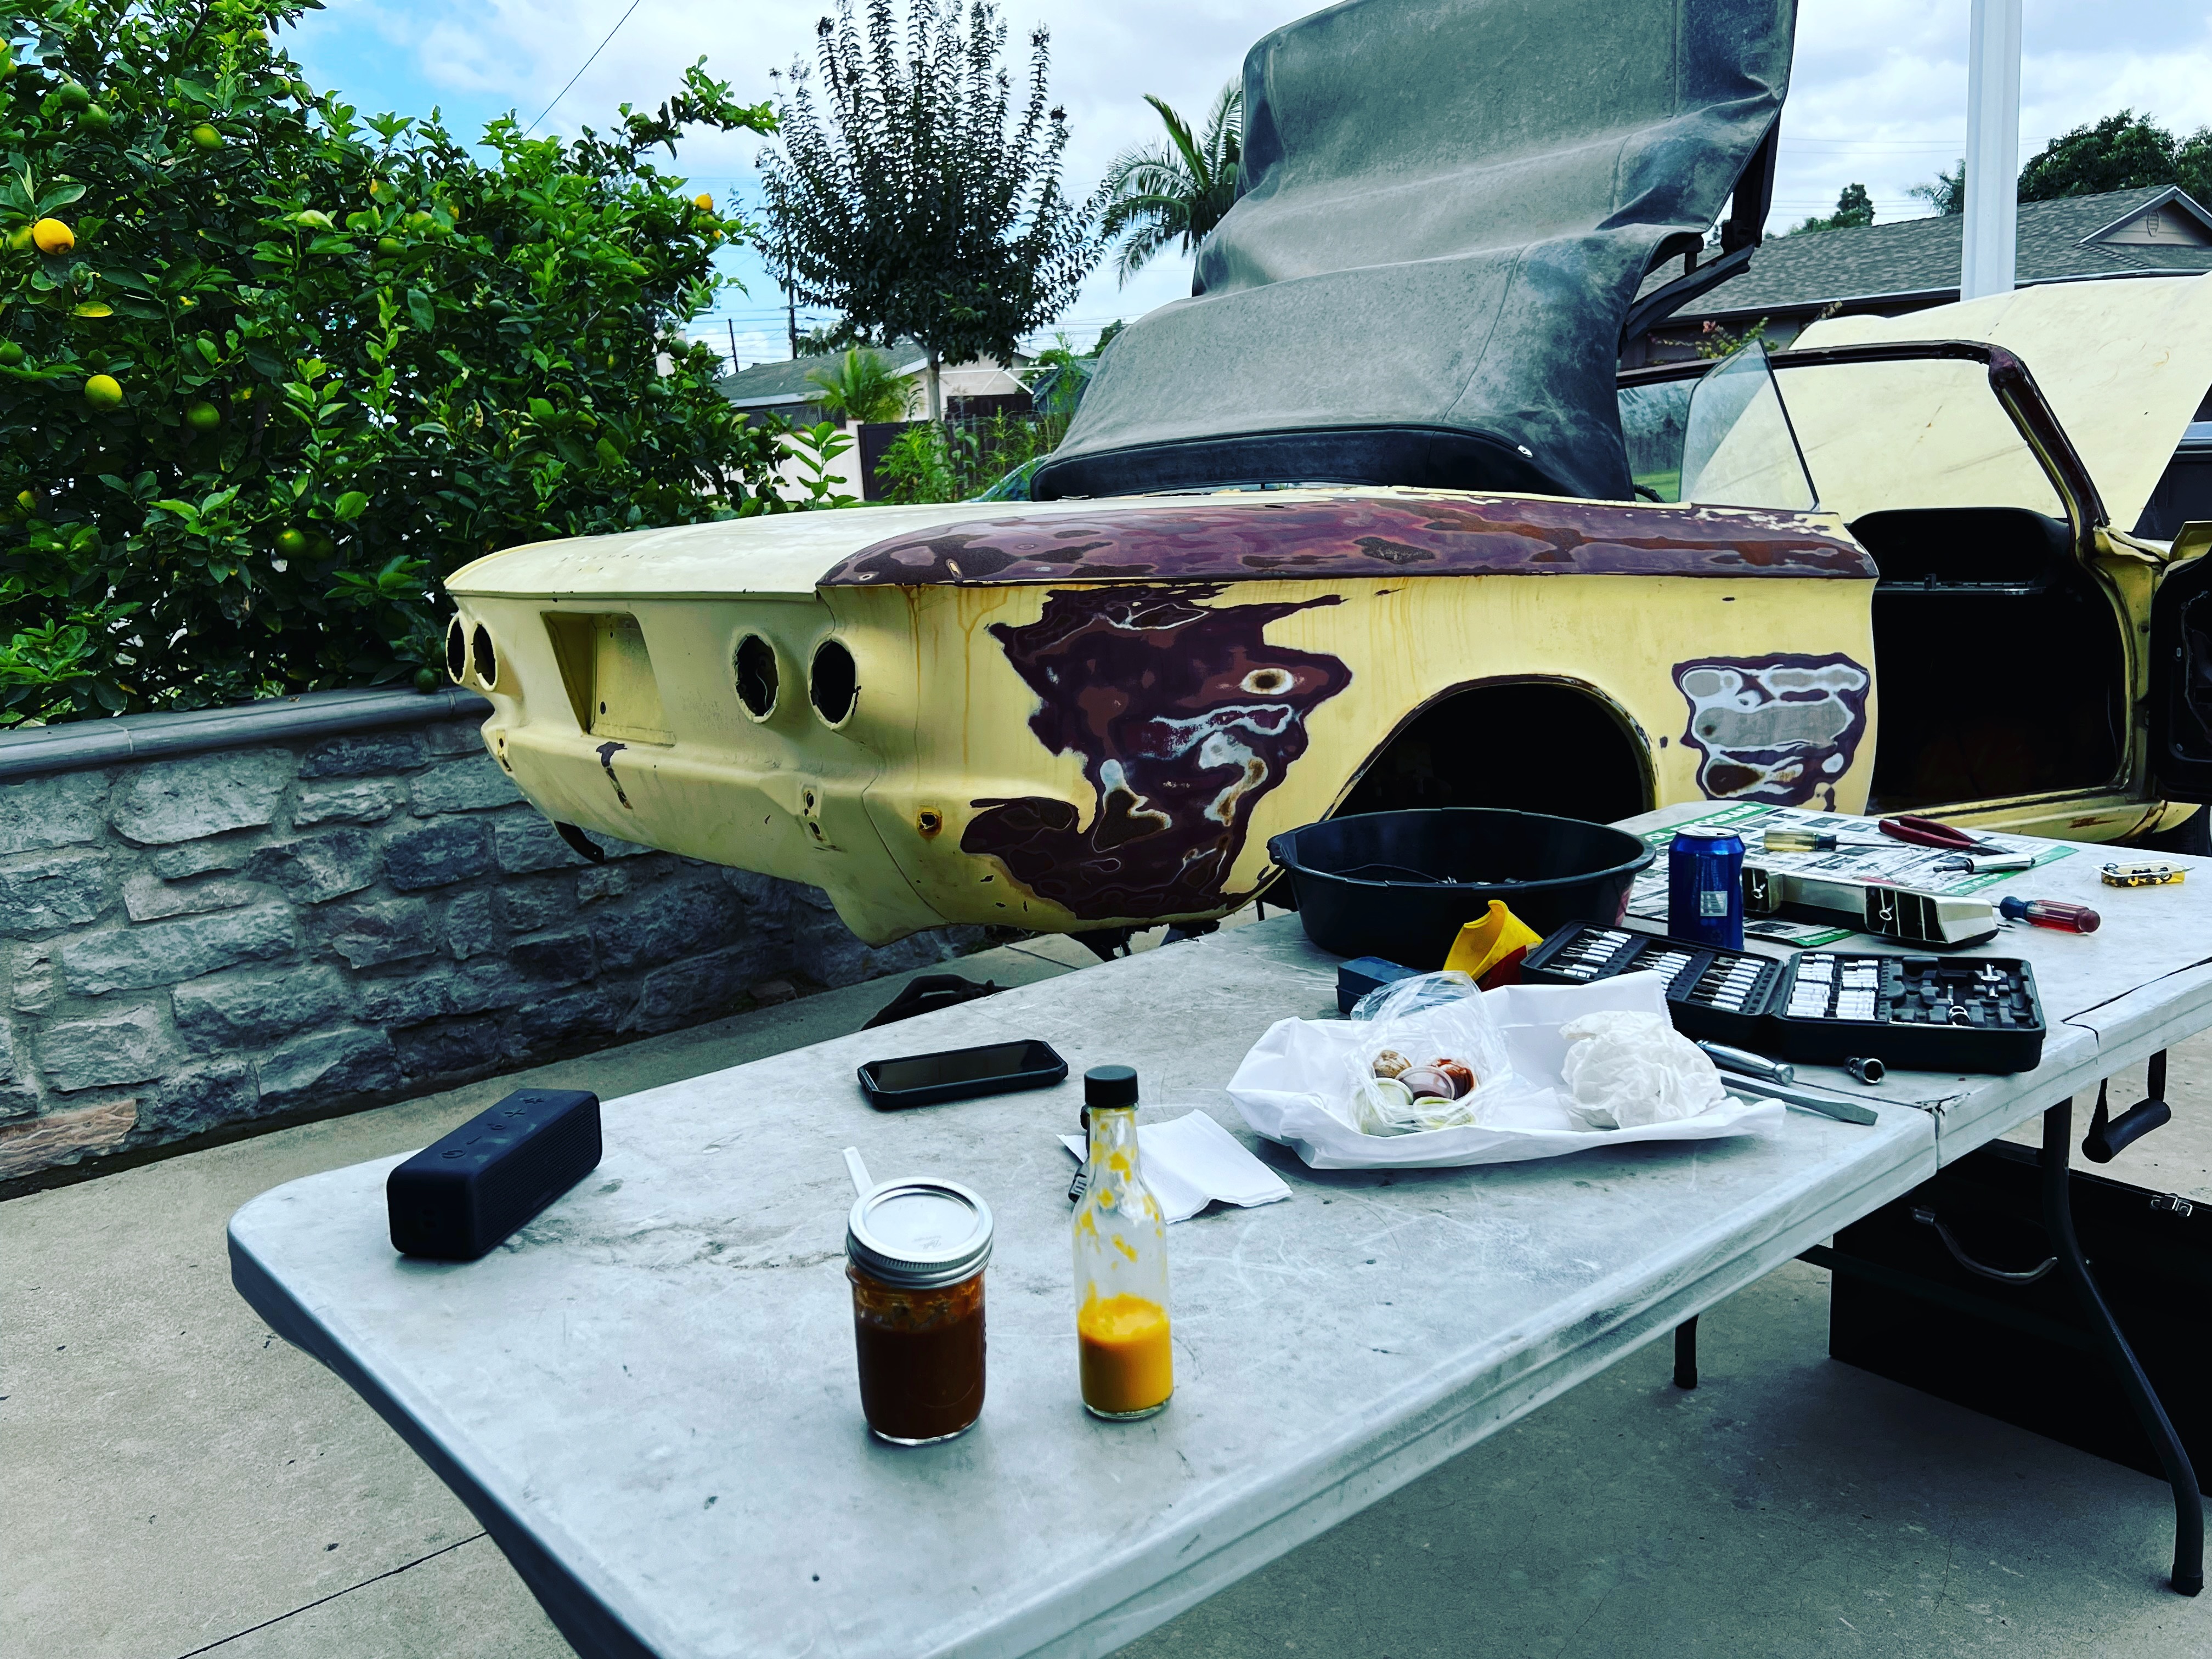
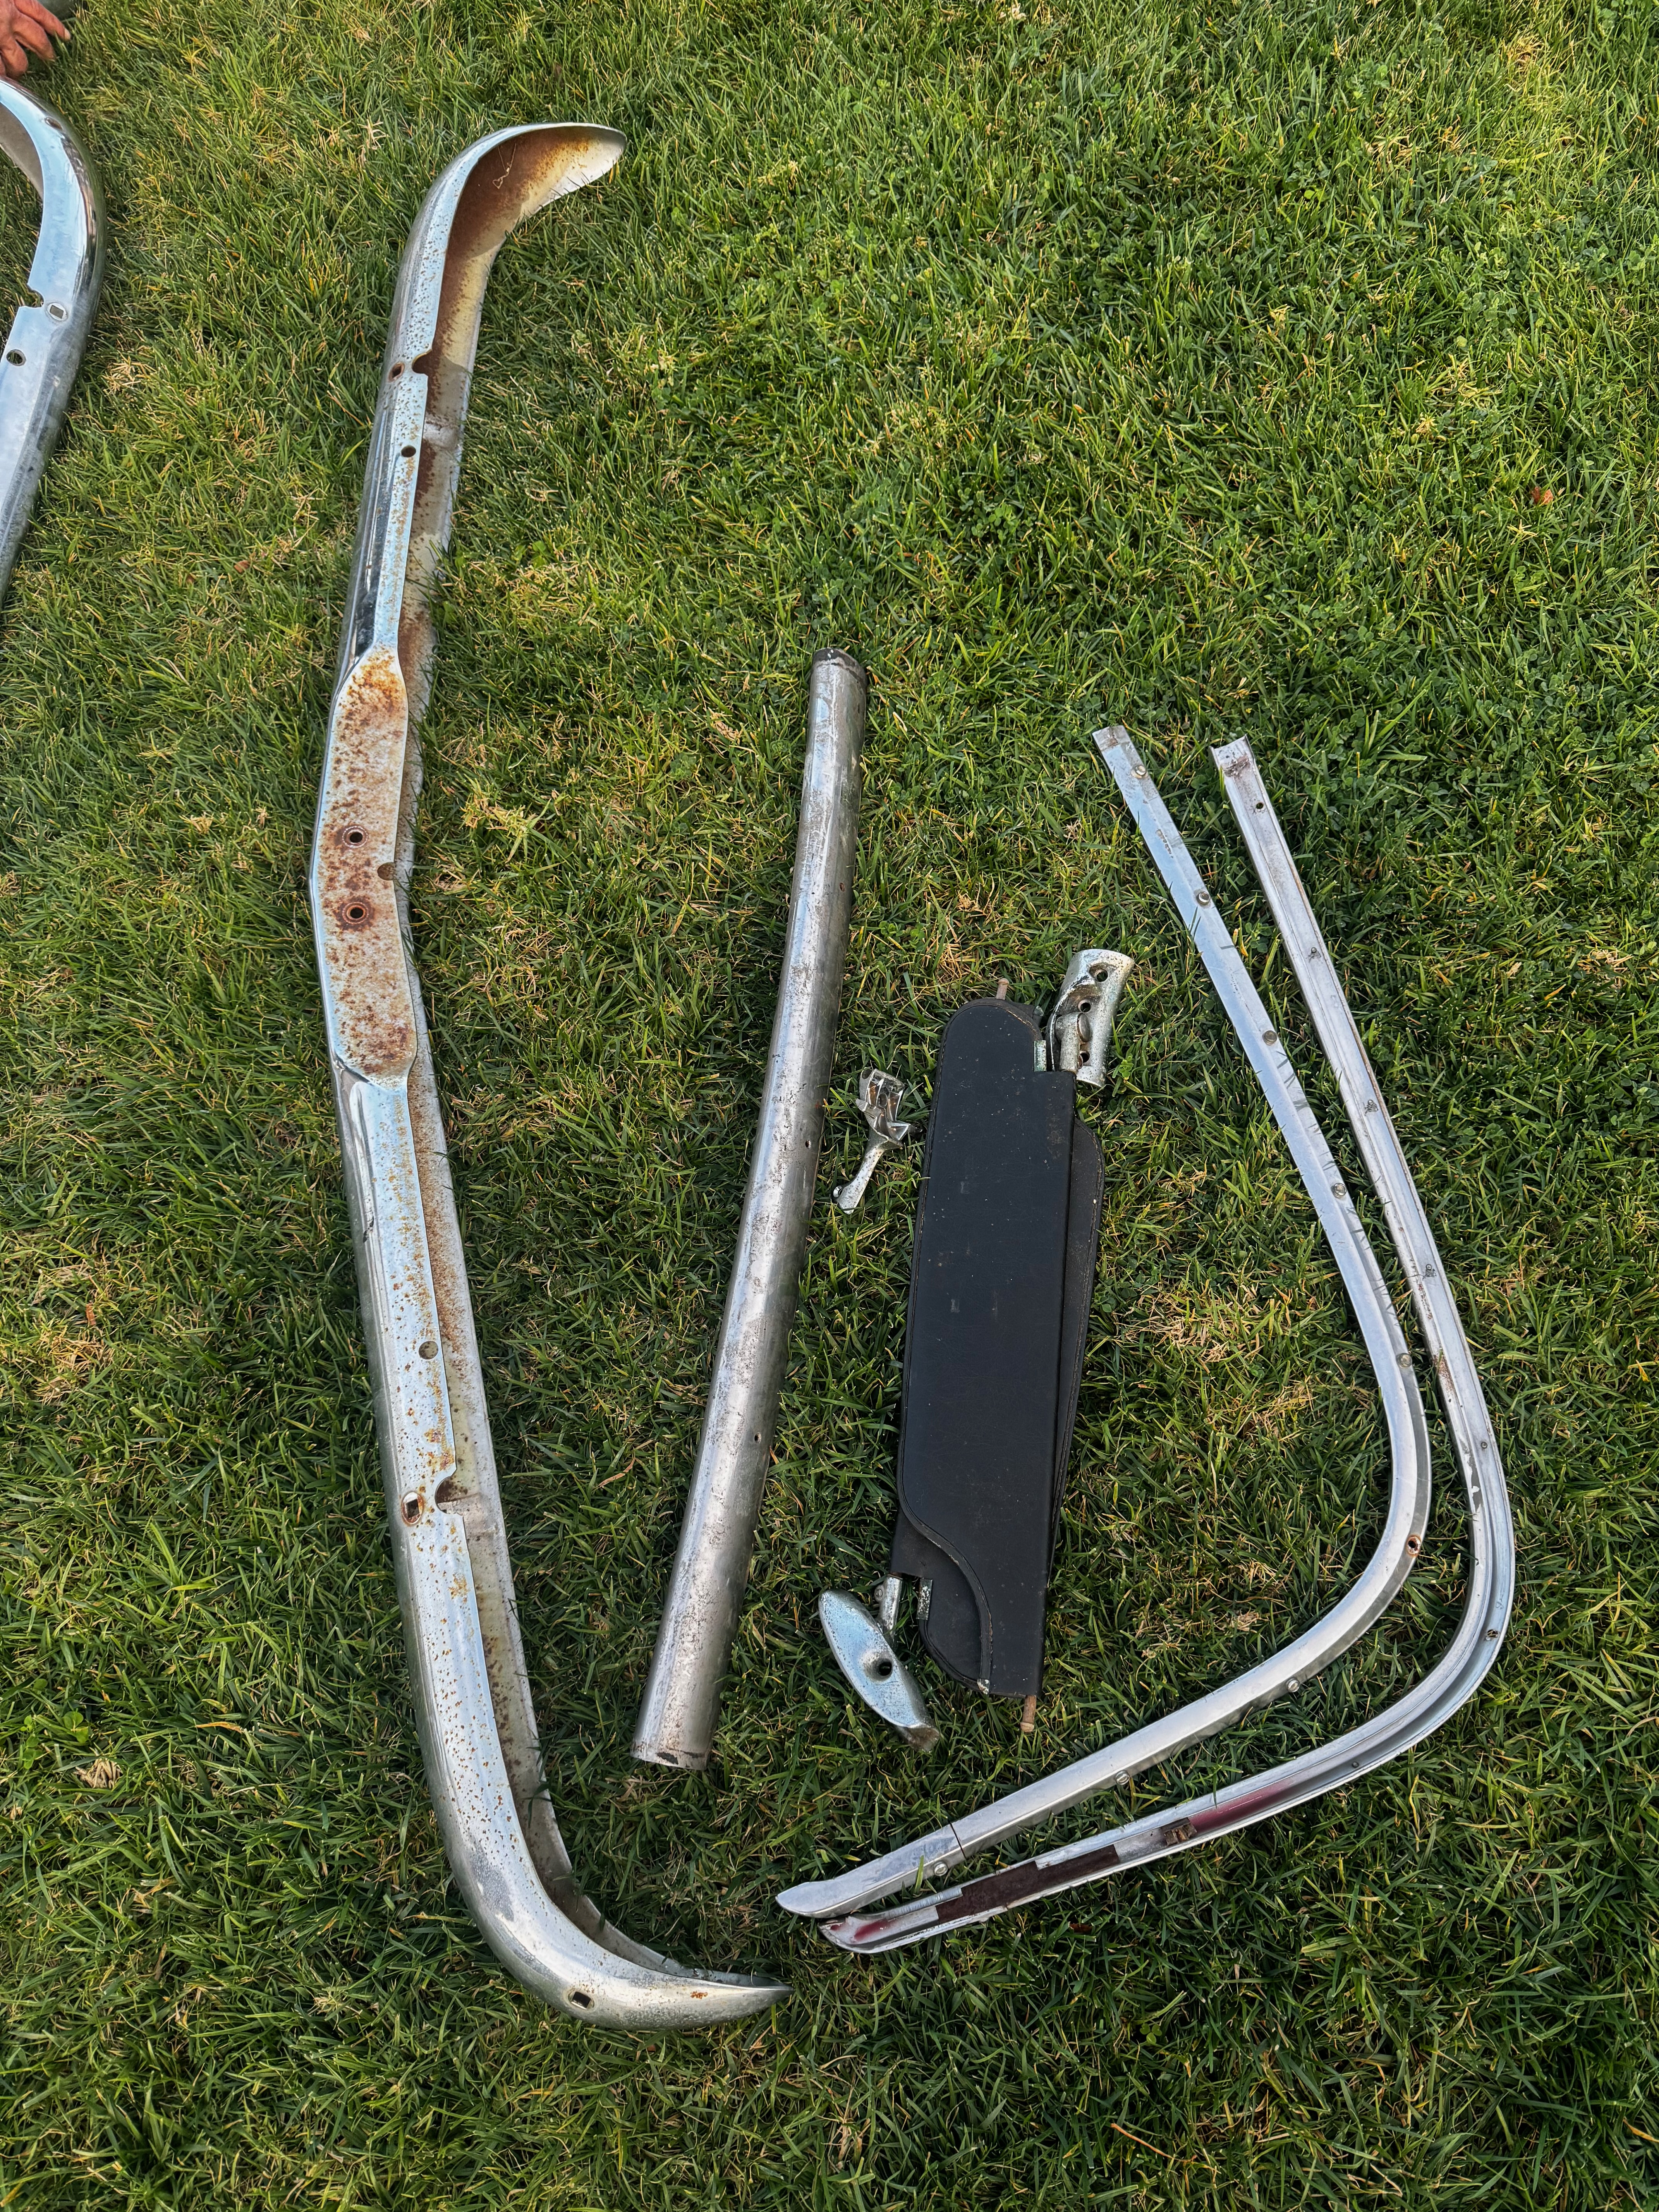
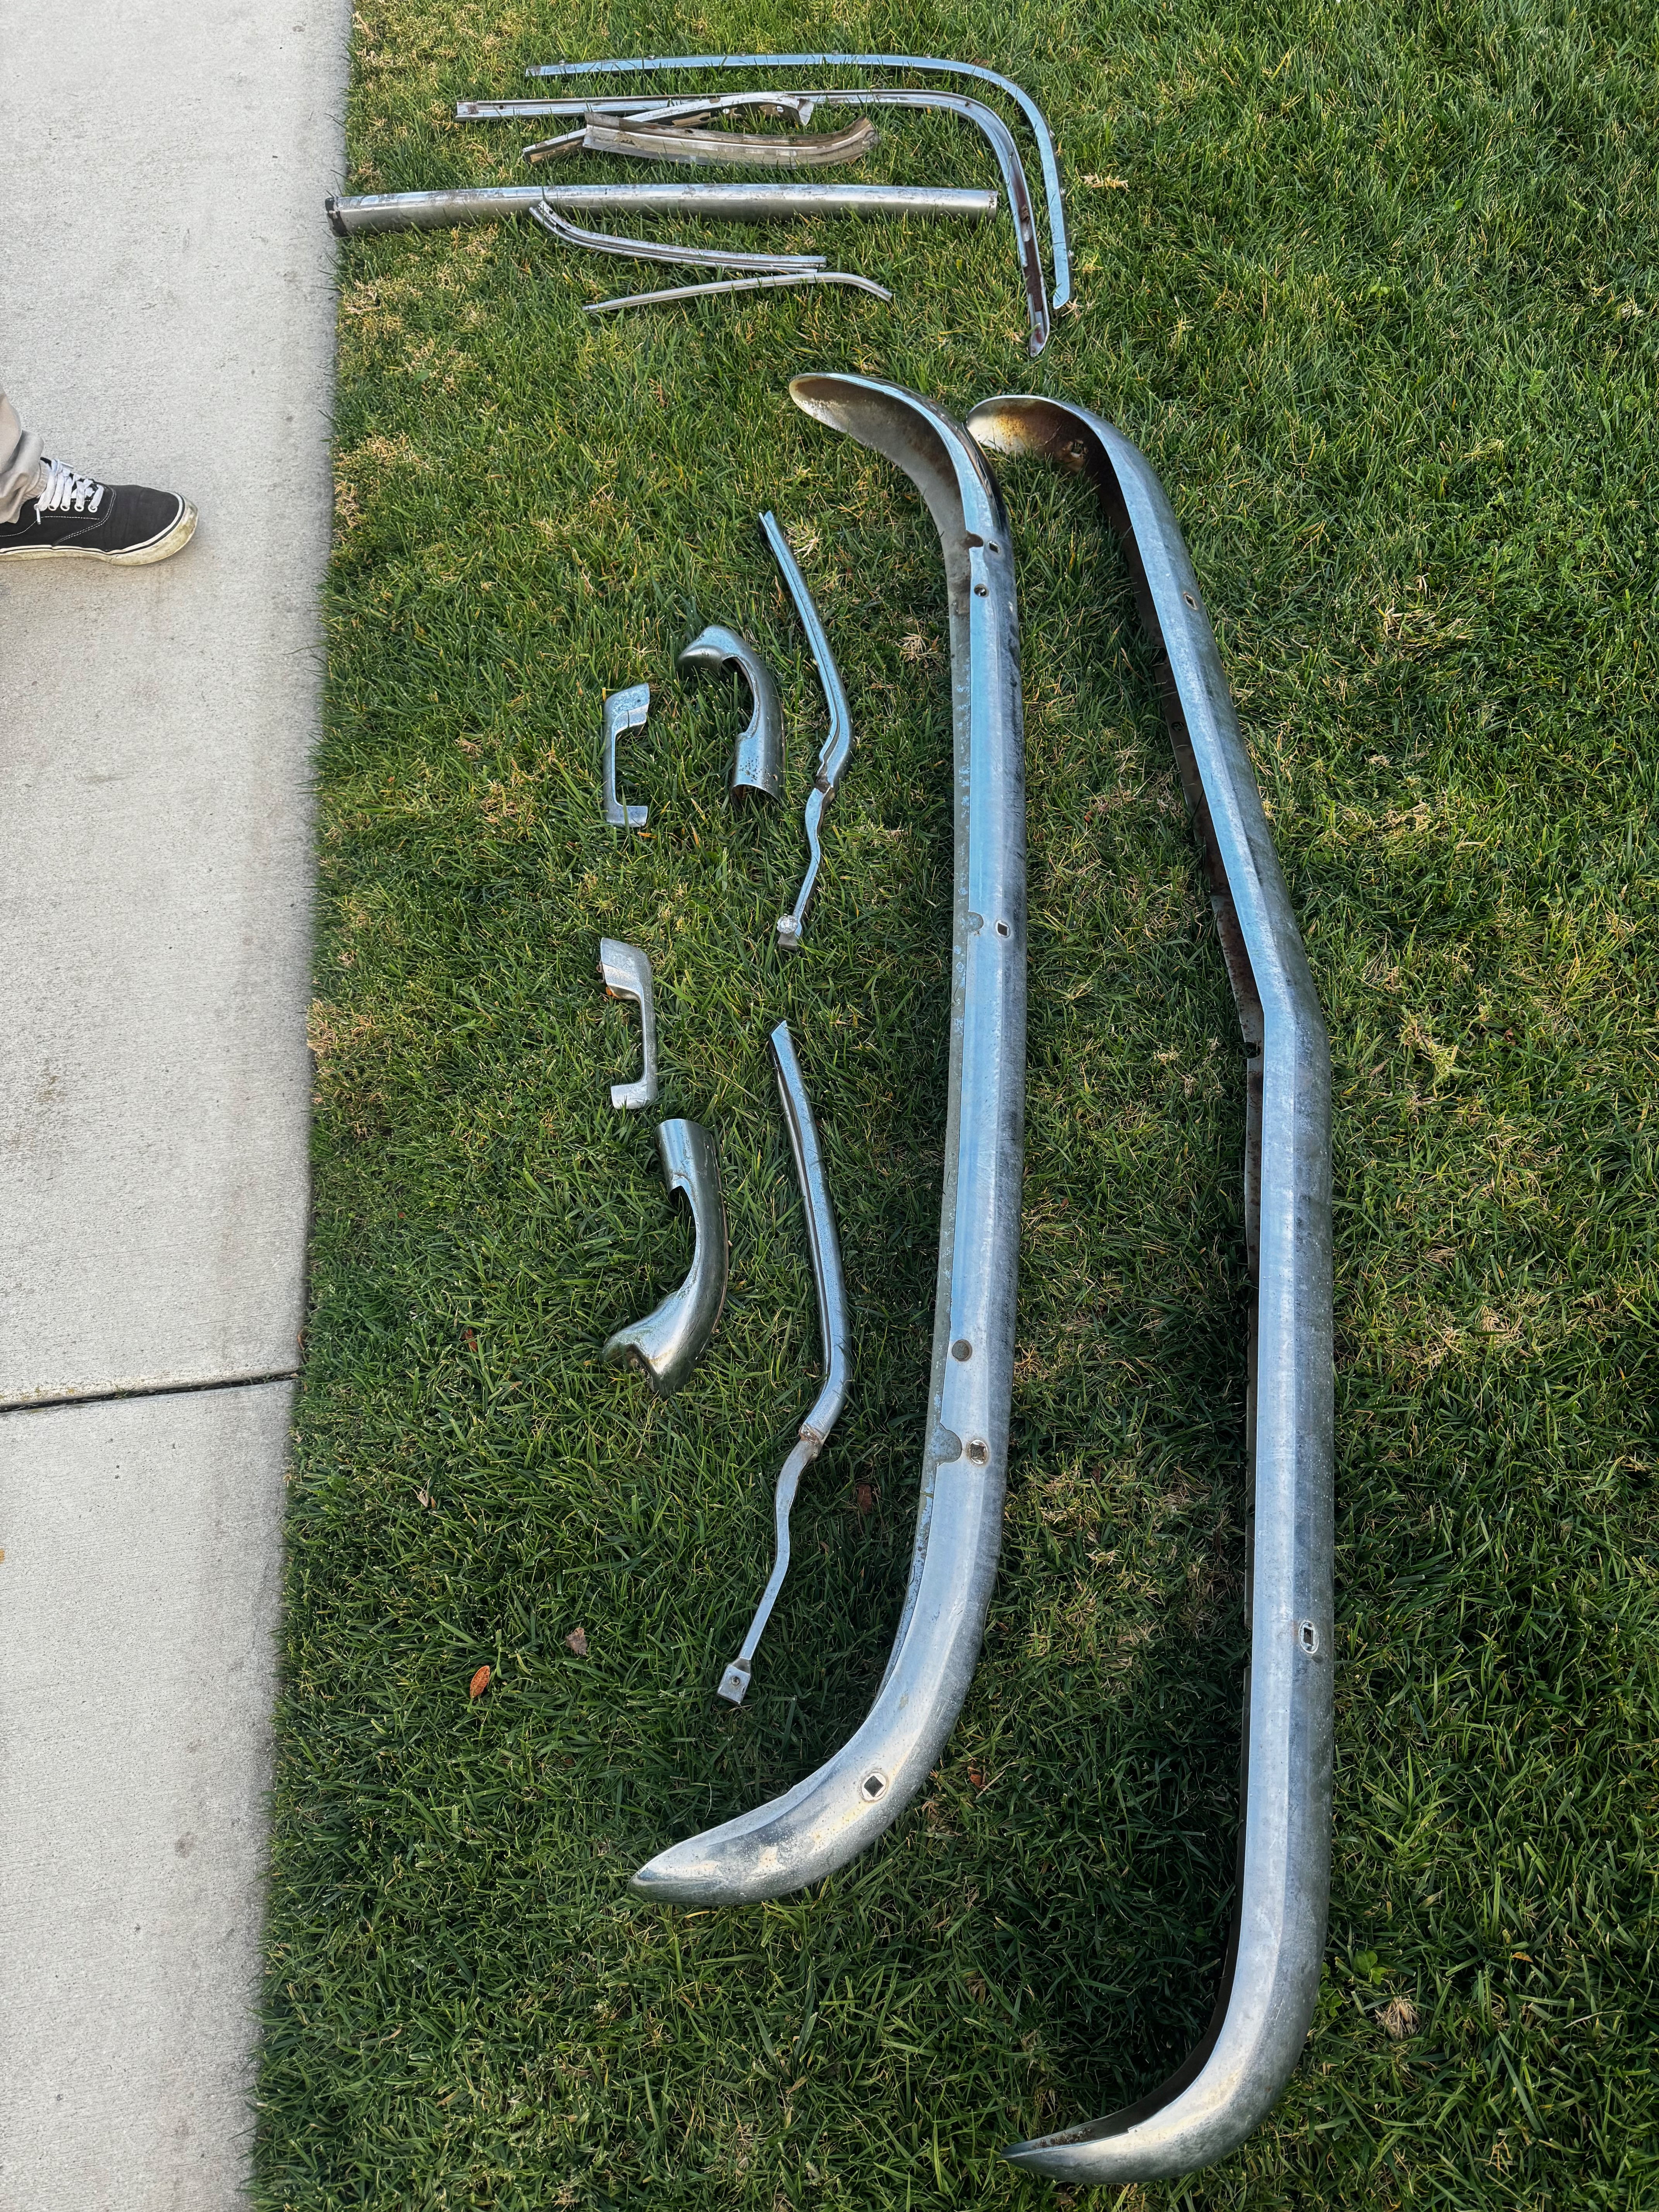
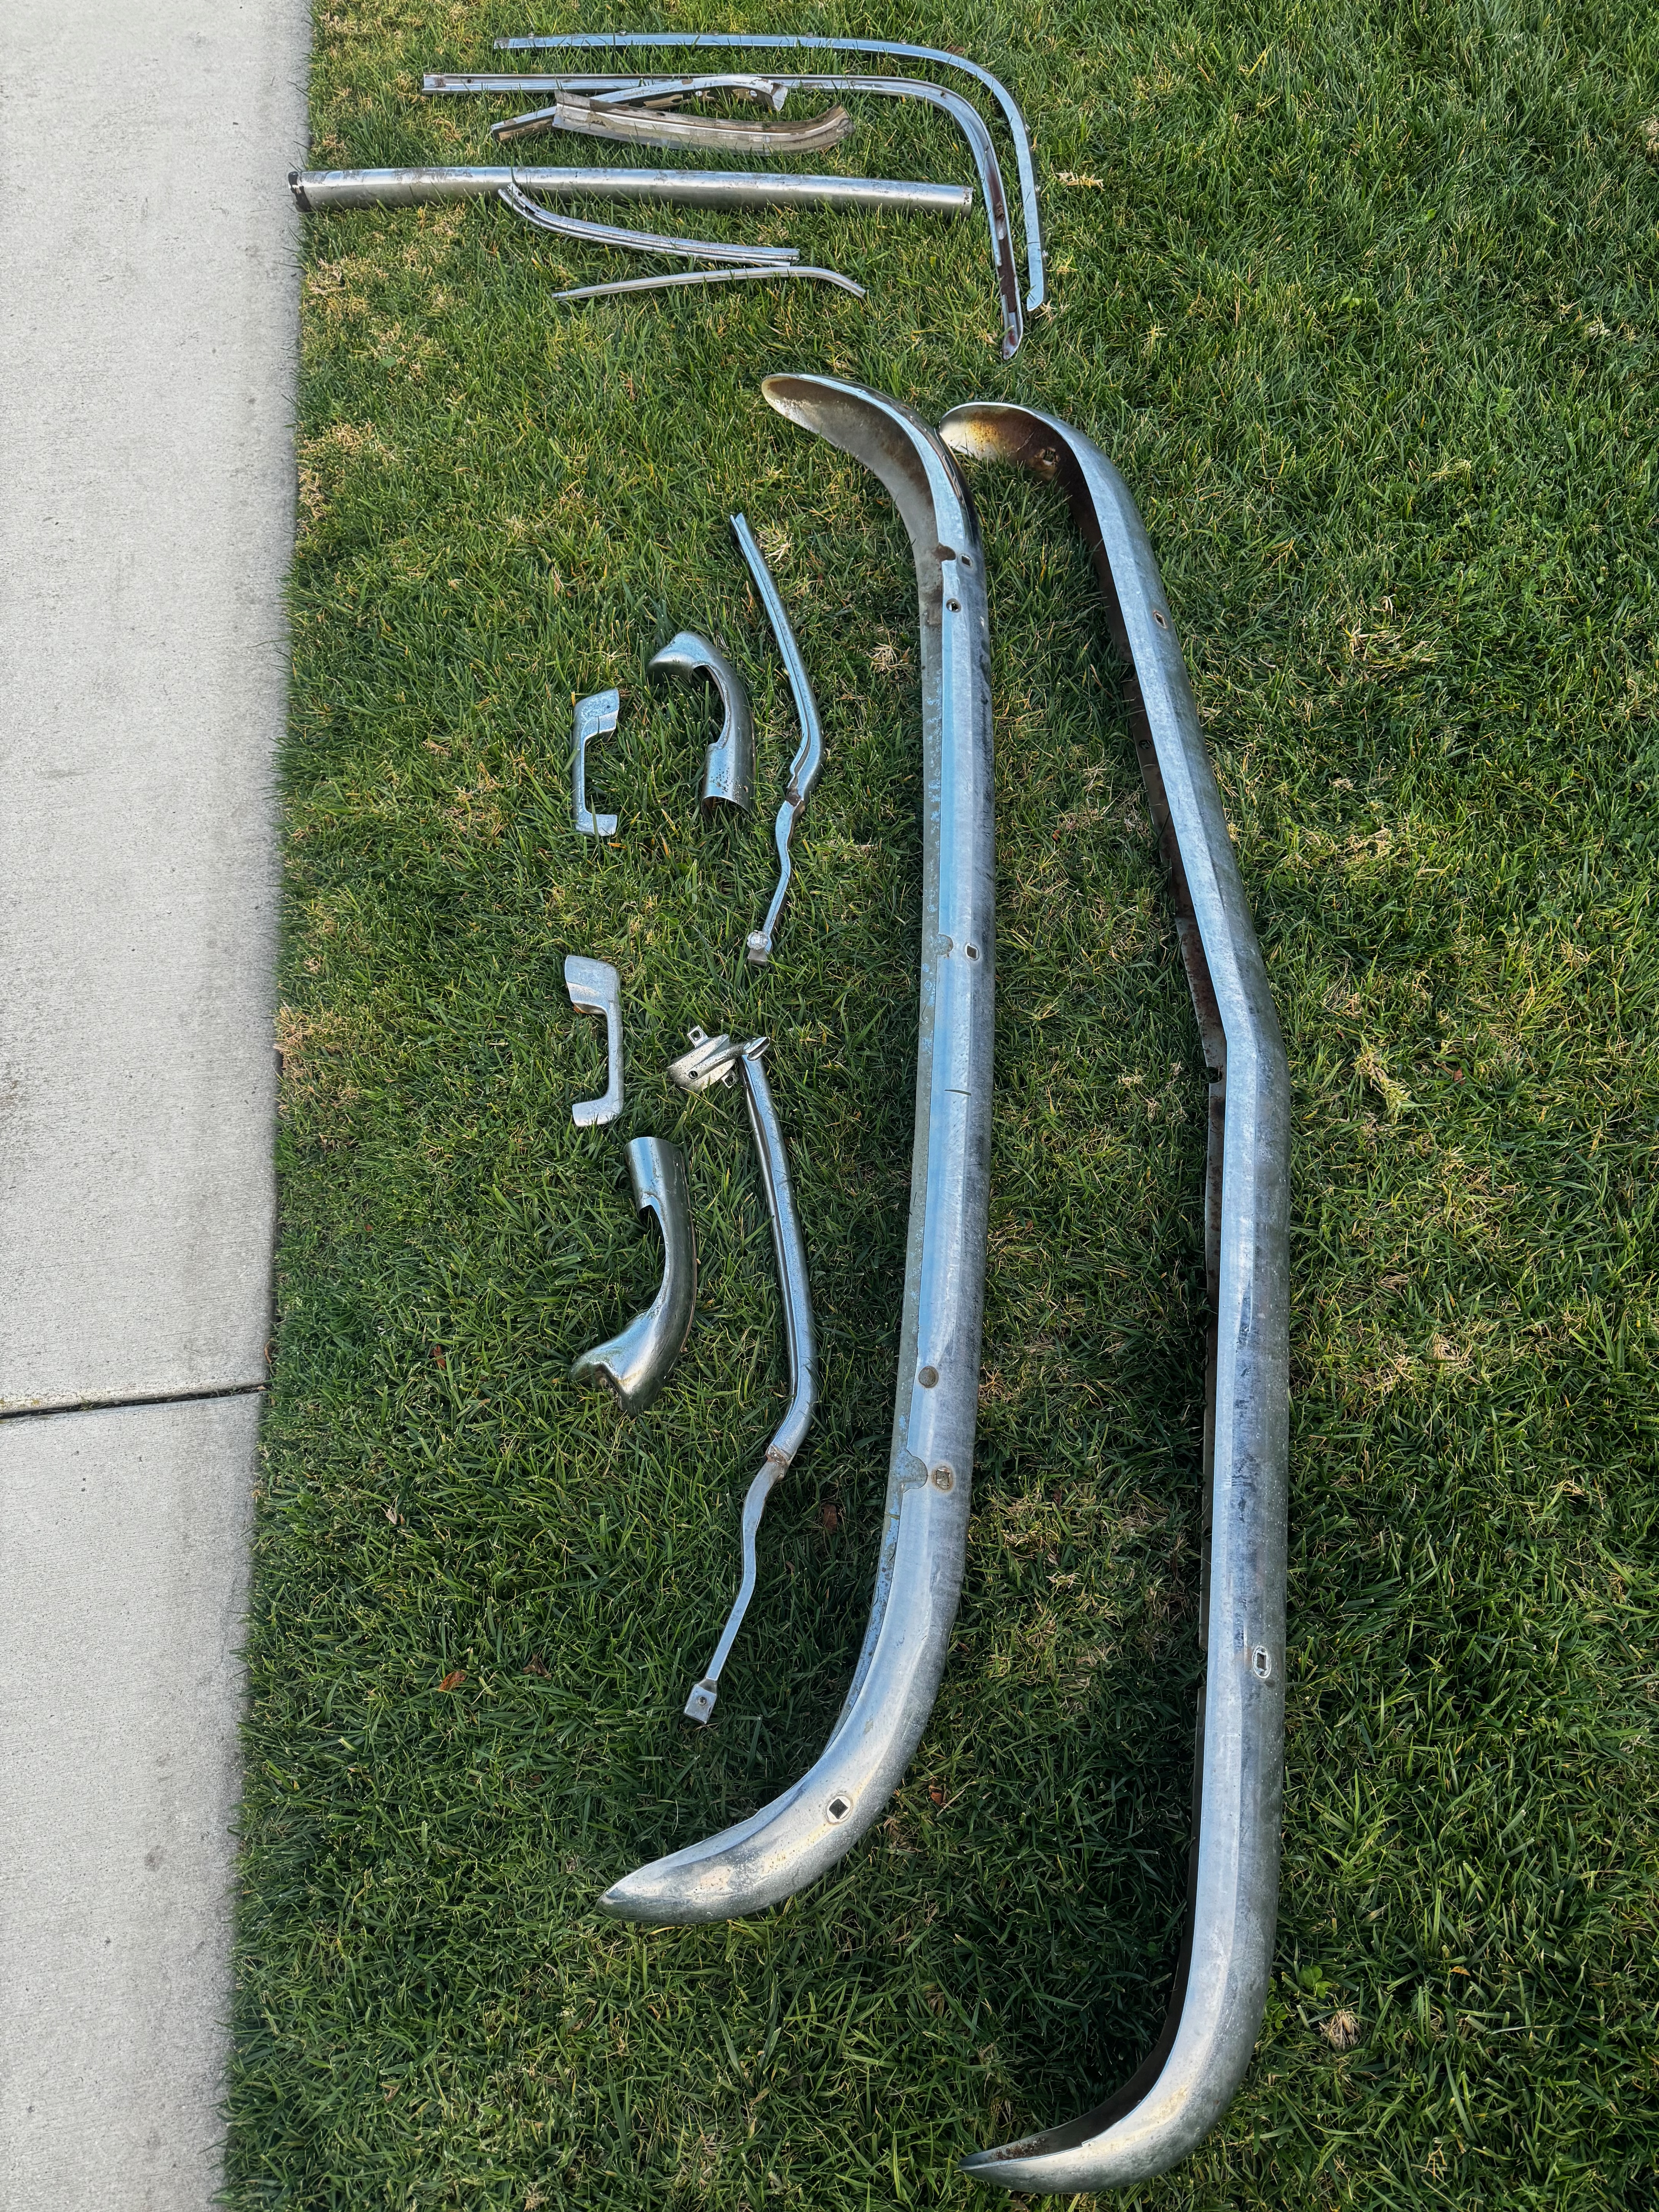
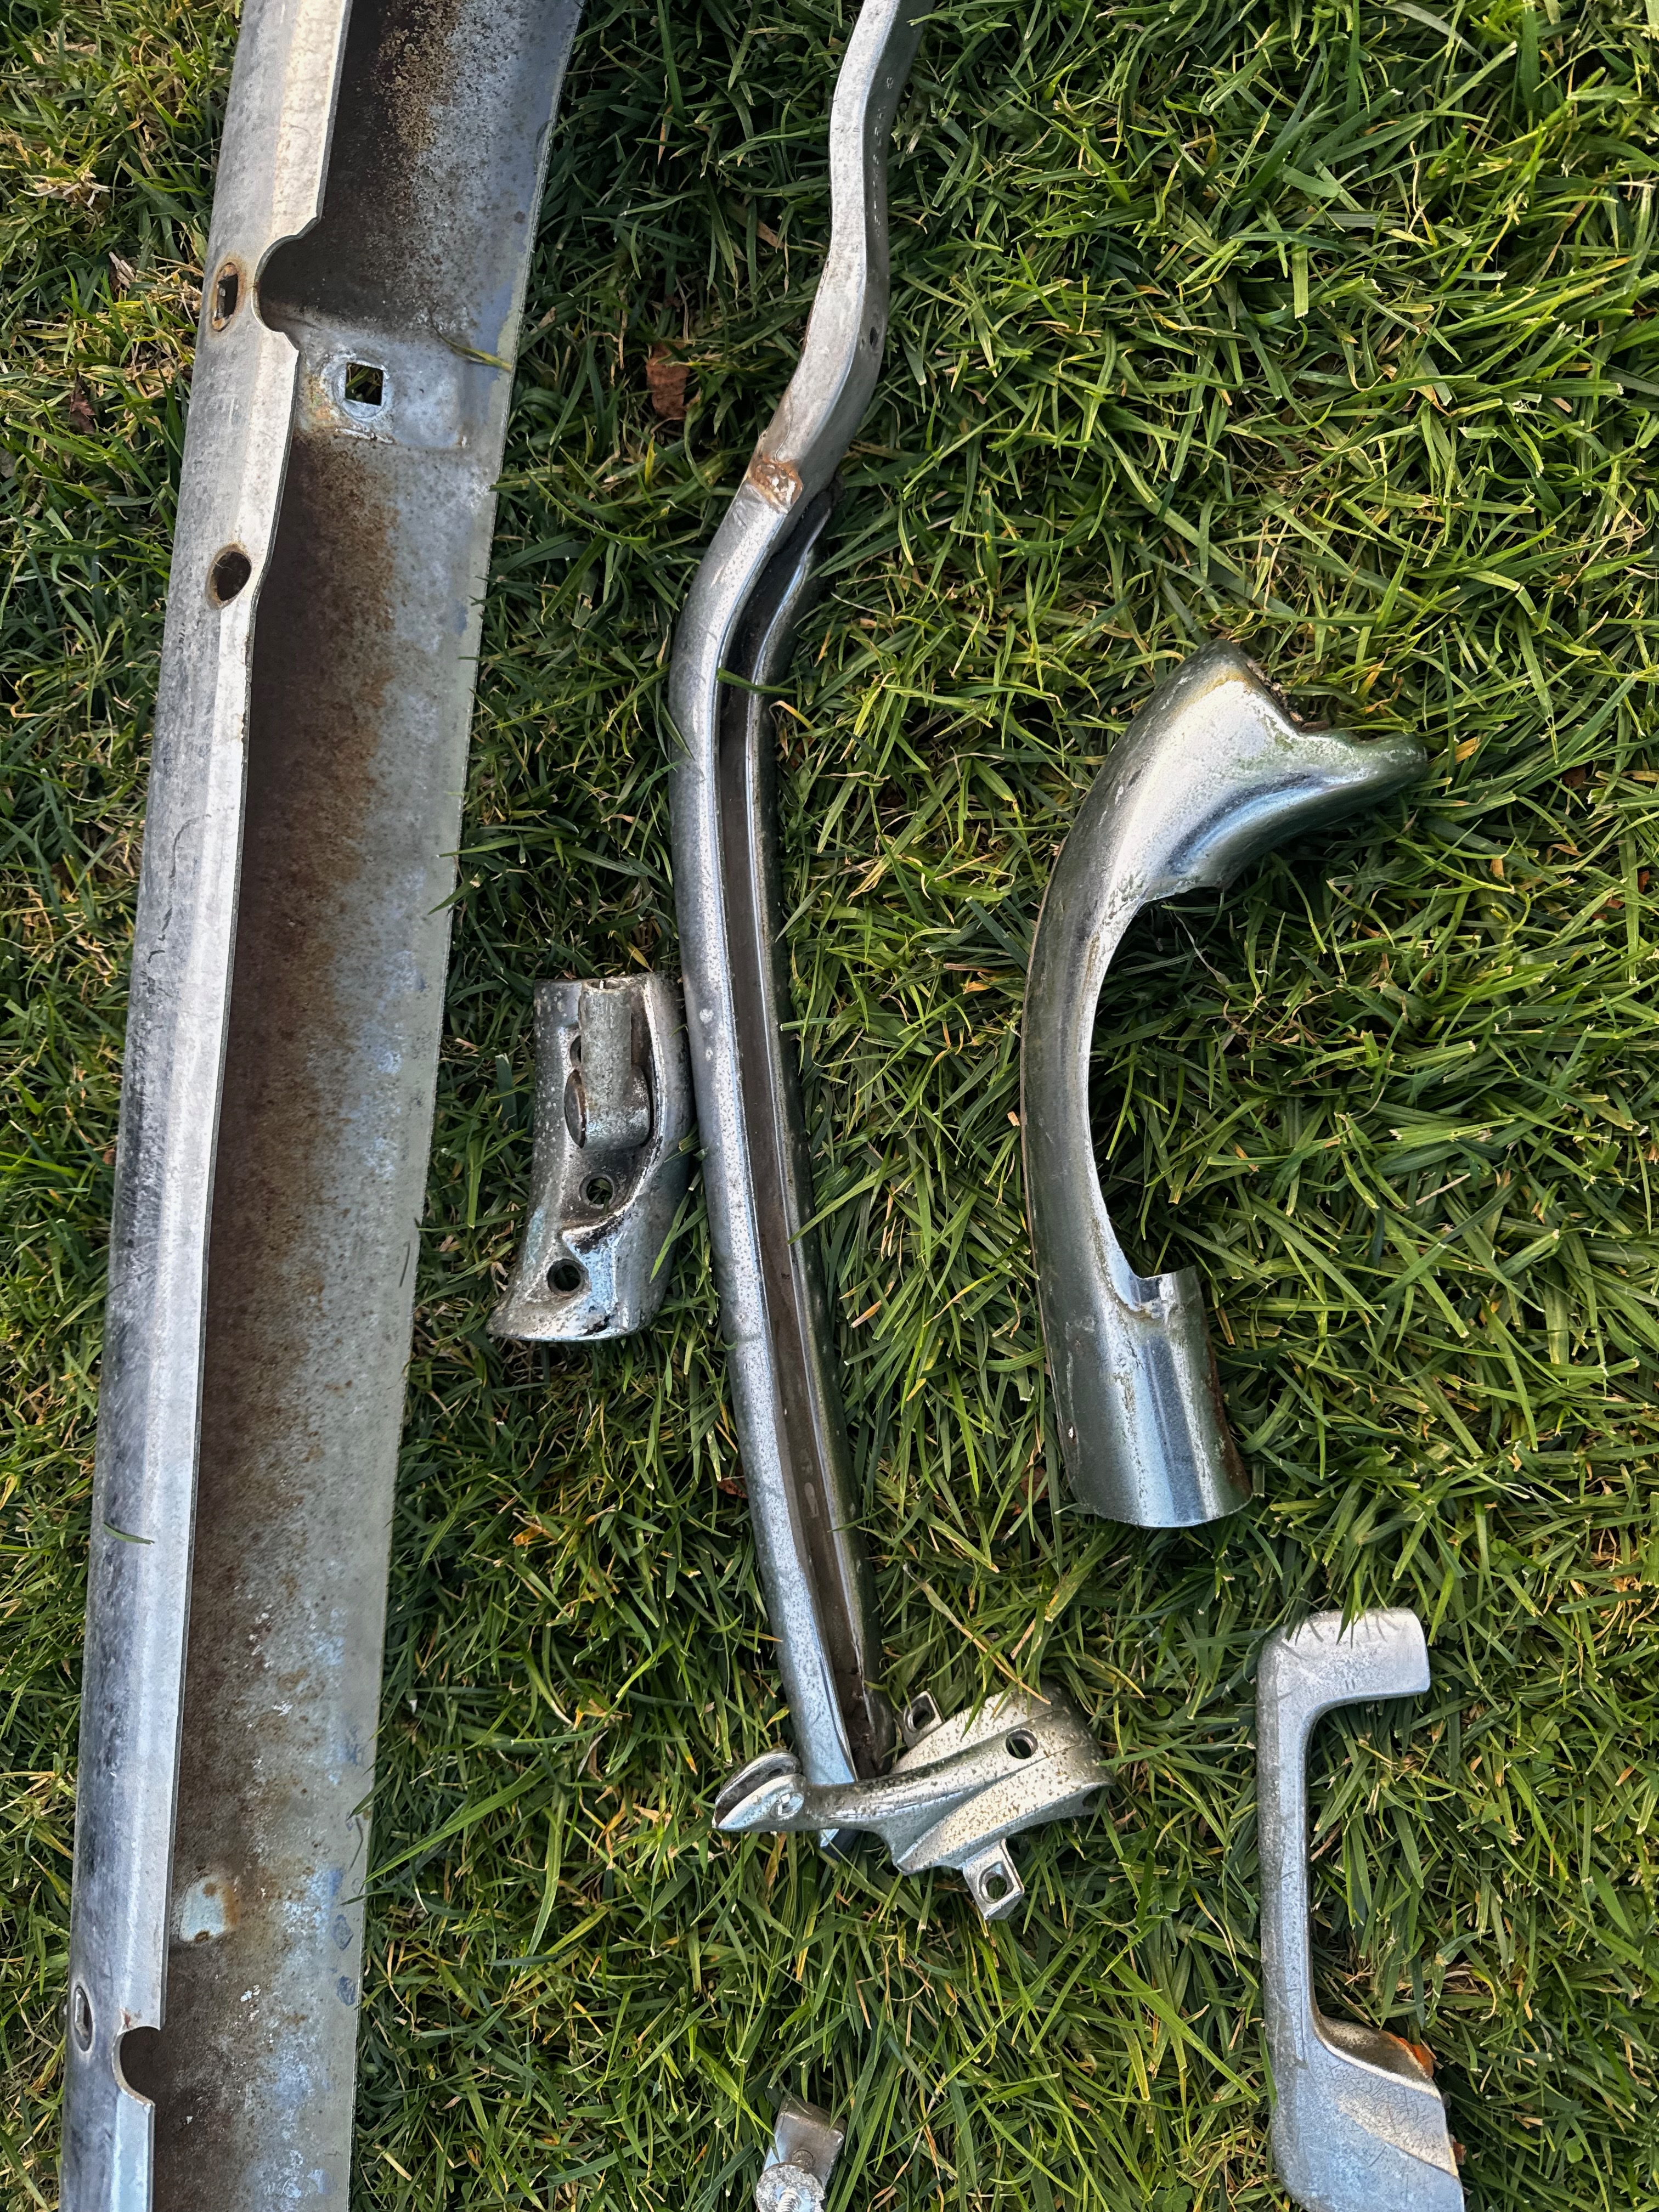
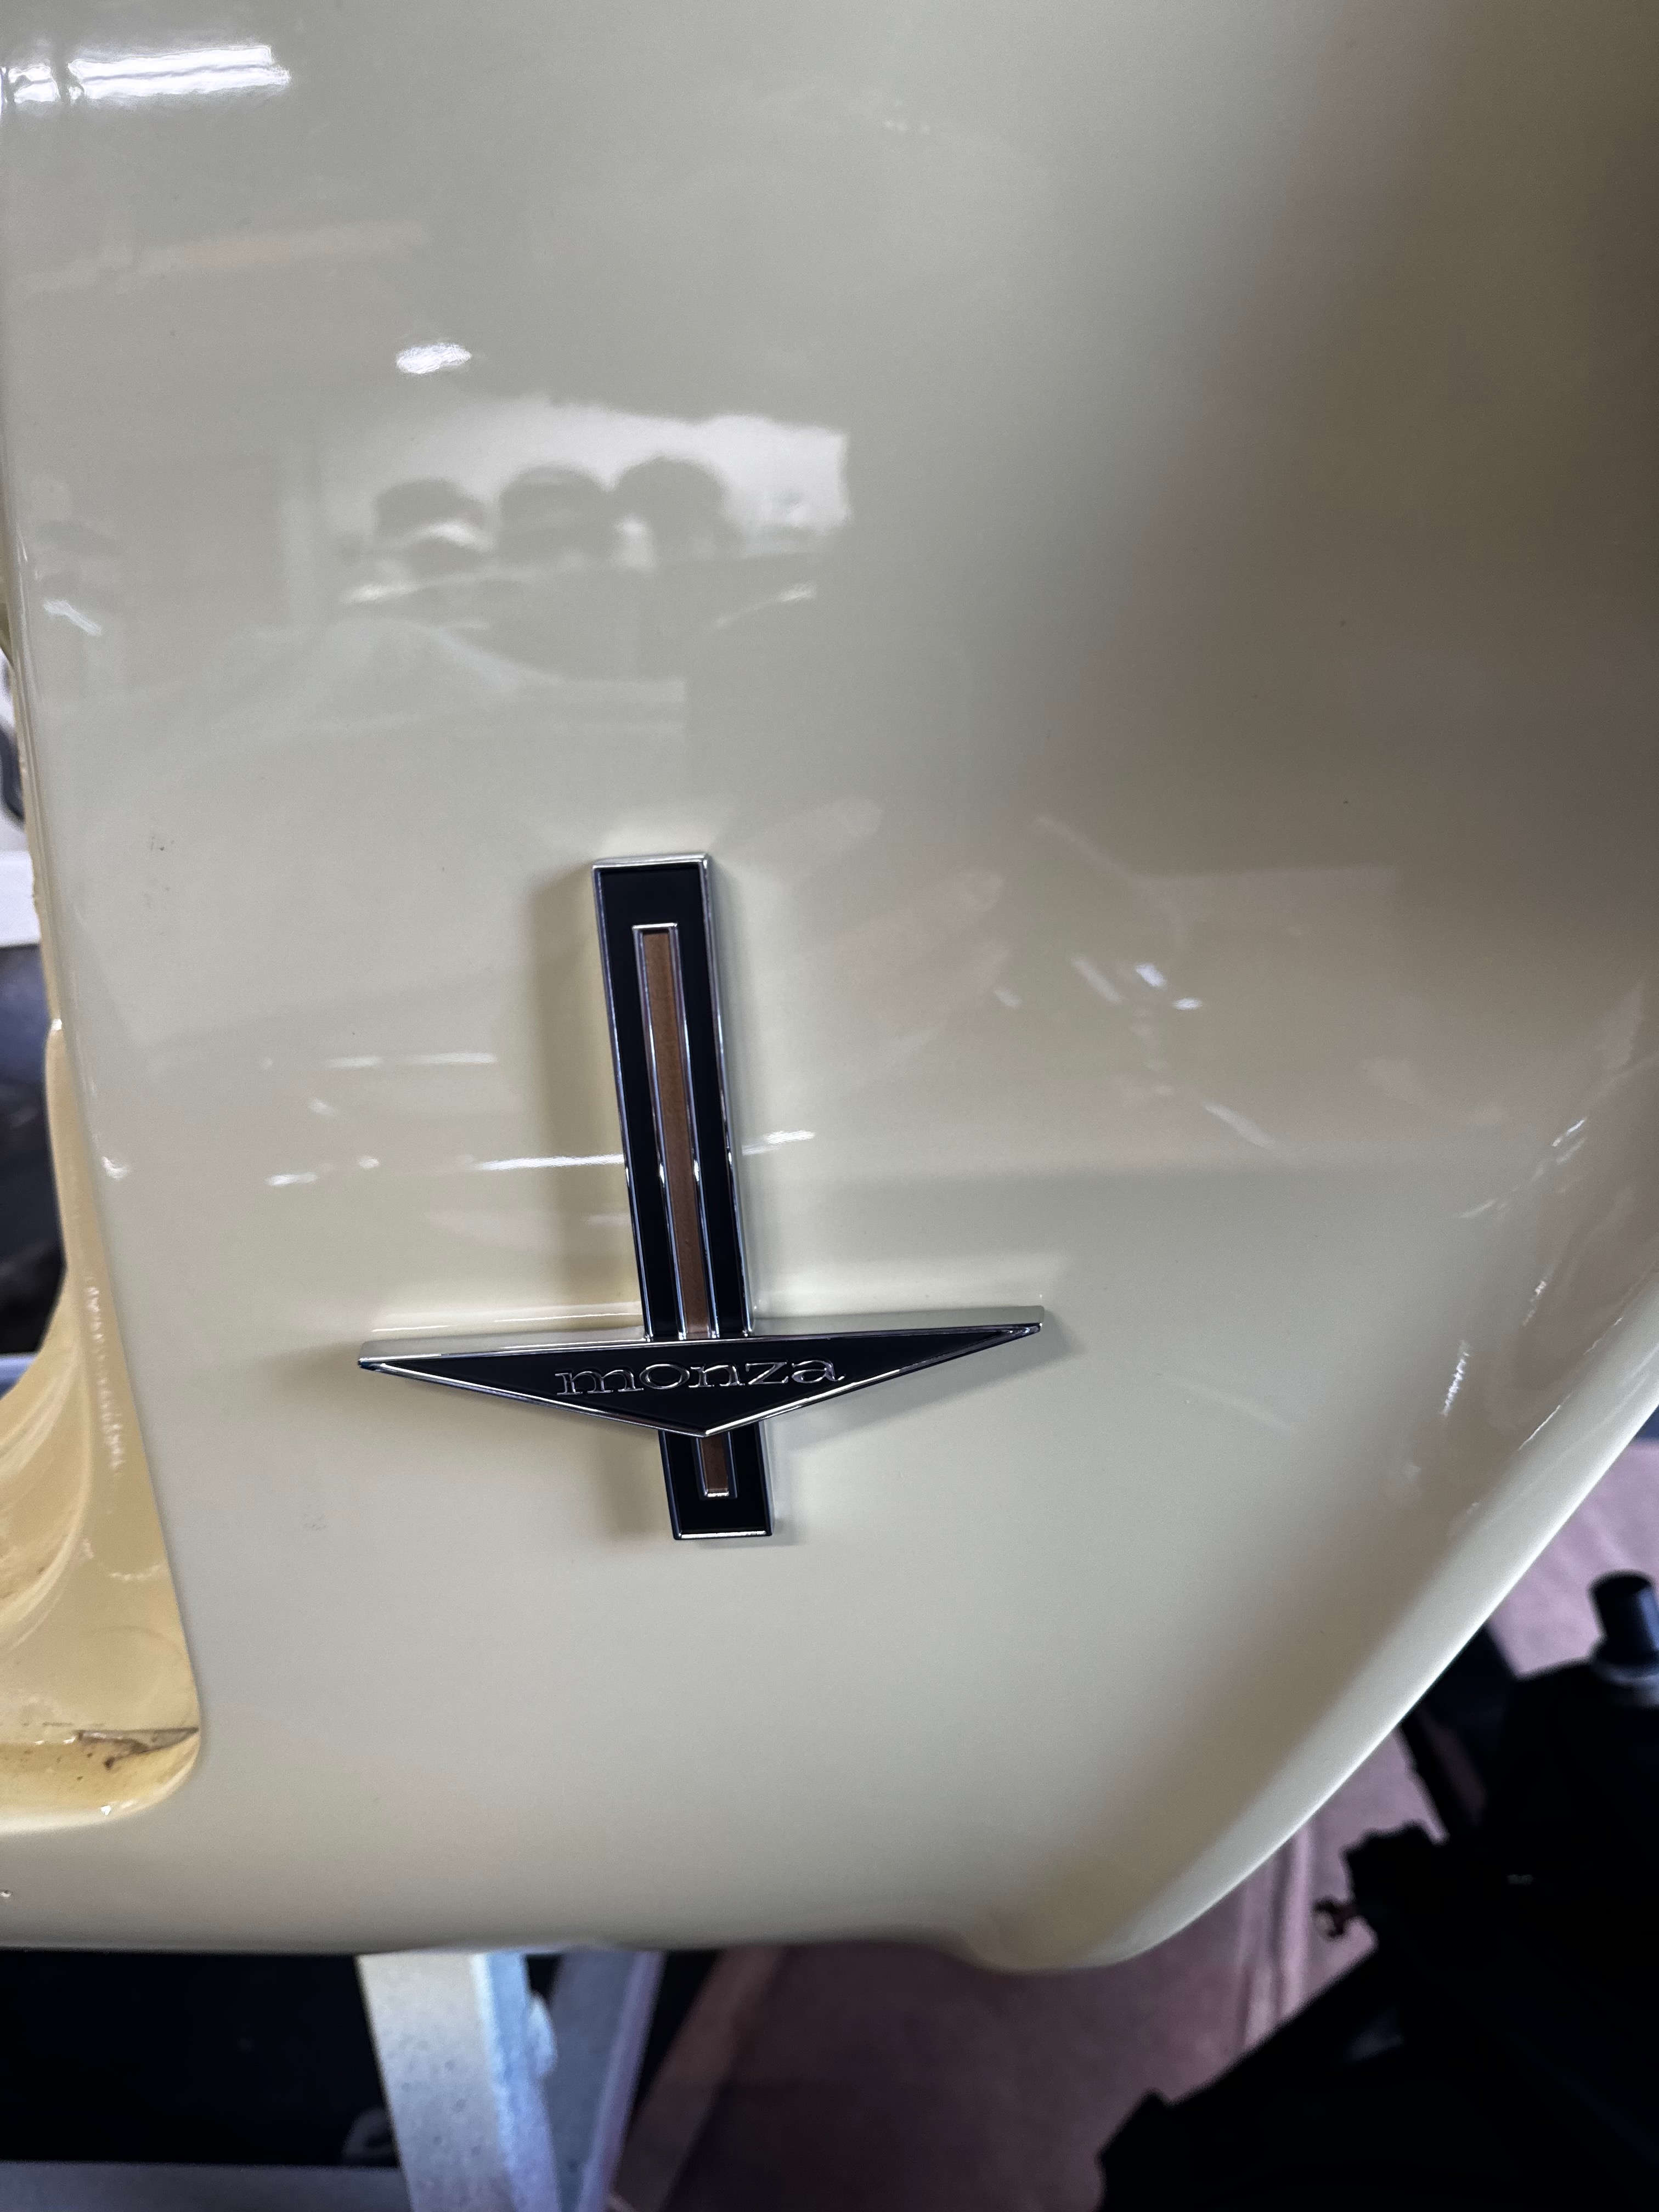
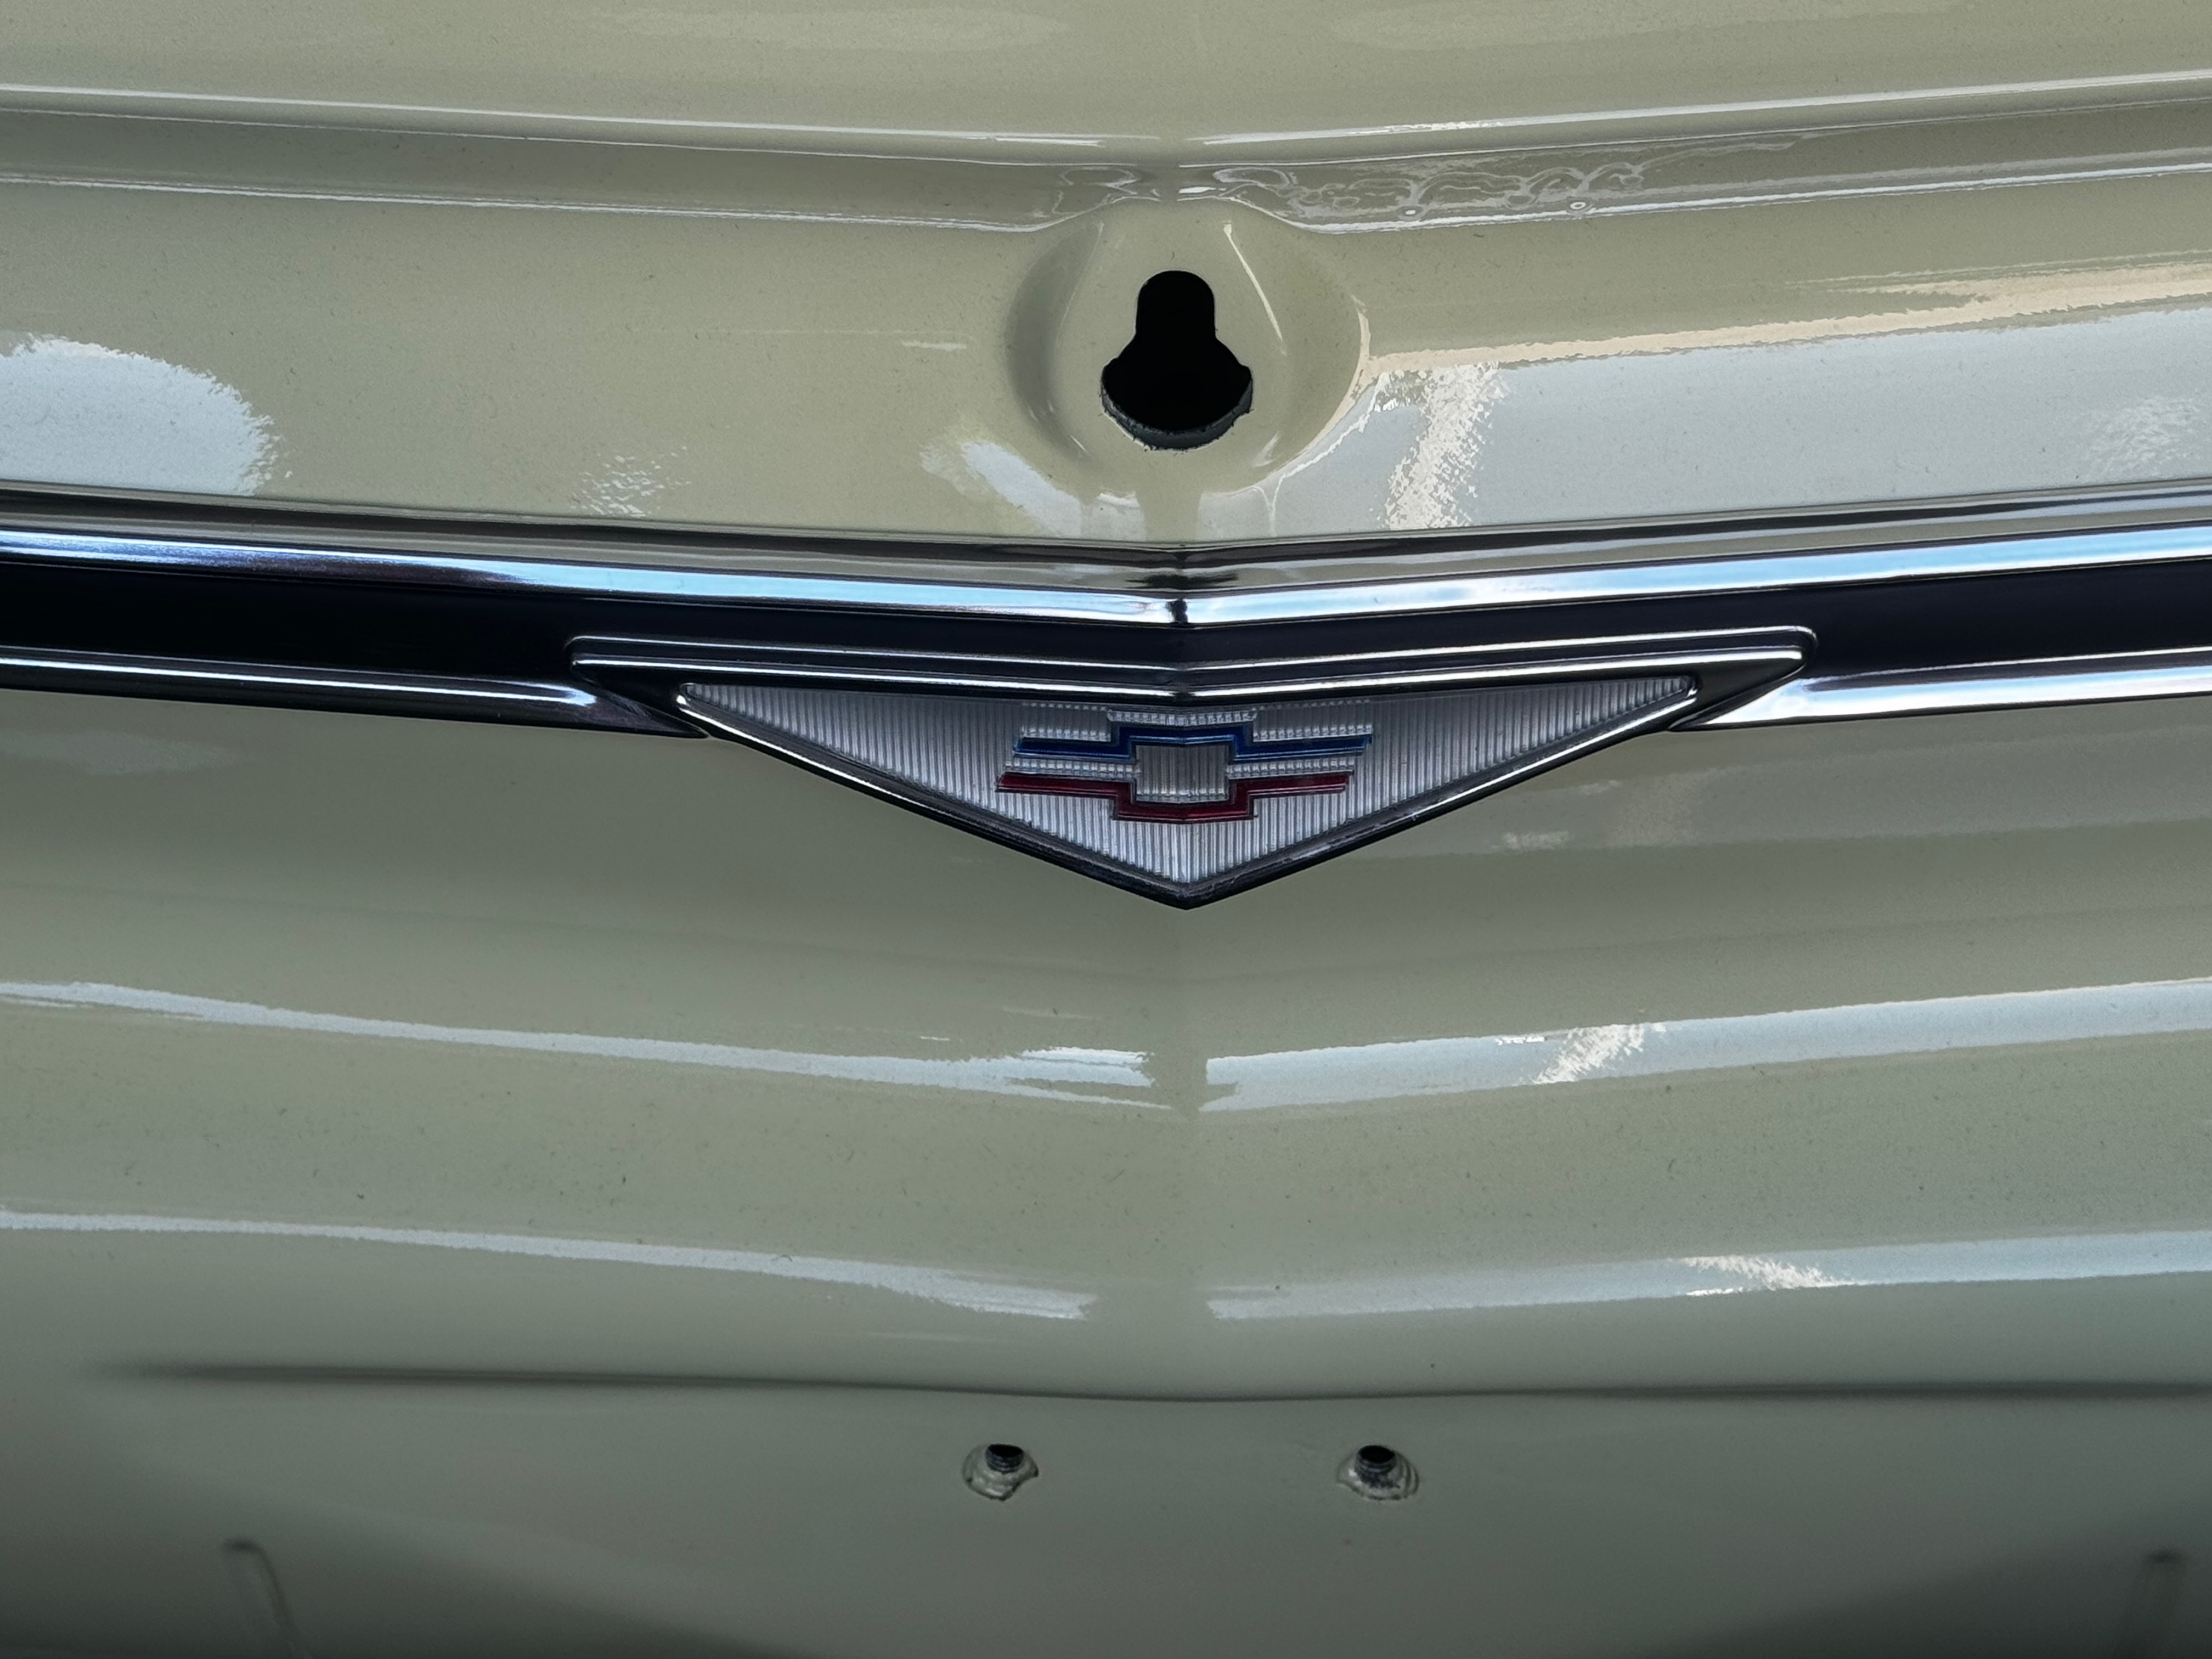
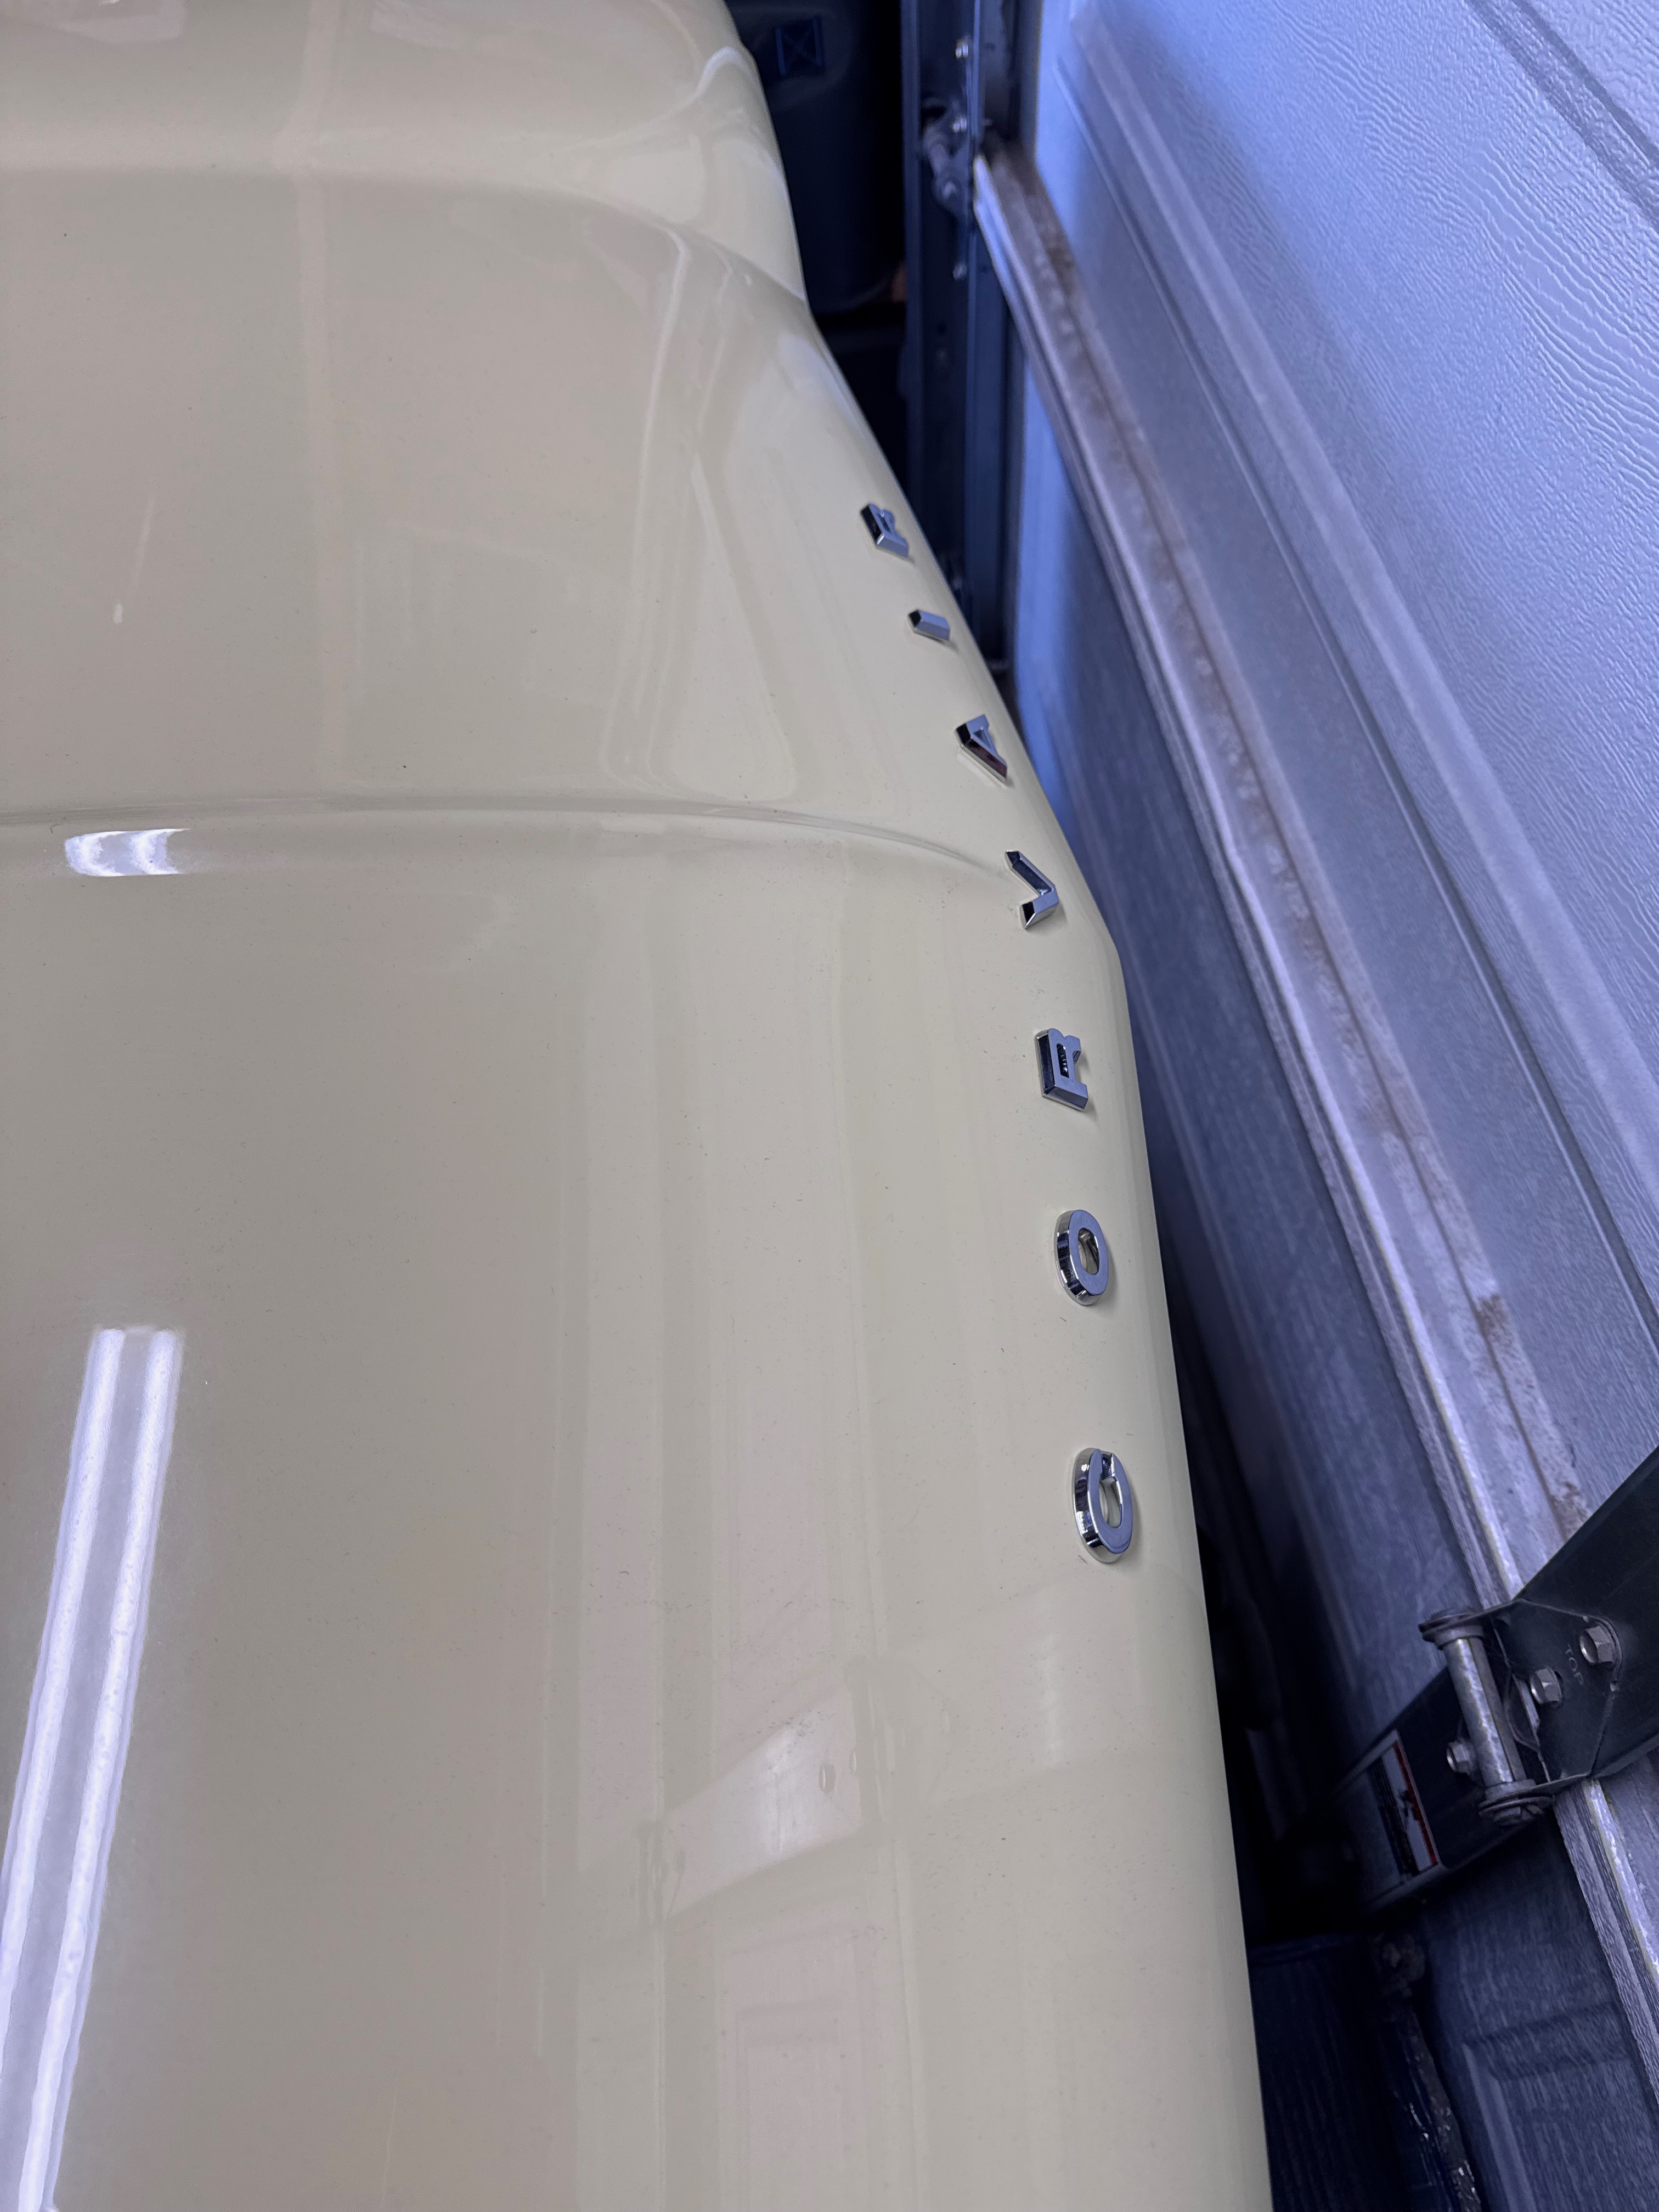
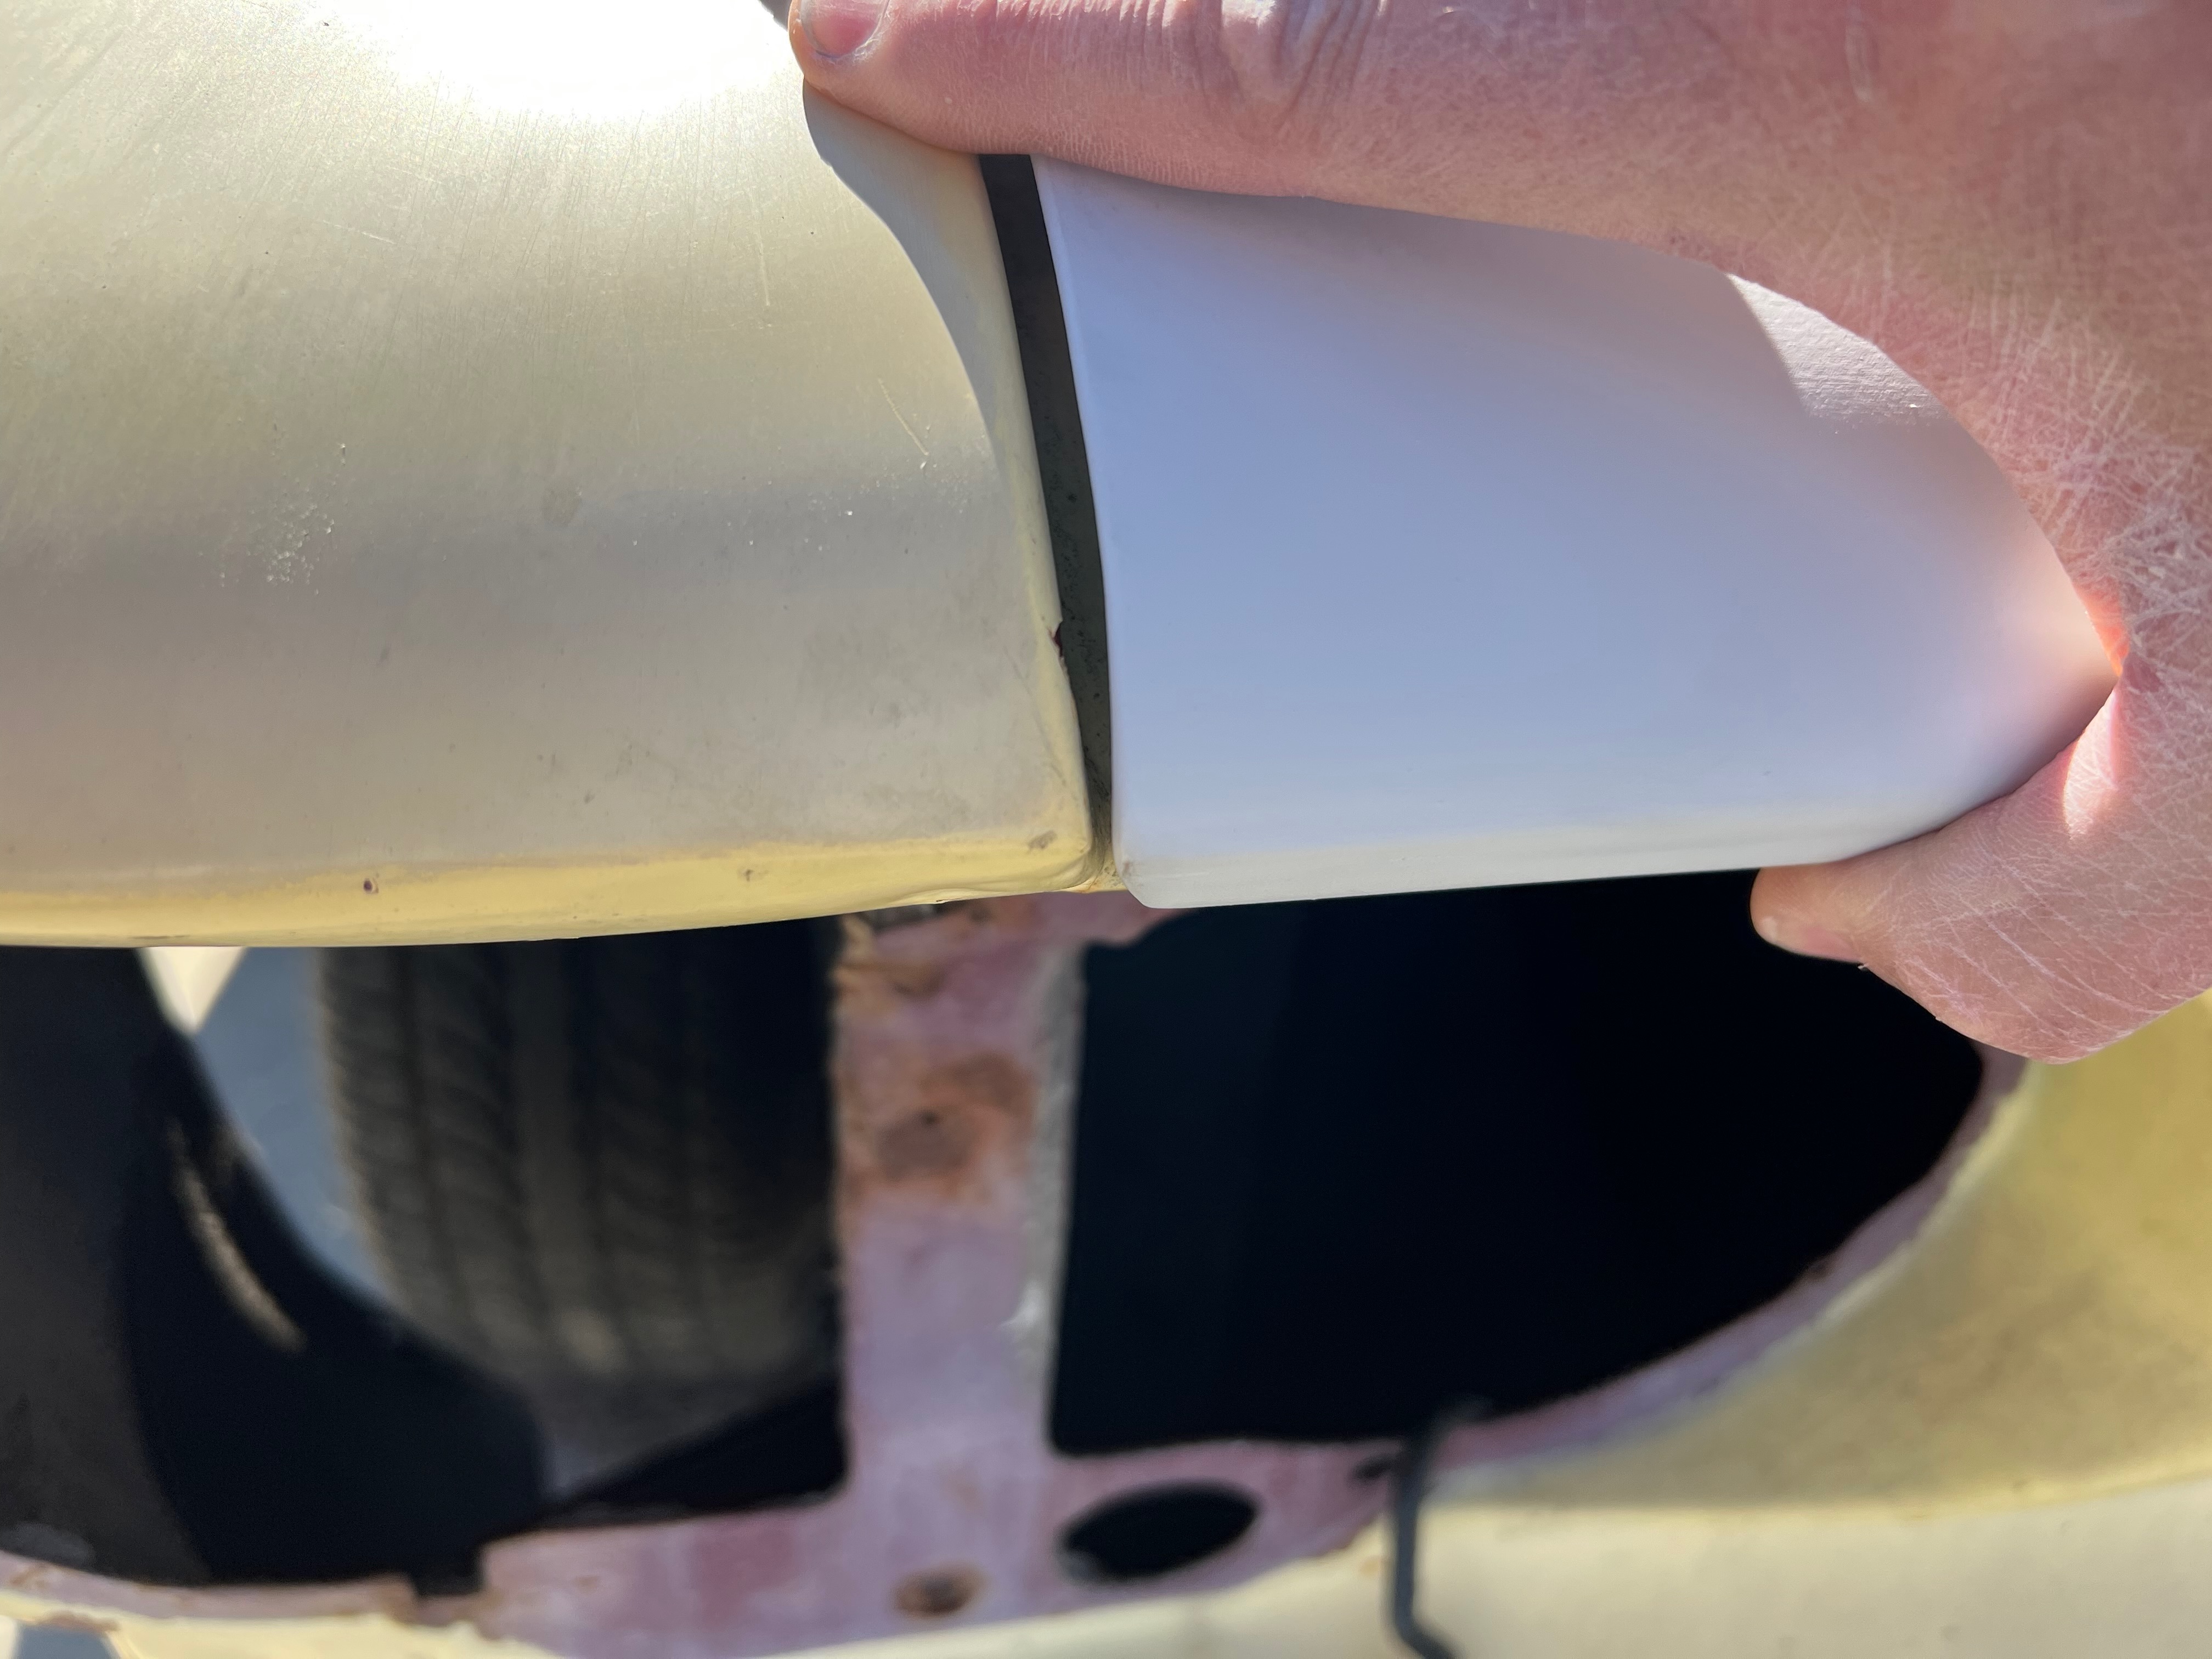
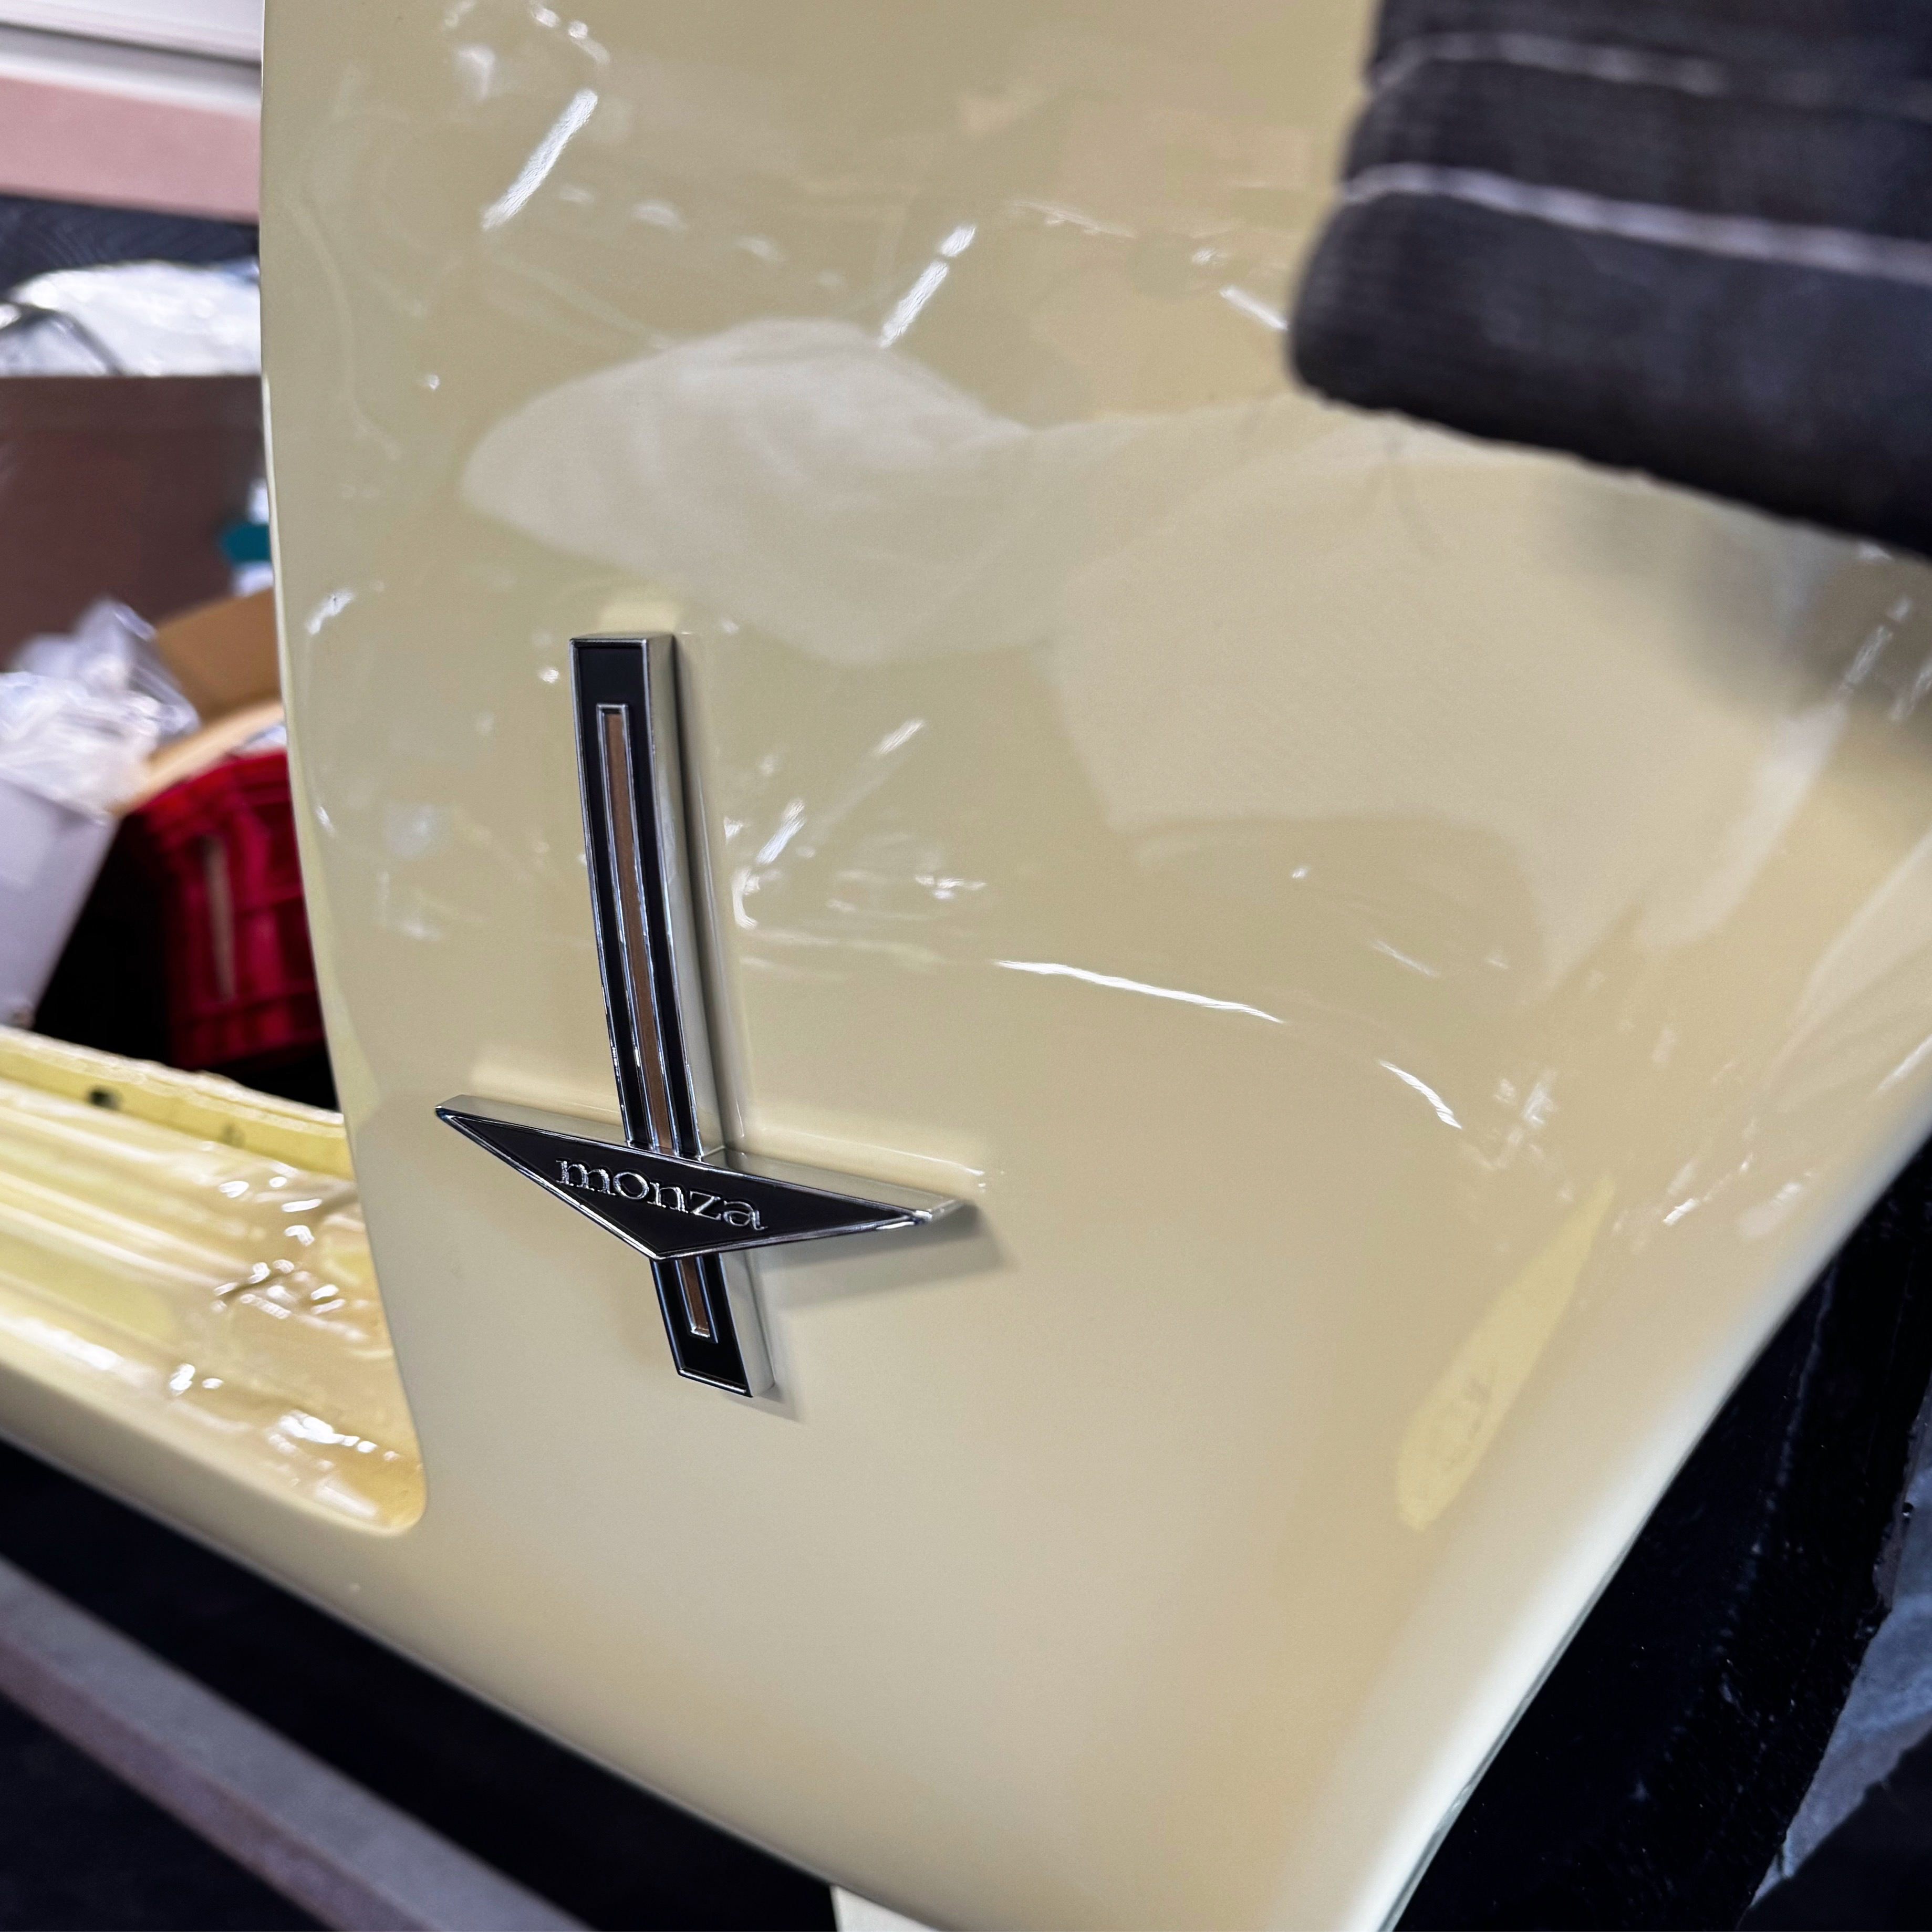
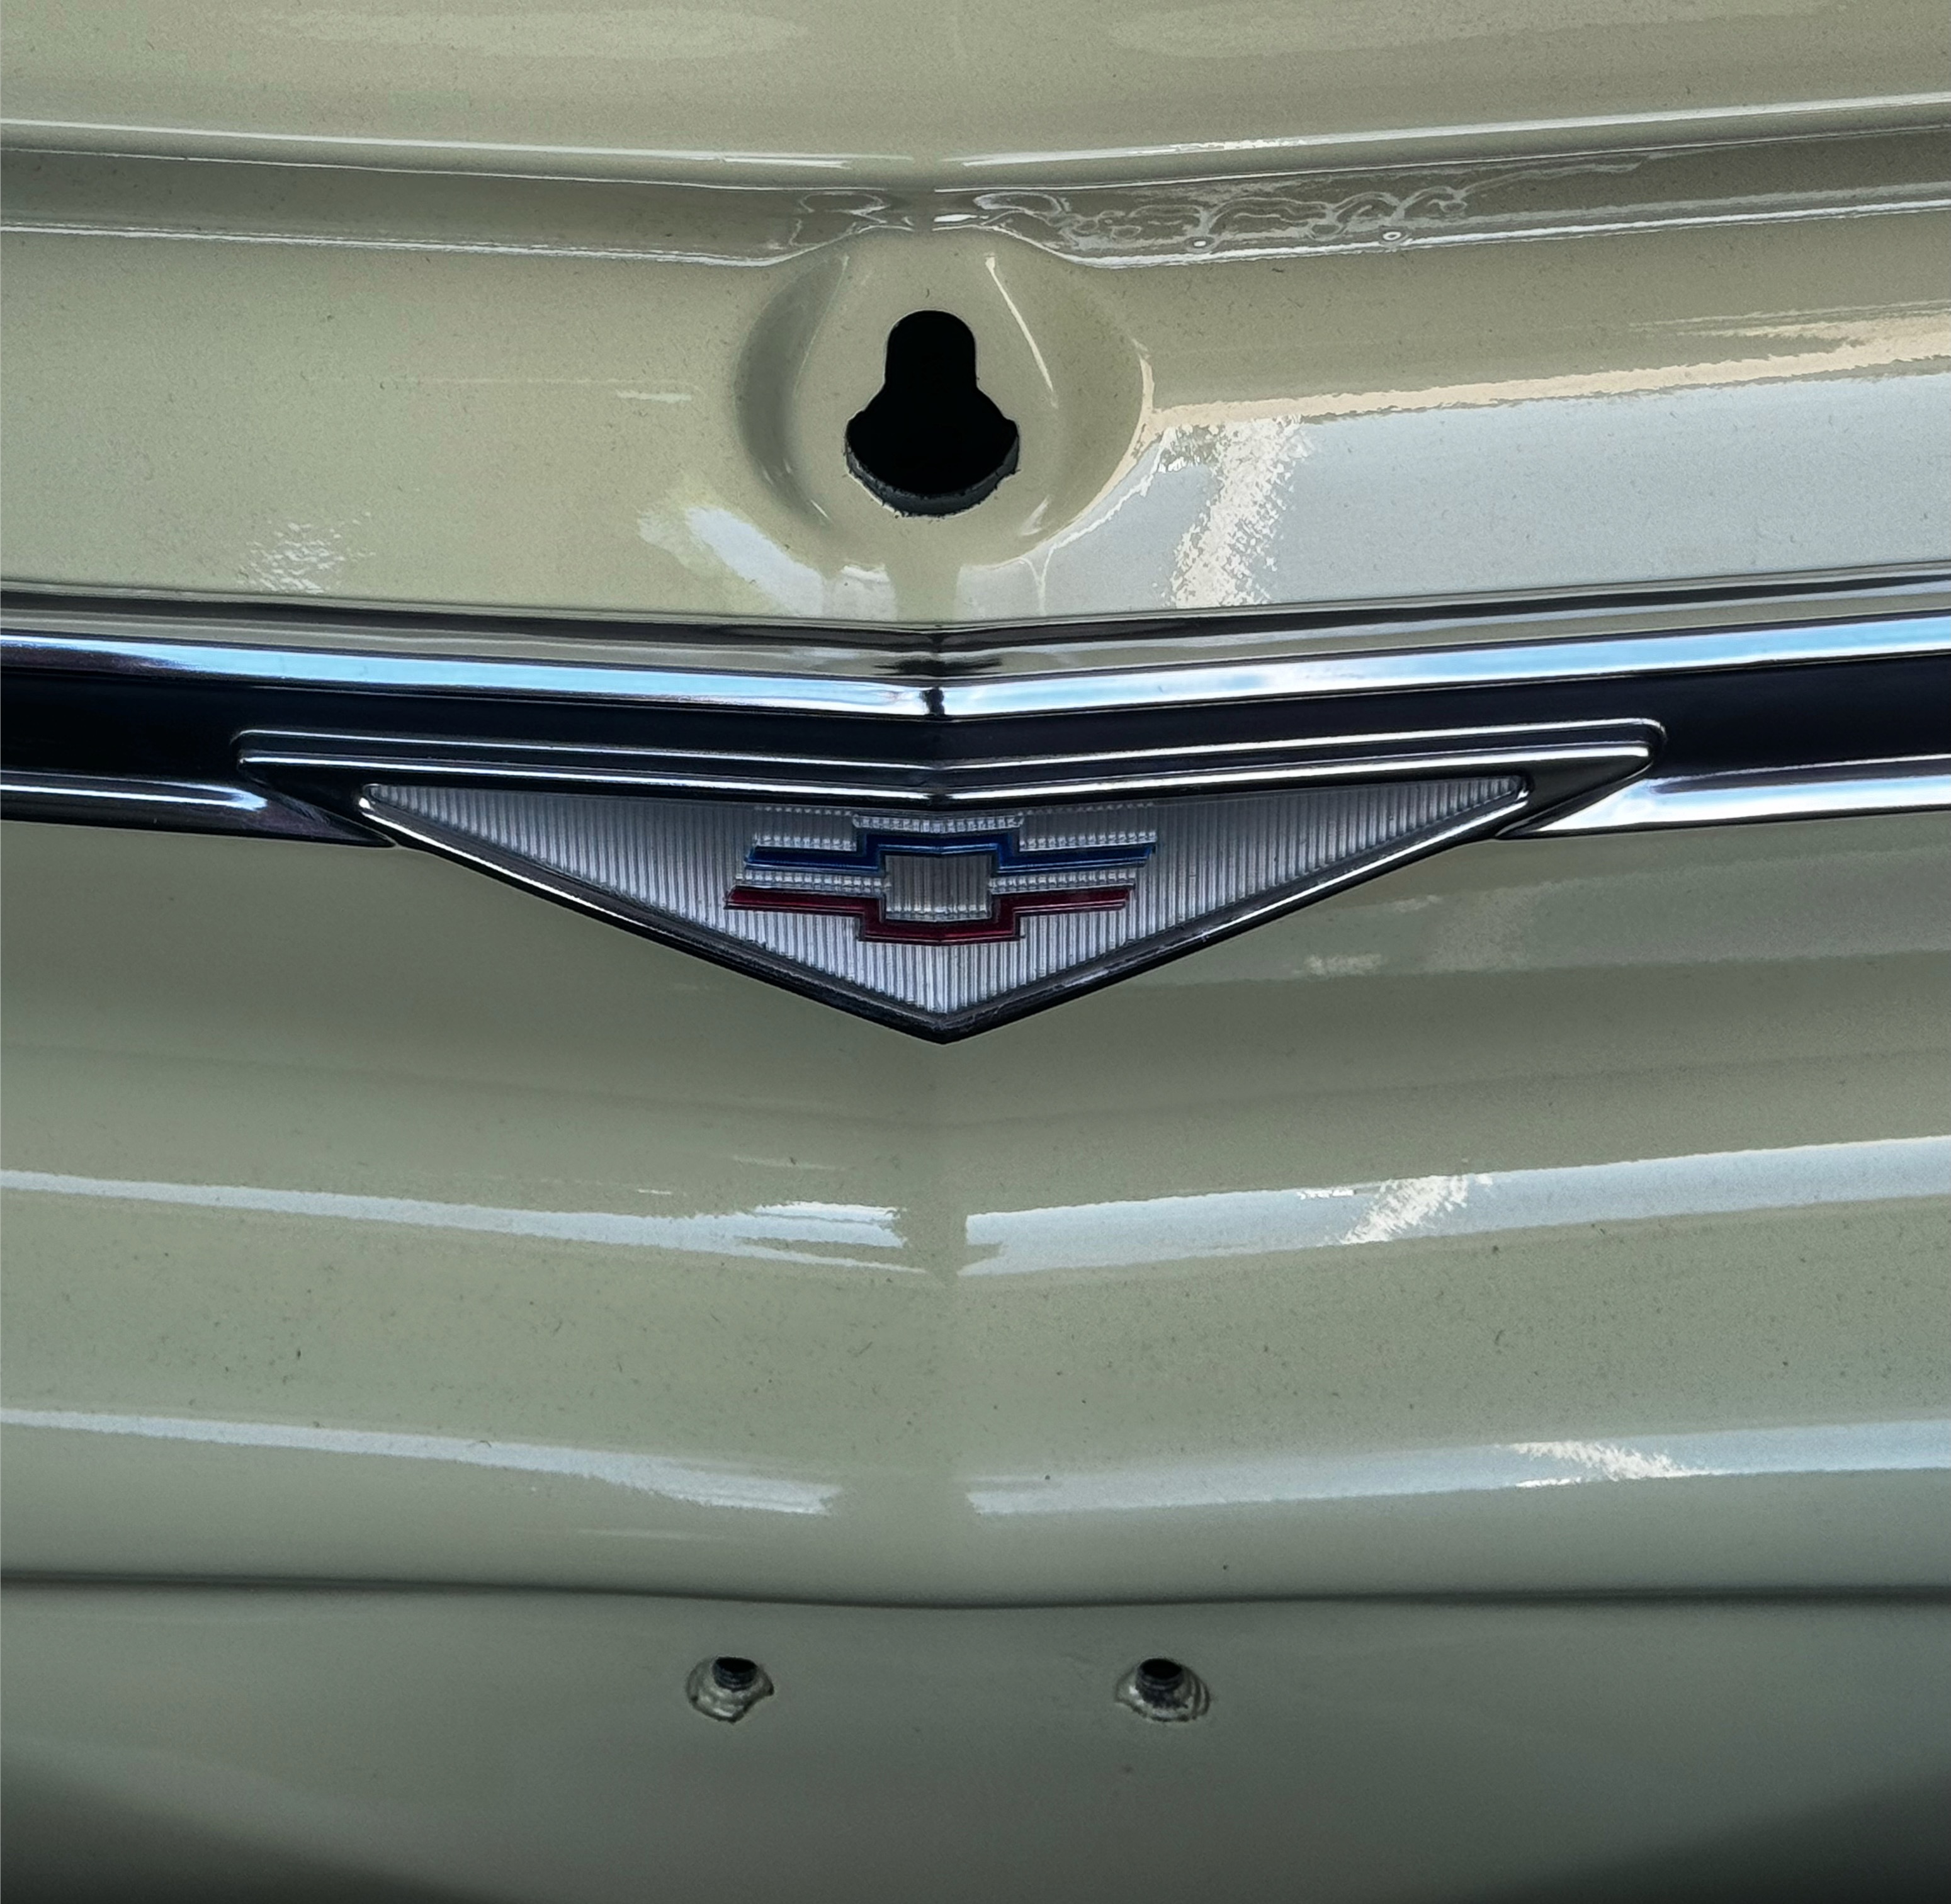
Pre-Build: Exterior Trim Details
Close-up of the exterior trim and chrome details showing tarnishing, pitting and deterioration that would need attention during the restoration process.
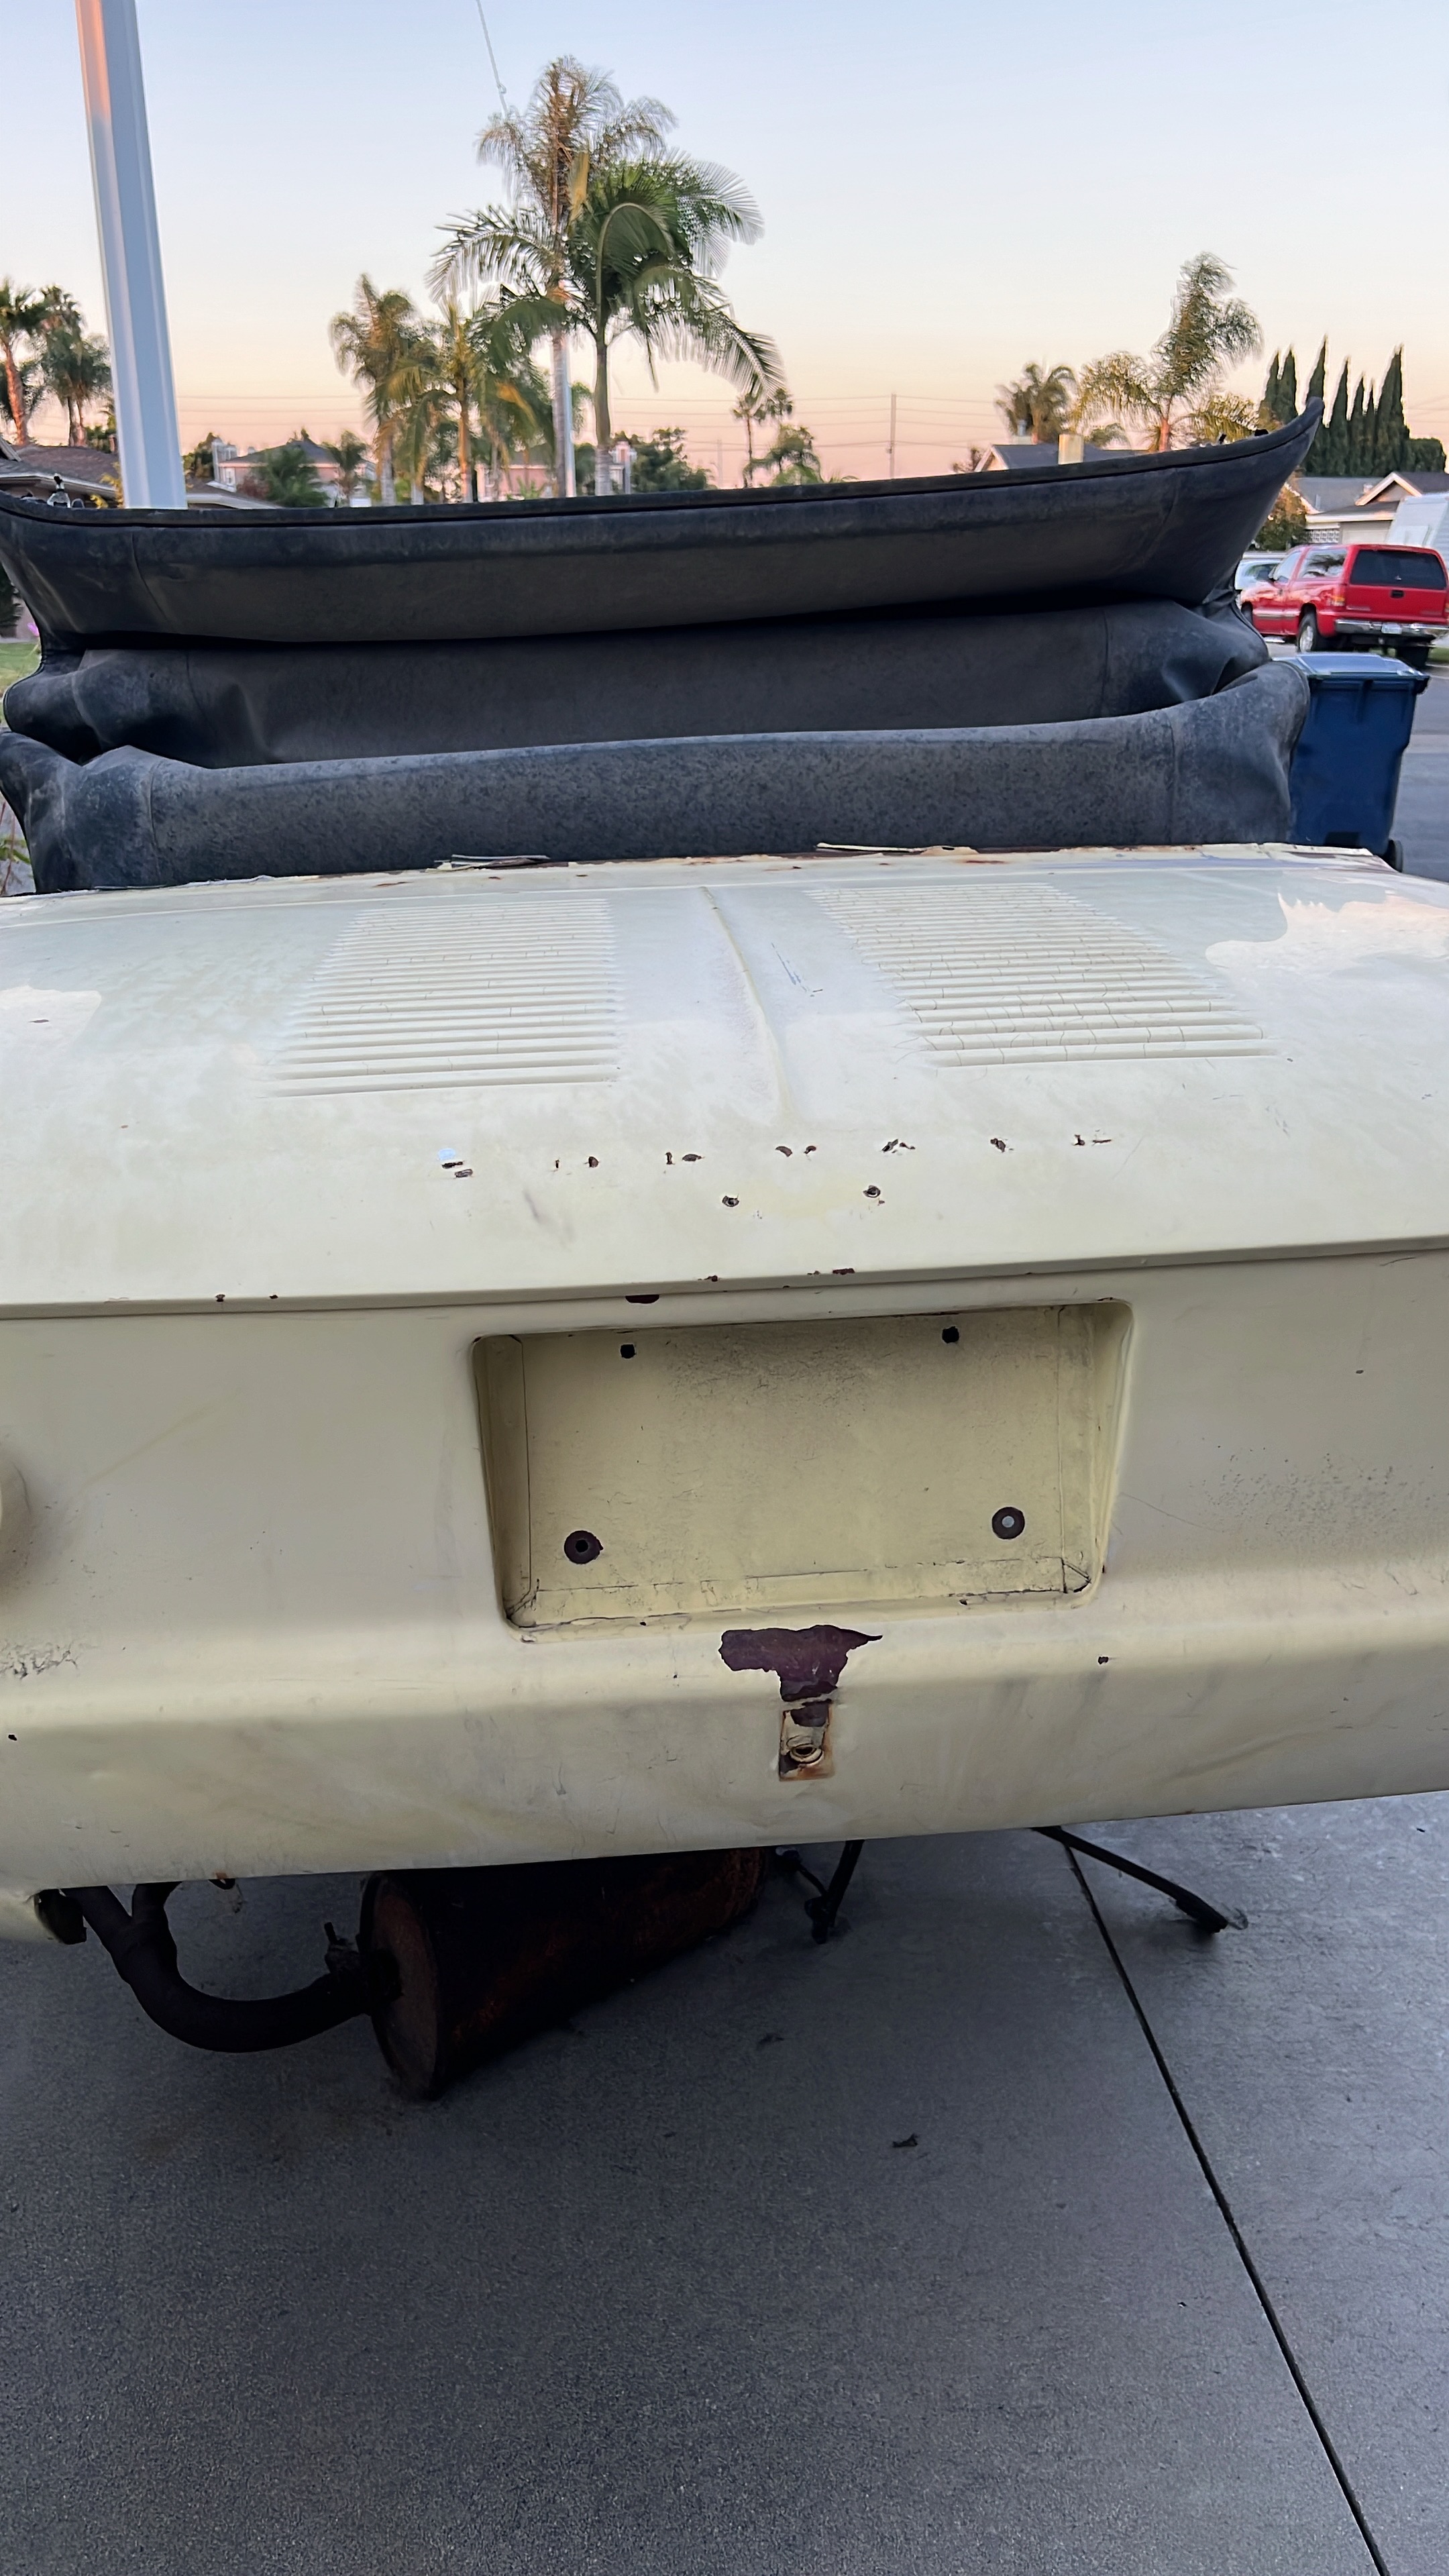
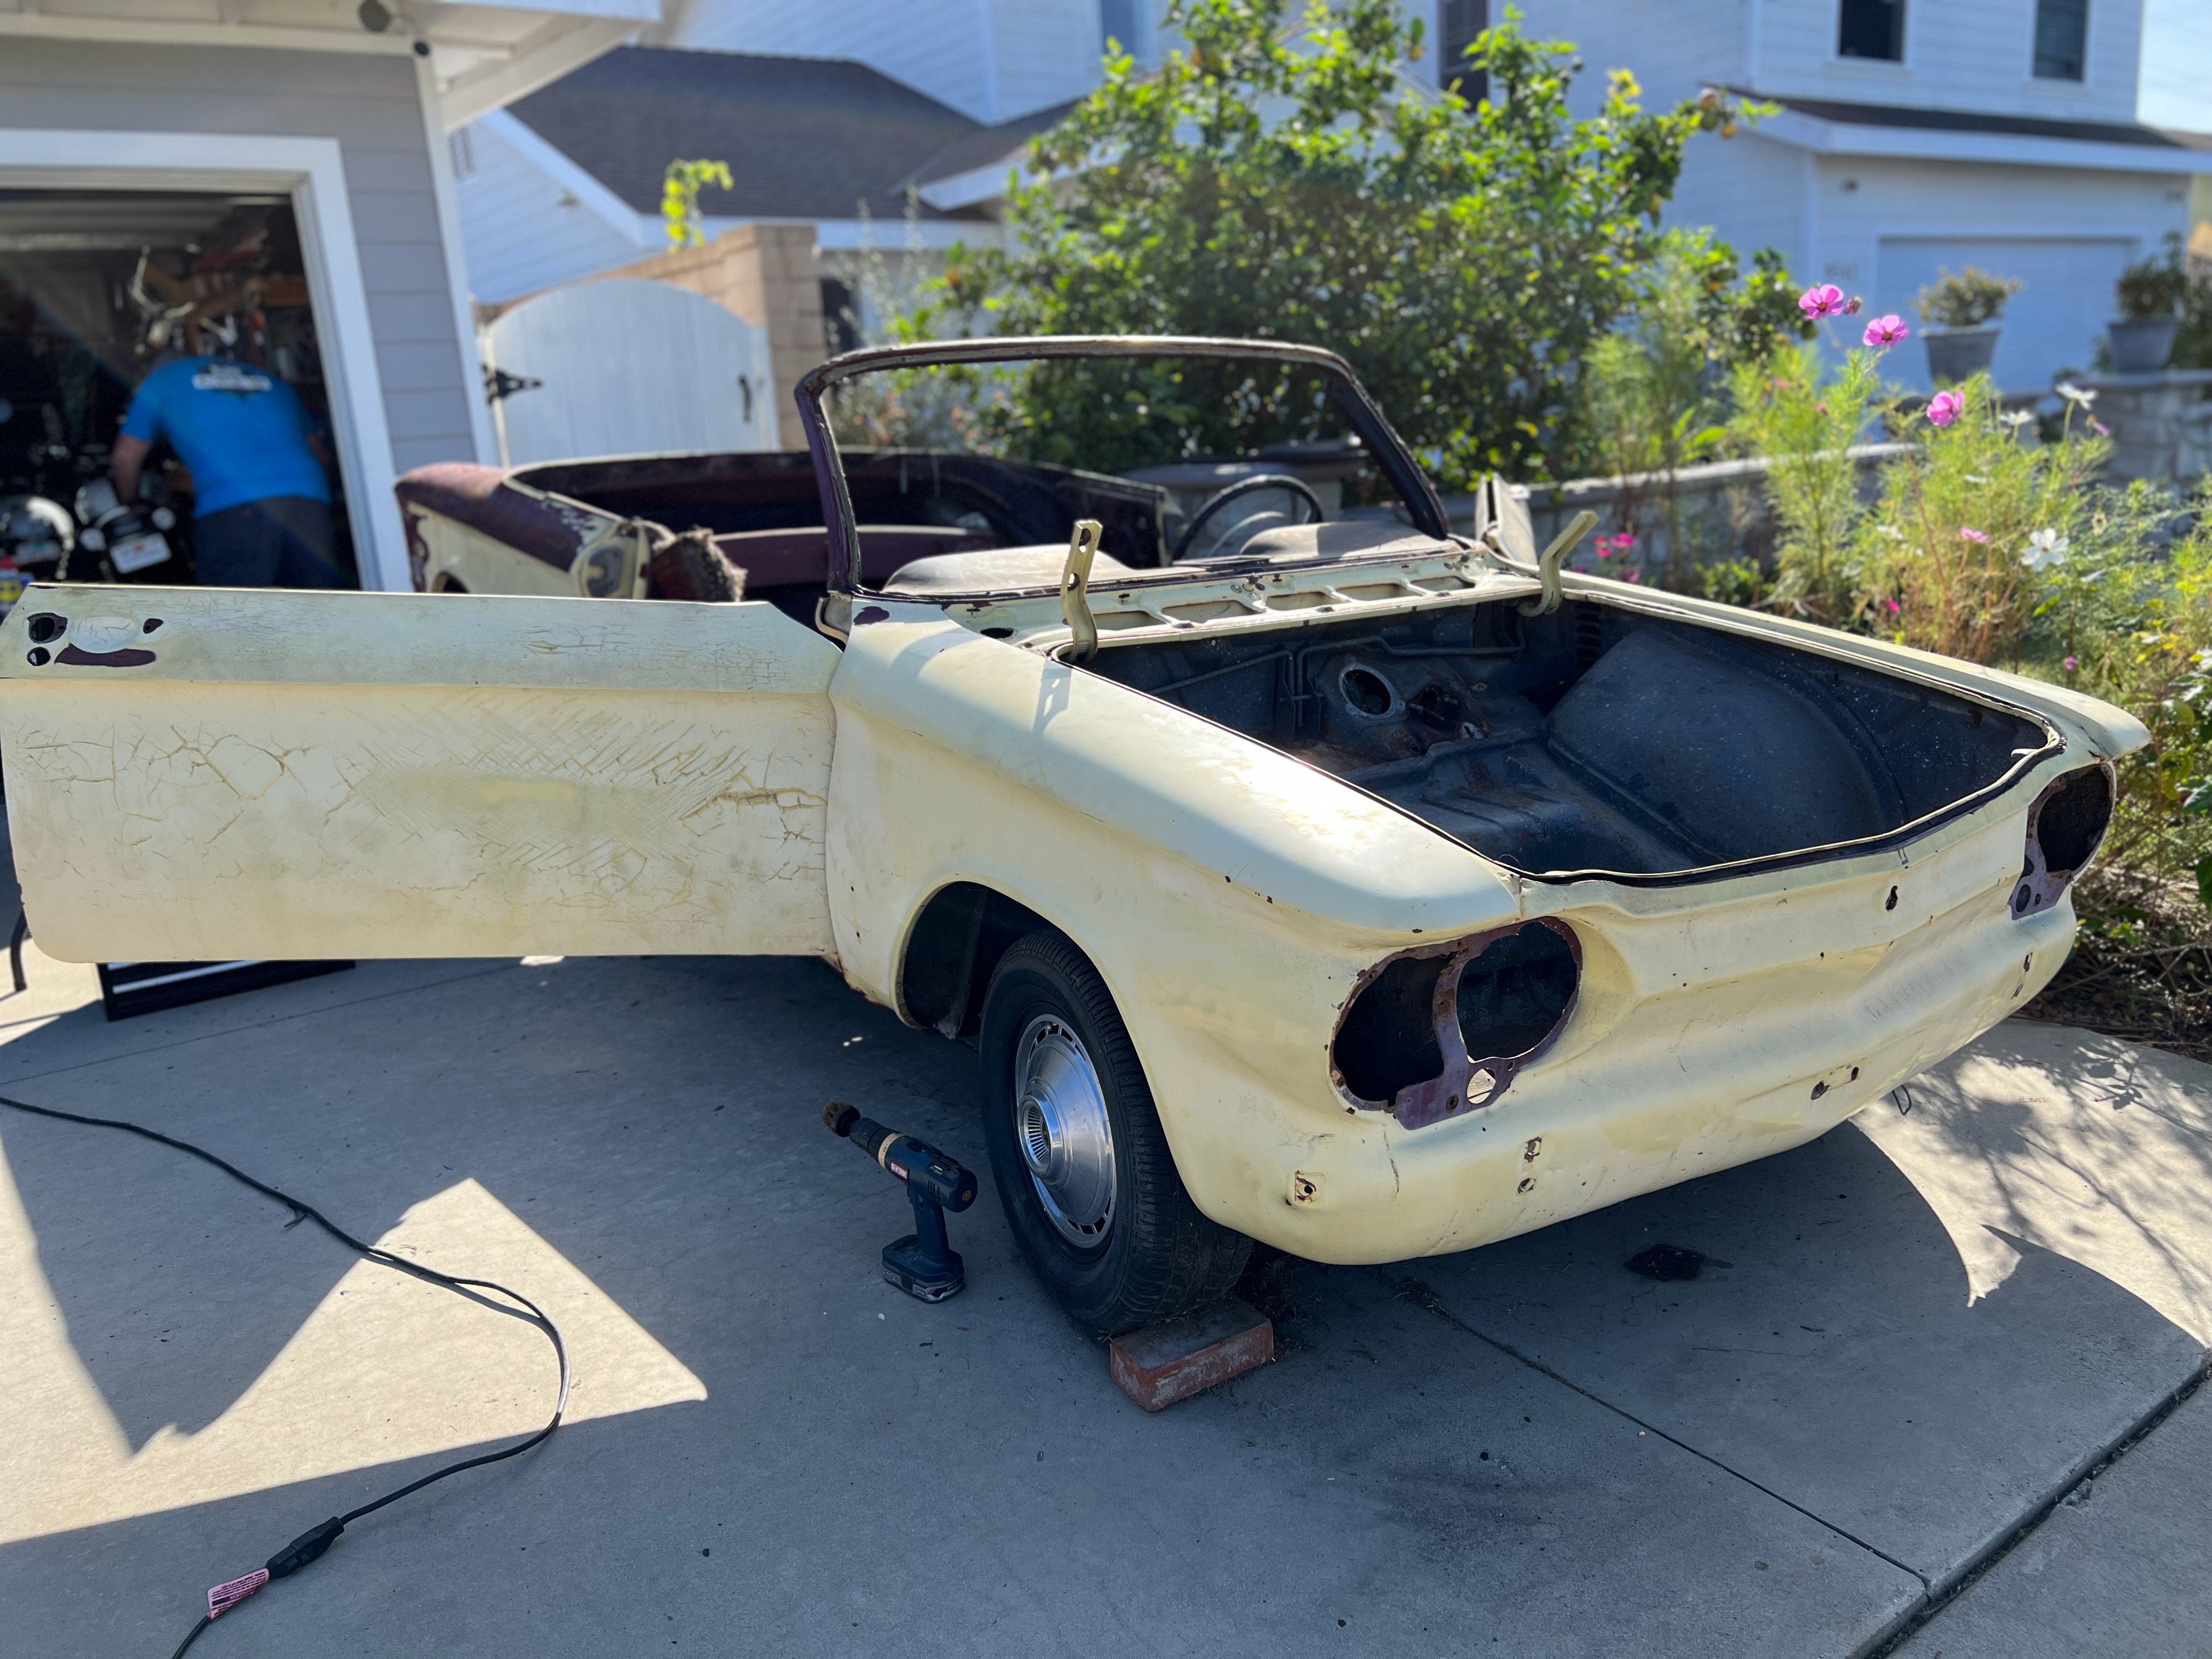
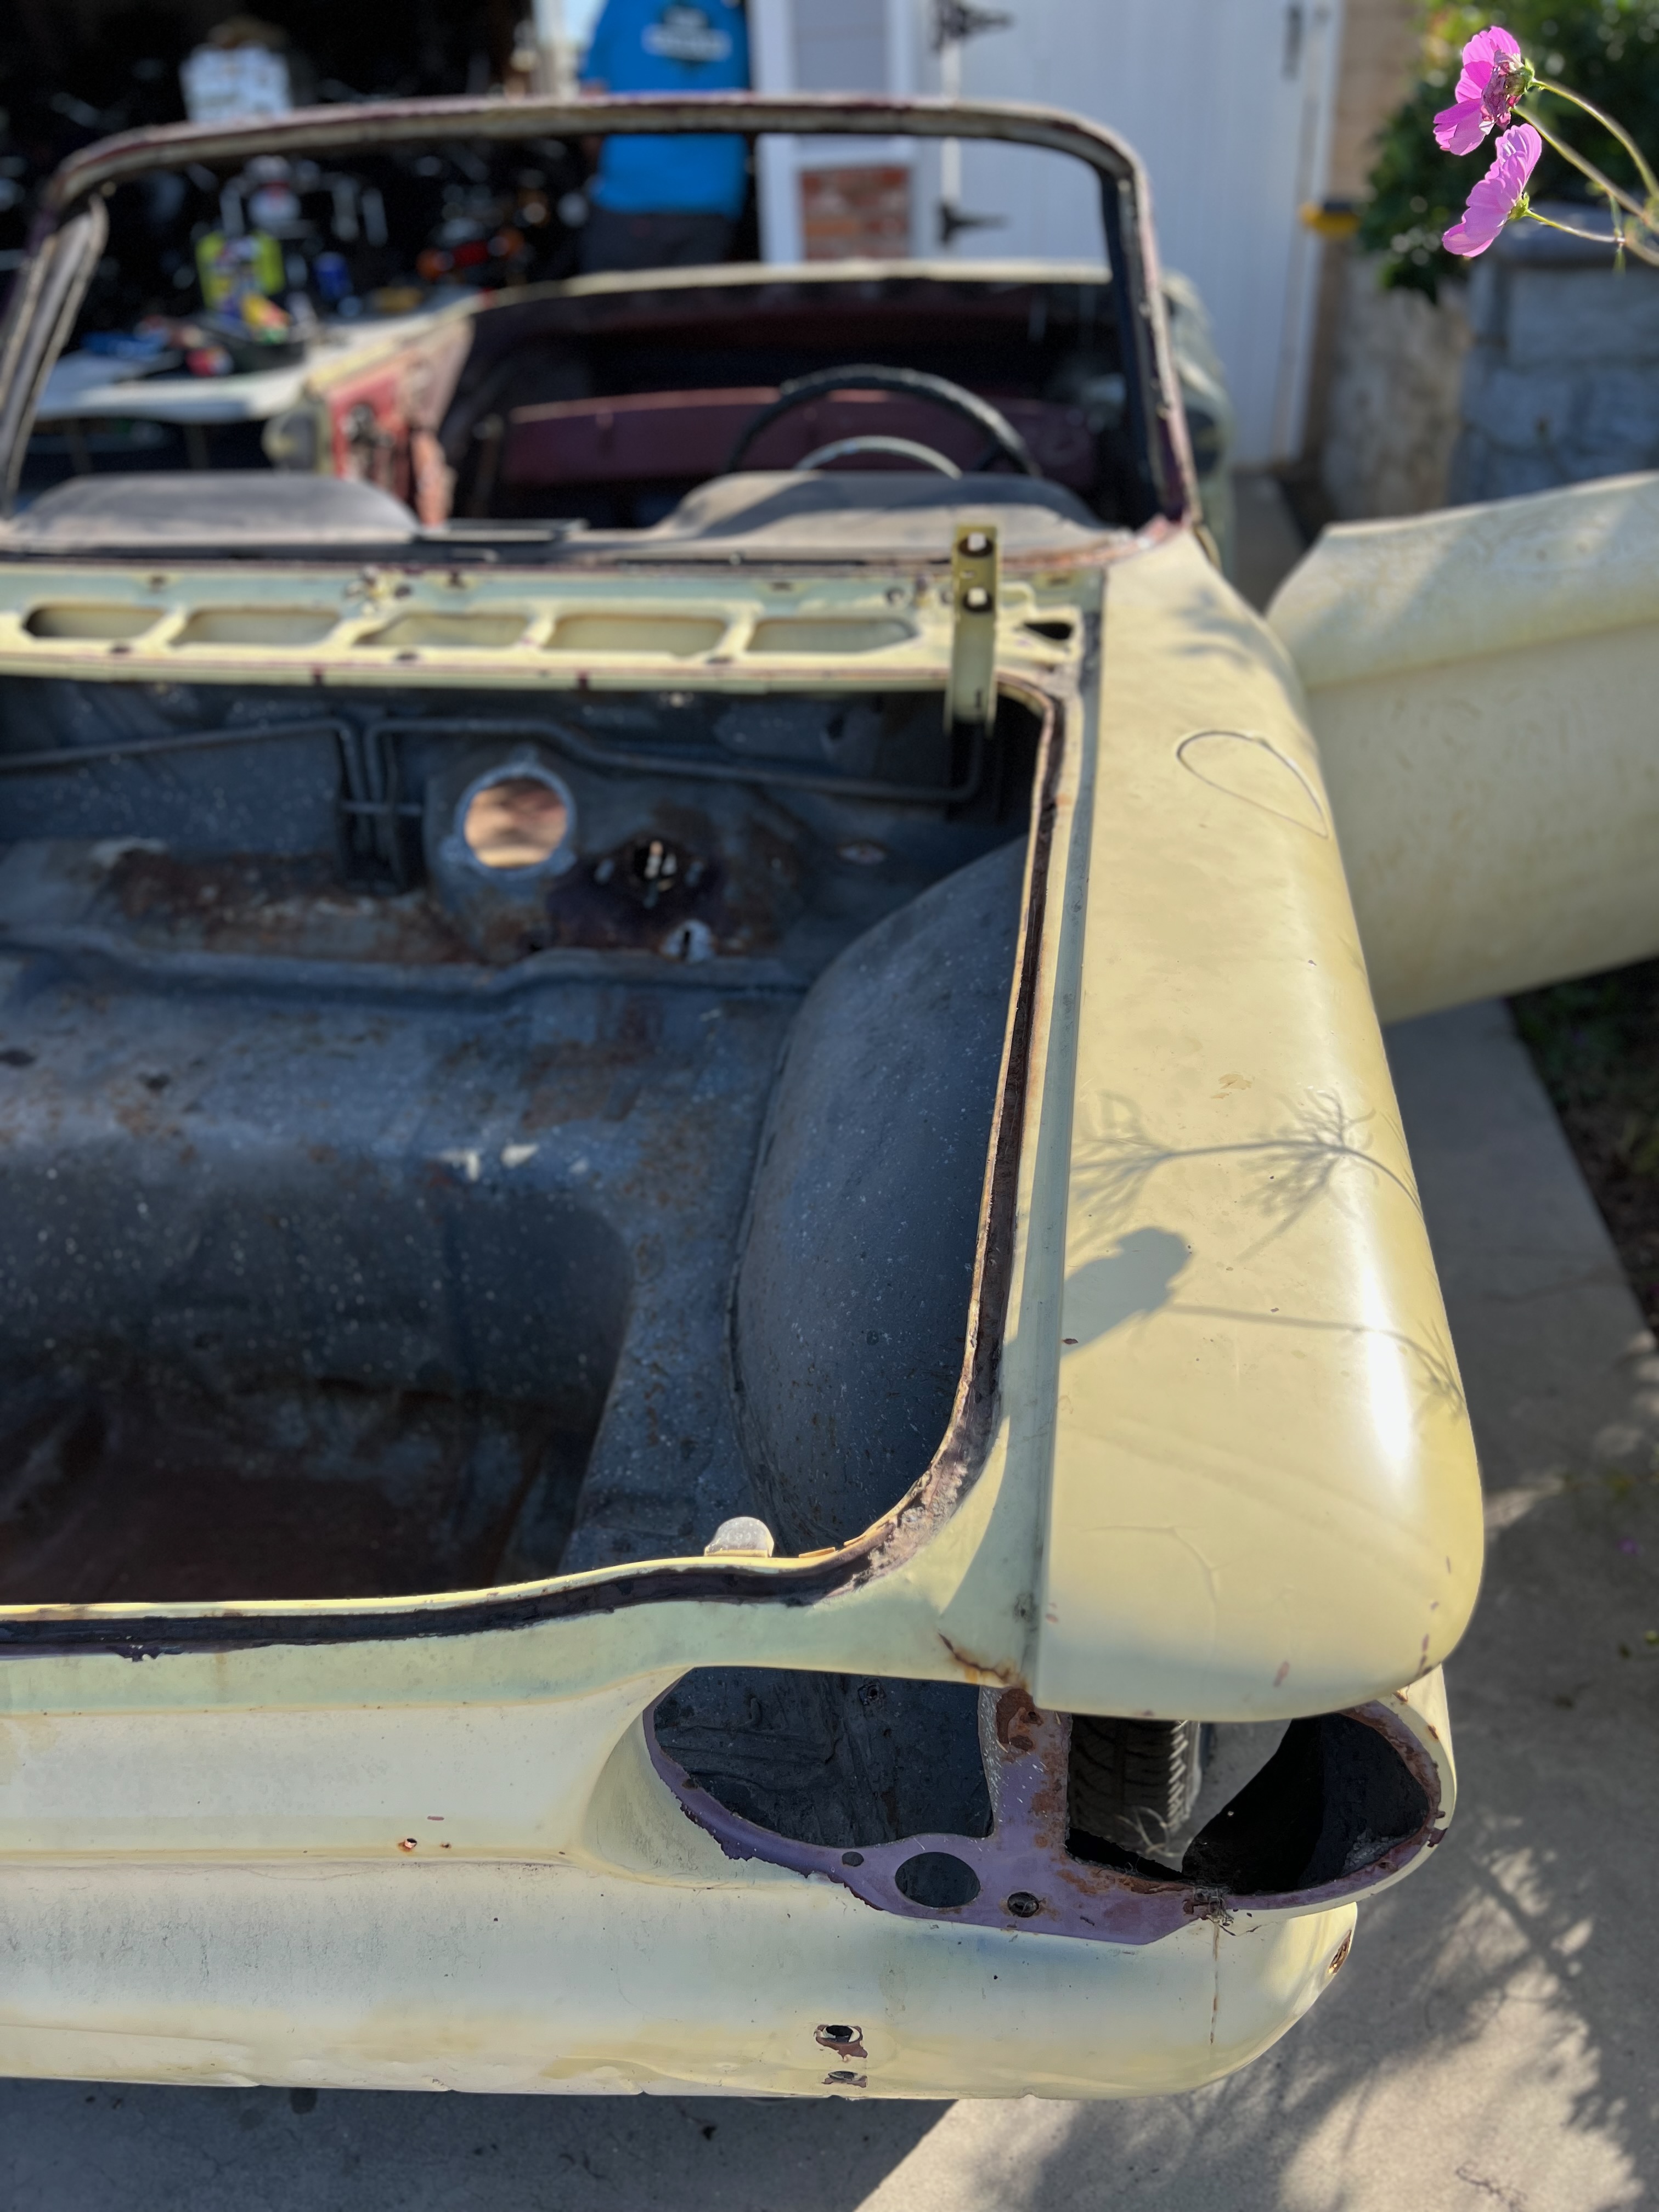
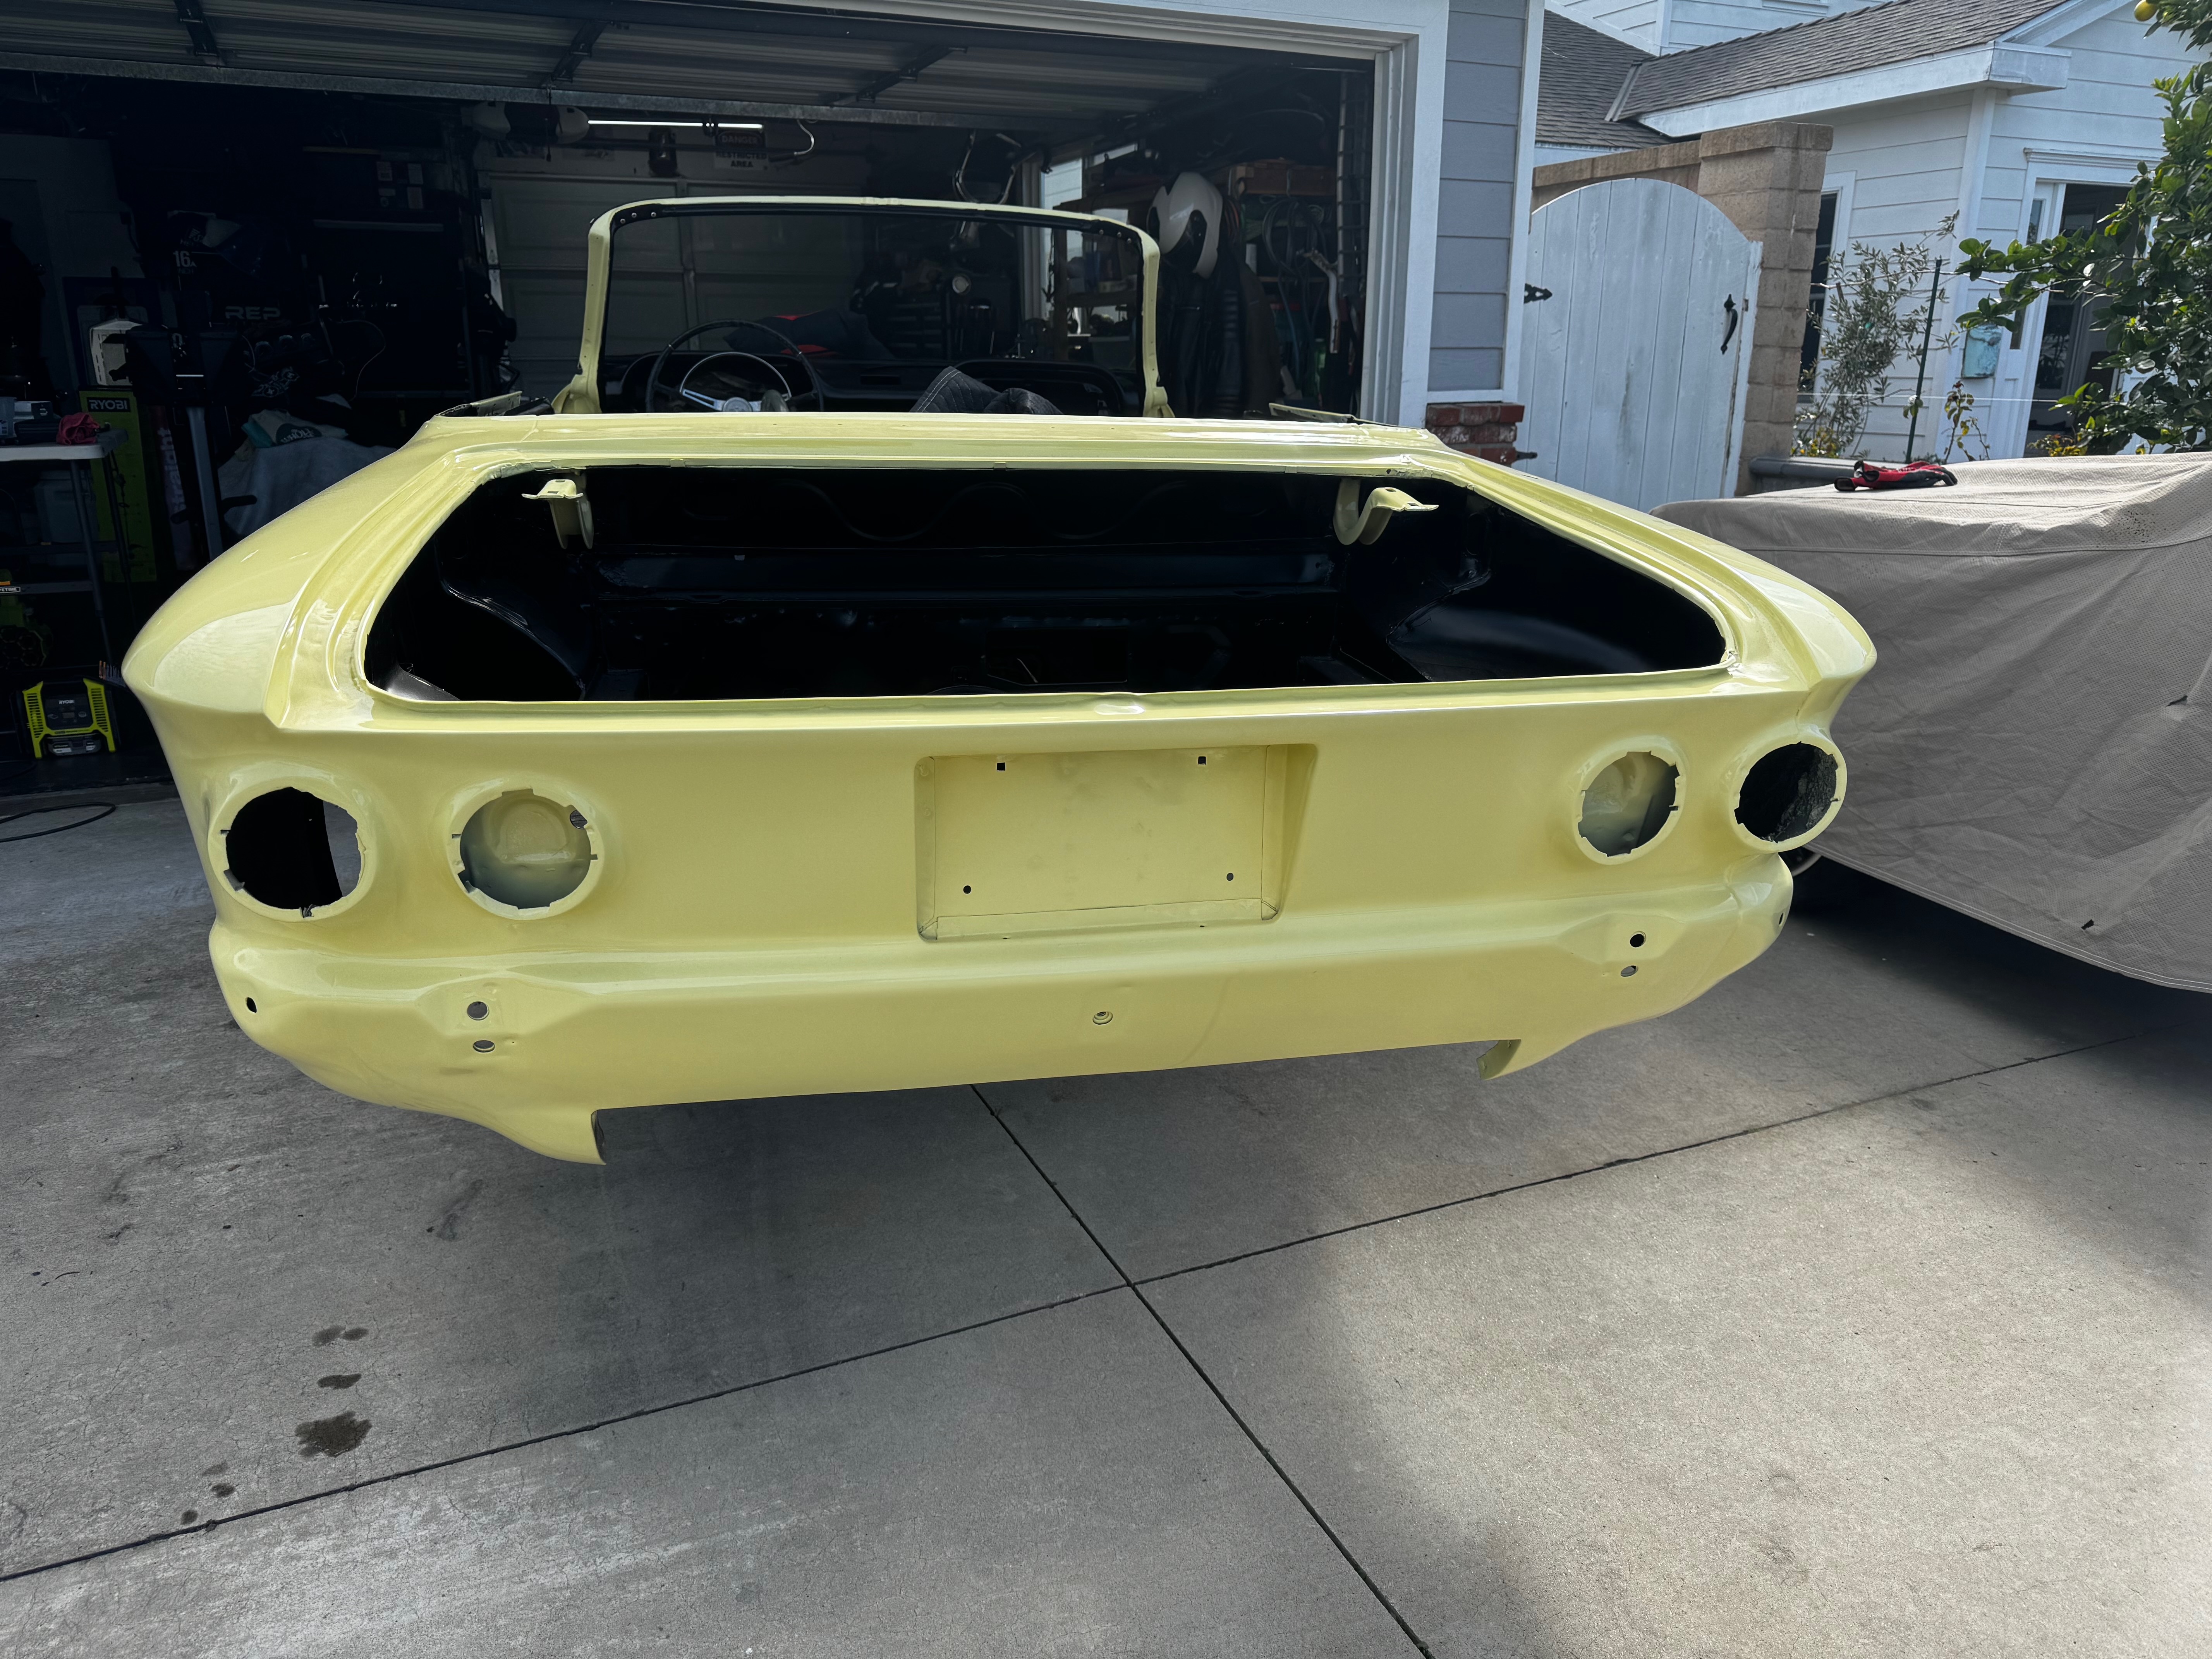
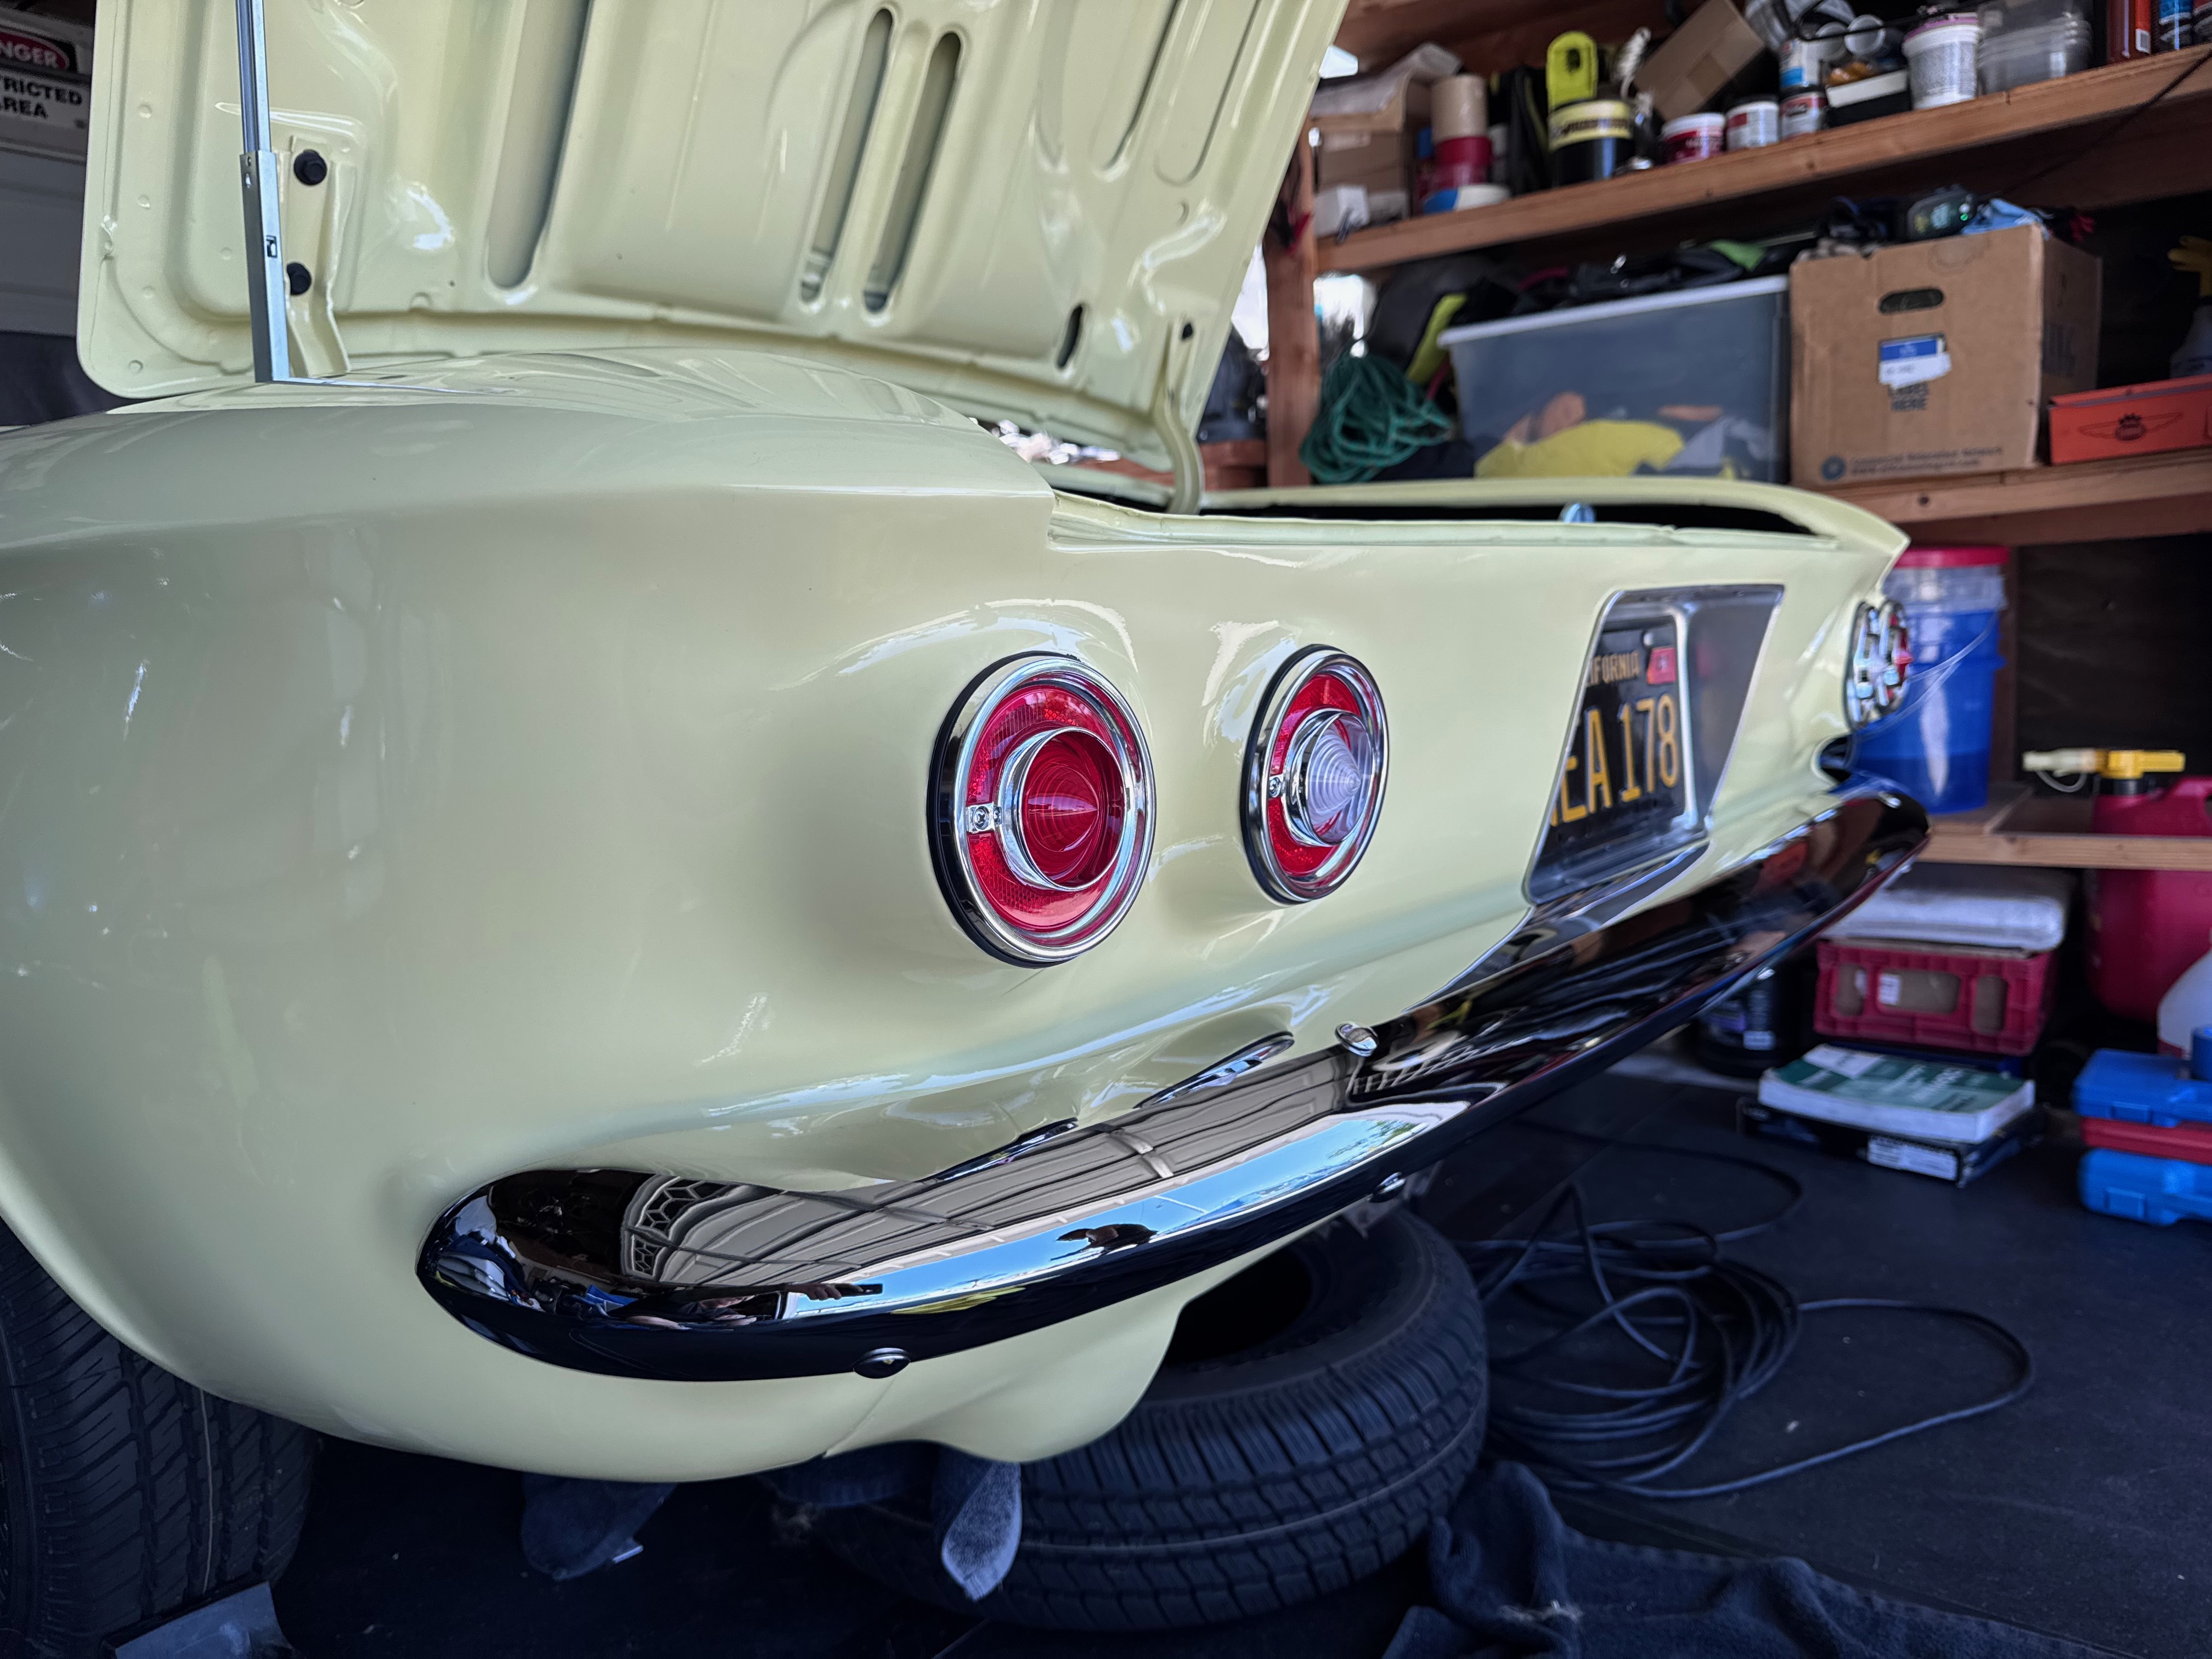
Pre-Build: Rear View
The rear of the Corvair before restoration, showing the distinctive rear-engine design and relatively straight body panels despite years of neglect.
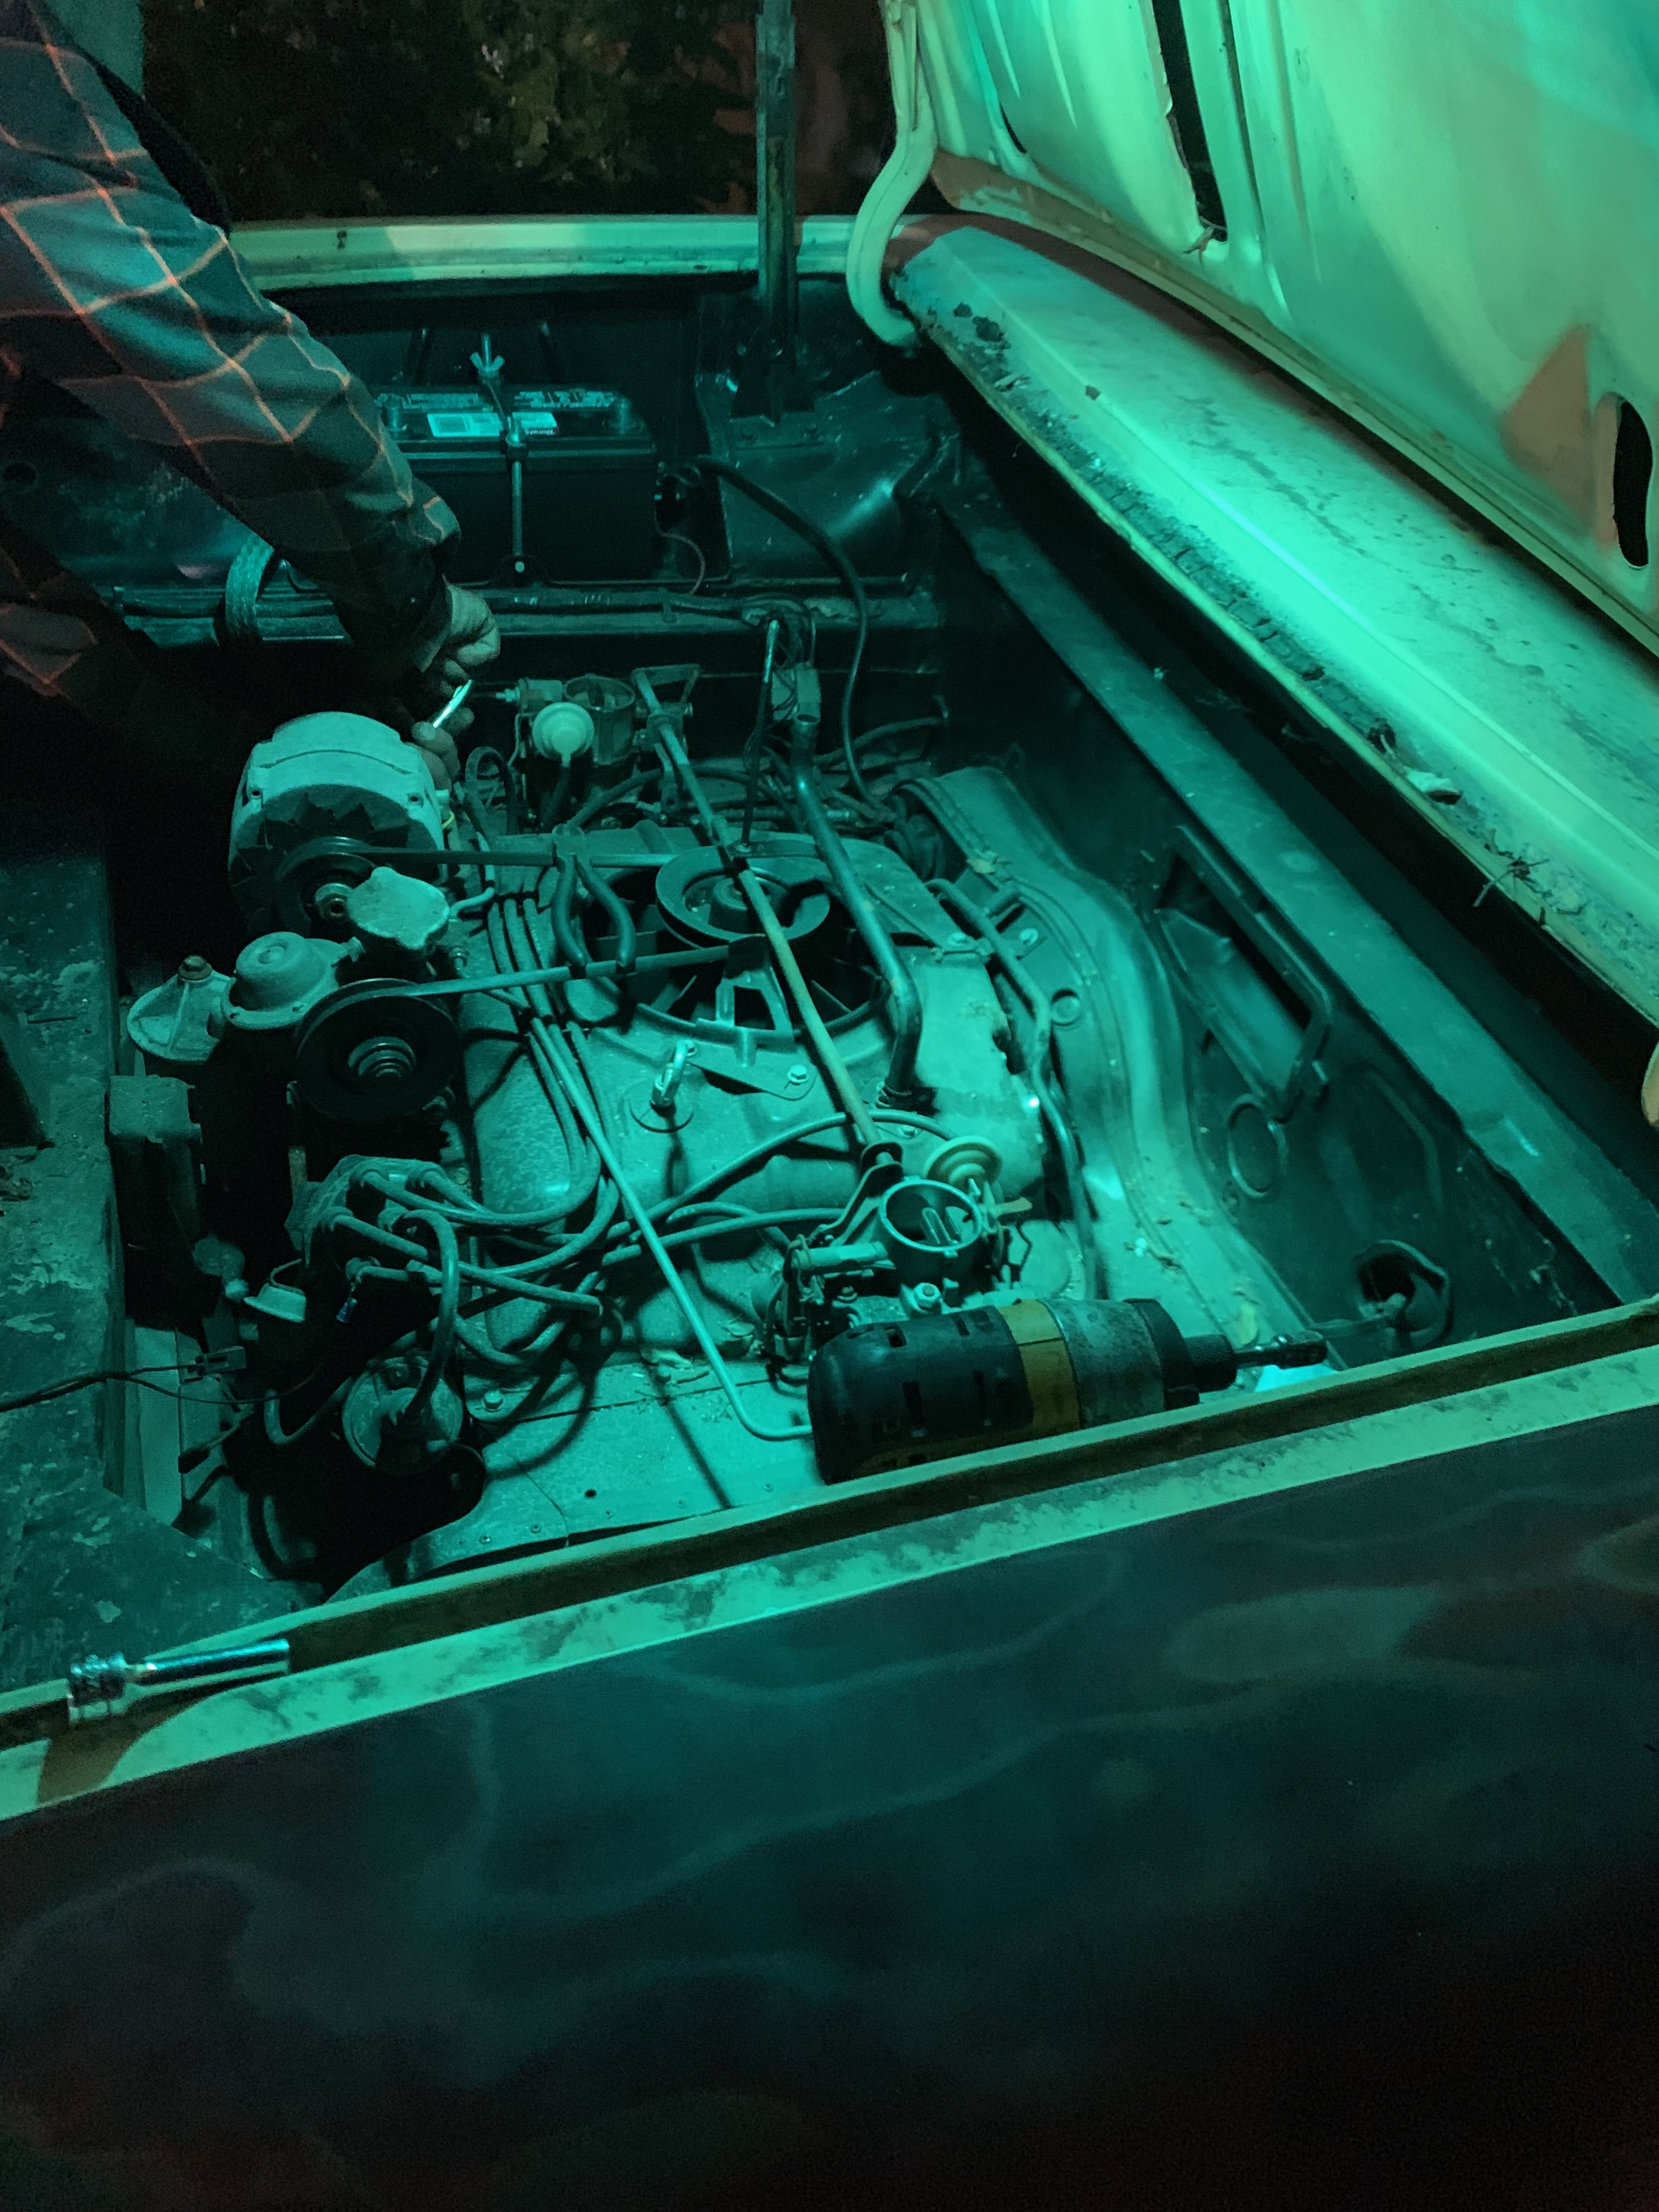
Pre-Build: Engine Condition
Close-up of the Corvair's air-cooled flat-six engine showing corrosion, grime, and wear that would need to be addressed during the mechanical restoration phase.
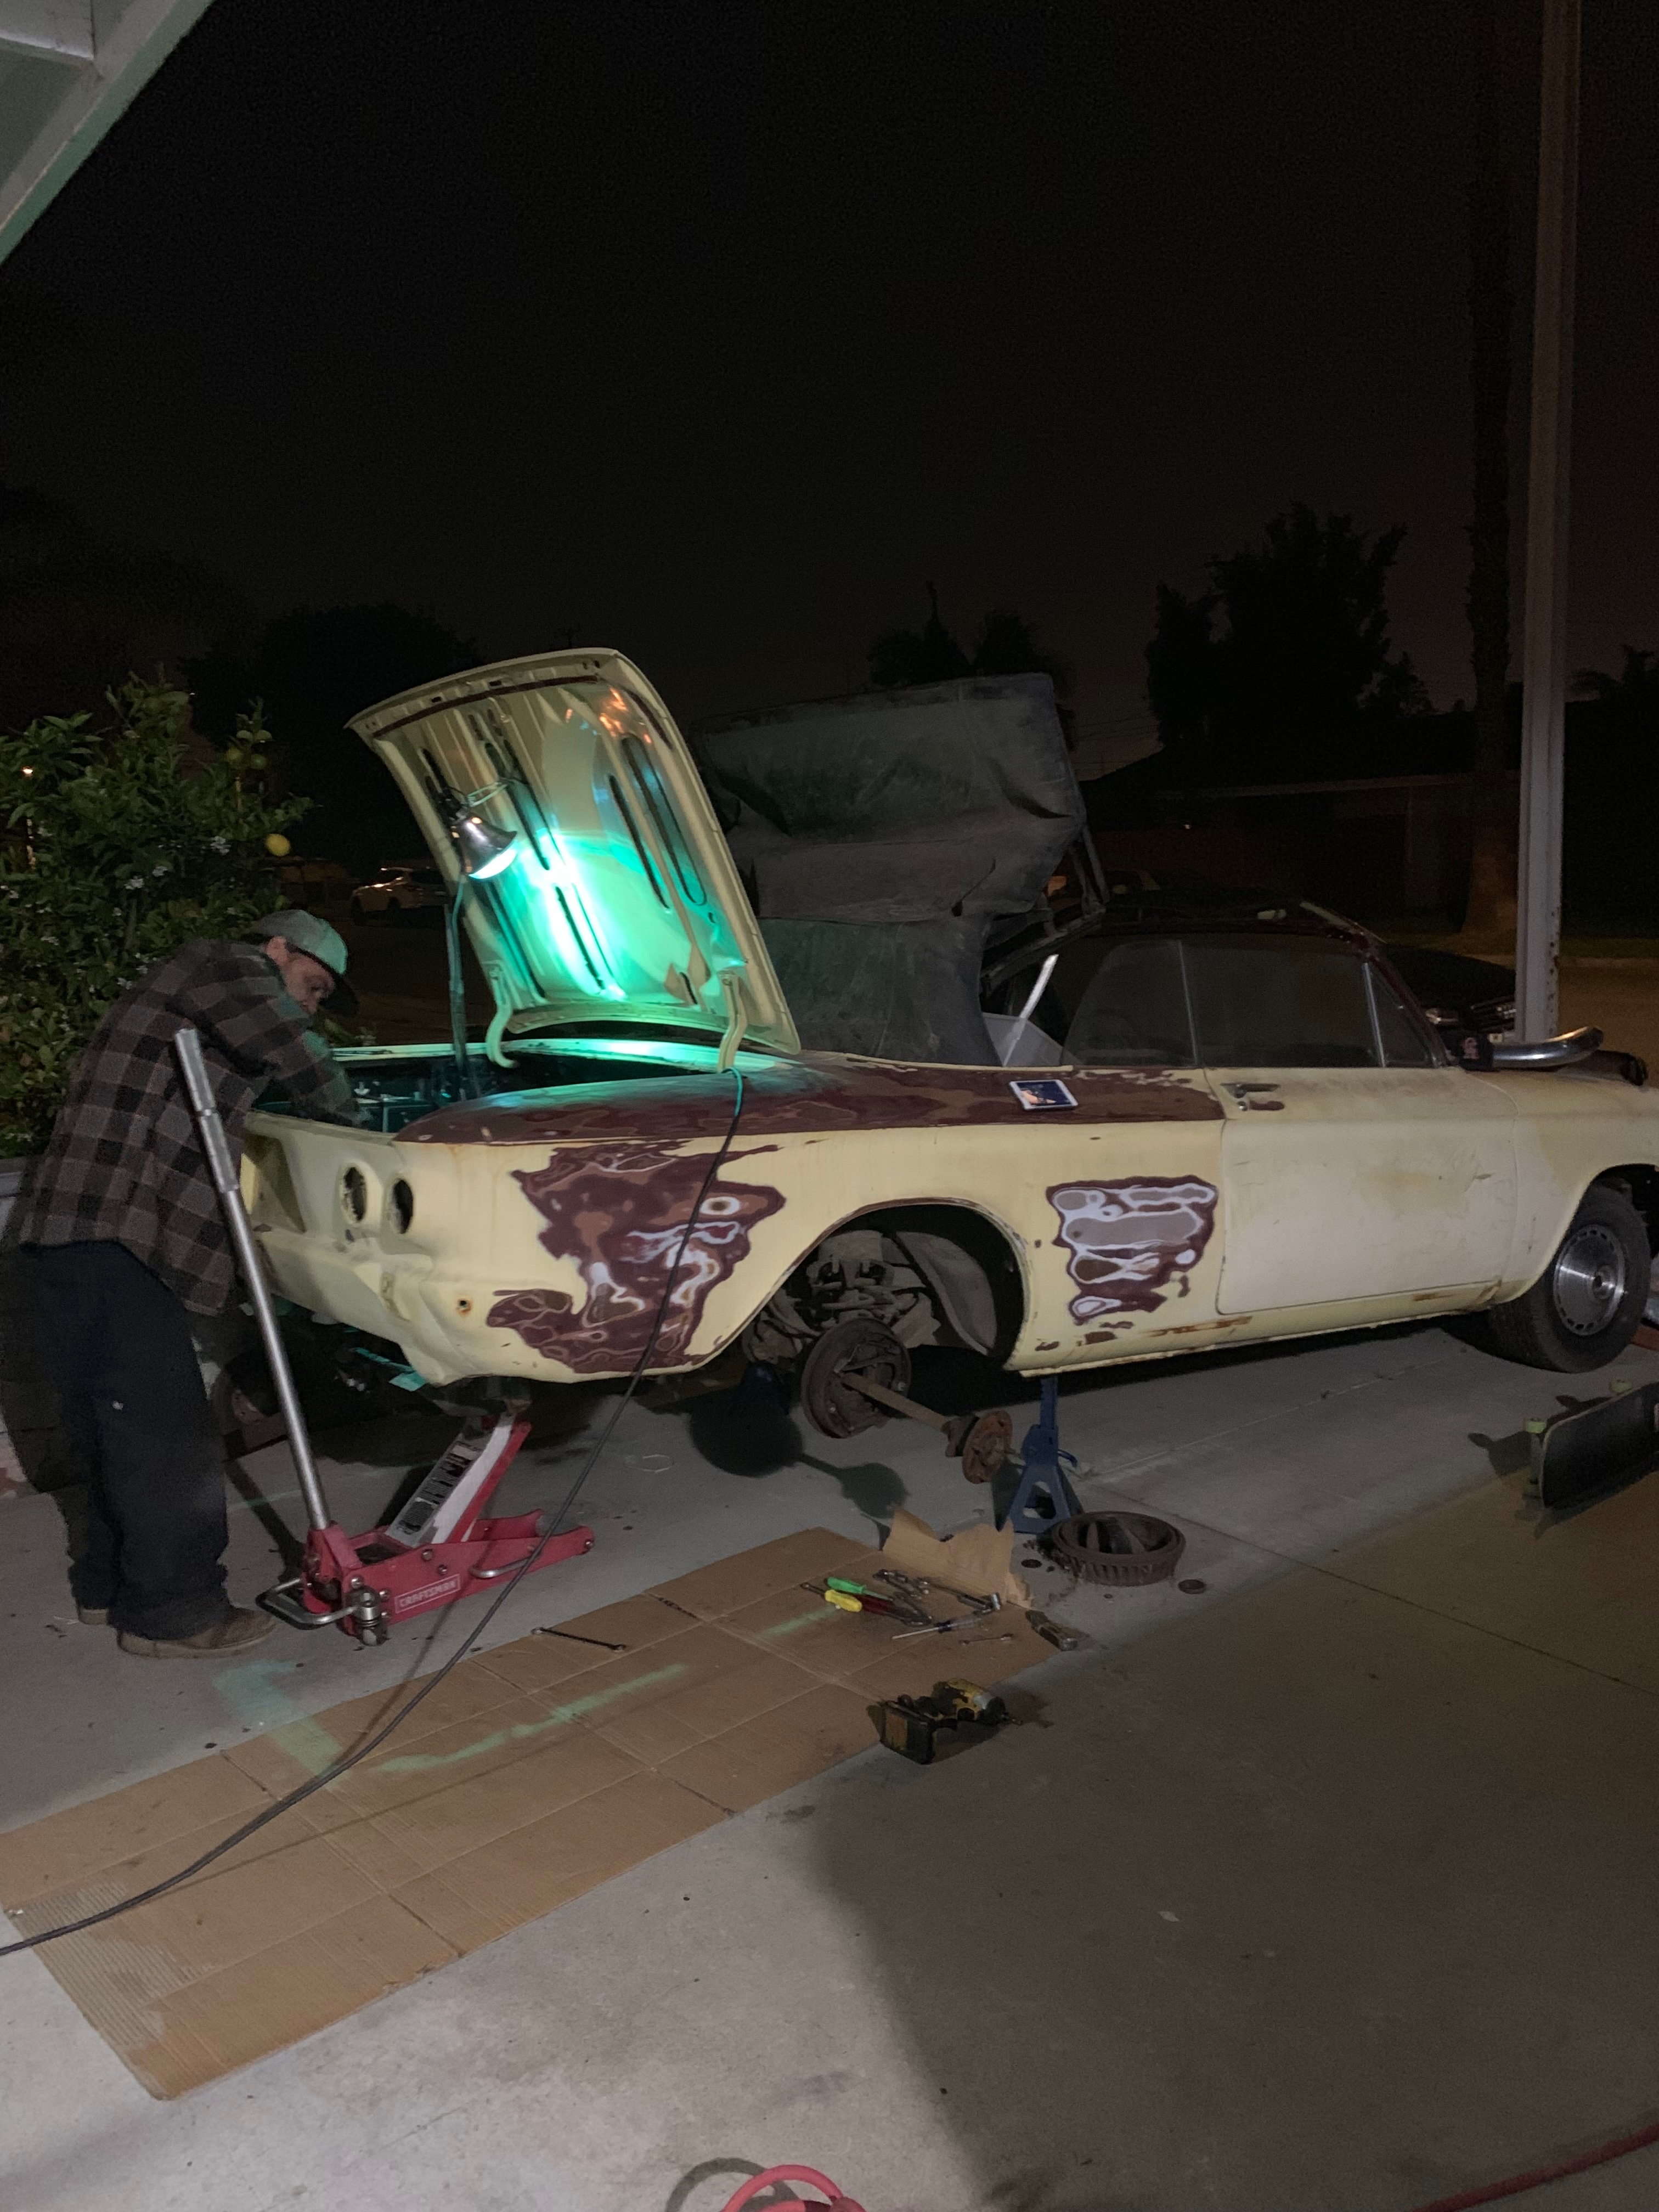
Disassembly: Initial Teardown
The first steps of the disassembly process, carefully documenting the original condition and component locations for accurate reassembly later.
Disassembly: Engine Extraction
Carefully removing the rear-mounted flat-six engine from the Corvair chassis for a complete mechanical rebuild.
Disassembly: Parts Organization
Systematic organization and labeling of all removed components to ensure nothing gets lost during the lengthy restoration process.

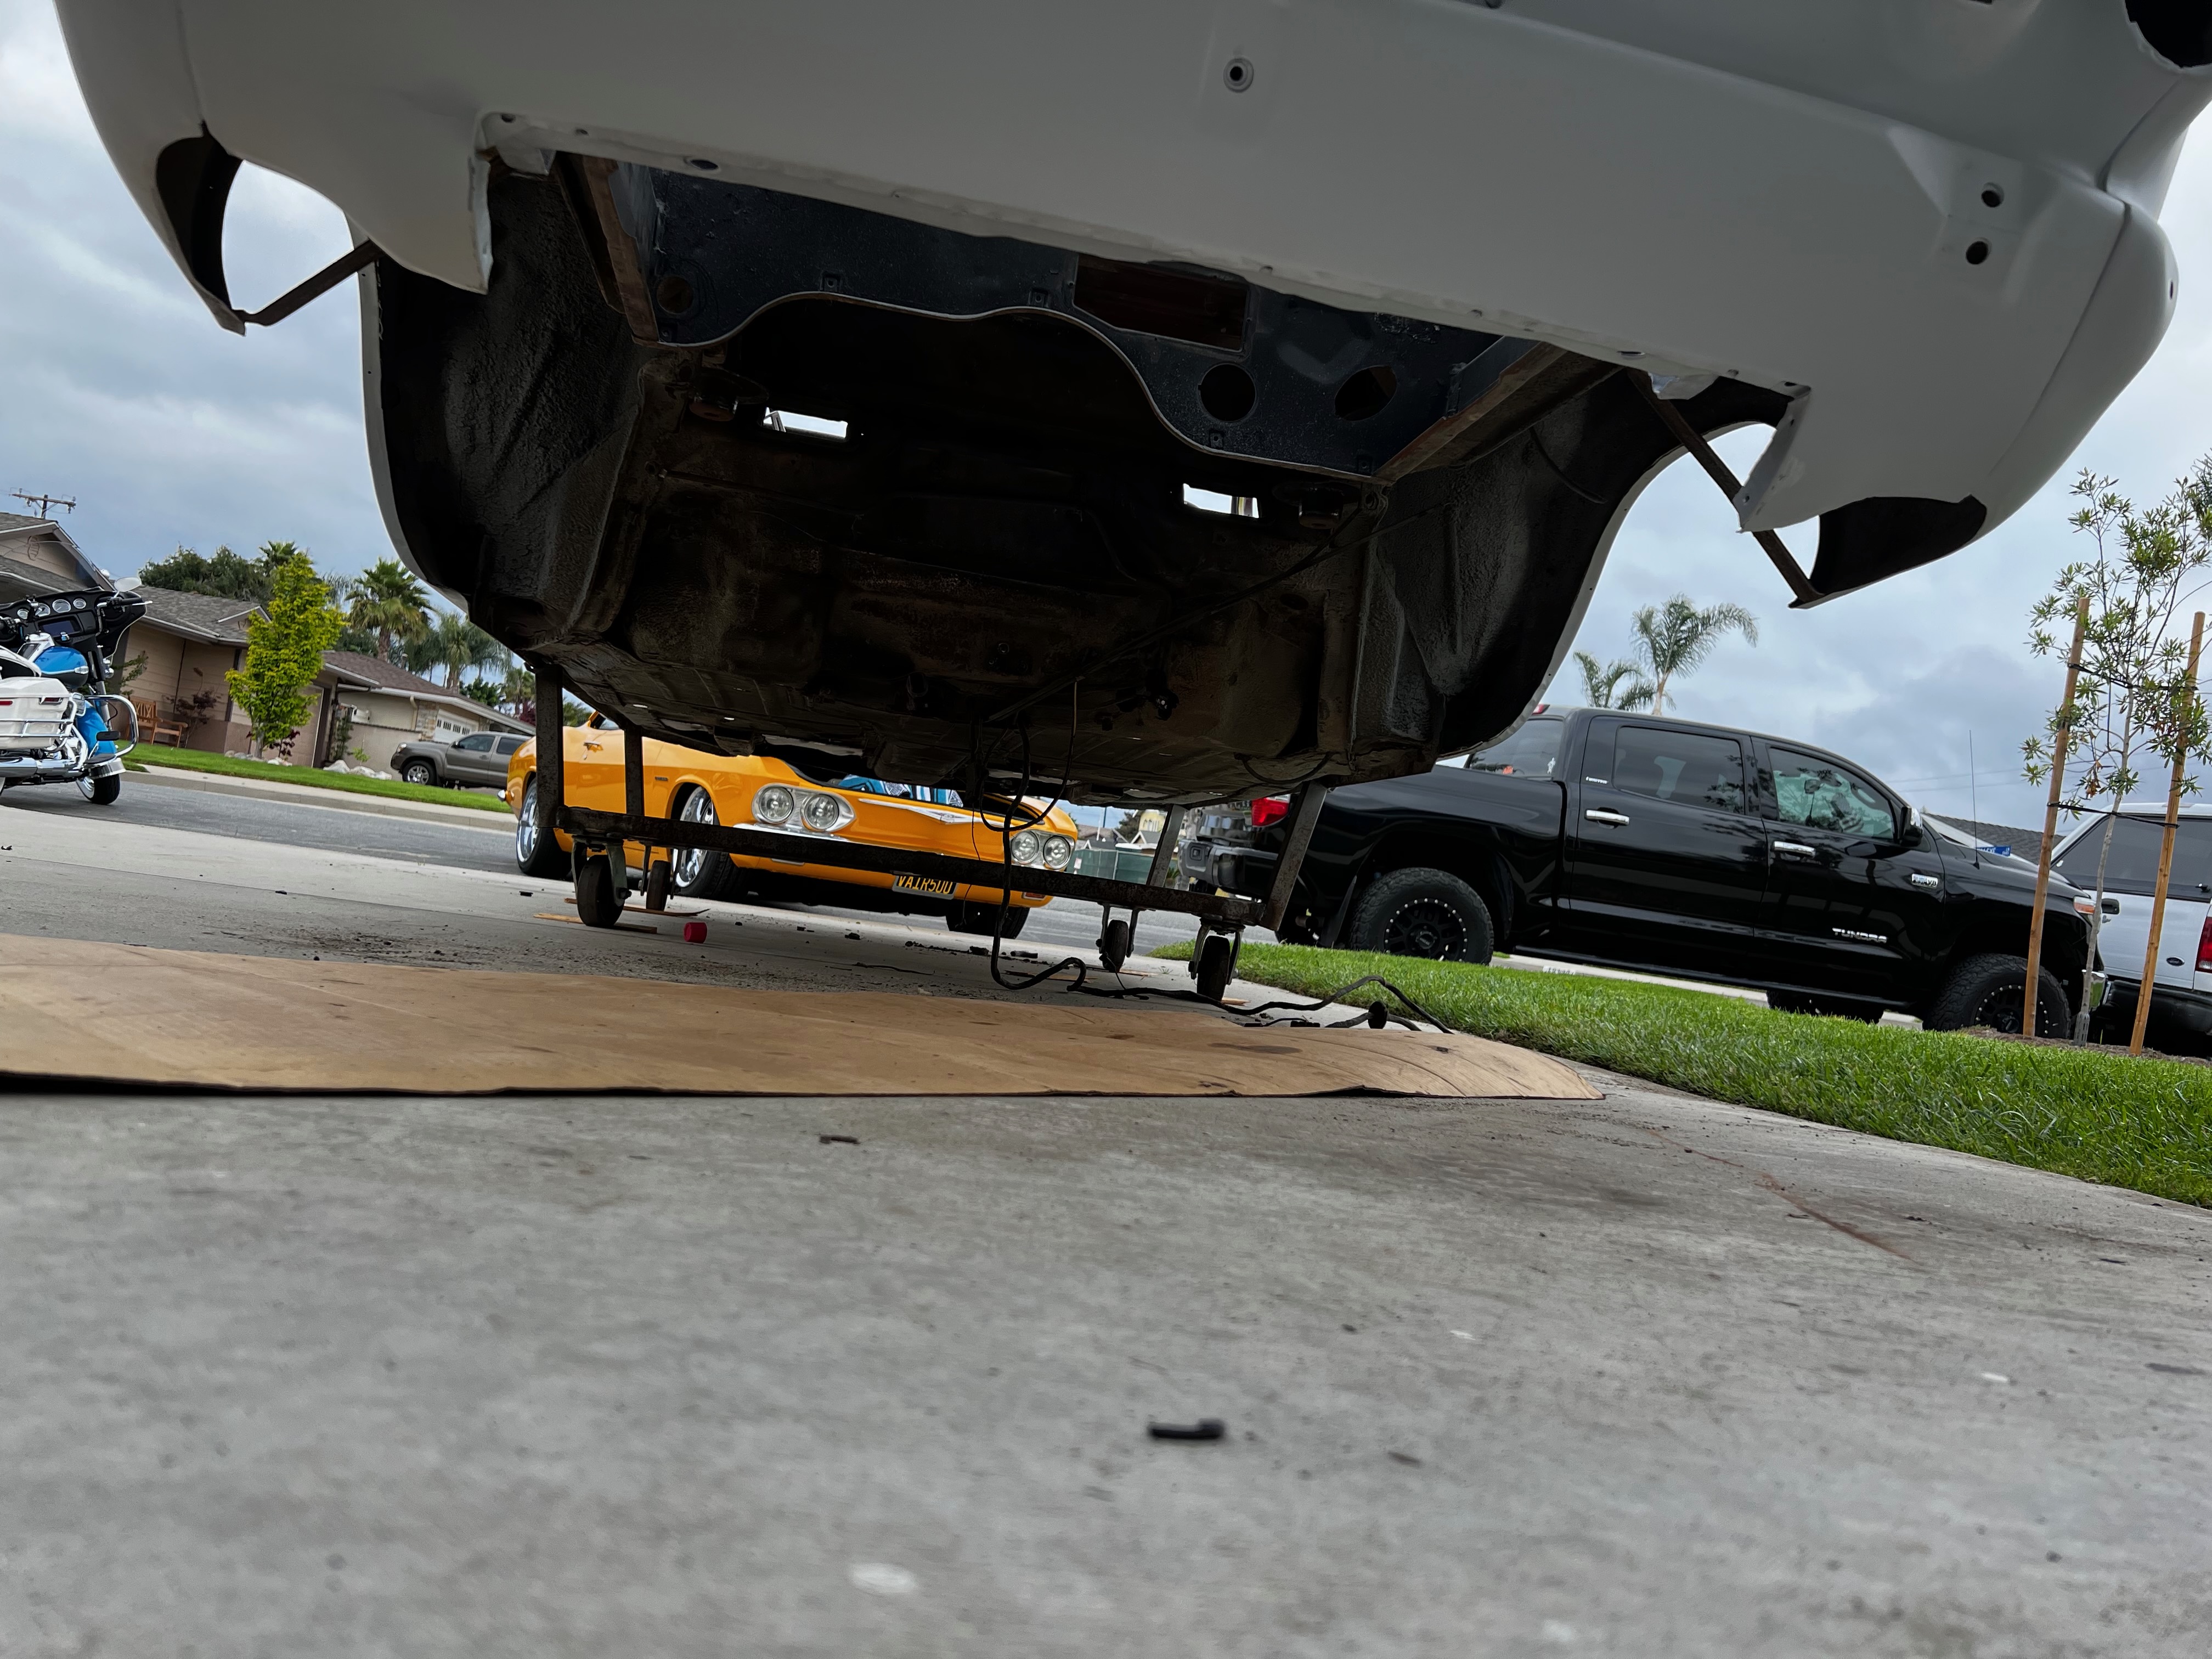
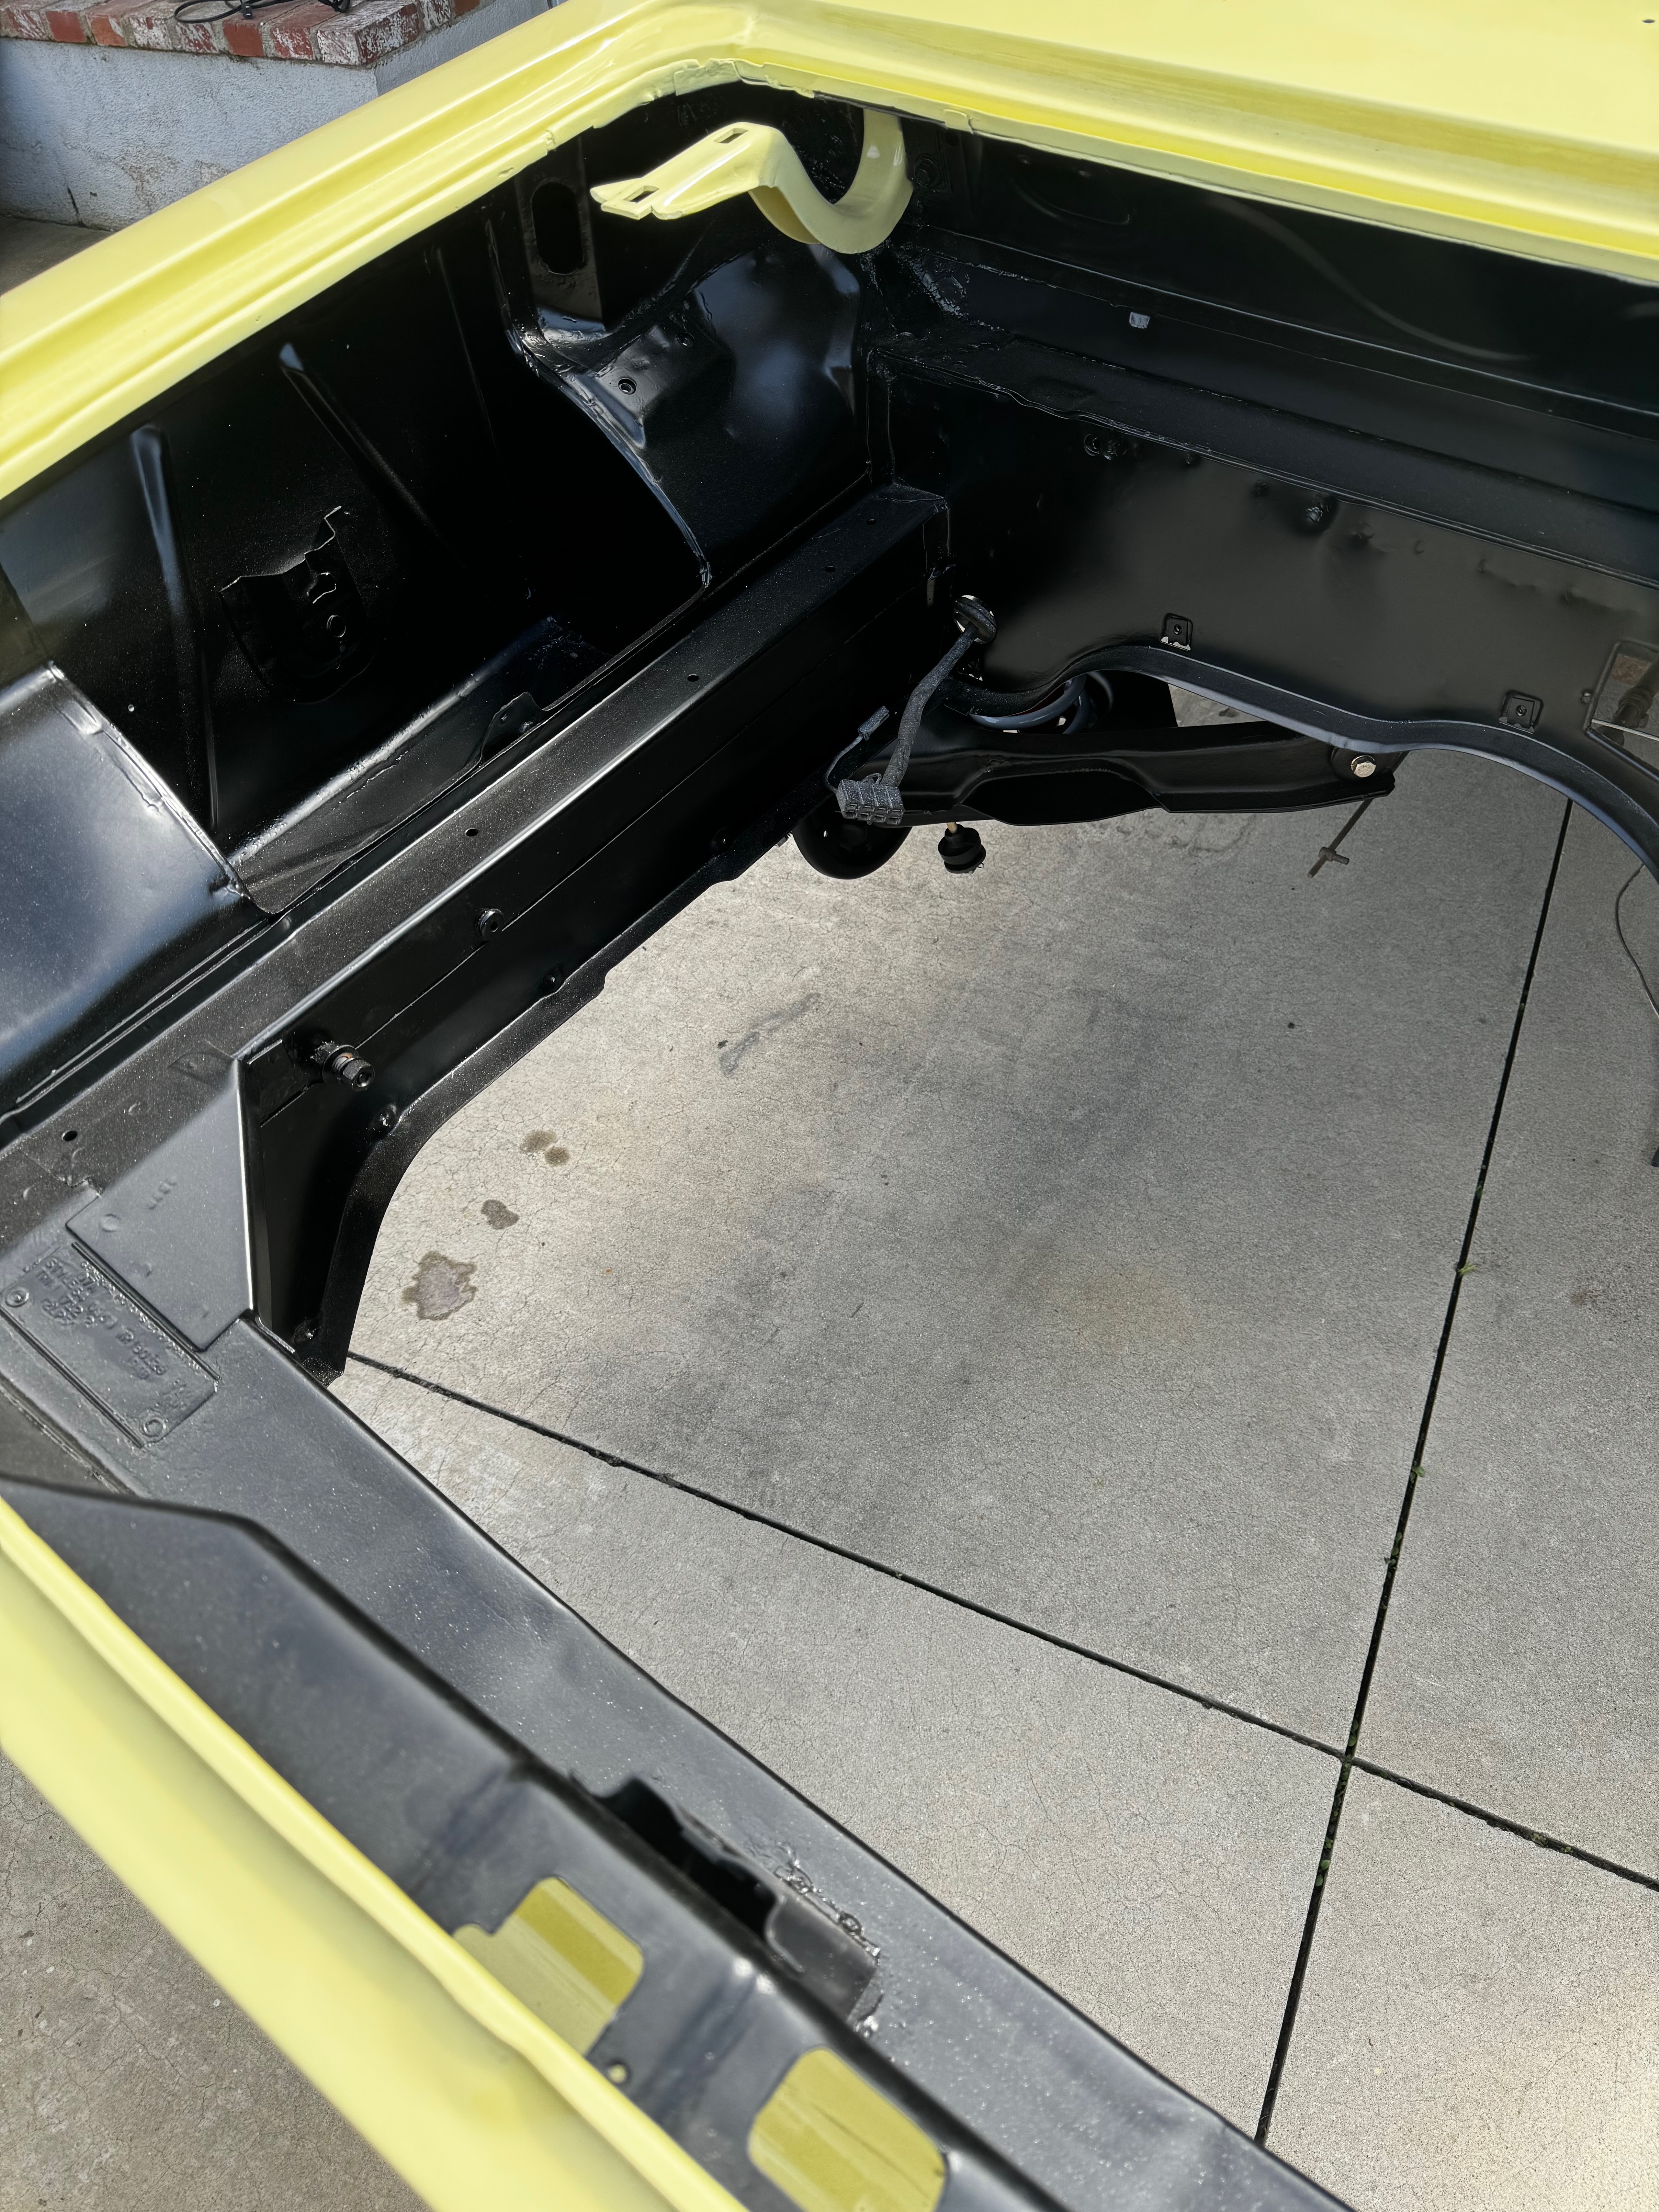
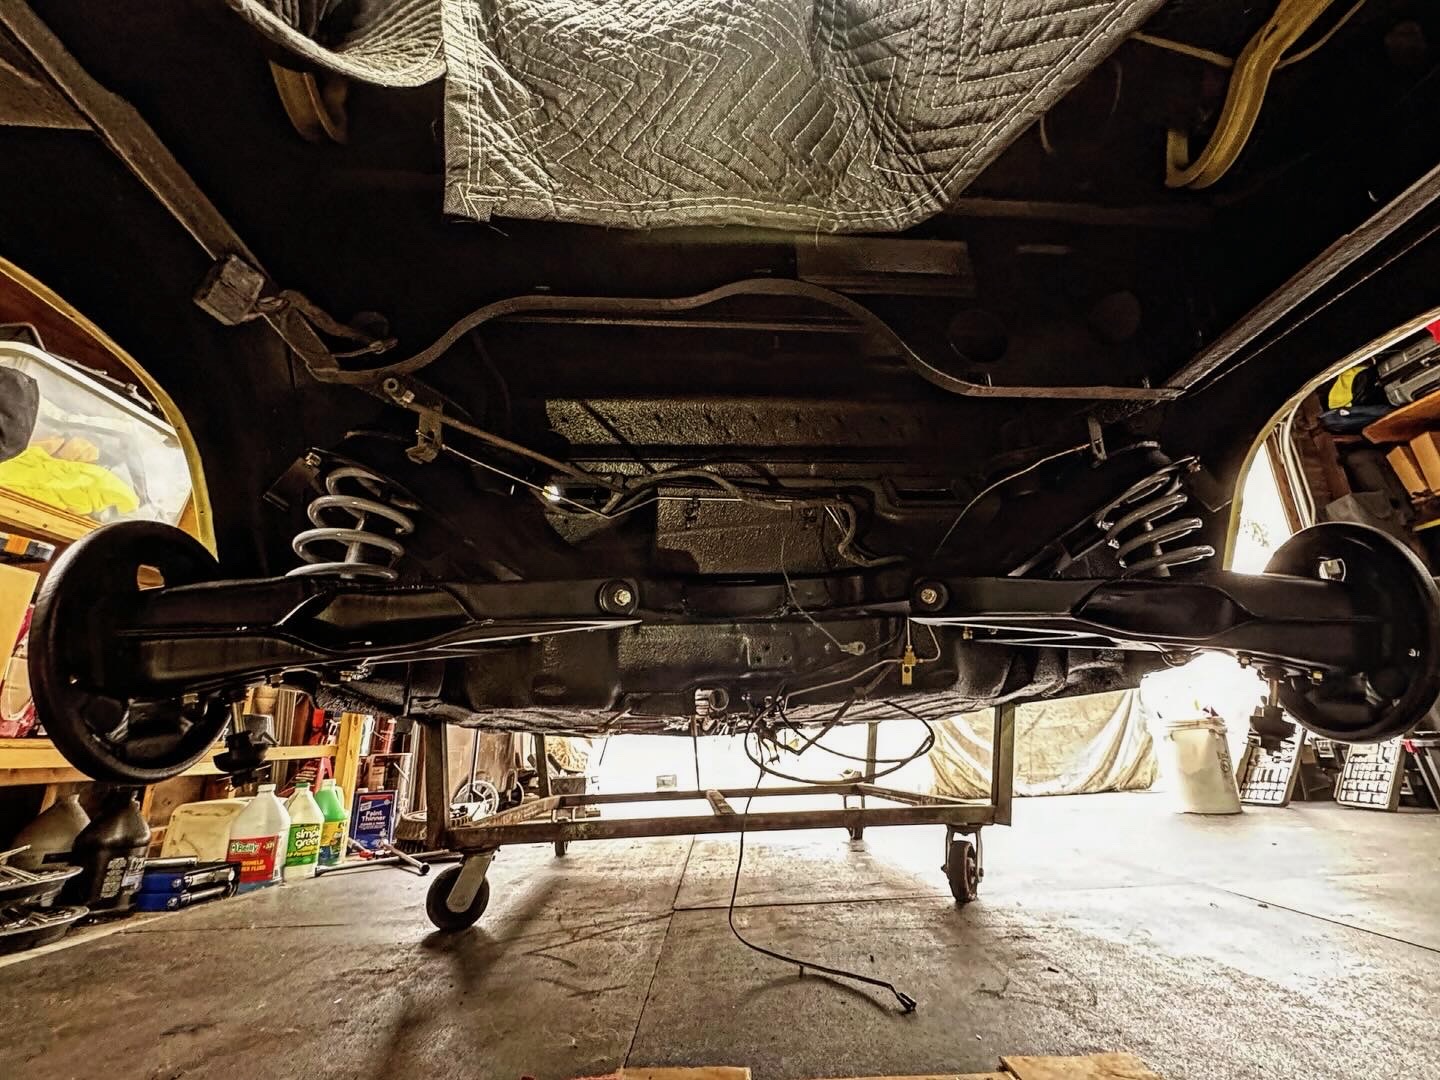
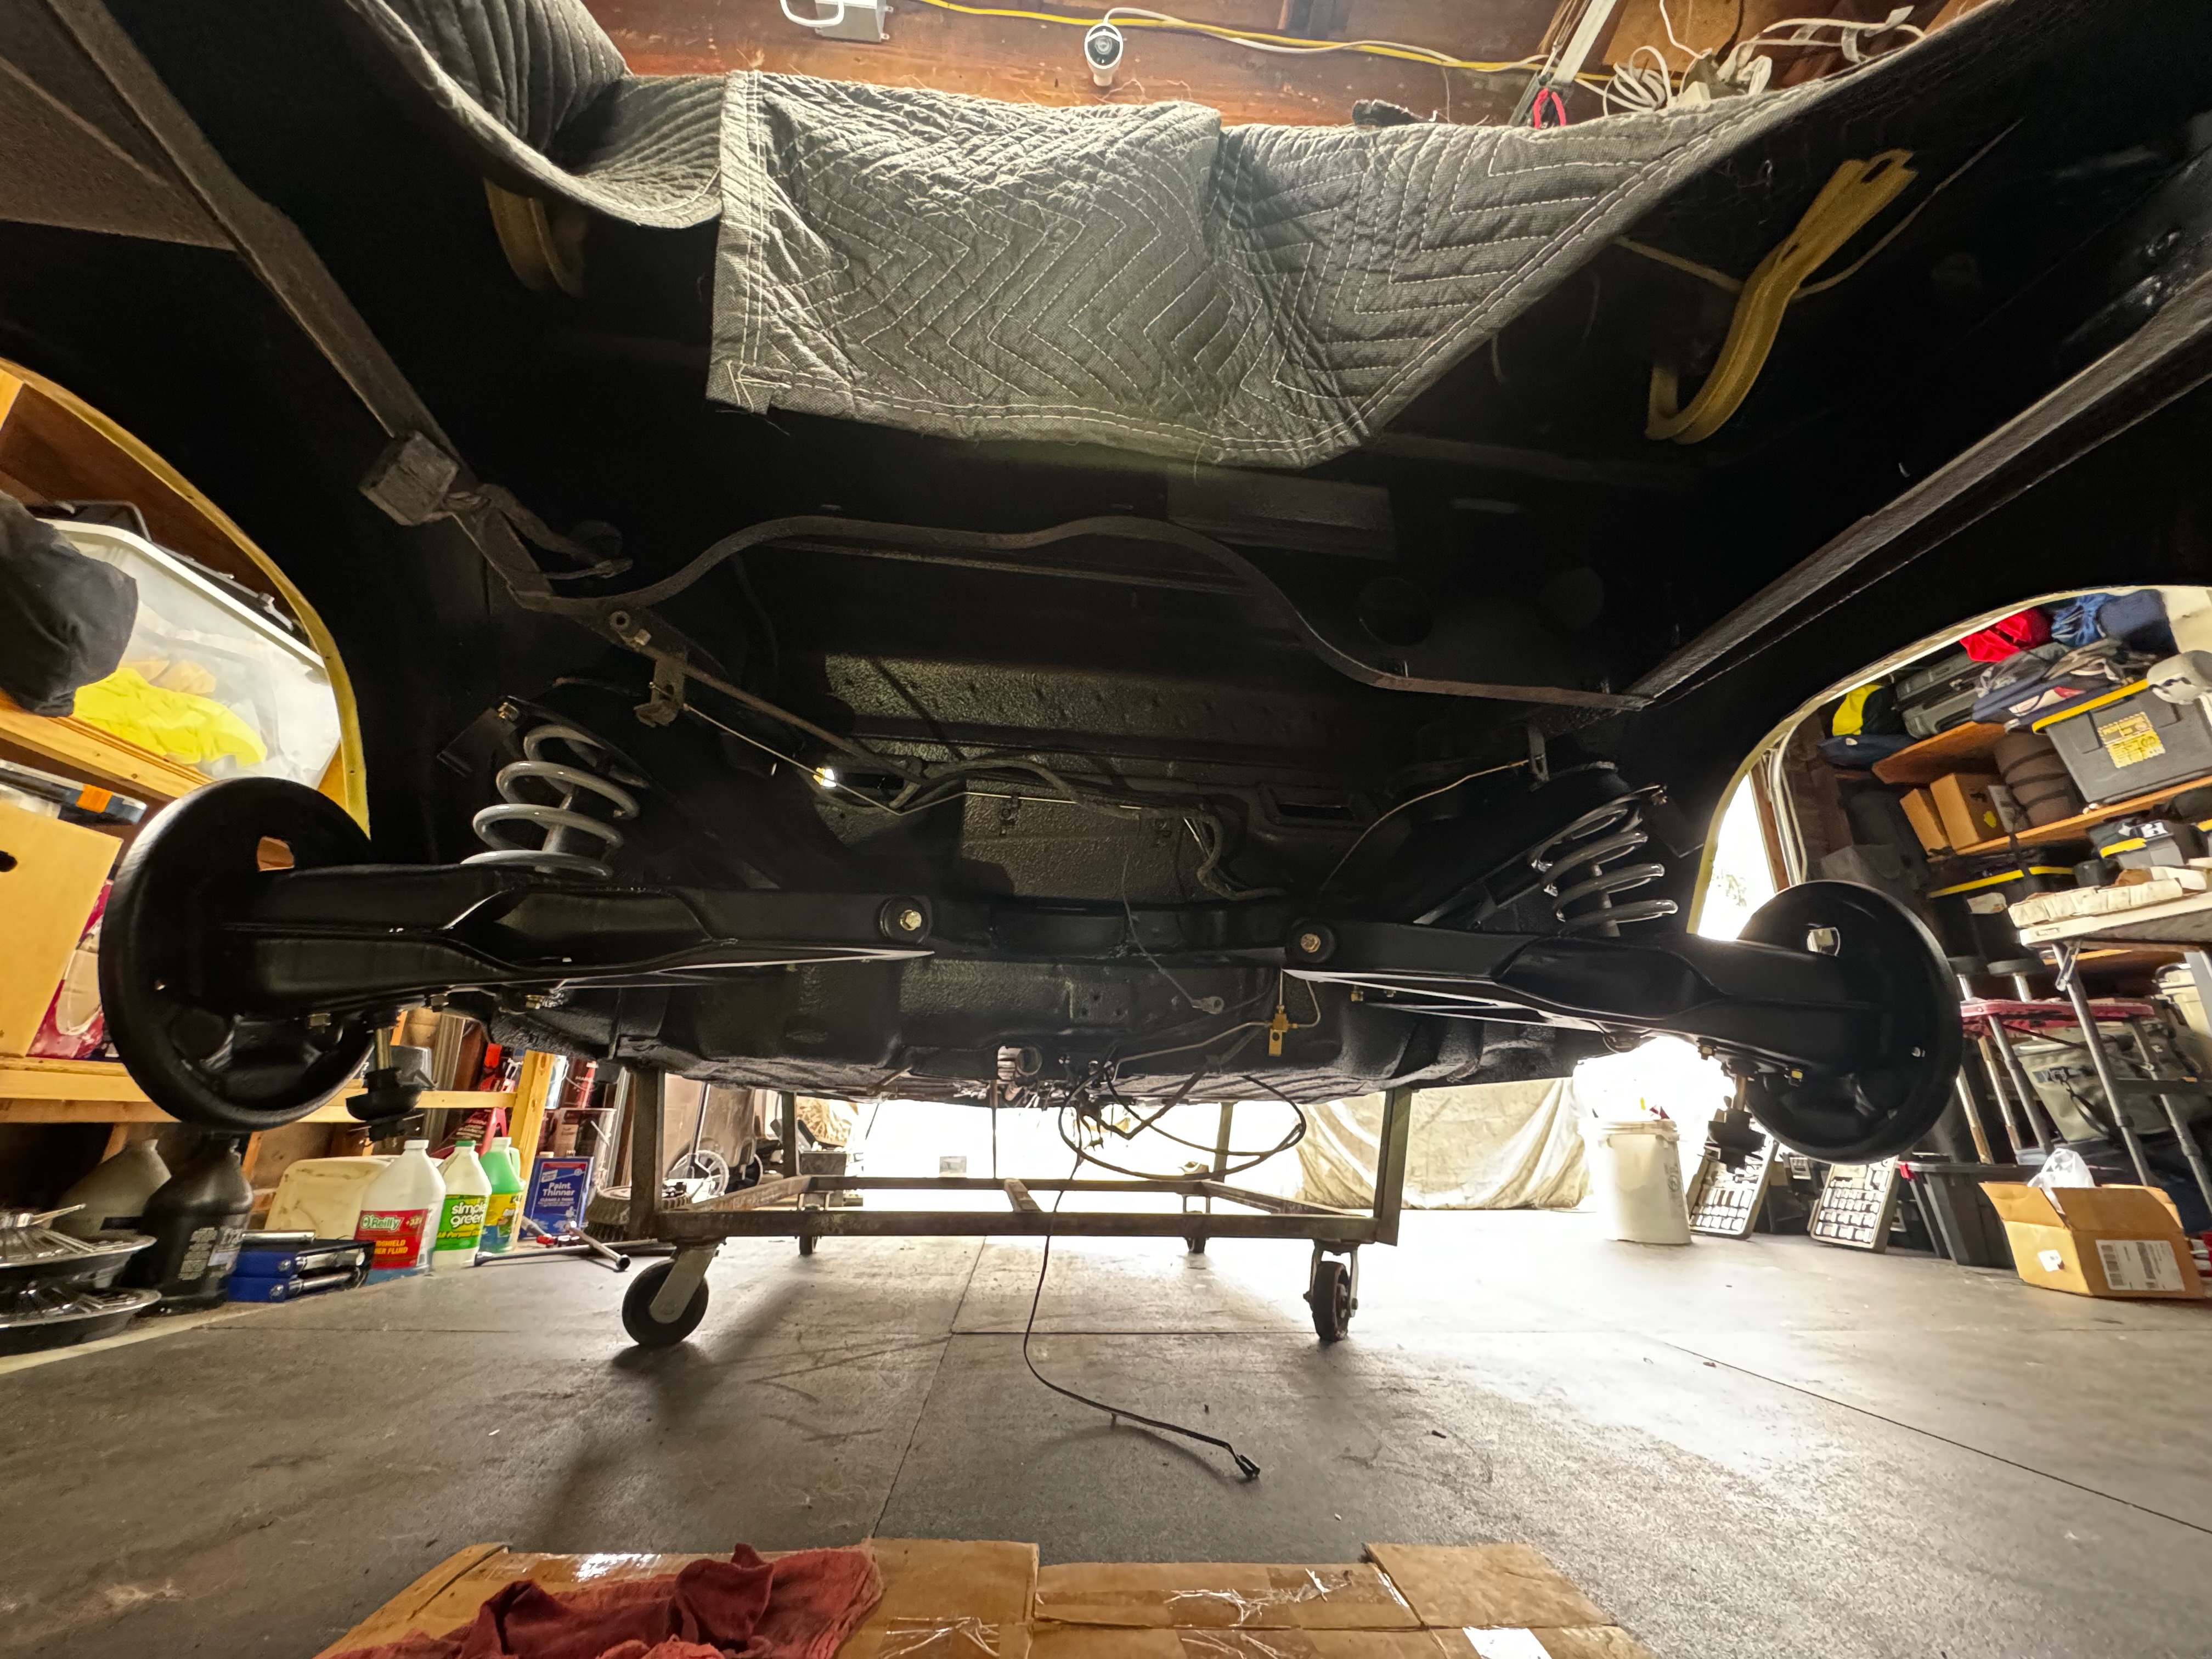
Disassembly: Engine Bay Exposed
View of the Corvair with the engine removed, exposing the rear suspension components that will need inspection and rebuilding.
Disassembly: Convertible Top Removal
Carefully removing the deteriorated convertible top mechanism and fabric, which will be completely replaced during restoration.
Disassembly: Glass Removal
Removing all window glass and weatherstripping to allow for complete body restoration and paint preparation.
Disassembly: Interior Components
Disassembled interior components laid out for inspection, cataloging, and preparation for restoration or replacement.

Disassembly: Dashboard Extraction
Carefully removing the dashboard assembly to access the wiring, gauges, and controls that will need restoration.
Disassembly: Systematic Approach
Following a methodical disassembly process to ensure all parts are properly documented, labeled, and stored for future reassembly.
Disassembly: Component Inspection
Carefully removing and inspecting each component to determine what can be restored and what will need replacement.
Disassembly: Small Components
Close-up view of the meticulous disassembly process for smaller components, ensuring proper documentation of how everything fits together.
Disassembly: Interior Stripping
Carefully removing and cataloging interior components including seats, trim panels, and carpeting for restoration or replacement.
Disassembly: Component Sorting
Methodically organizing removed components by system and function to facilitate the restoration process and ensure nothing is overlooked.
Disassembly: Engine Teardown
Disassembling the air-cooled flat-six engine to inspect internal components and prepare for a complete mechanical rebuild.
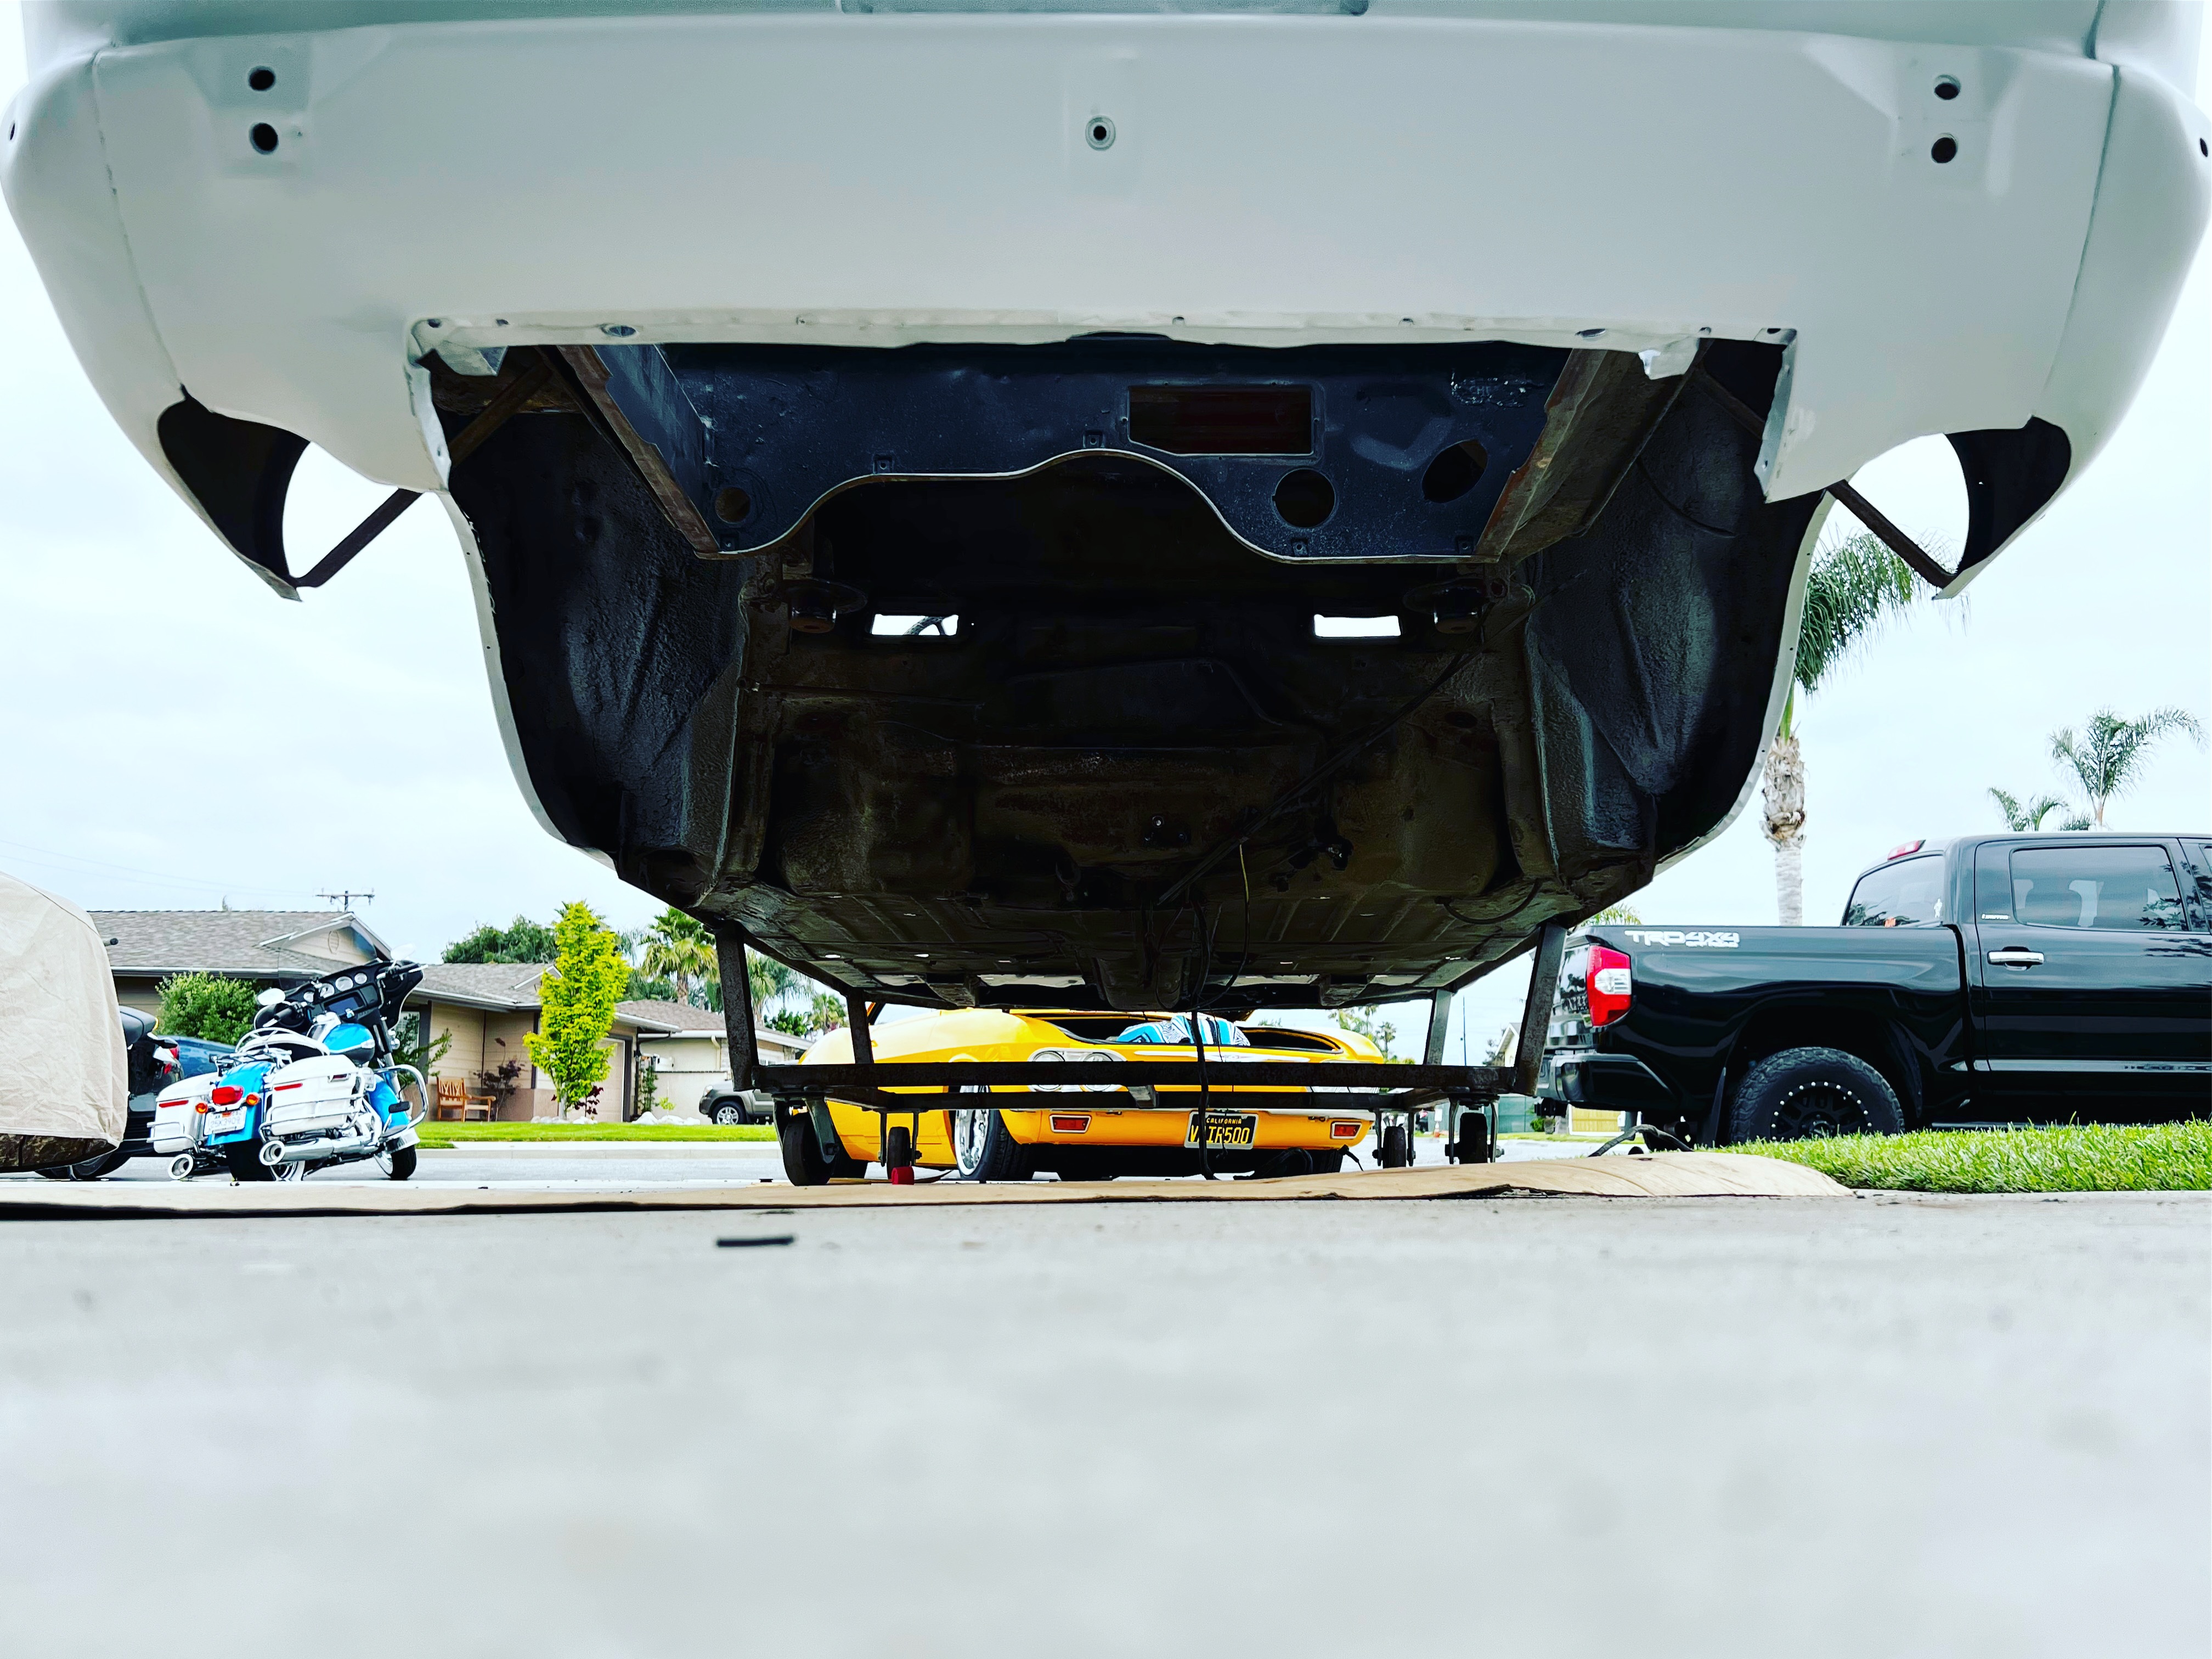
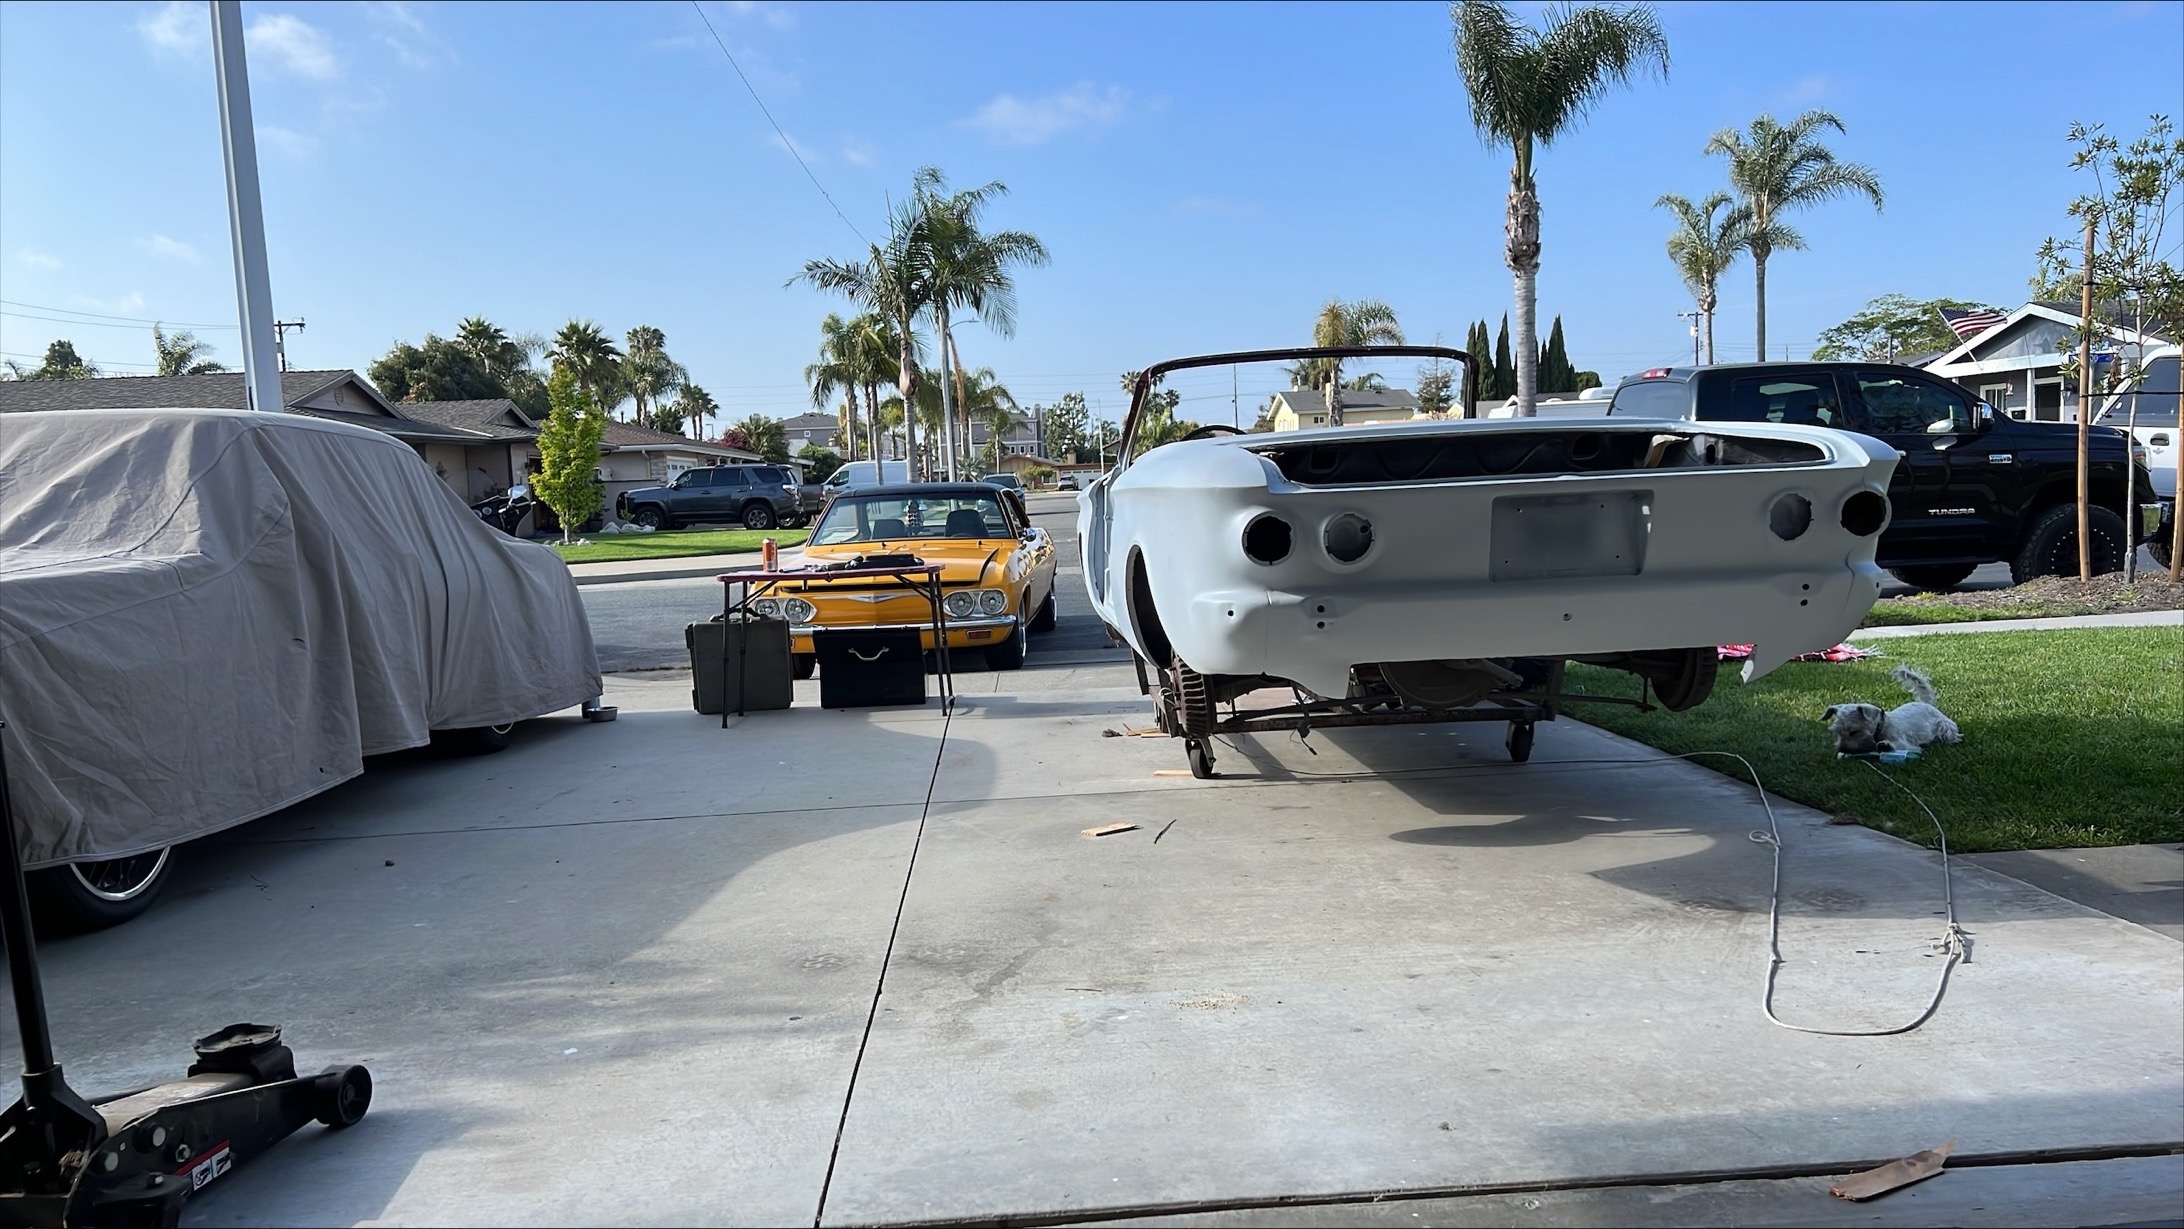
Disassembly: Chassis Stripping
Progress view of the Corvair with most components removed, revealing the extent of work needed on the underlying structure.
Disassembly: Drivetrain Components
Removing and inspecting critical drivetrain components that will need thorough restoration before reassembly.
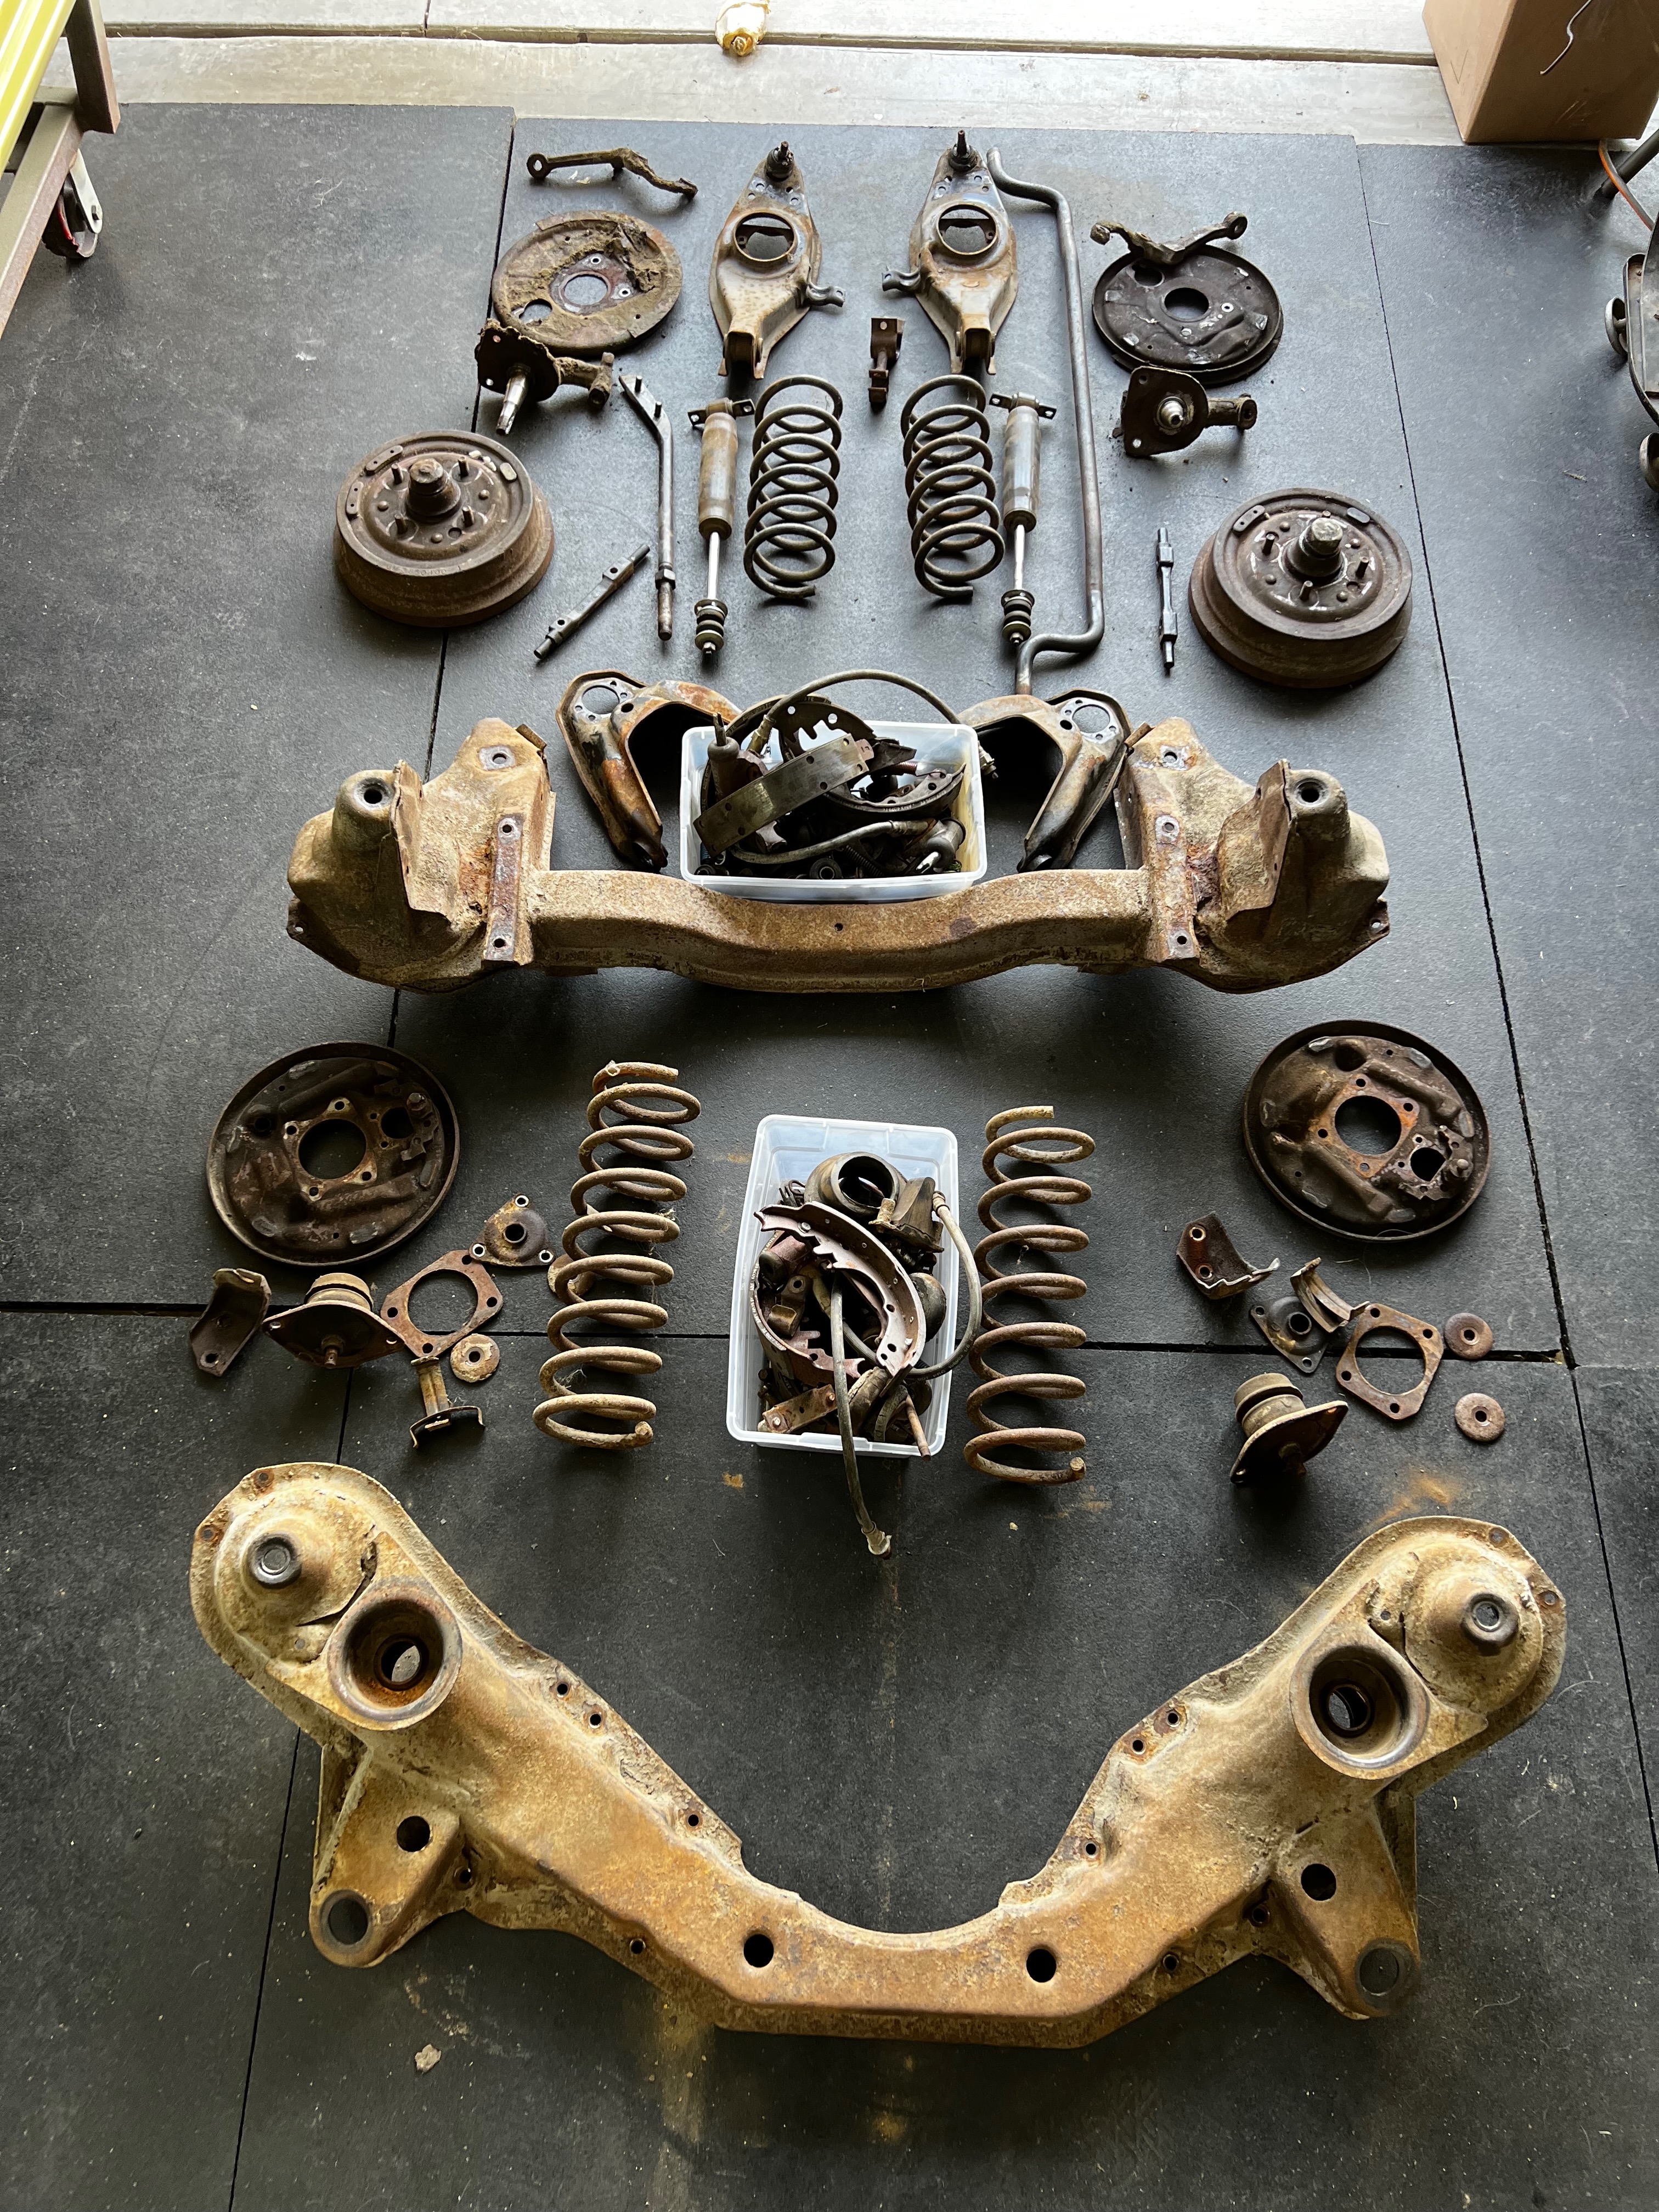
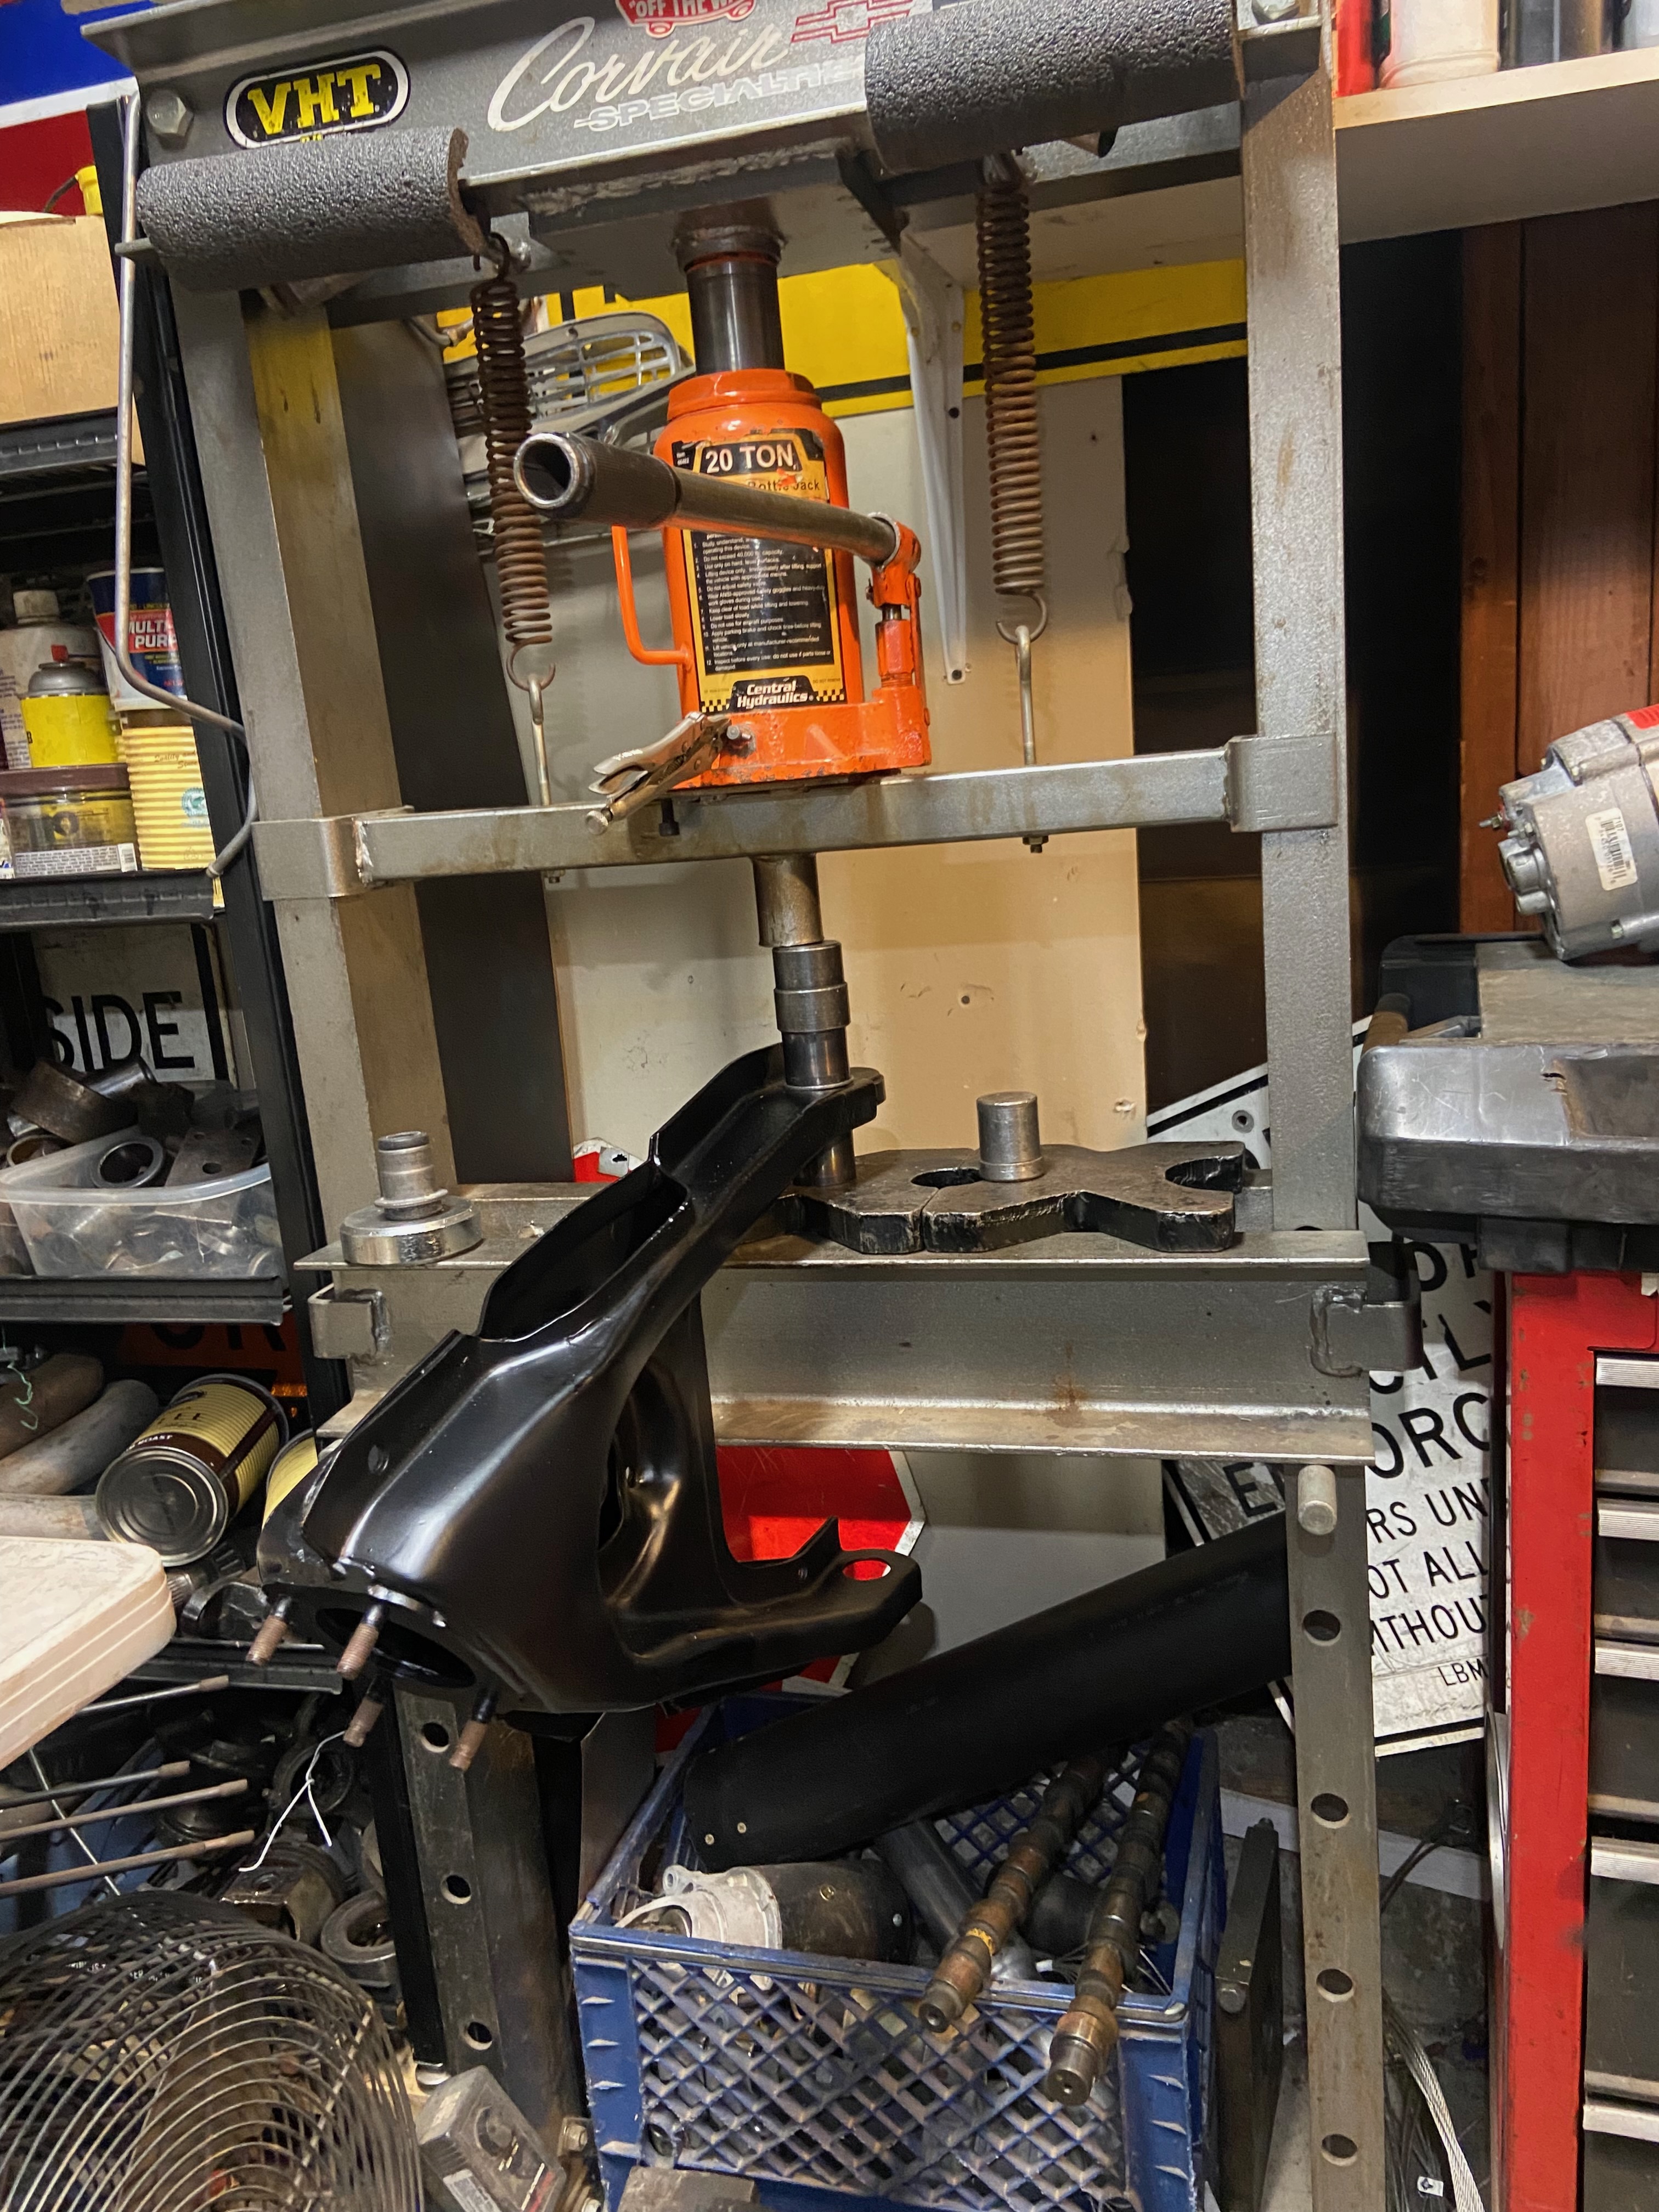
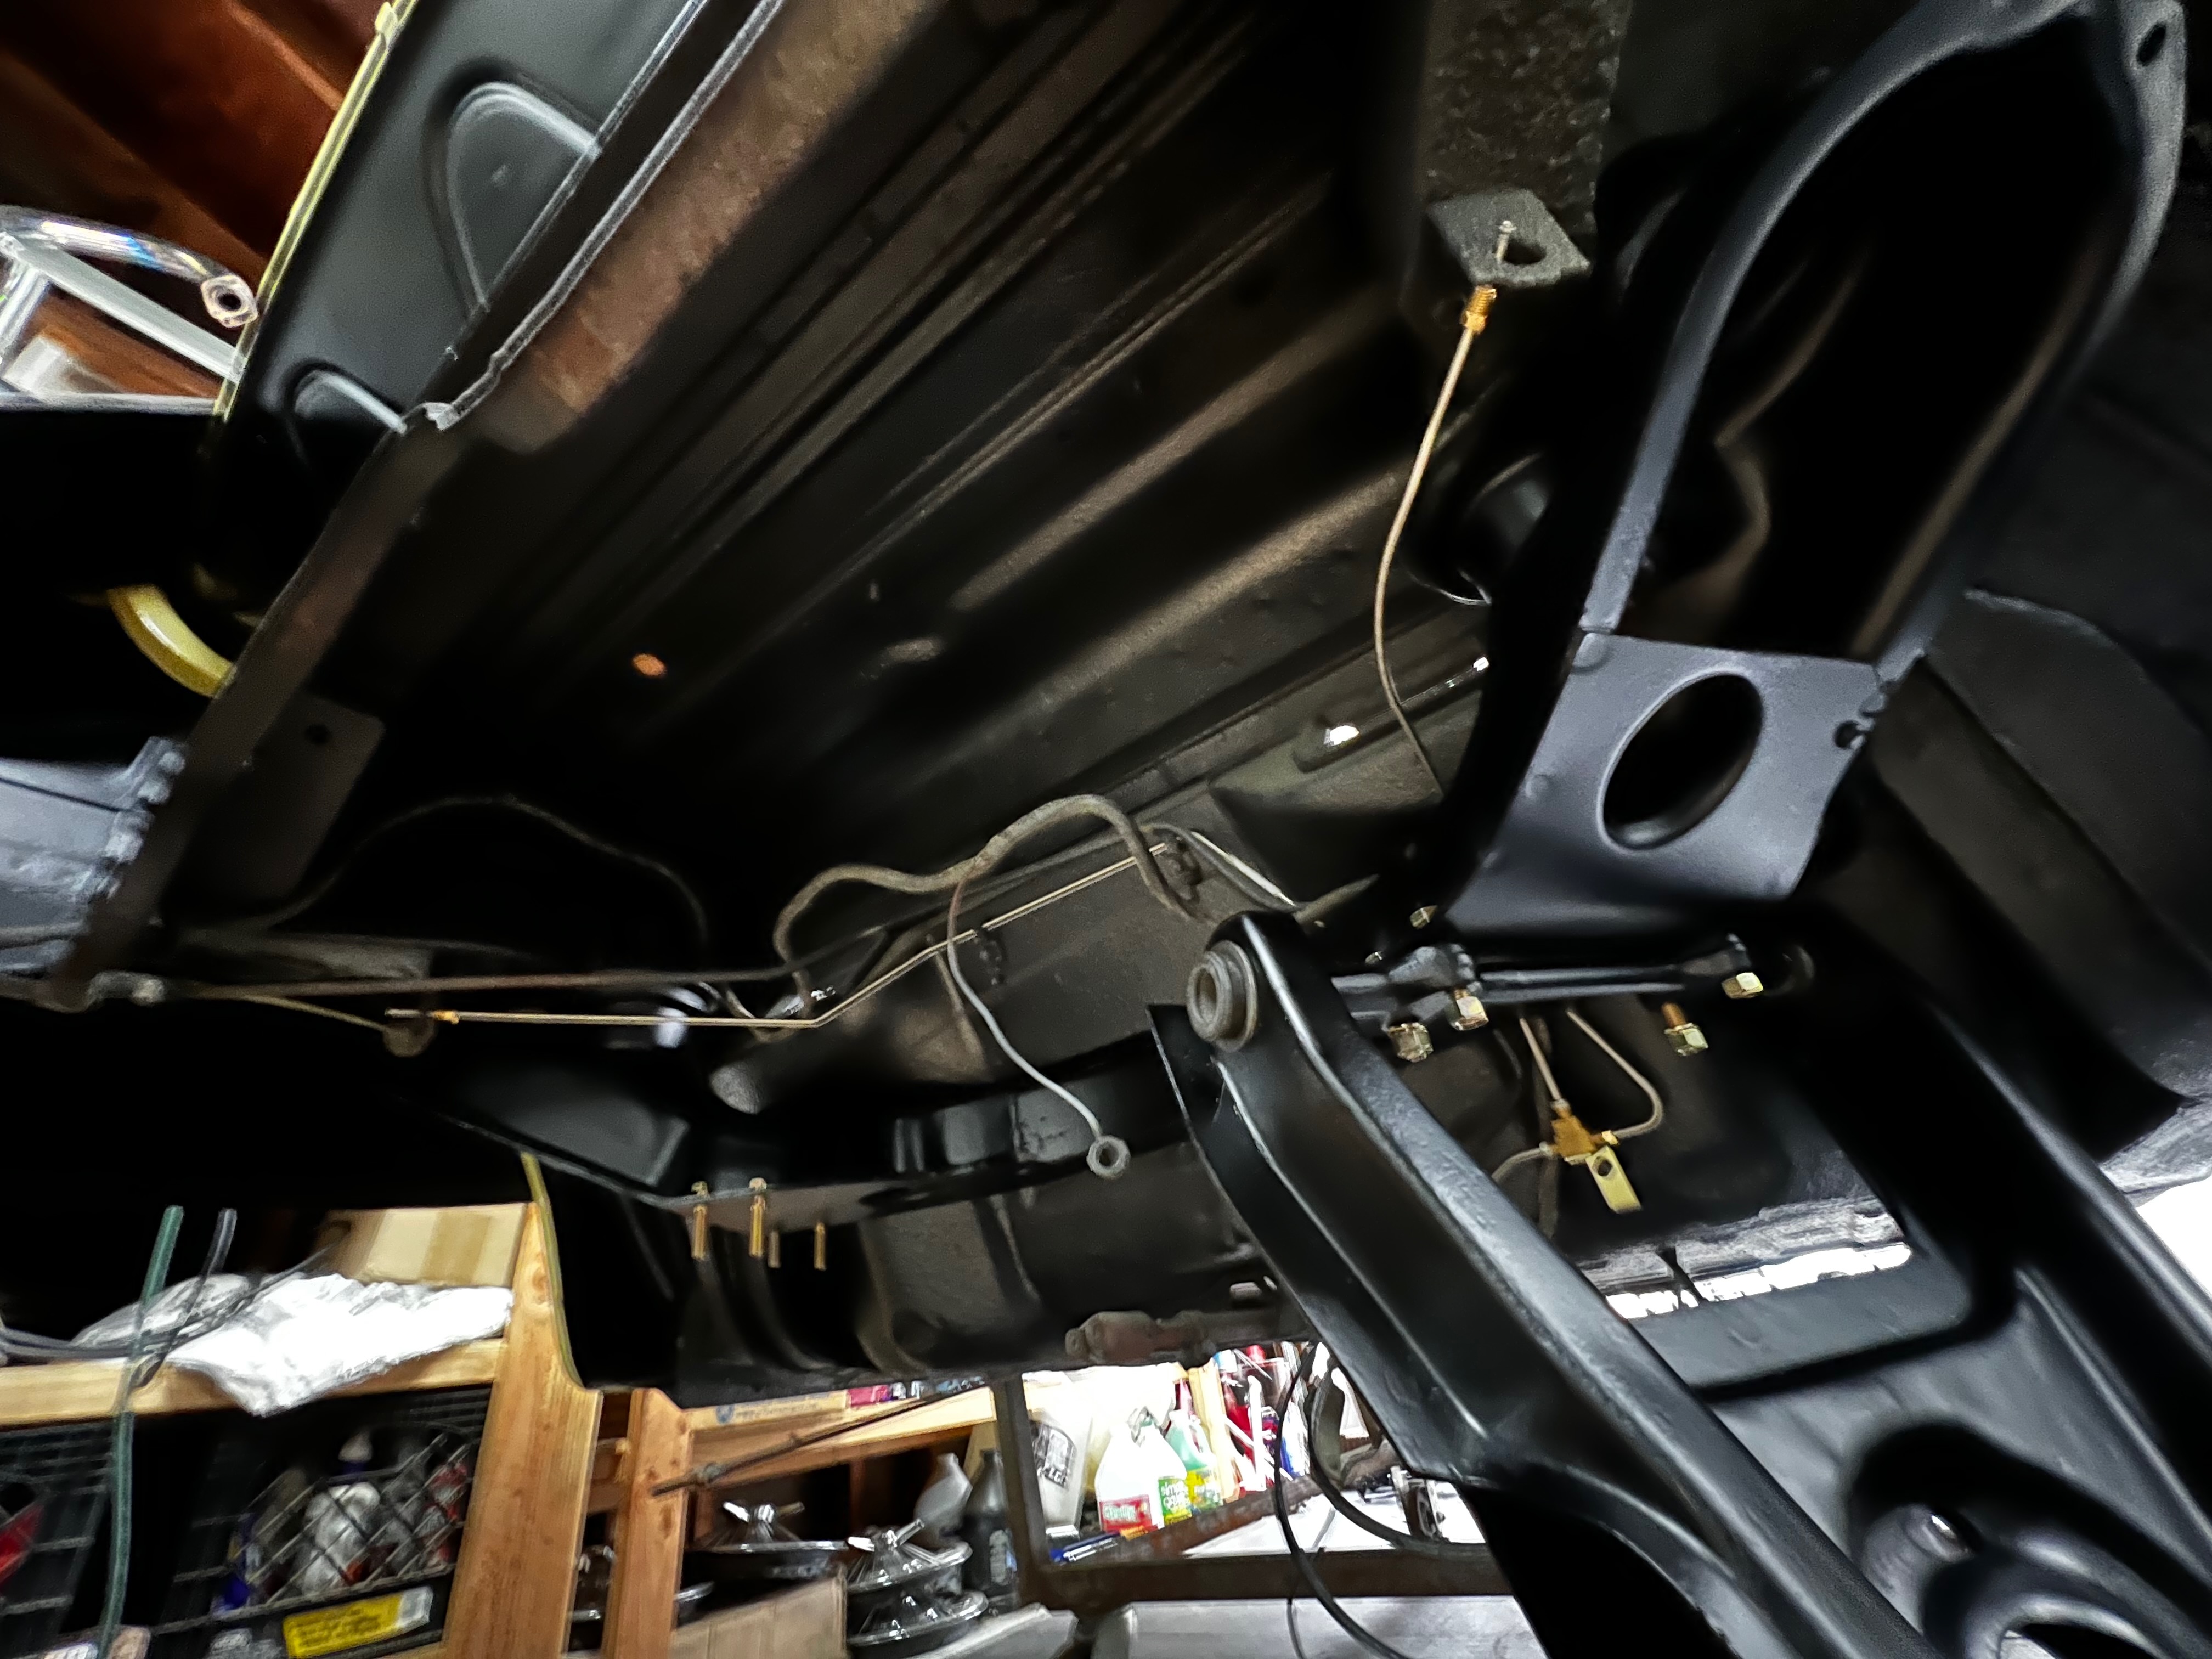
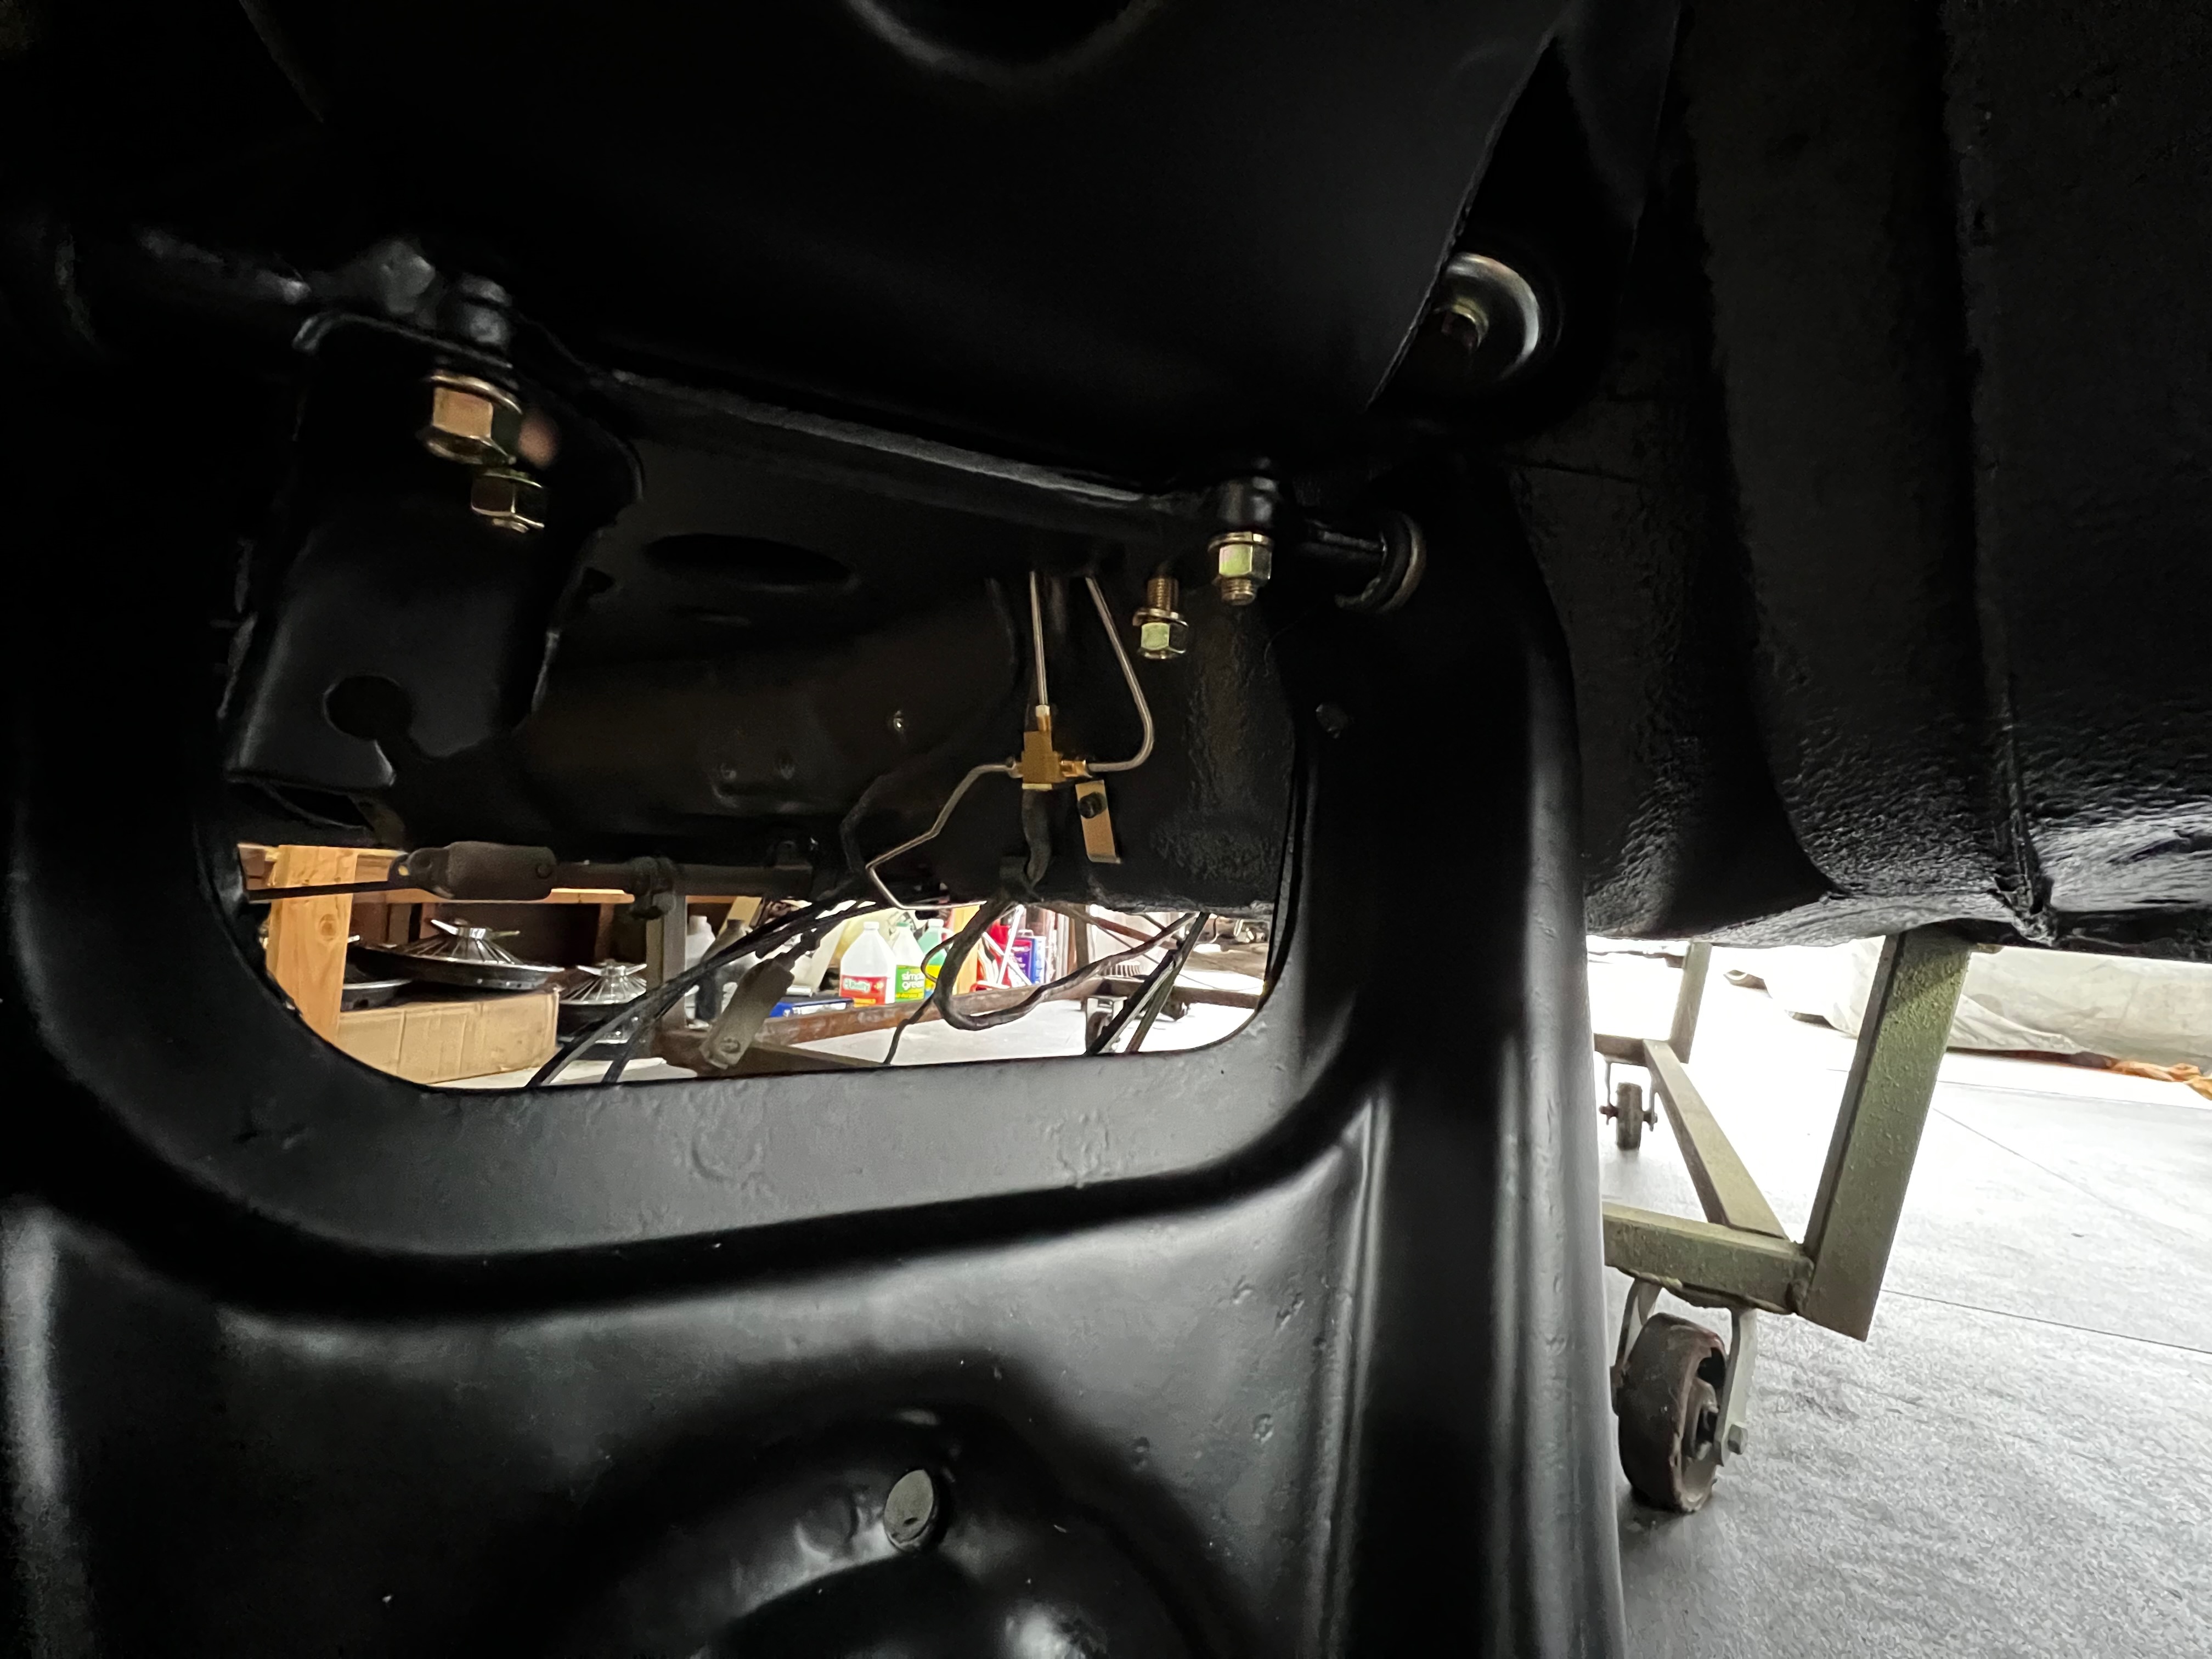
Disassembly: Suspension Details
Close-up examination of the Corvair's unique suspension components, documenting wear patterns and identifying parts needing replacement.
Disassembly: Parts Cataloging
Systematic organization of disassembled components in labeled bins to maintain order throughout the lengthy restoration process.
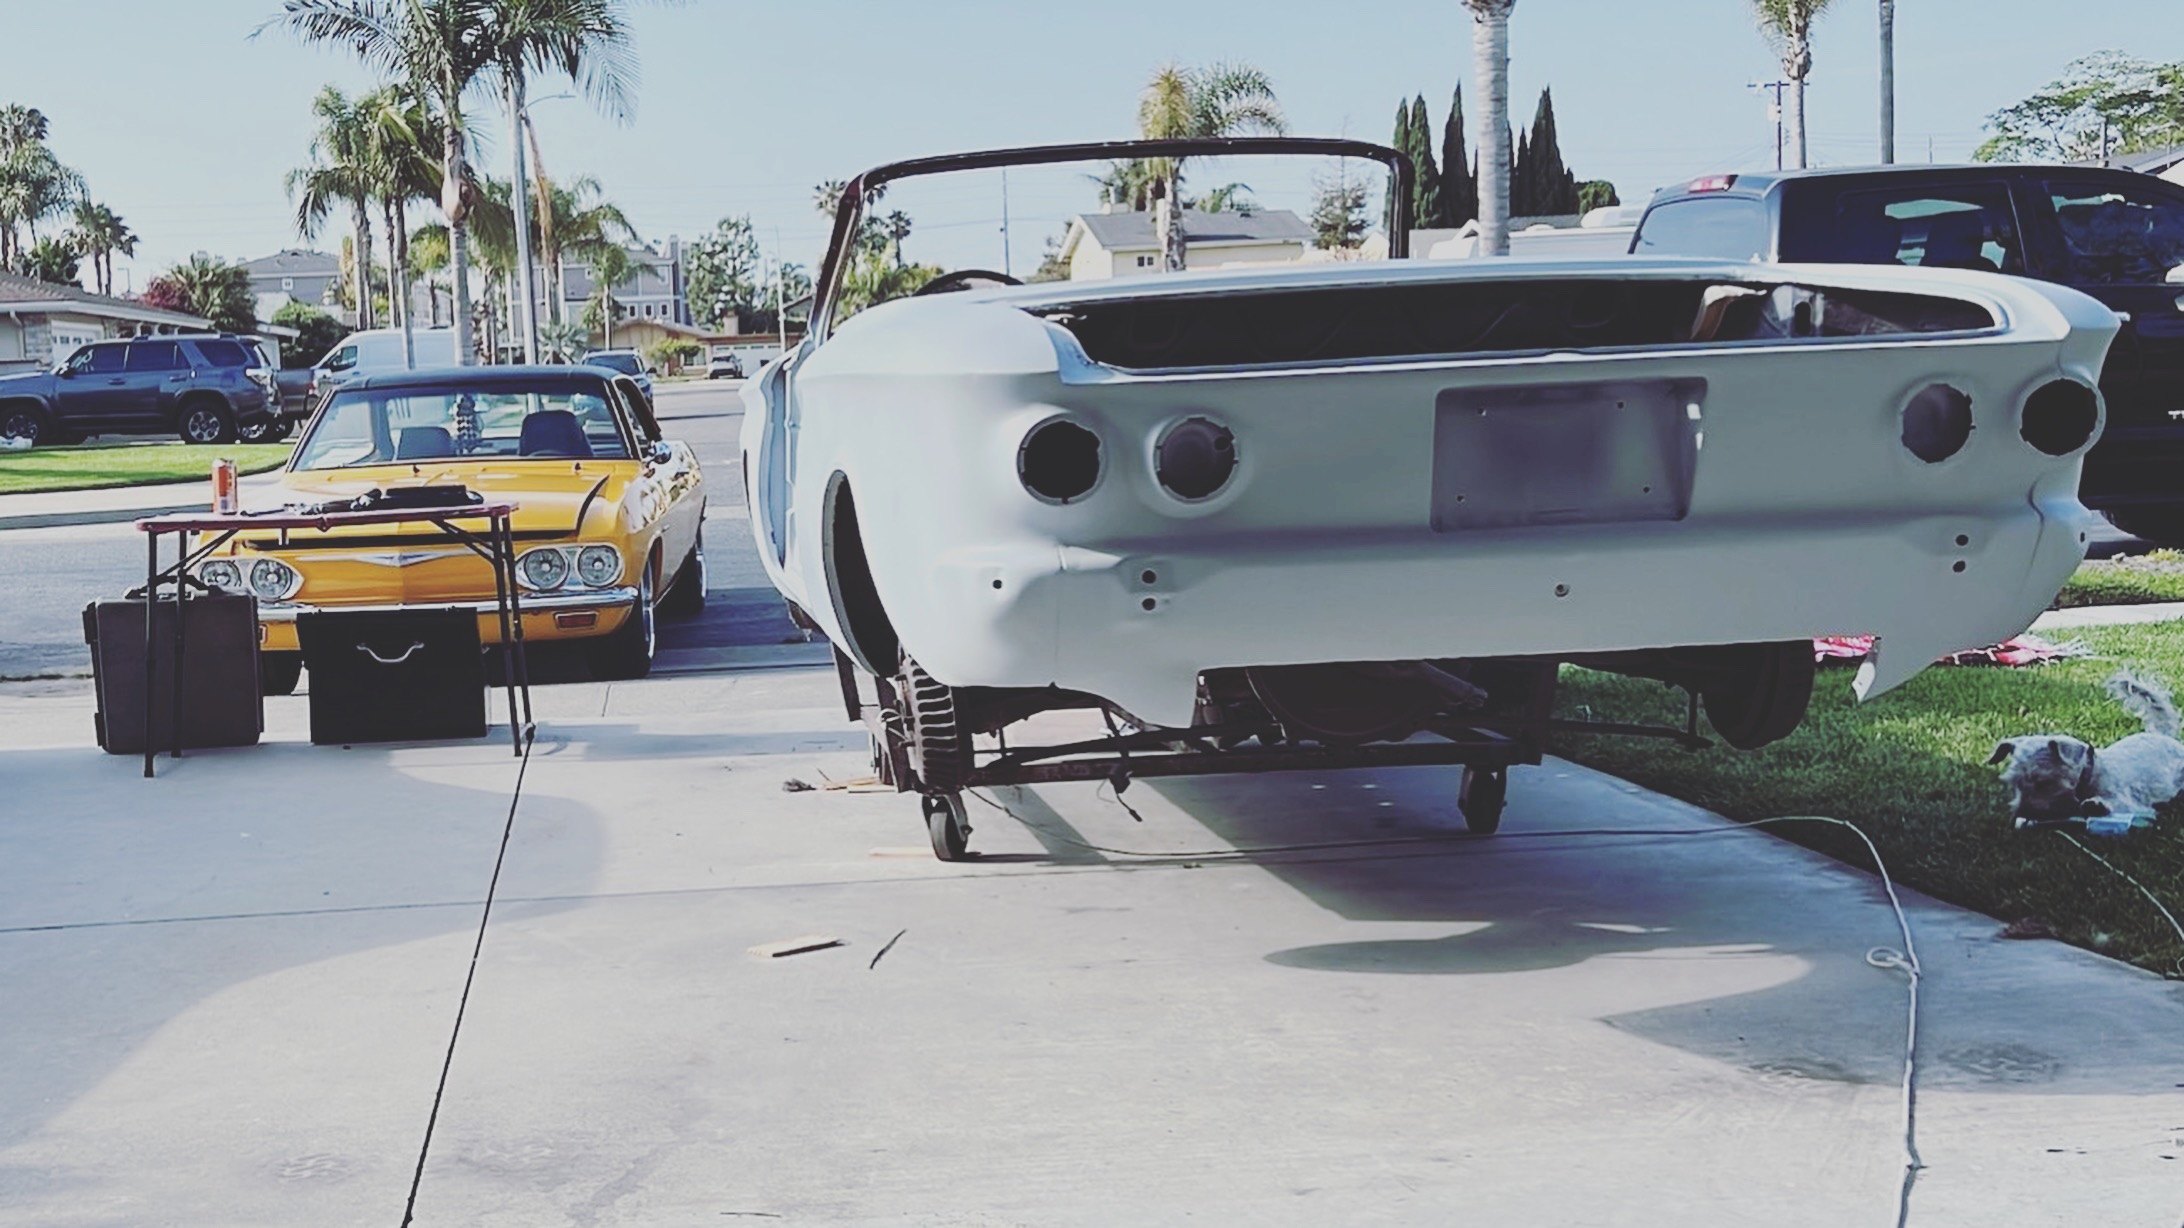
Disassembly: Body Shell Preparation
The Corvair body shell with most components removed, ready for the next phase of body and paint restoration work.
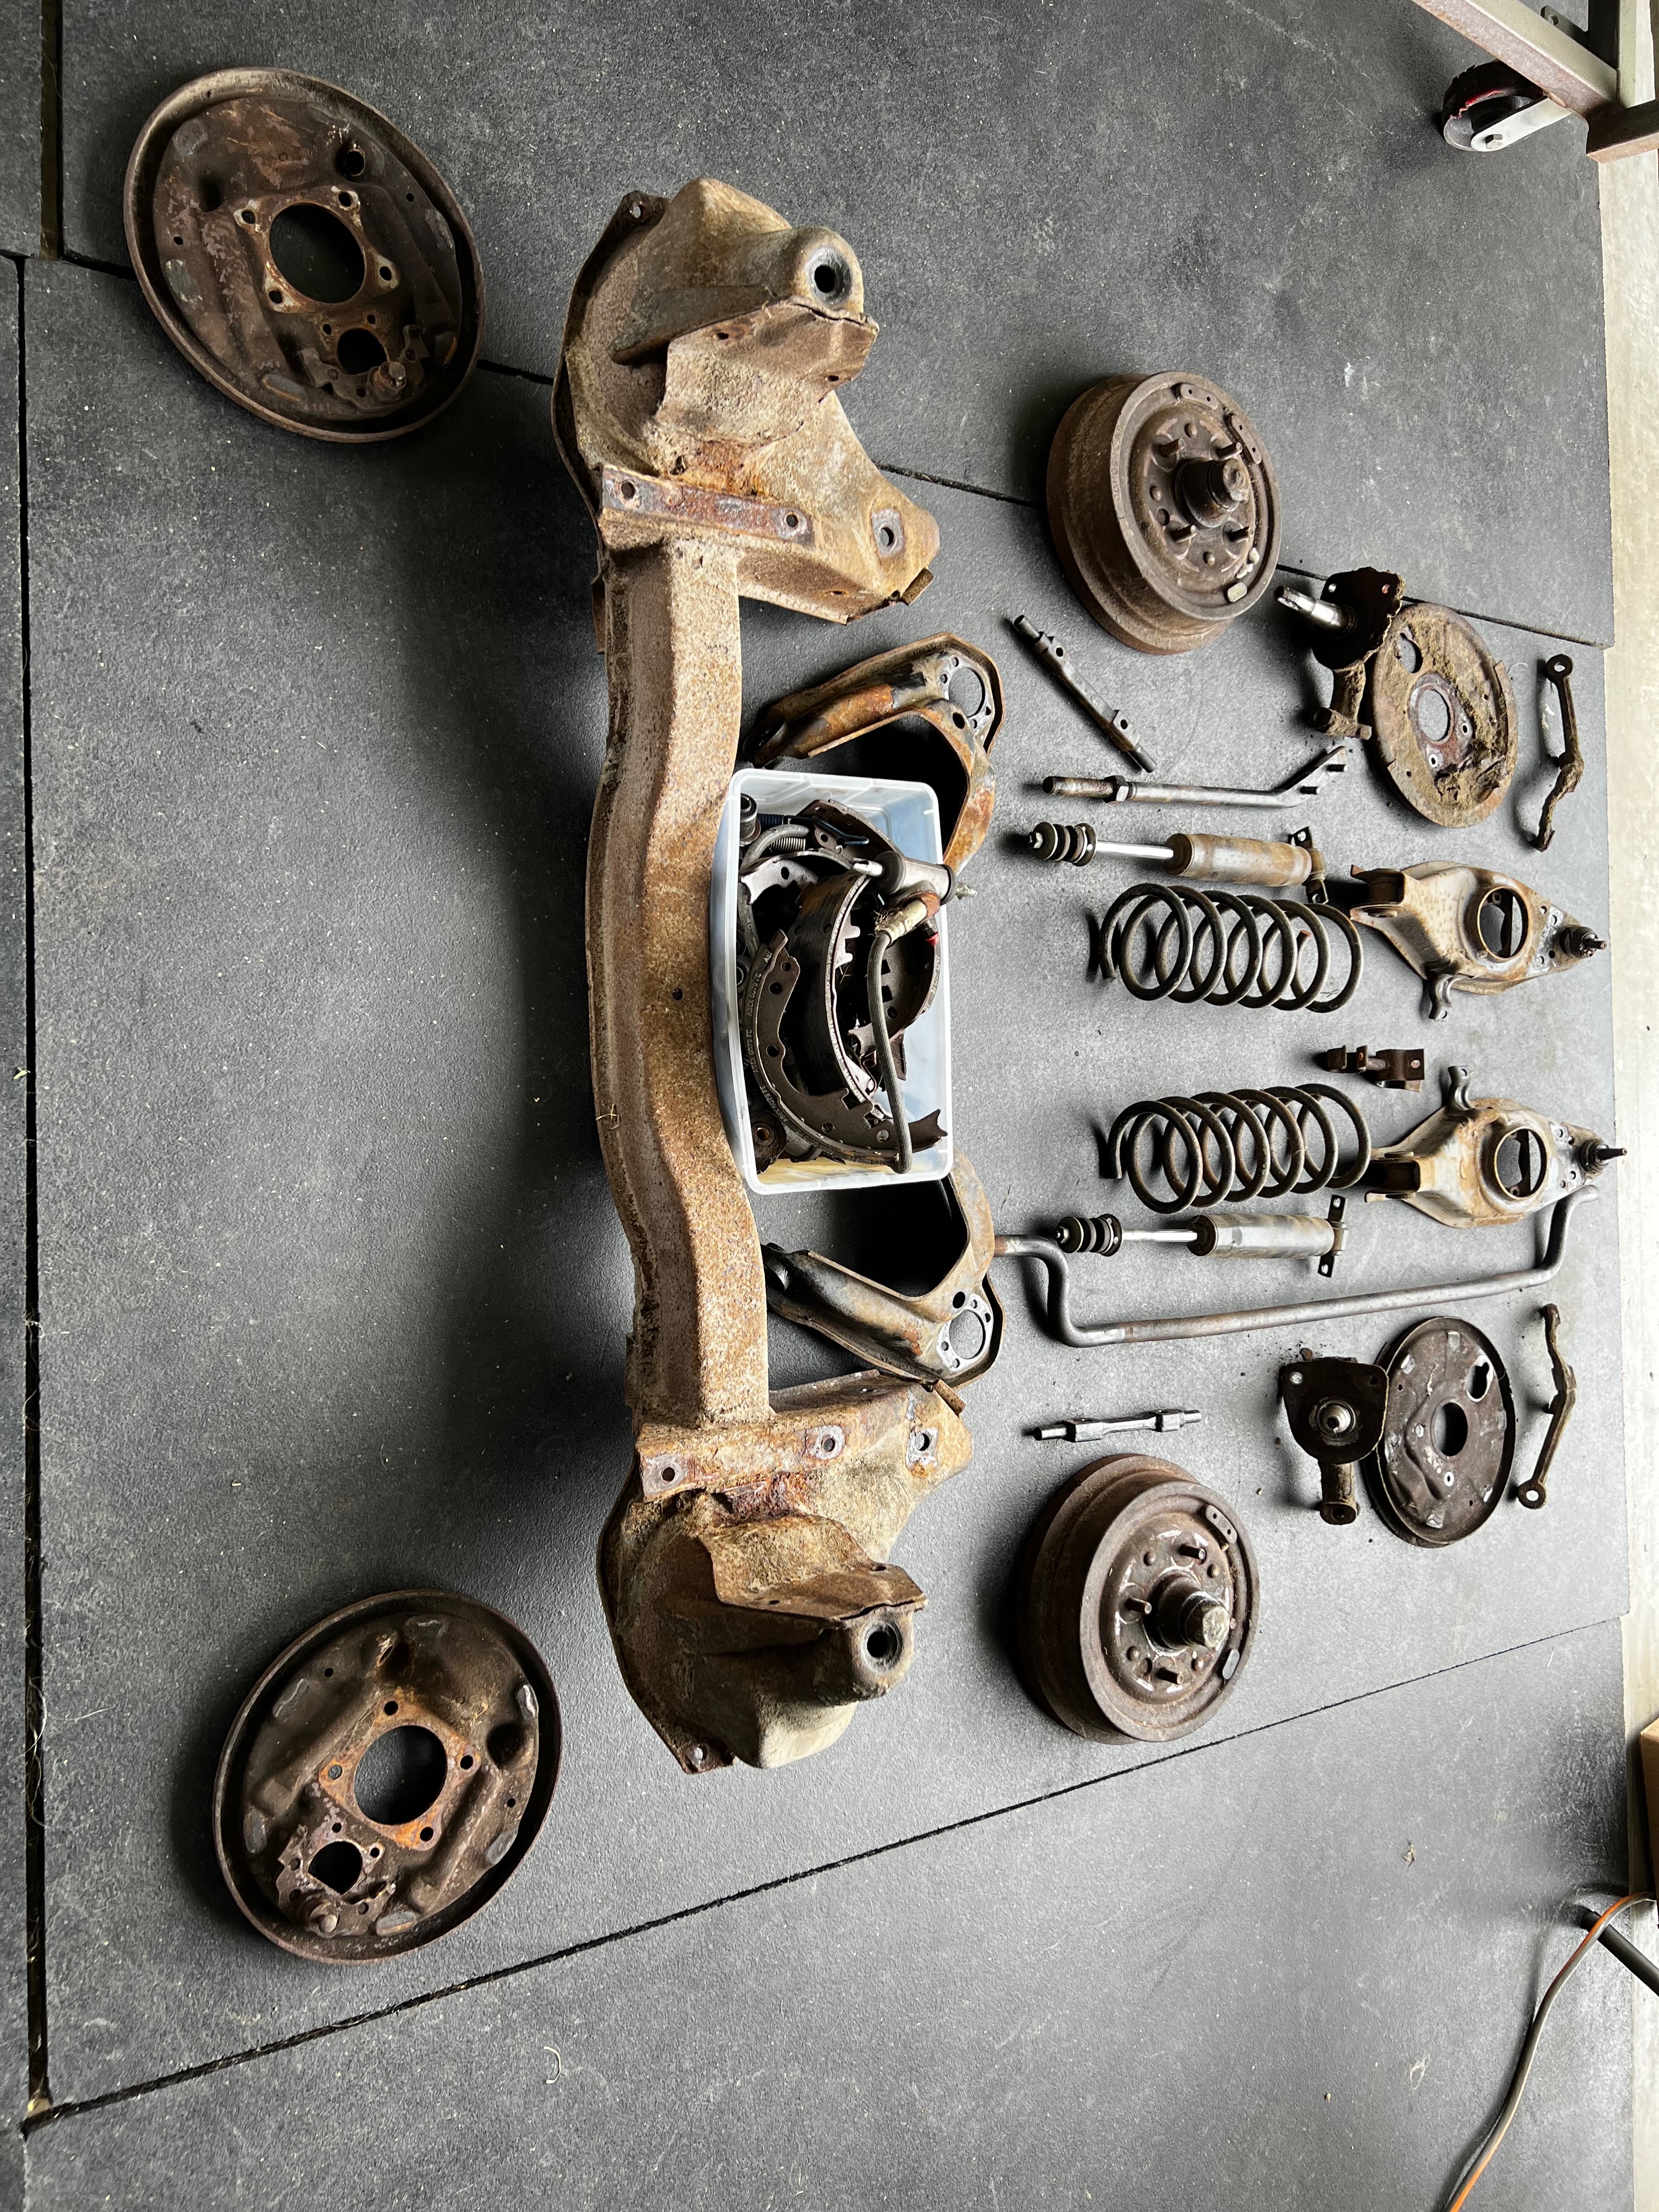
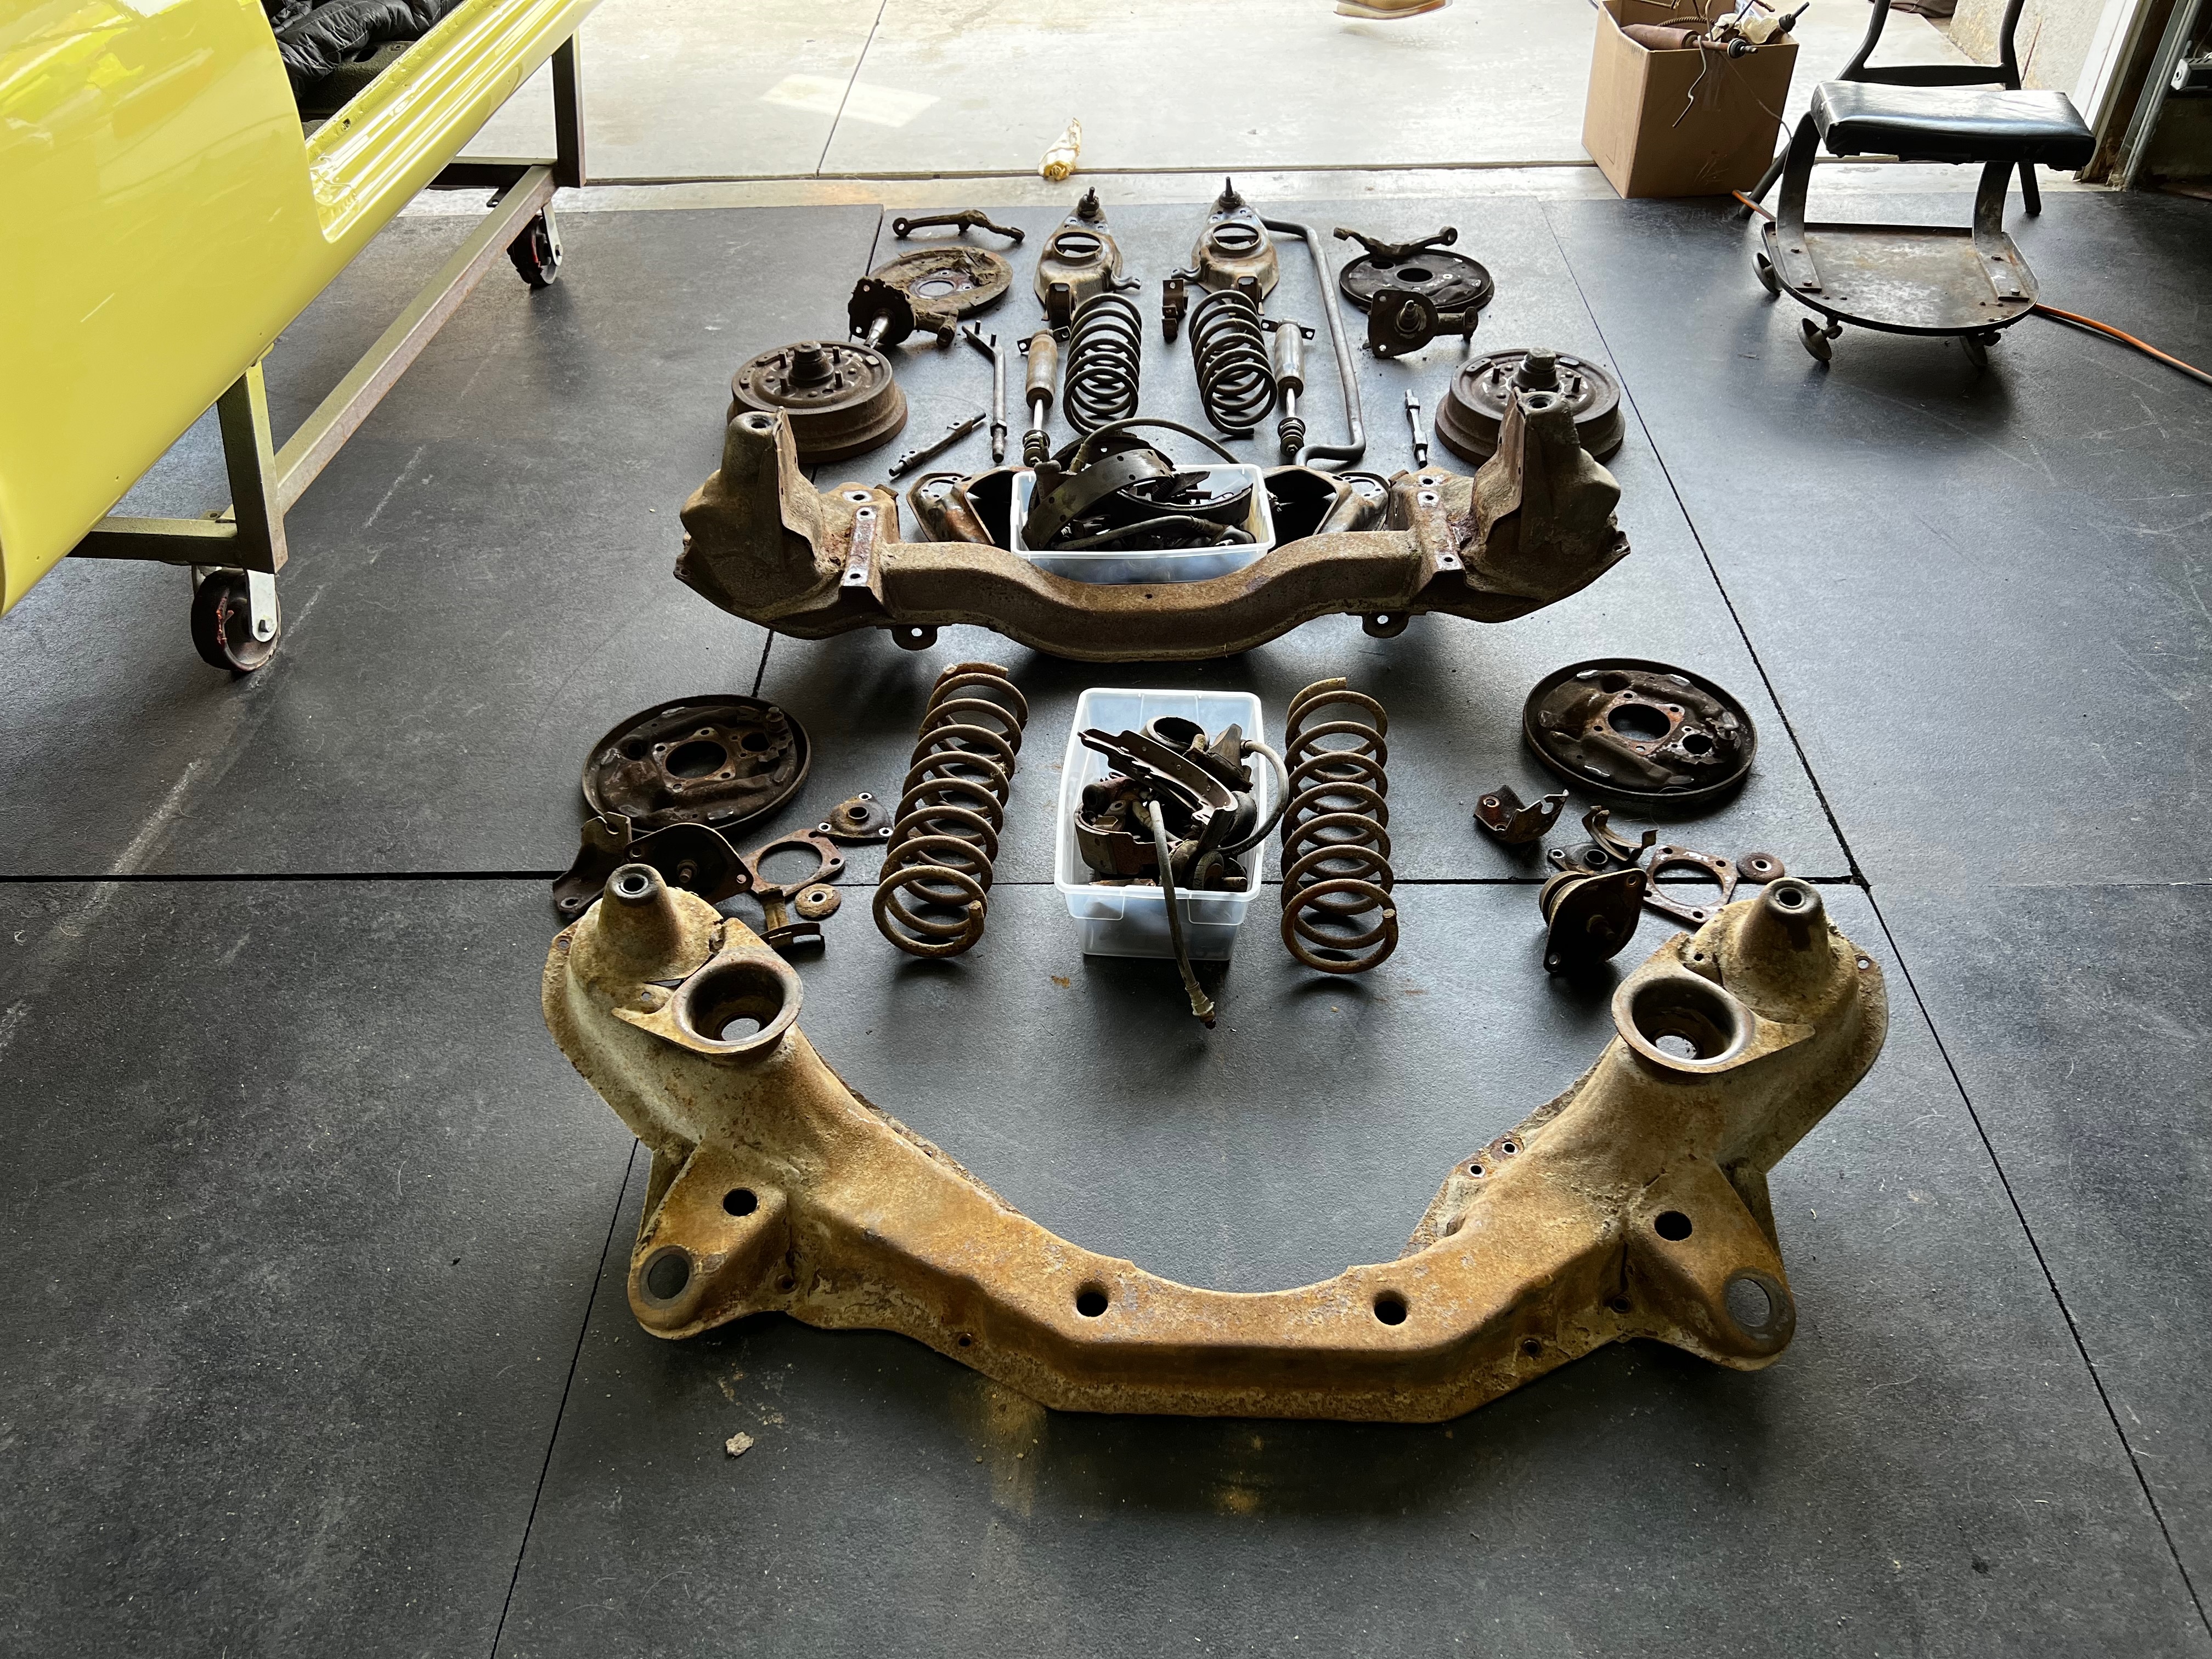
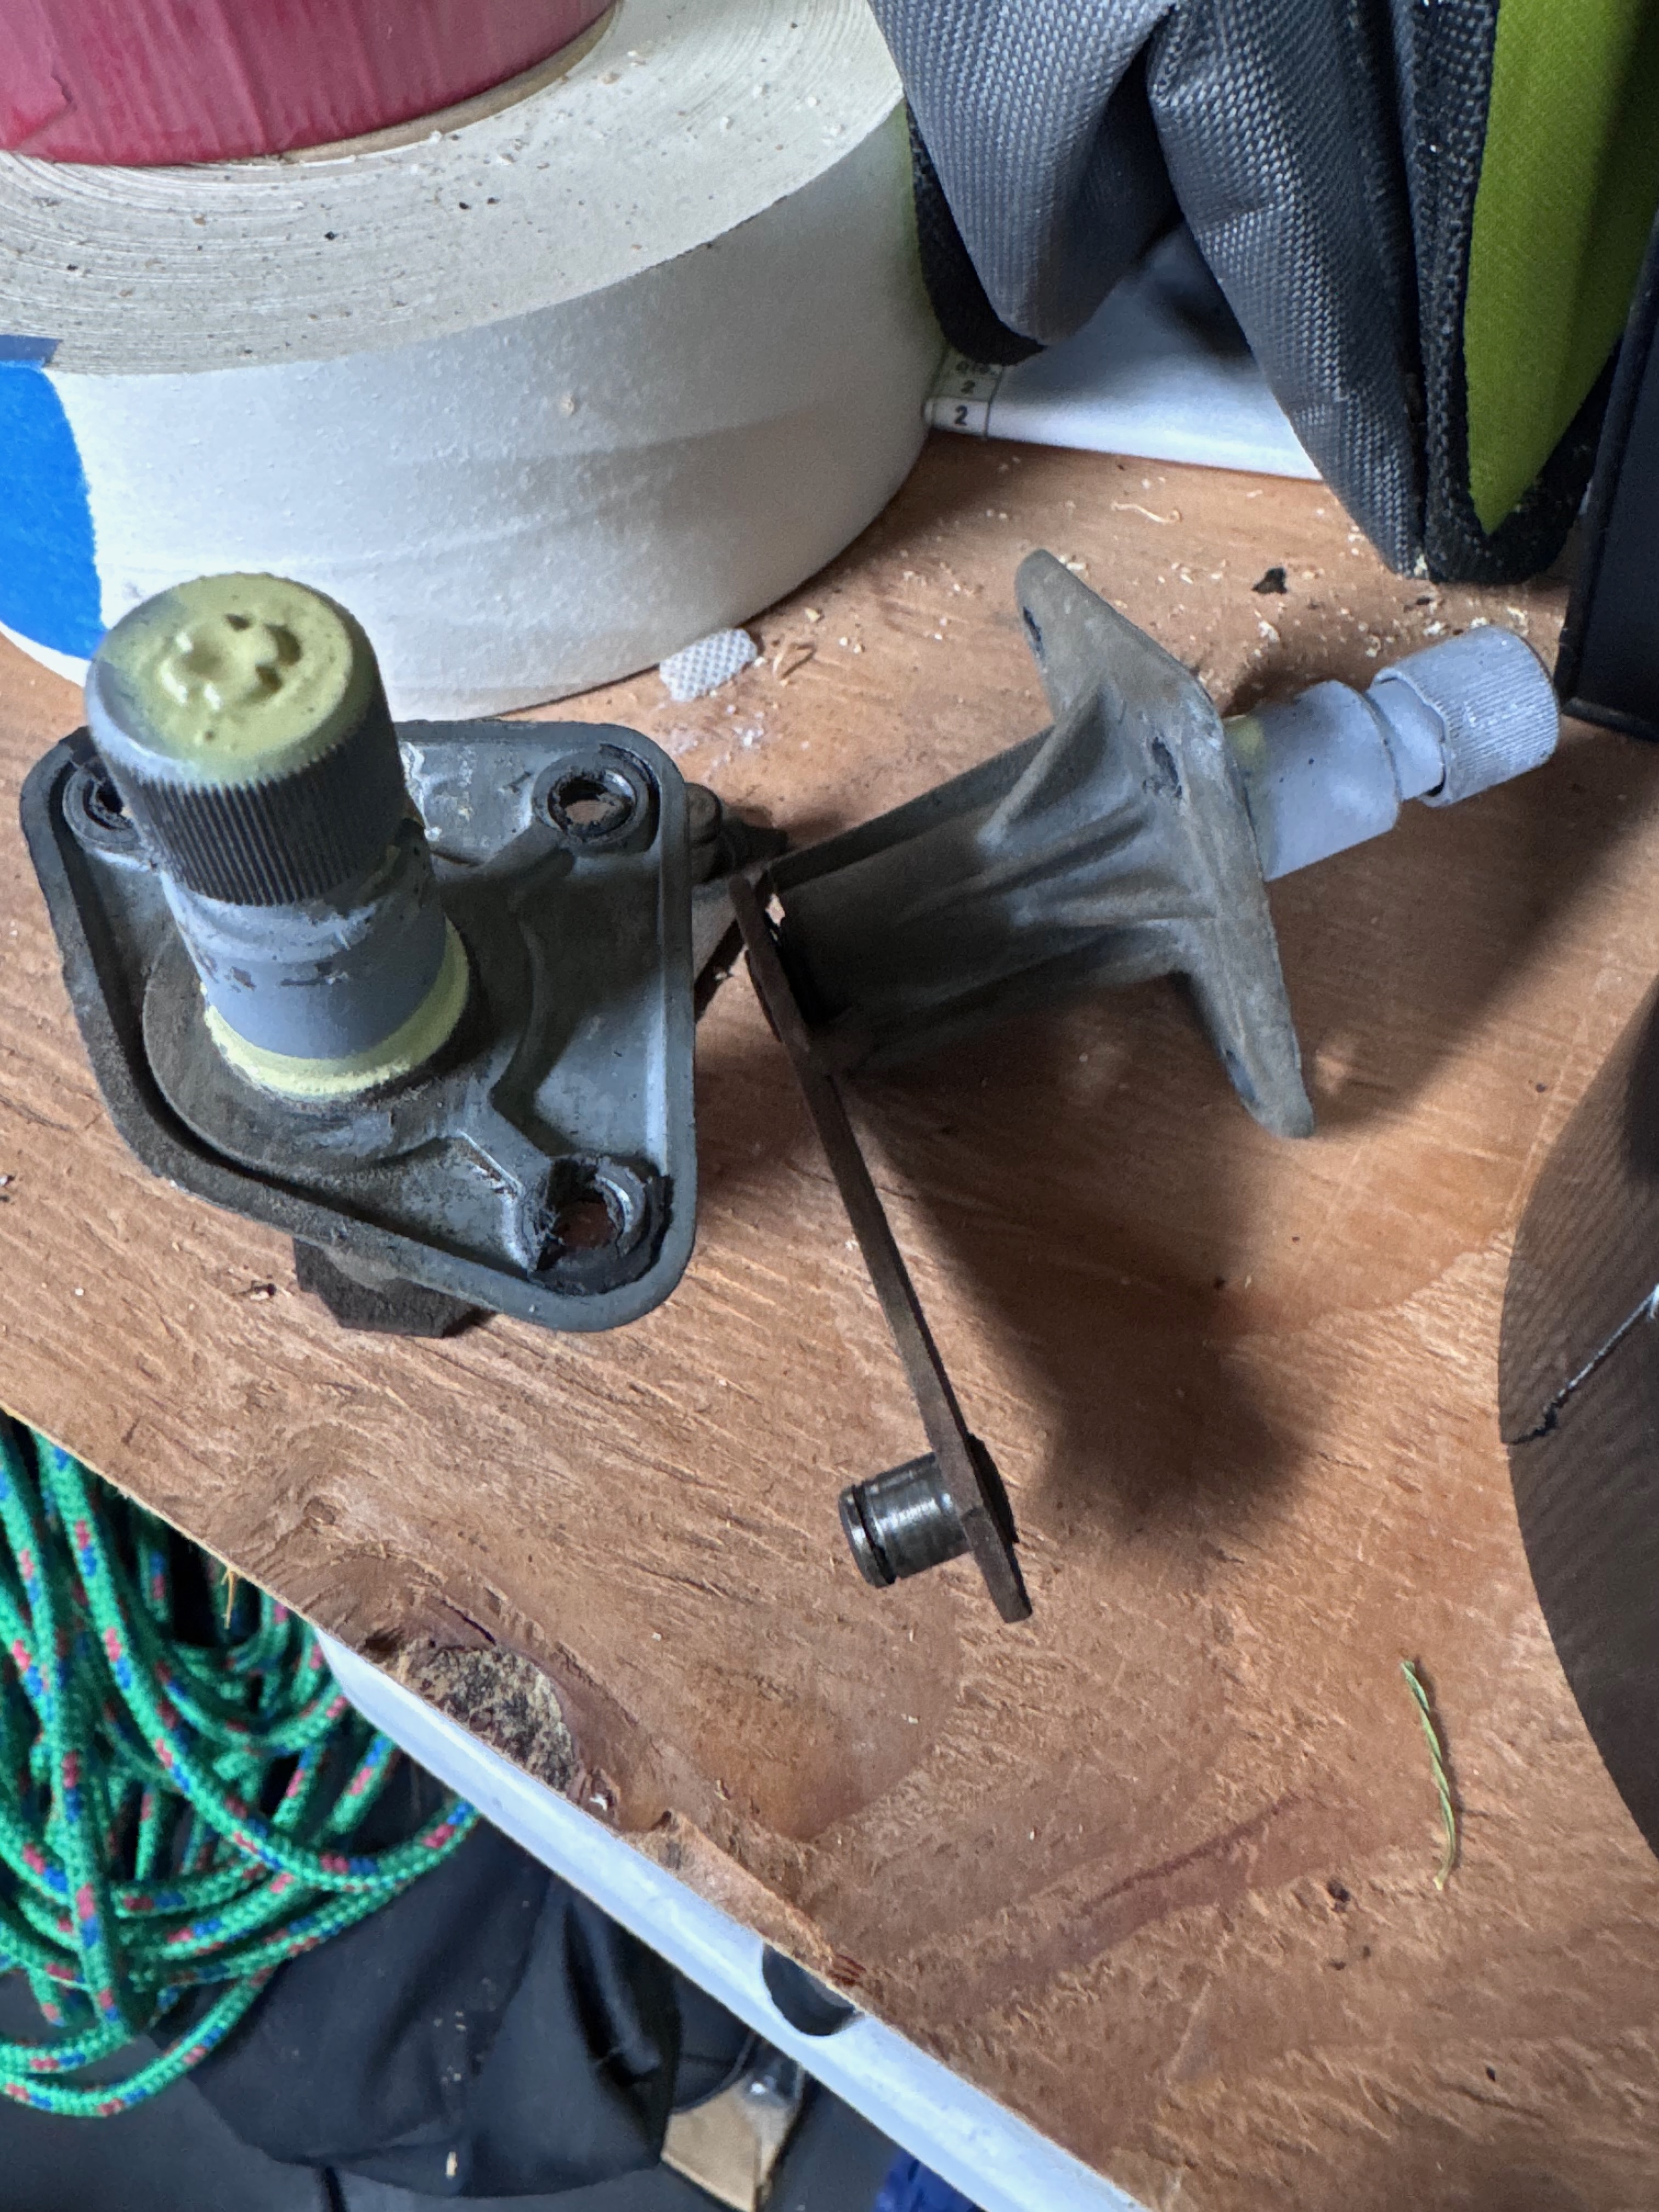
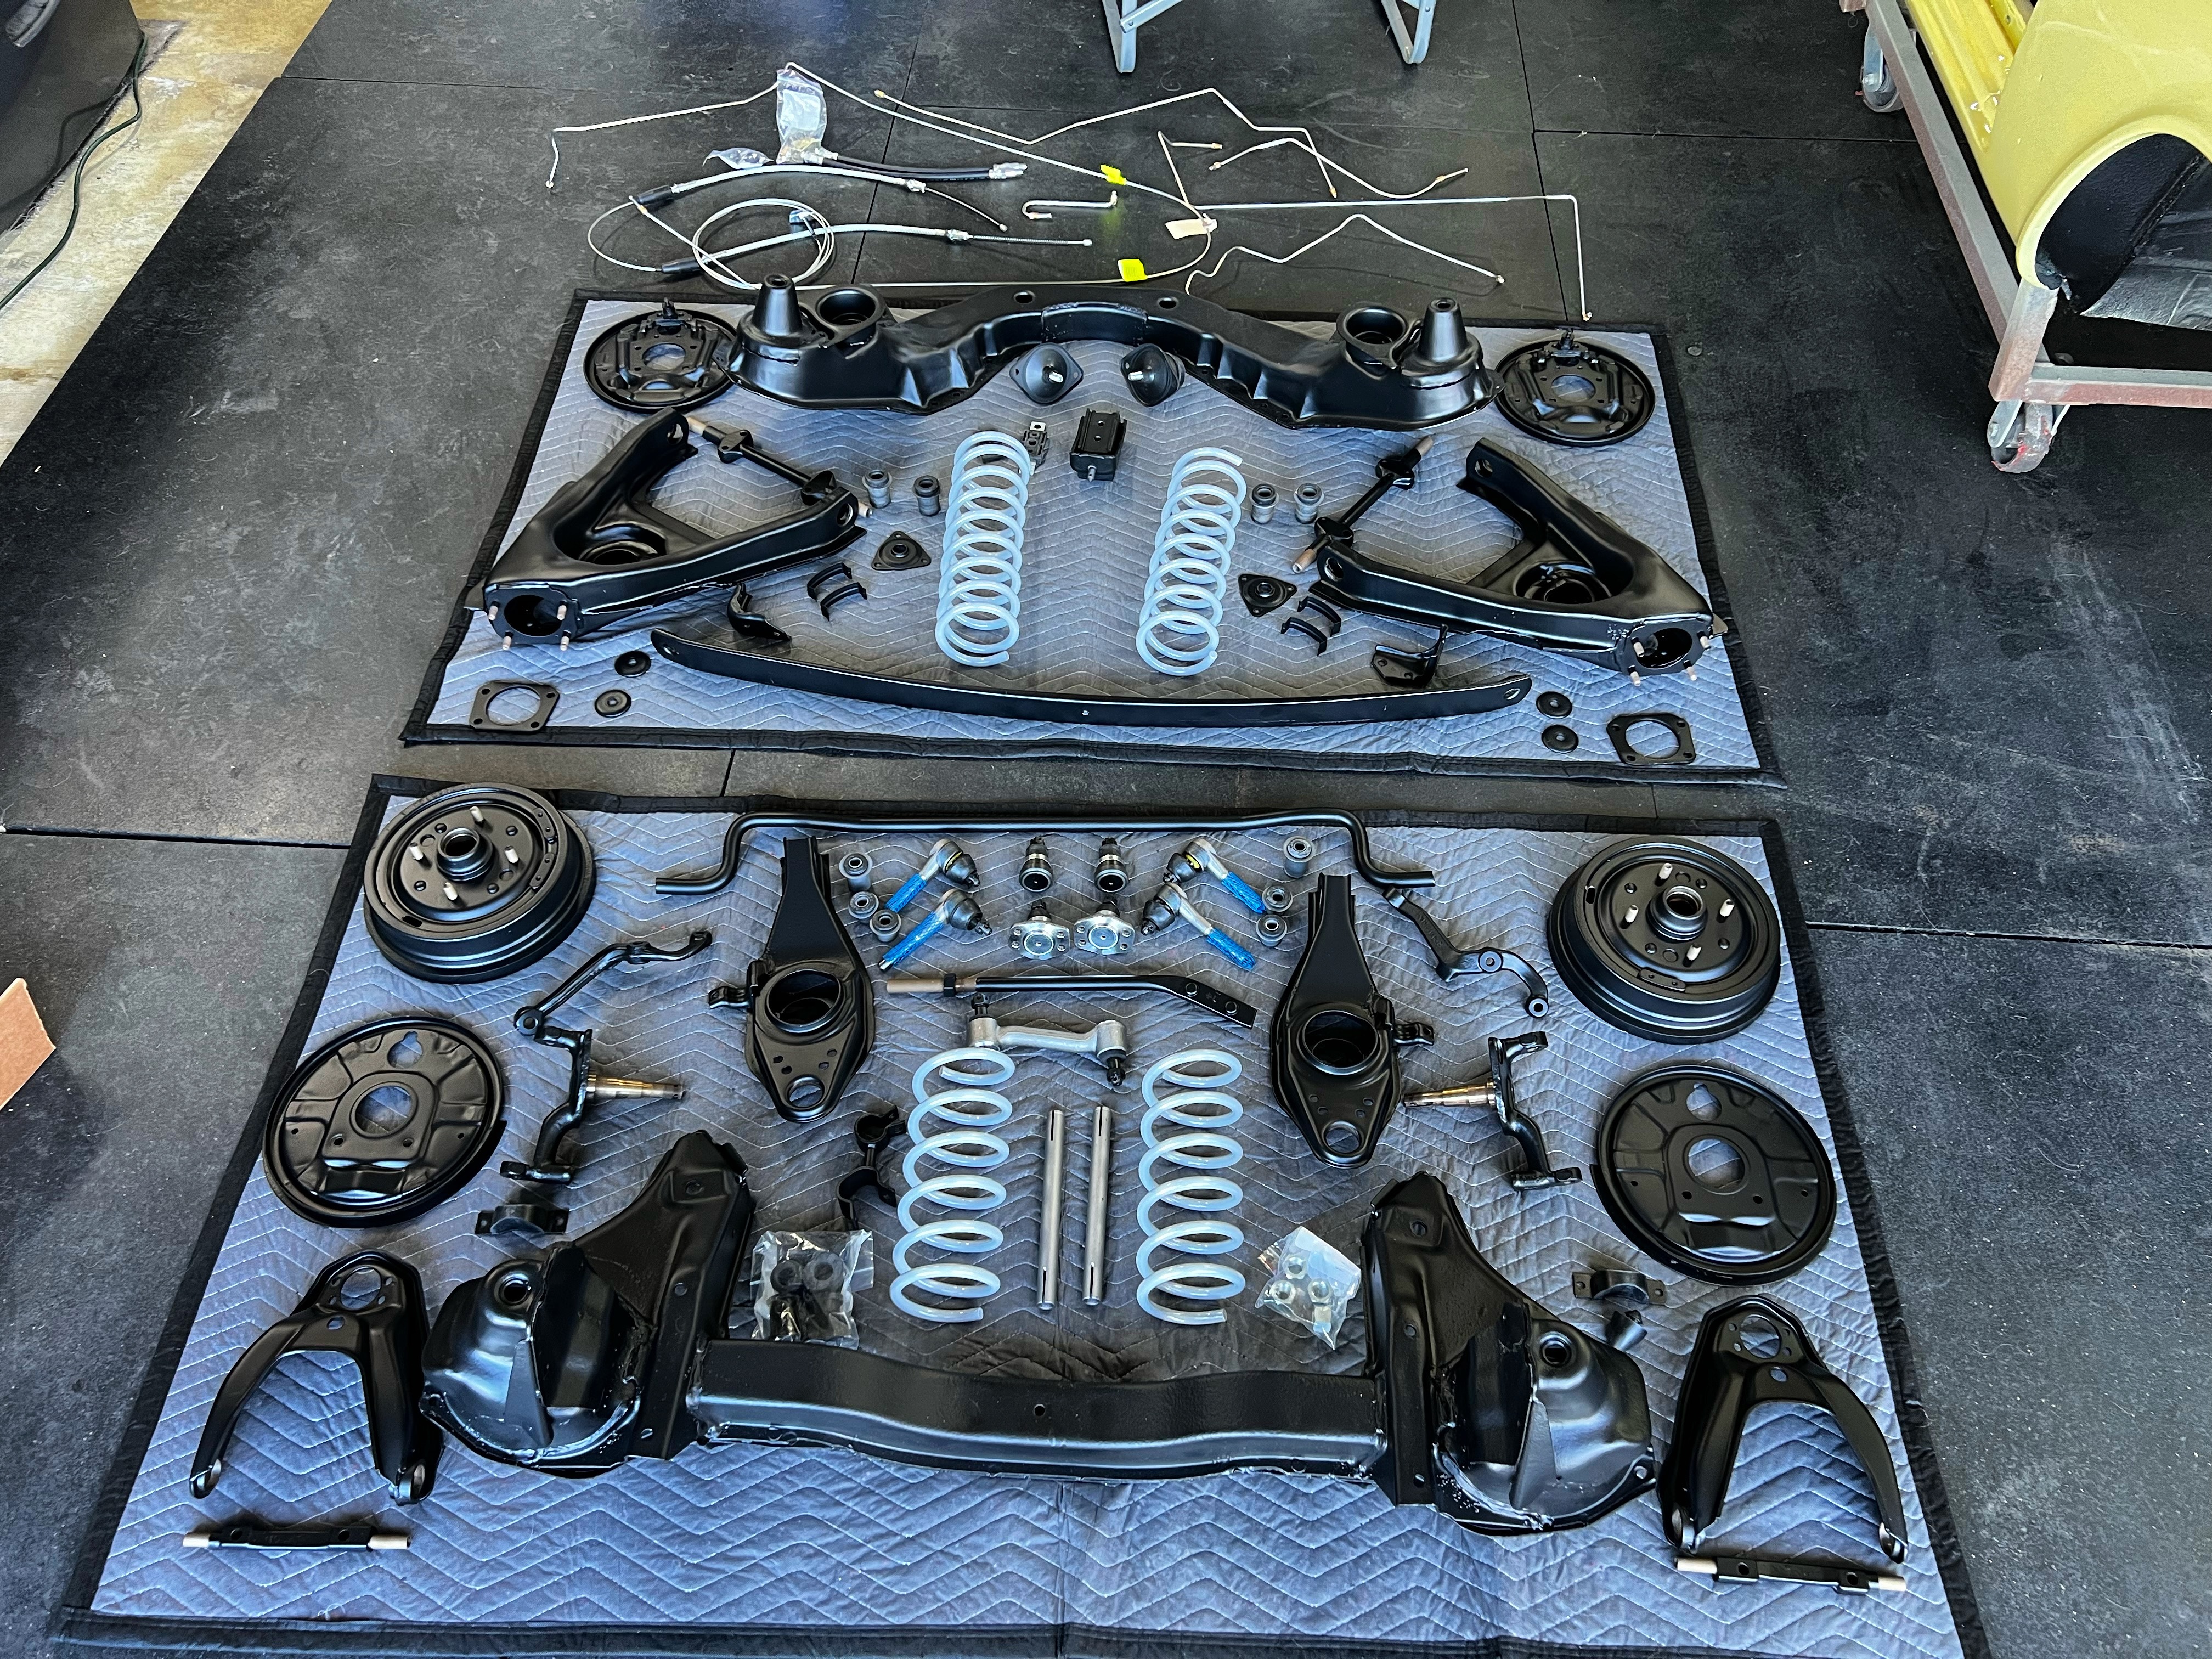
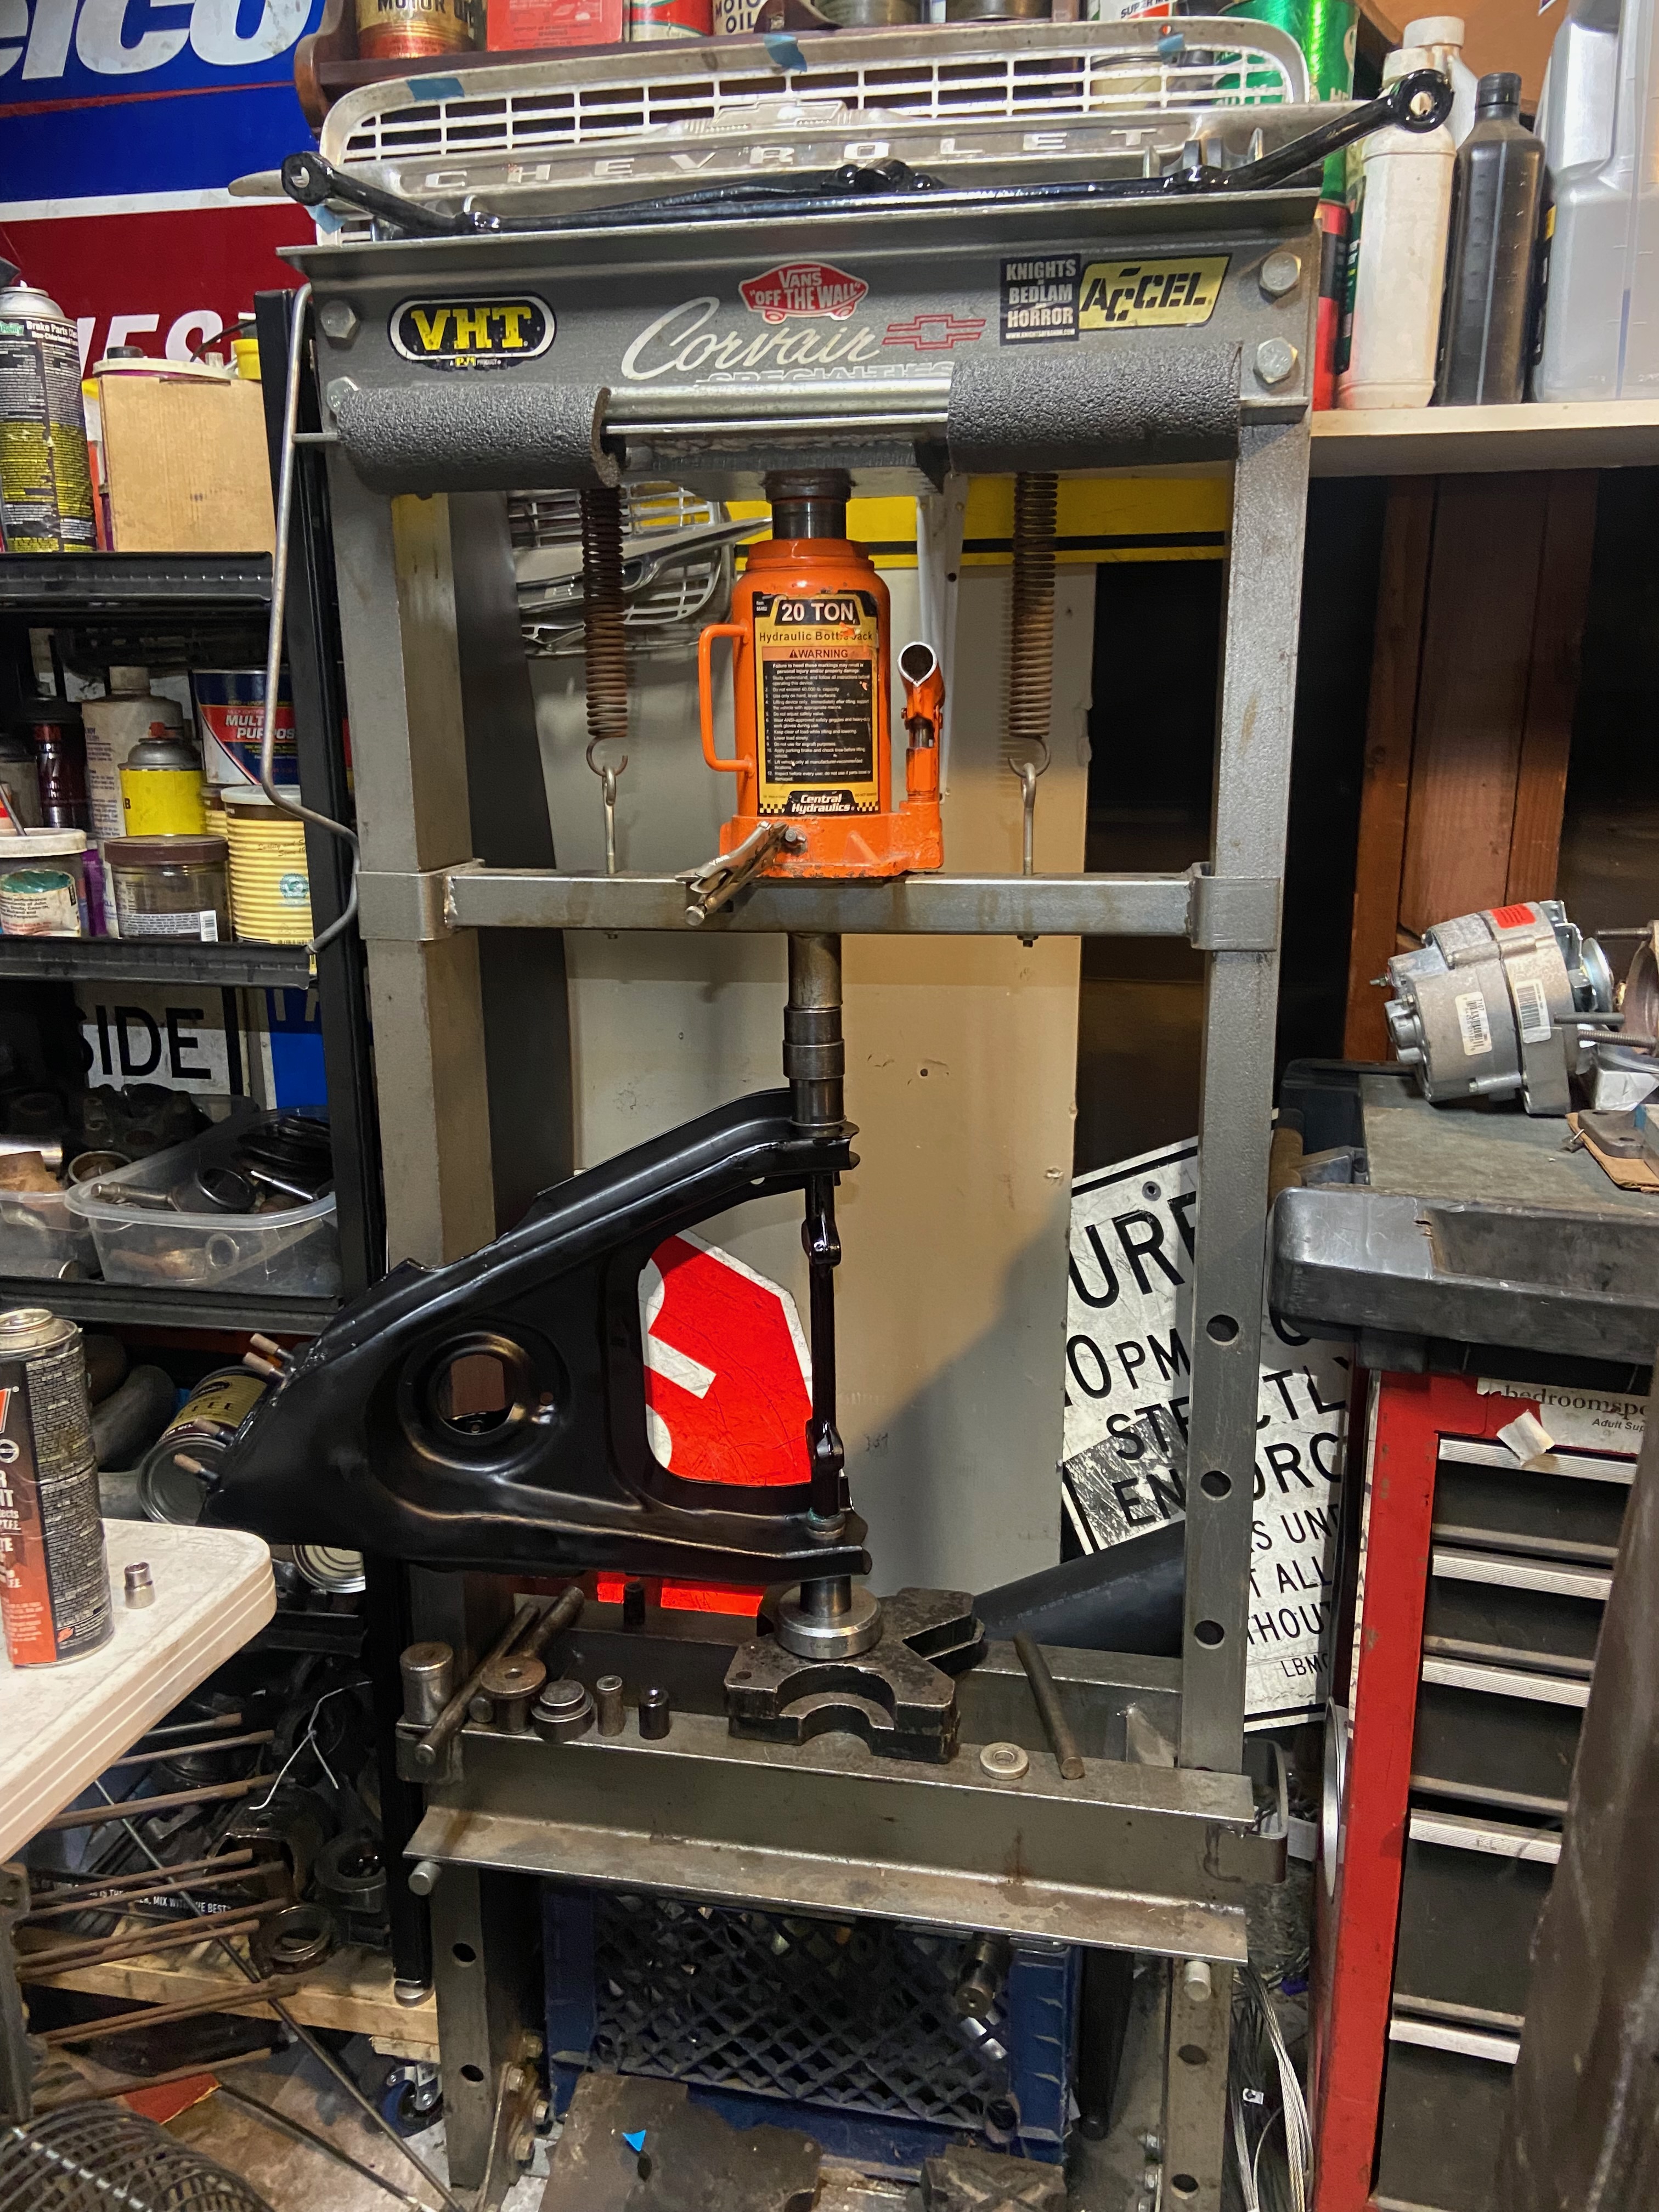
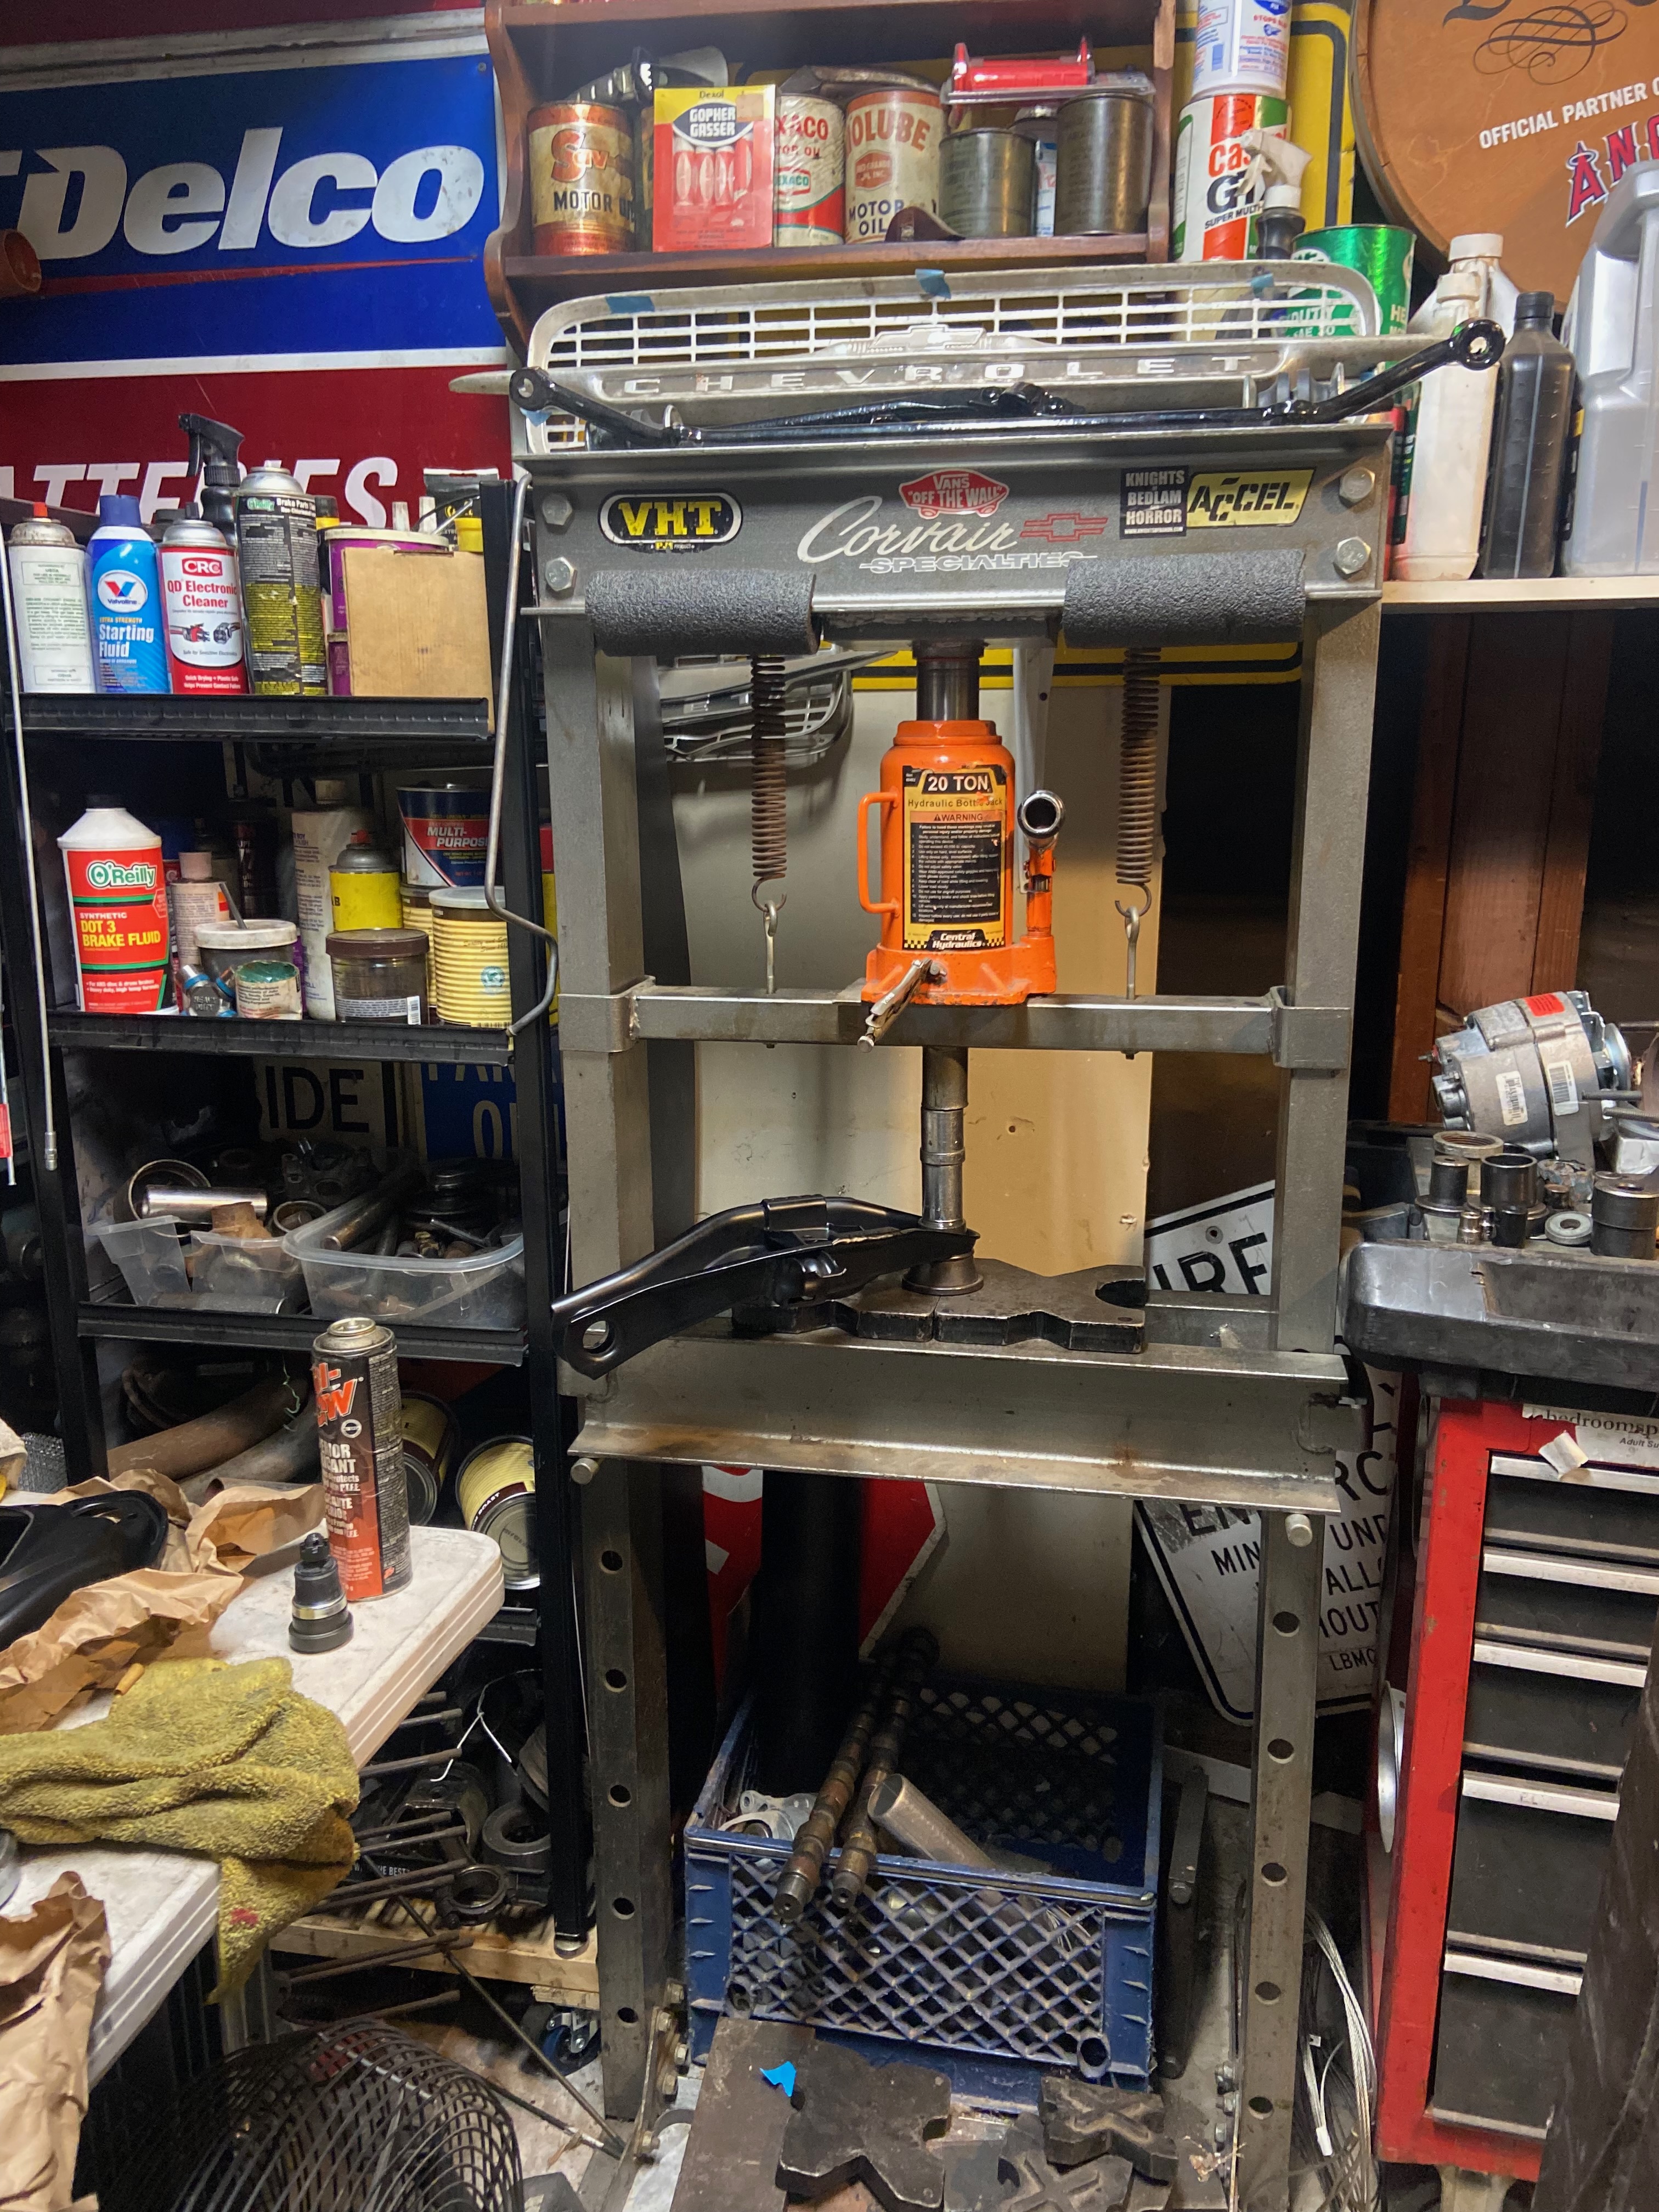
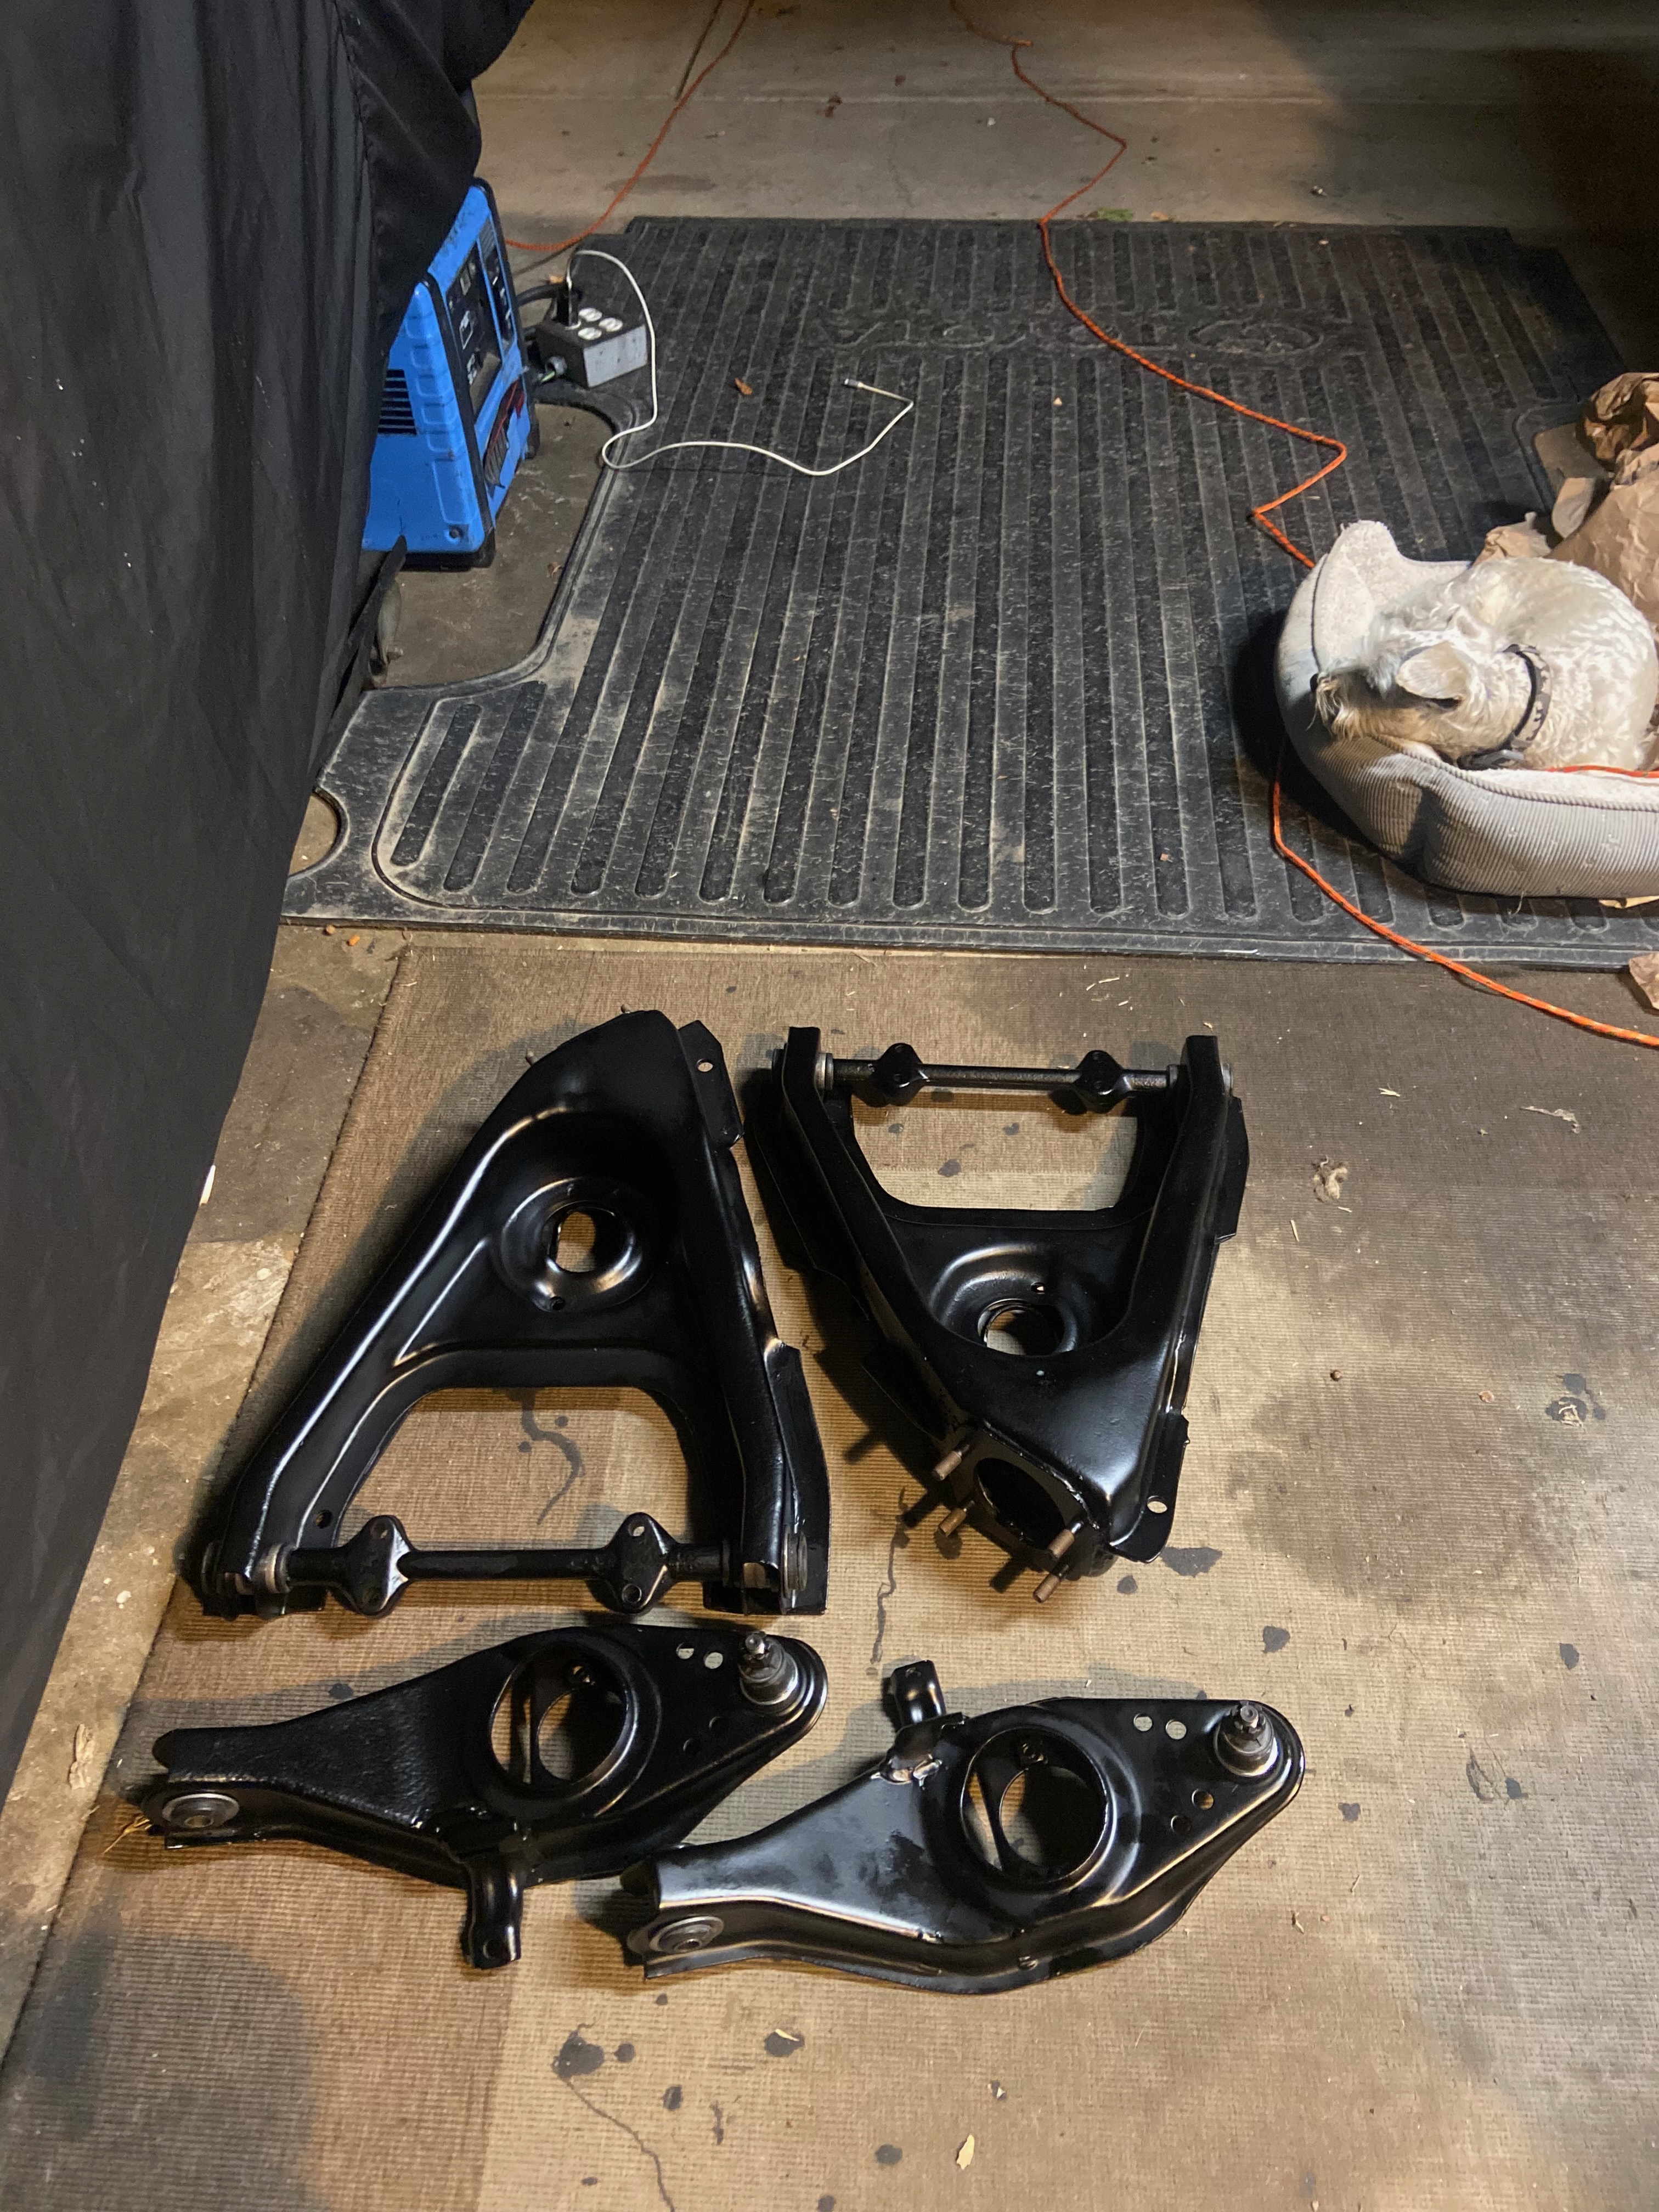
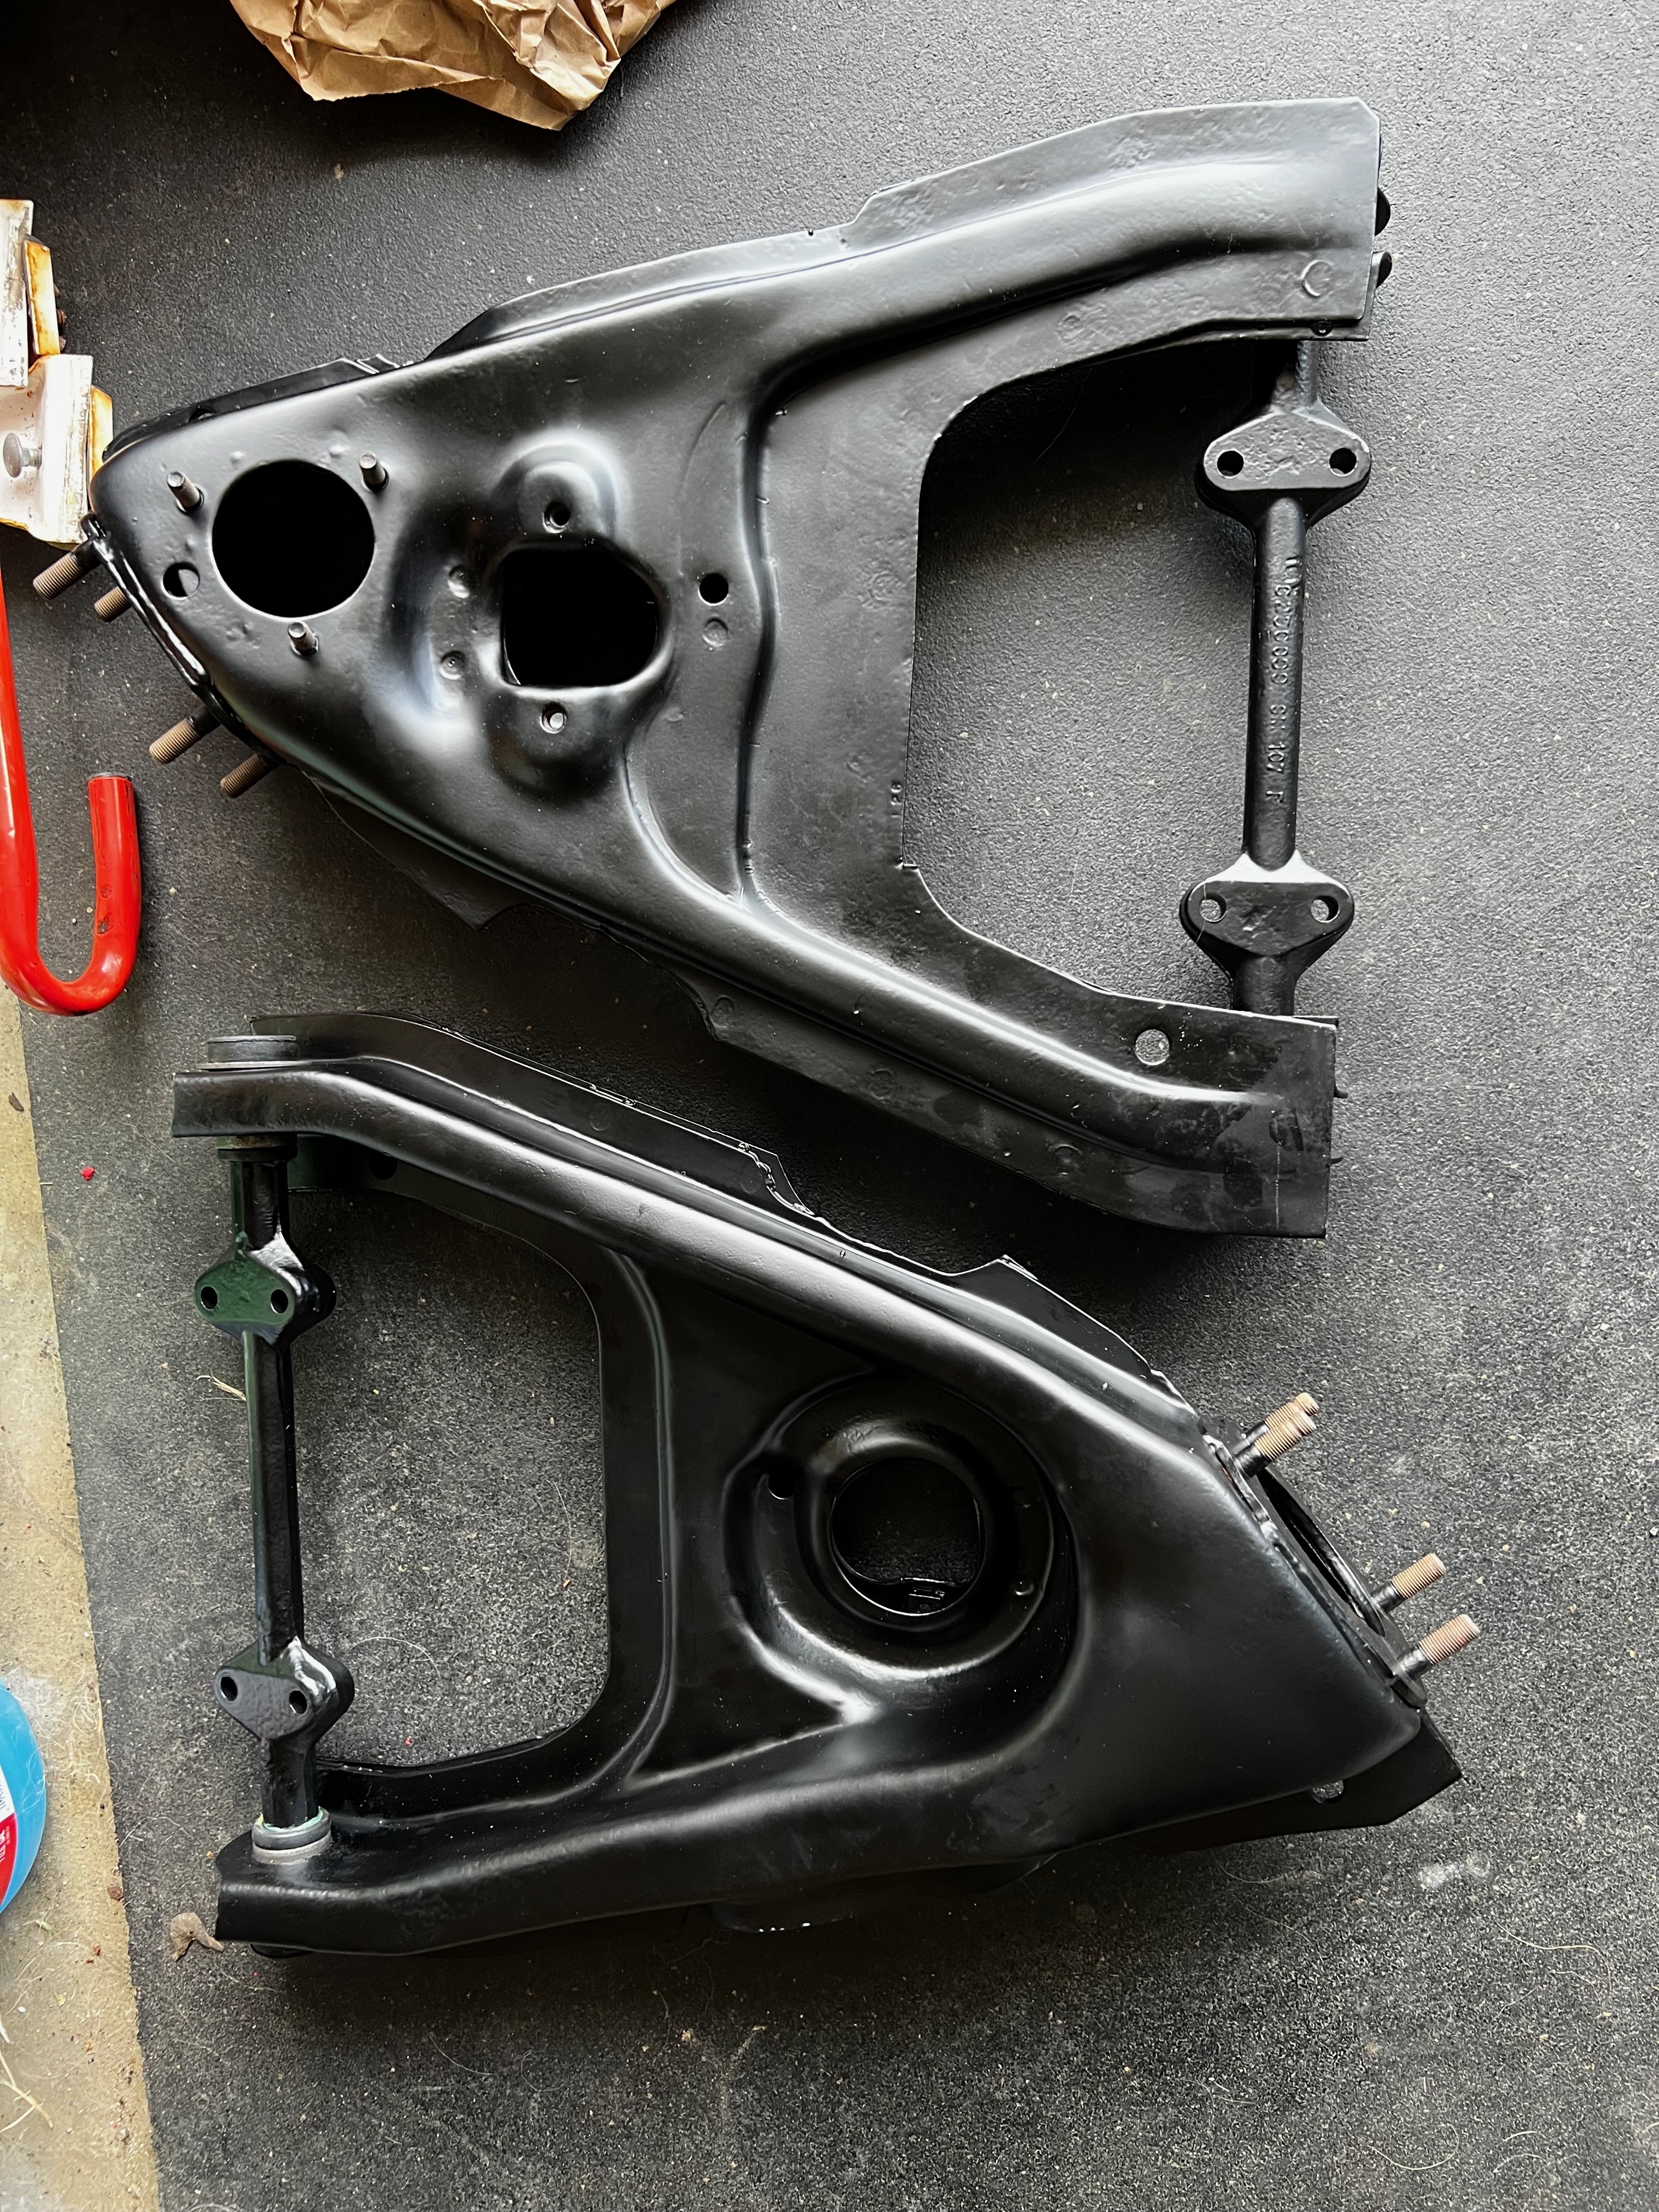
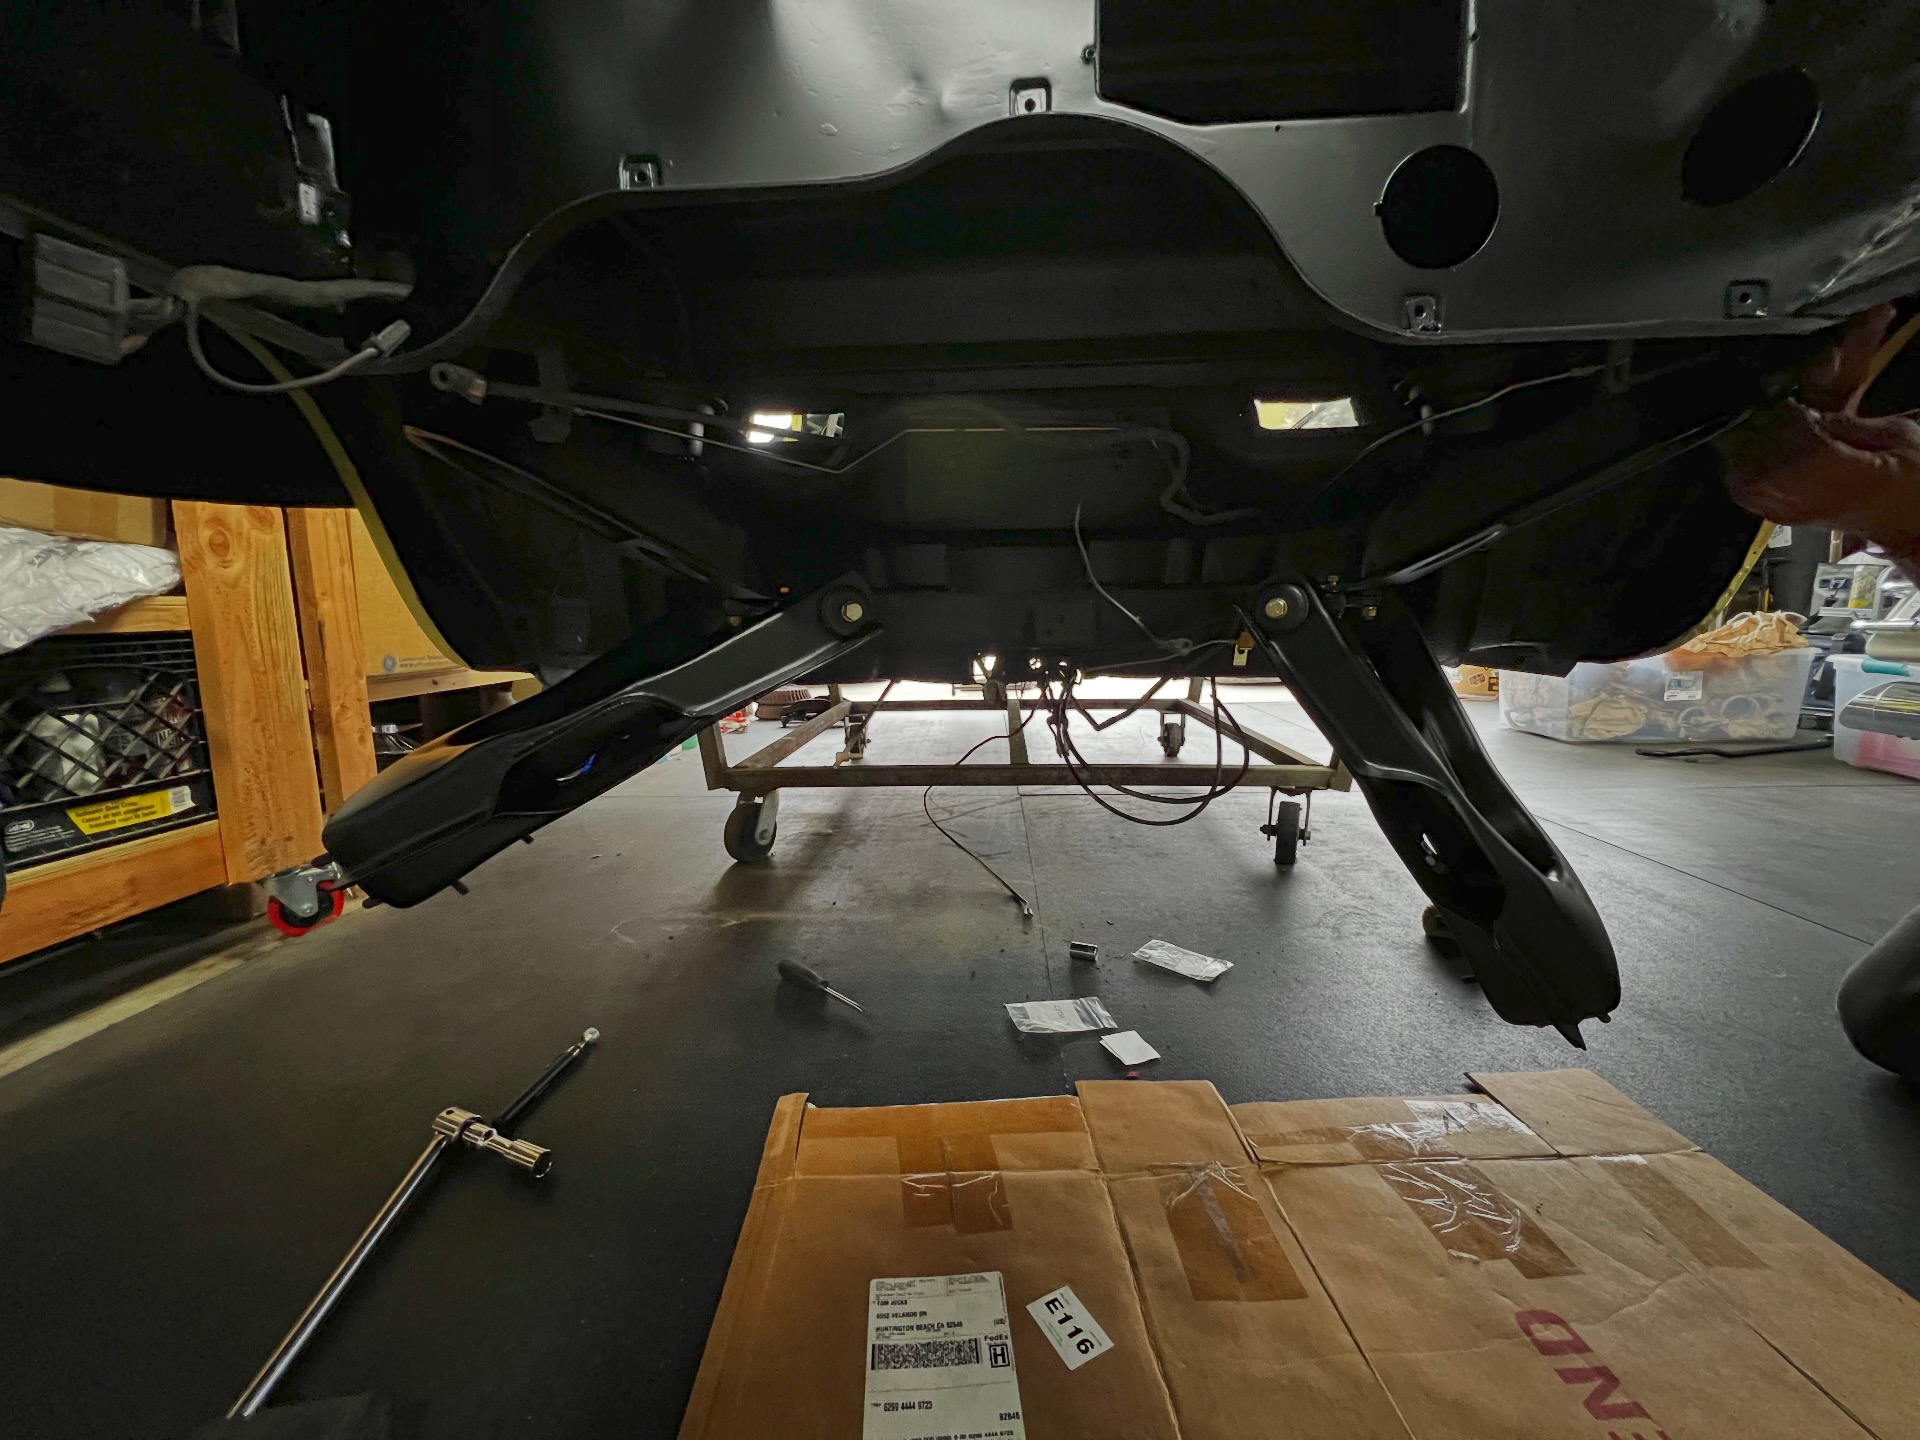
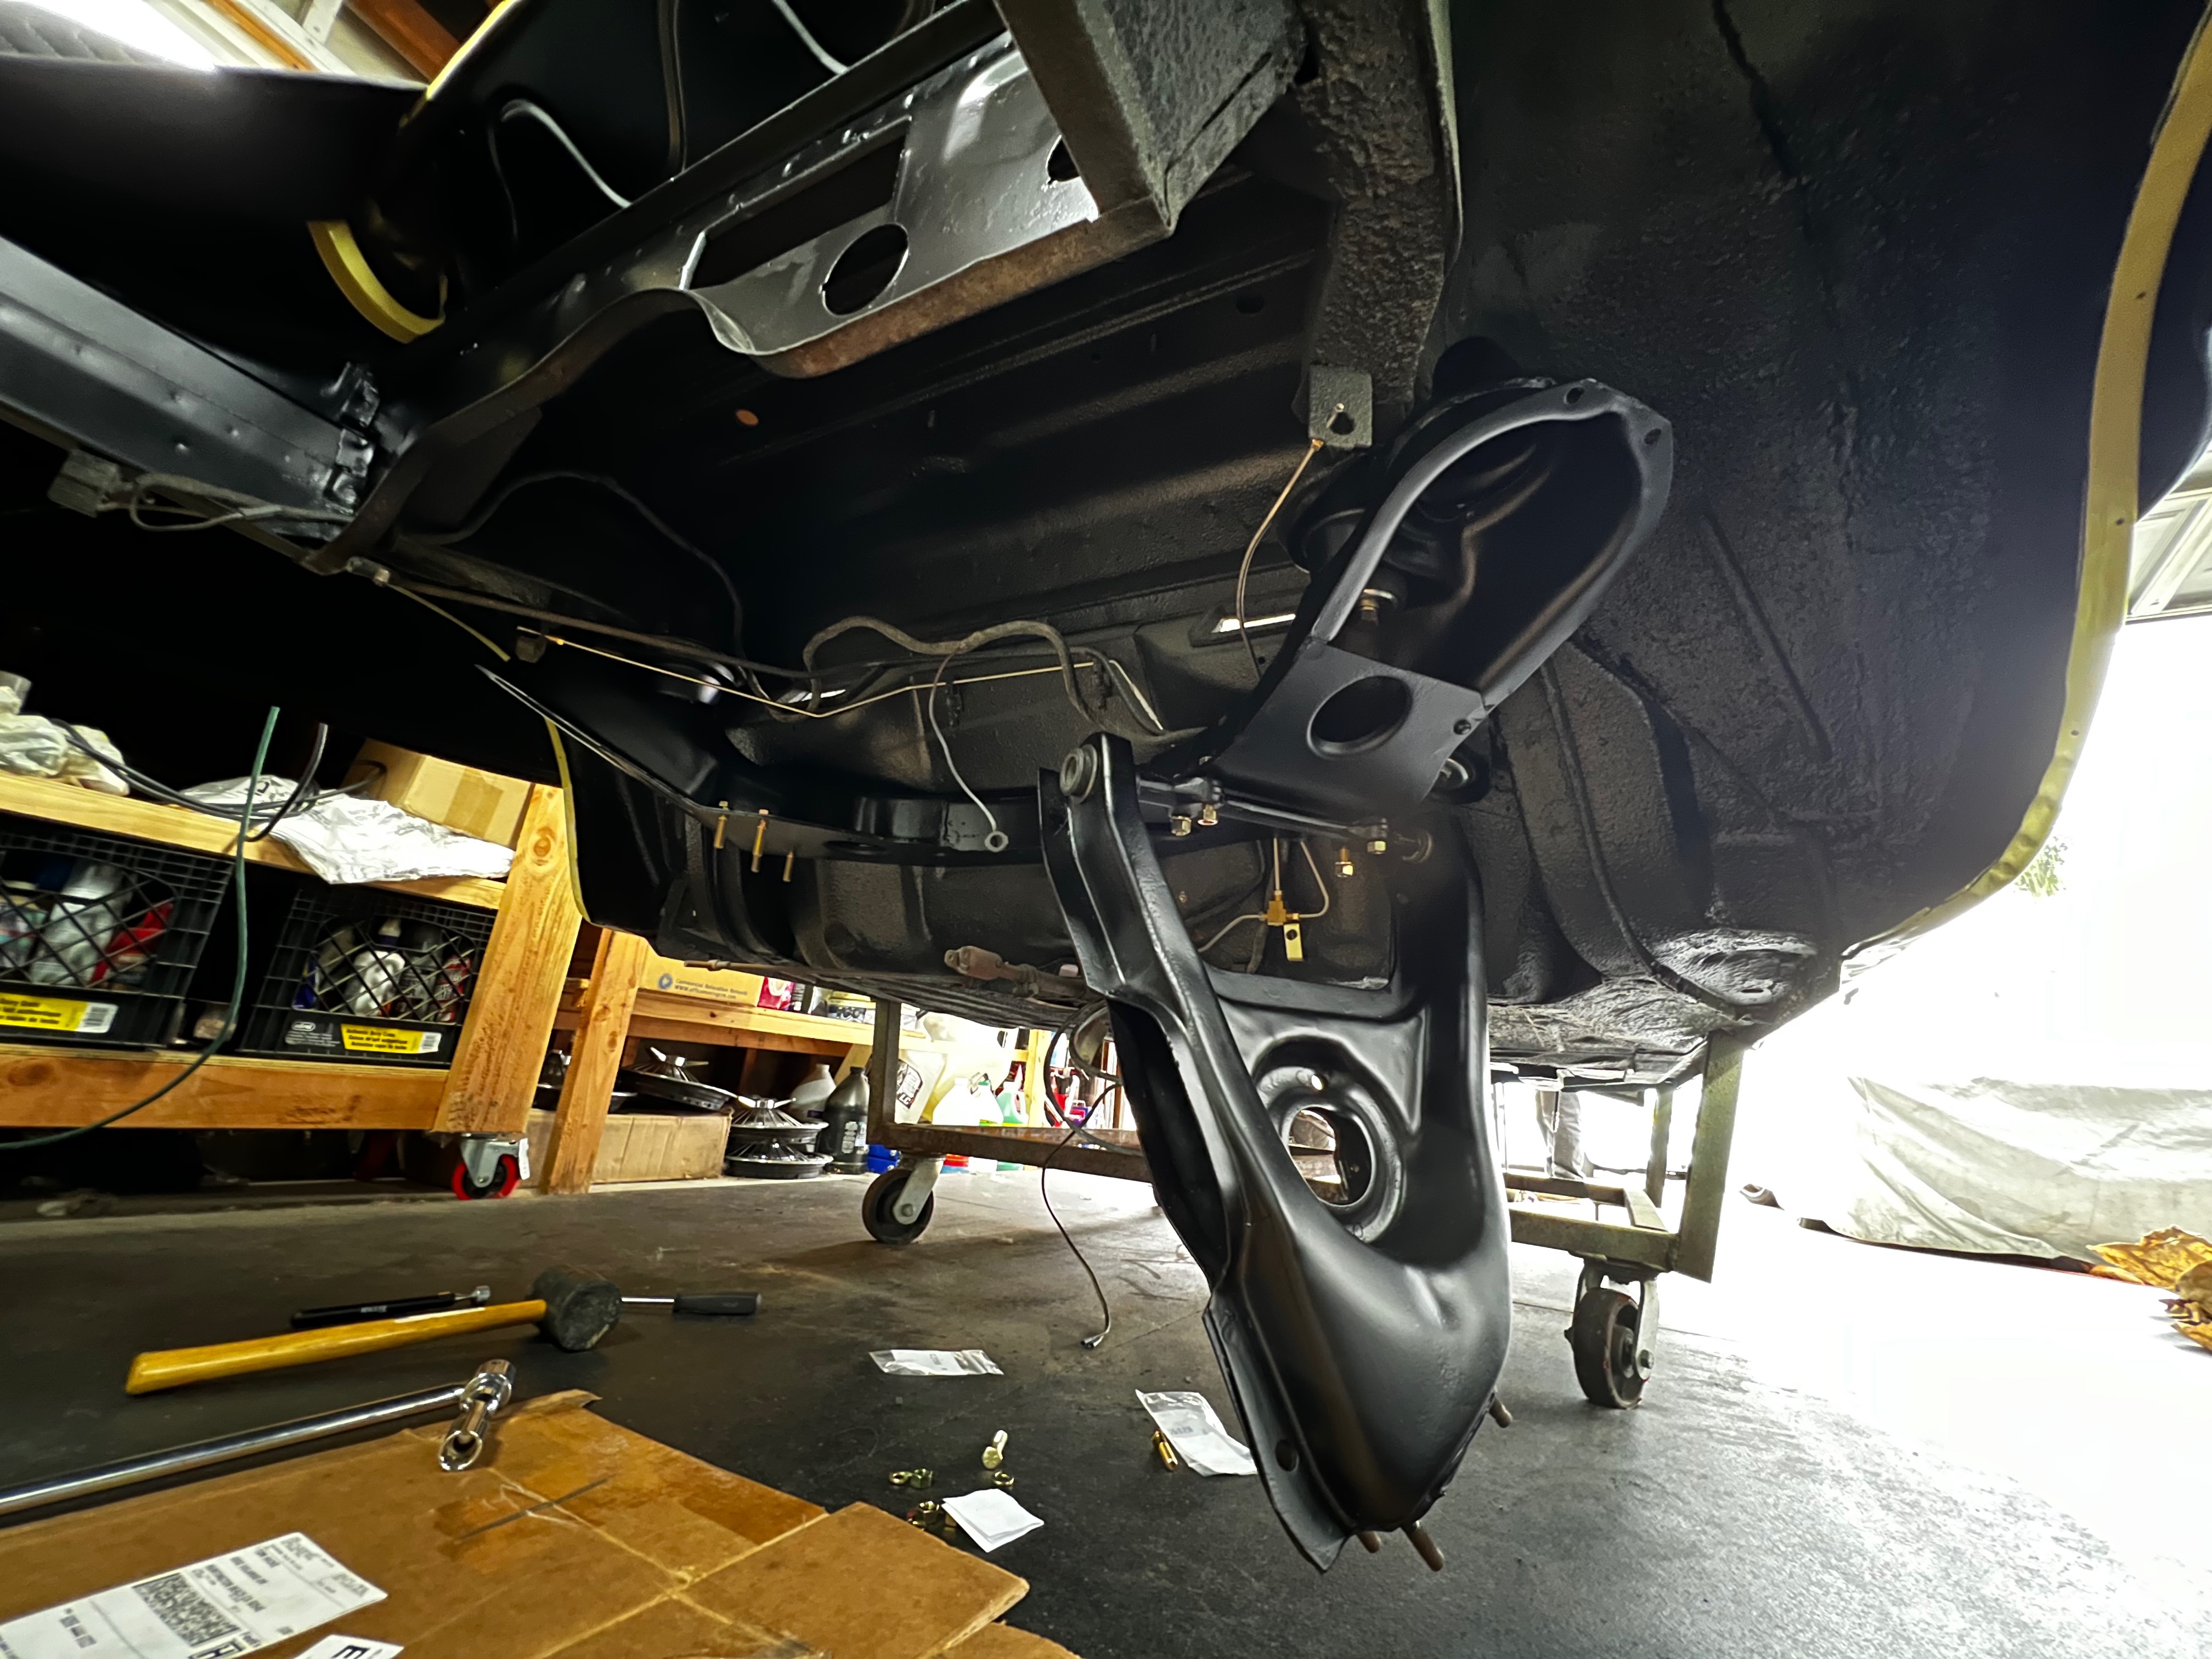
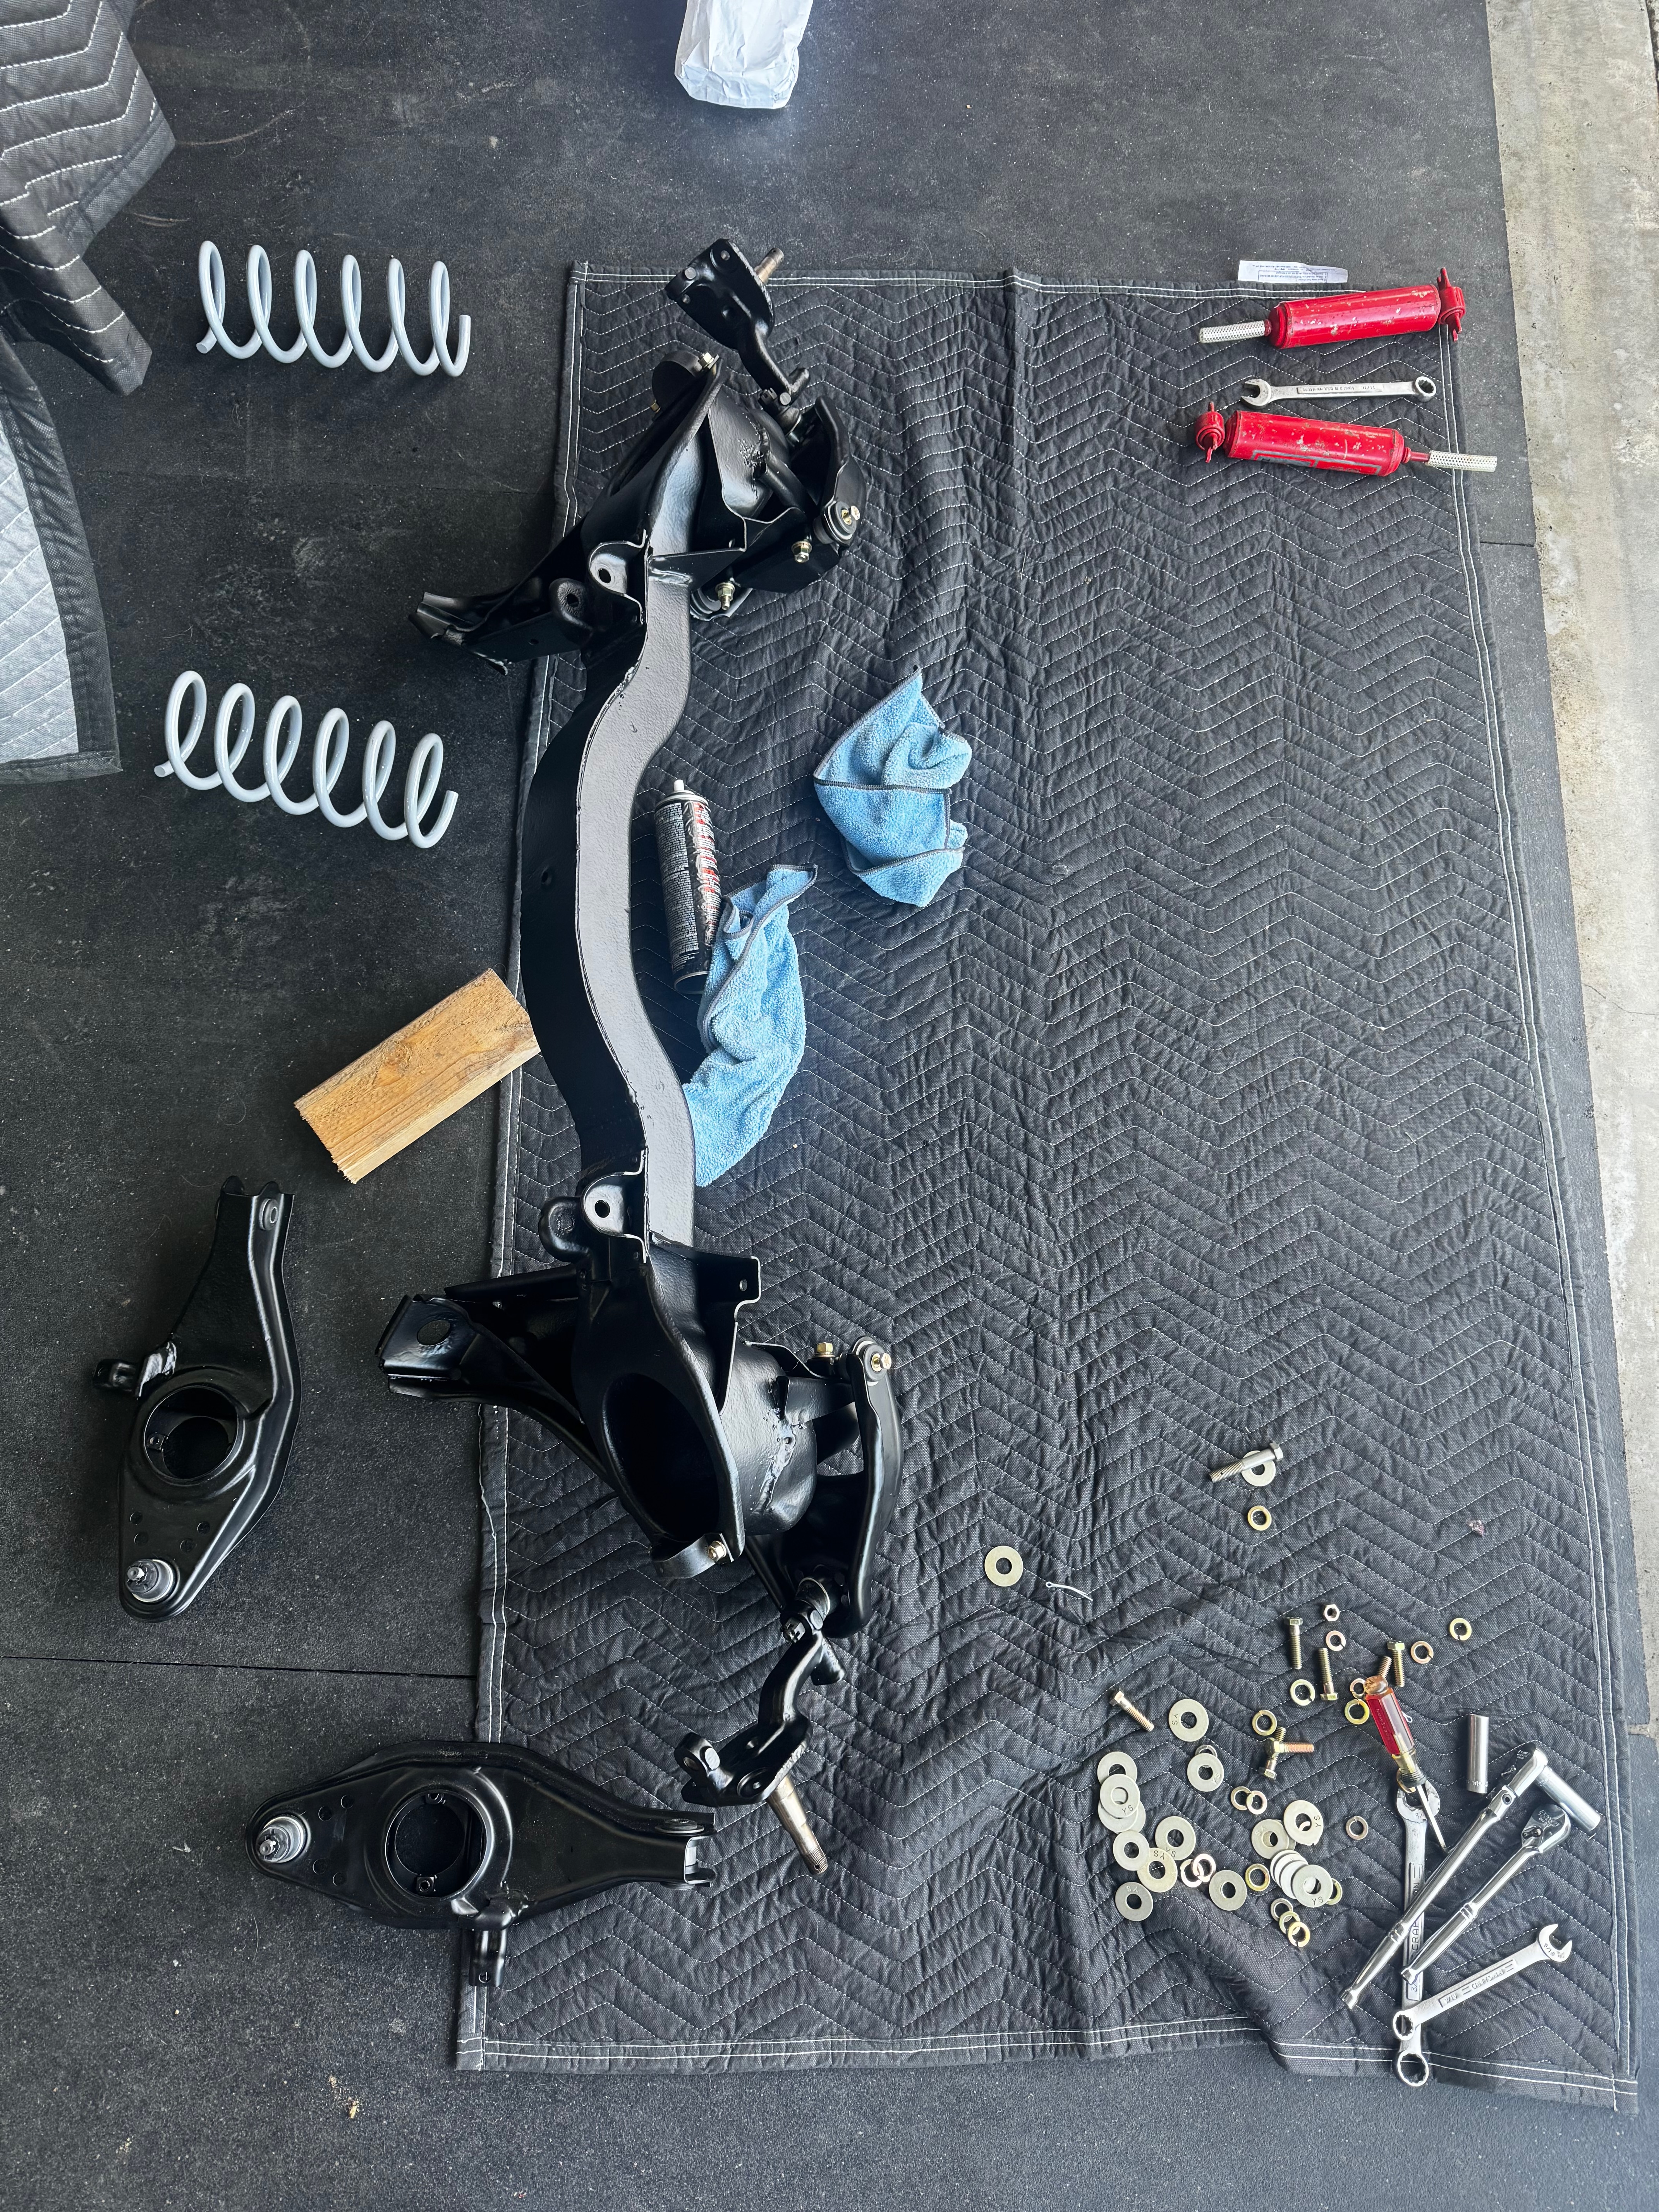
Disassembly: Front Suspension
Removing and inspecting the front suspension components to assess wear and determine what parts will need replacement.
Disassembly: Brake System
Detailed view of the brake system disassembly, documenting the condition of drums, shoes, and hydraulic components before restoration.

Disassembly: Hardware Organization
Meticulous organization of fasteners and hardware by location and function, ensuring proper reassembly with correct torque specifications.
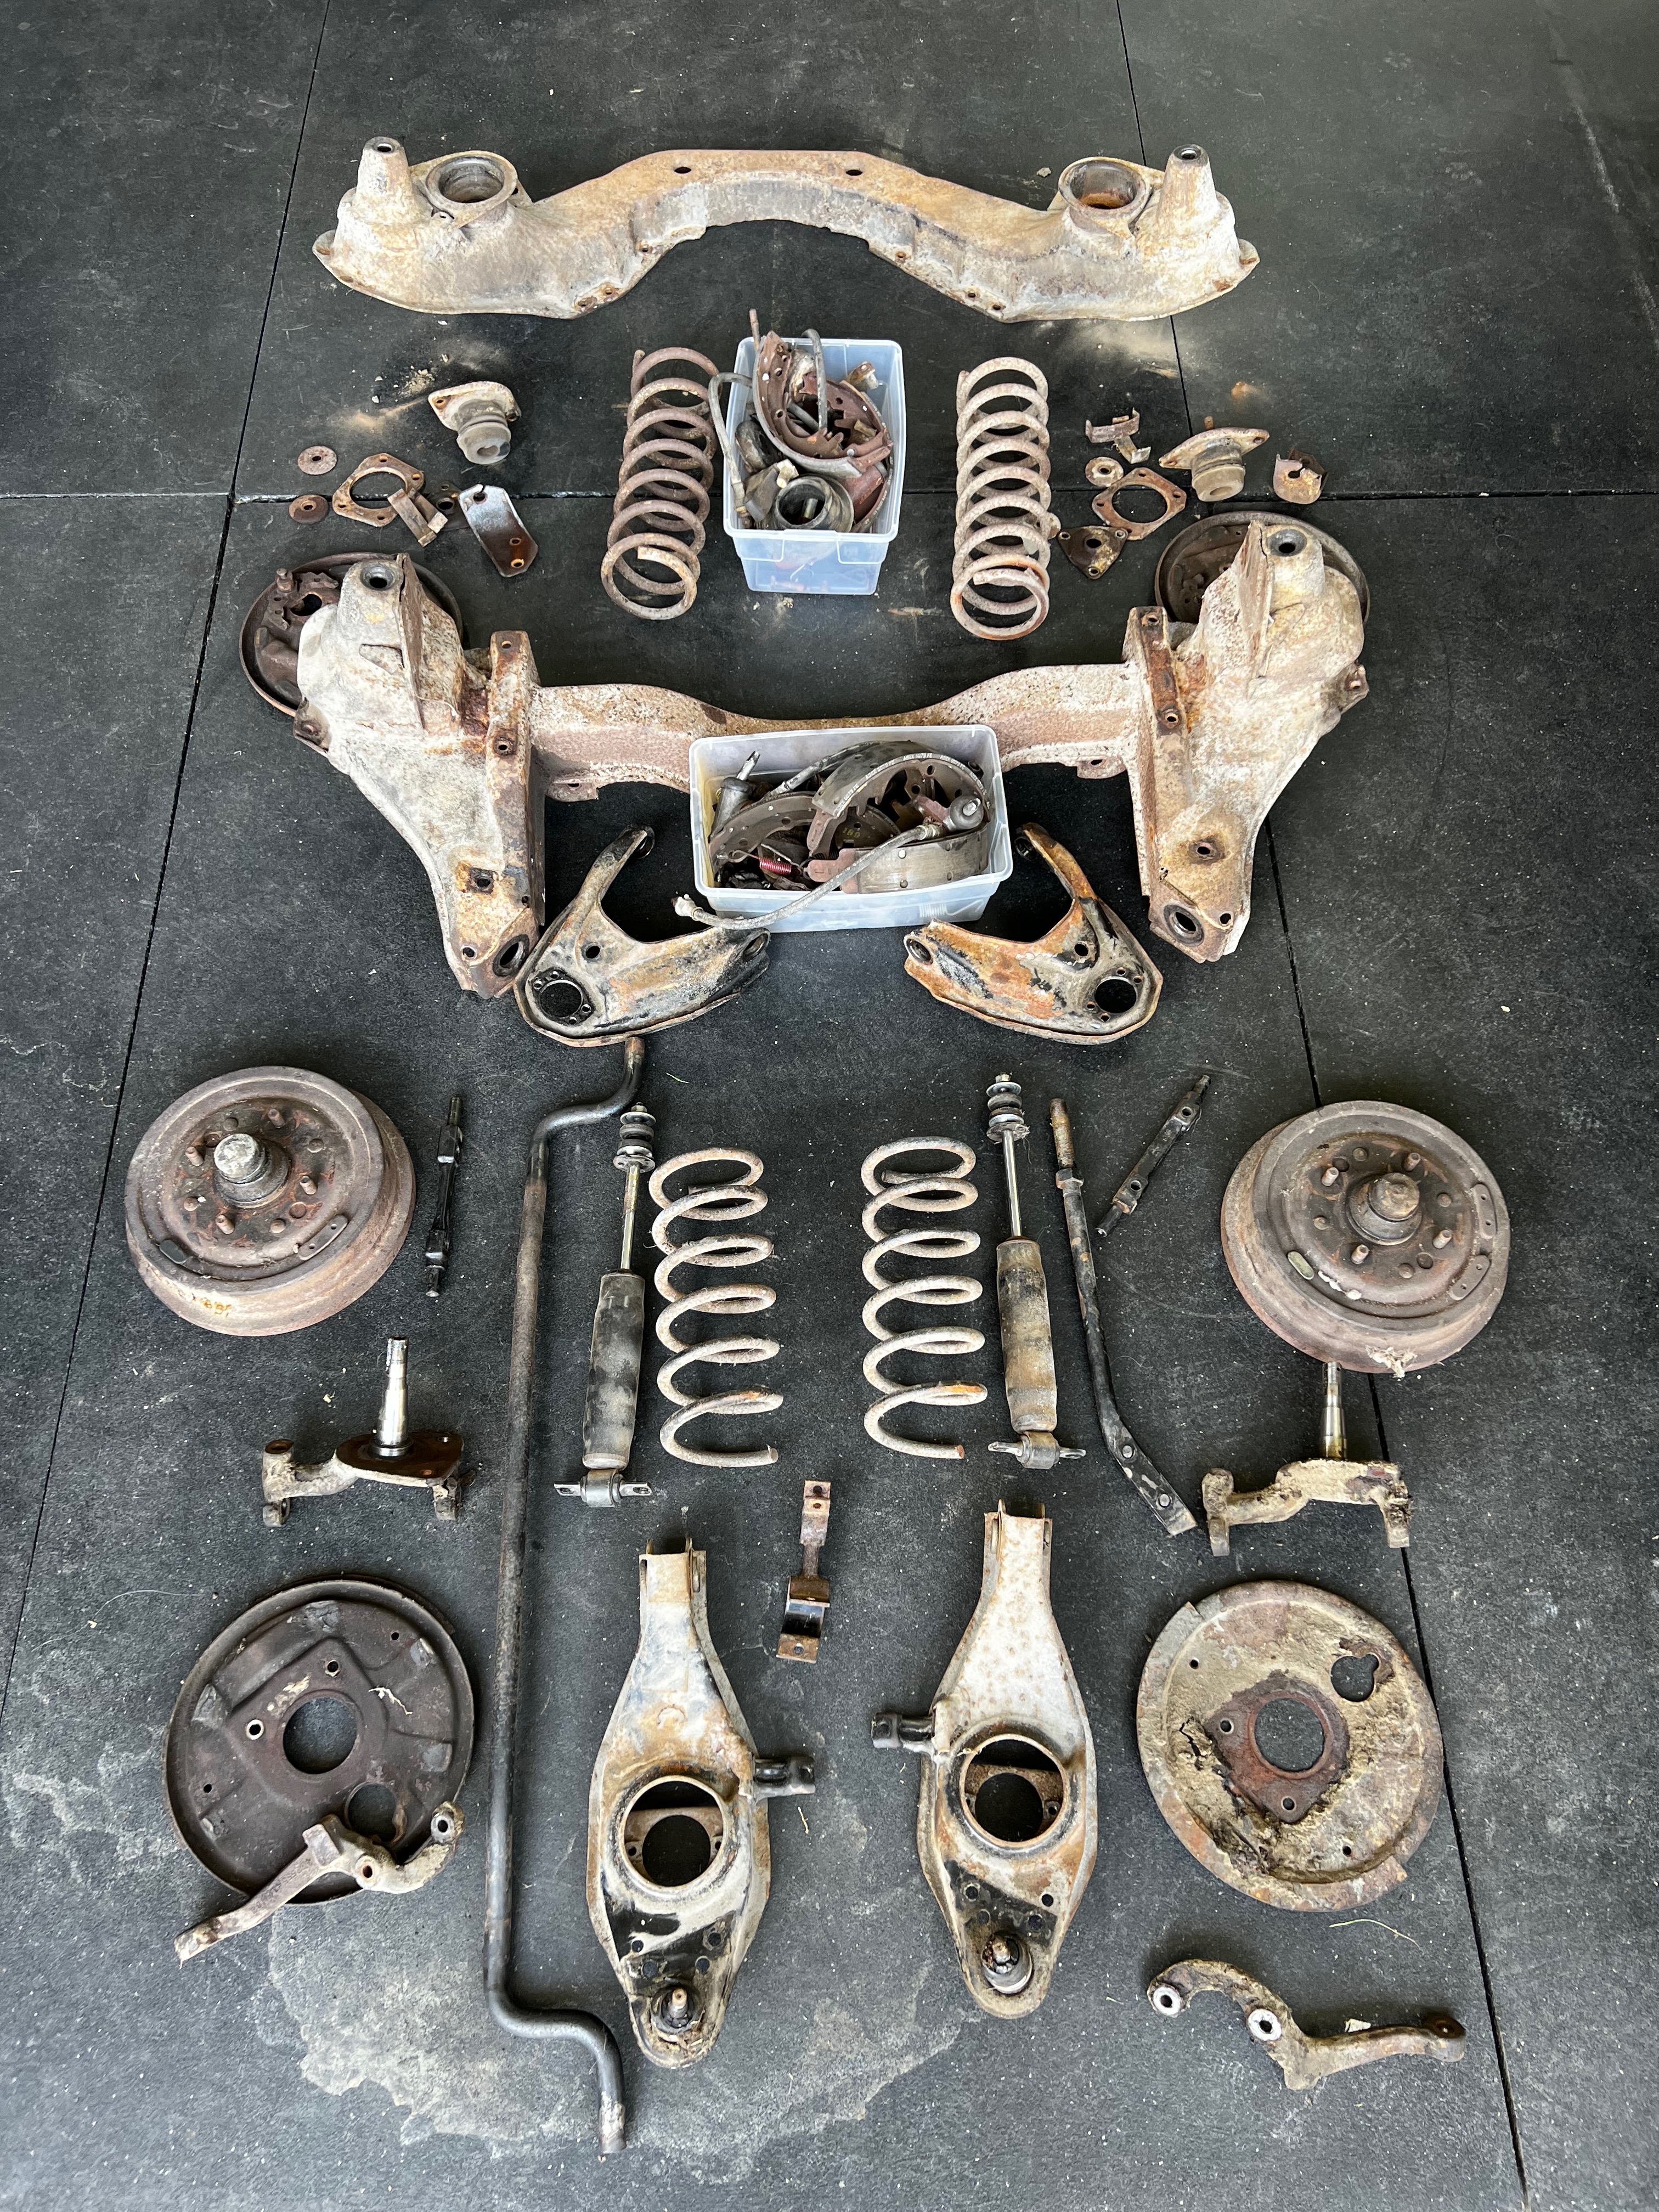
Disassembly: Chassis Progress
Mid-point progress of the chassis disassembly, showing the methodical approach to removing components in the correct sequence.

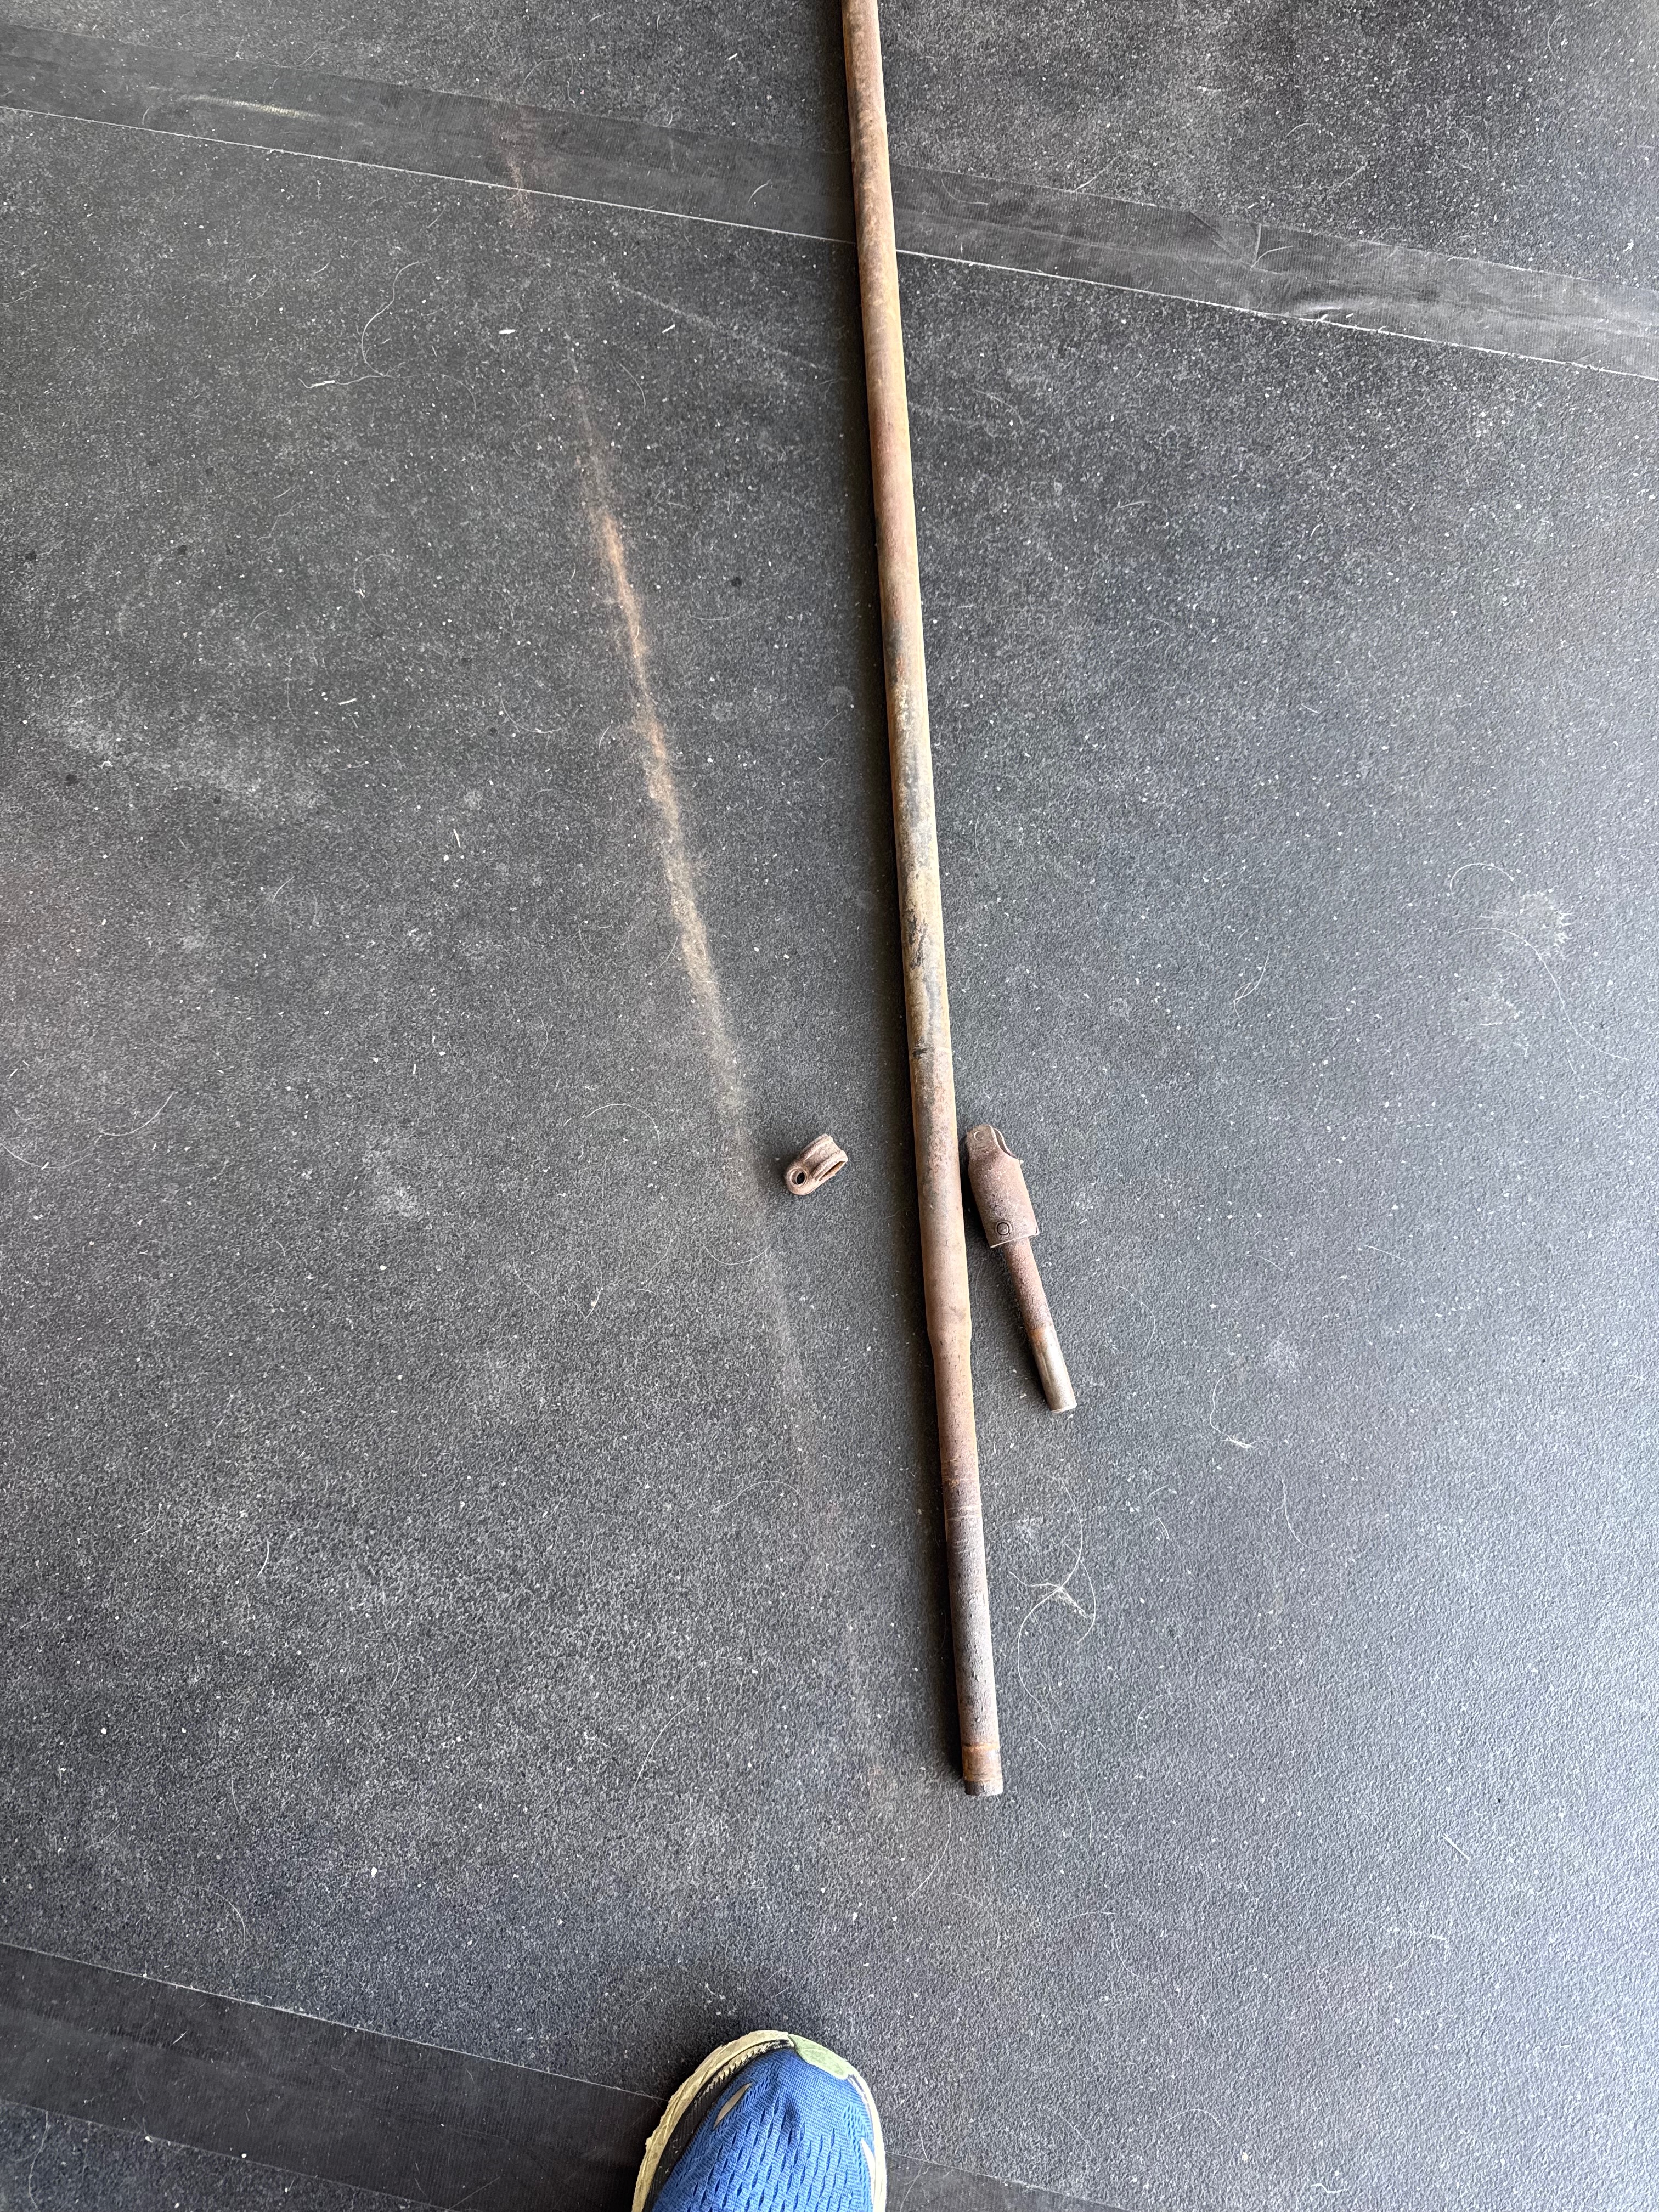
Disassembly: Steering System
Removing and inspecting the steering components to assess wear and determine what parts will need rebuilding or replacement.
Disassembly: Electrical System
Careful documentation and removal of the wiring harness, noting connections and routing for accurate restoration and reinstallation.
Disassembly: Labeled Storage
Using a comprehensive labeling system to organize removed components by system and location for efficient restoration workflow.

Disassembly: Body Shell
The Corvair body shell after removal of interior components and drivetrain, ready for structural inspection and repair.
Disassembly: Cooling System
Removing and inspecting the air-cooled engine's cooling components, including shrouds, baffles, and fan assembly.
Disassembly: Transmission
Detailed documentation of the transmission disassembly, showing internal components that will need inspection and potential rebuilding.

Disassembly: Parts Inventory
Creating a comprehensive inventory of all disassembled parts to track what needs to be restored, replaced, or sourced from specialty suppliers.
Disassembly: Final Stripping
Final stage of disassembly with the body shell completely stripped, ready for the body-paint phase of the restoration process.
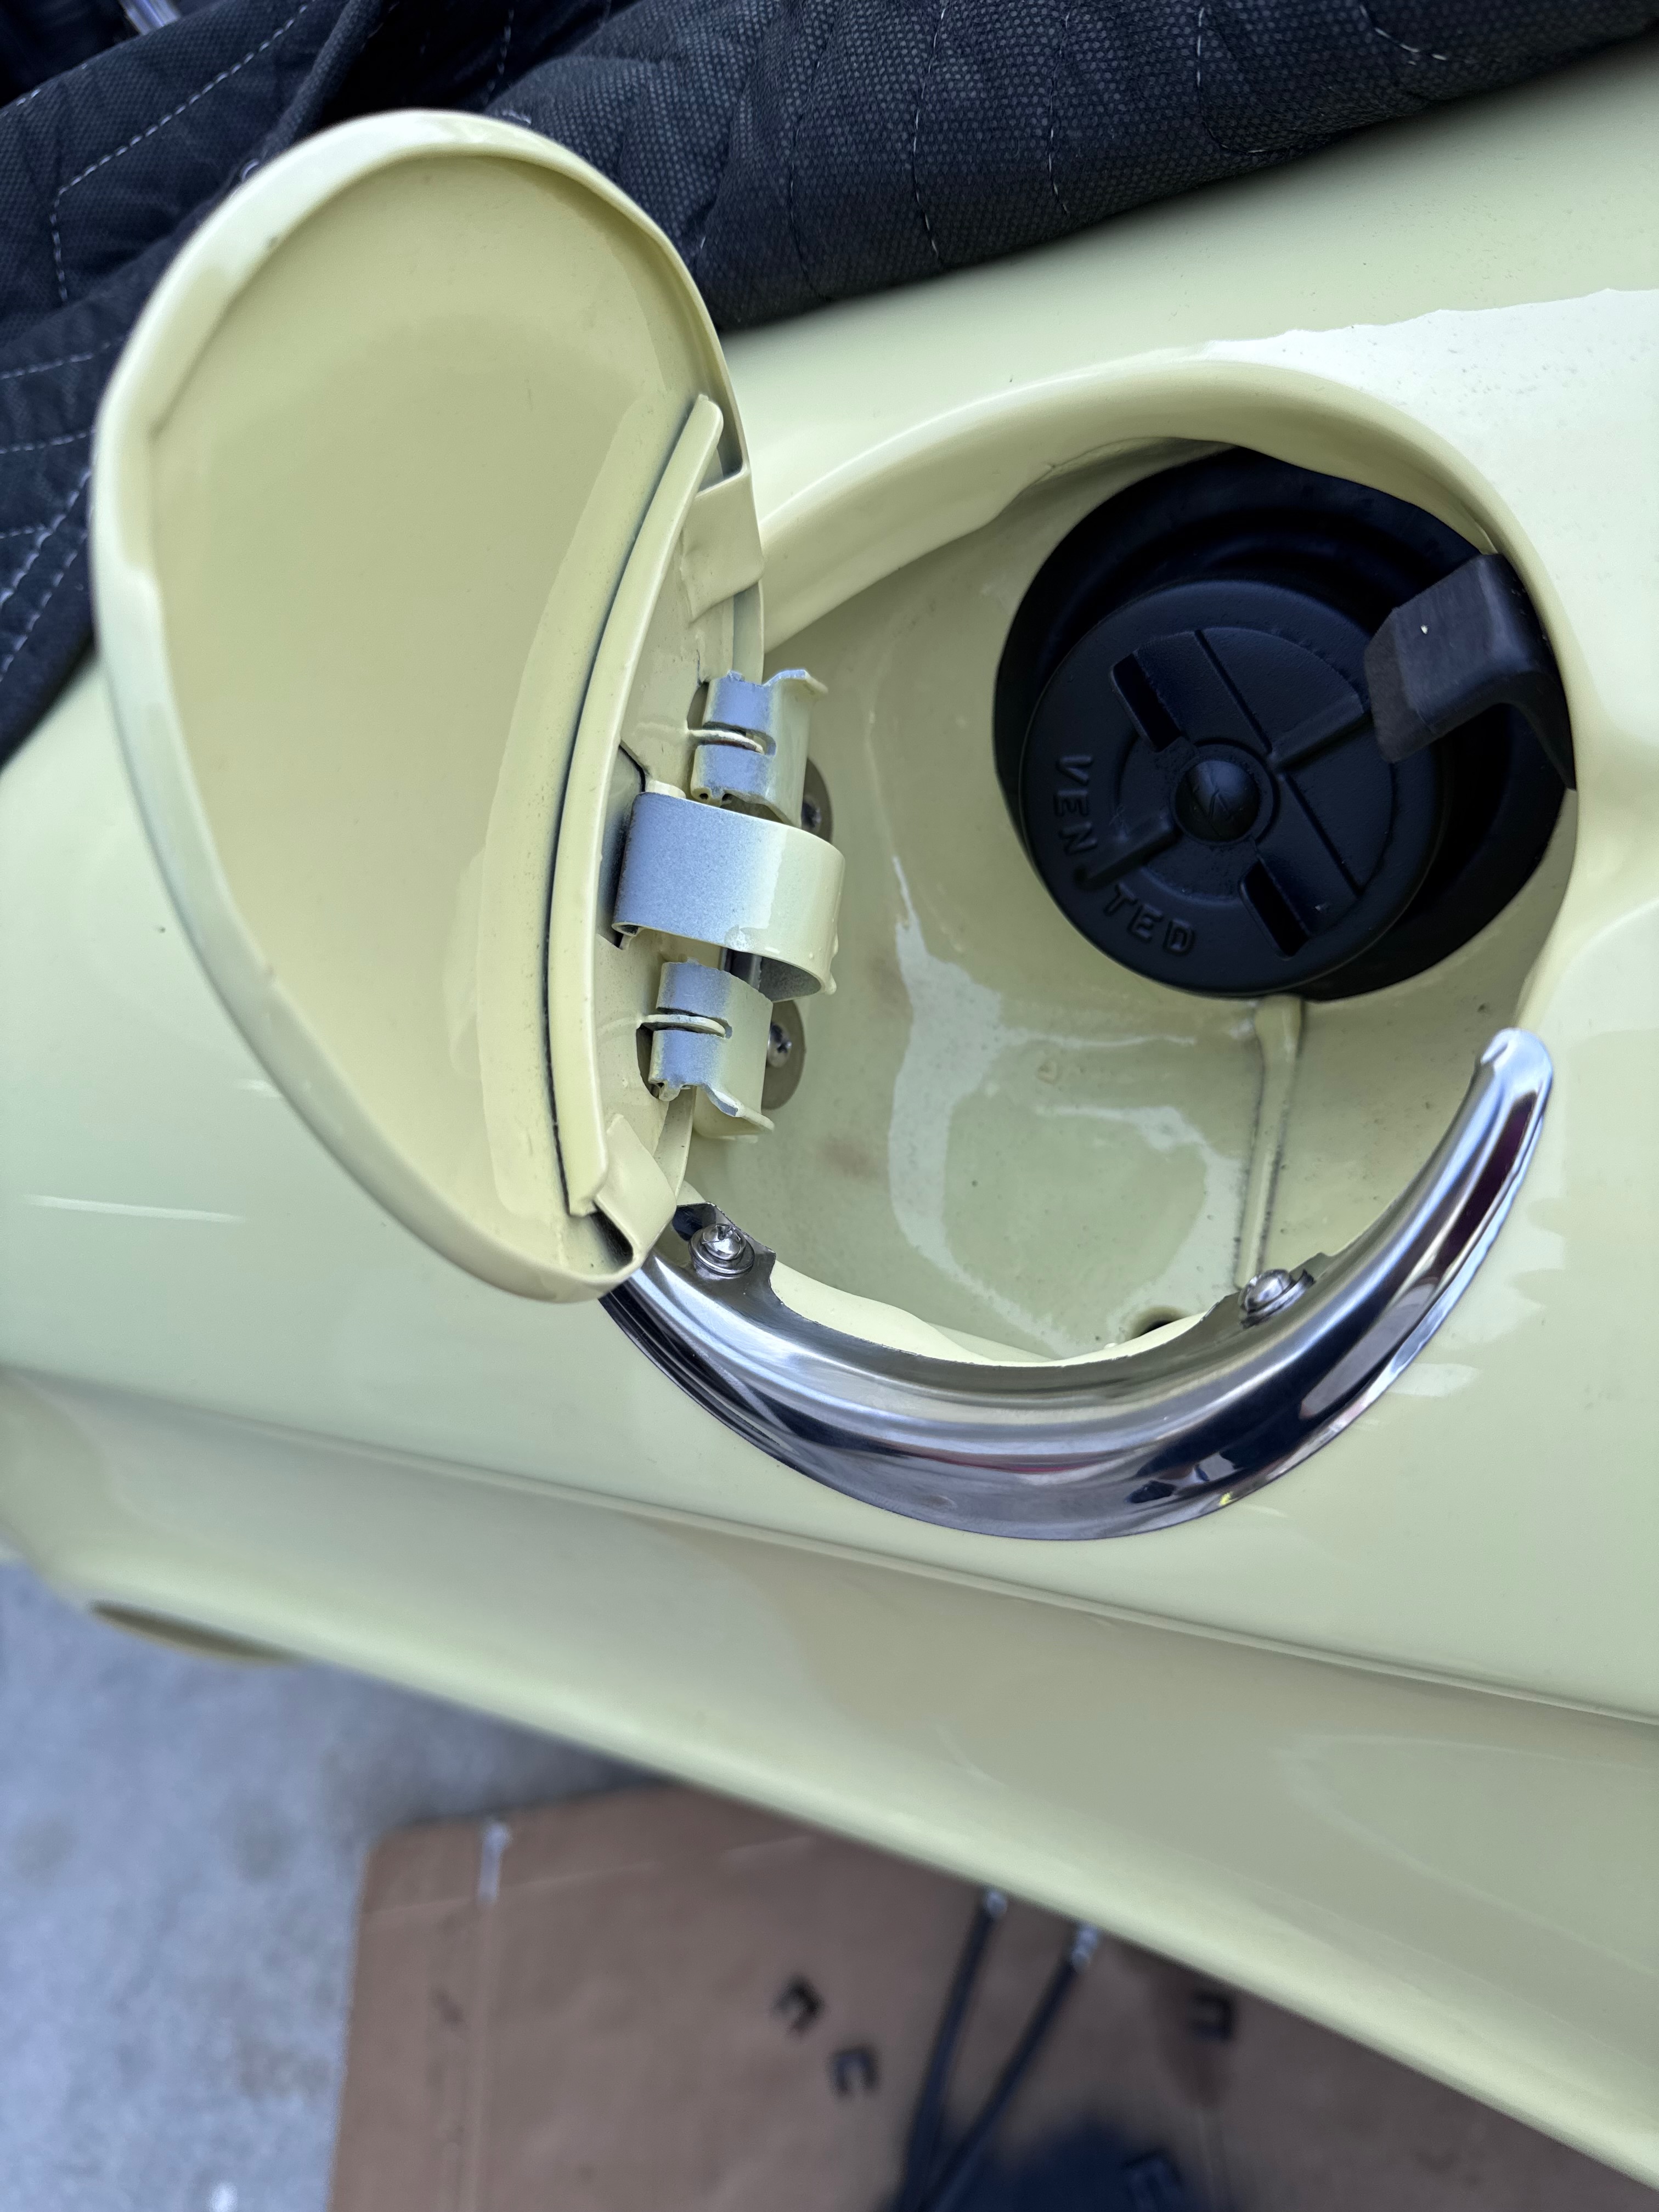
Disassembly: Fuel System
Removing and inspecting the fuel system components including tank, lines, and carburetor for cleaning and restoration.
Disassembly: Documentation
Comprehensive documentation of the disassembly sequence and component relationships to ensure accurate reassembly later in the project.

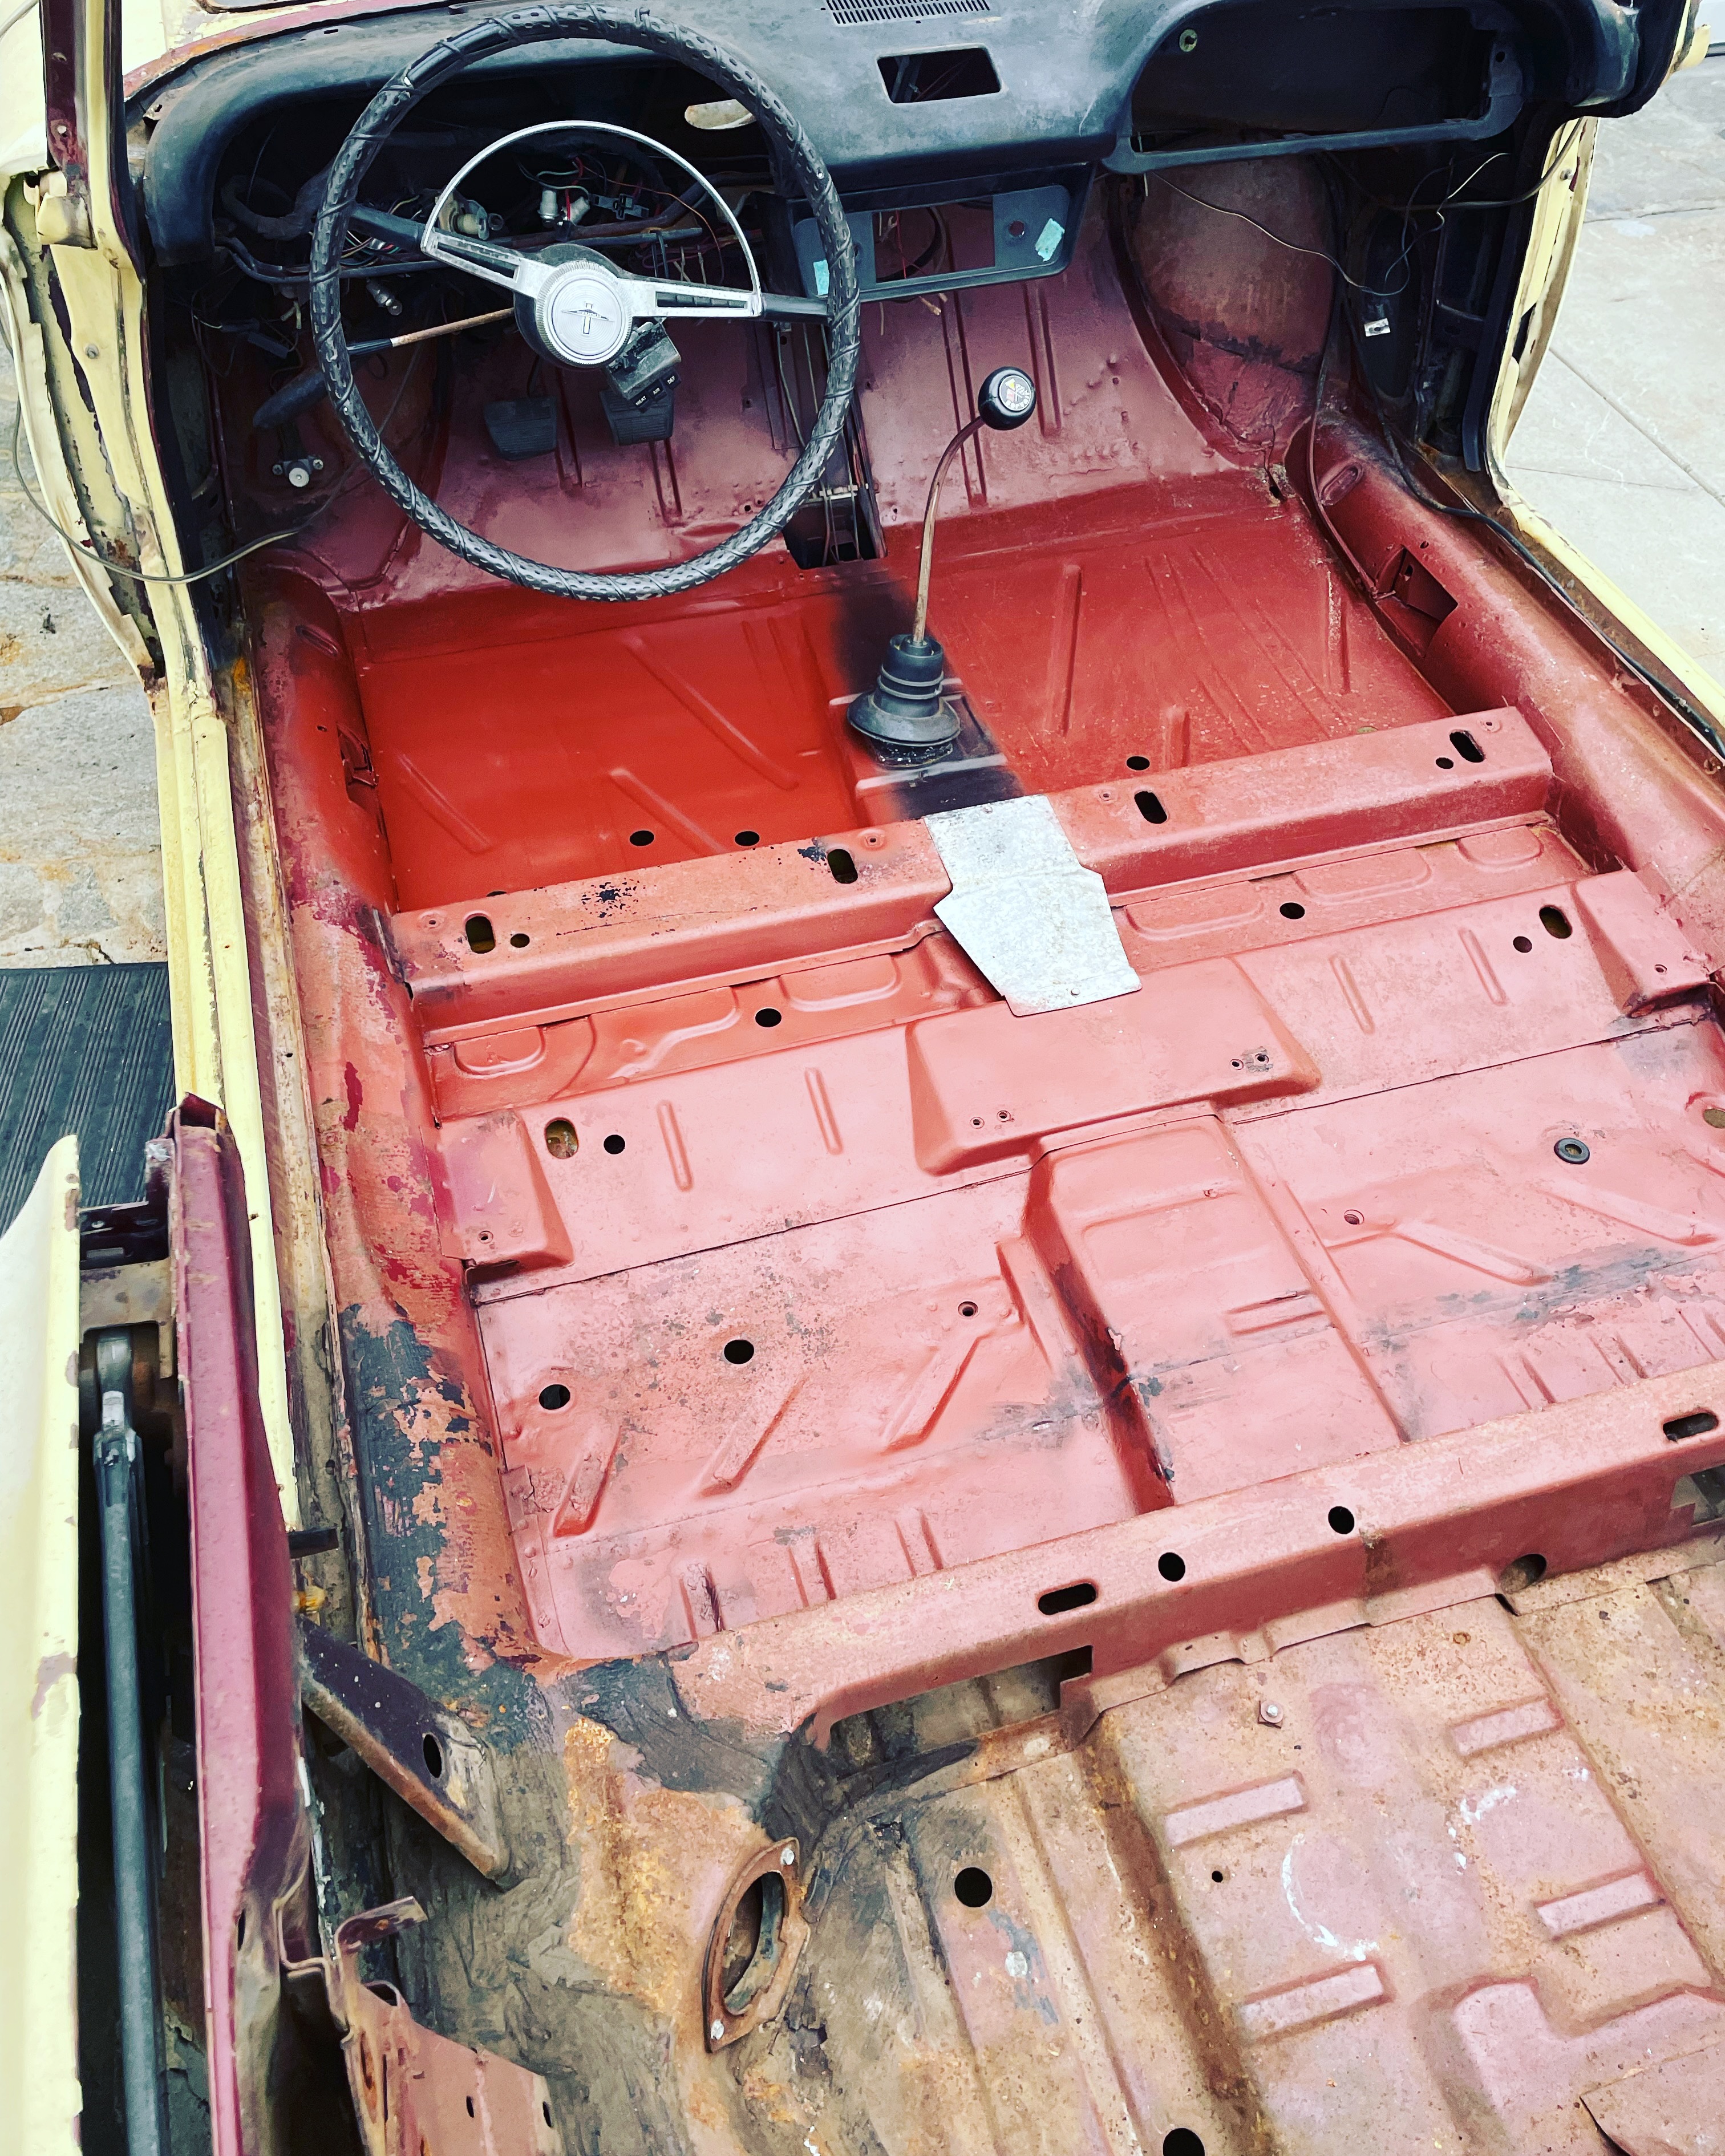
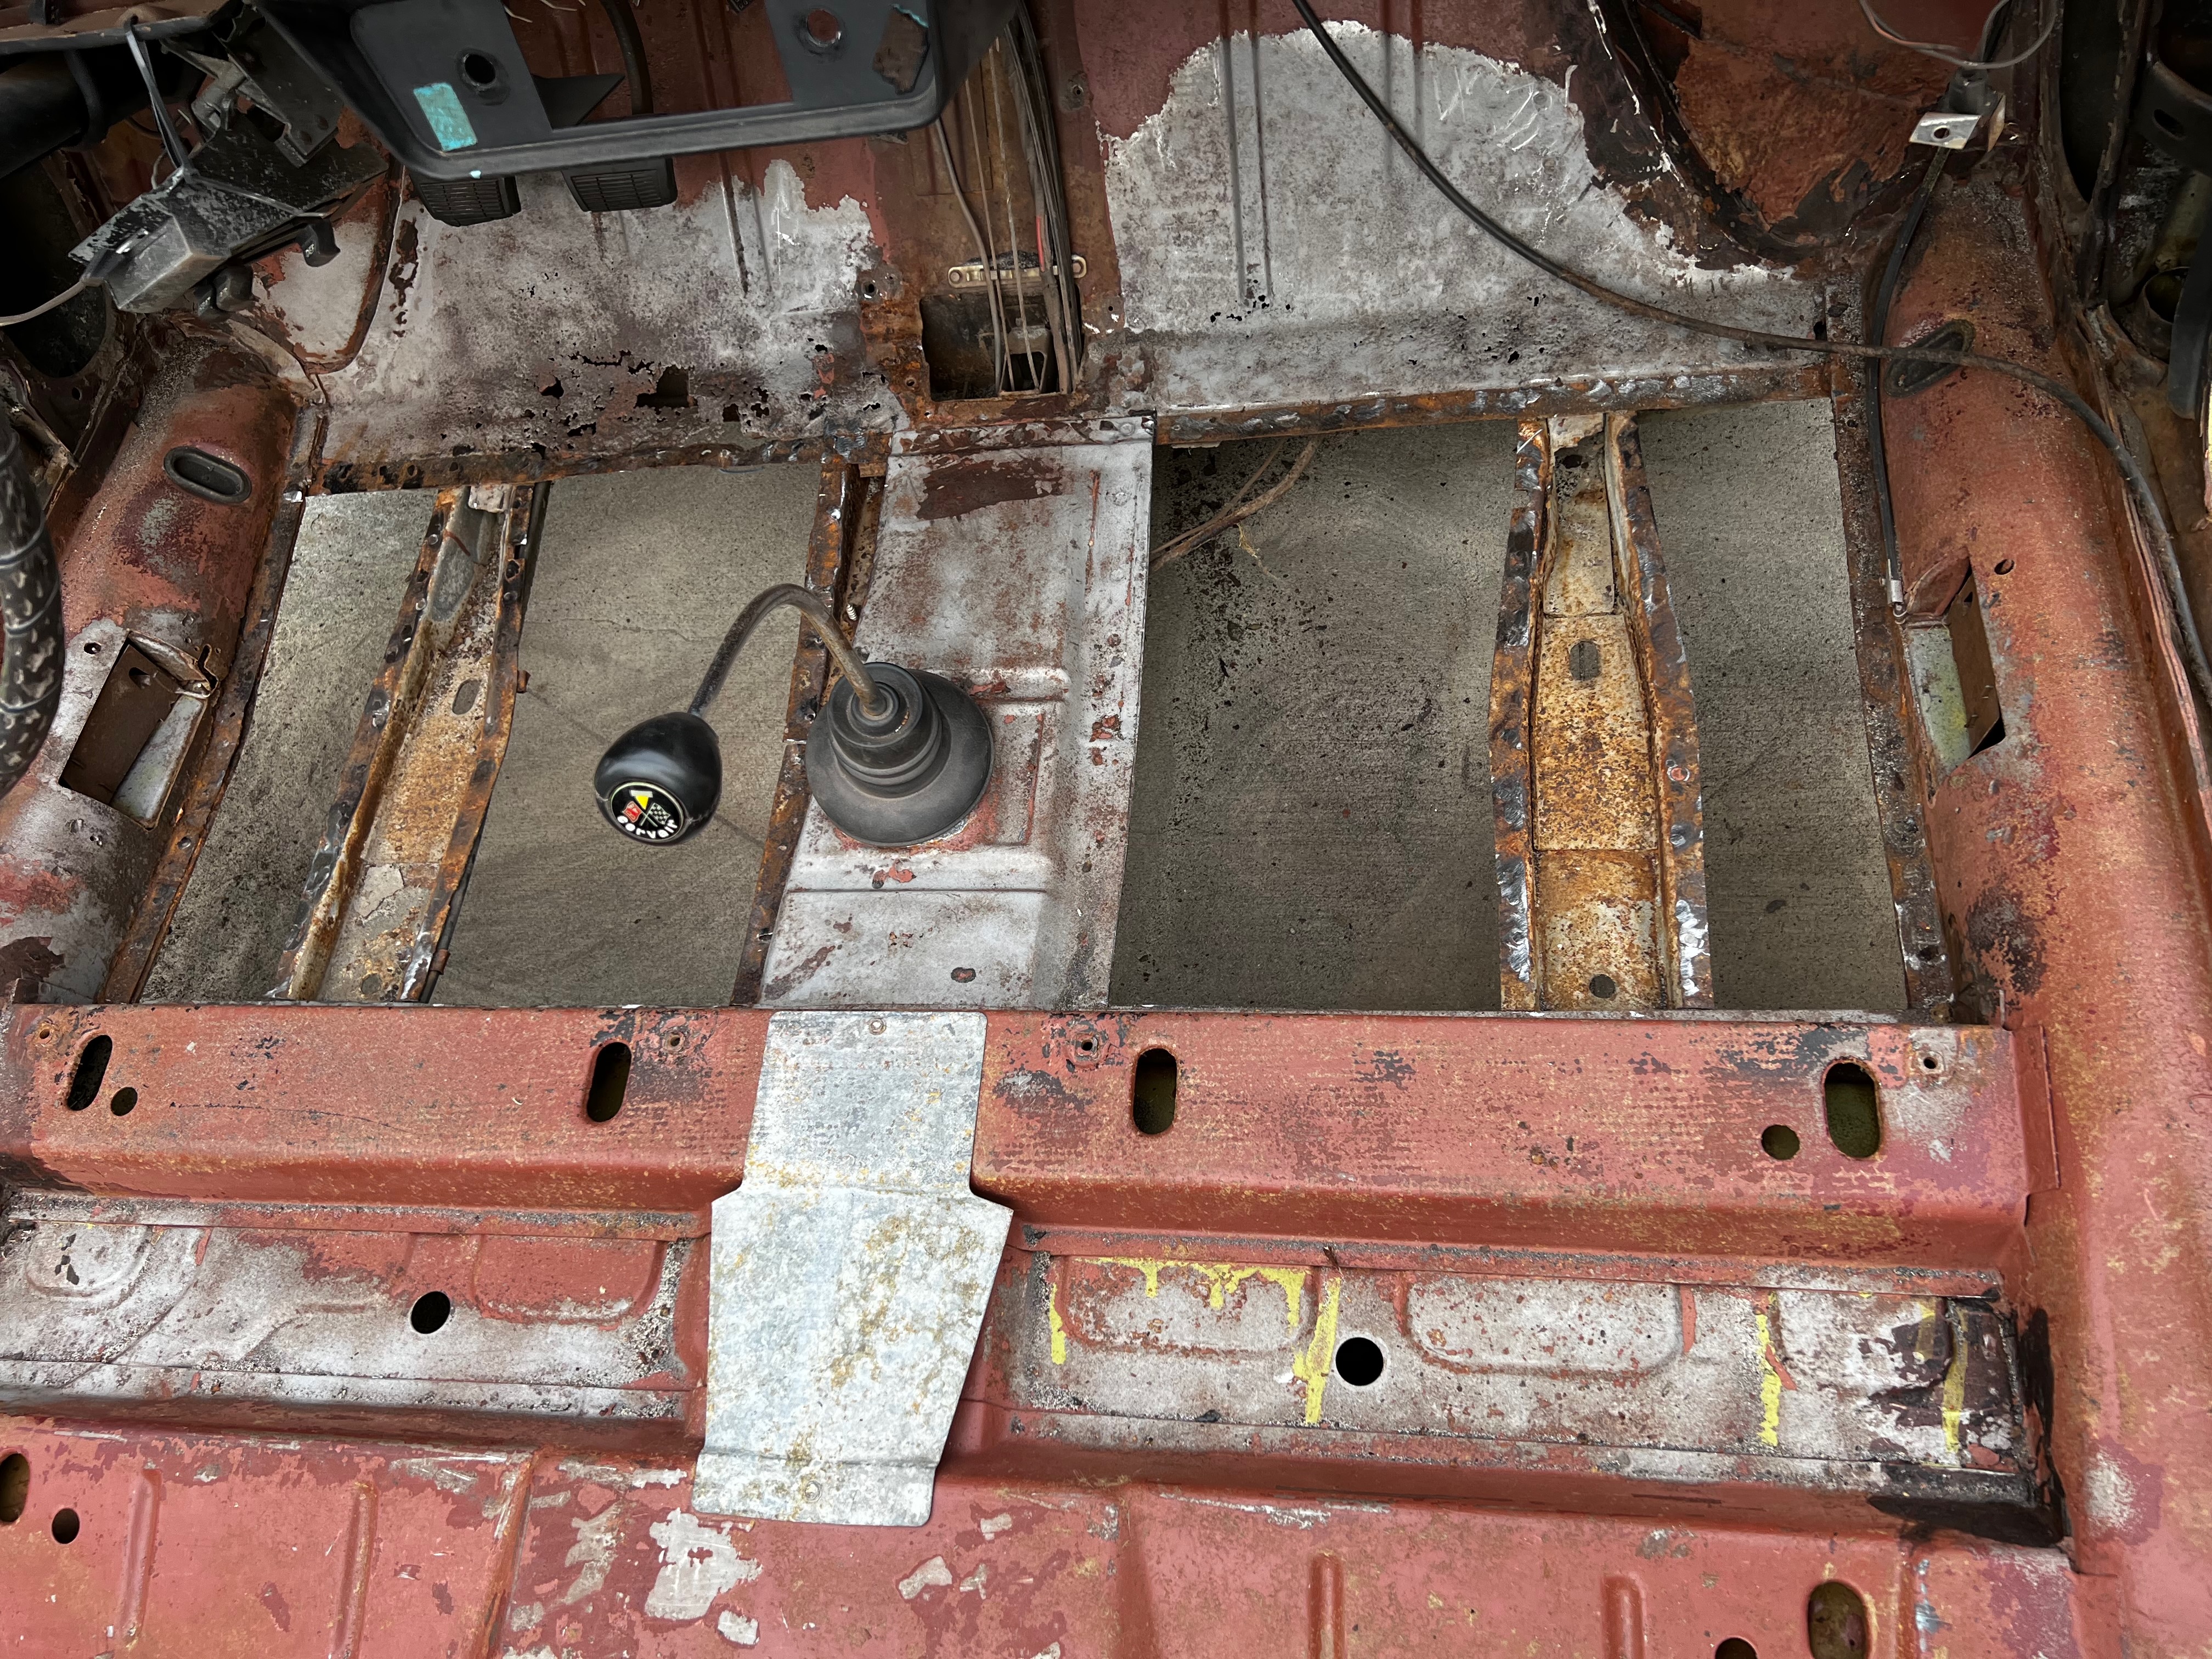
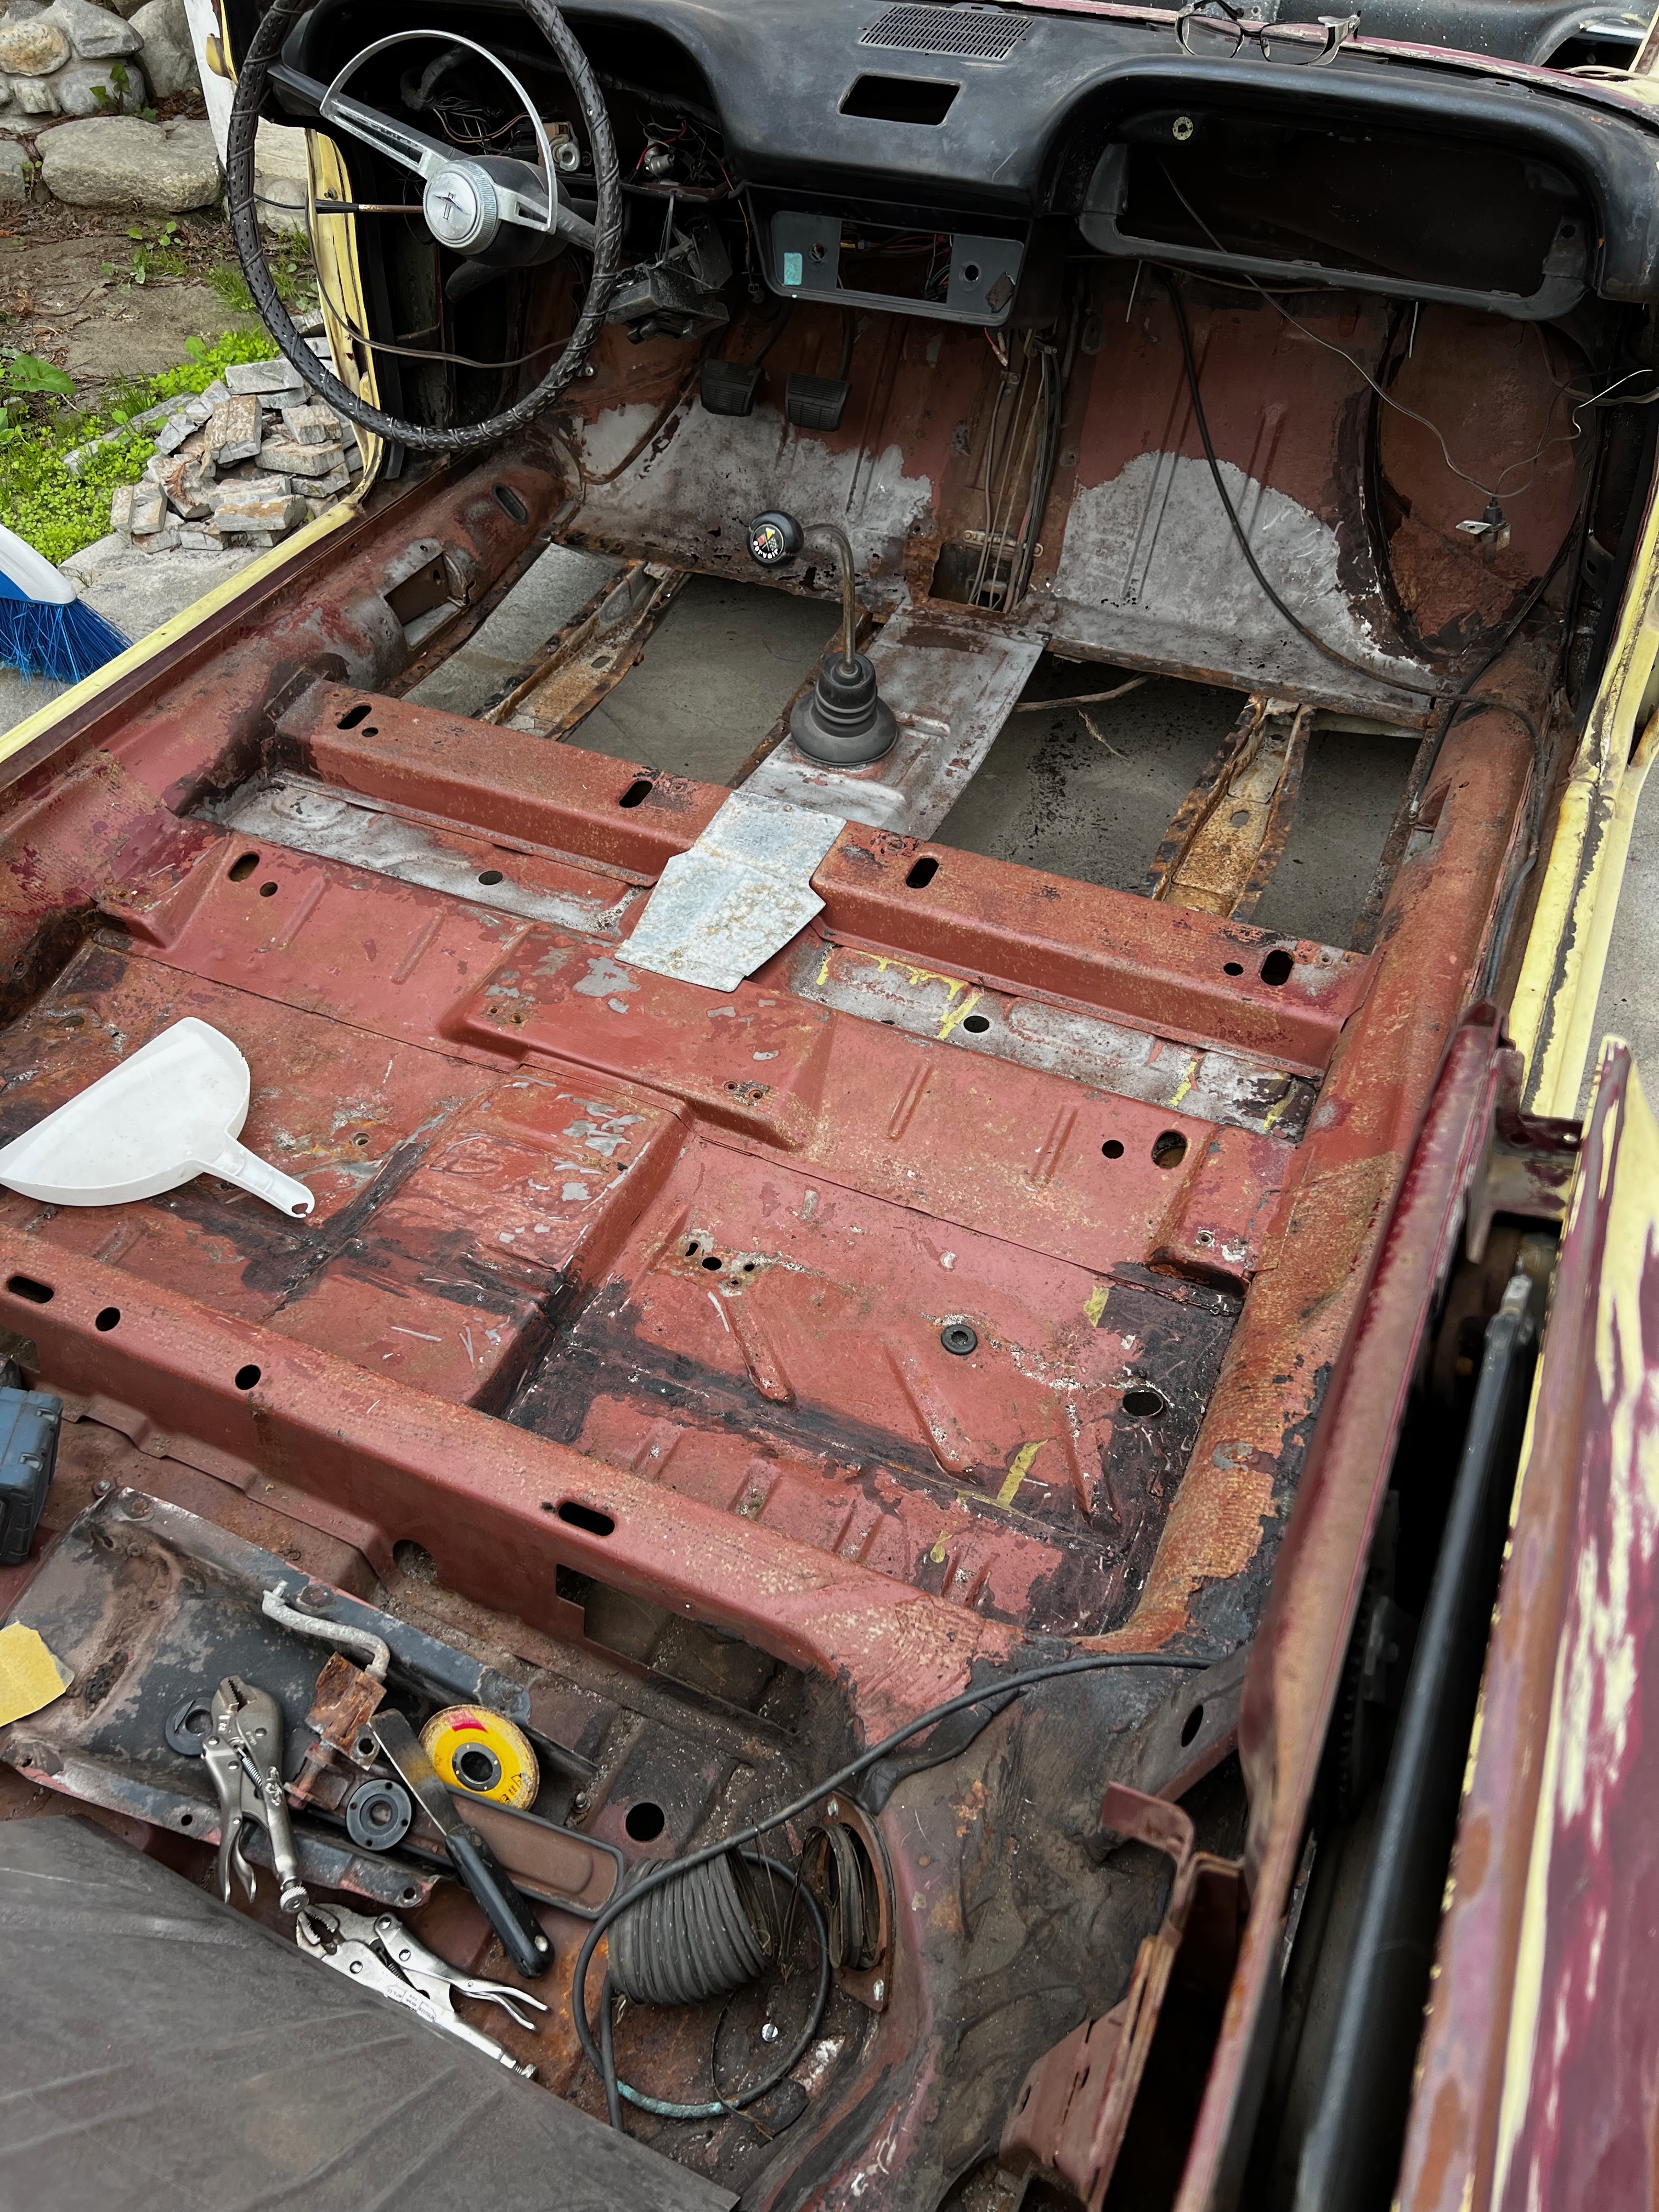
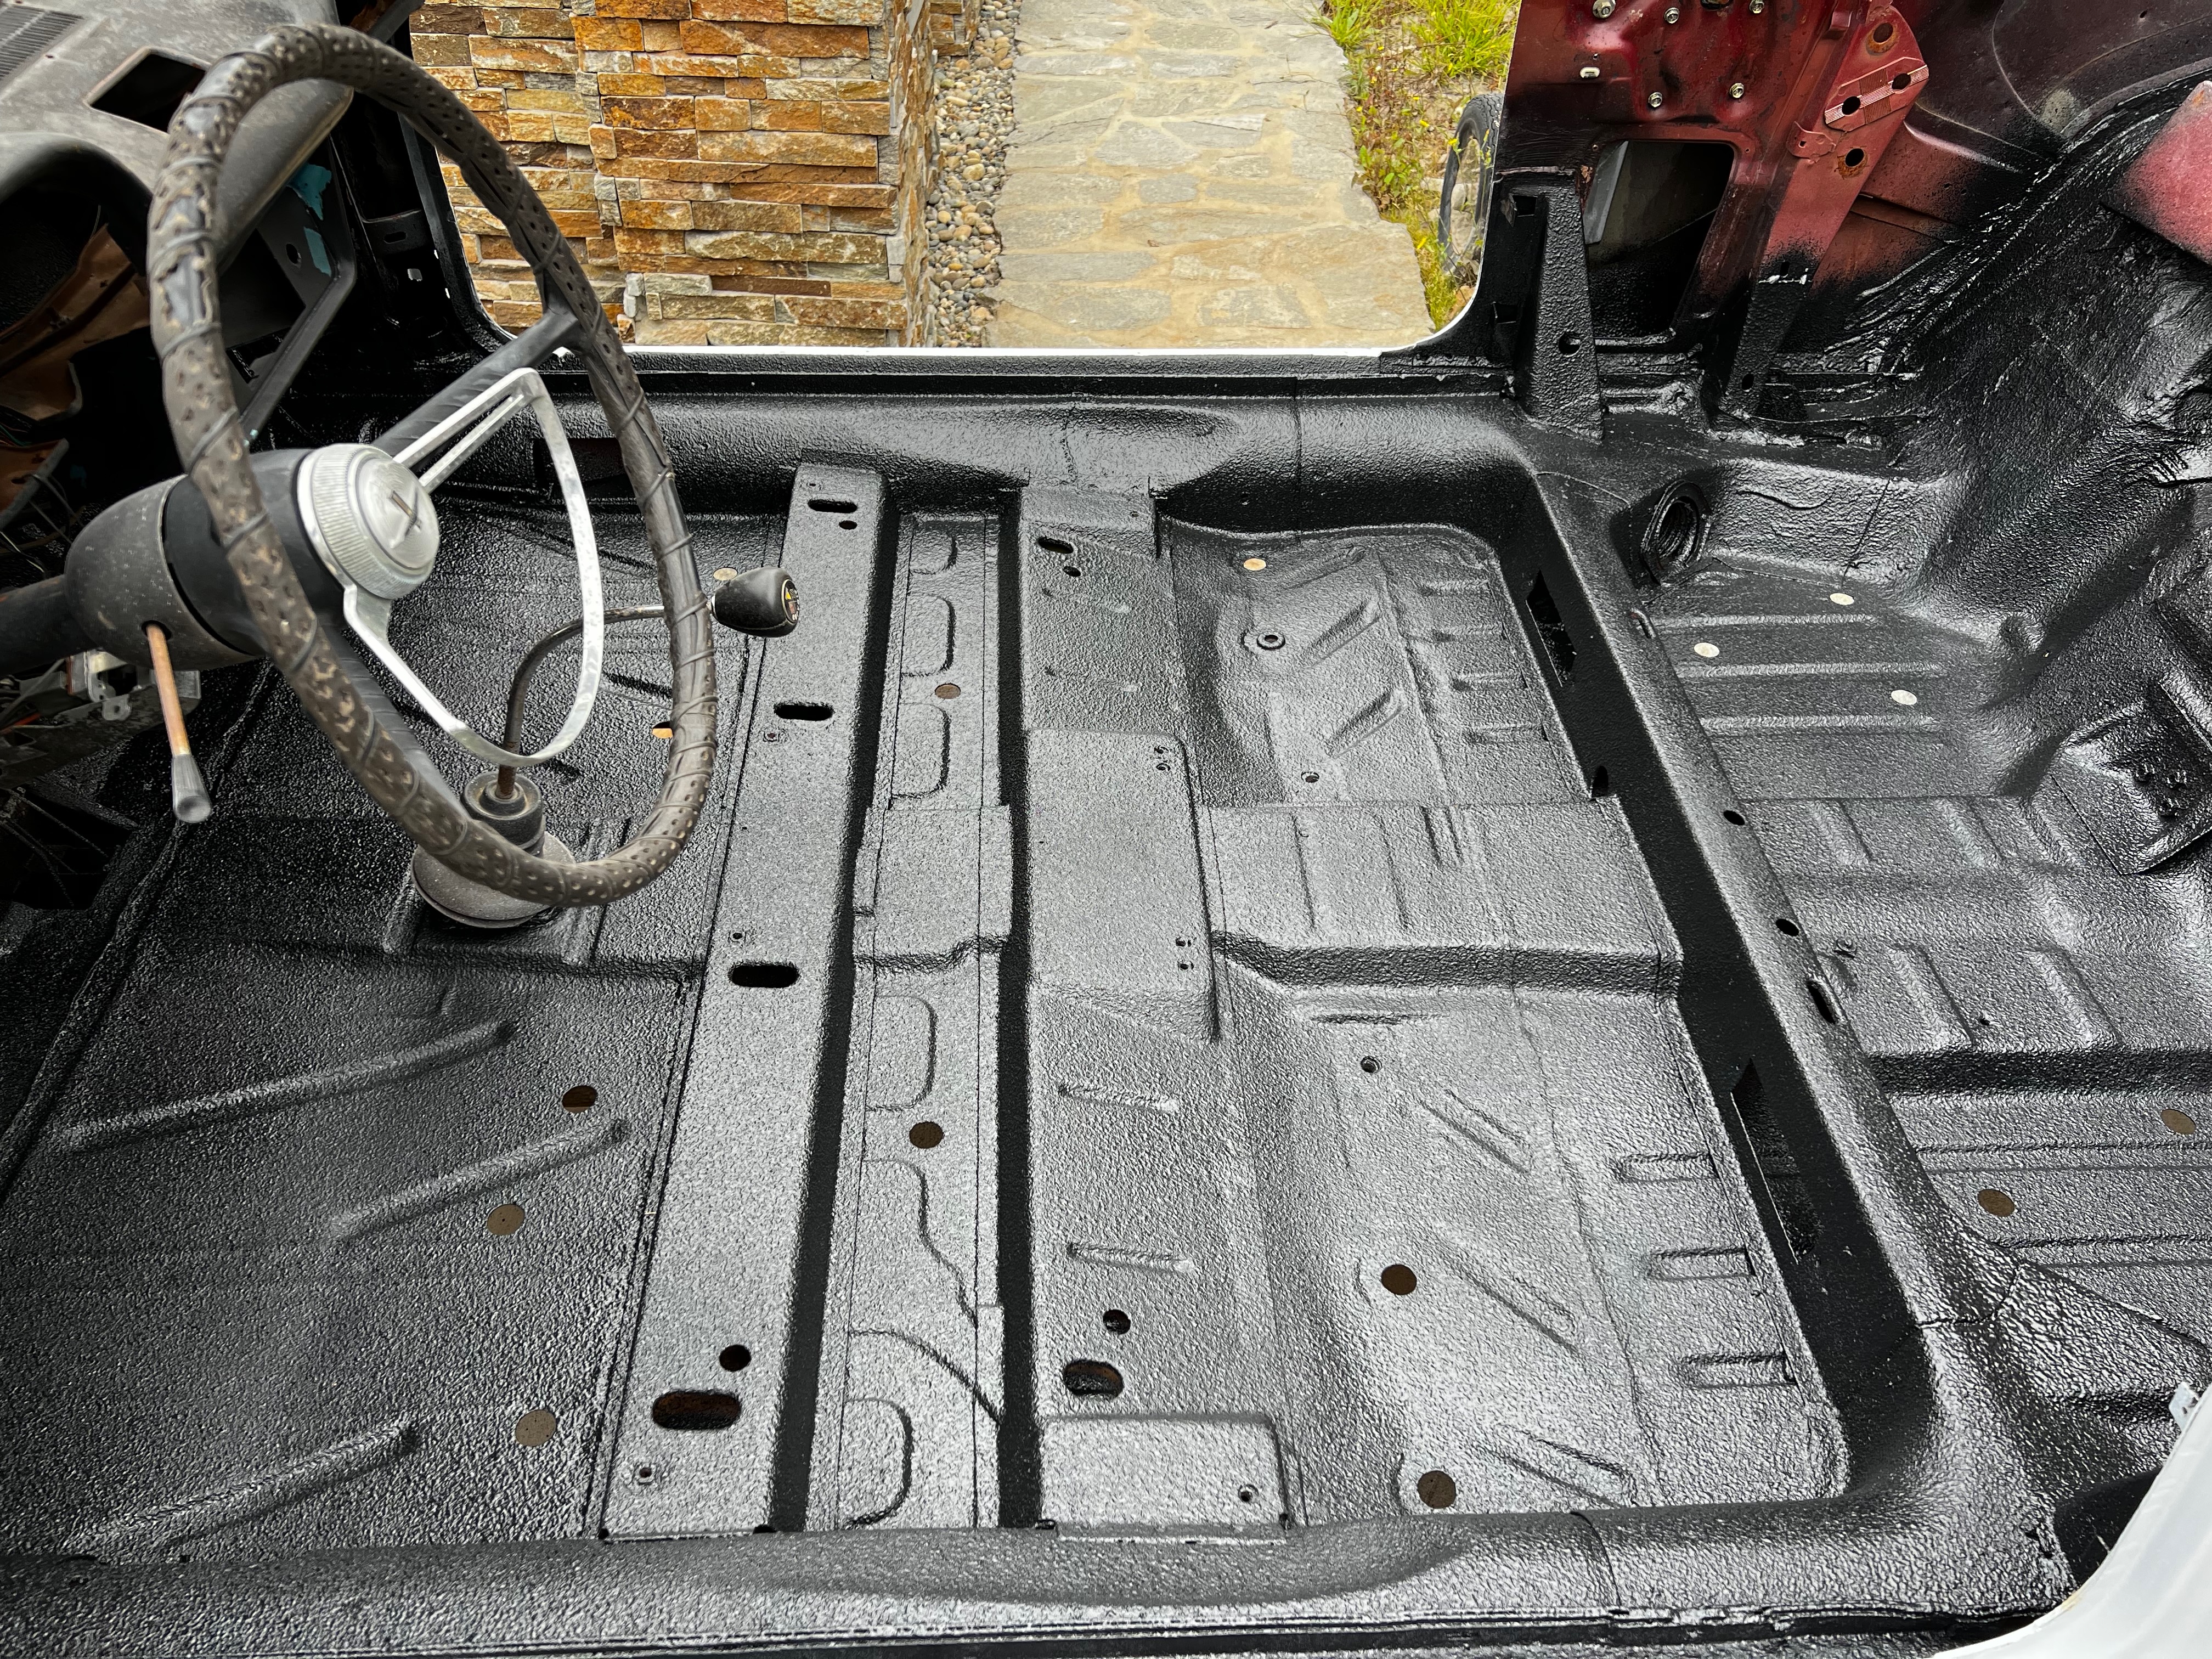
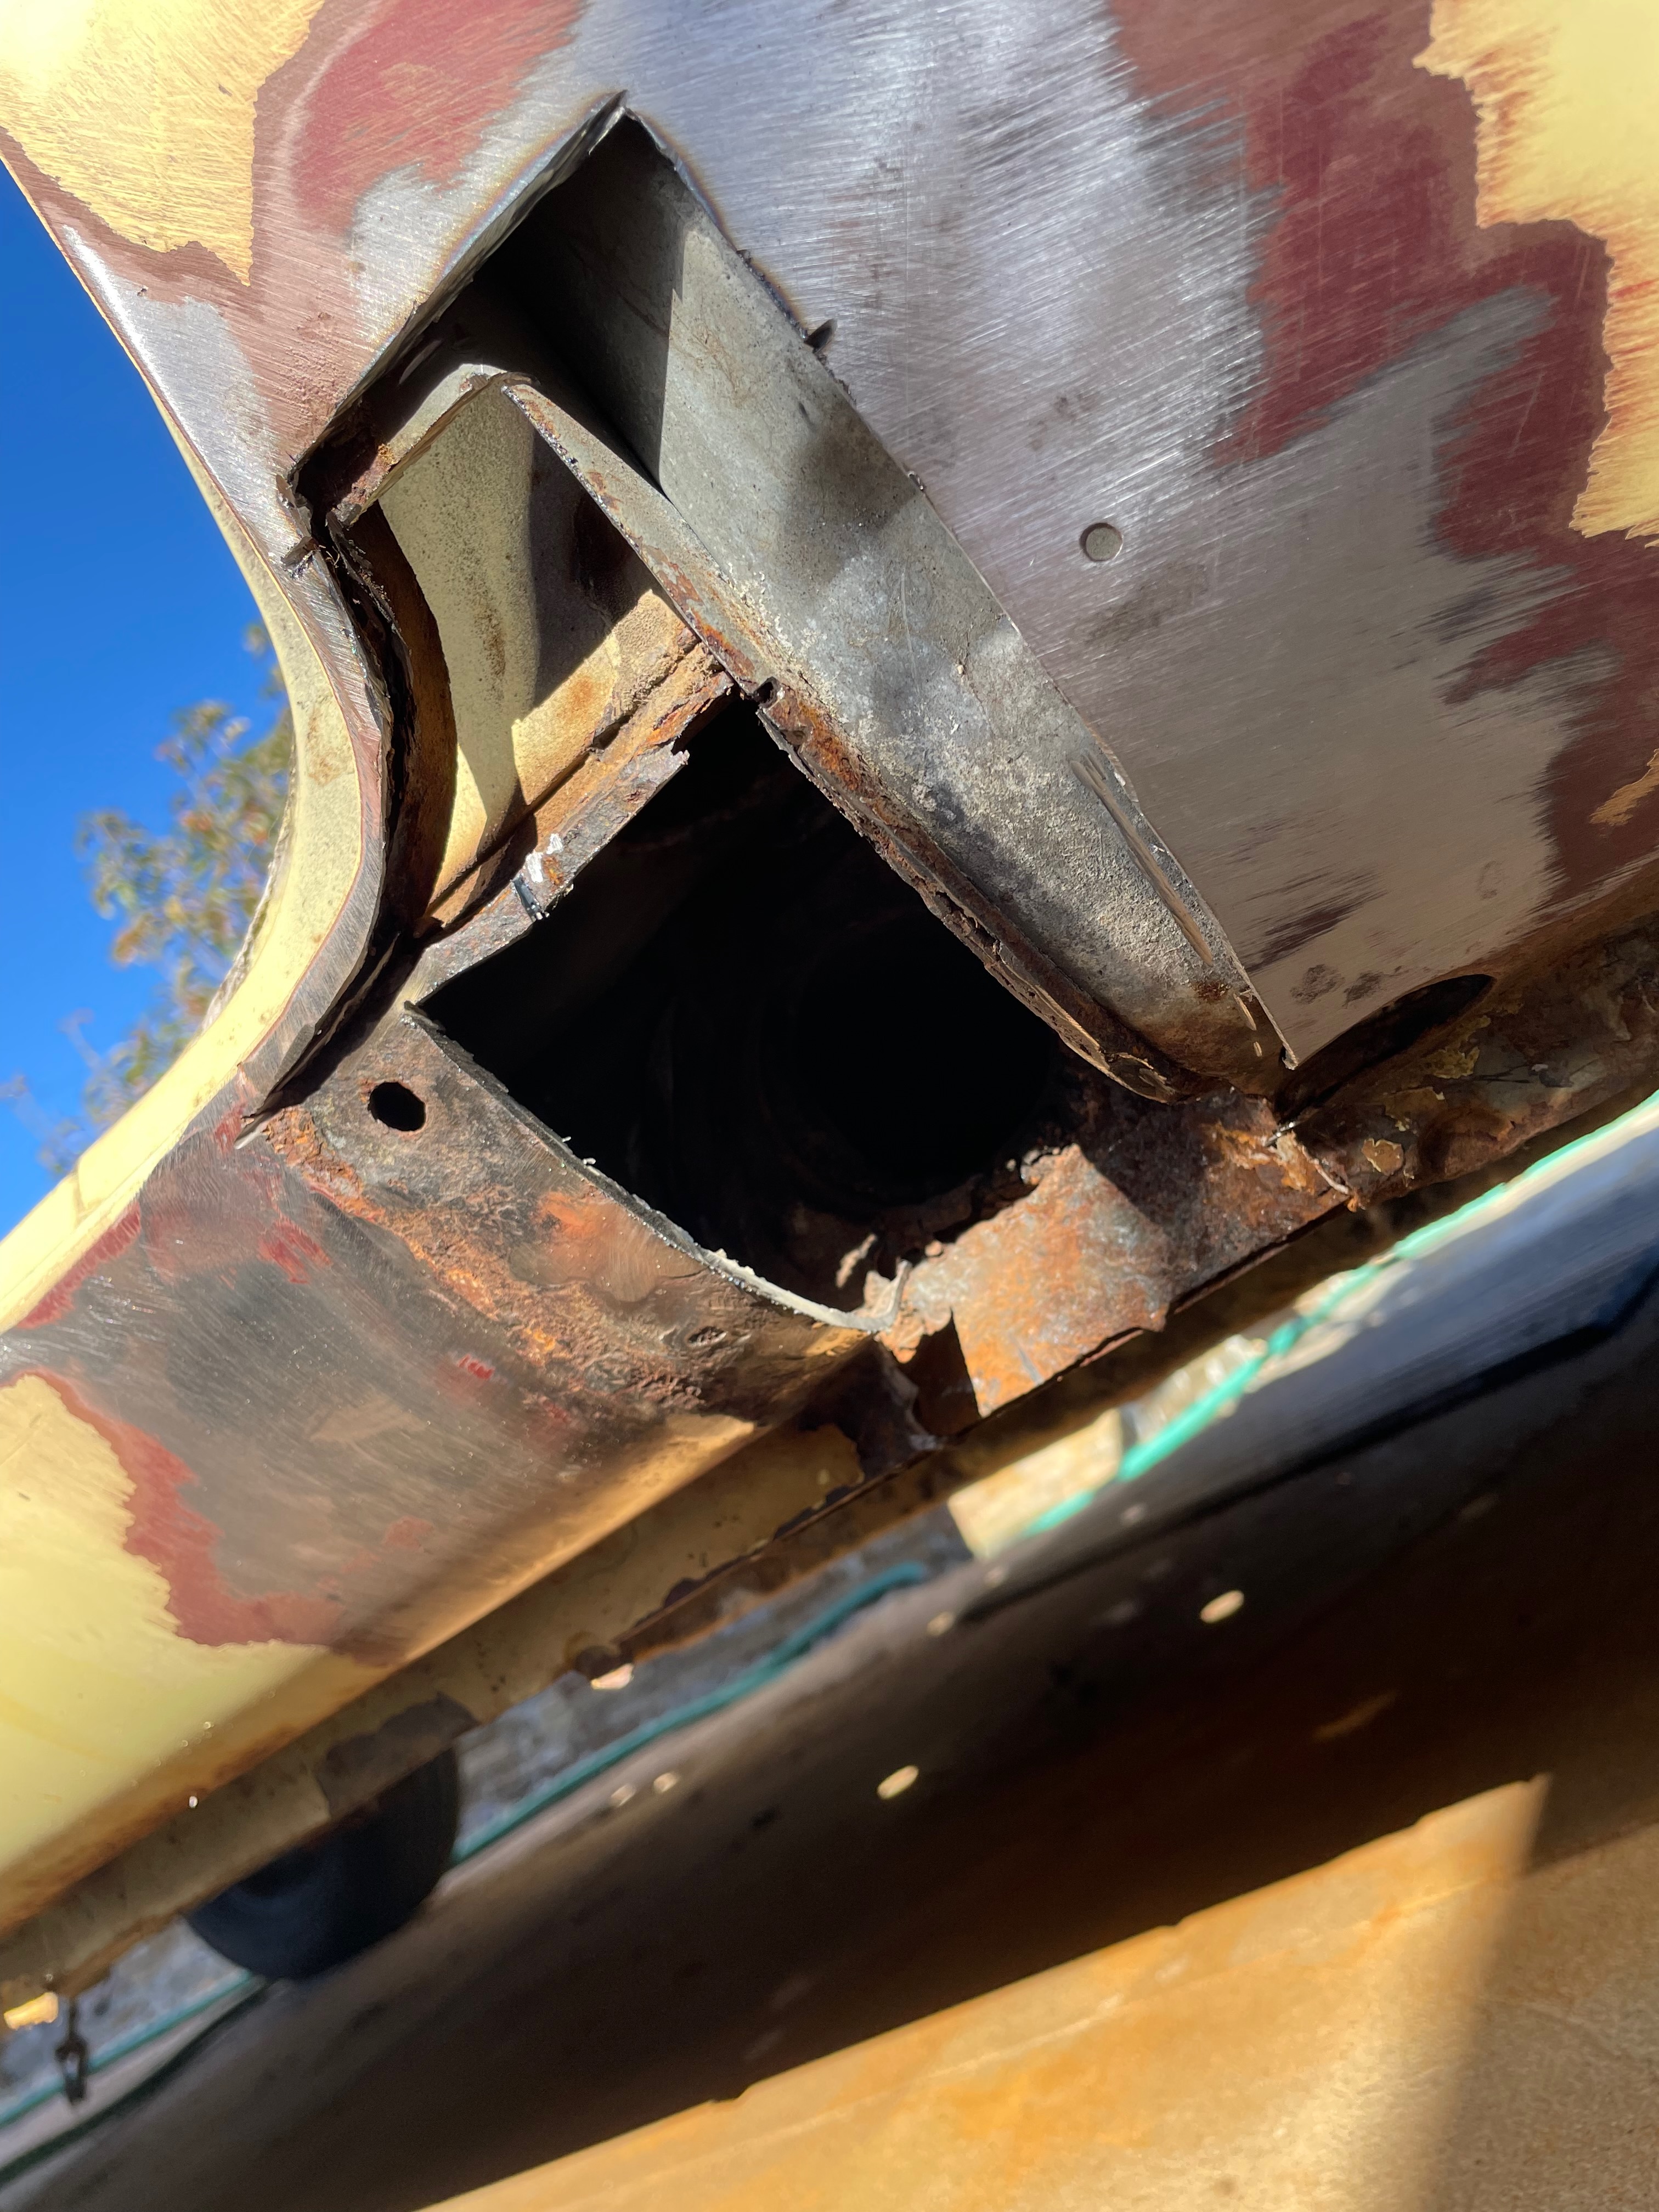
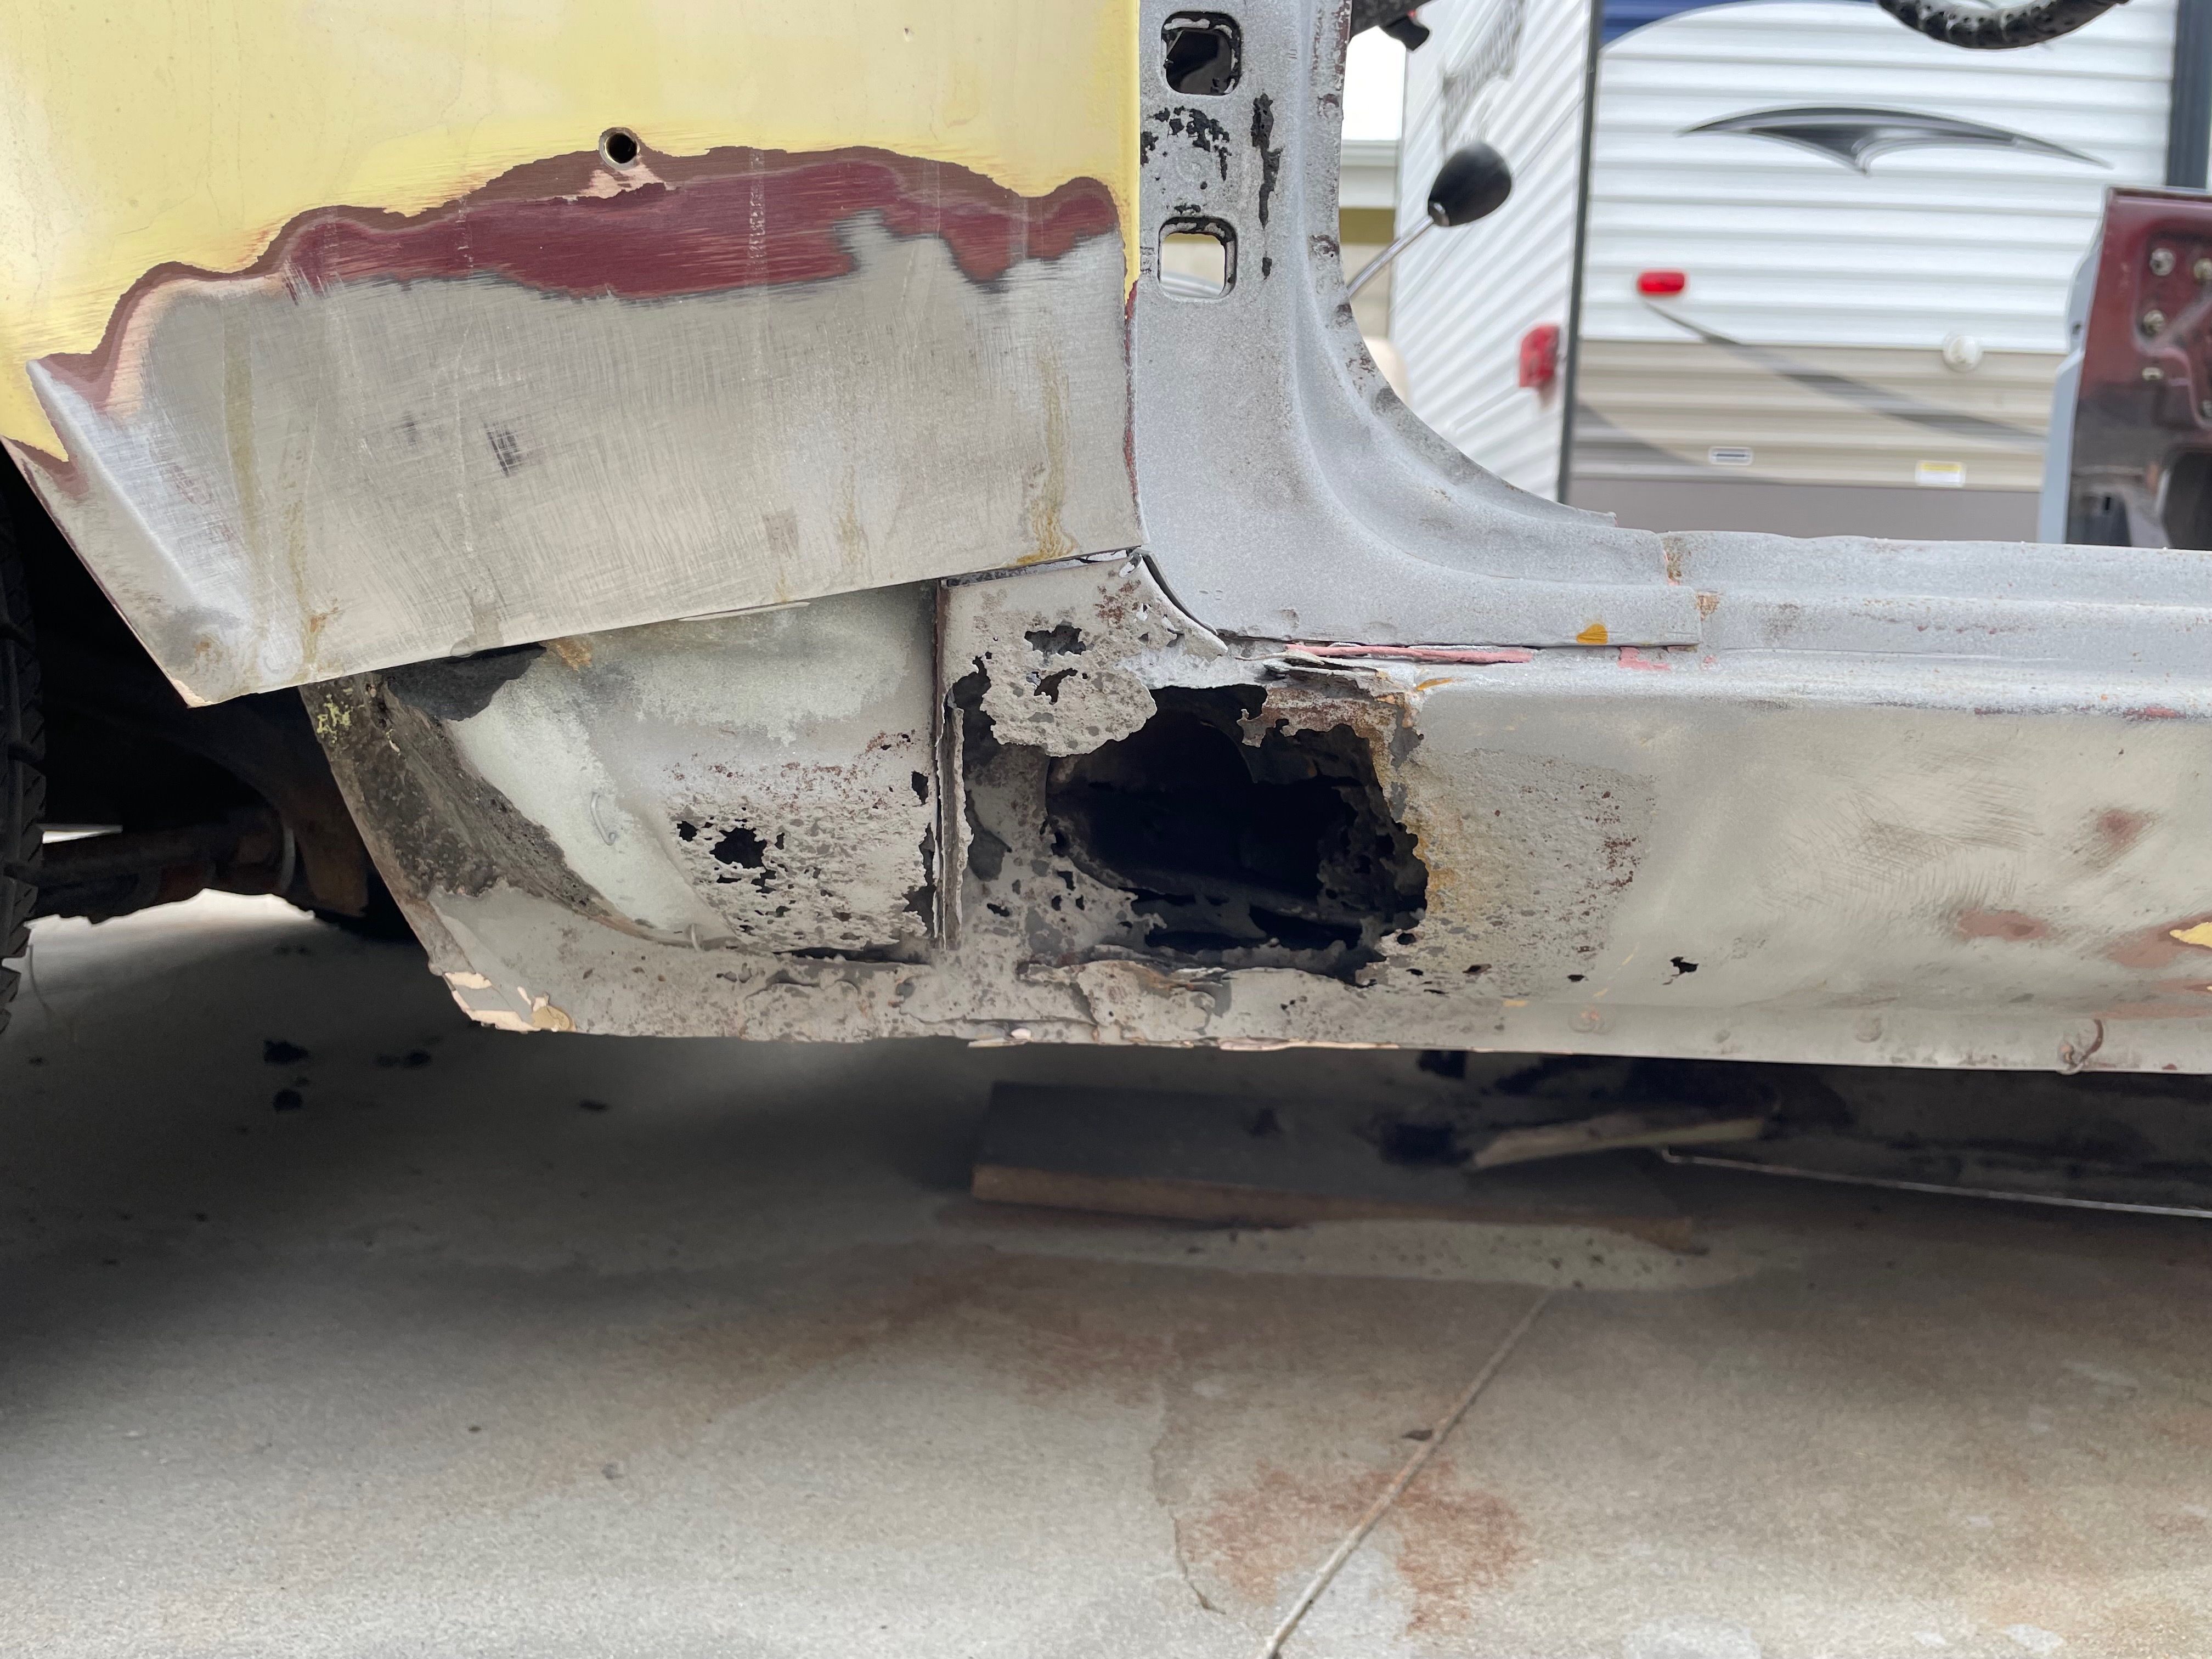
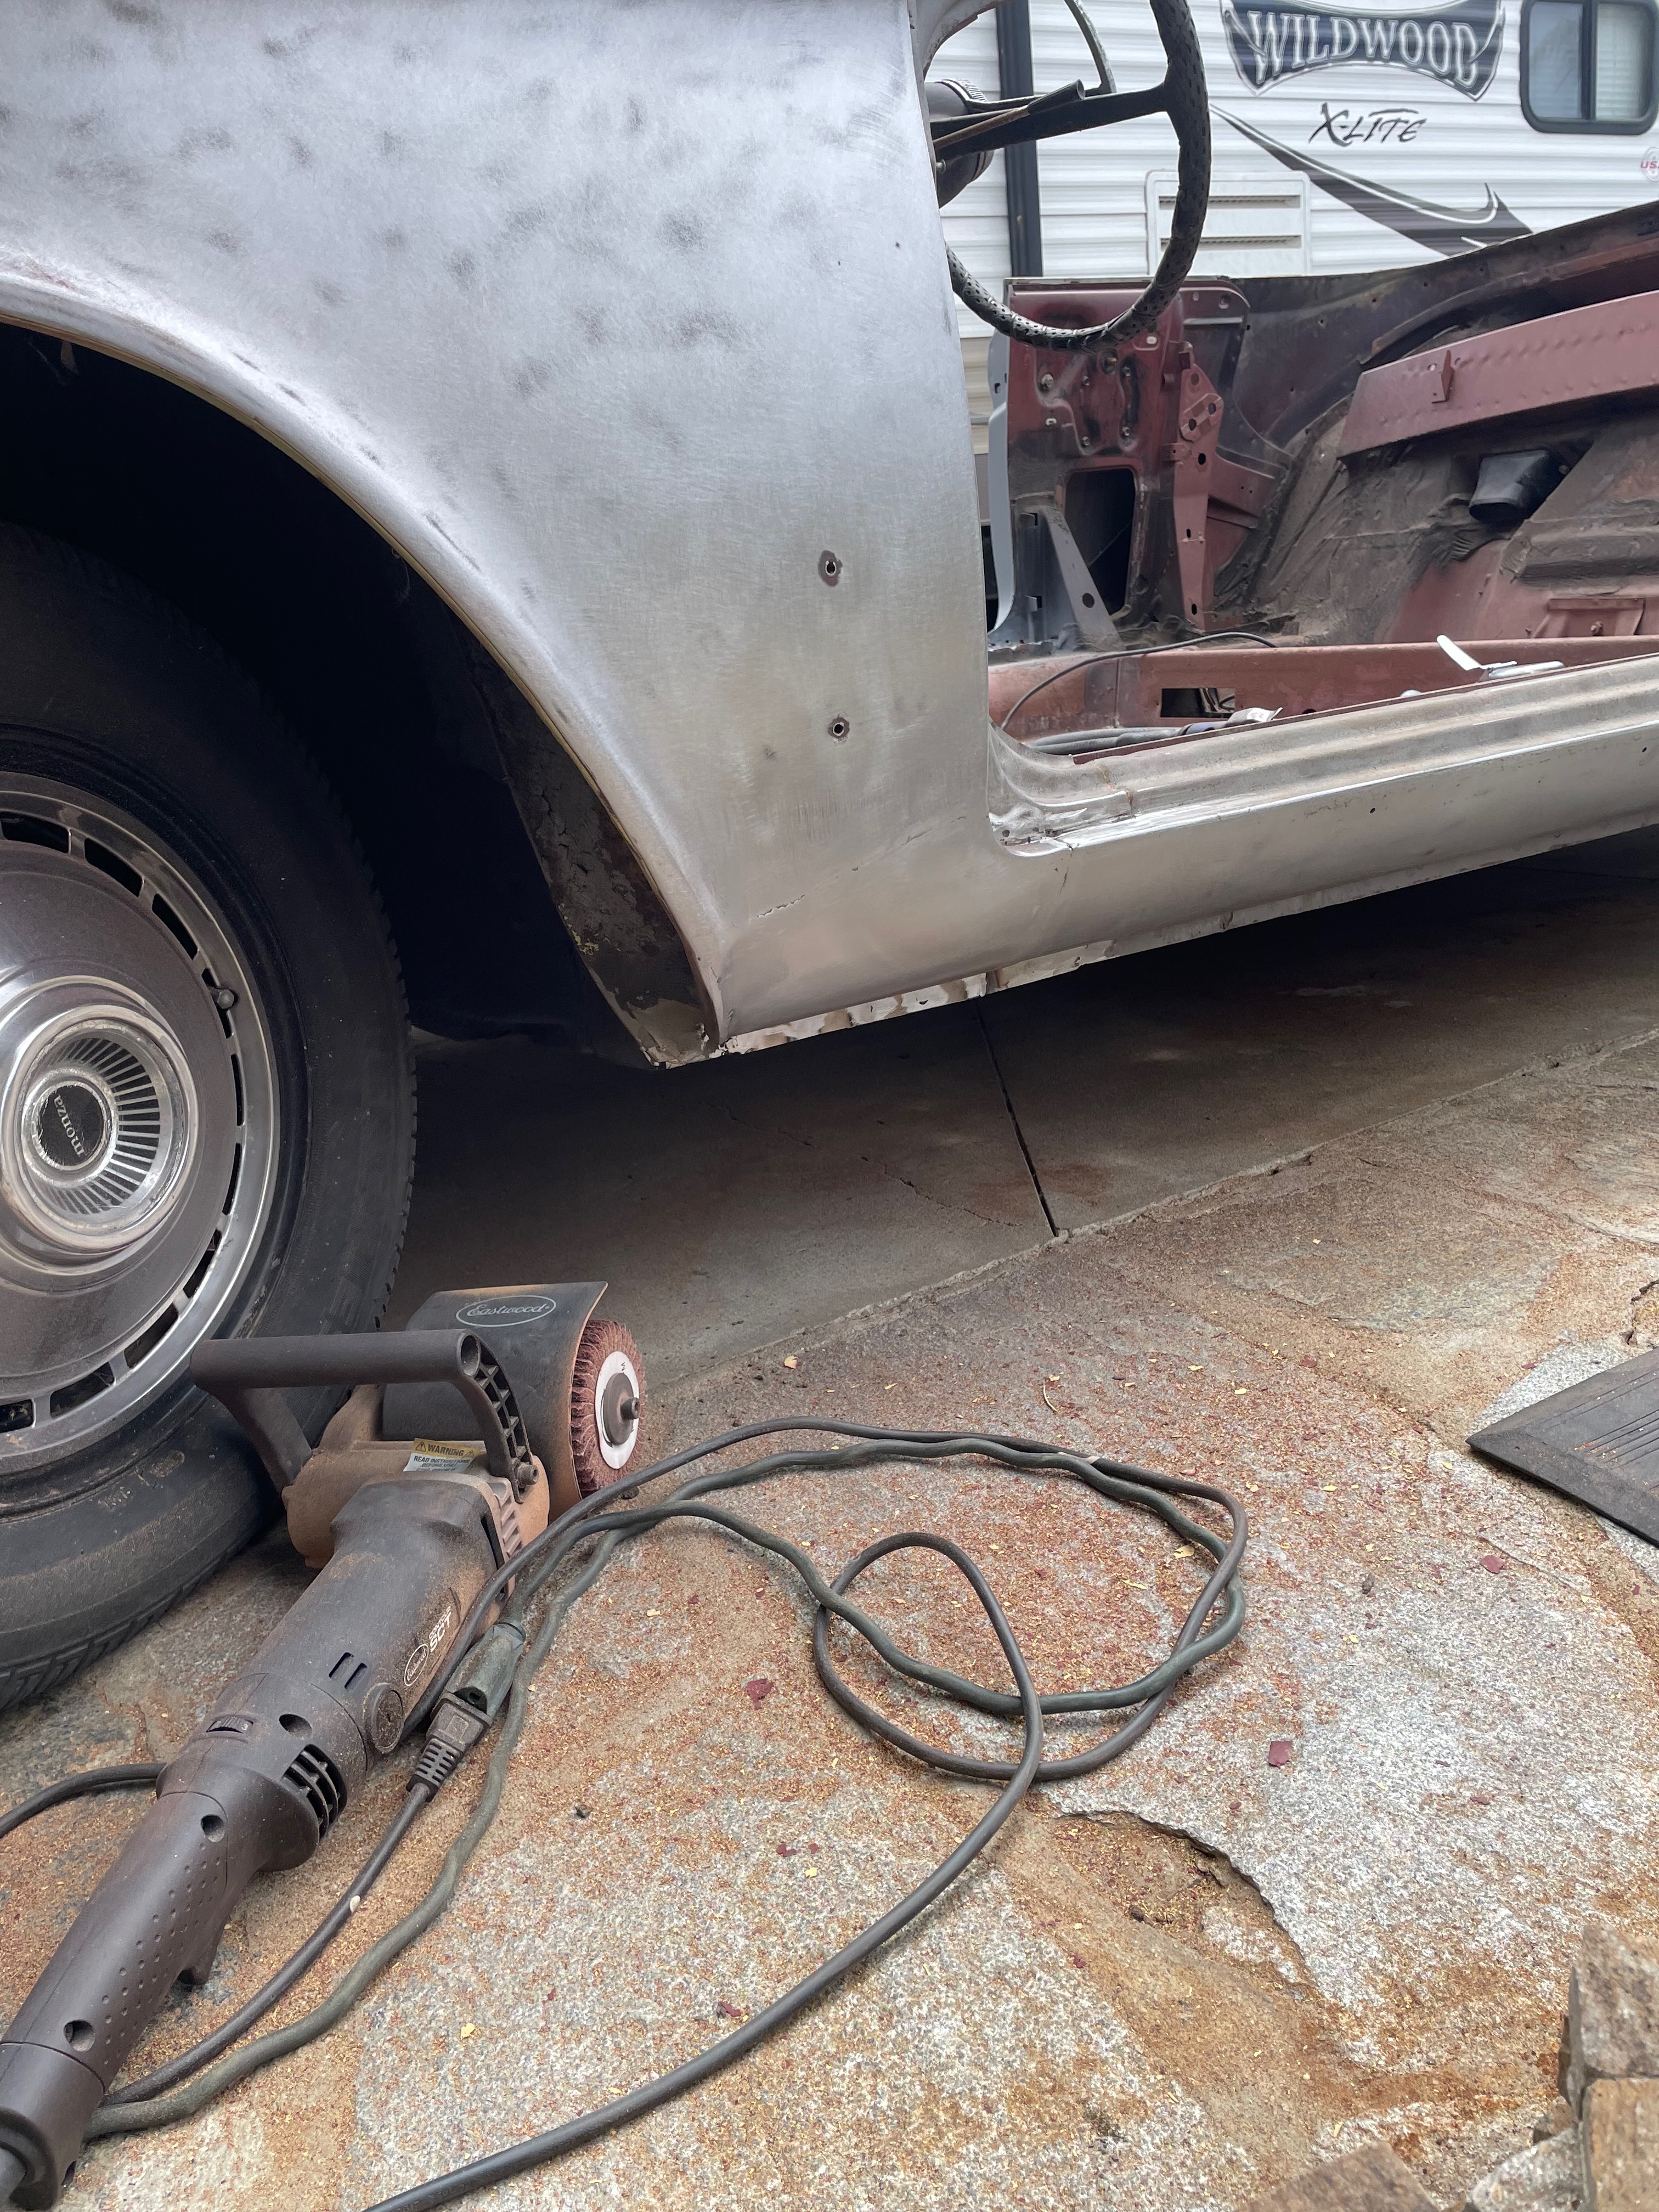
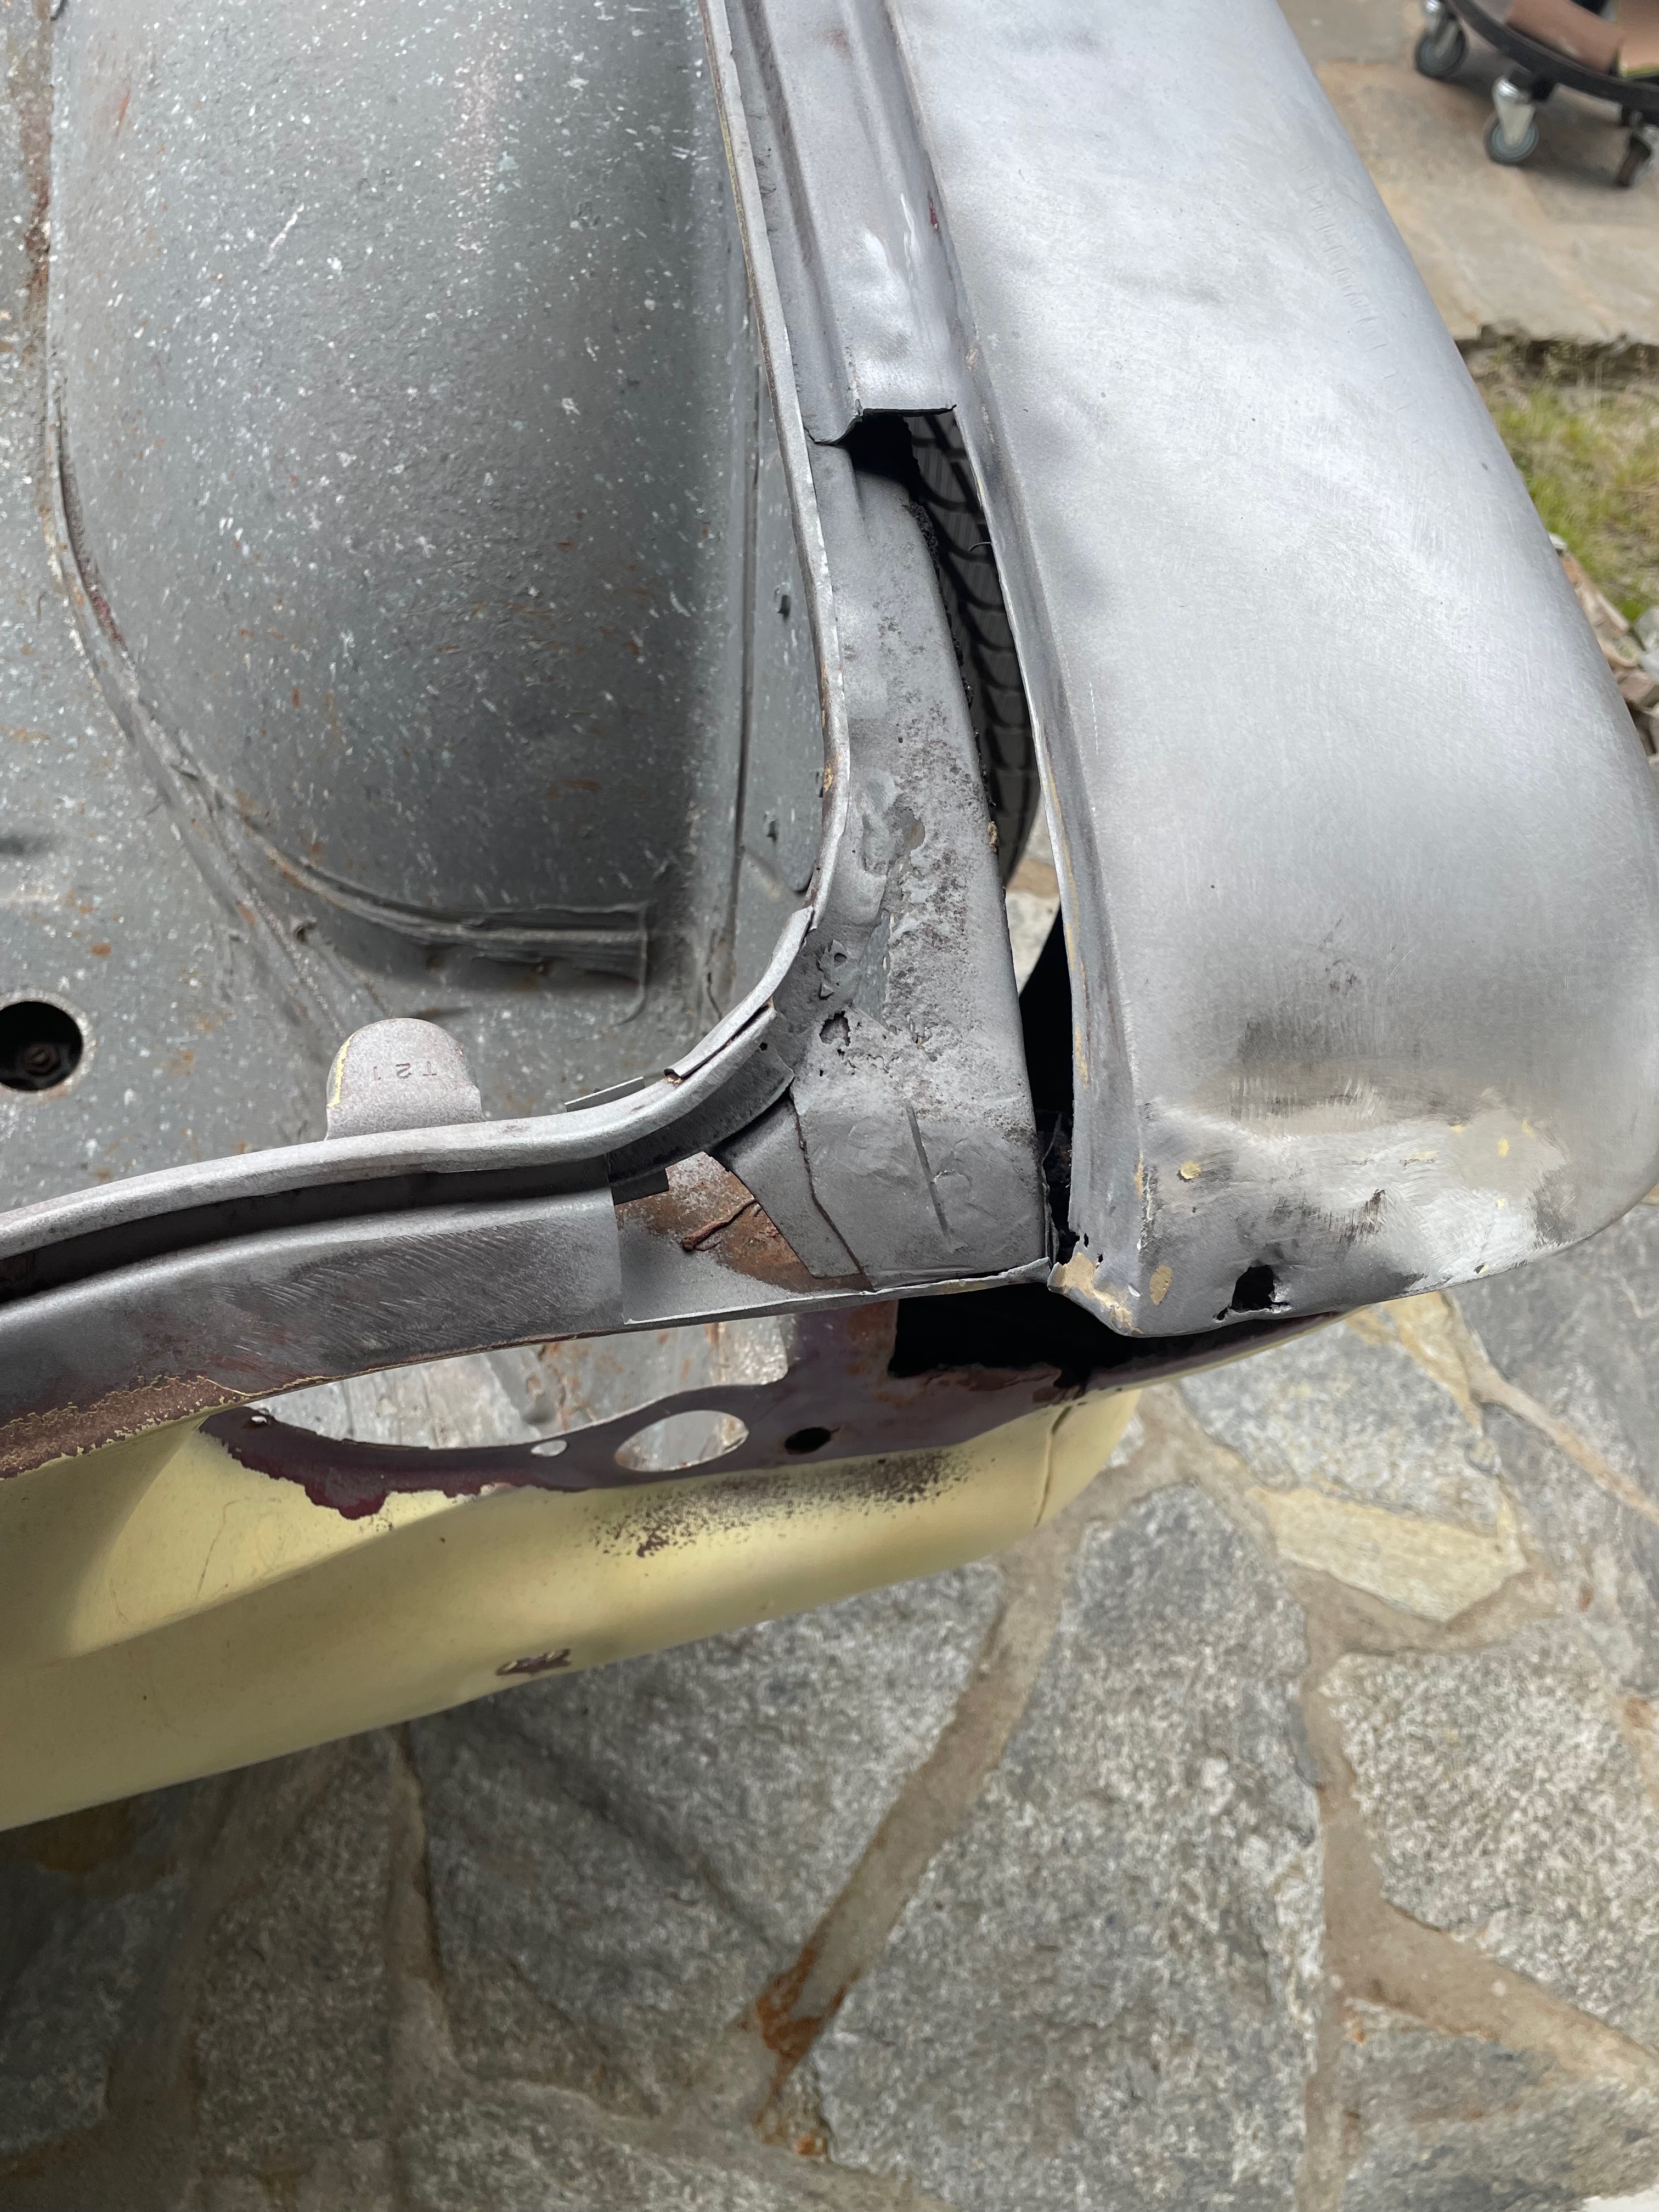
Body-Paint: Floor Pan Rust Repair
Cutting out severely rusted sections of the floor pan to prepare for welding in new metal panels, a critical structural repair in the body restoration process.
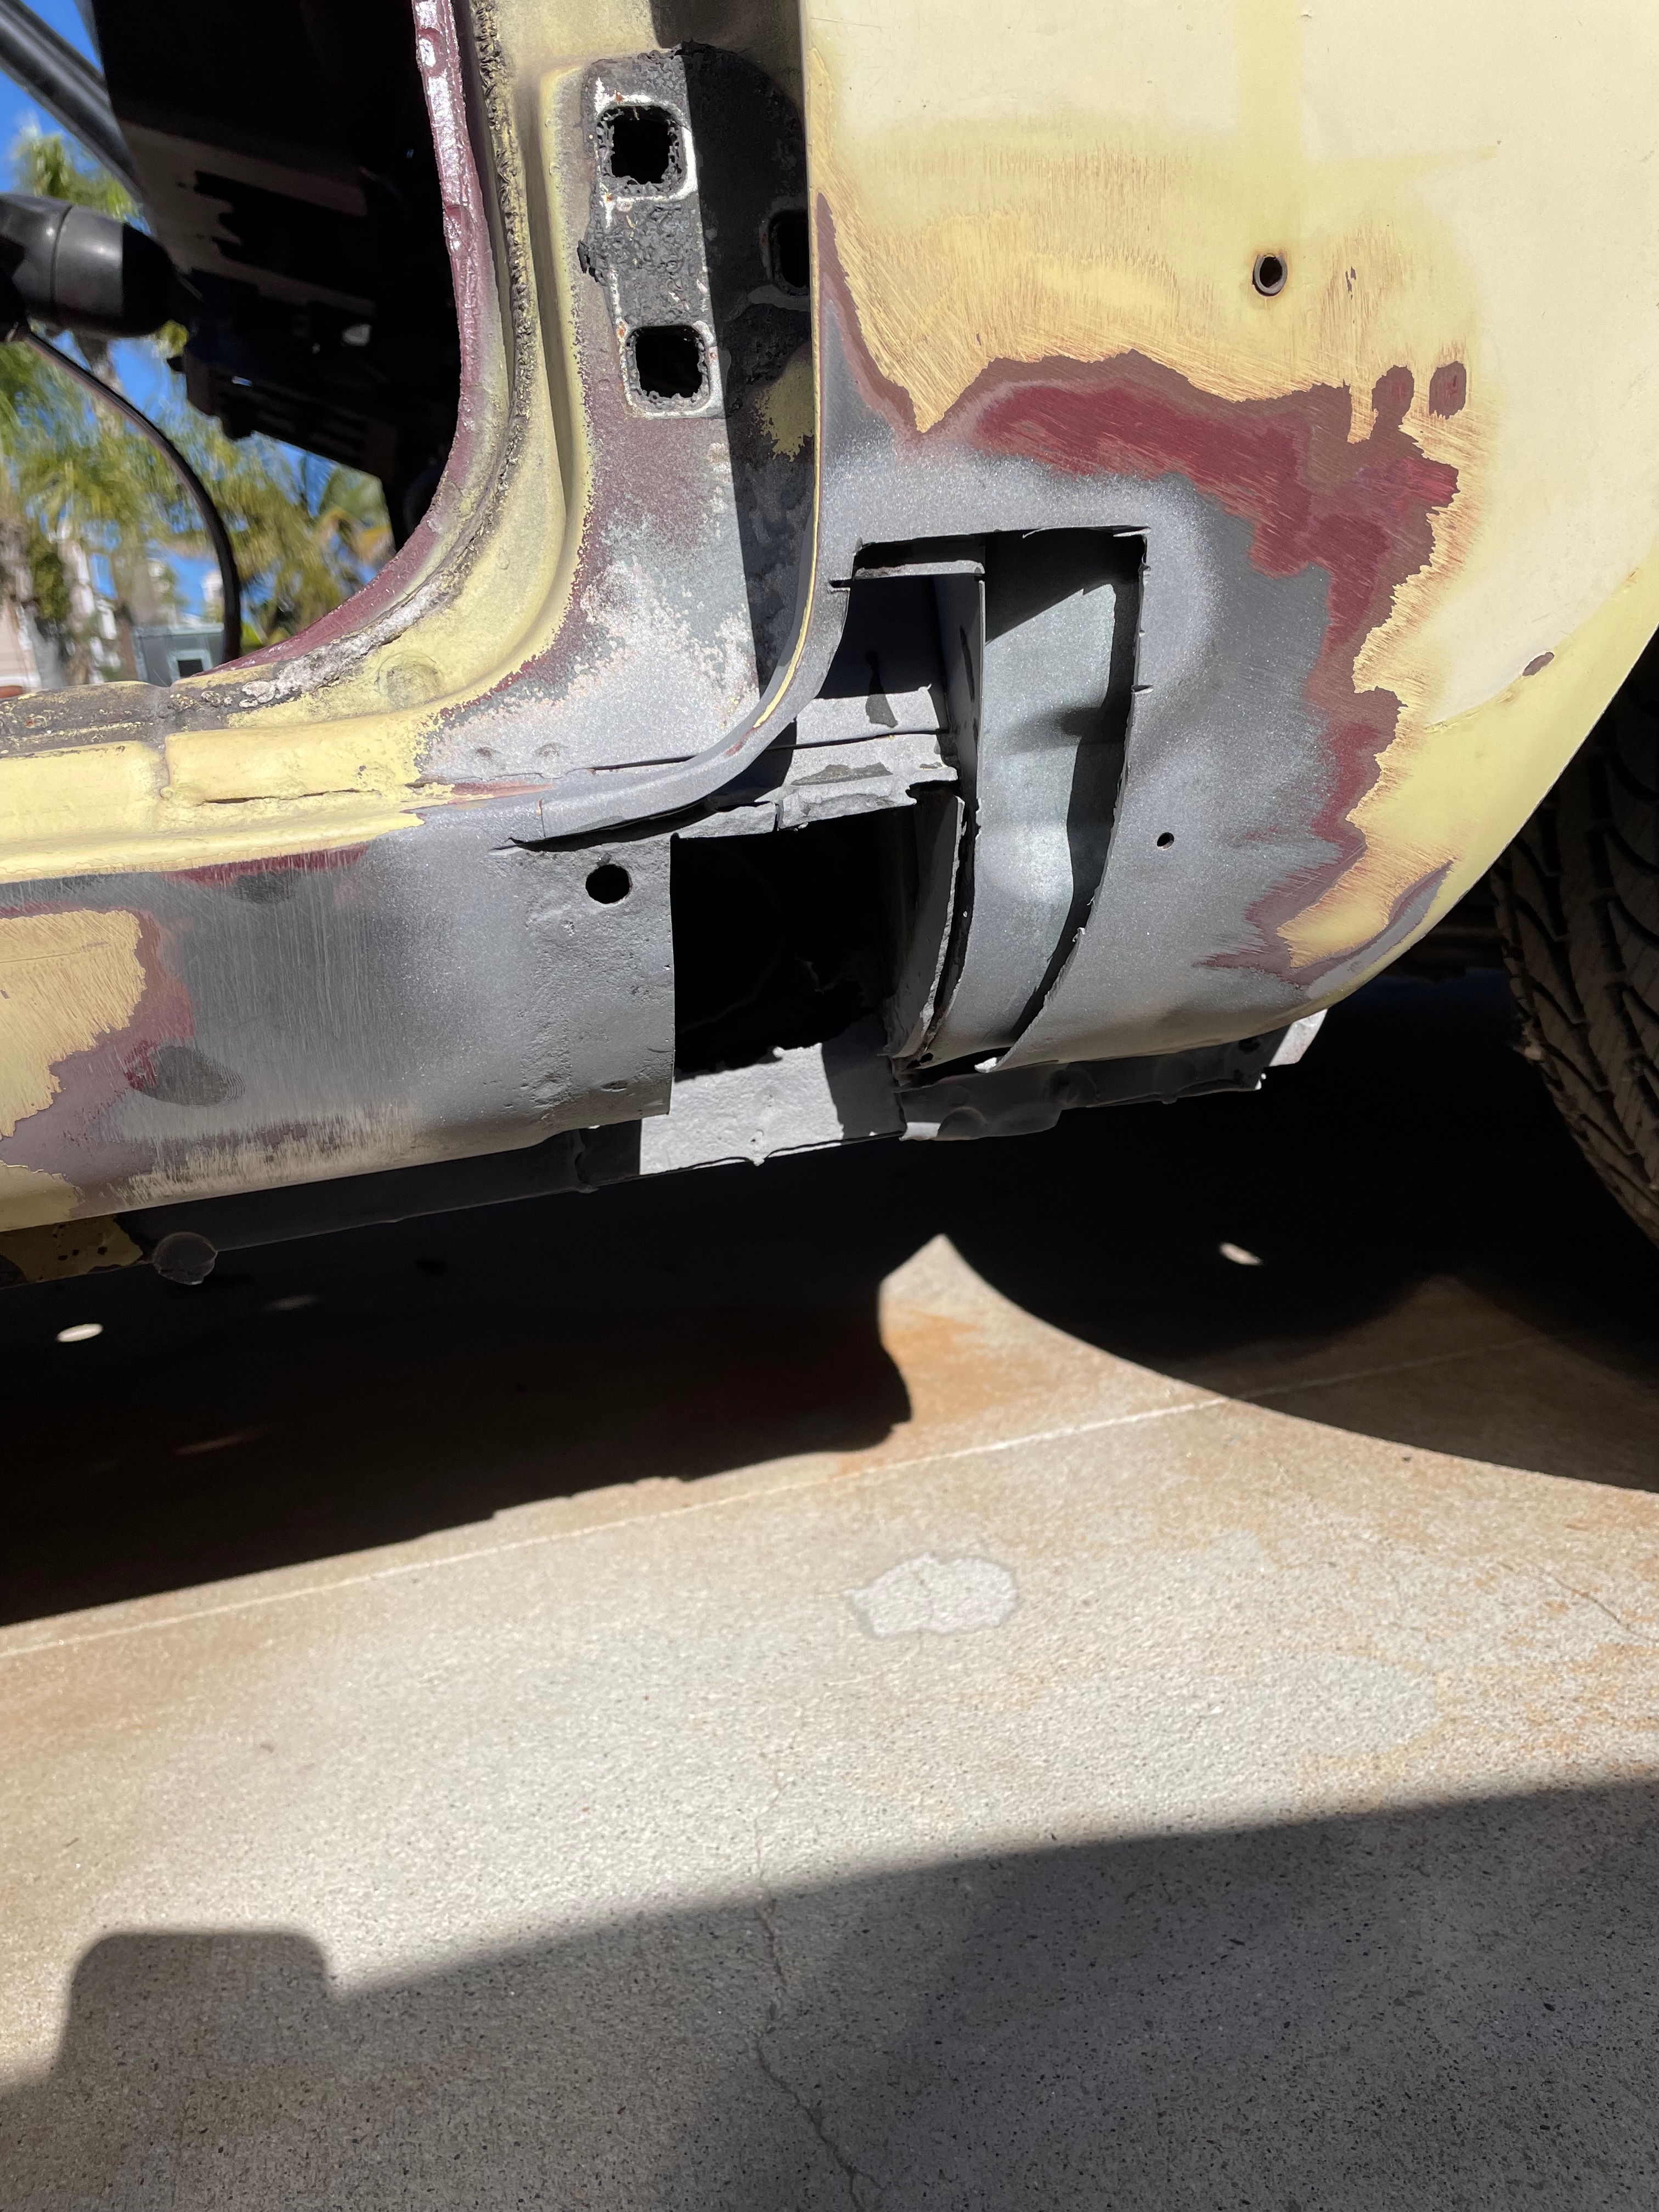
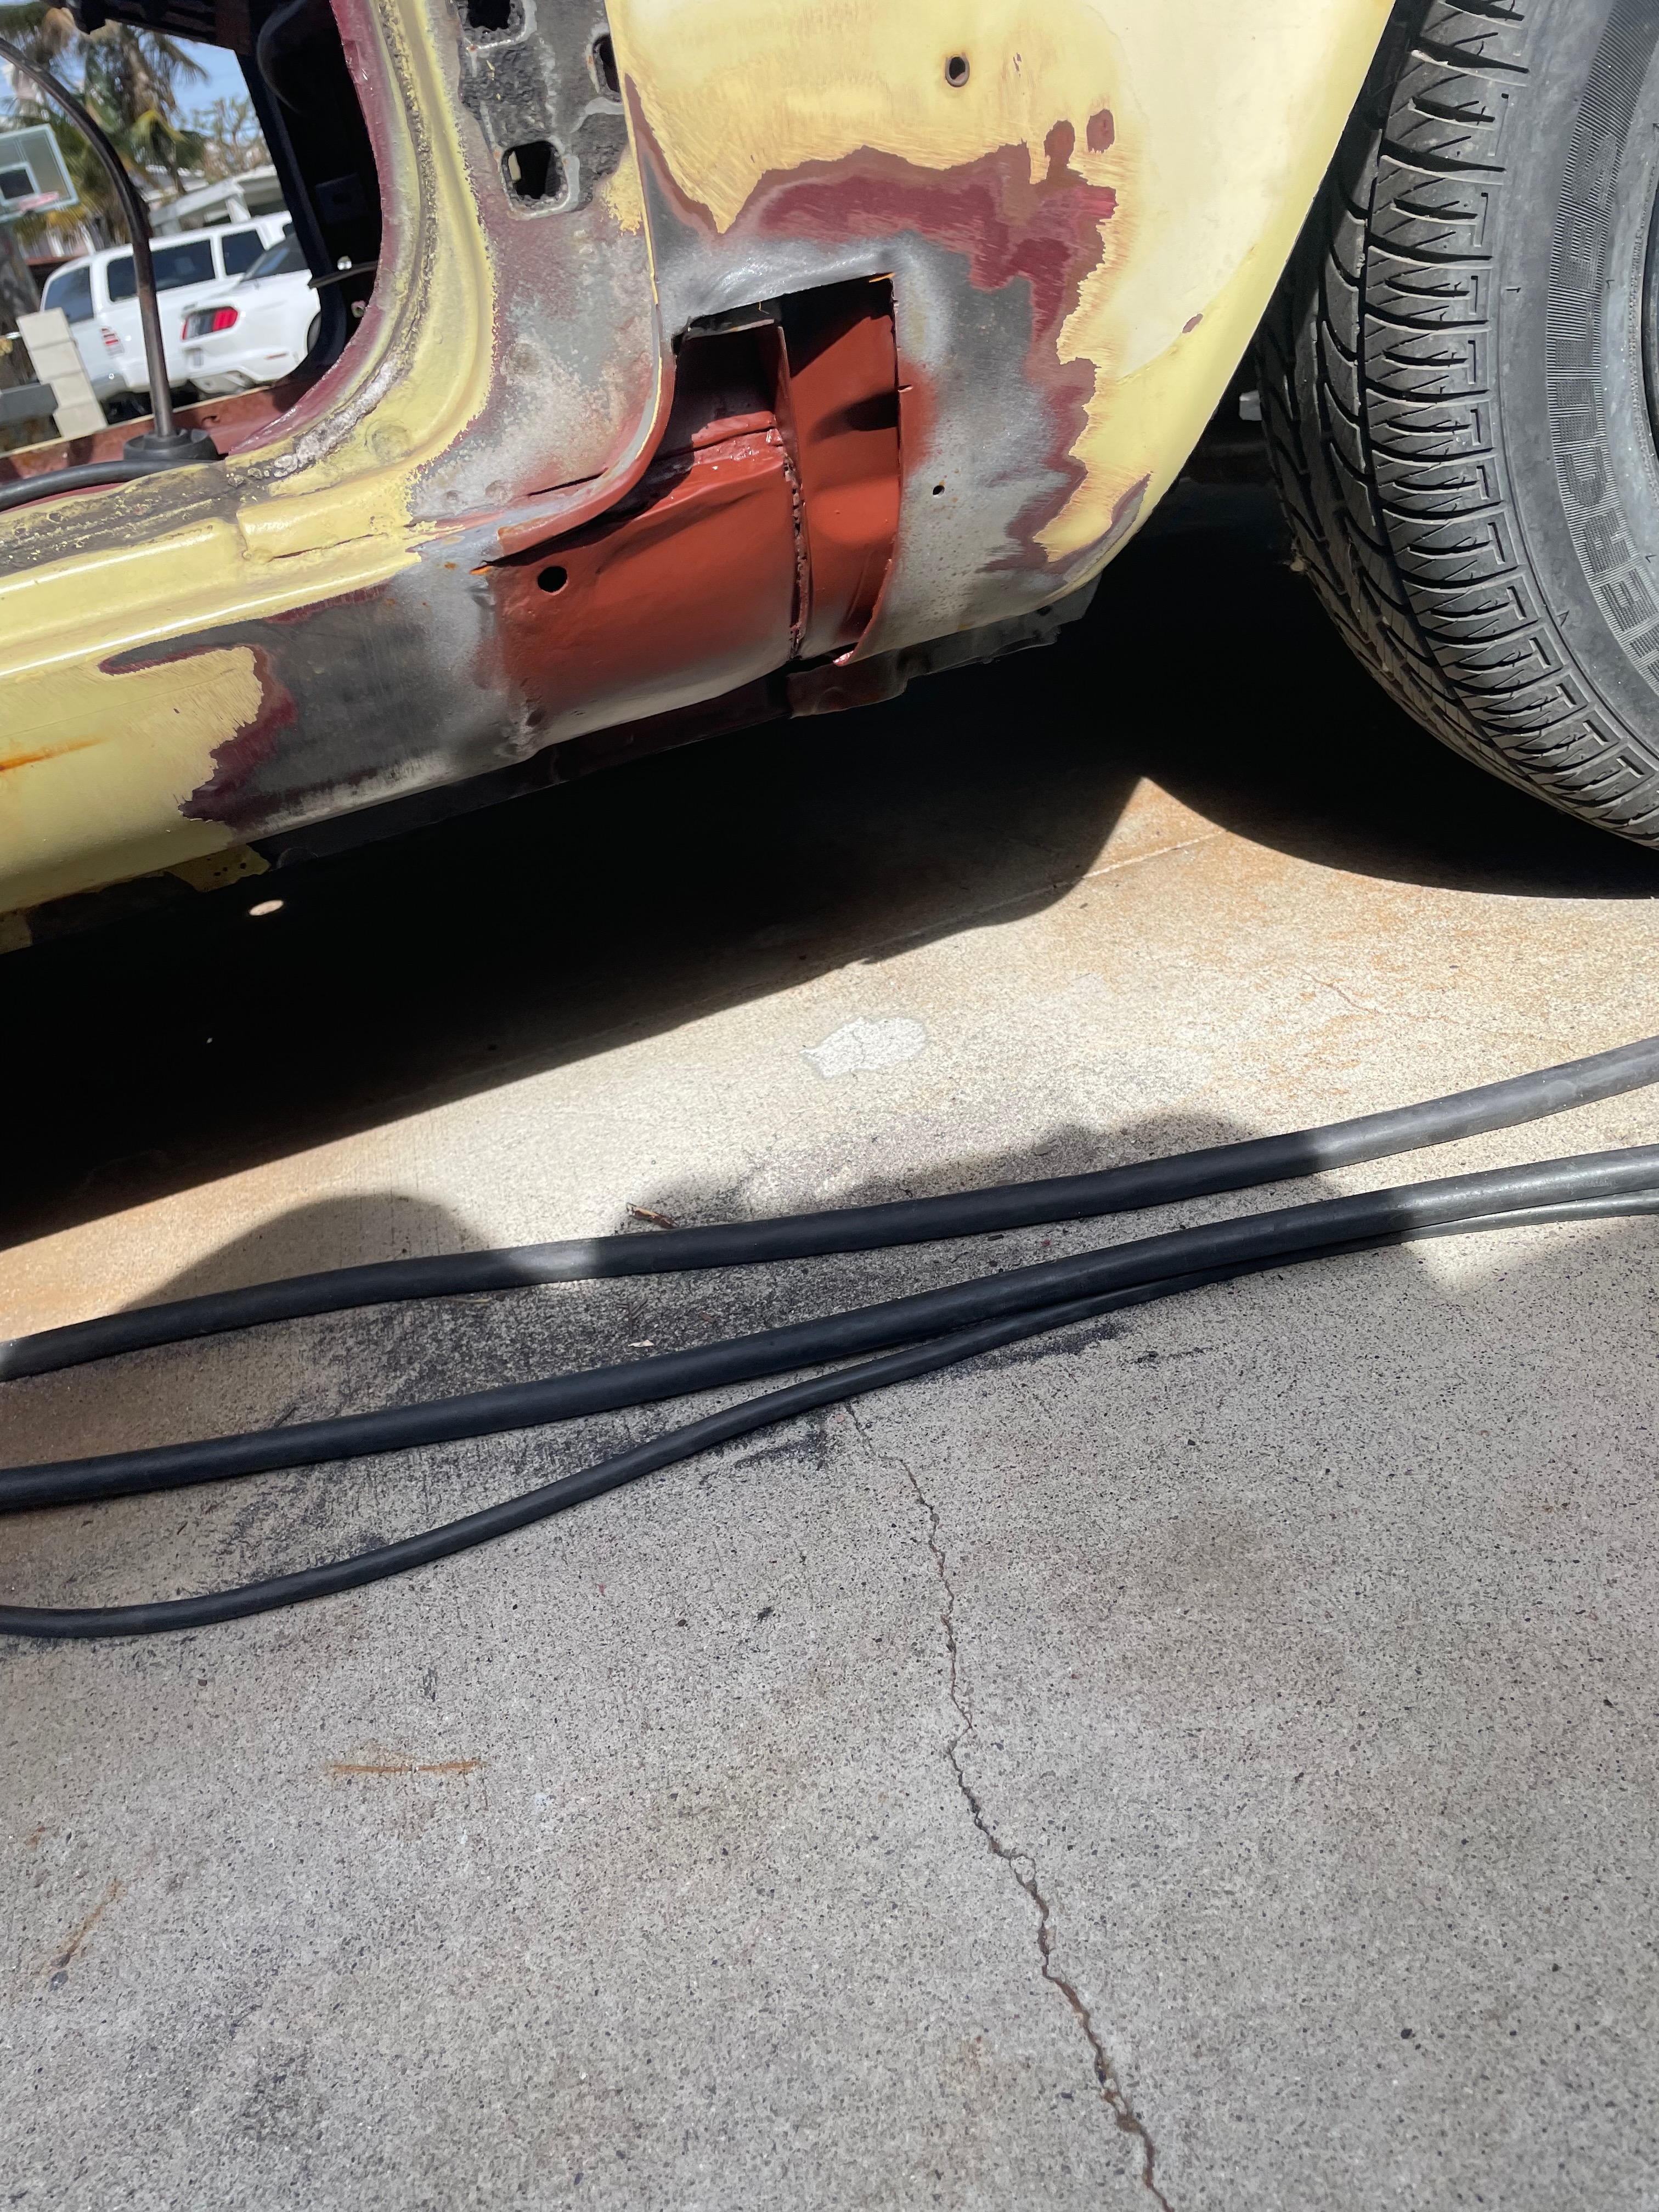
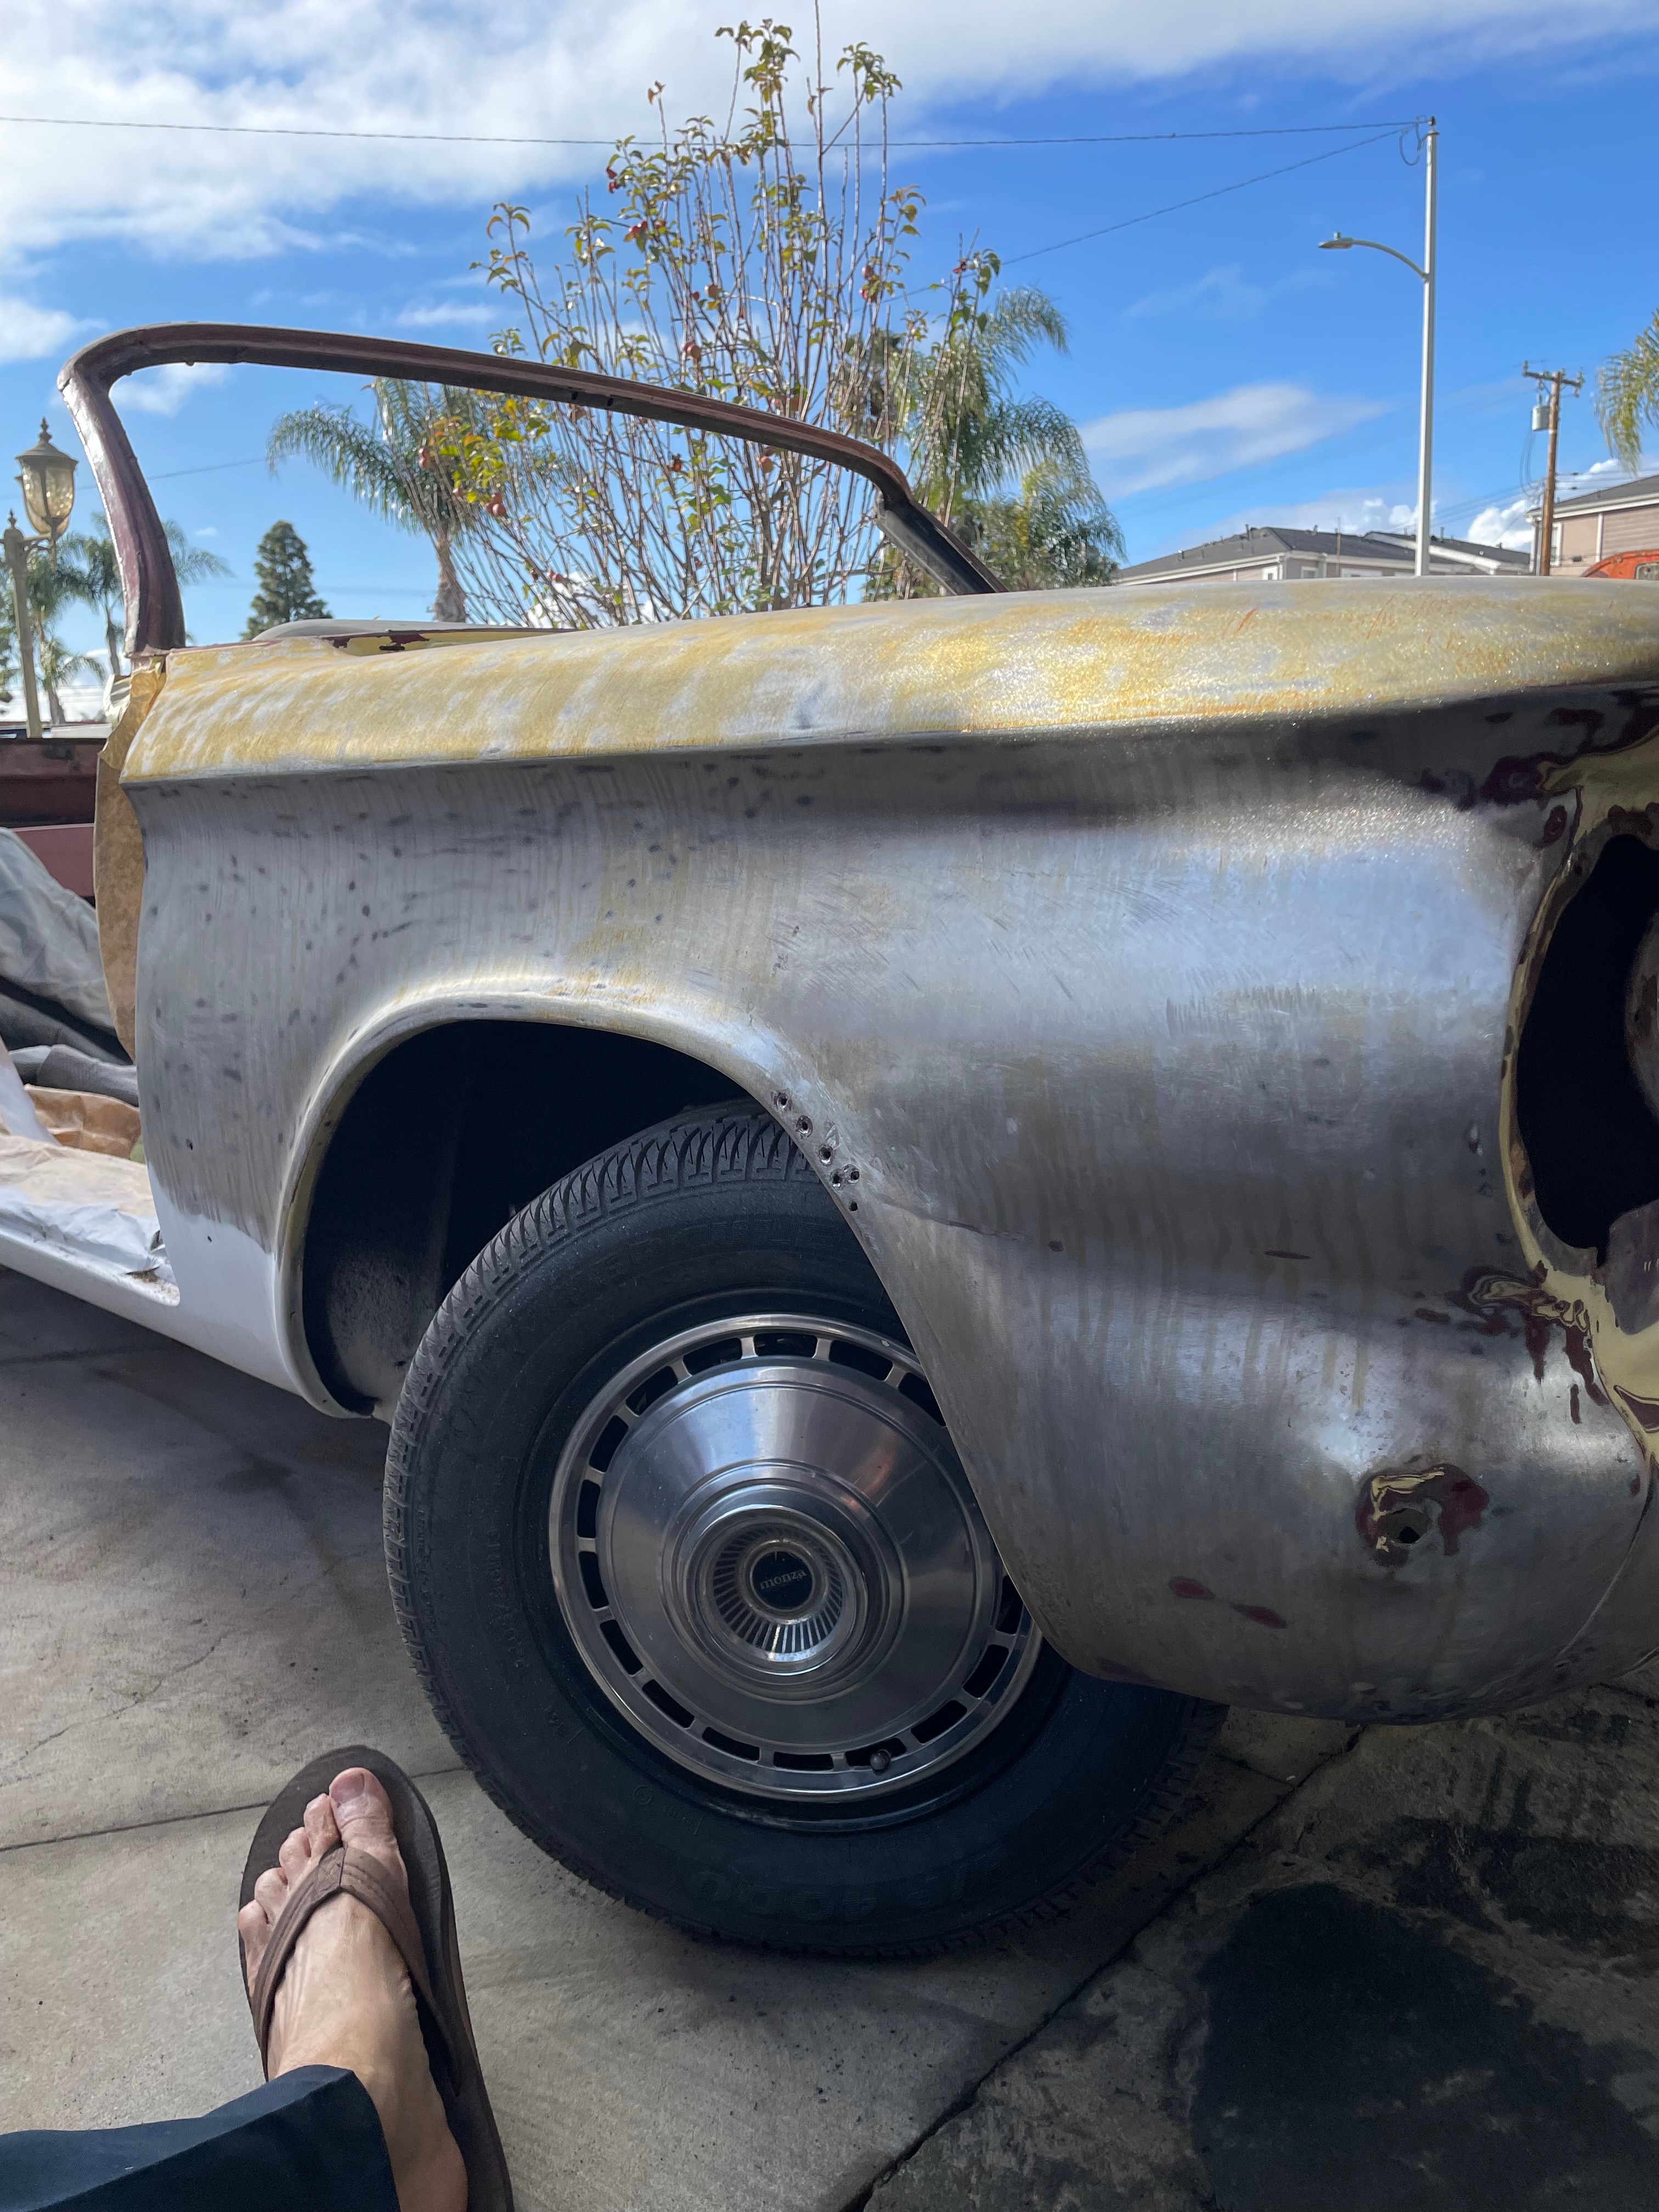
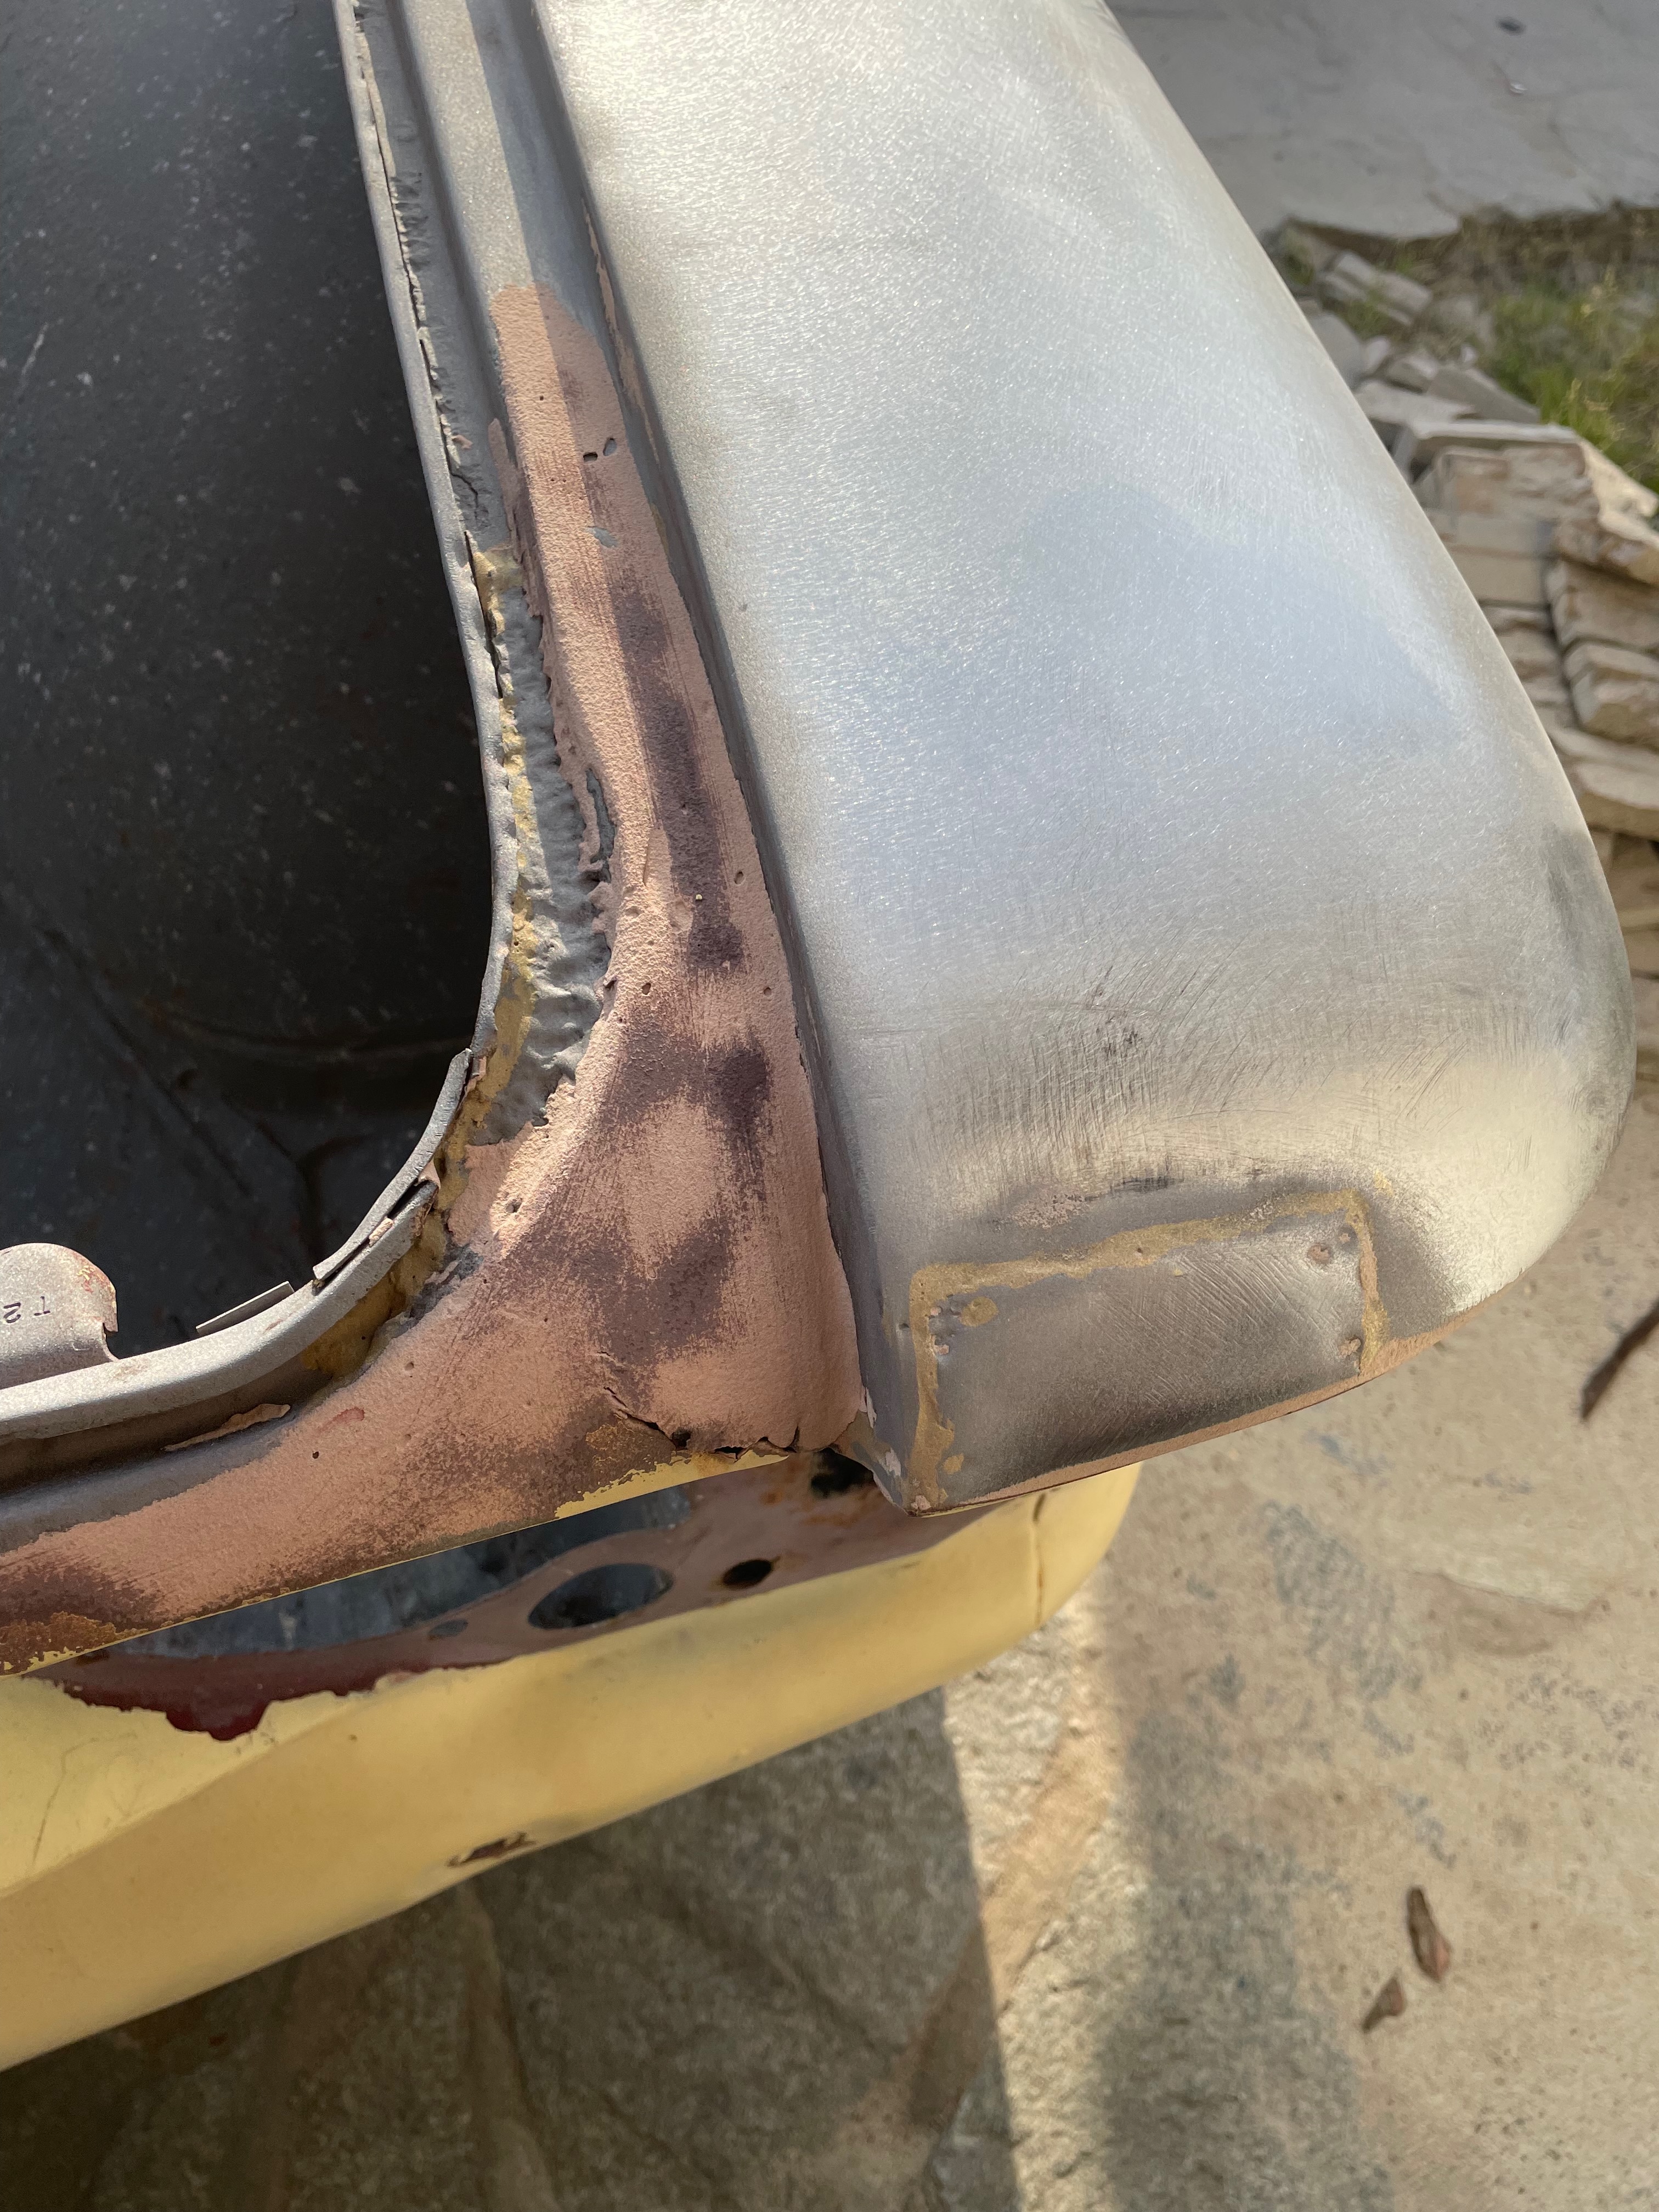
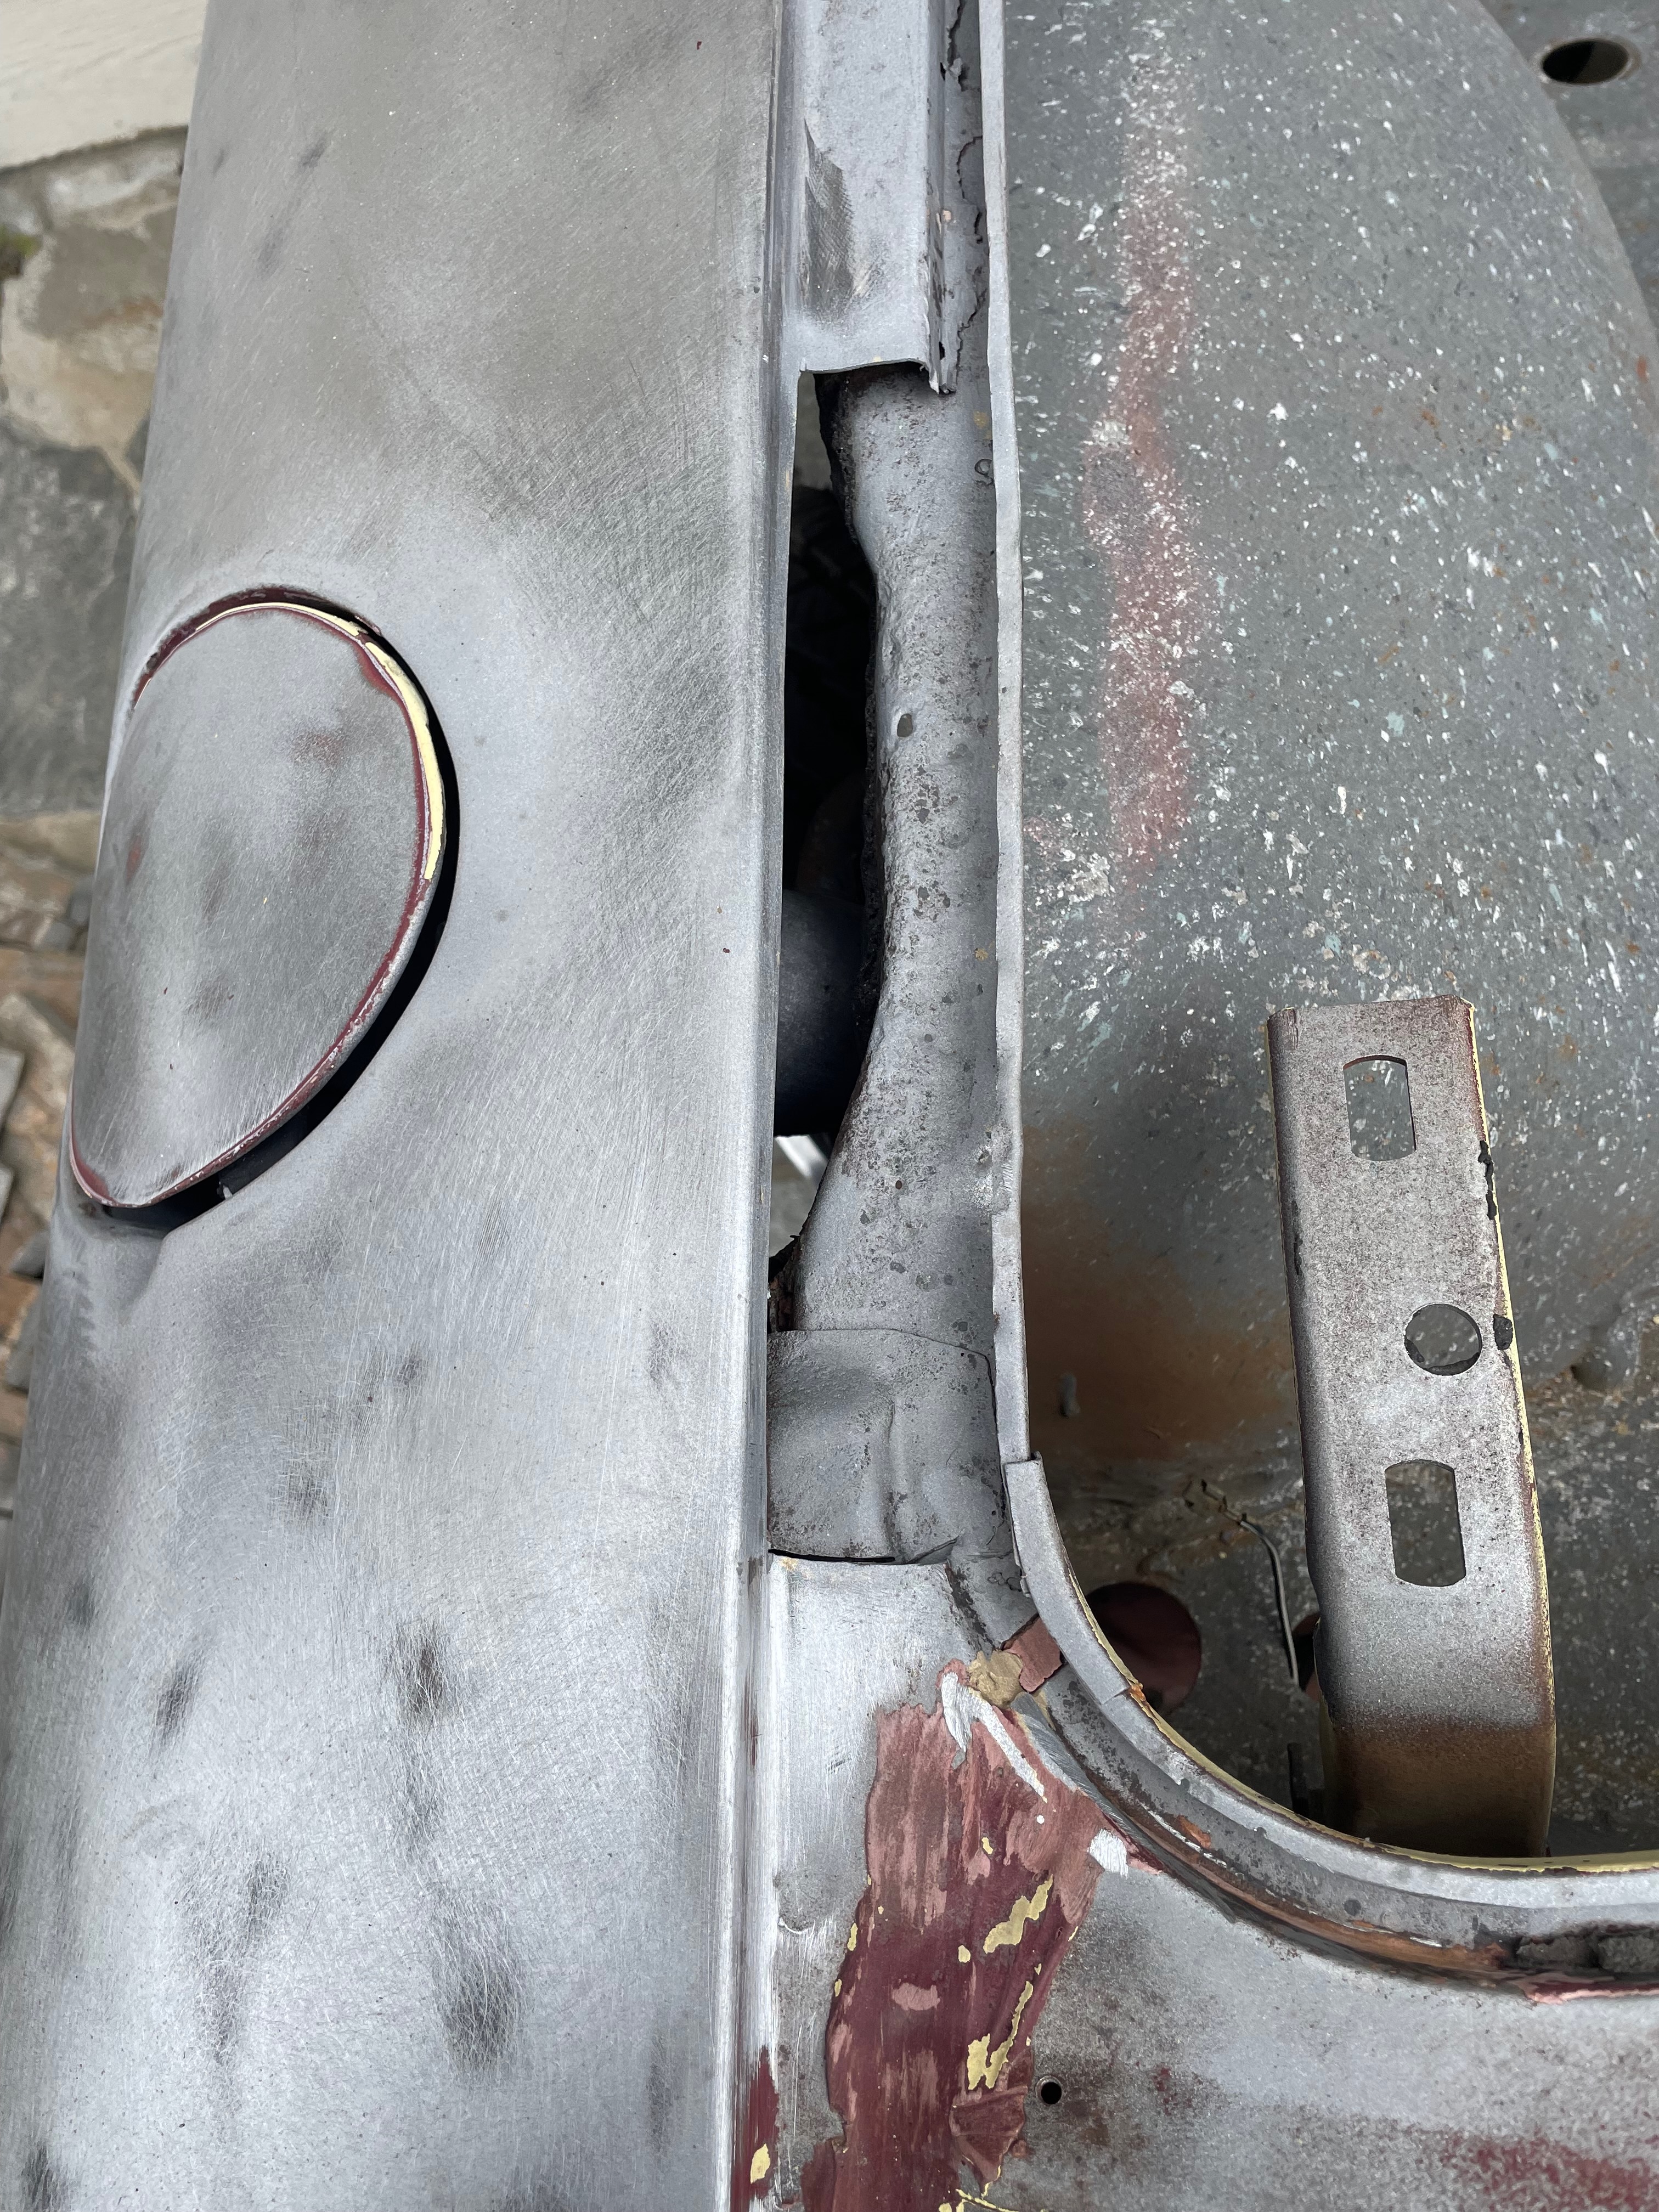
Body-Paint: Rust Excision
Removing deep-seated rust that had penetrated multiple body panels, requiring extensive cutting and preparation for replacement metal sections.
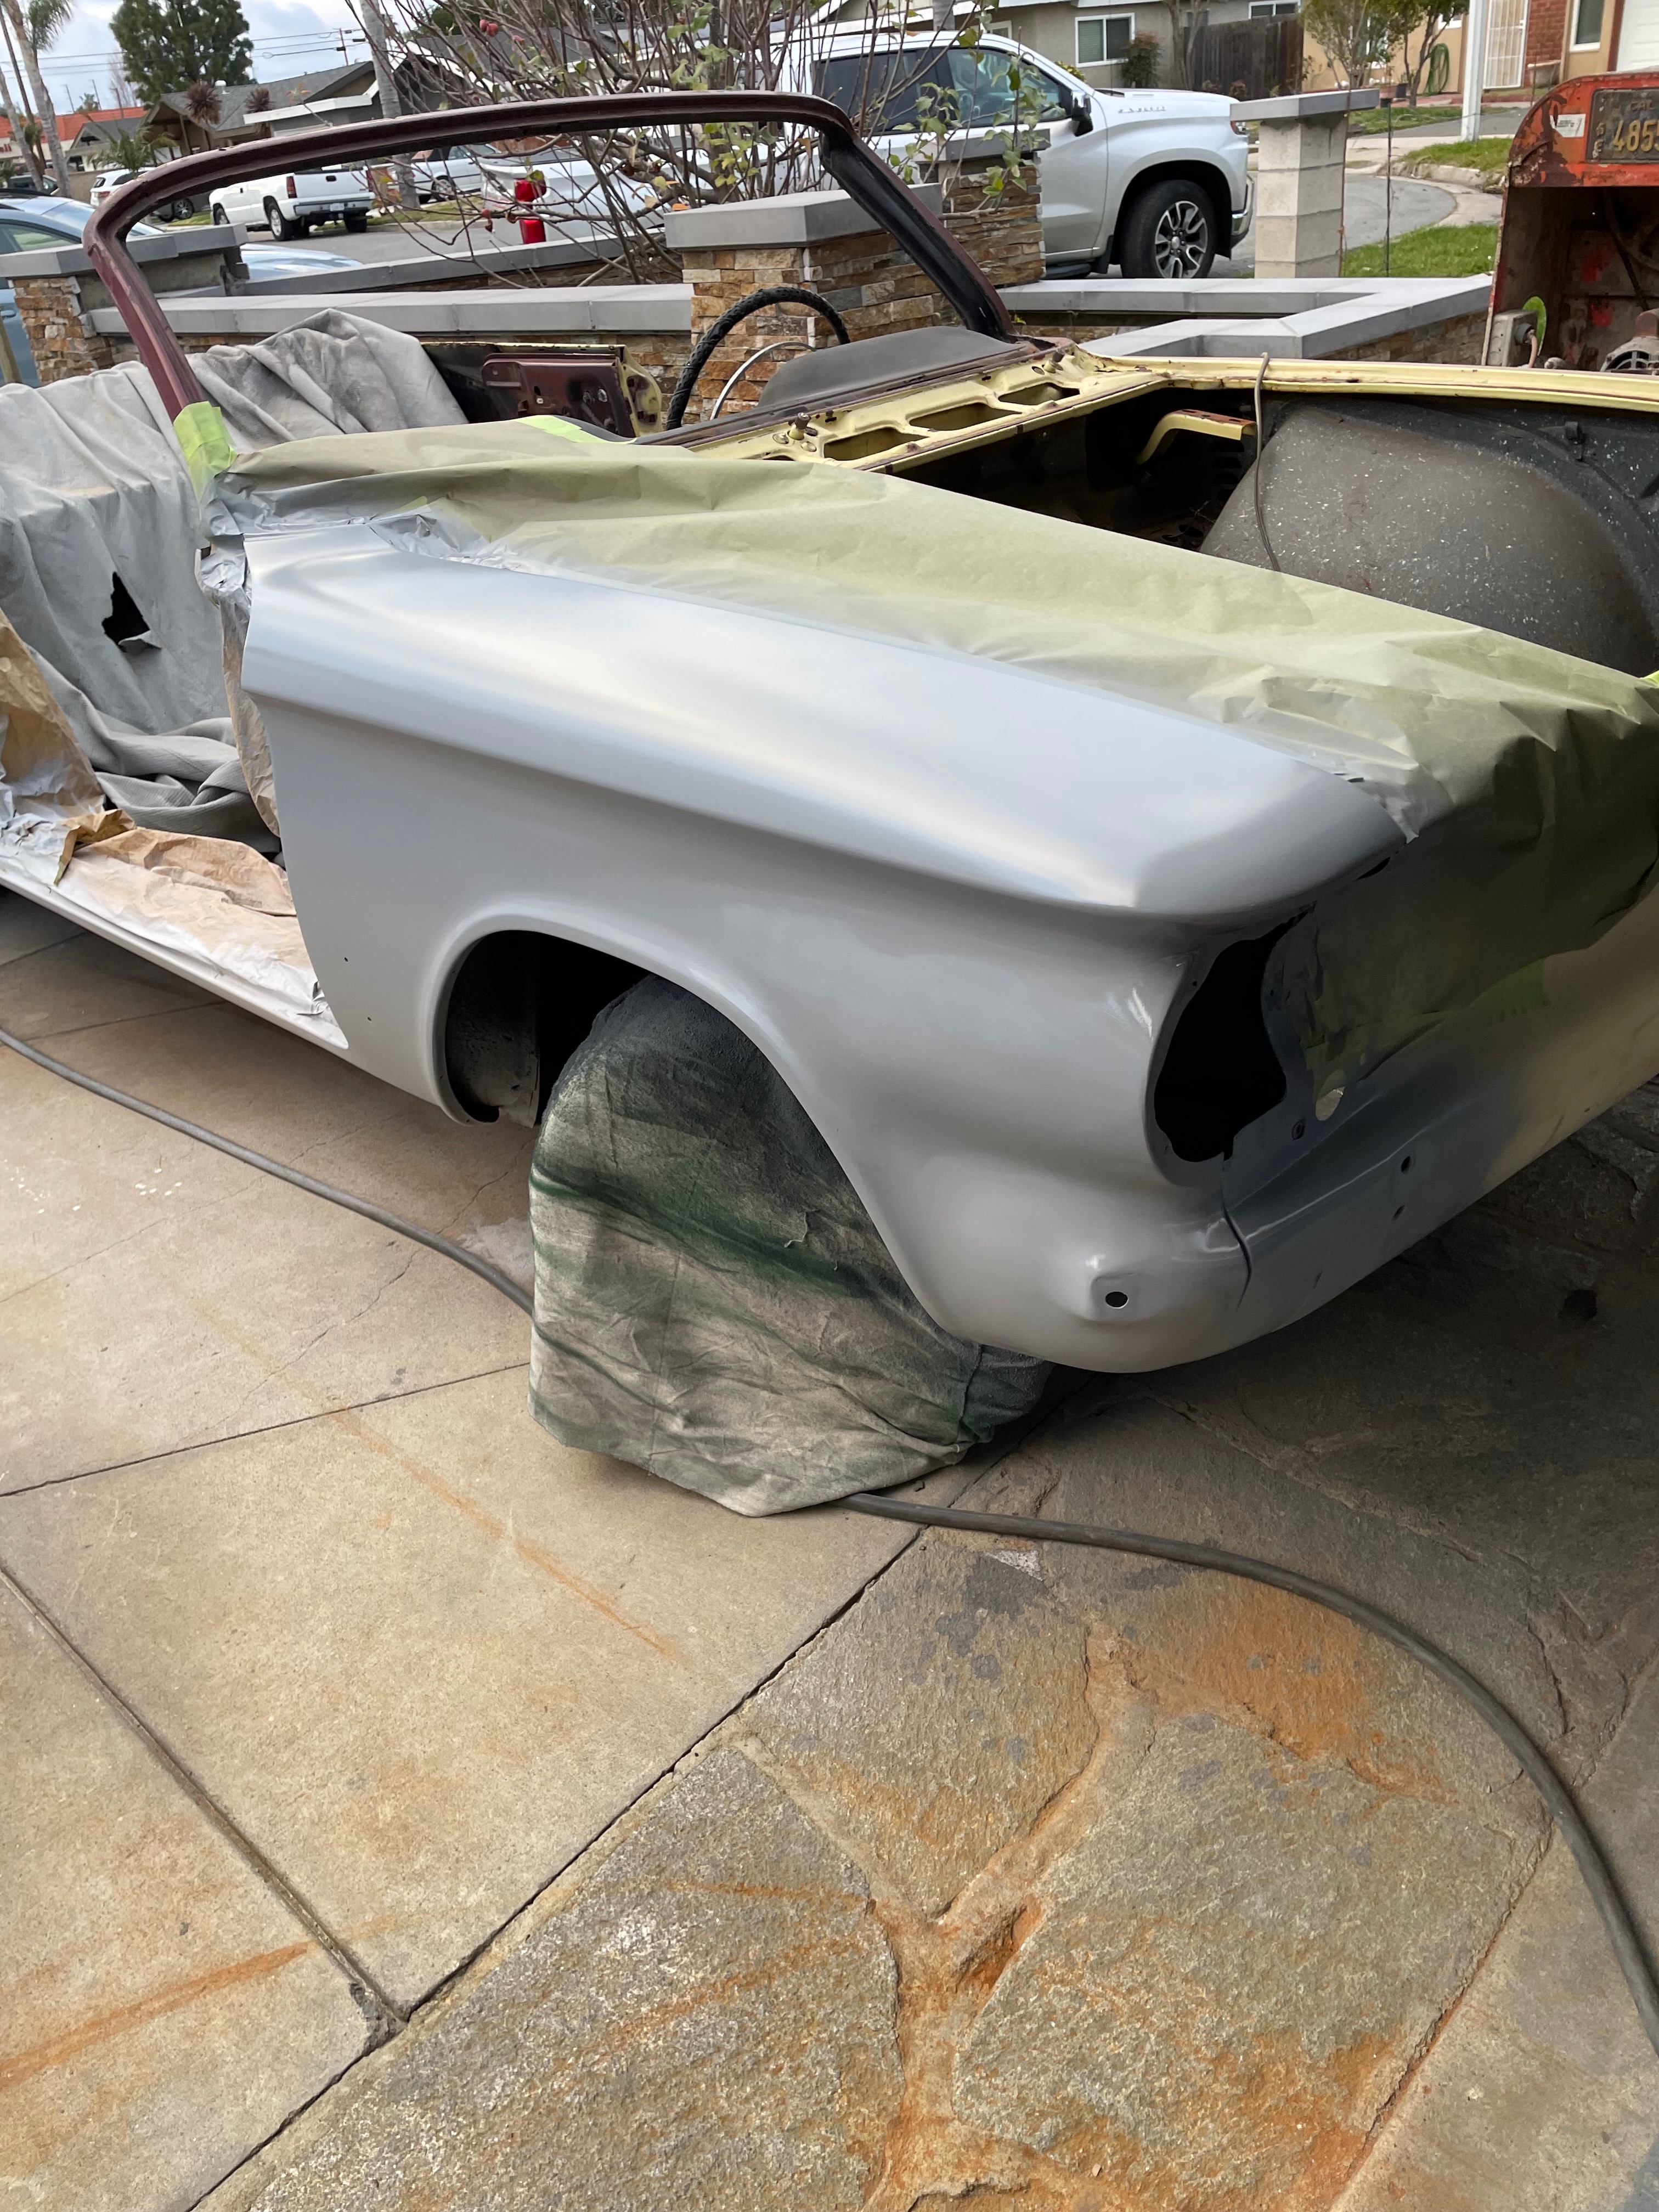
Body-Paint: Panel Preparation
After installing new metal panels to replace rusted sections, carefully smoothing and preparing the surface for primer and paint application.
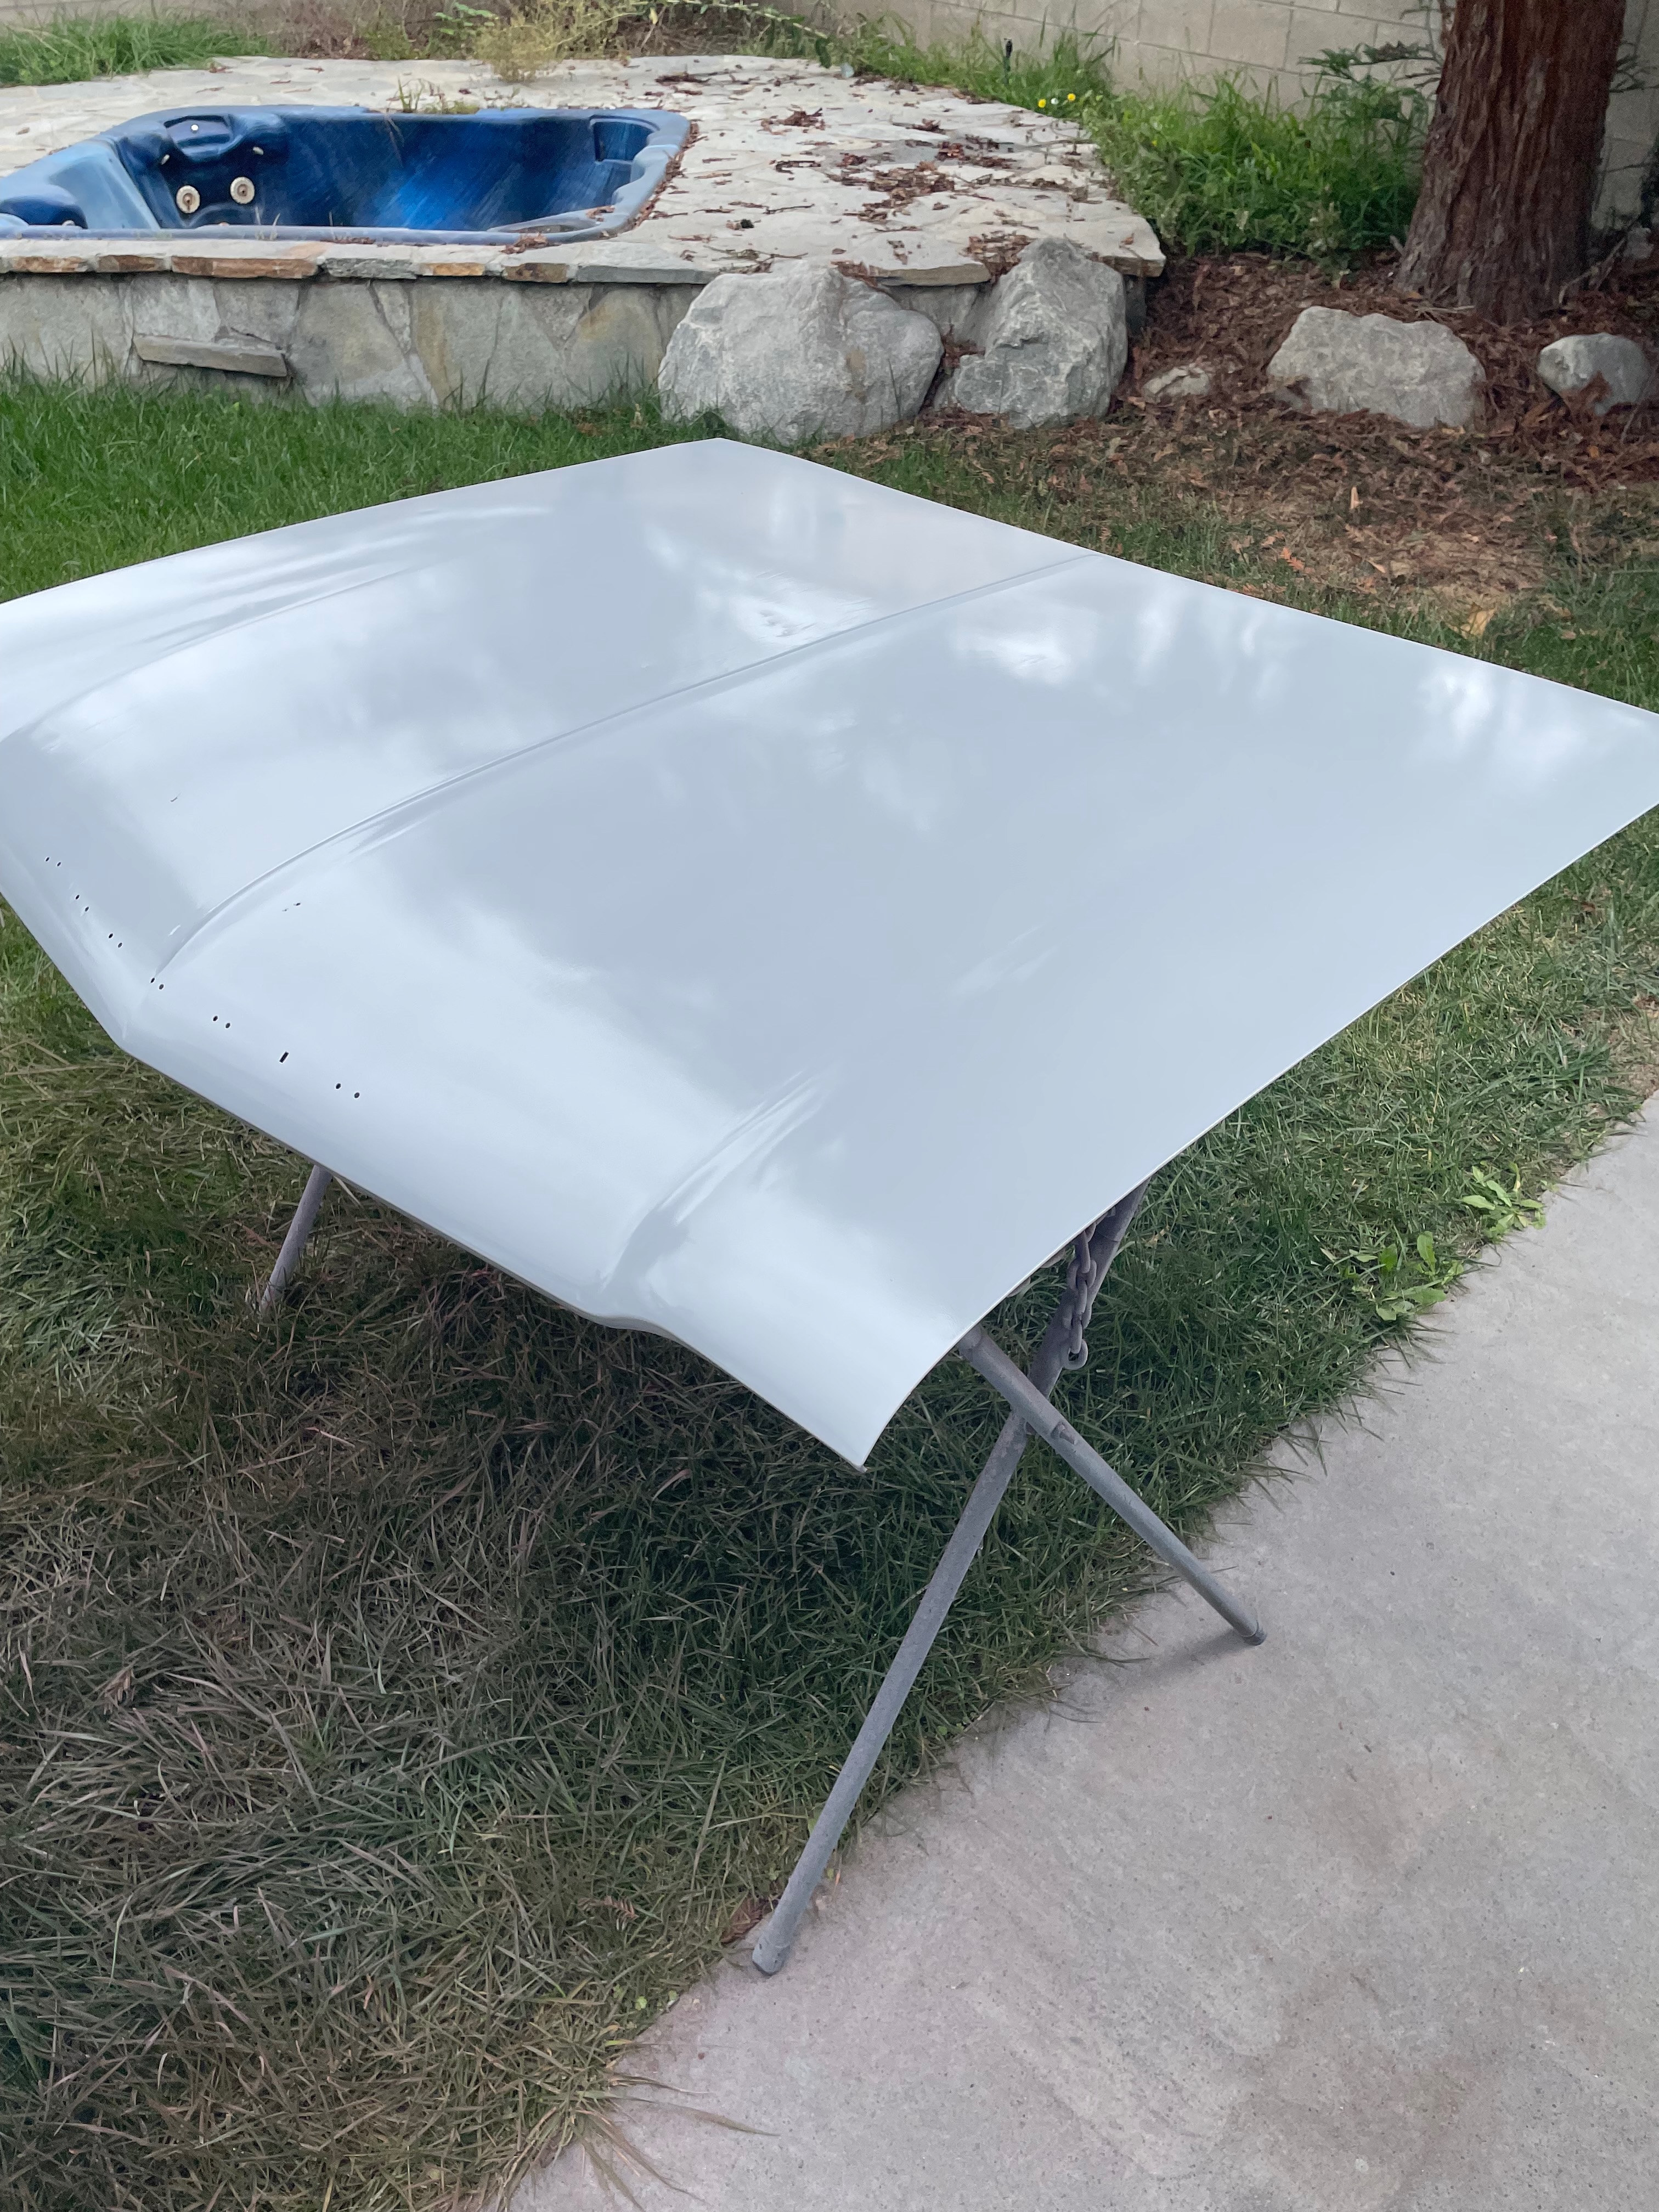
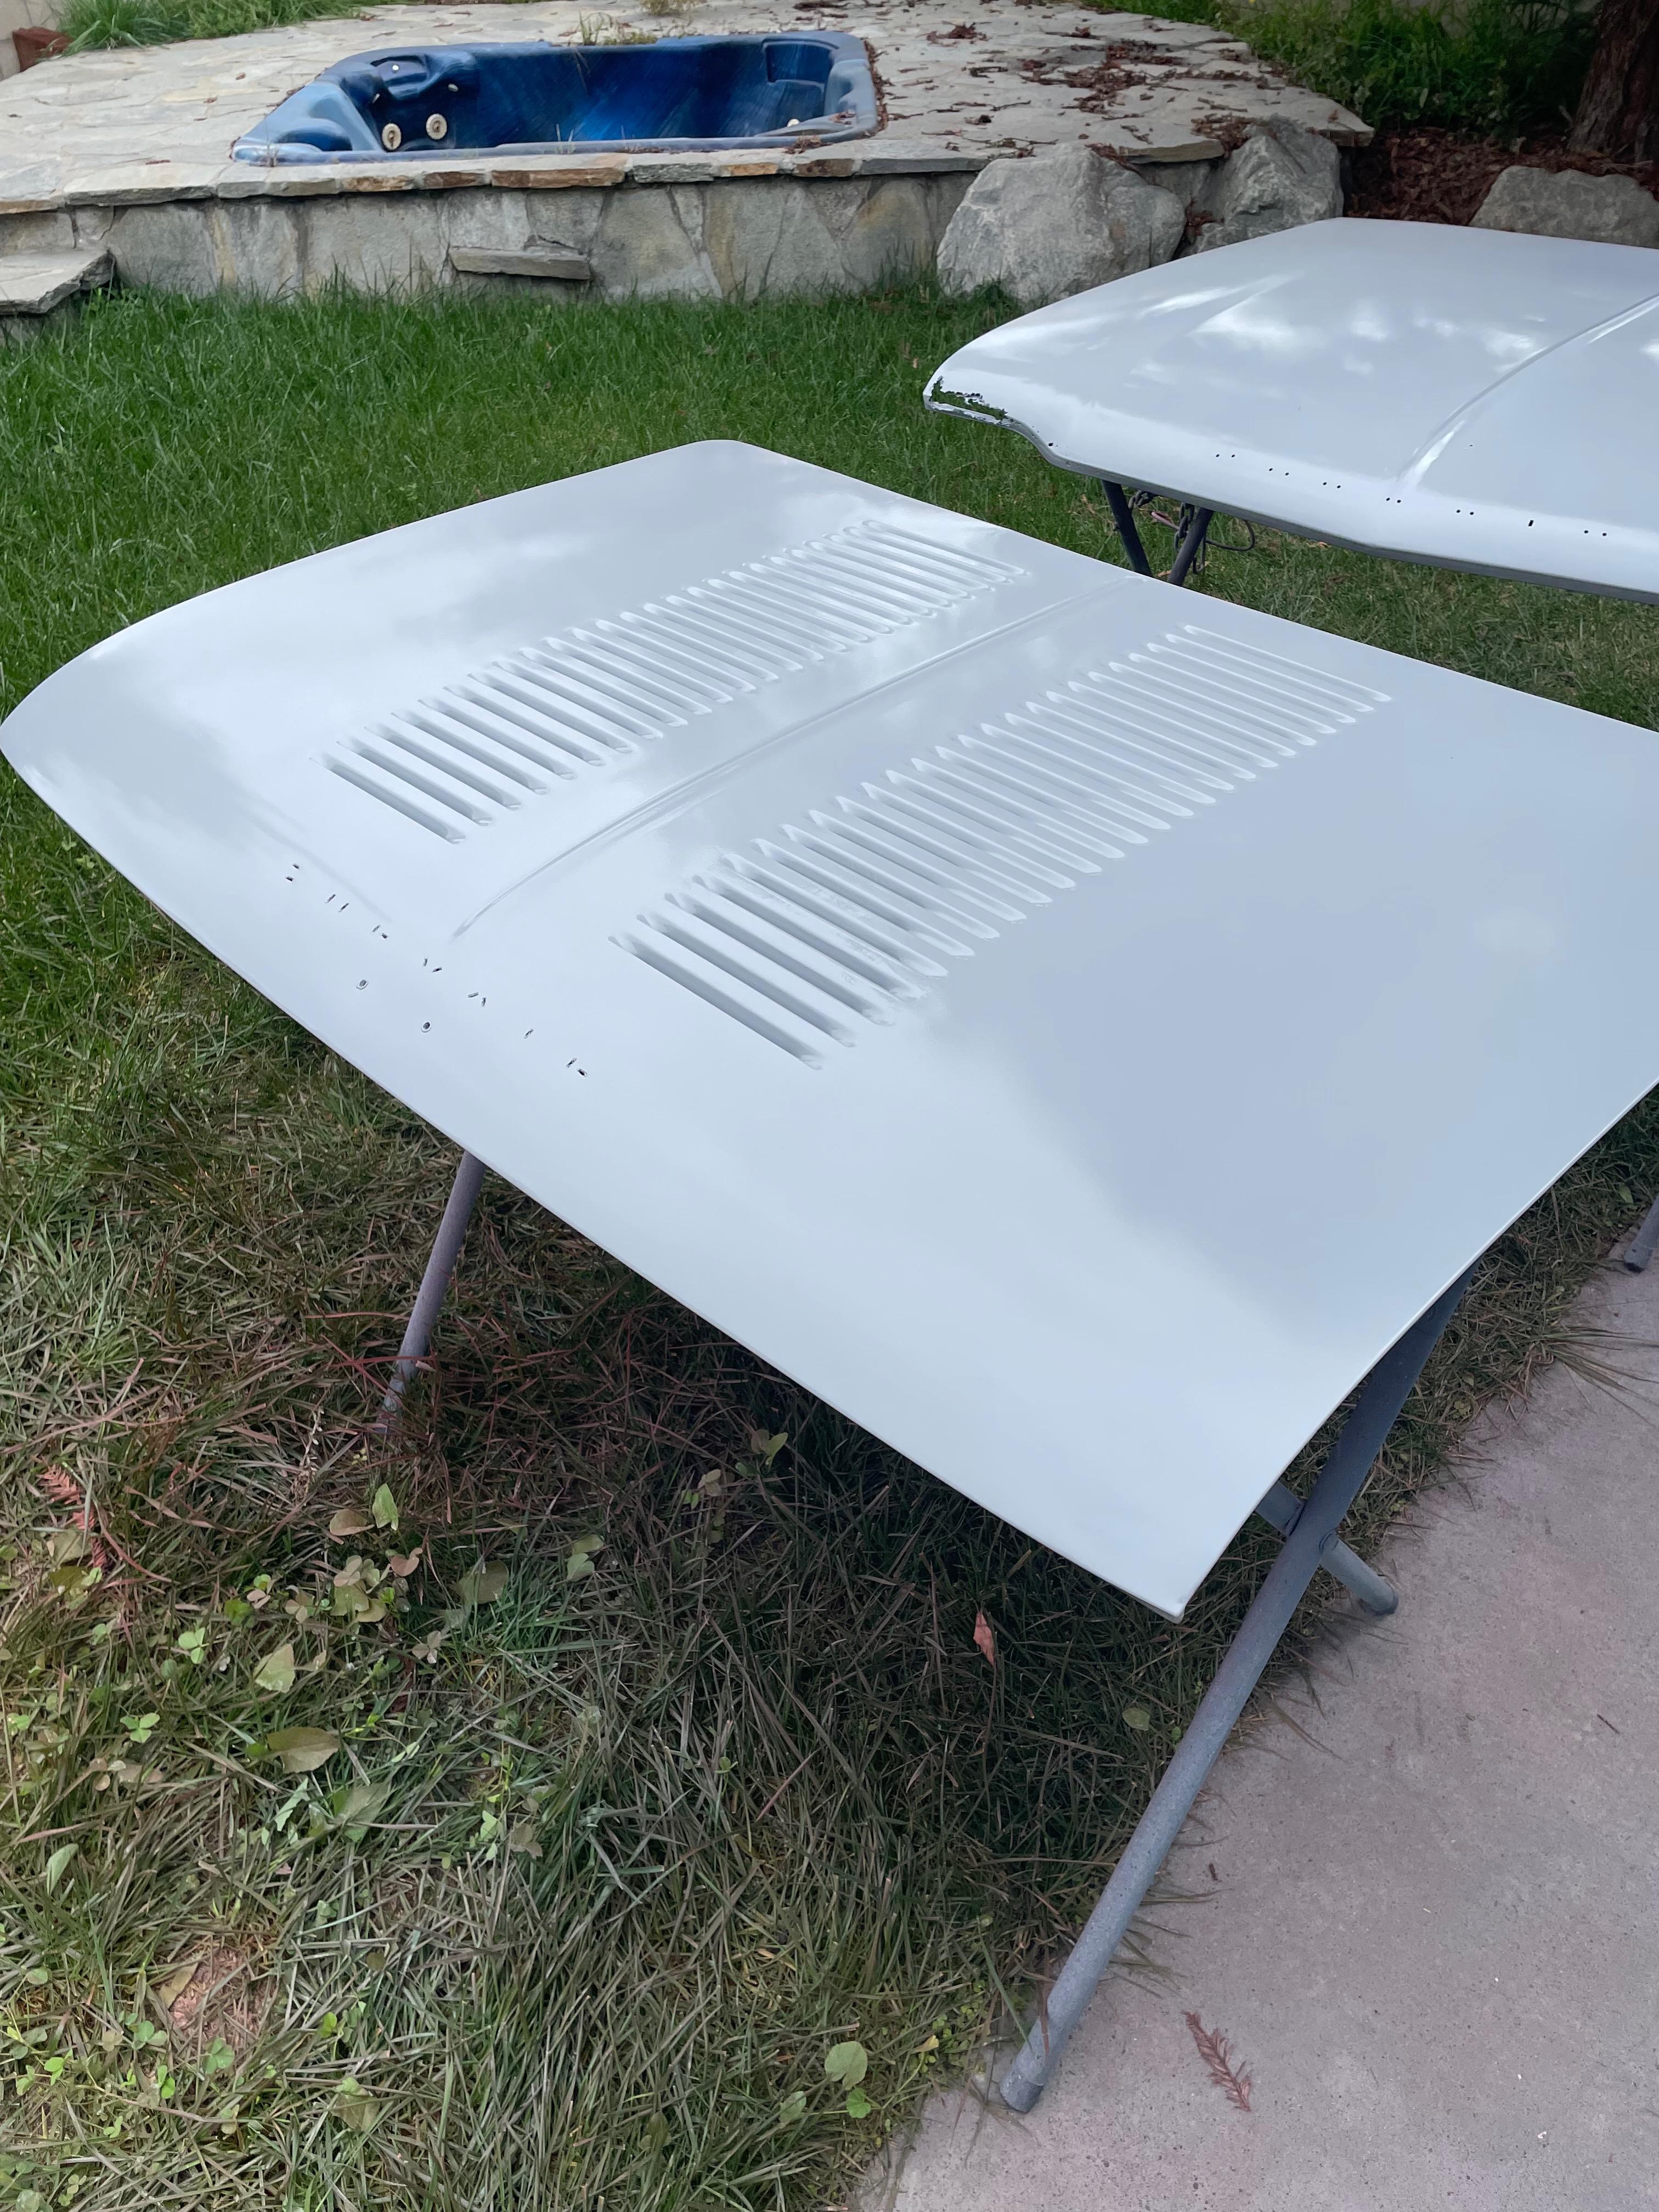
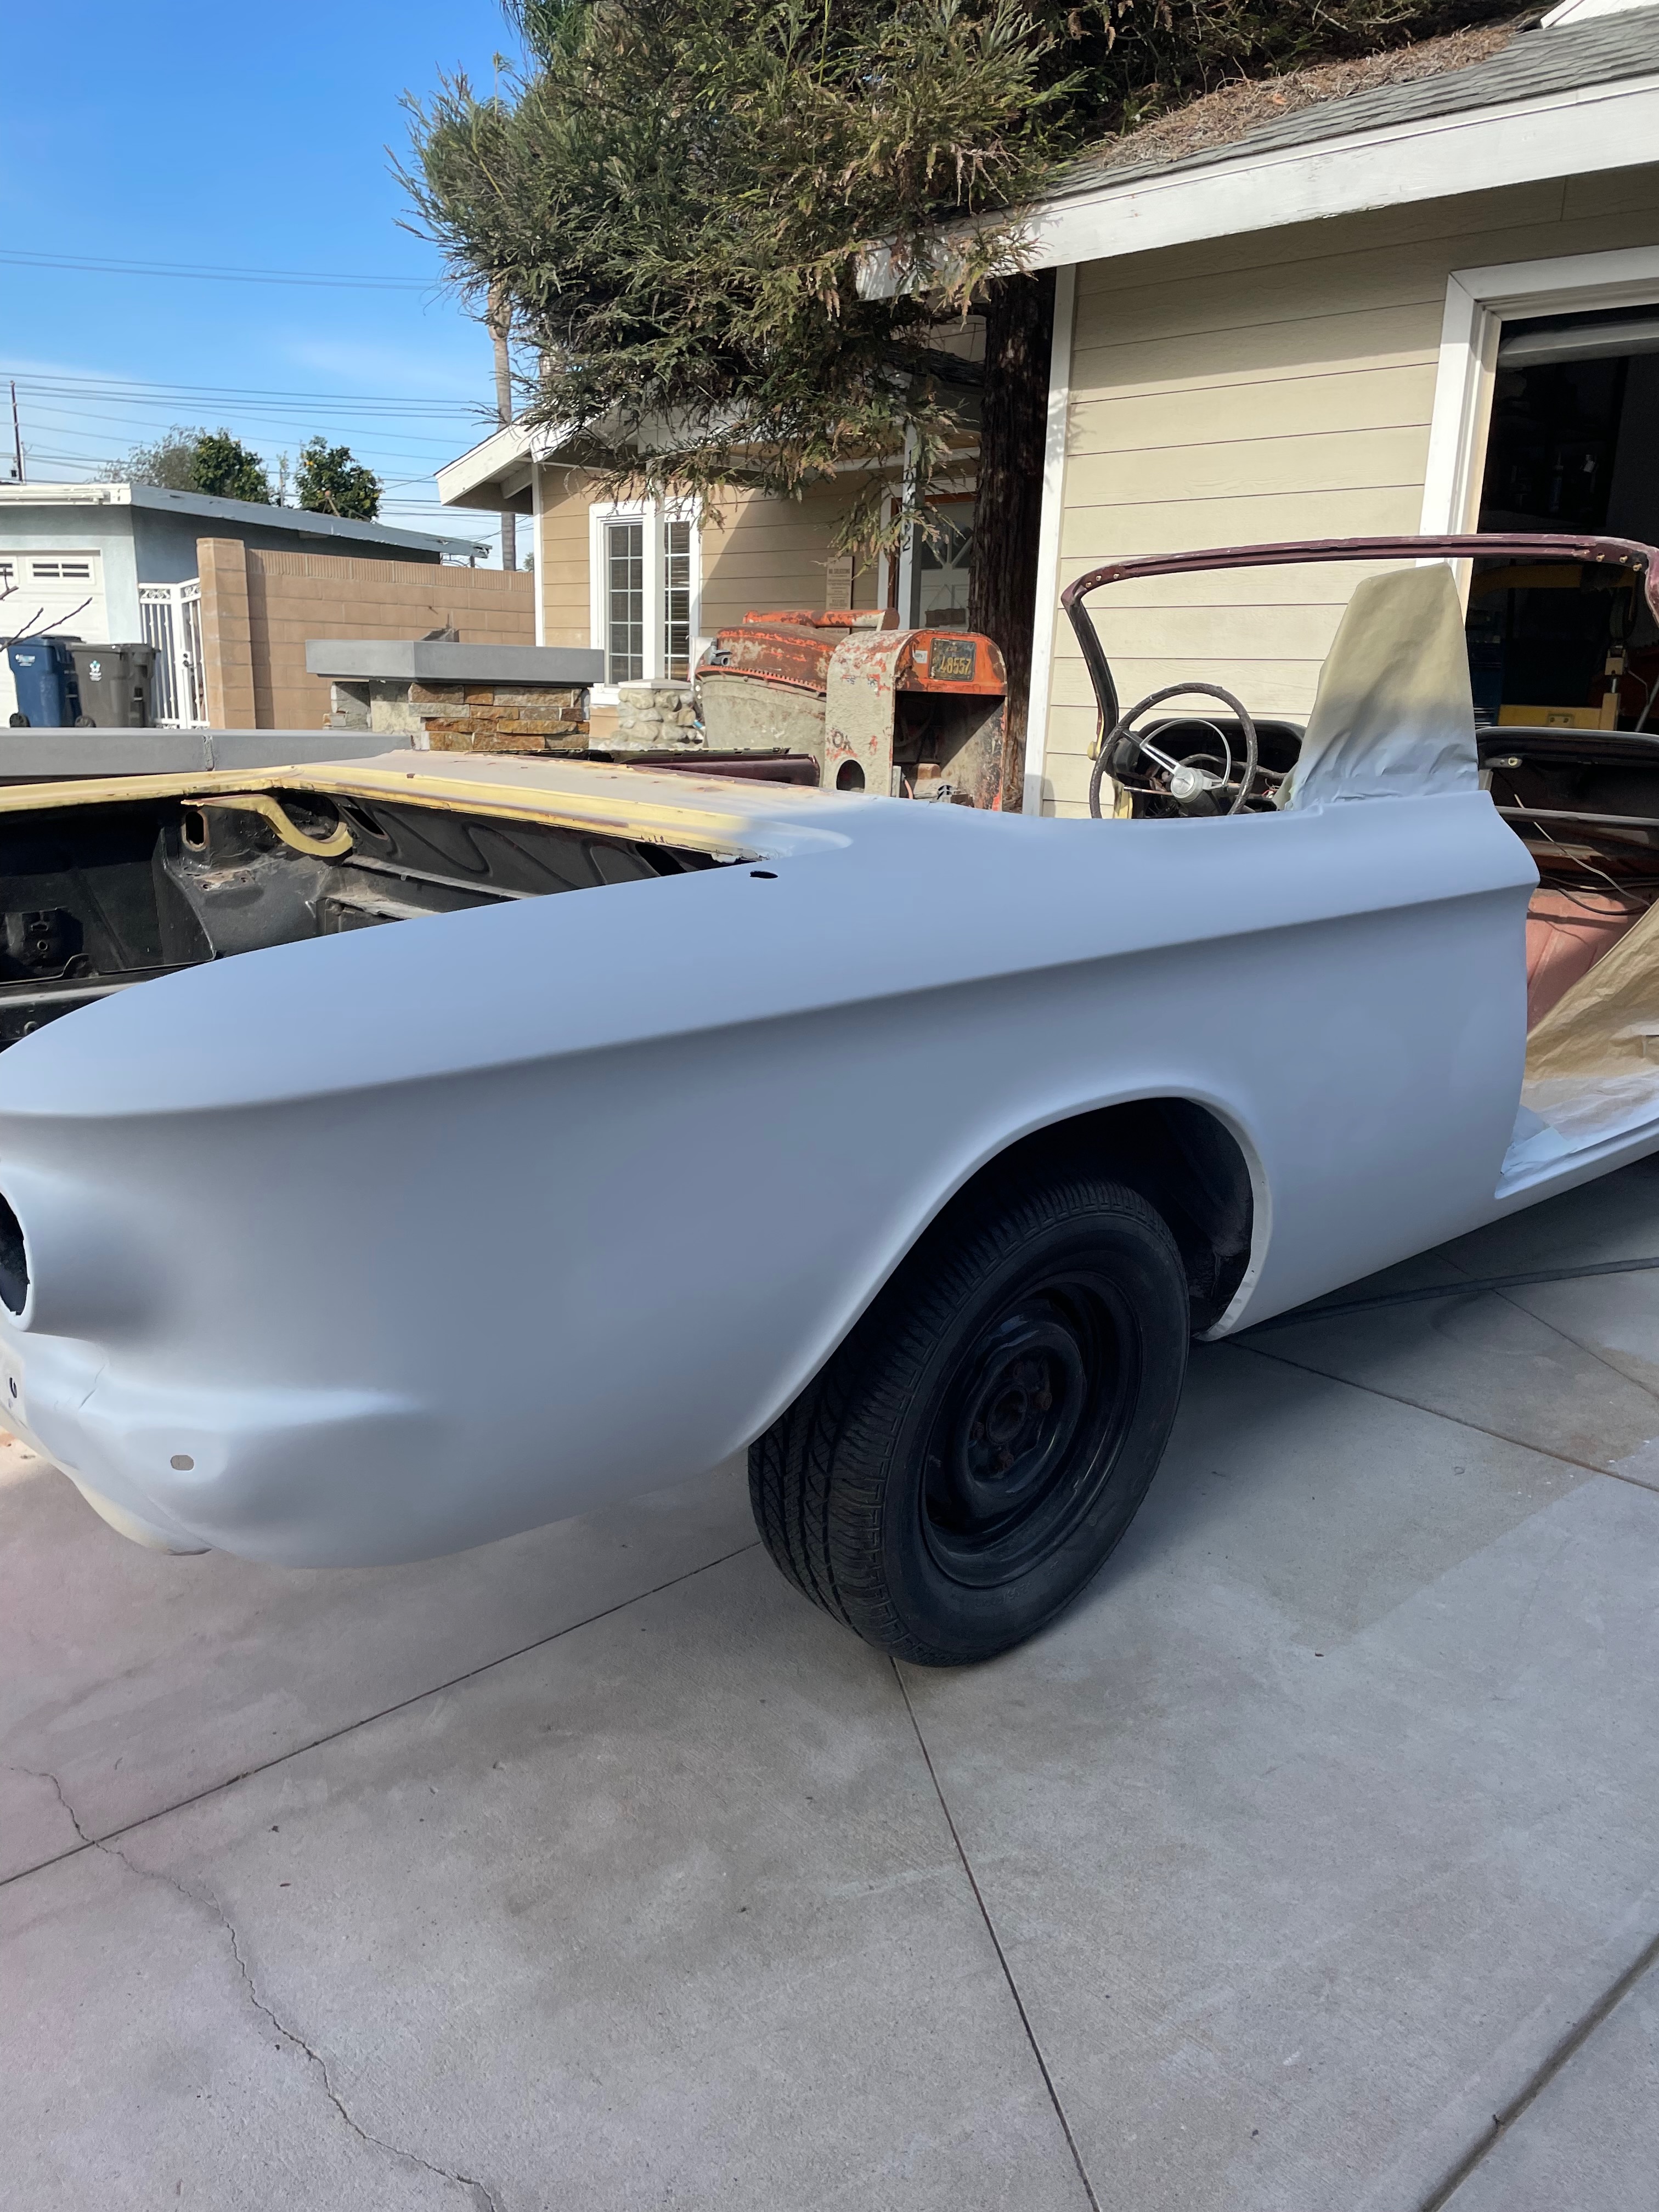
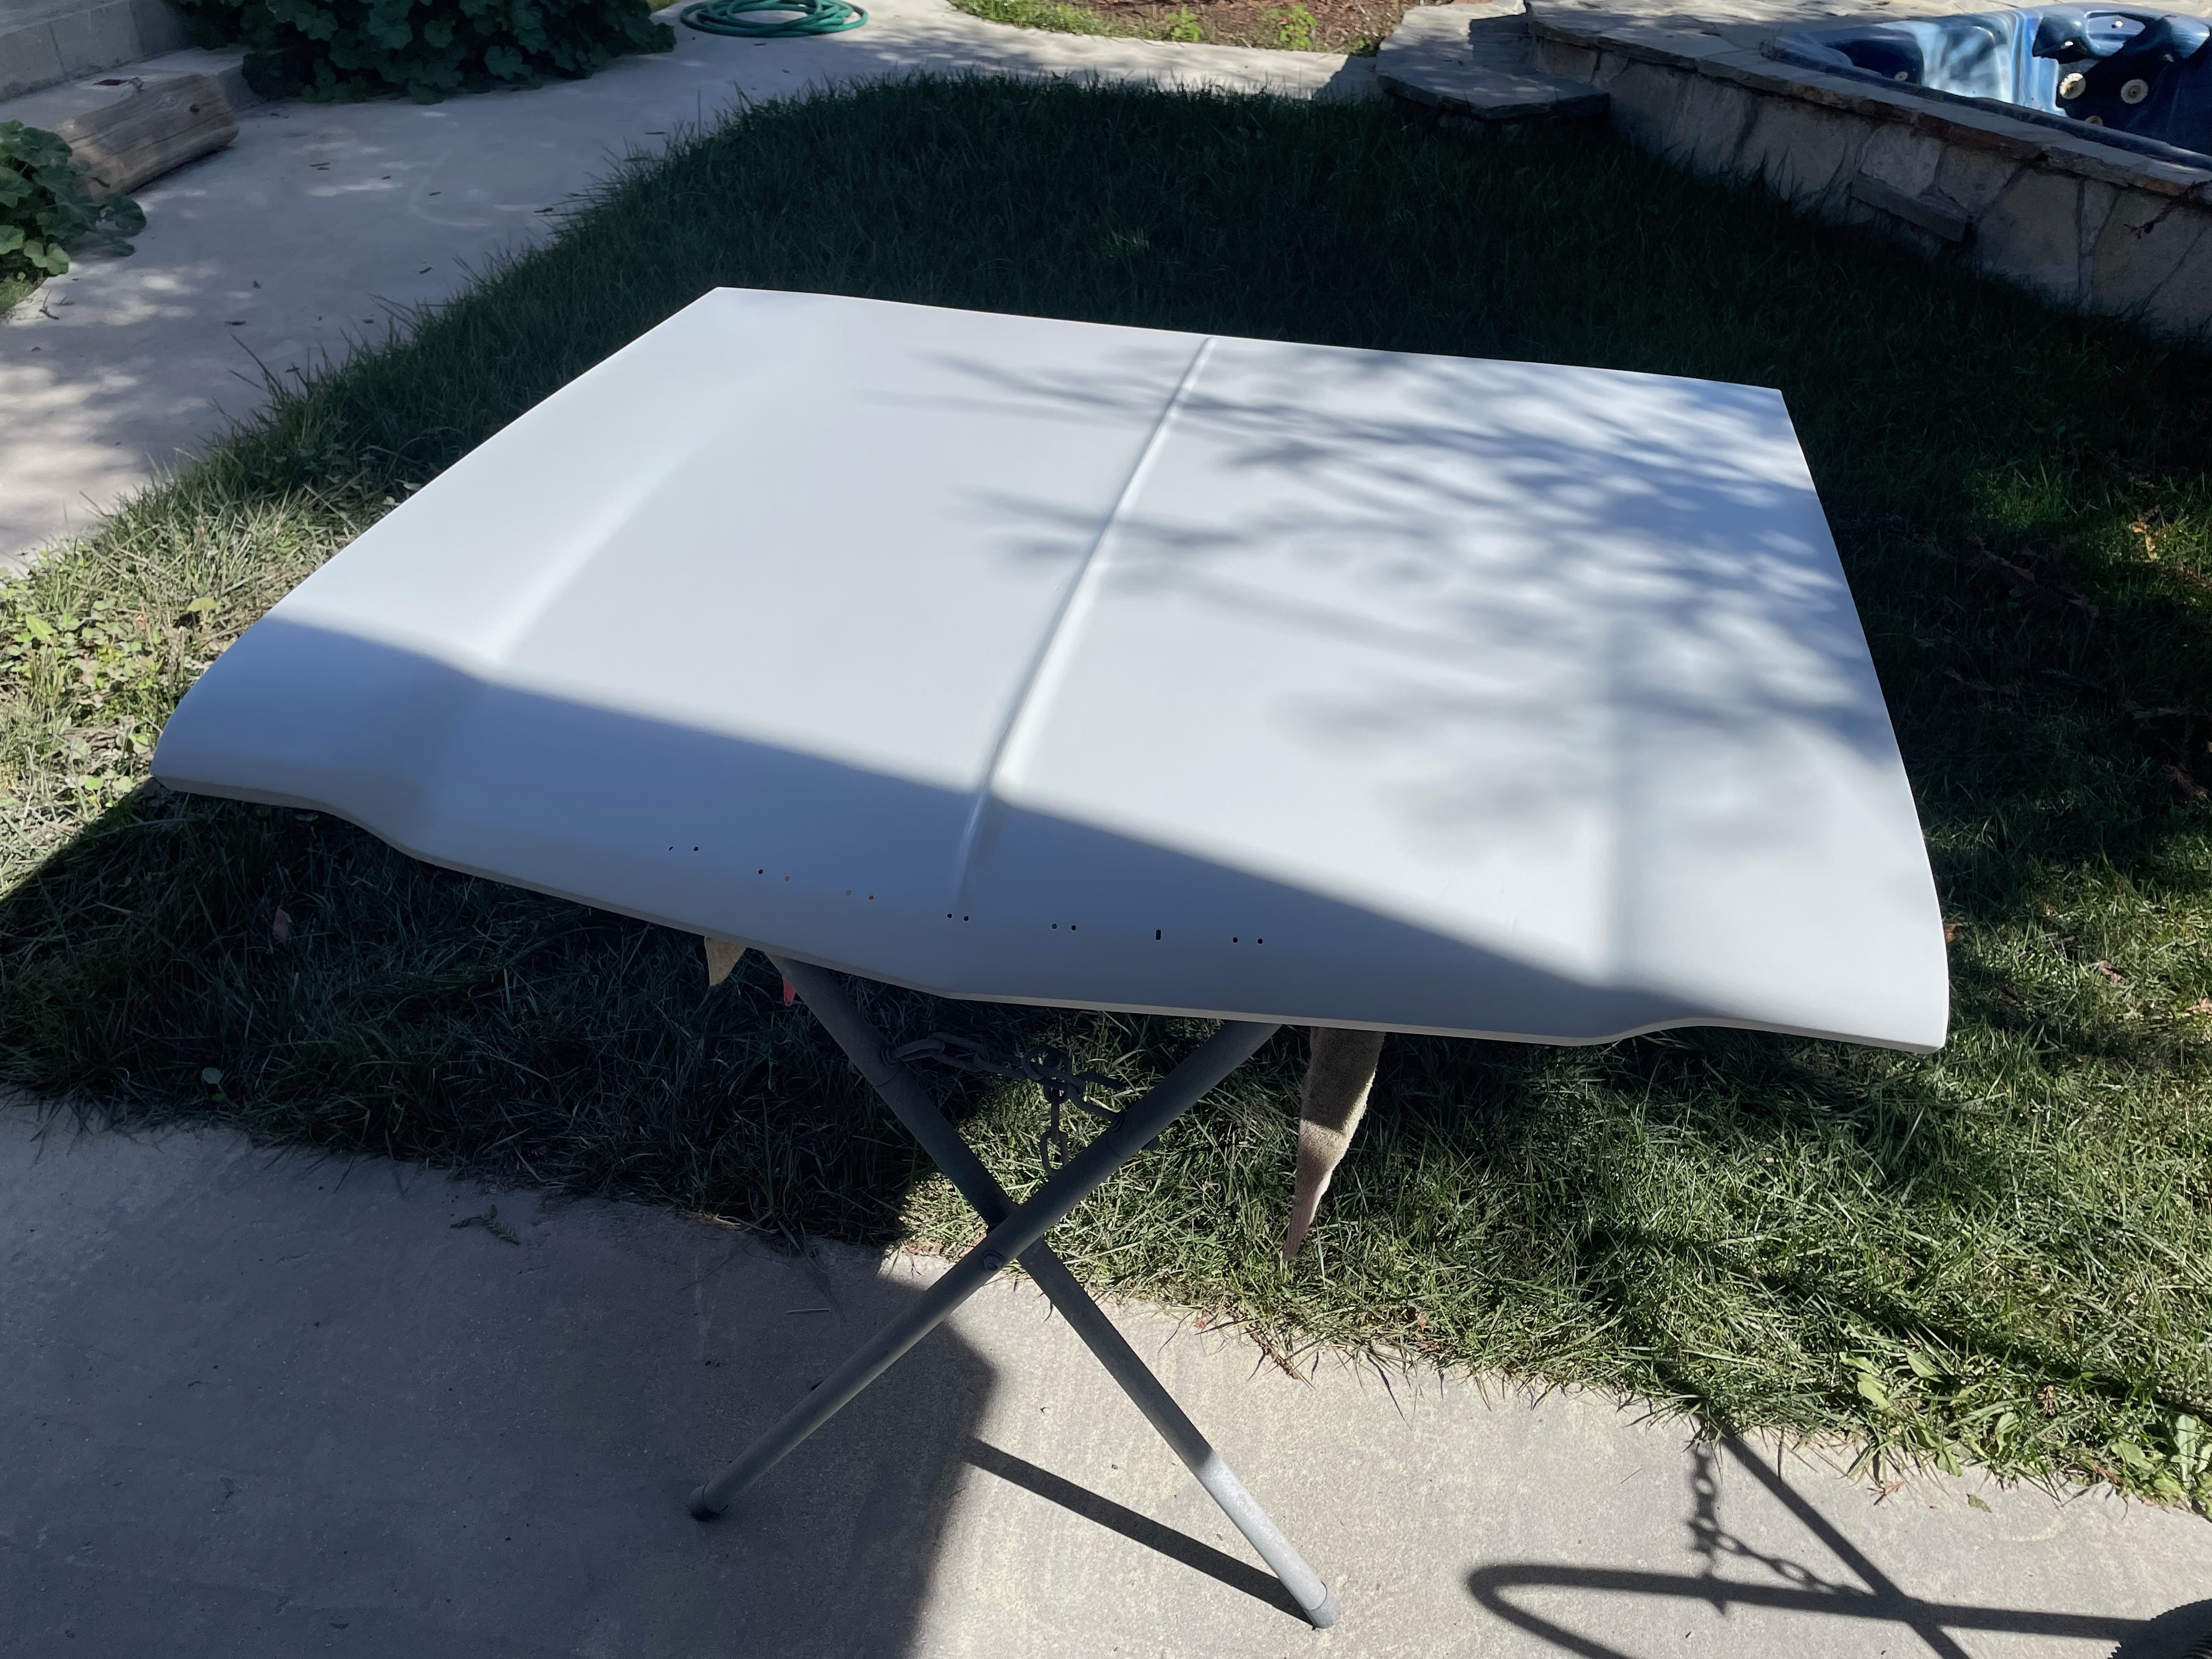
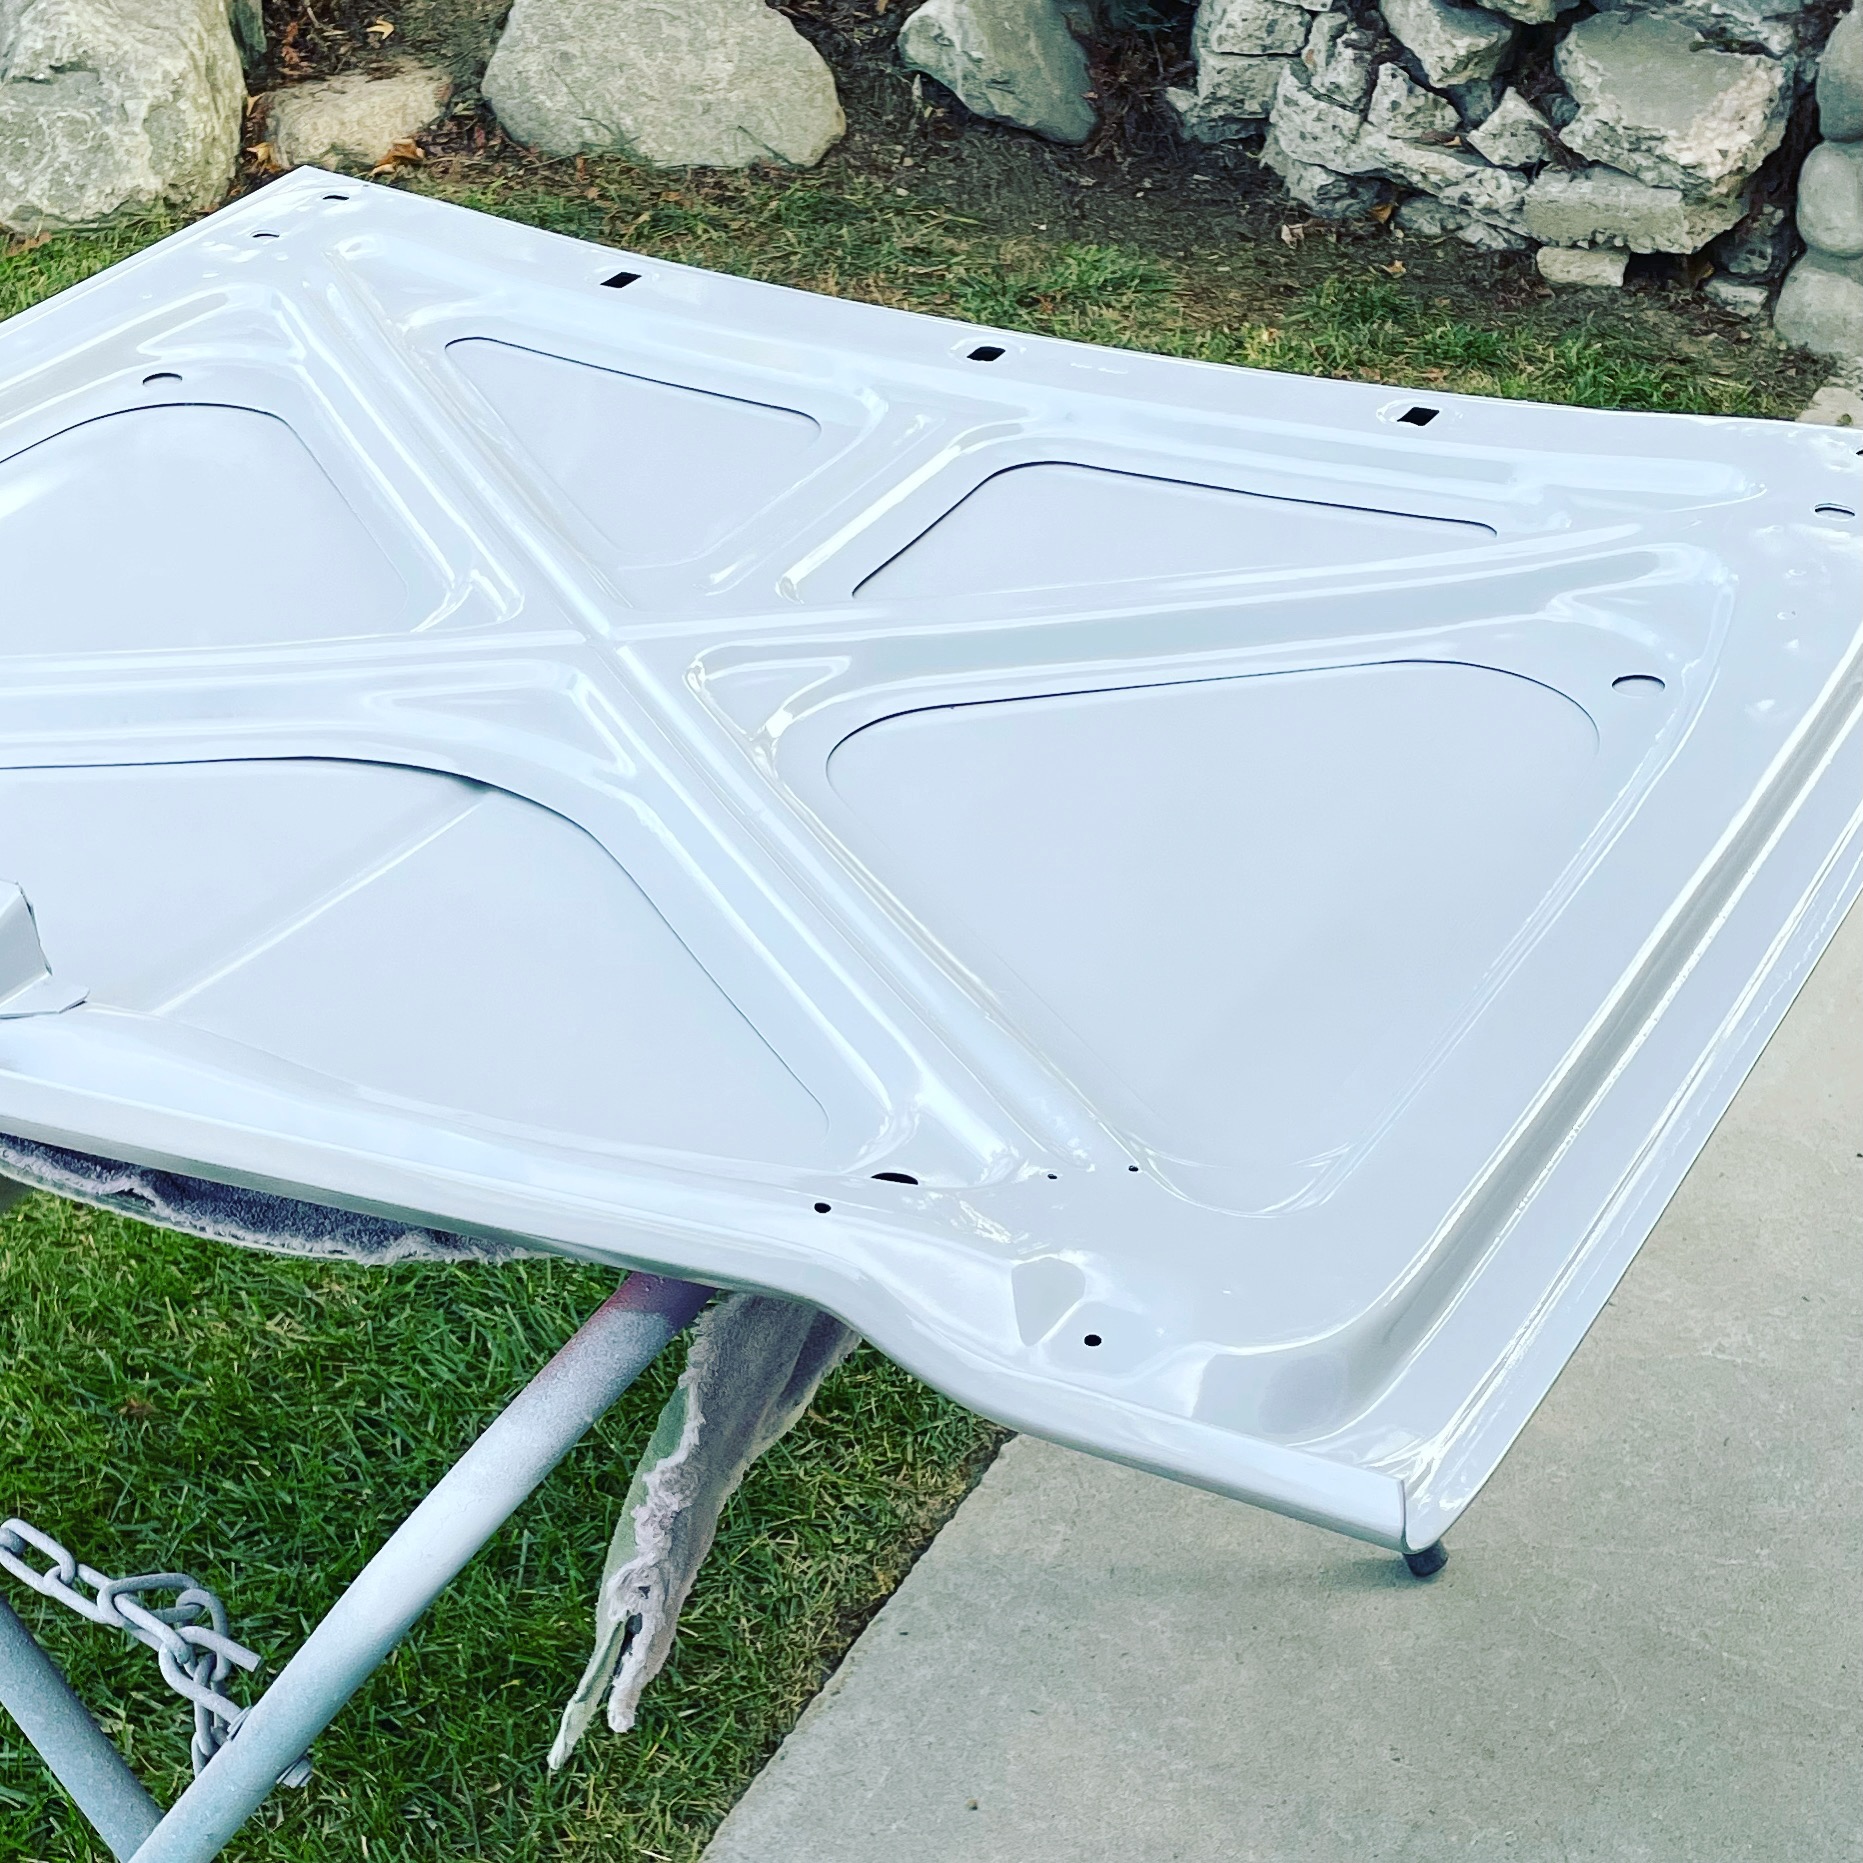
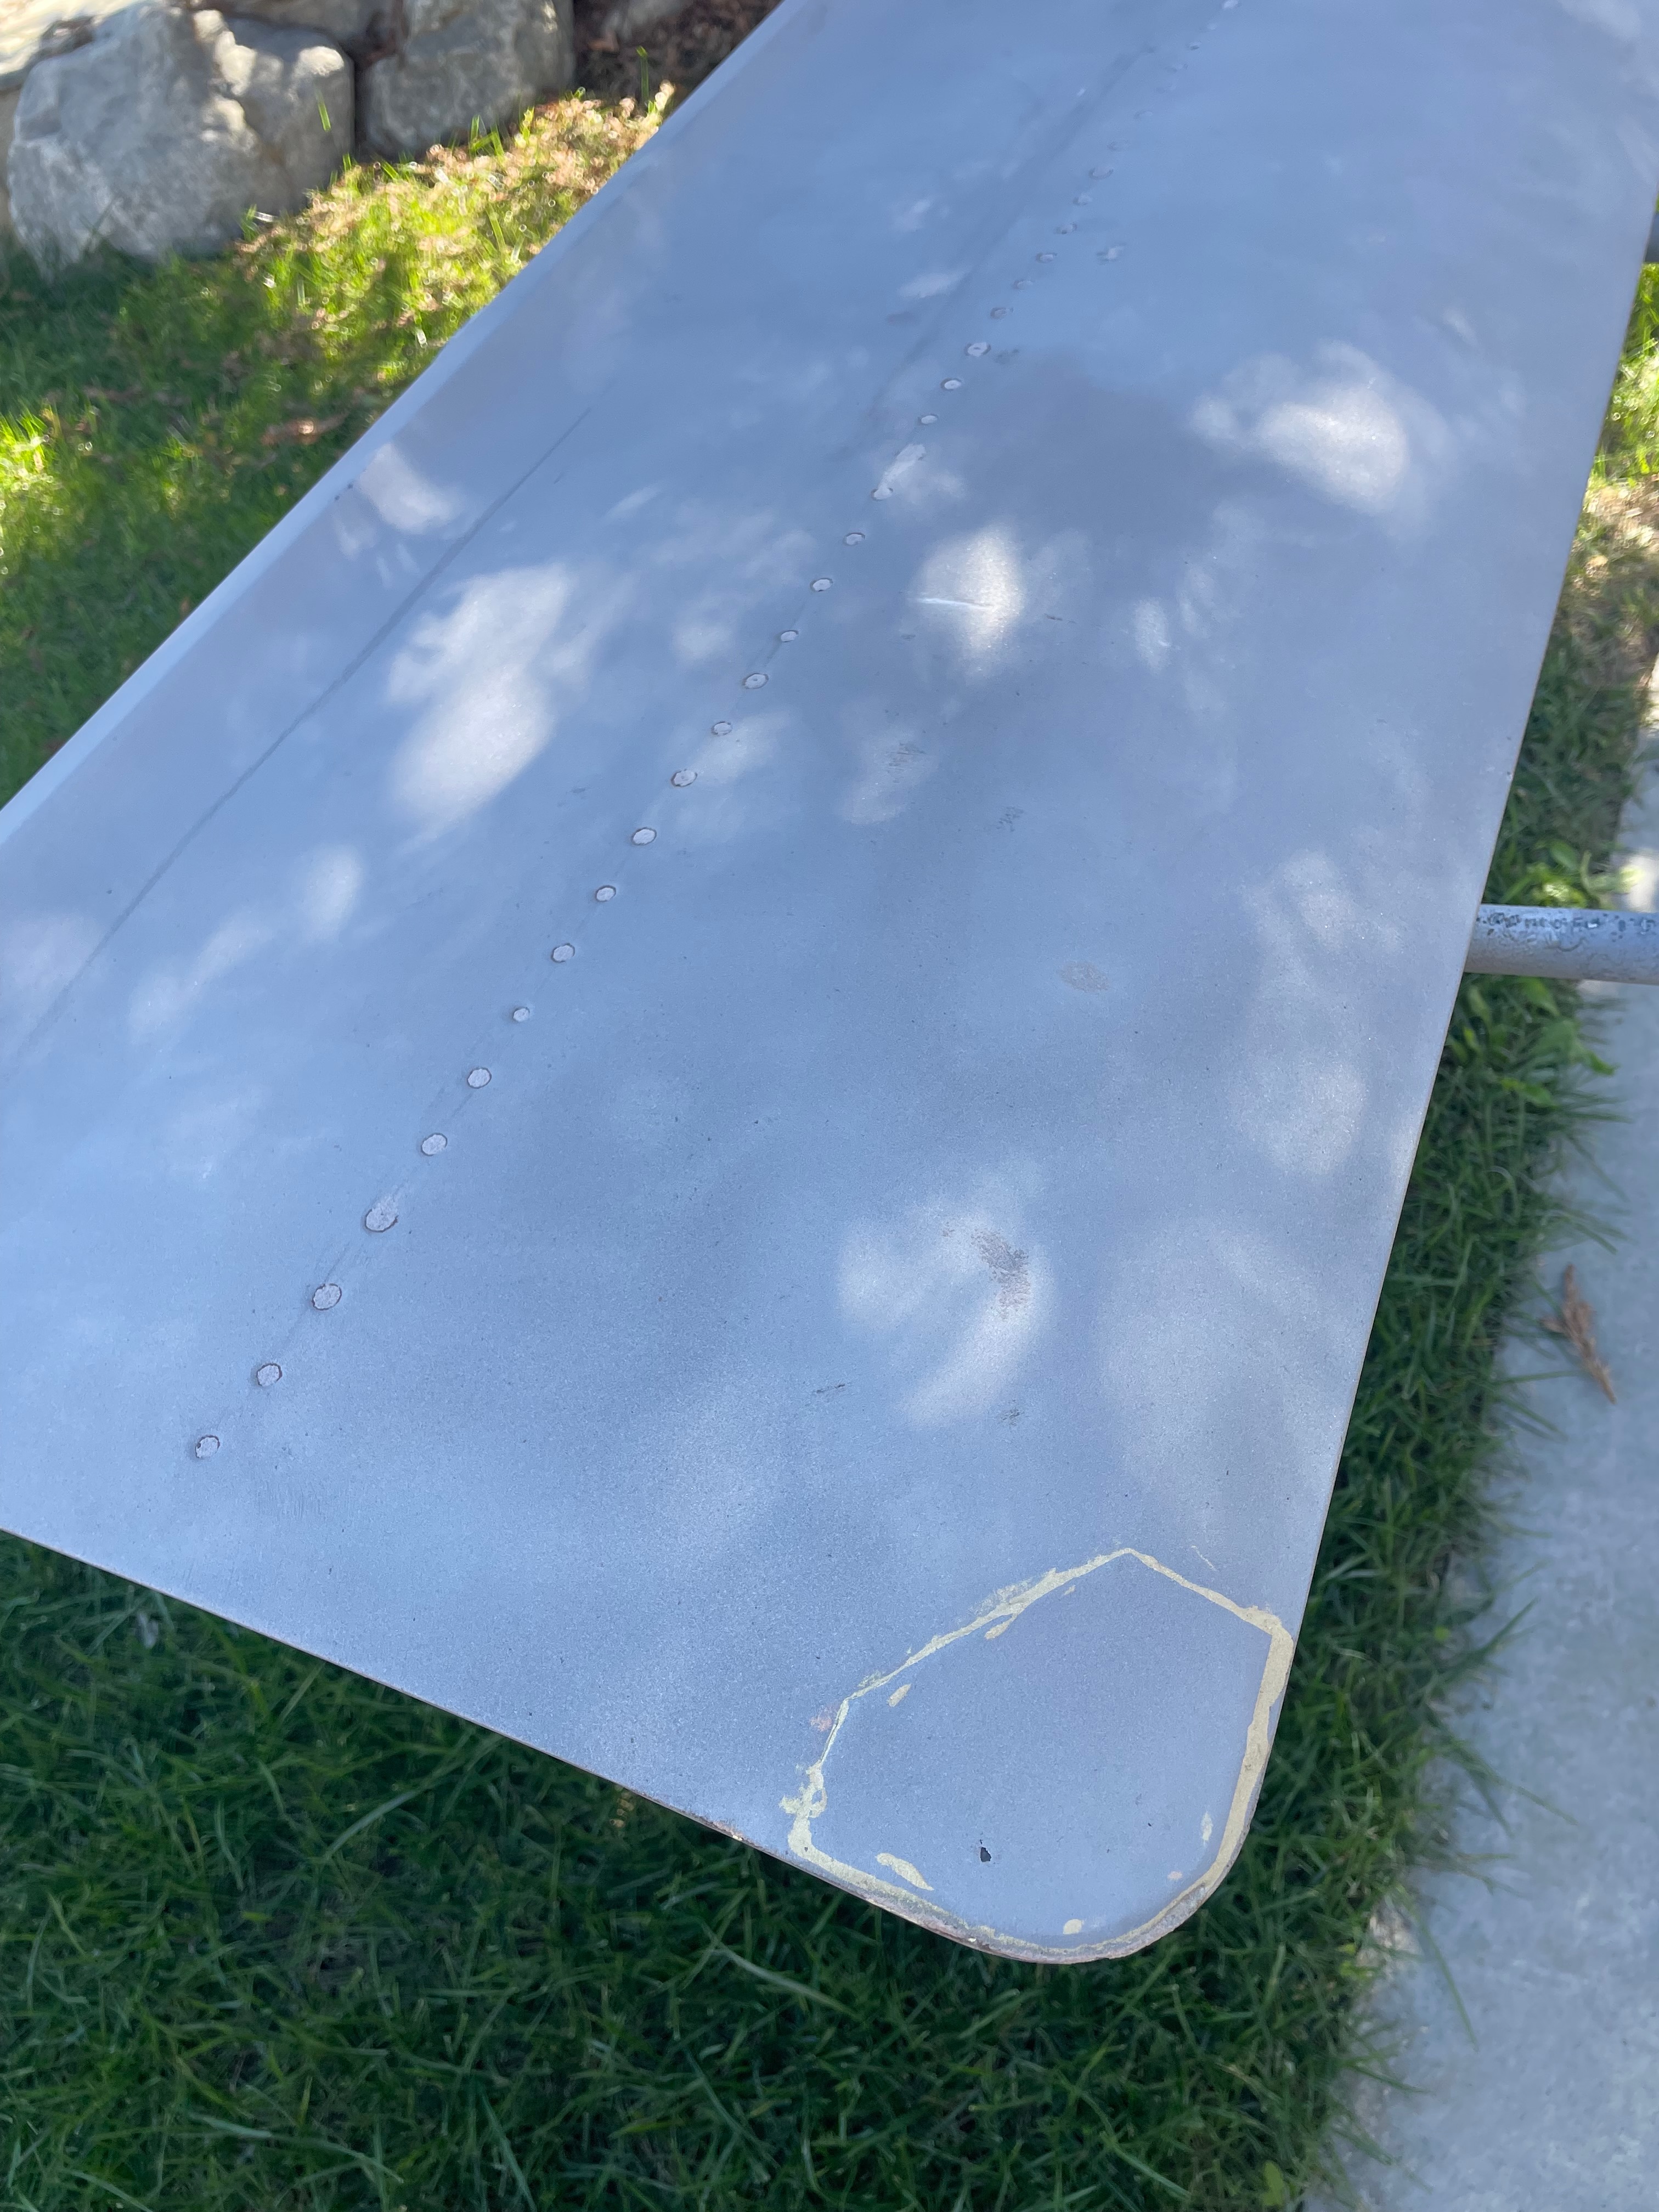
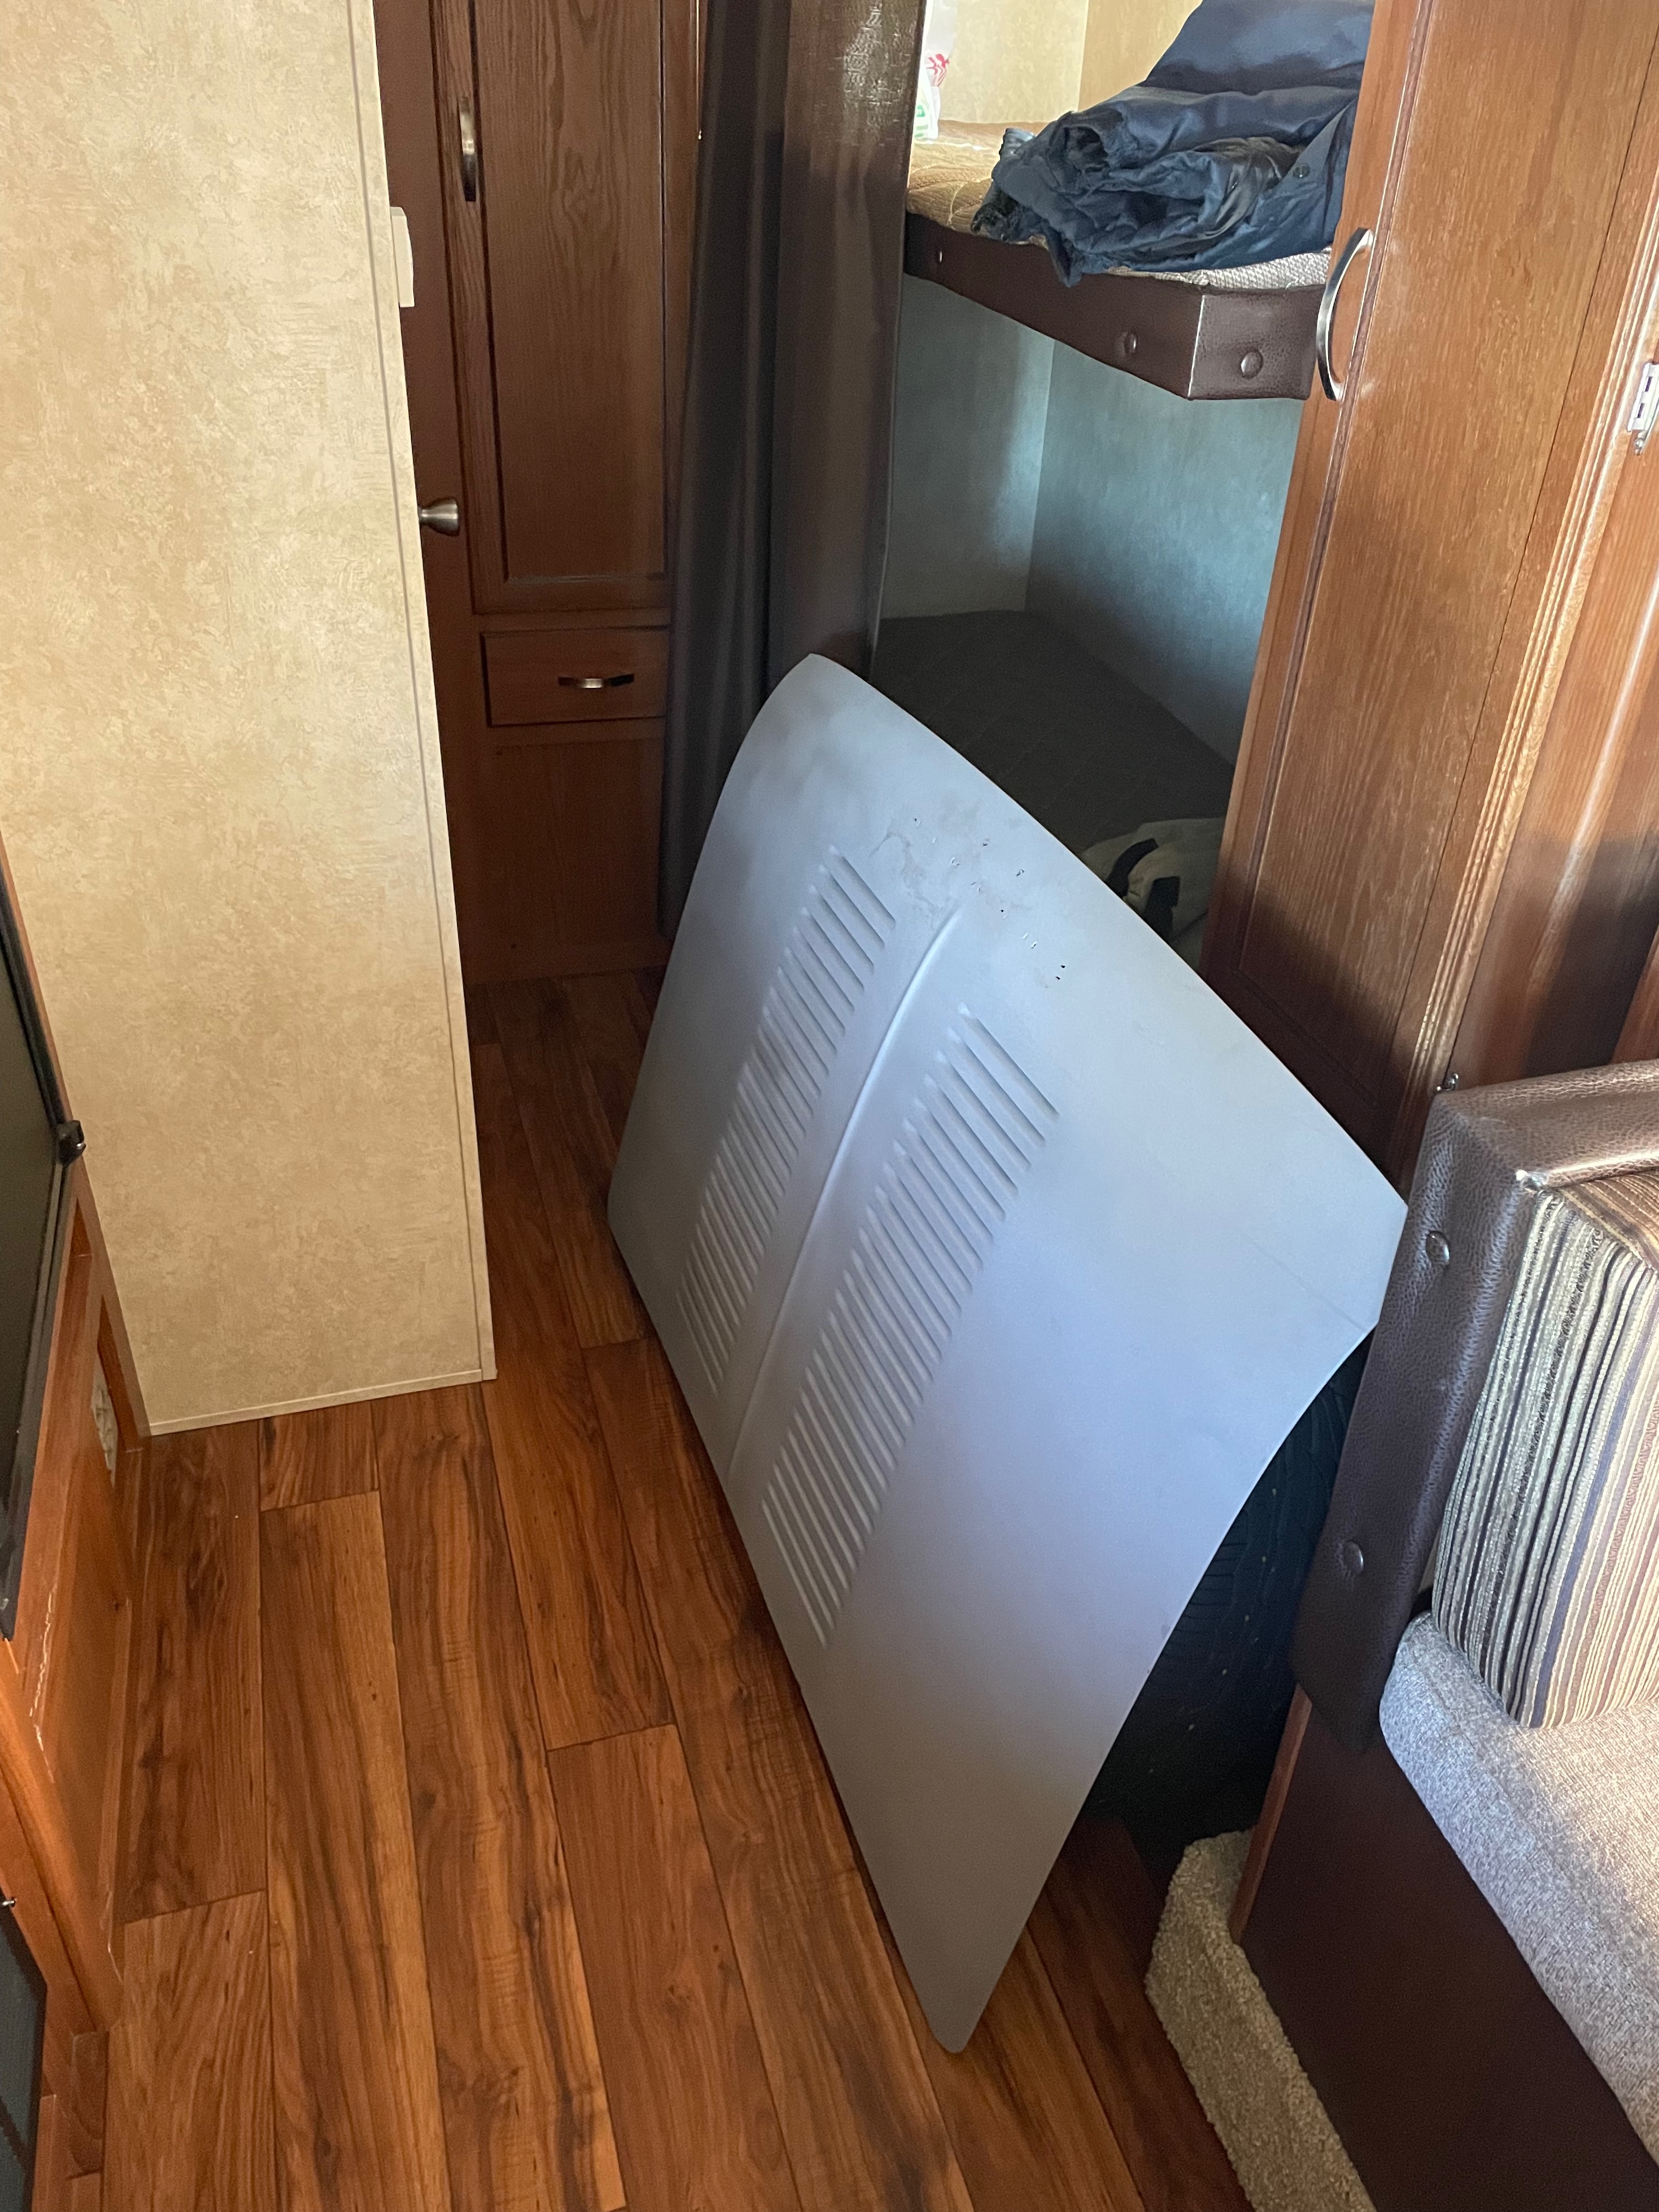
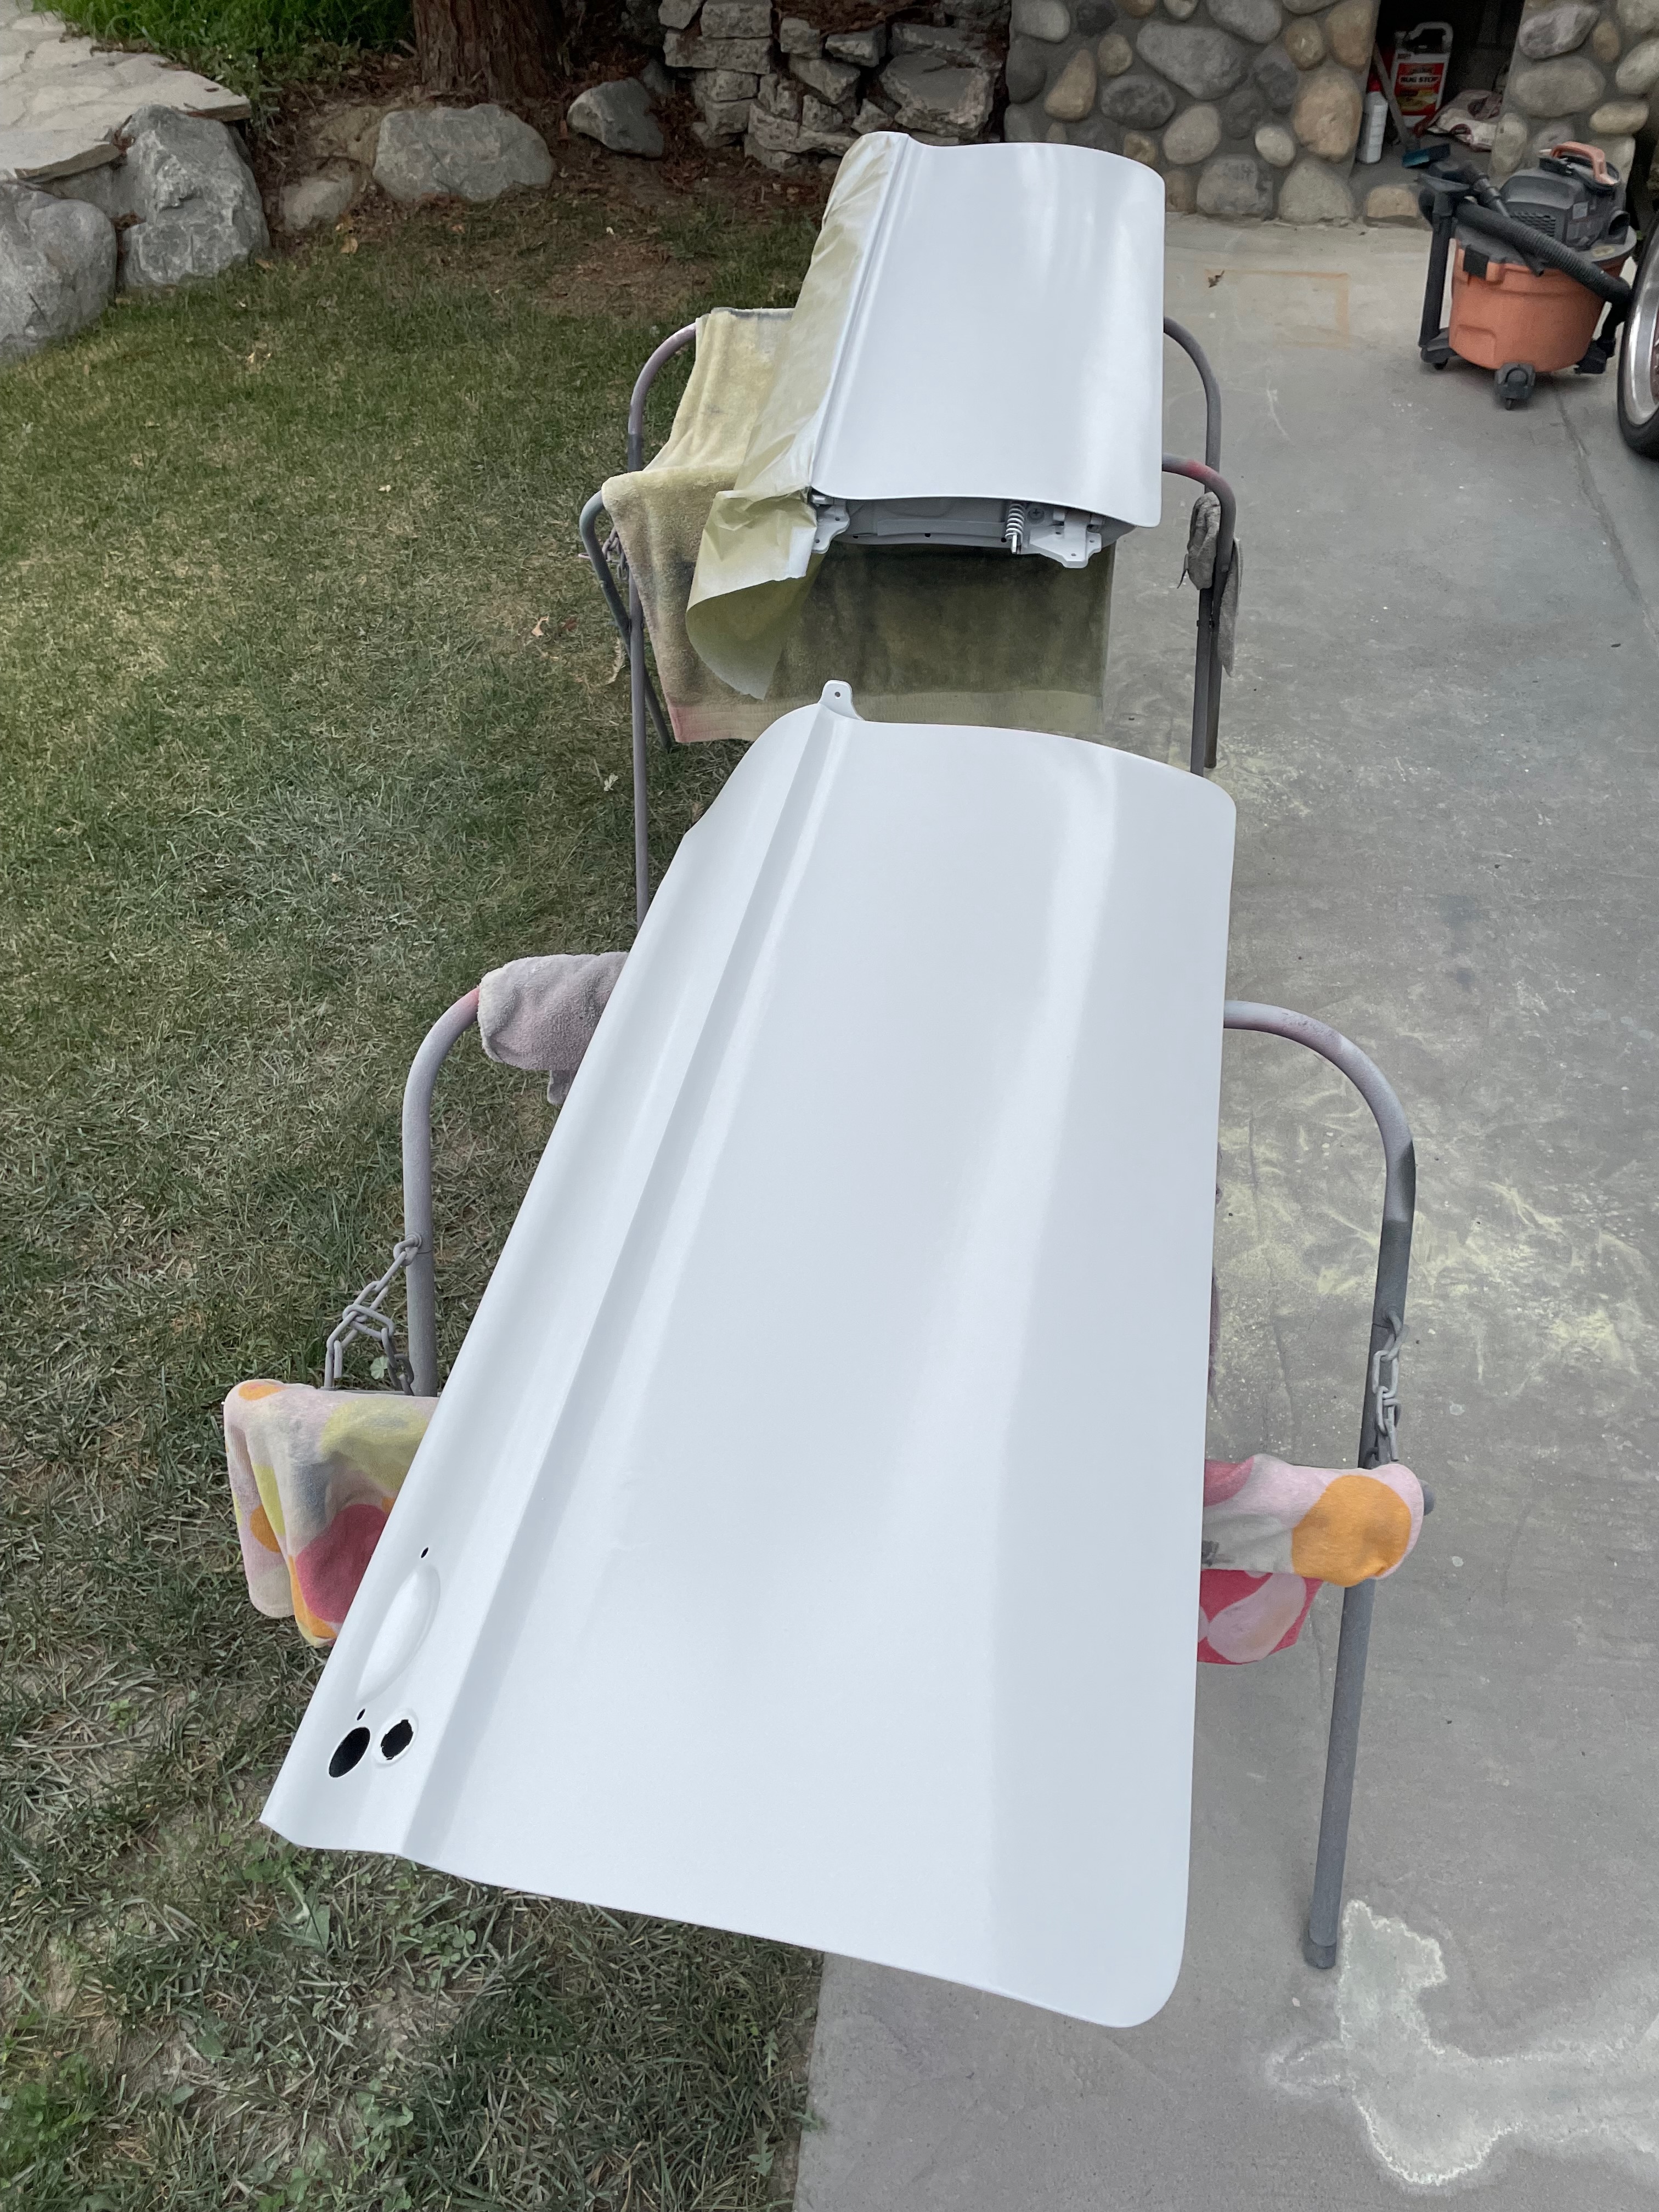
Body-Paint: Hood Surface Preparation
Applying primer to the hood and meticulously block-sanding to achieve a perfectly smooth surface before final paint application.
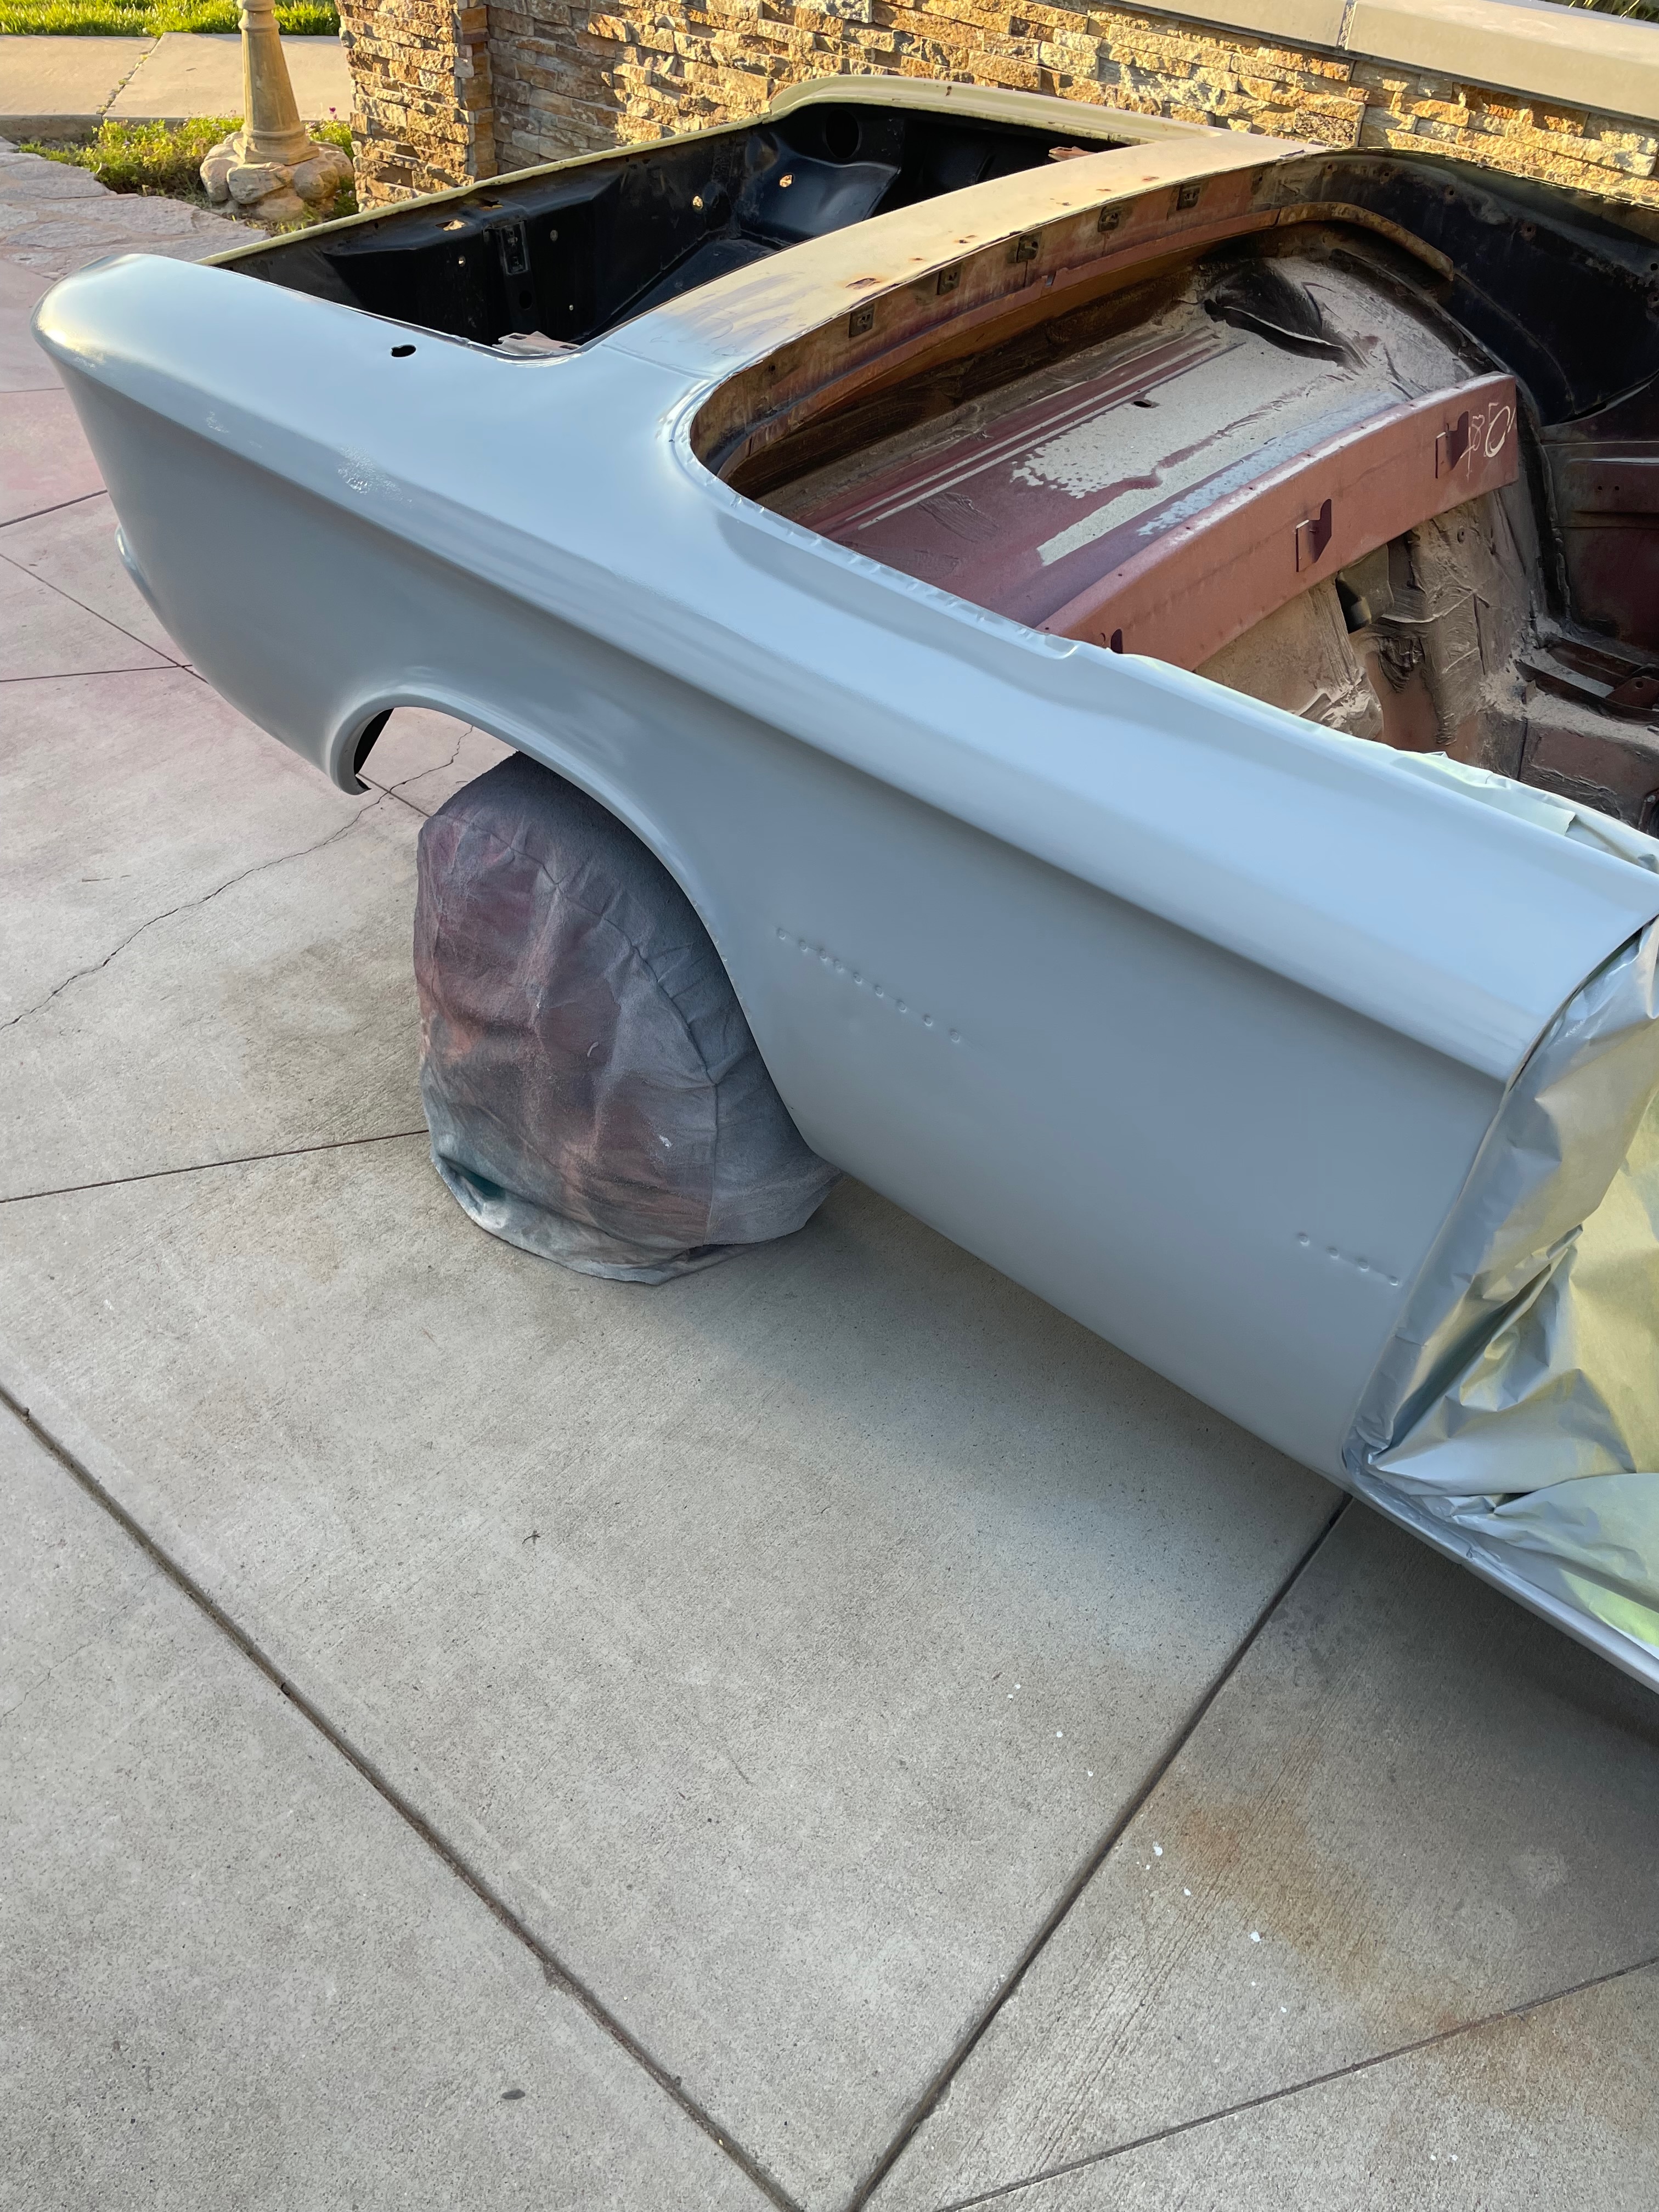
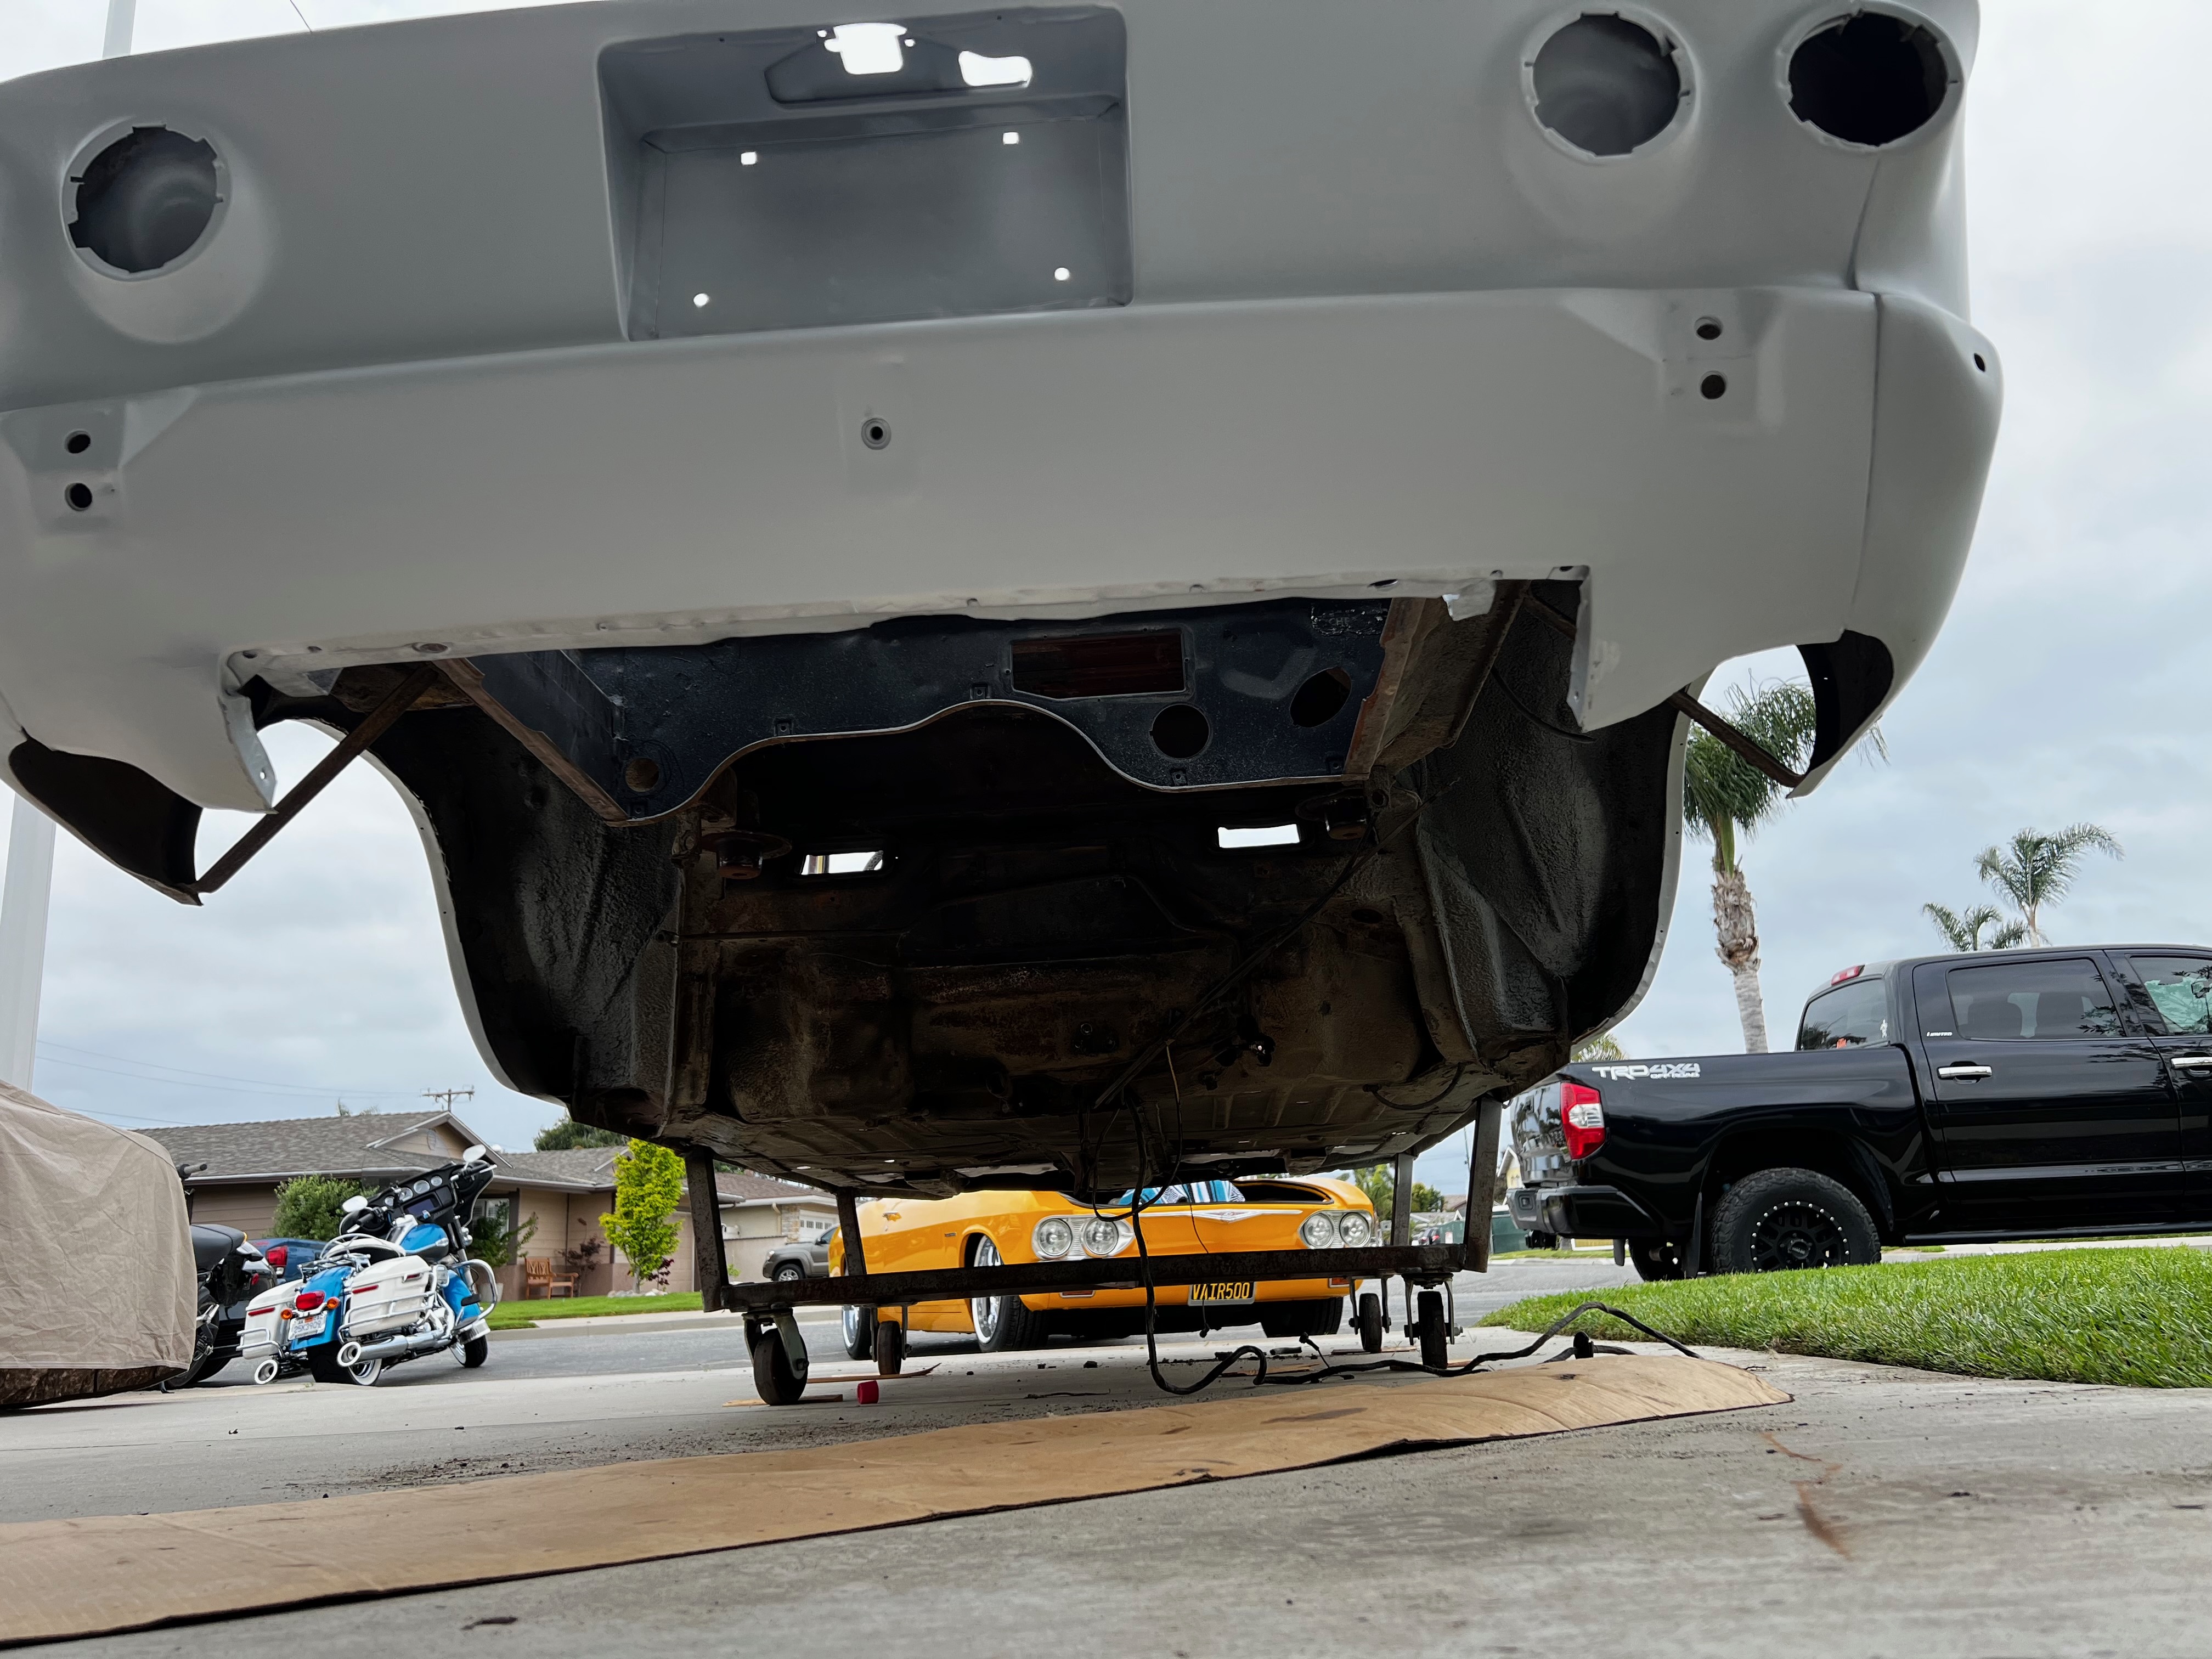
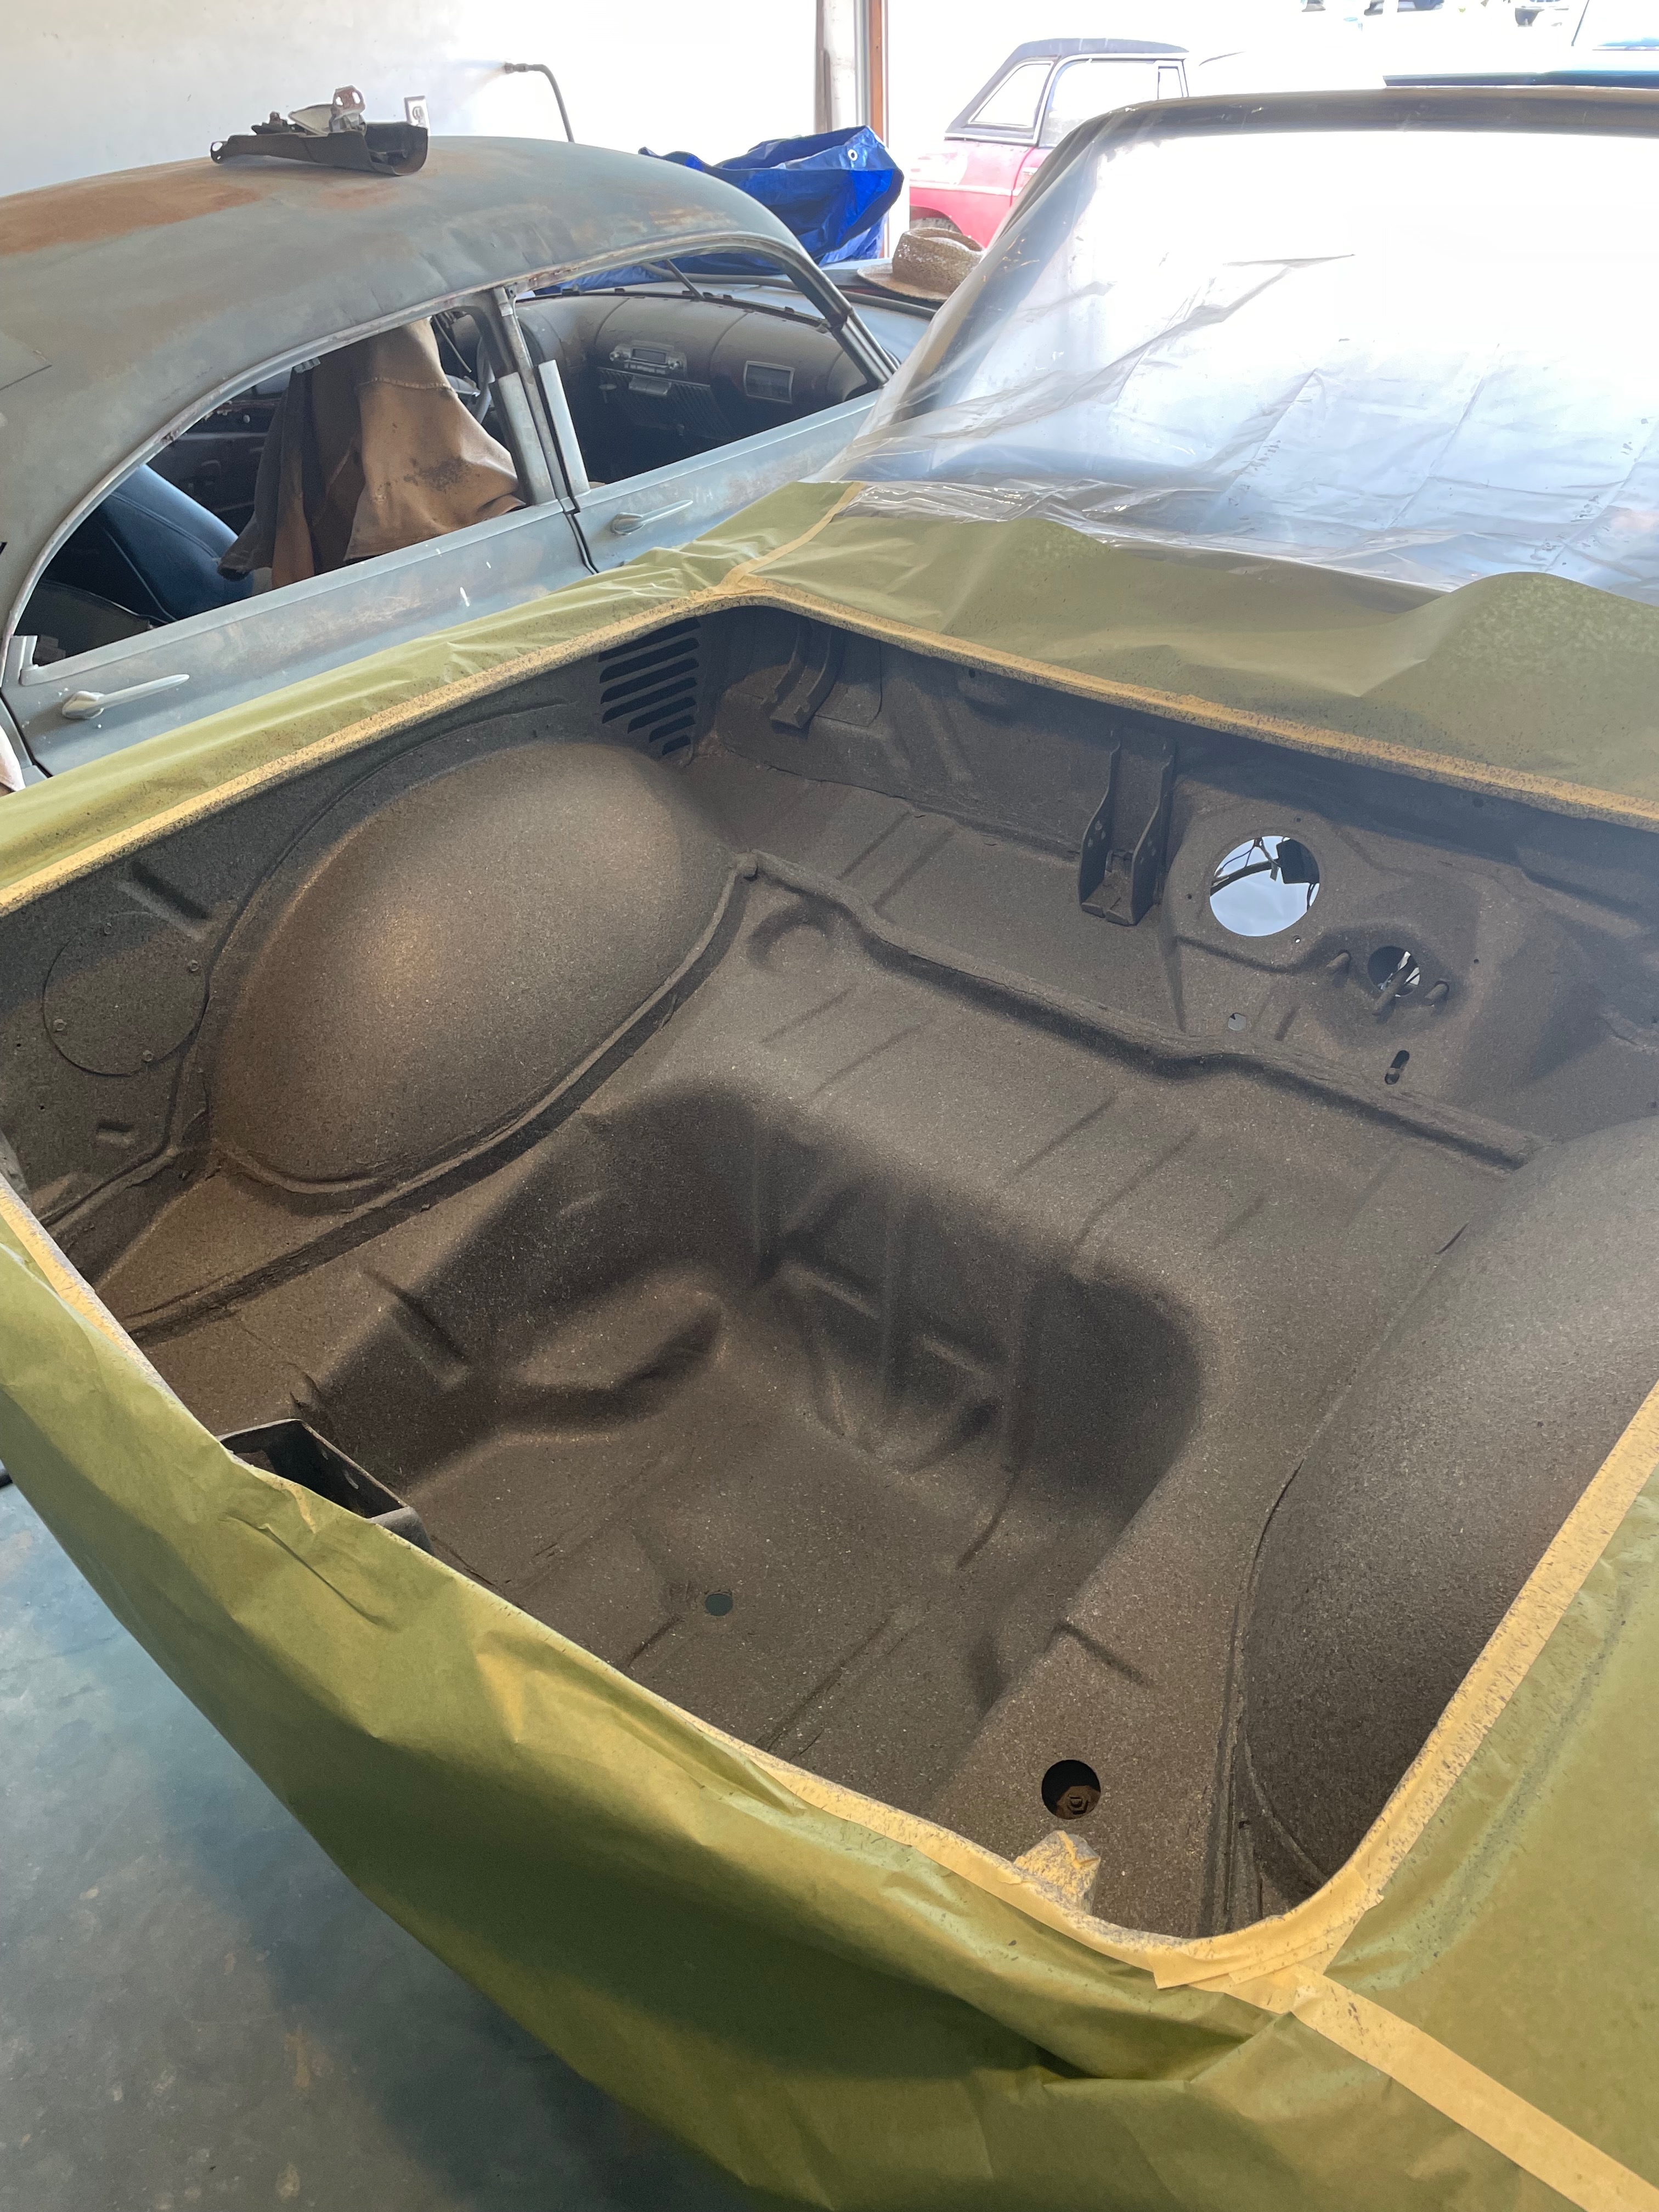
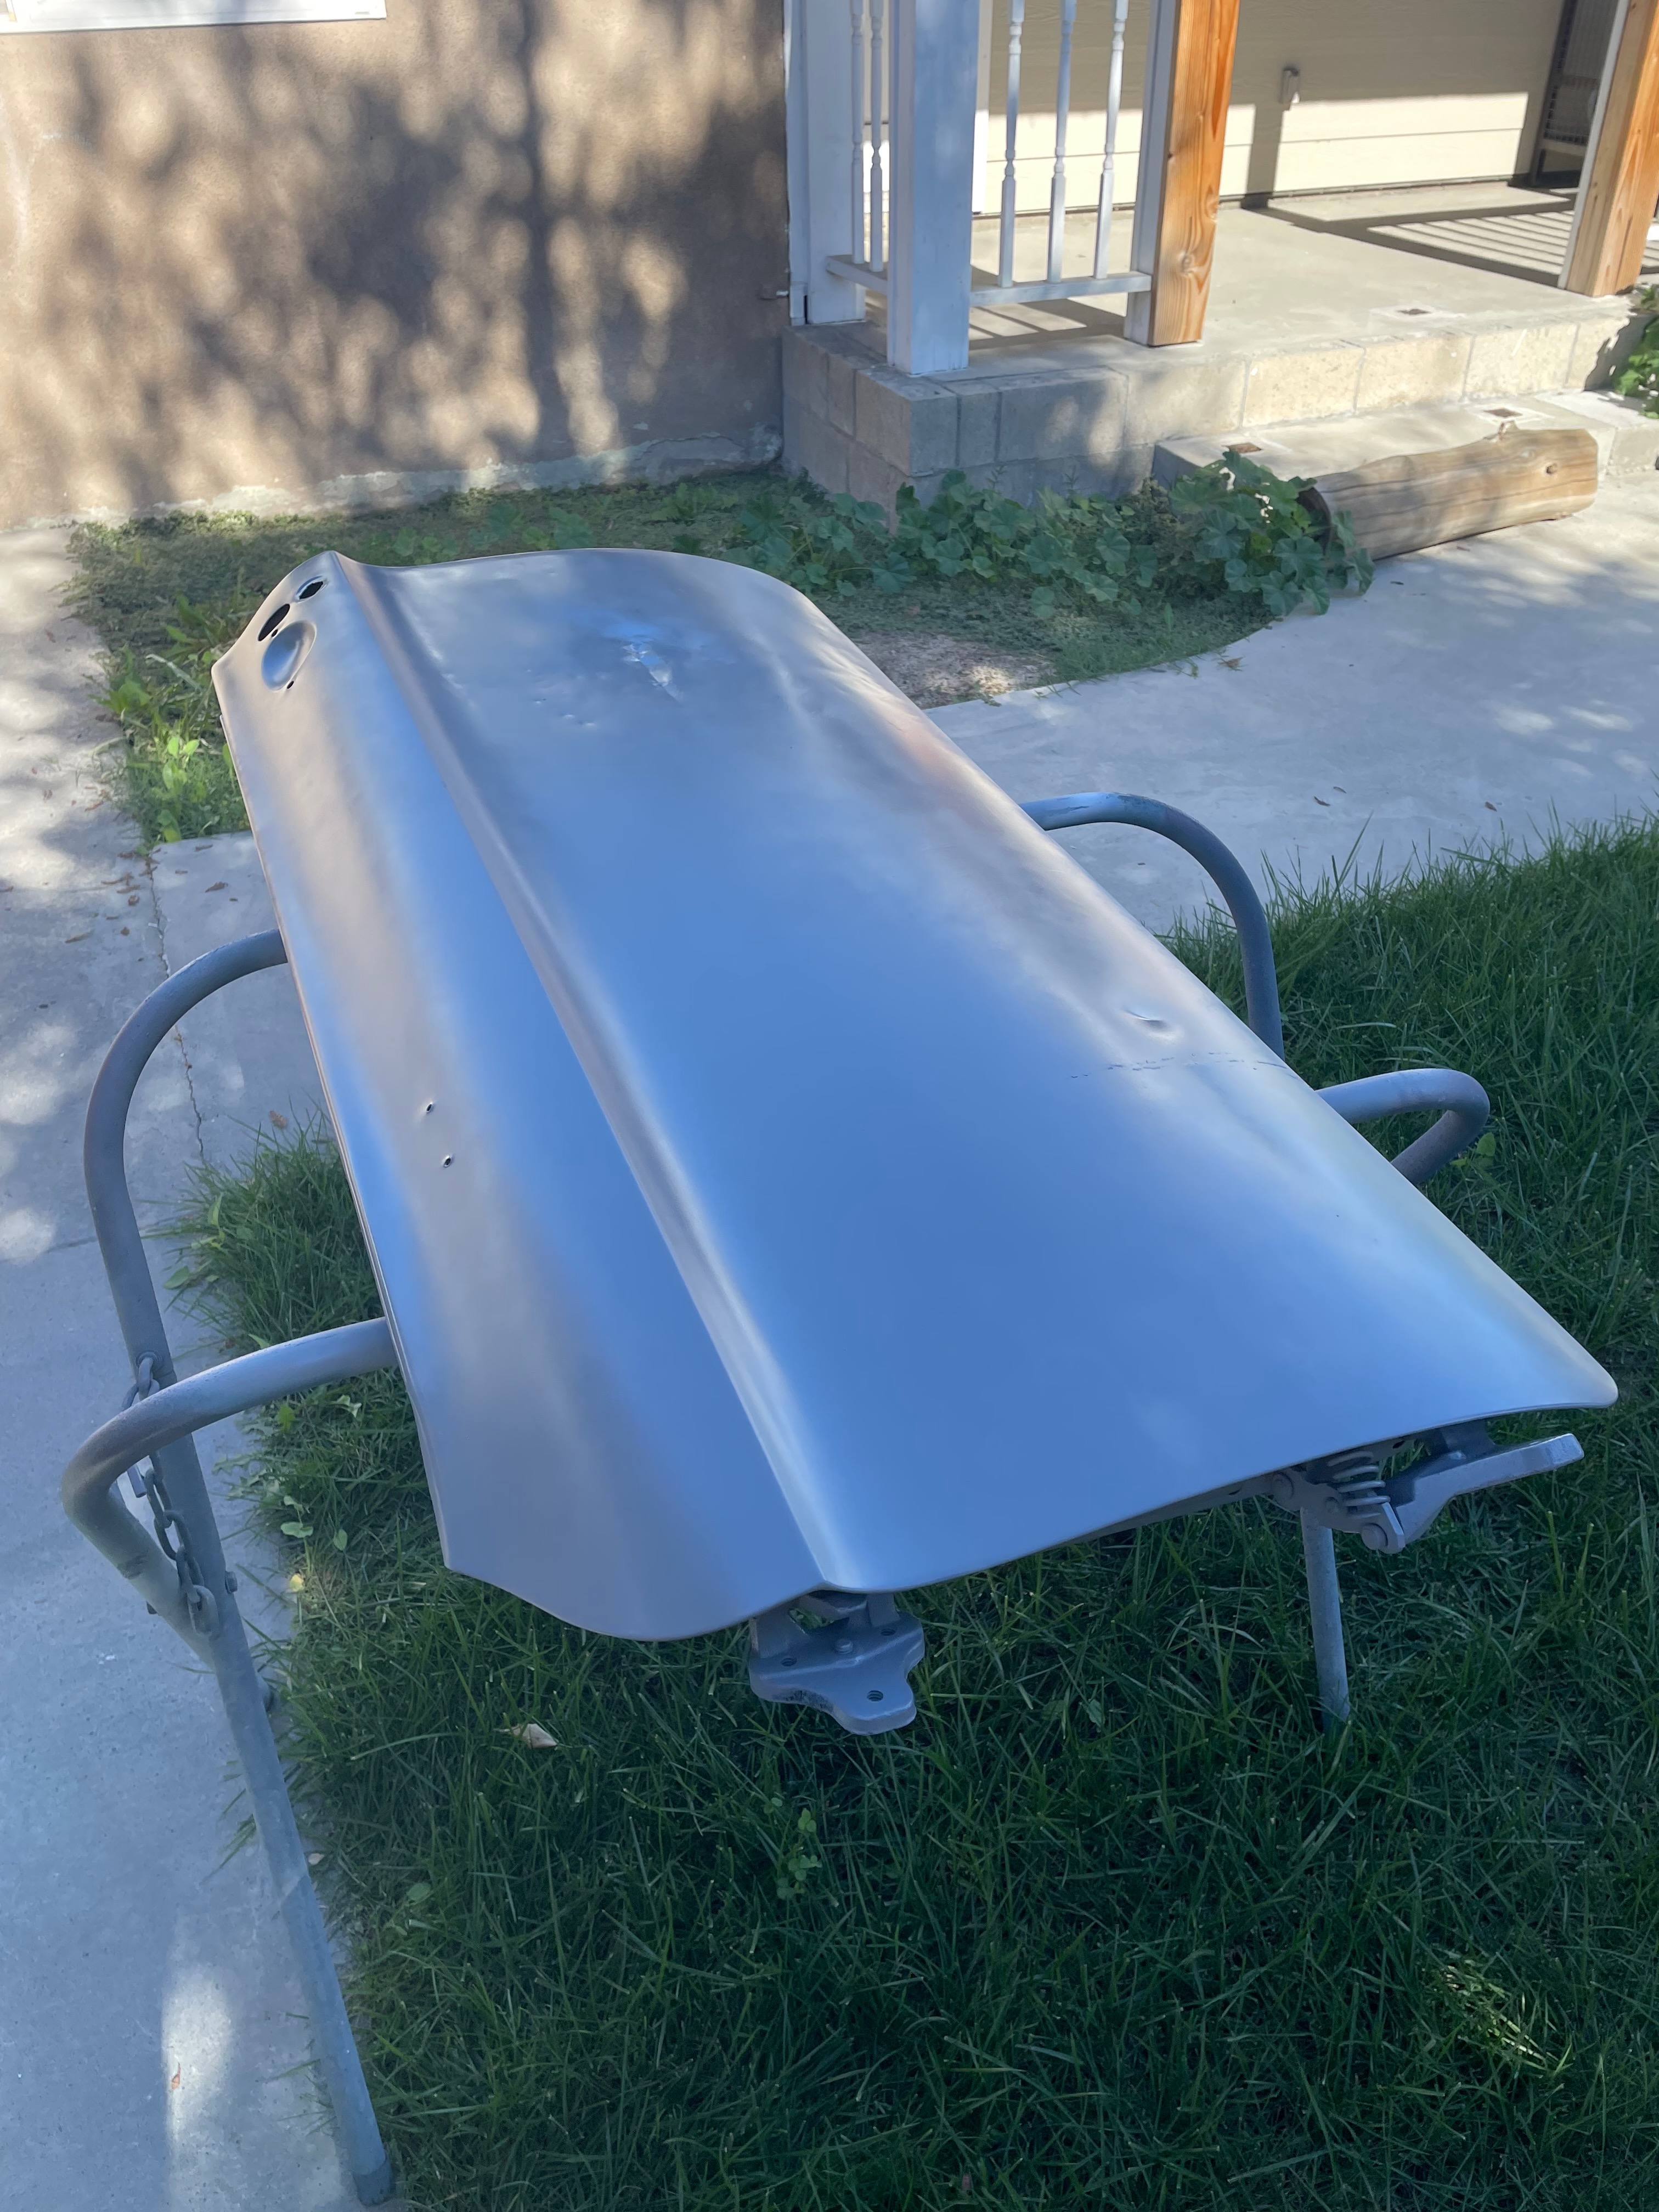
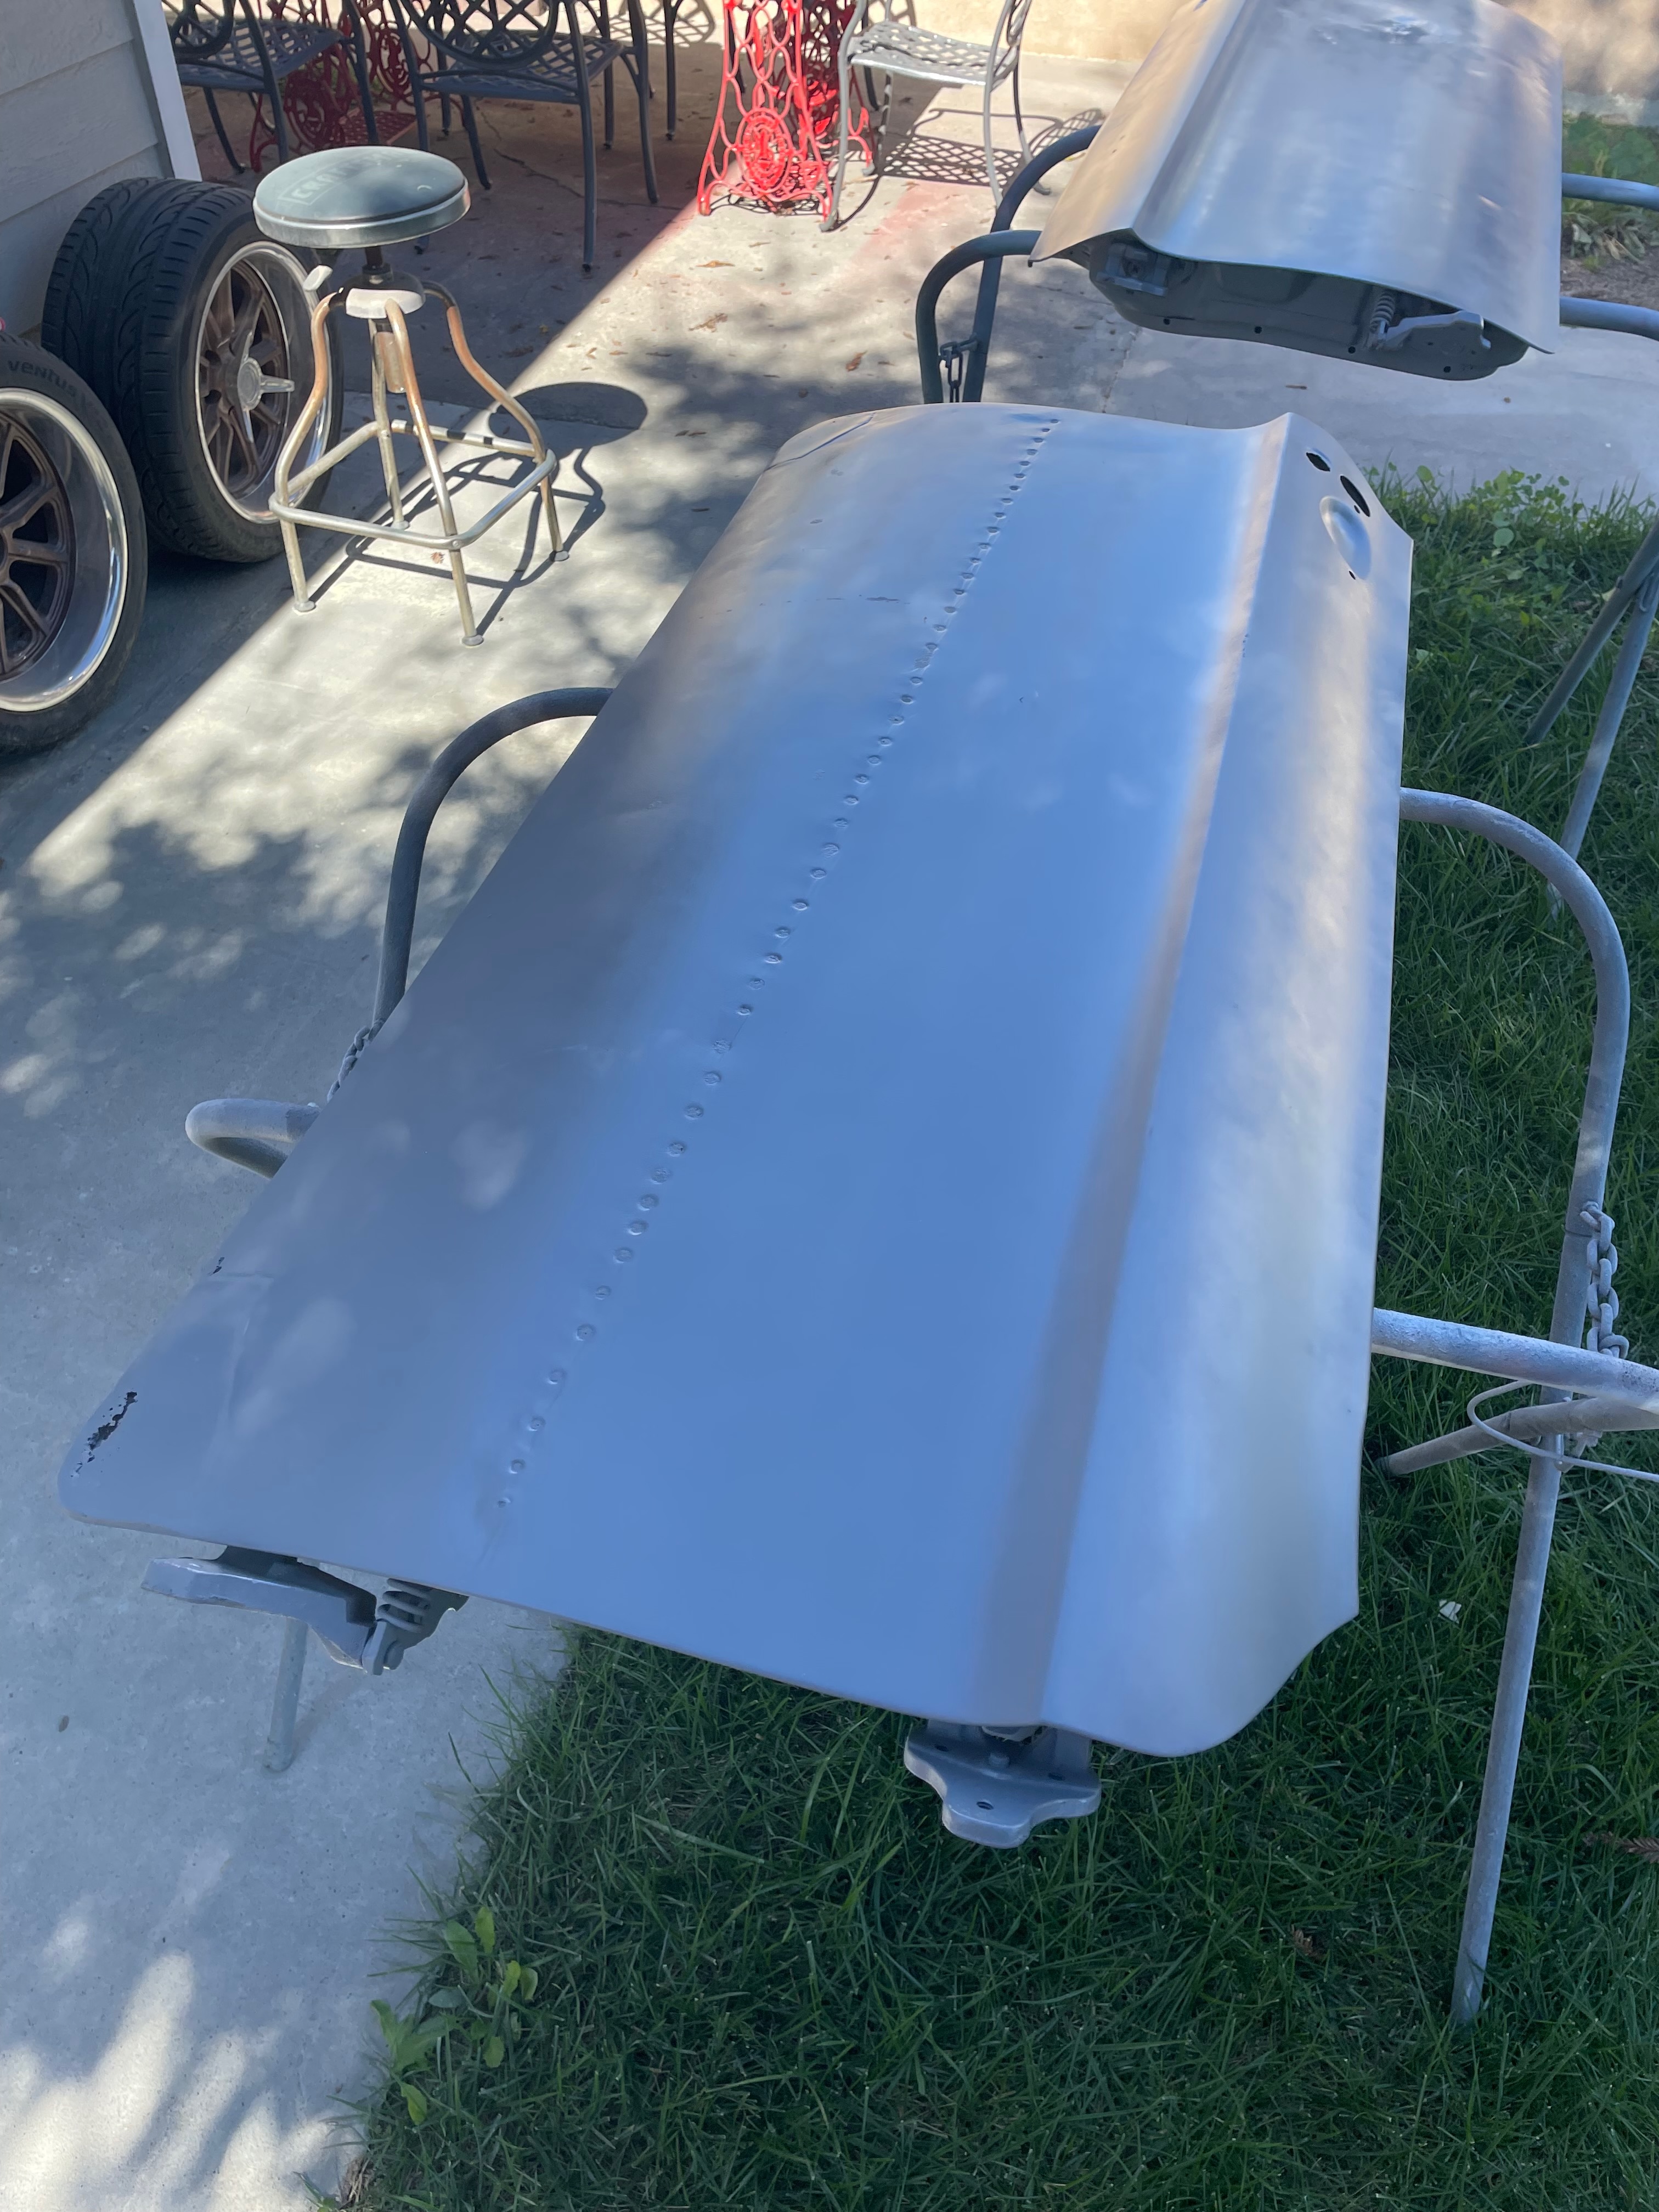
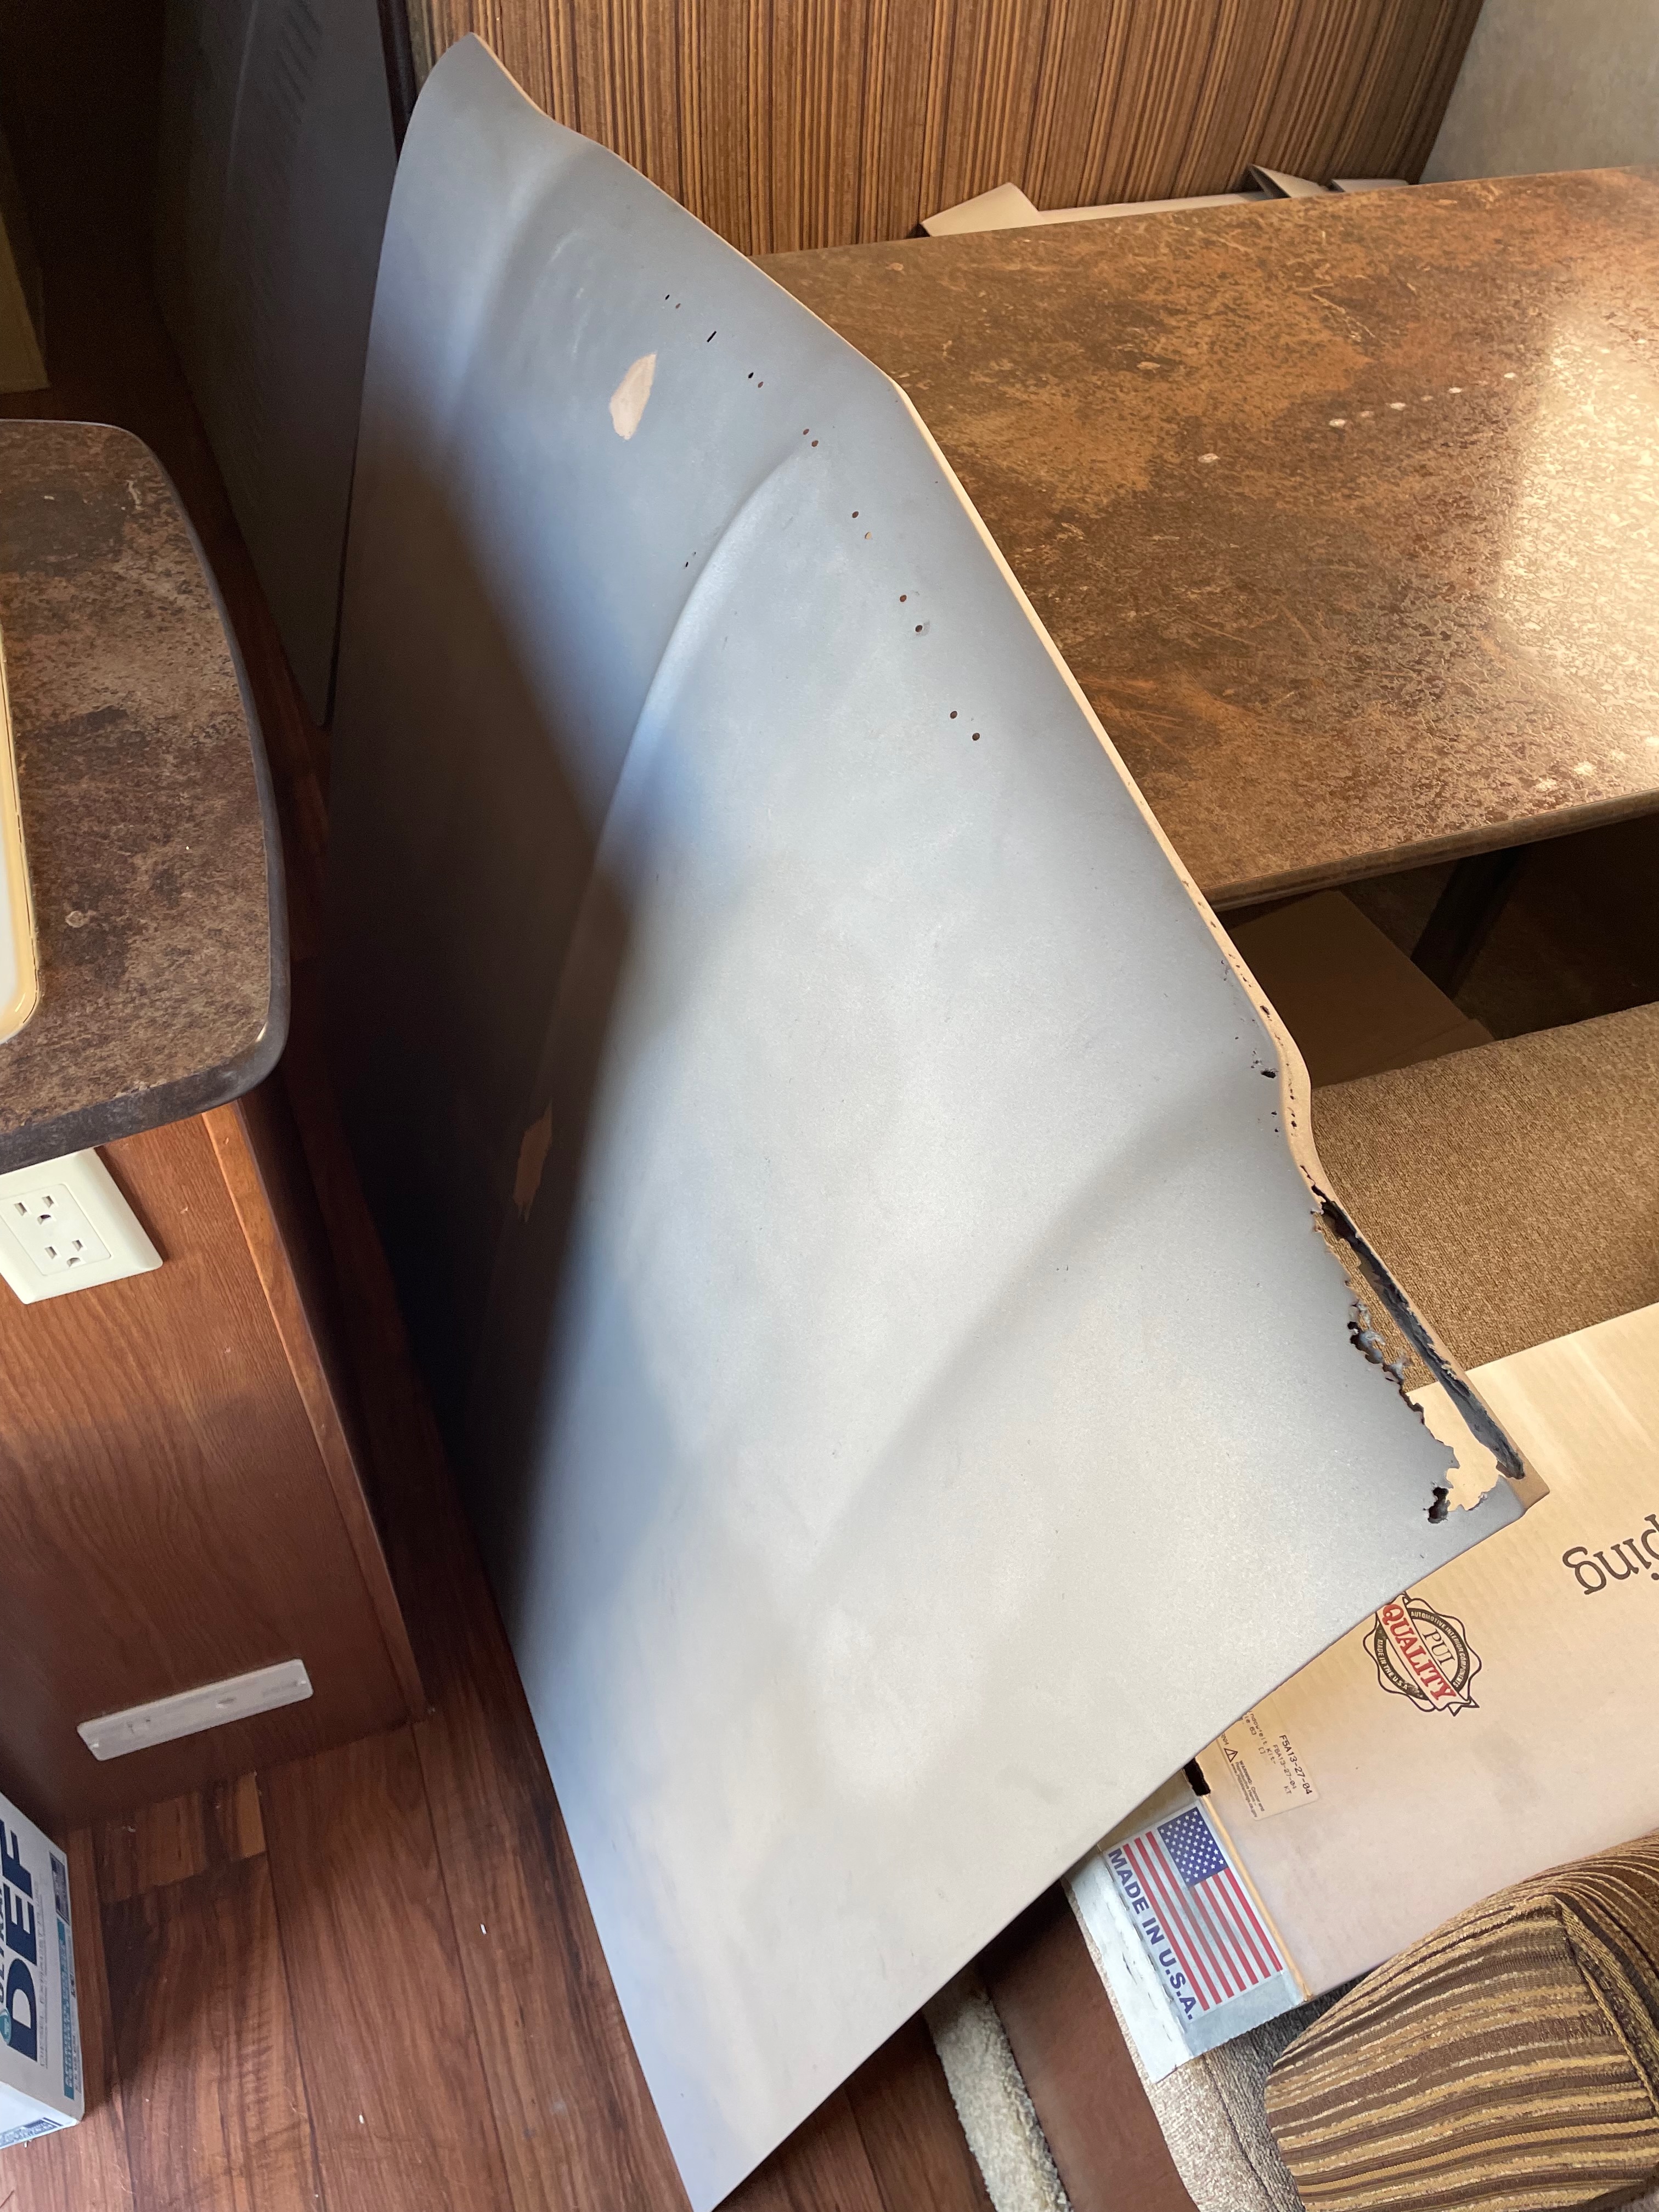
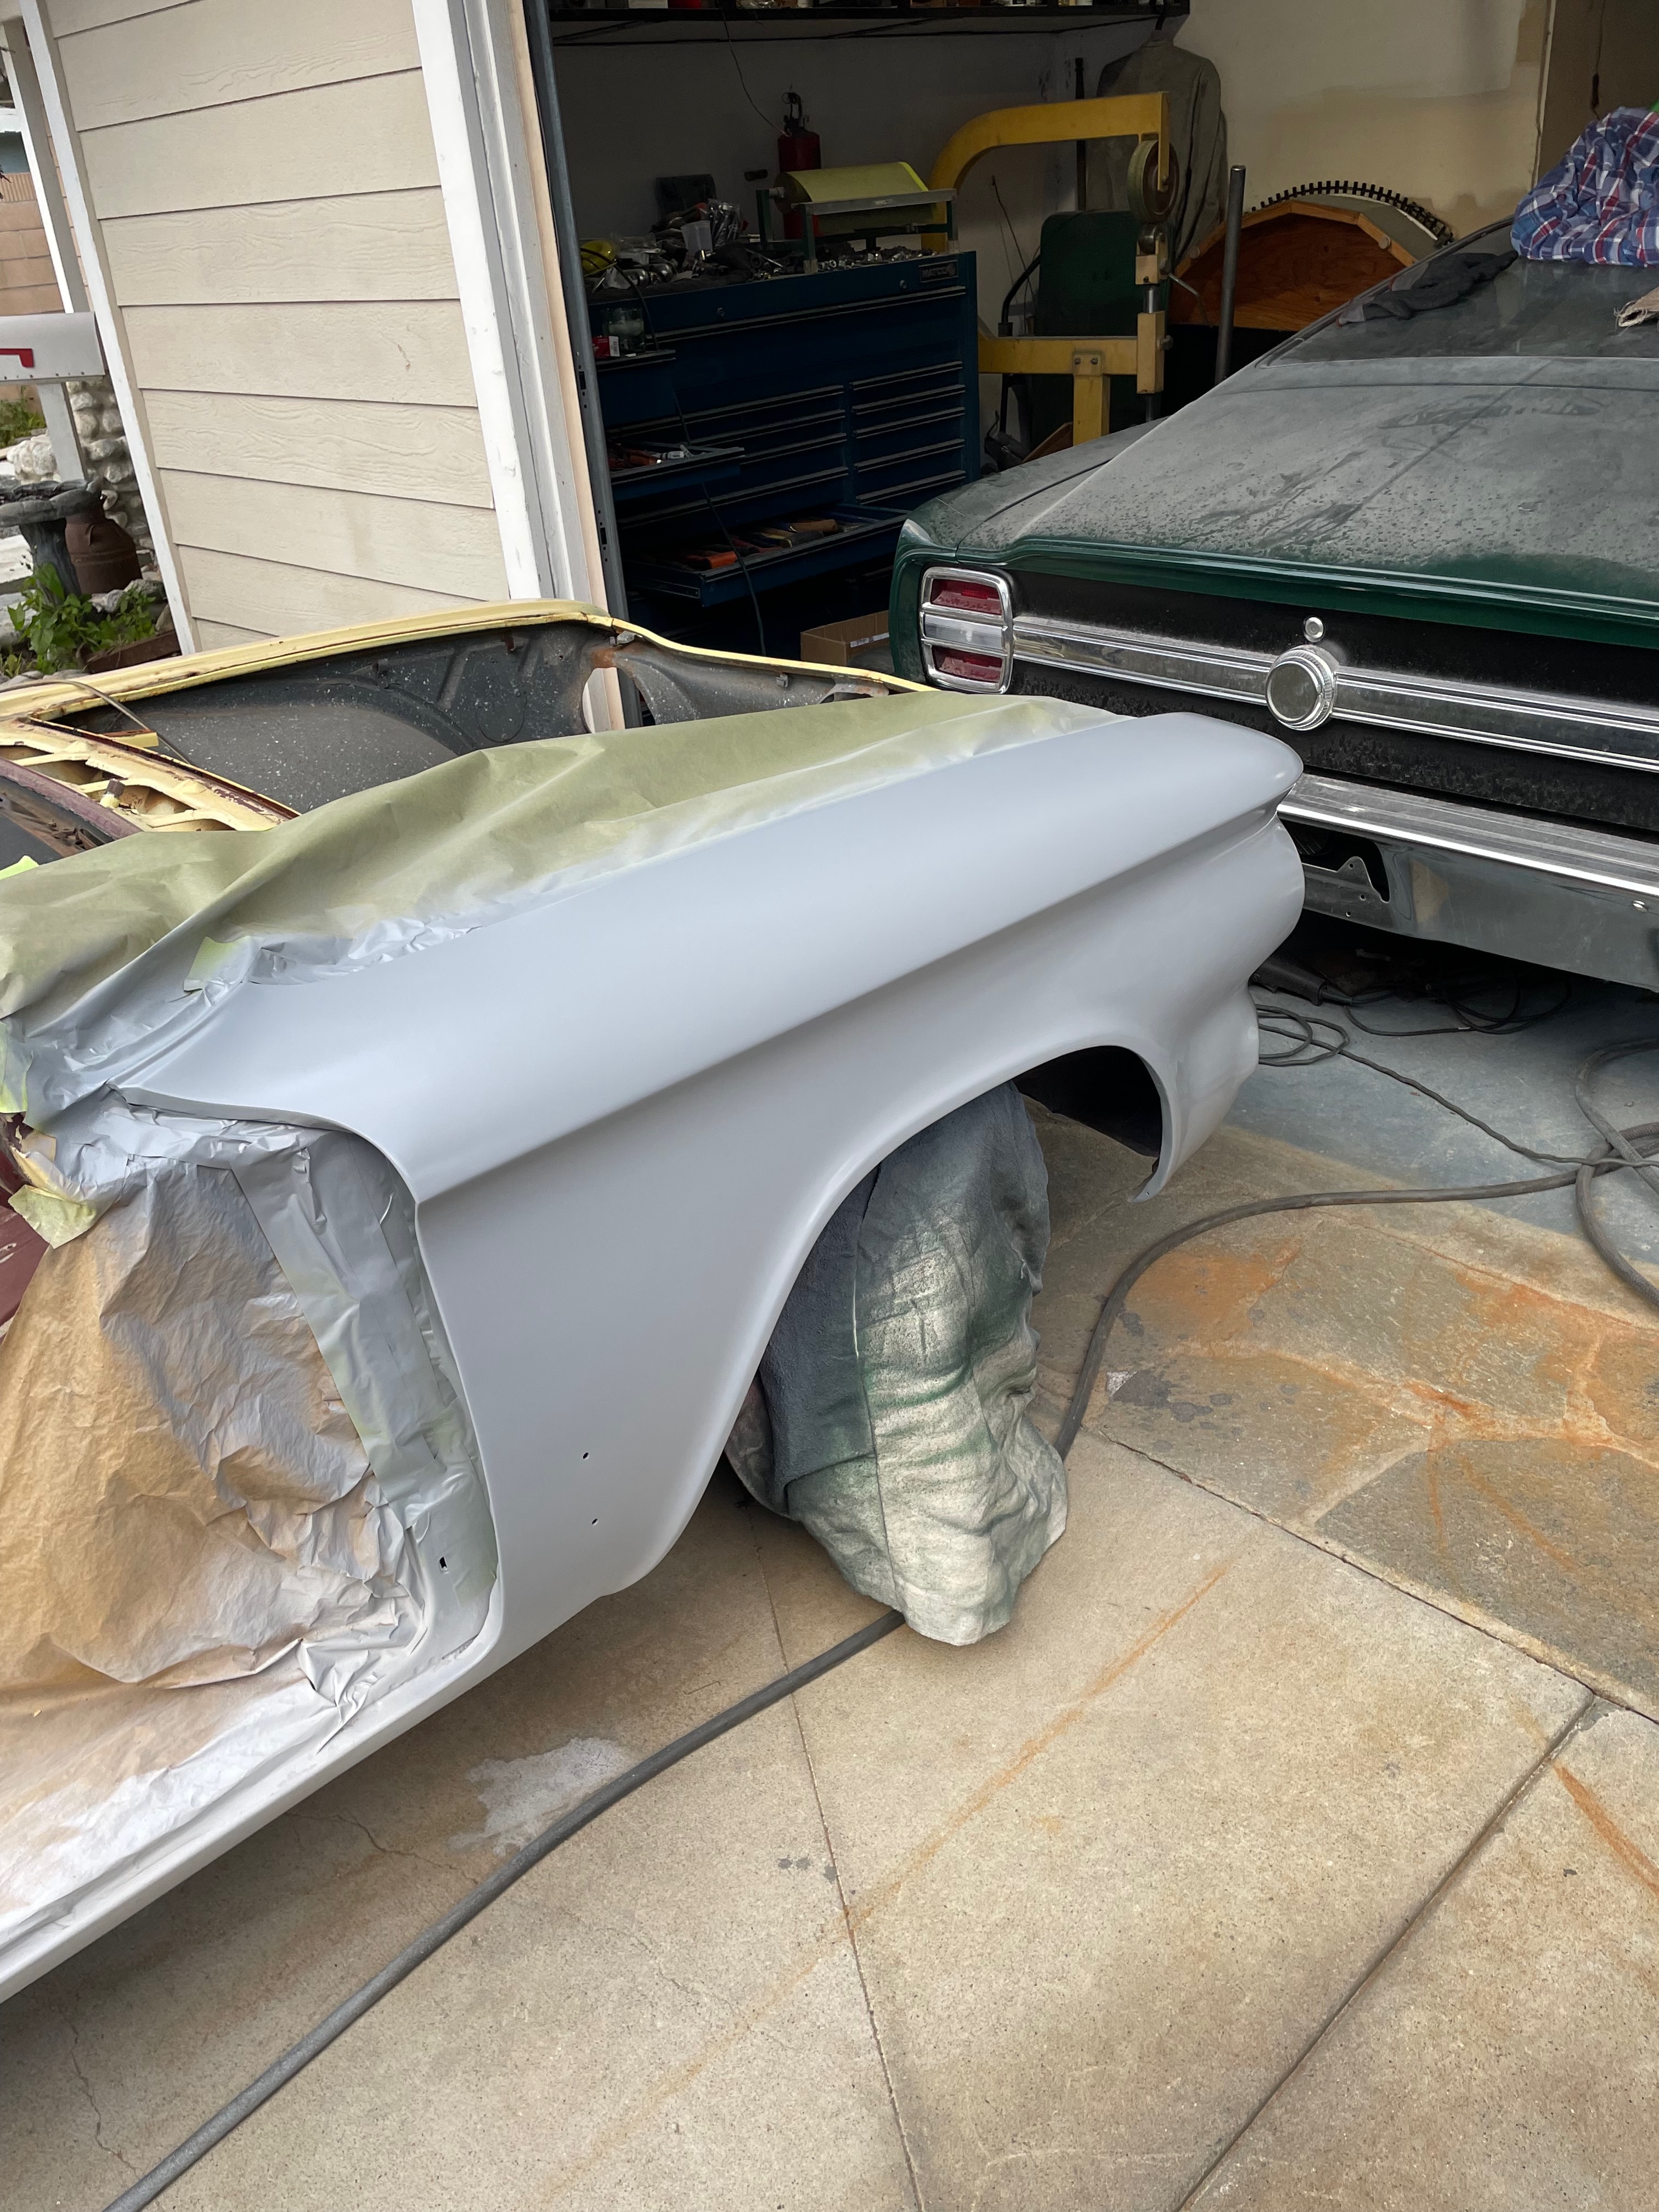
Body-Paint: Trunk Lid Priming
Applying high-build primer to the trunk lid after body work, creating a foundation for the final paint that will restore the Corvair's original appearance.
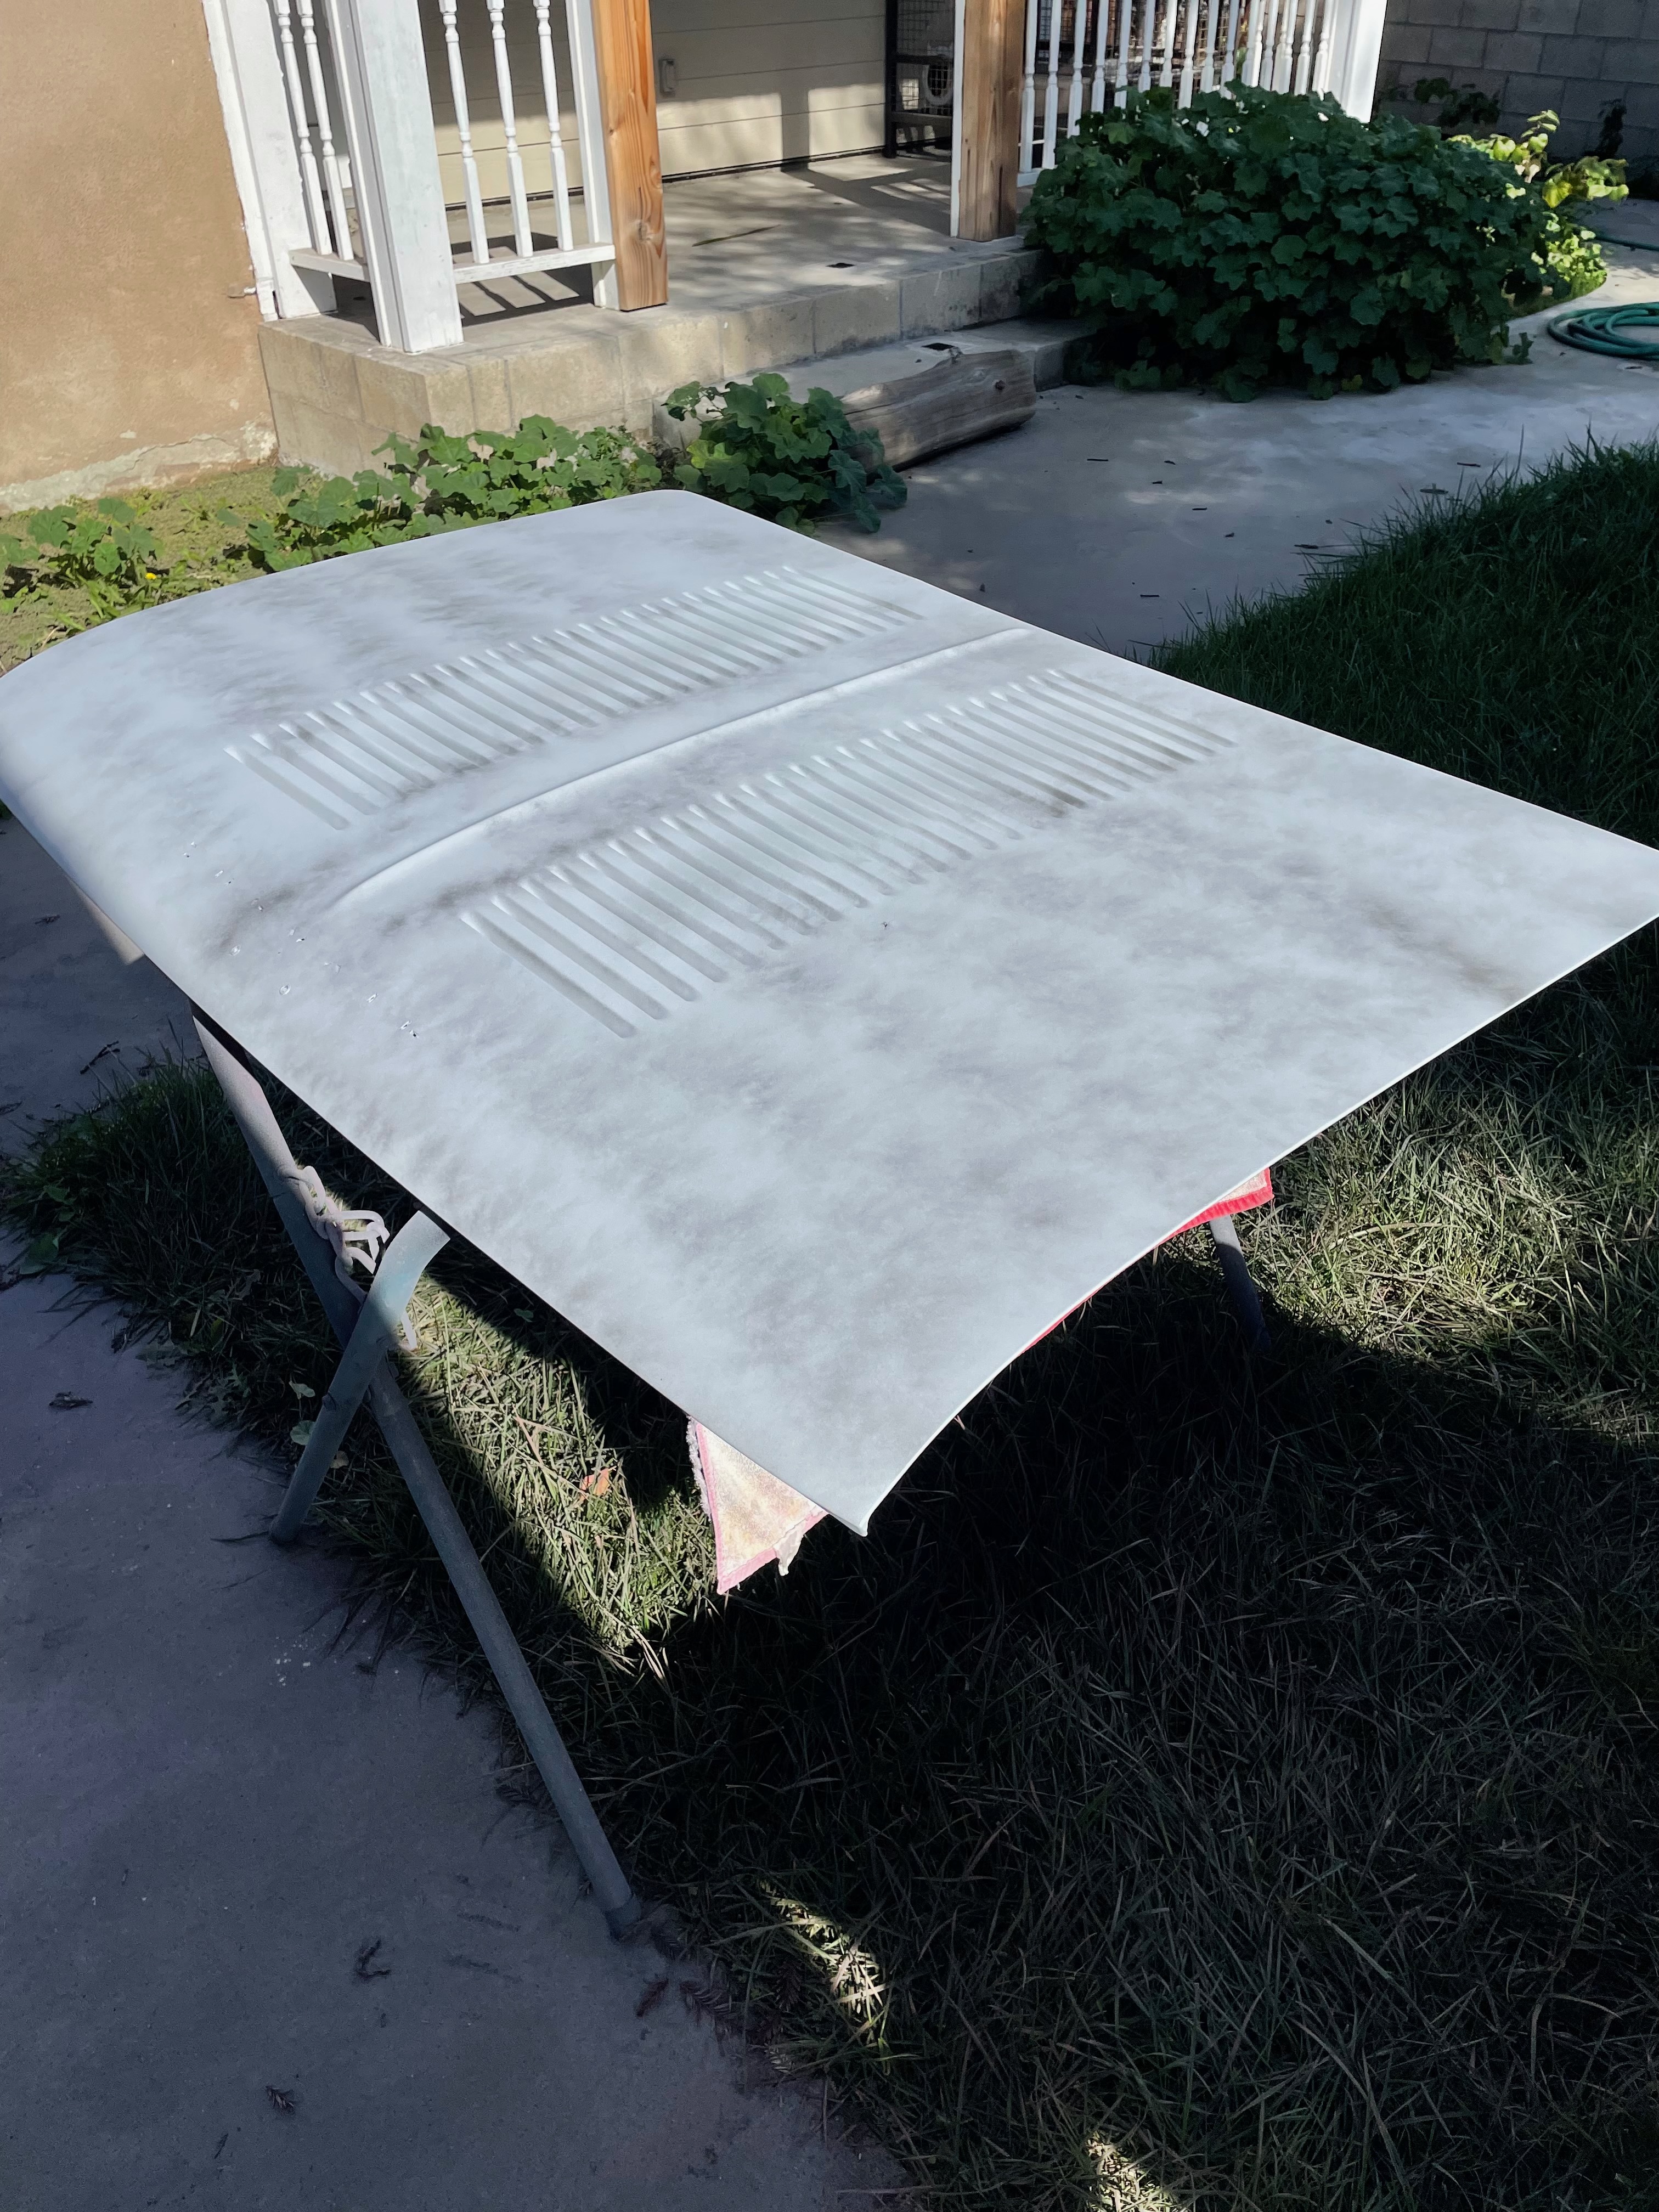
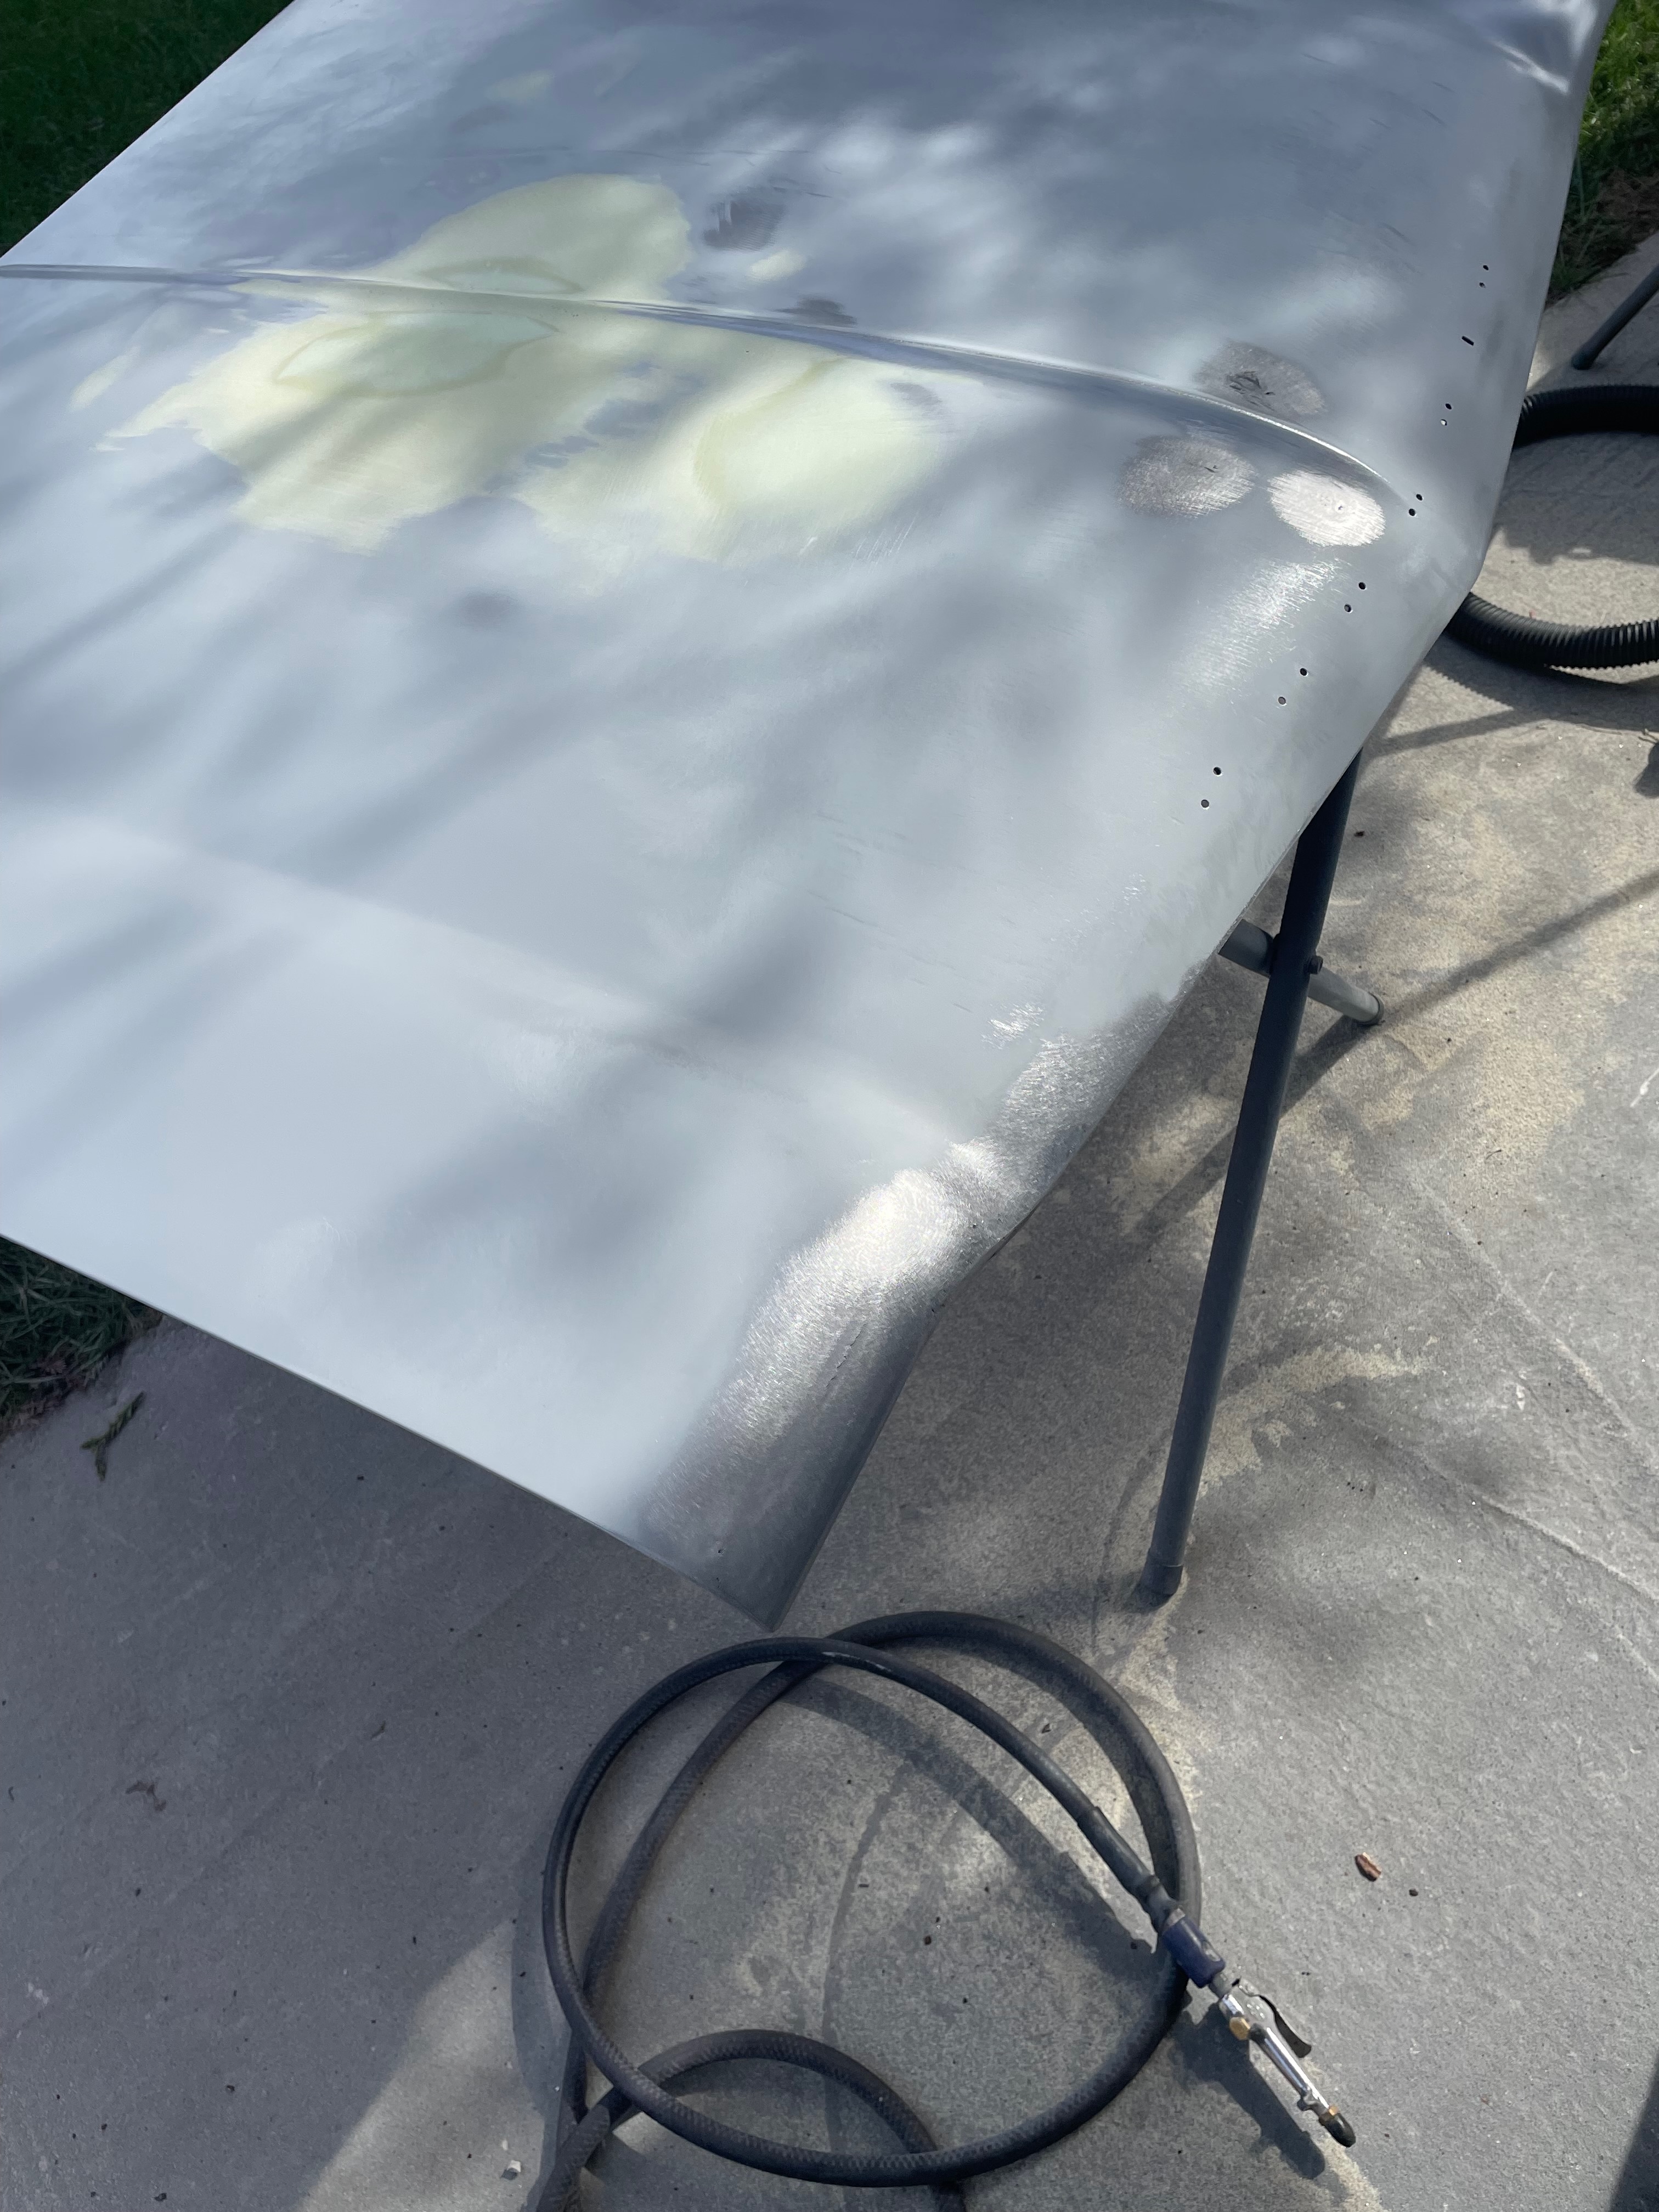
Body-Paint: Primer Finishing
Fine detailing work on the primer coat, using progressively finer sandpaper to achieve a glass-smooth surface that will ensure a flawless final paint finish.
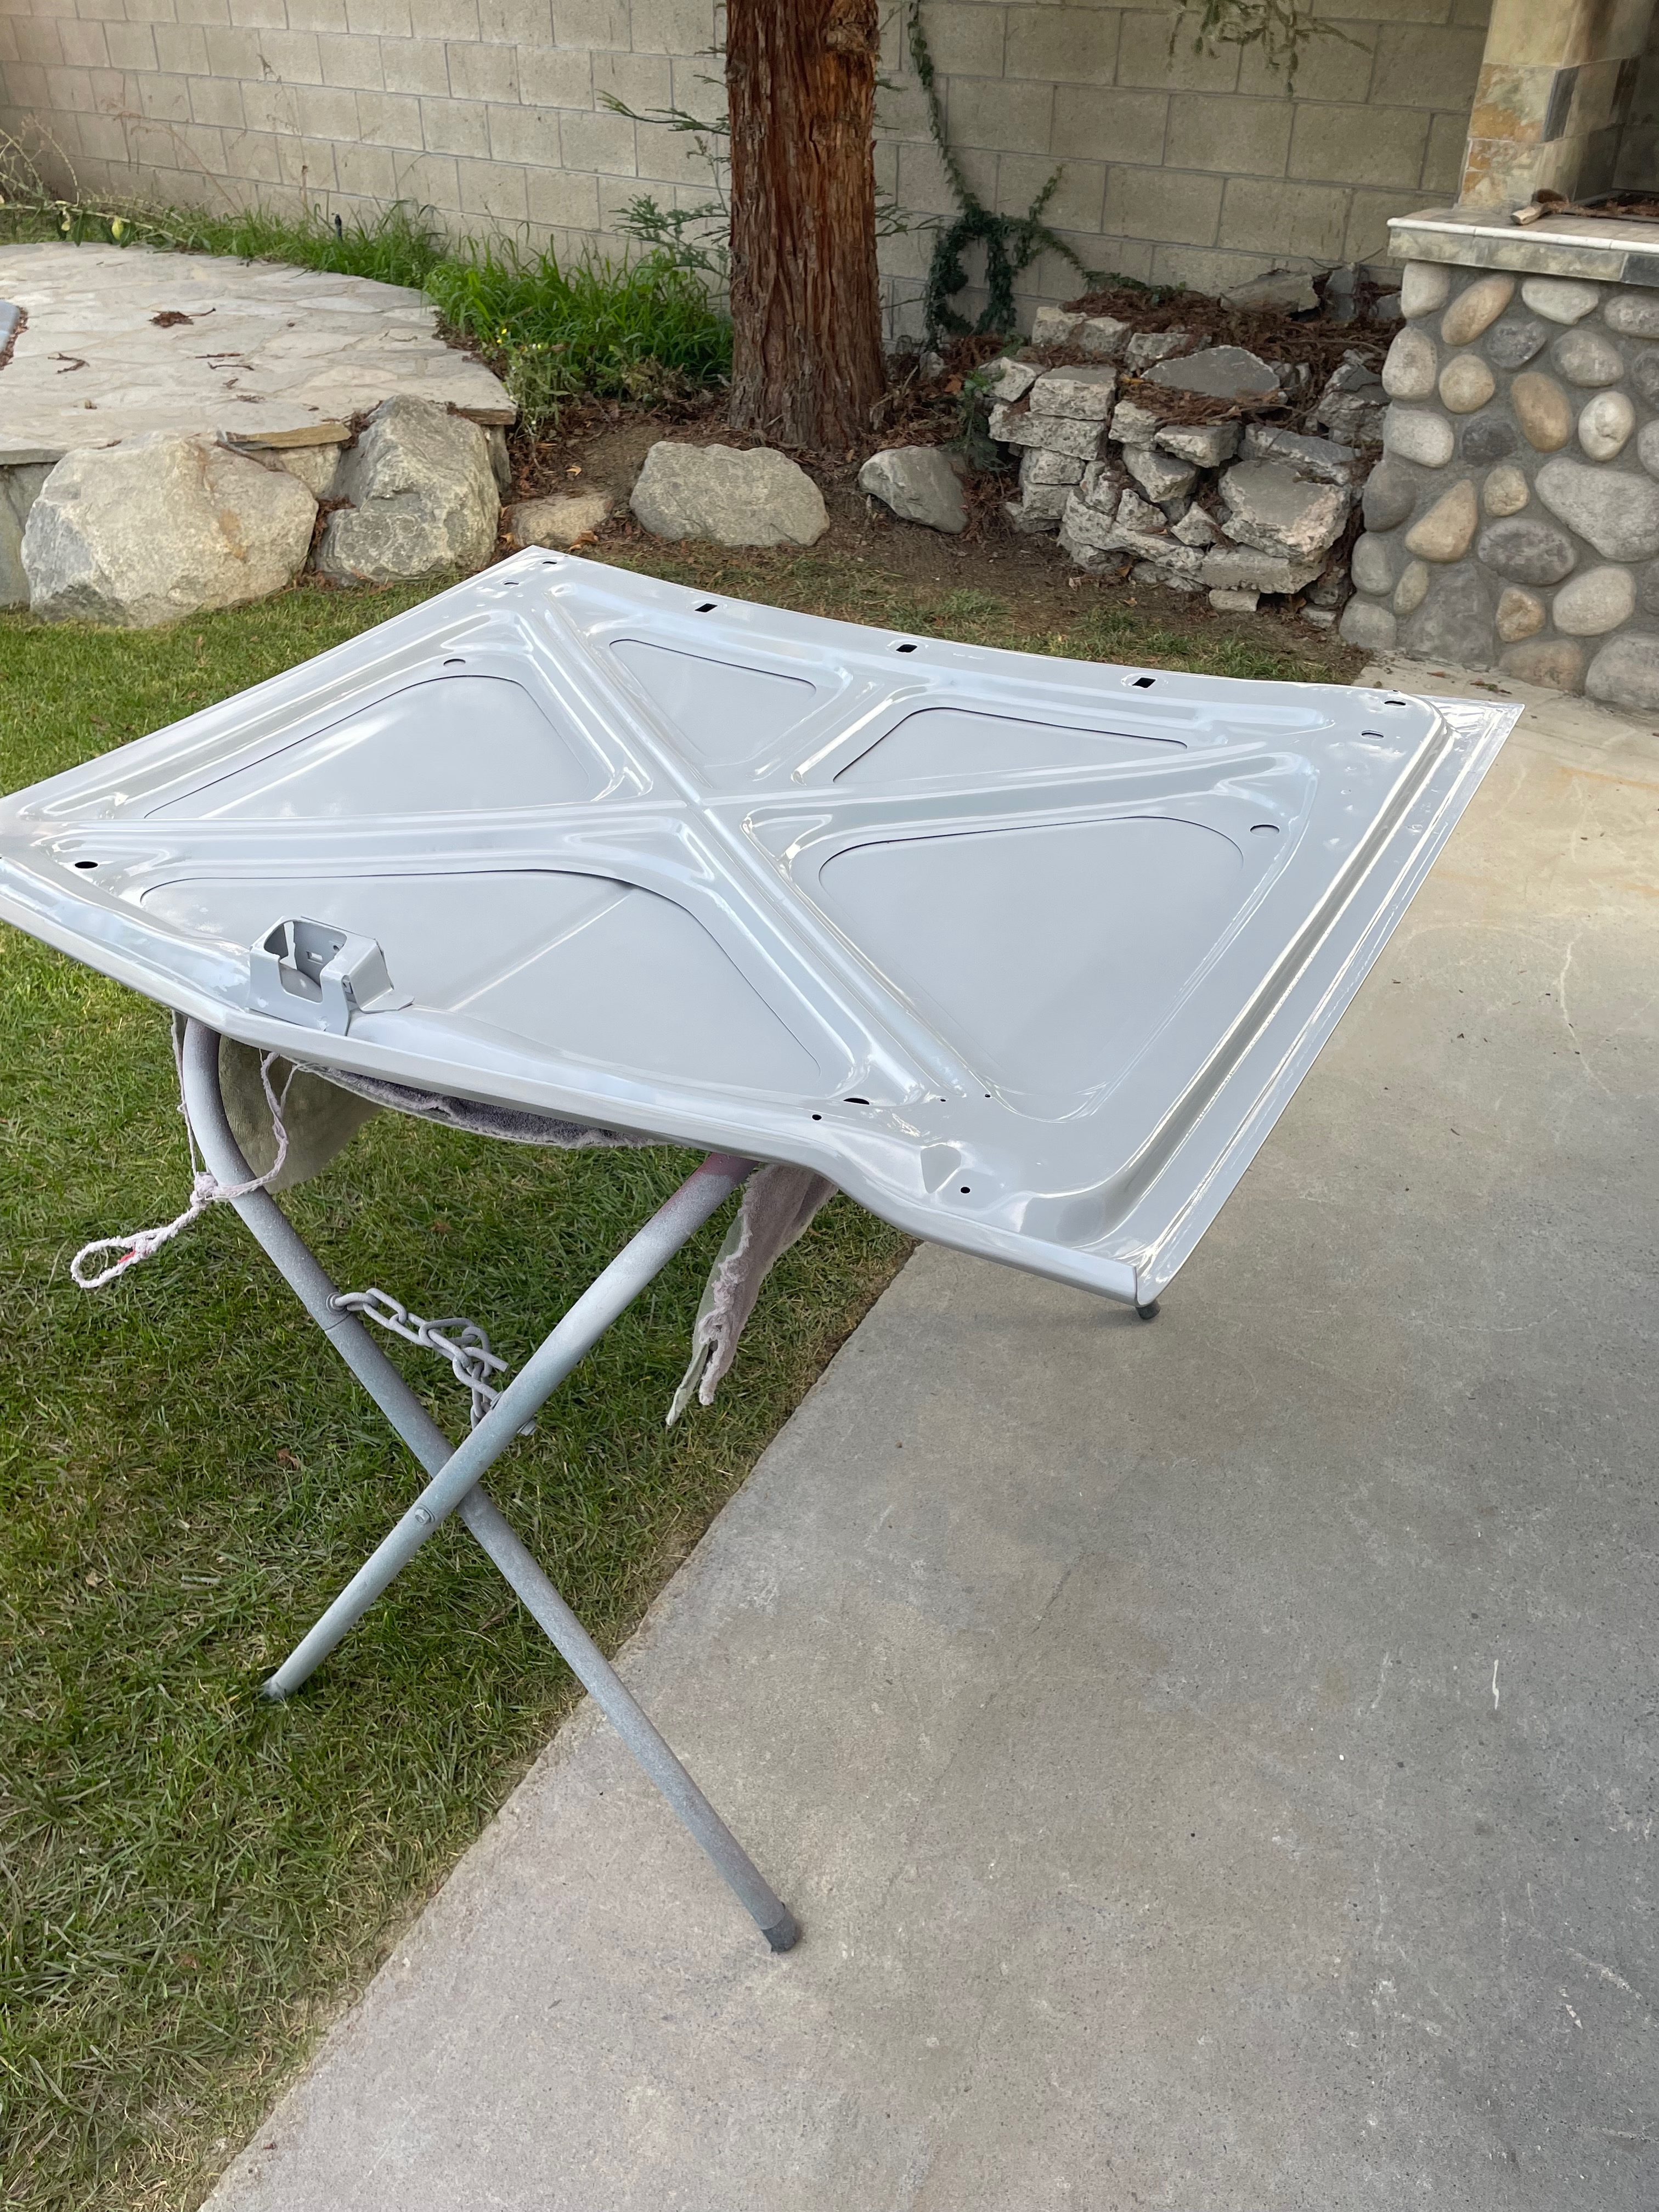
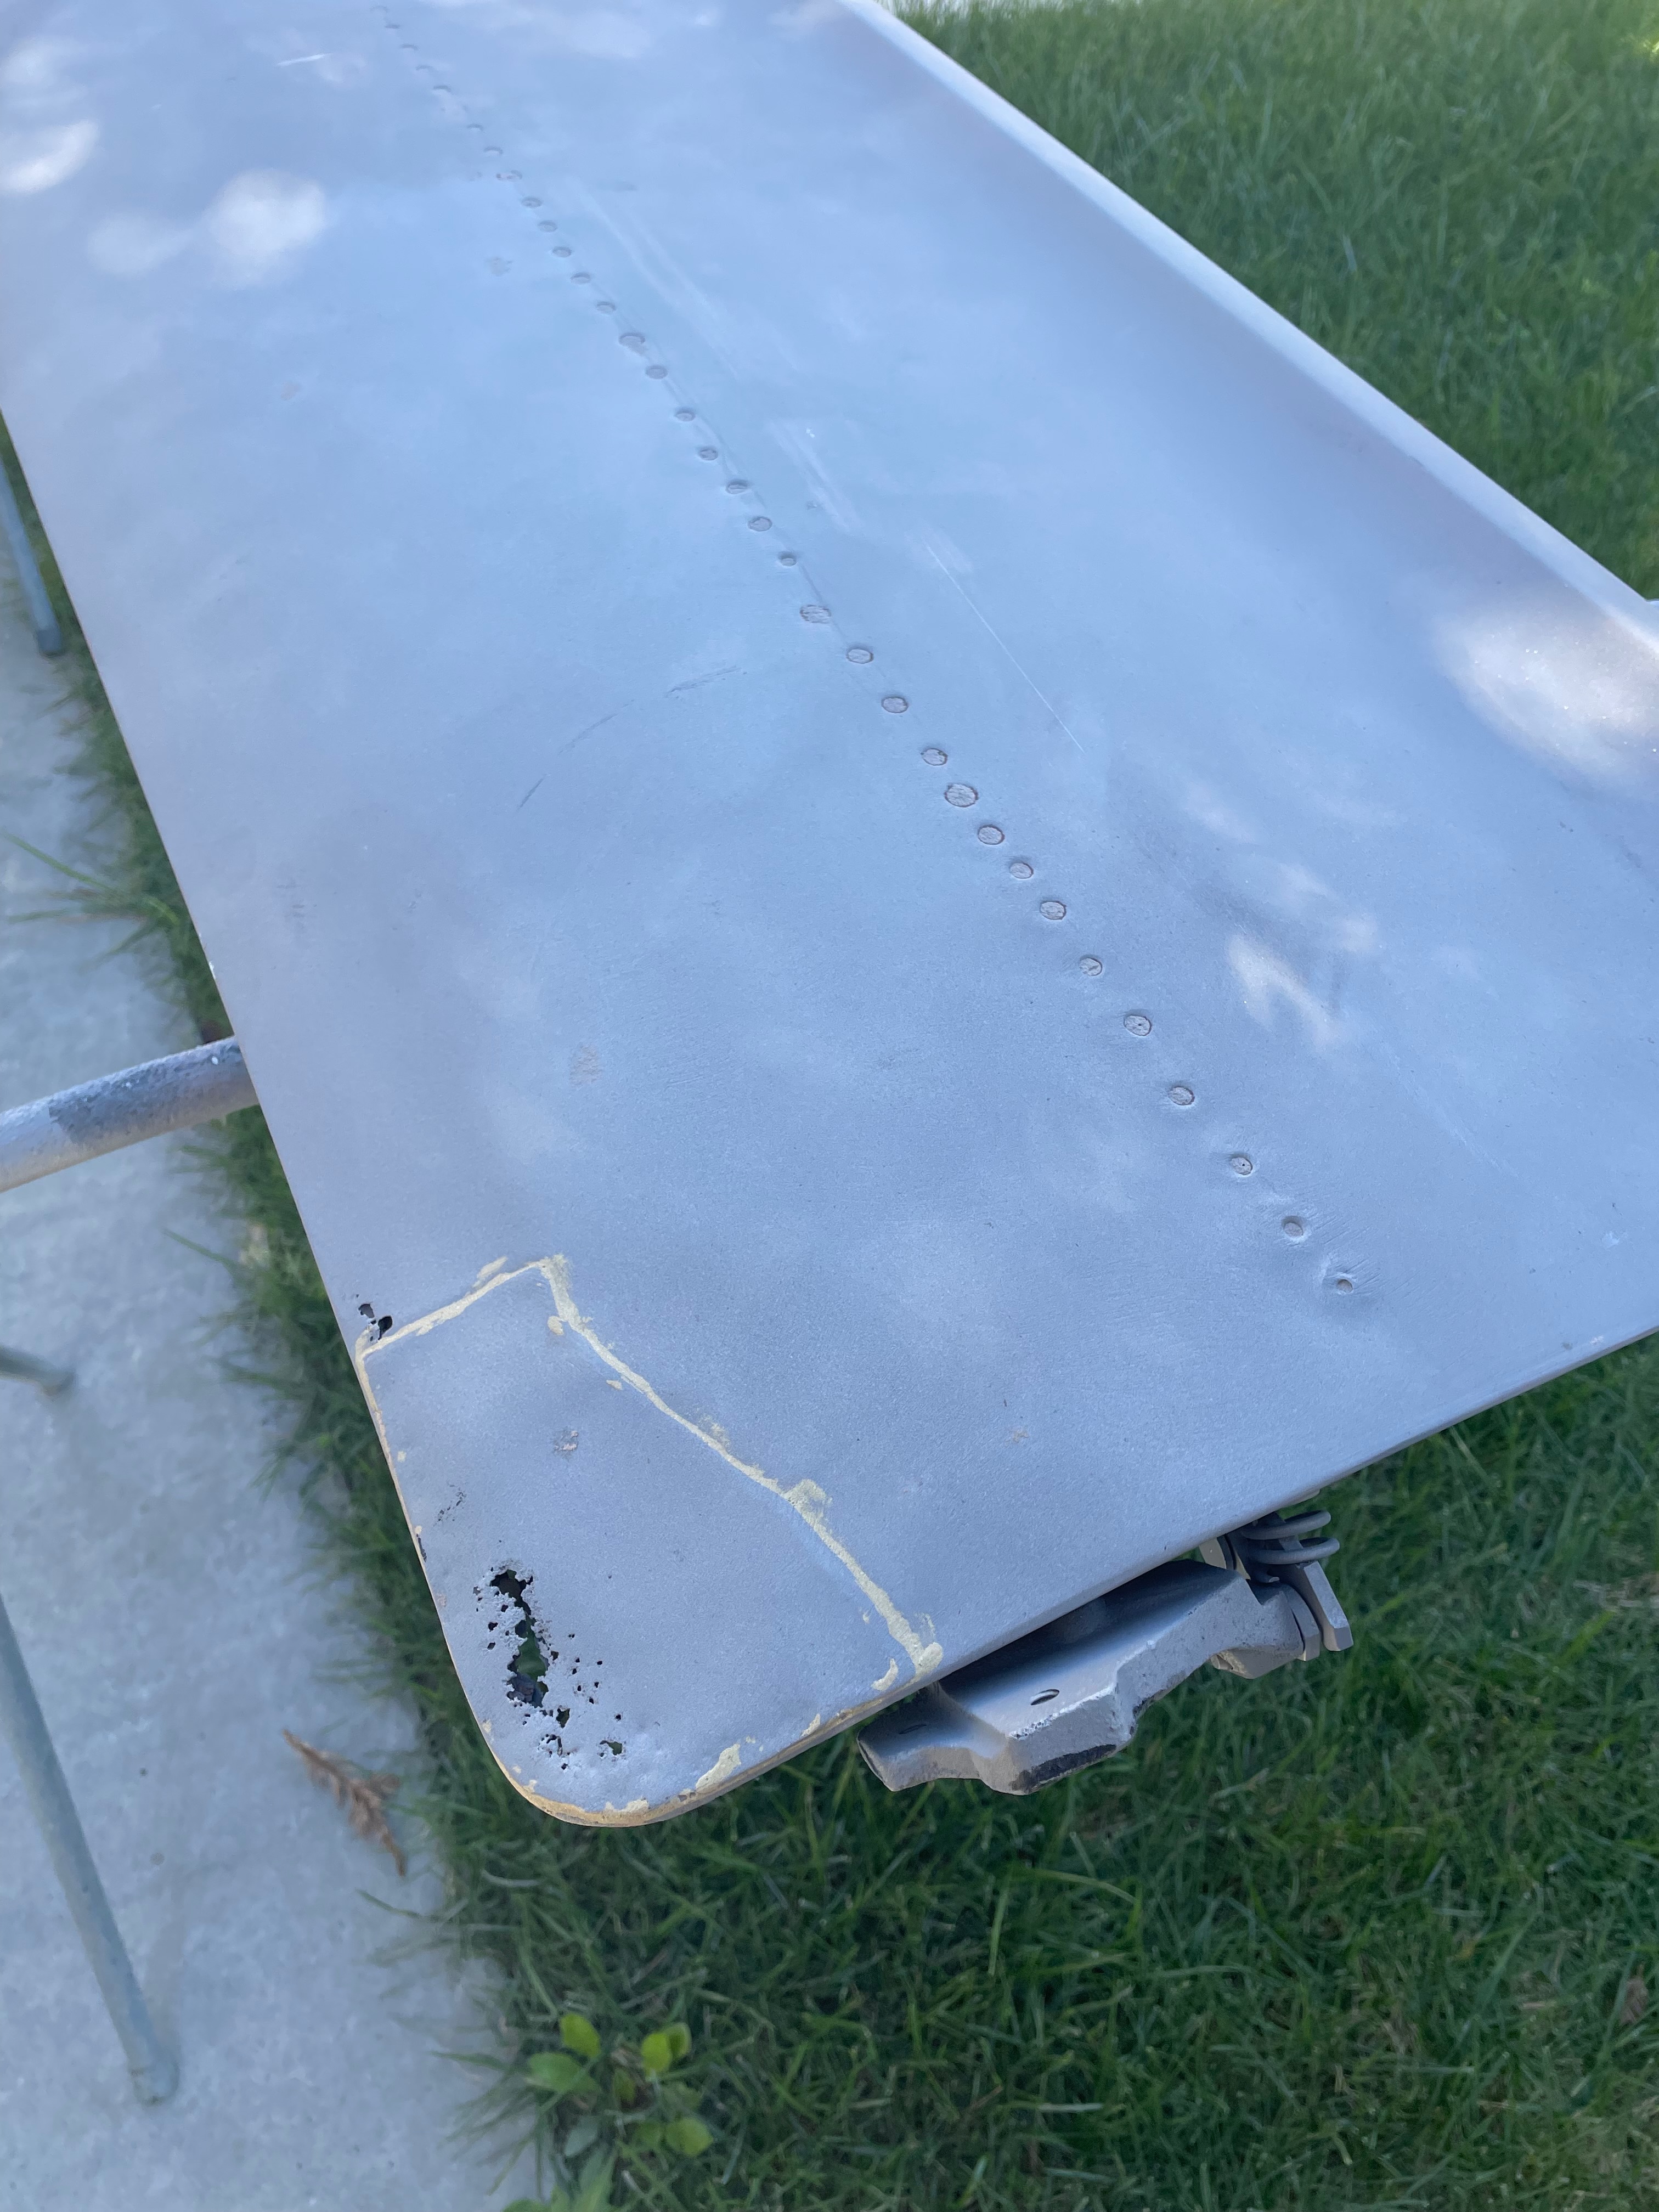
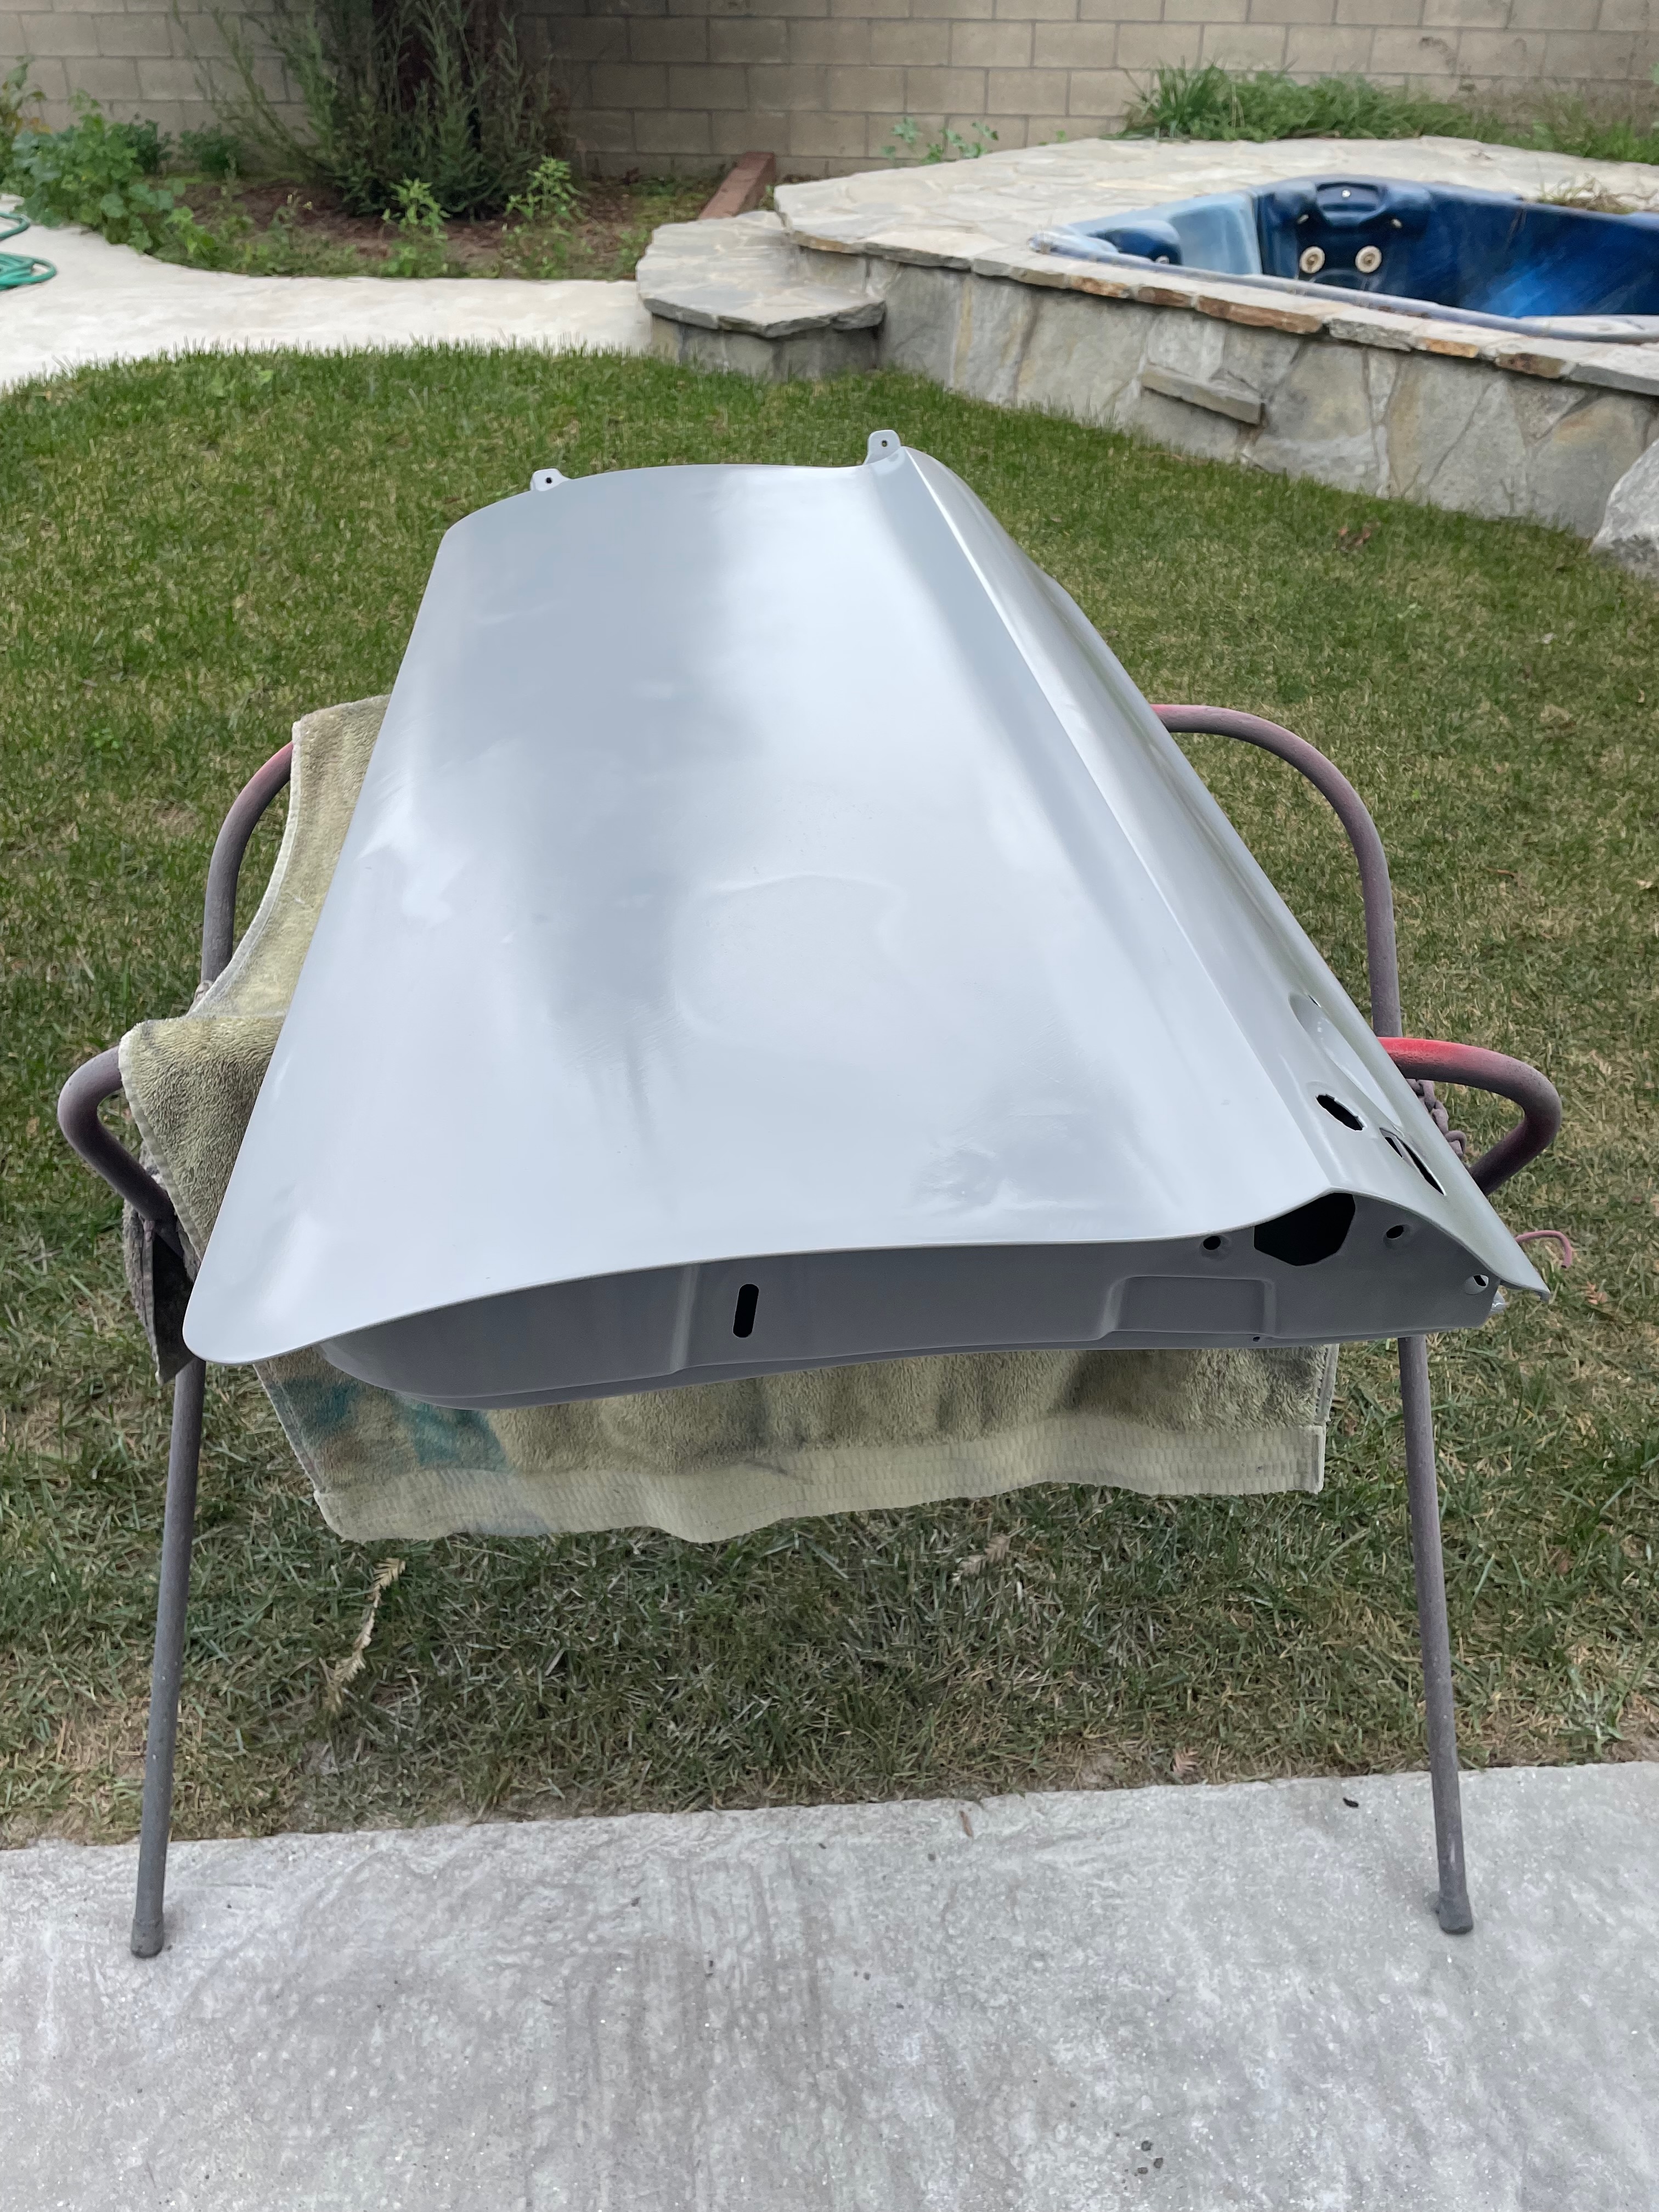
Body-Paint: Comprehensive Hood Preparation
Preparing both the exterior and underside of the hood with primer, ensuring complete protection against future corrosion and a proper foundation for paint.
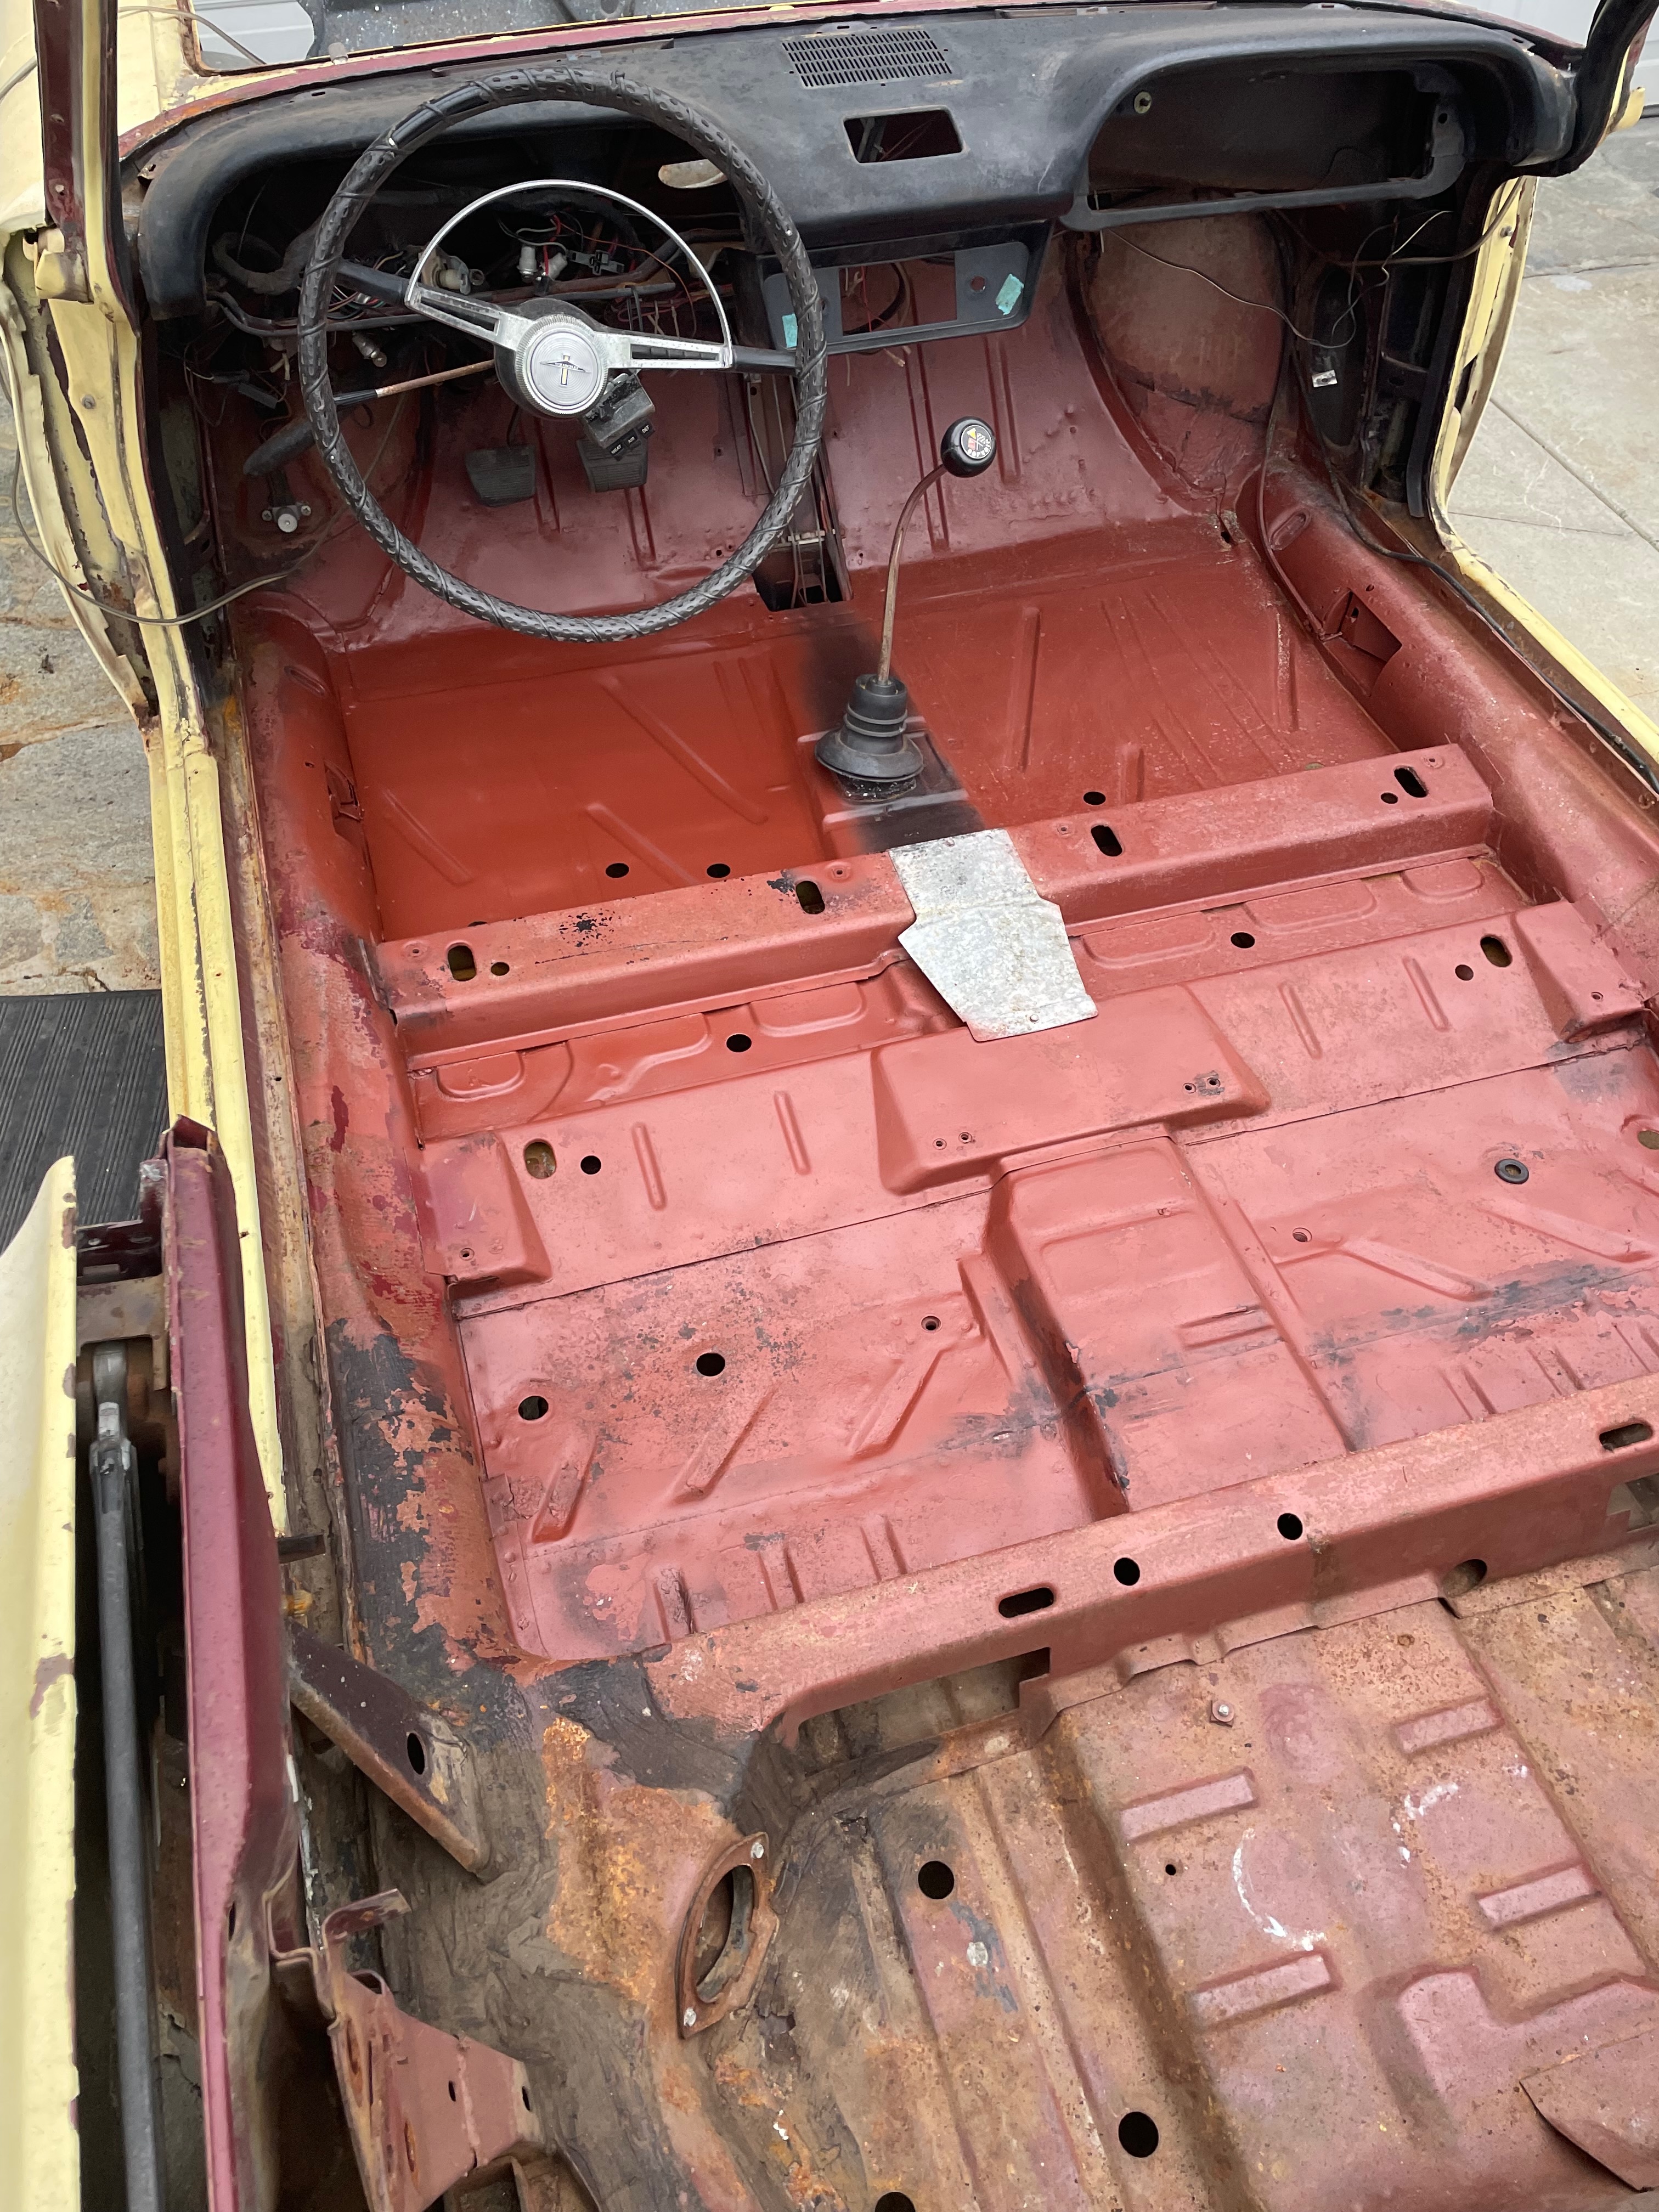
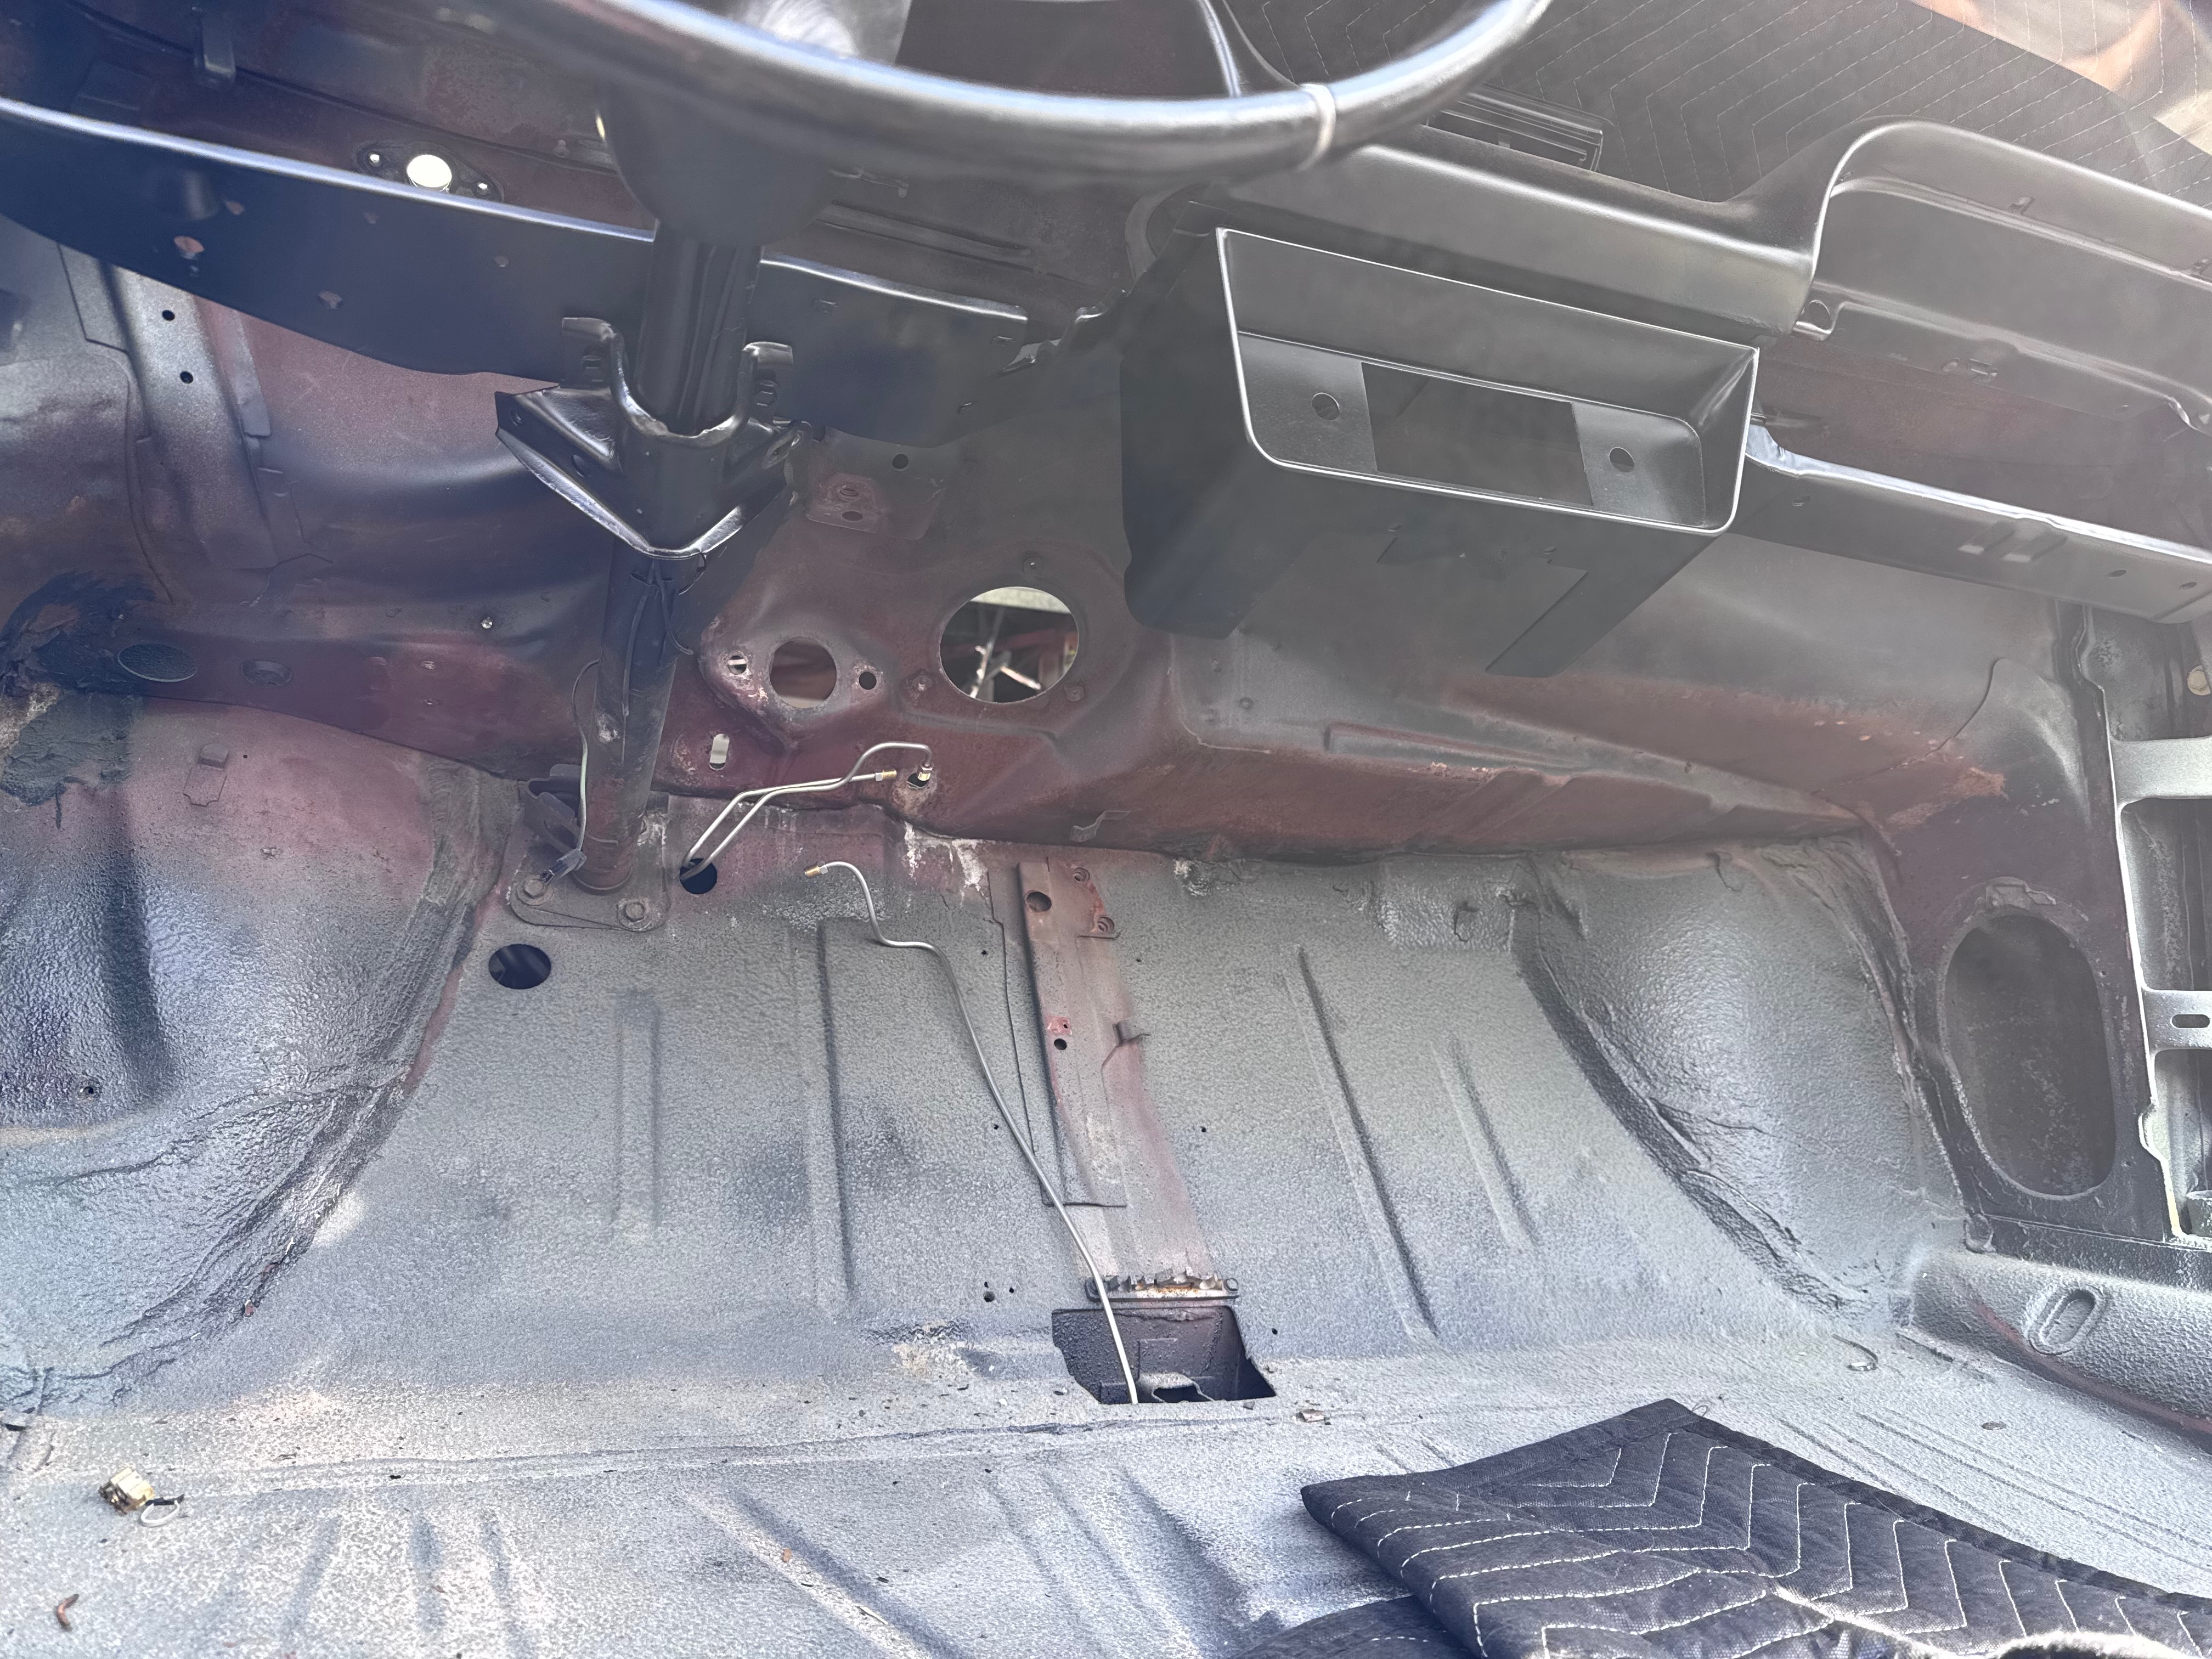
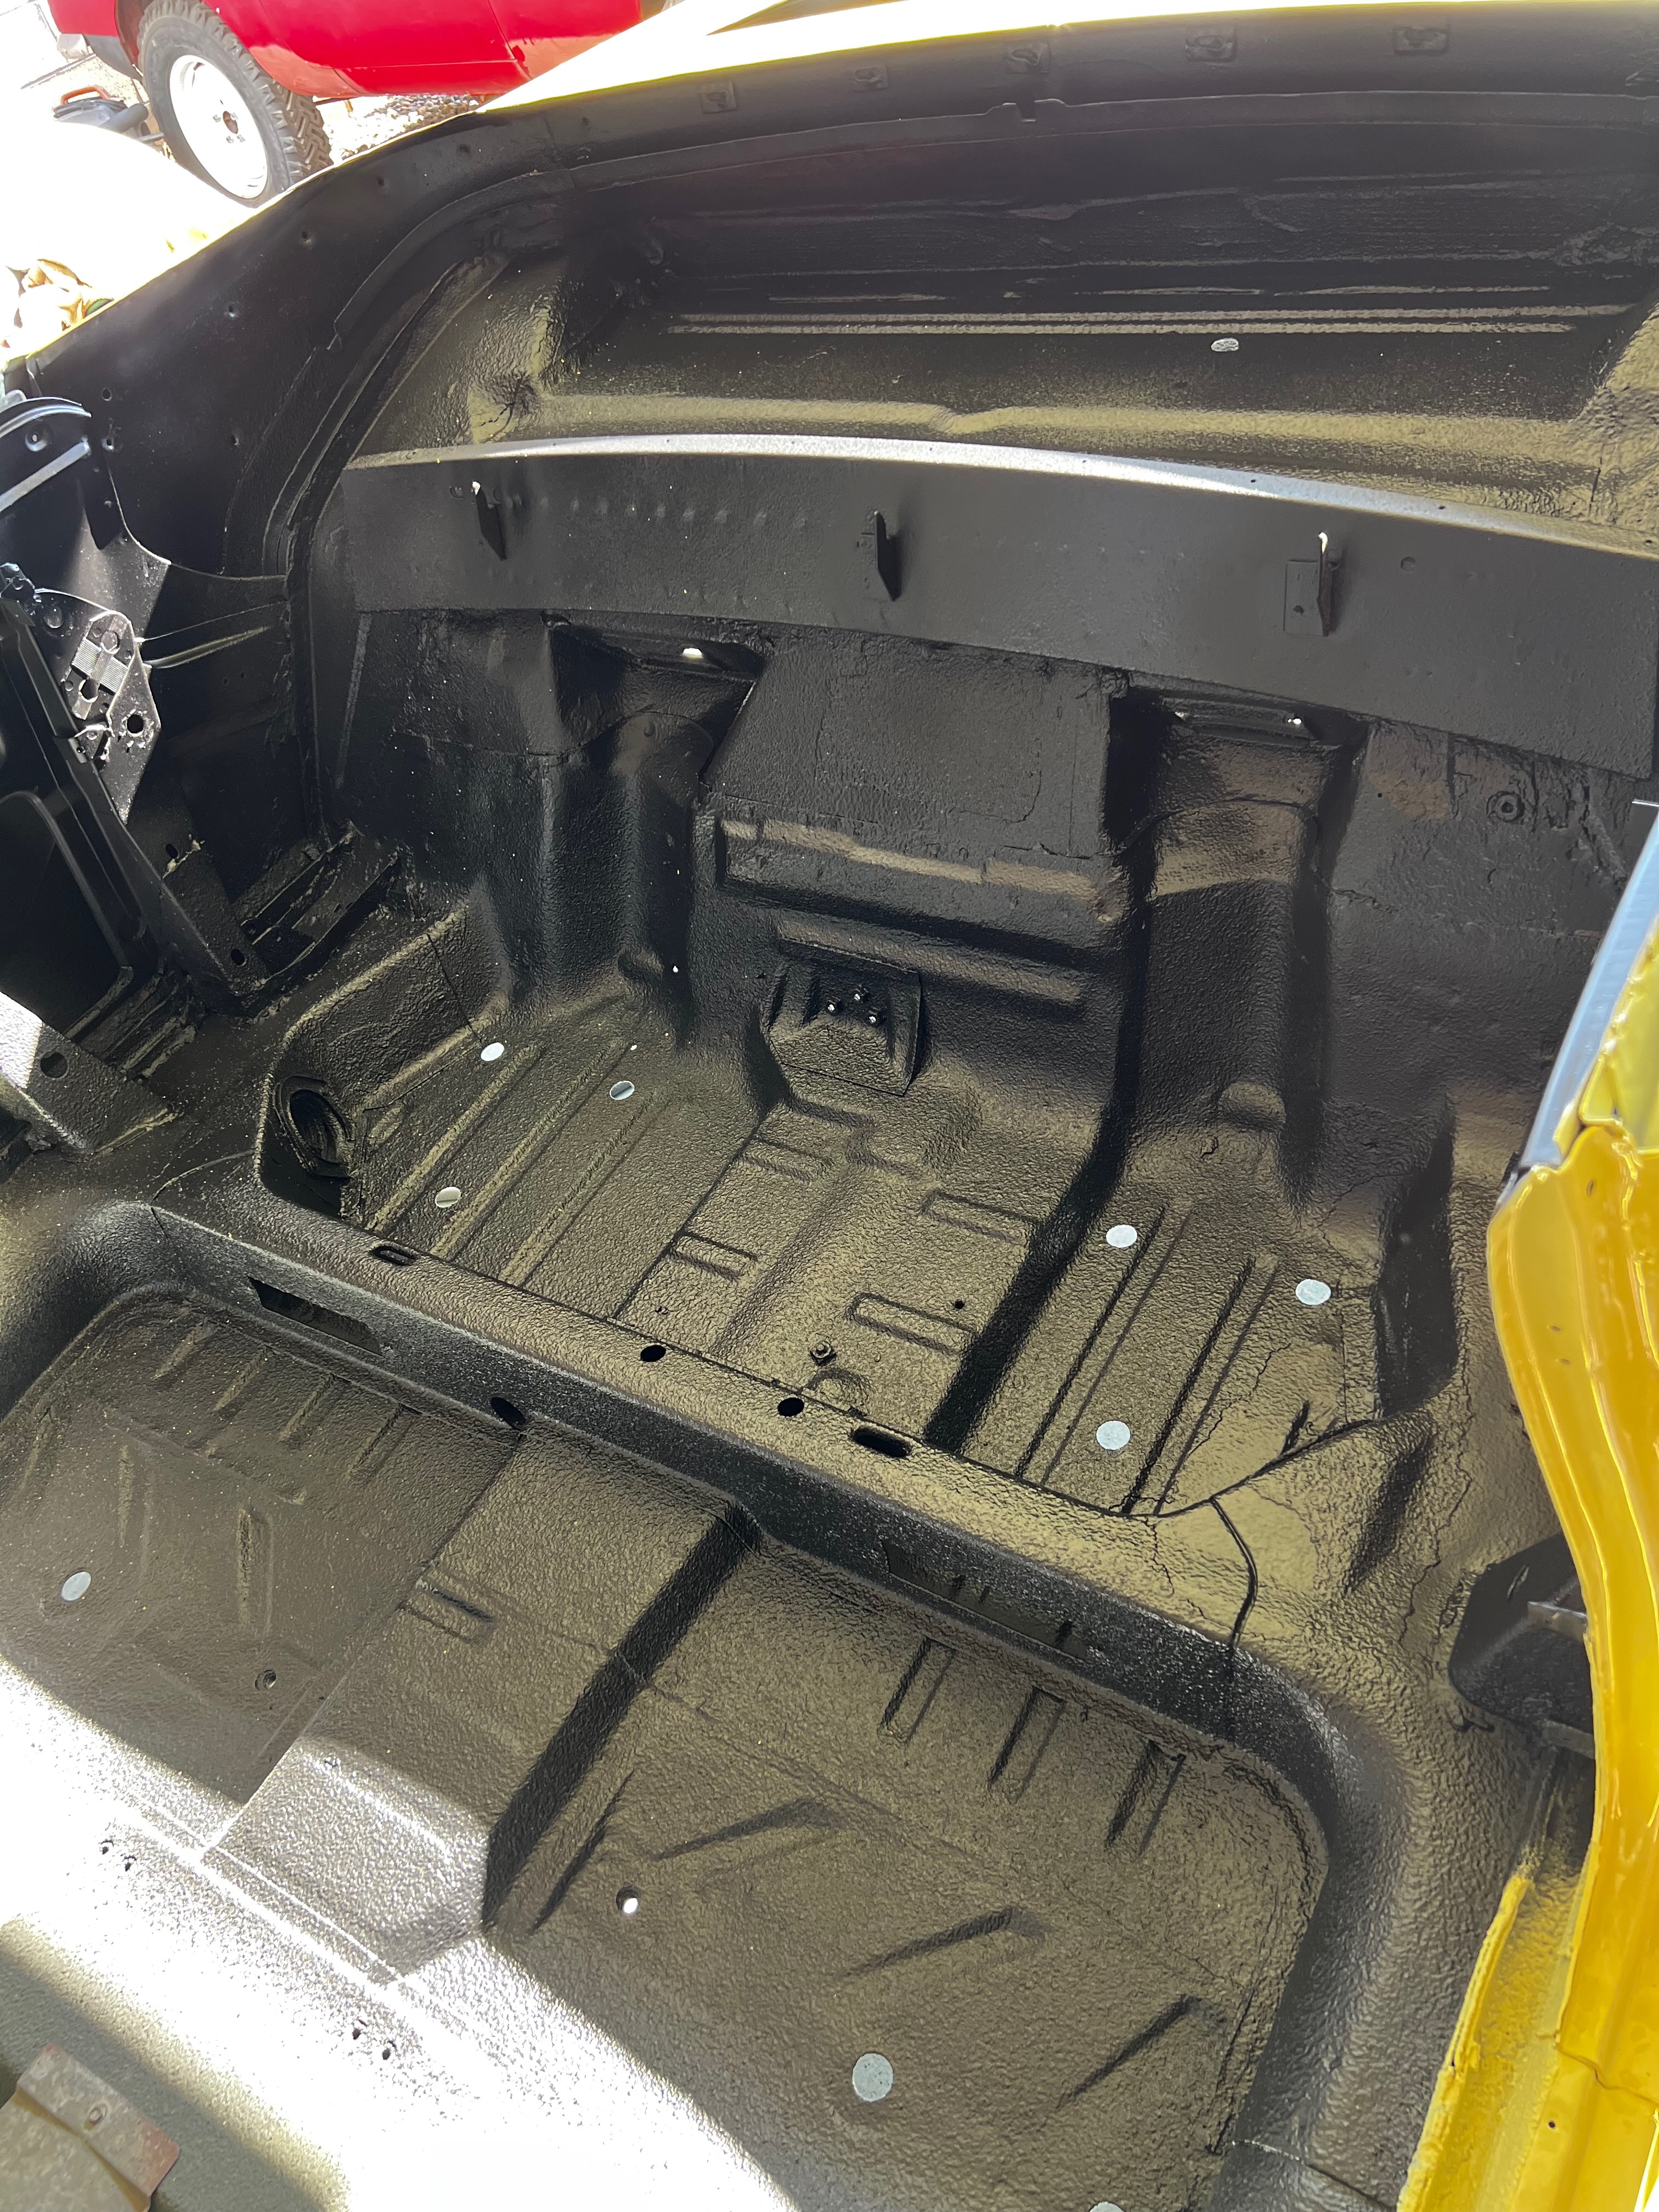
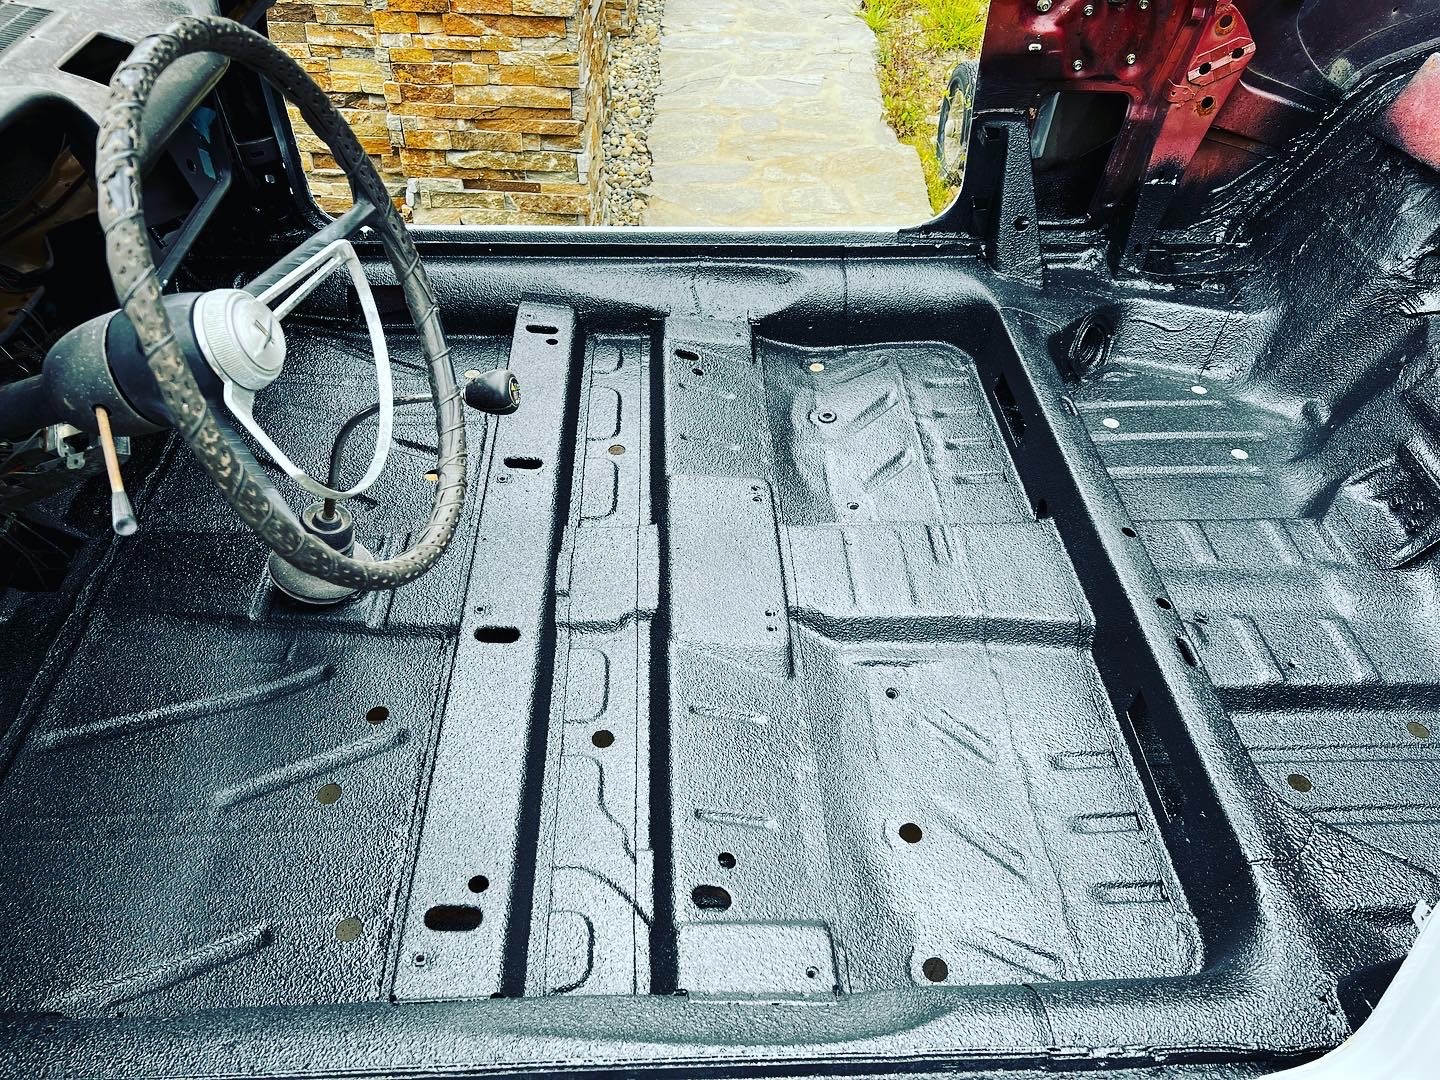
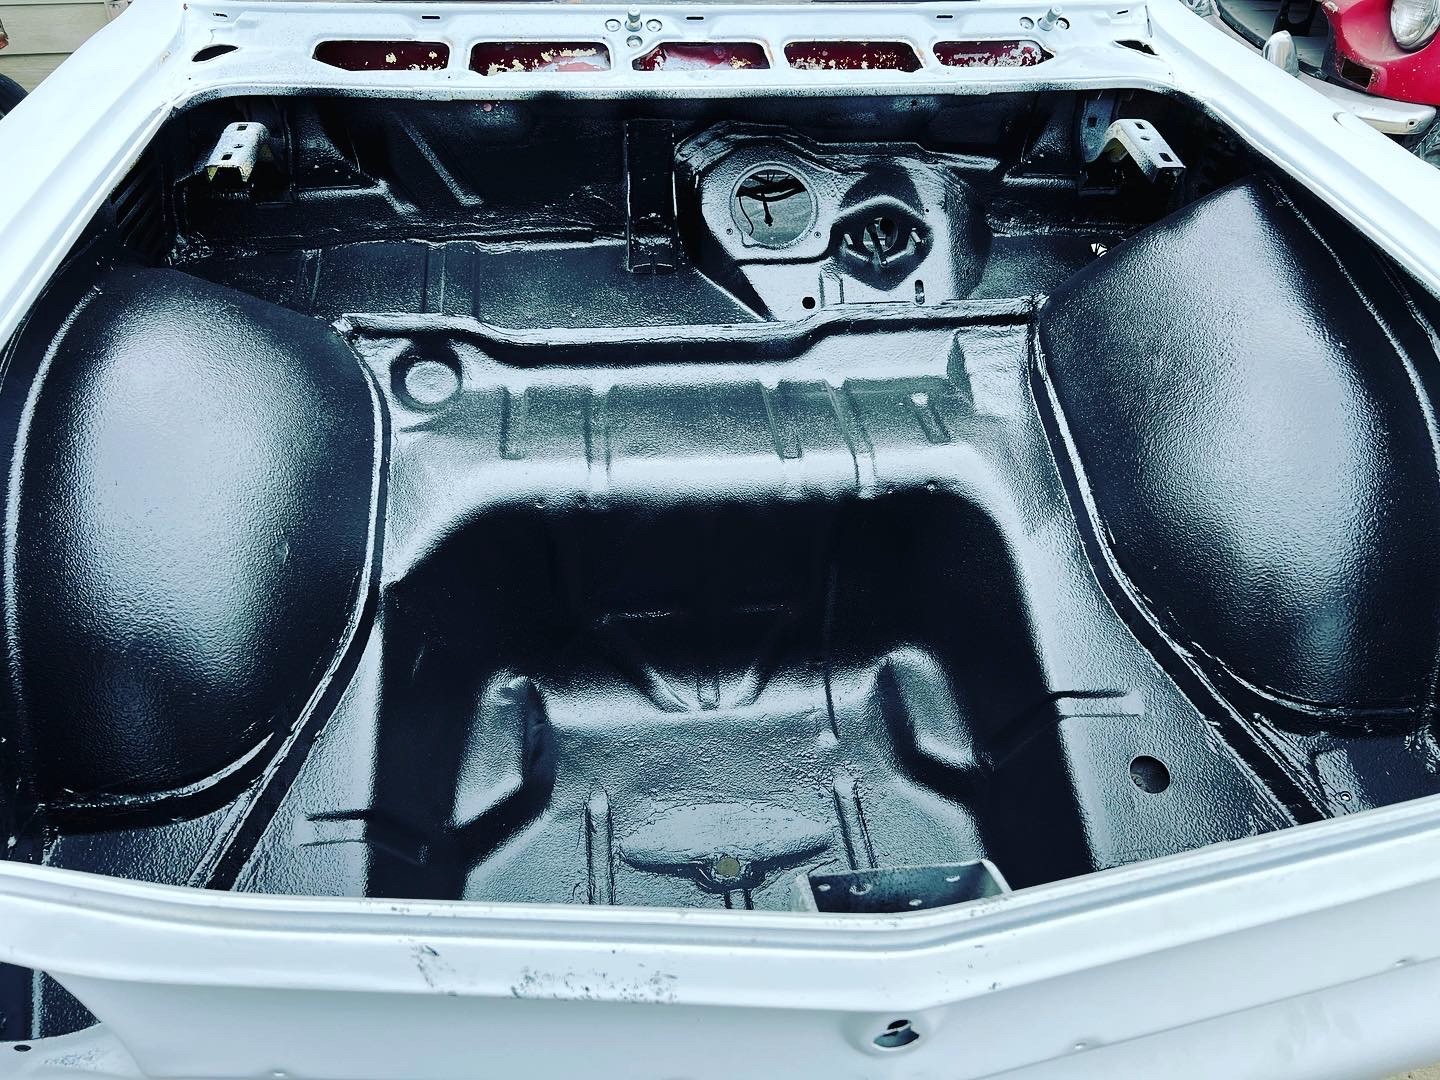
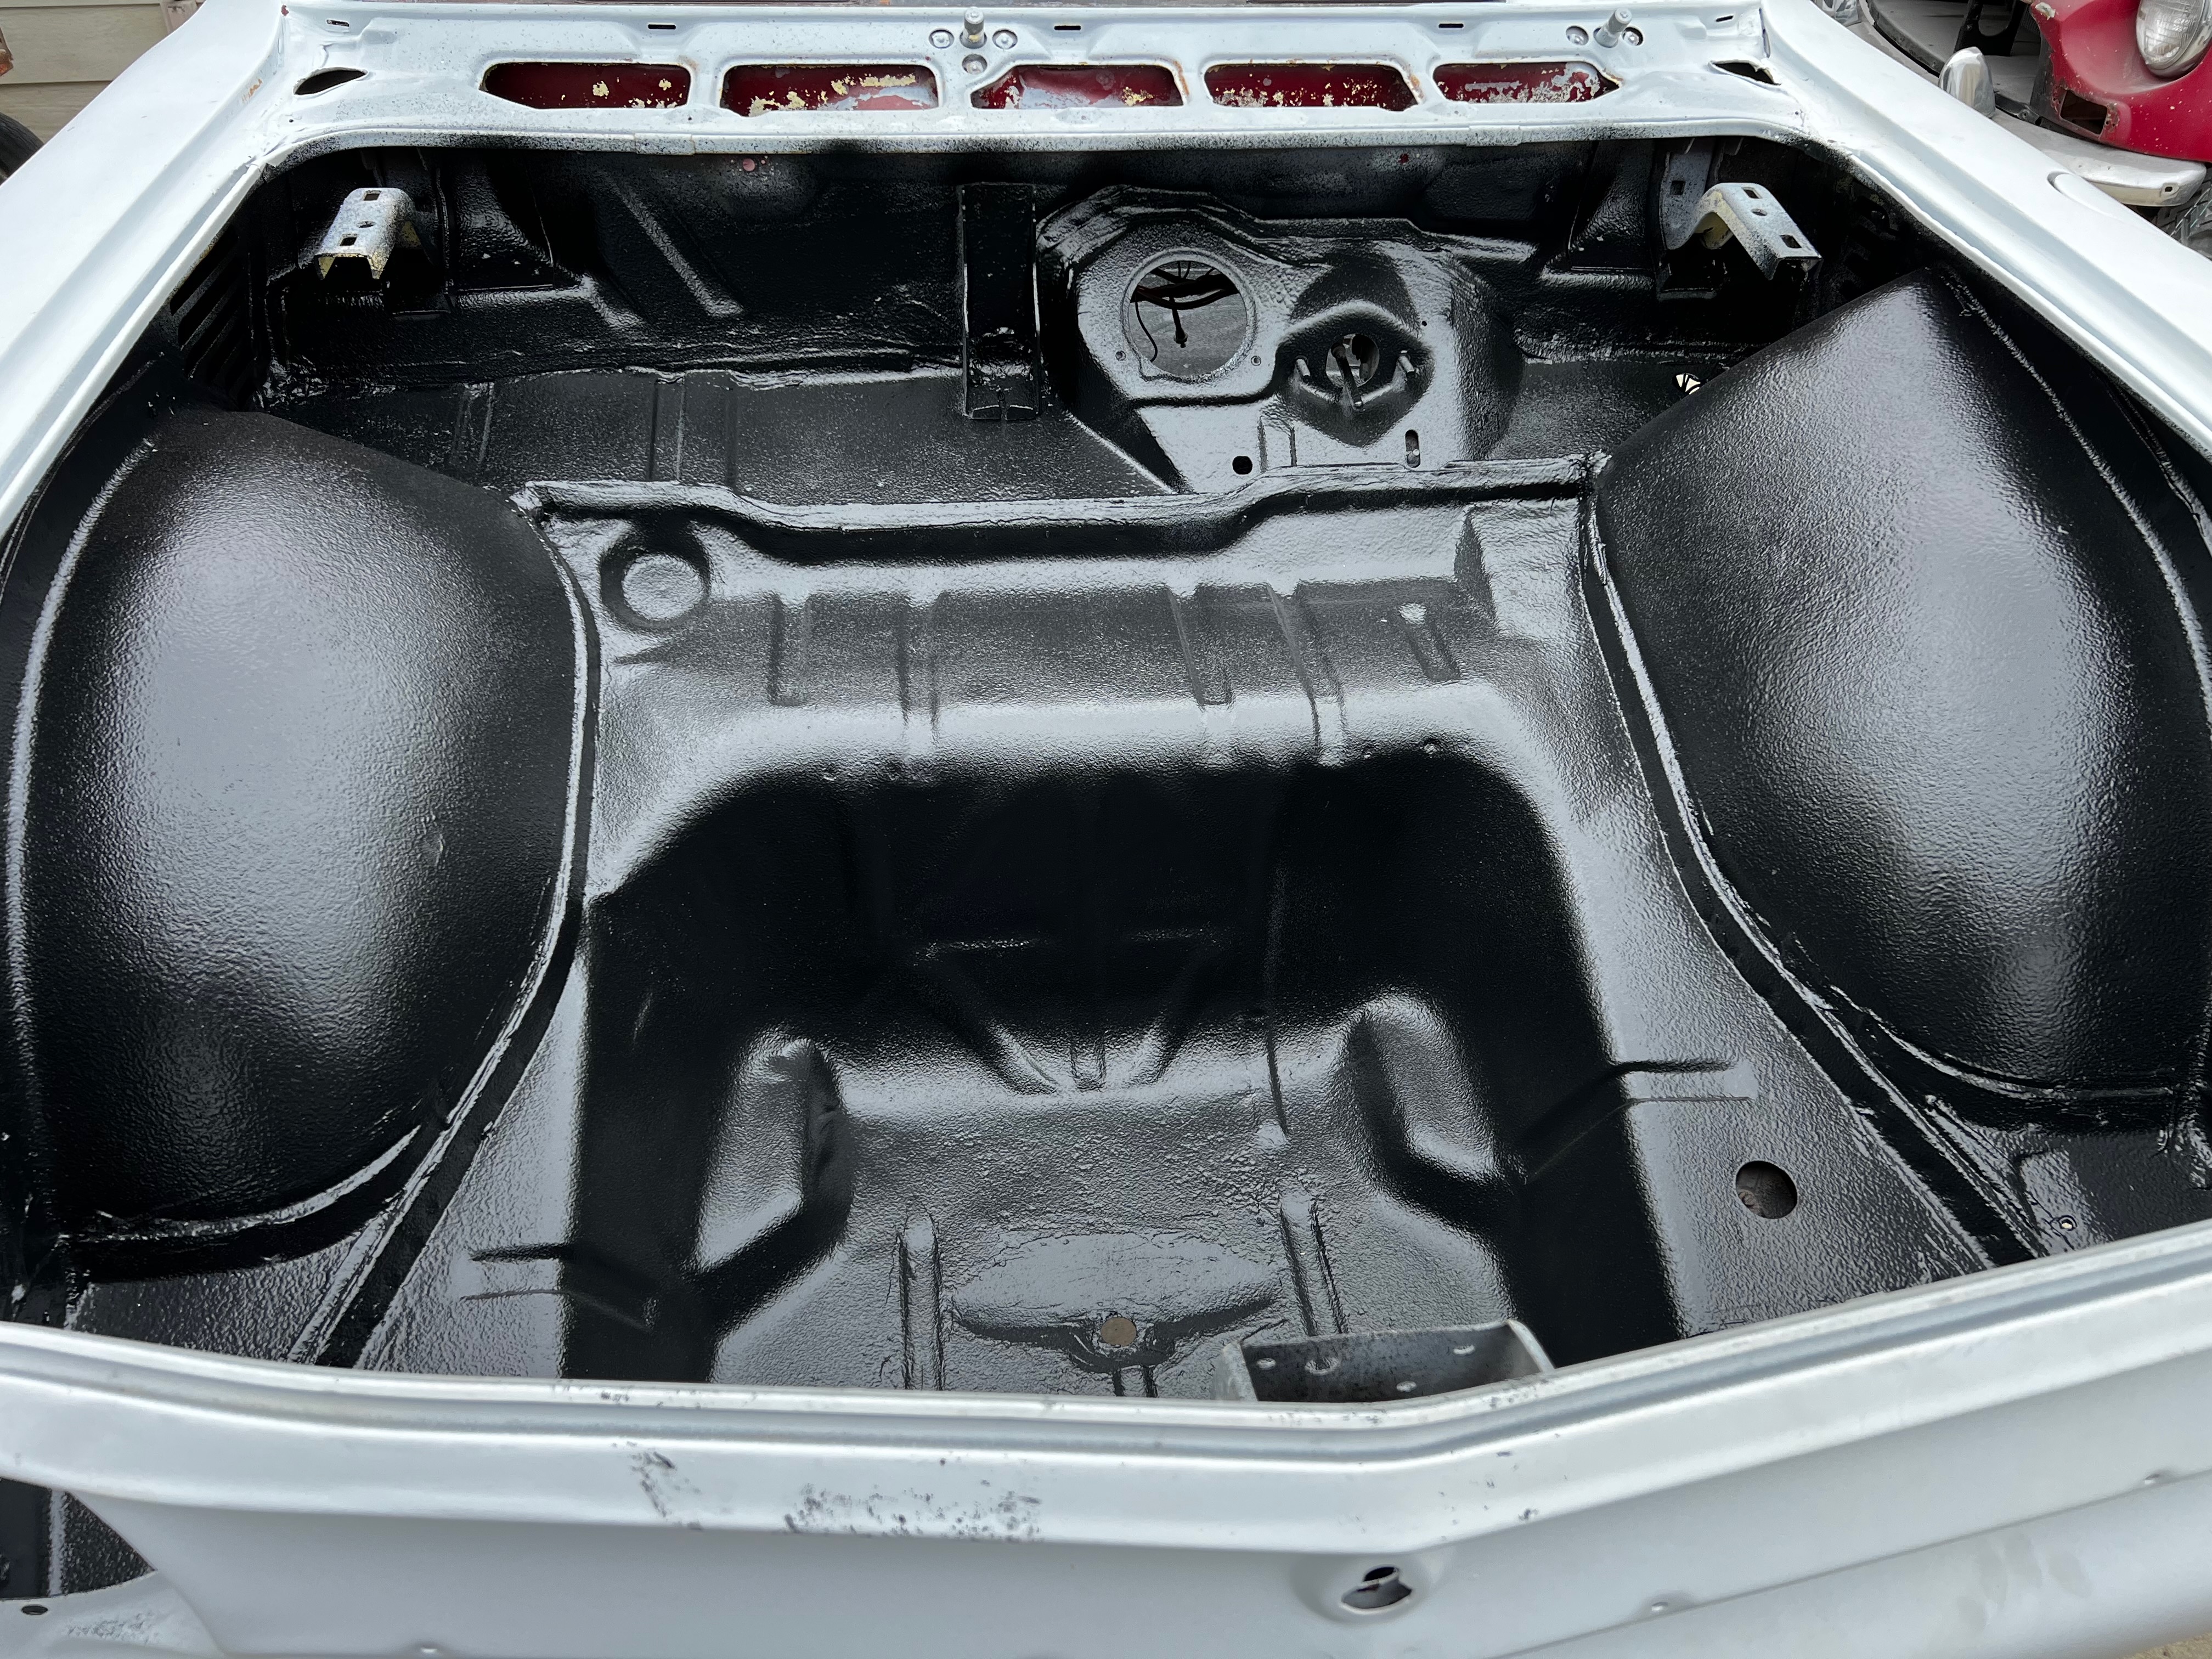
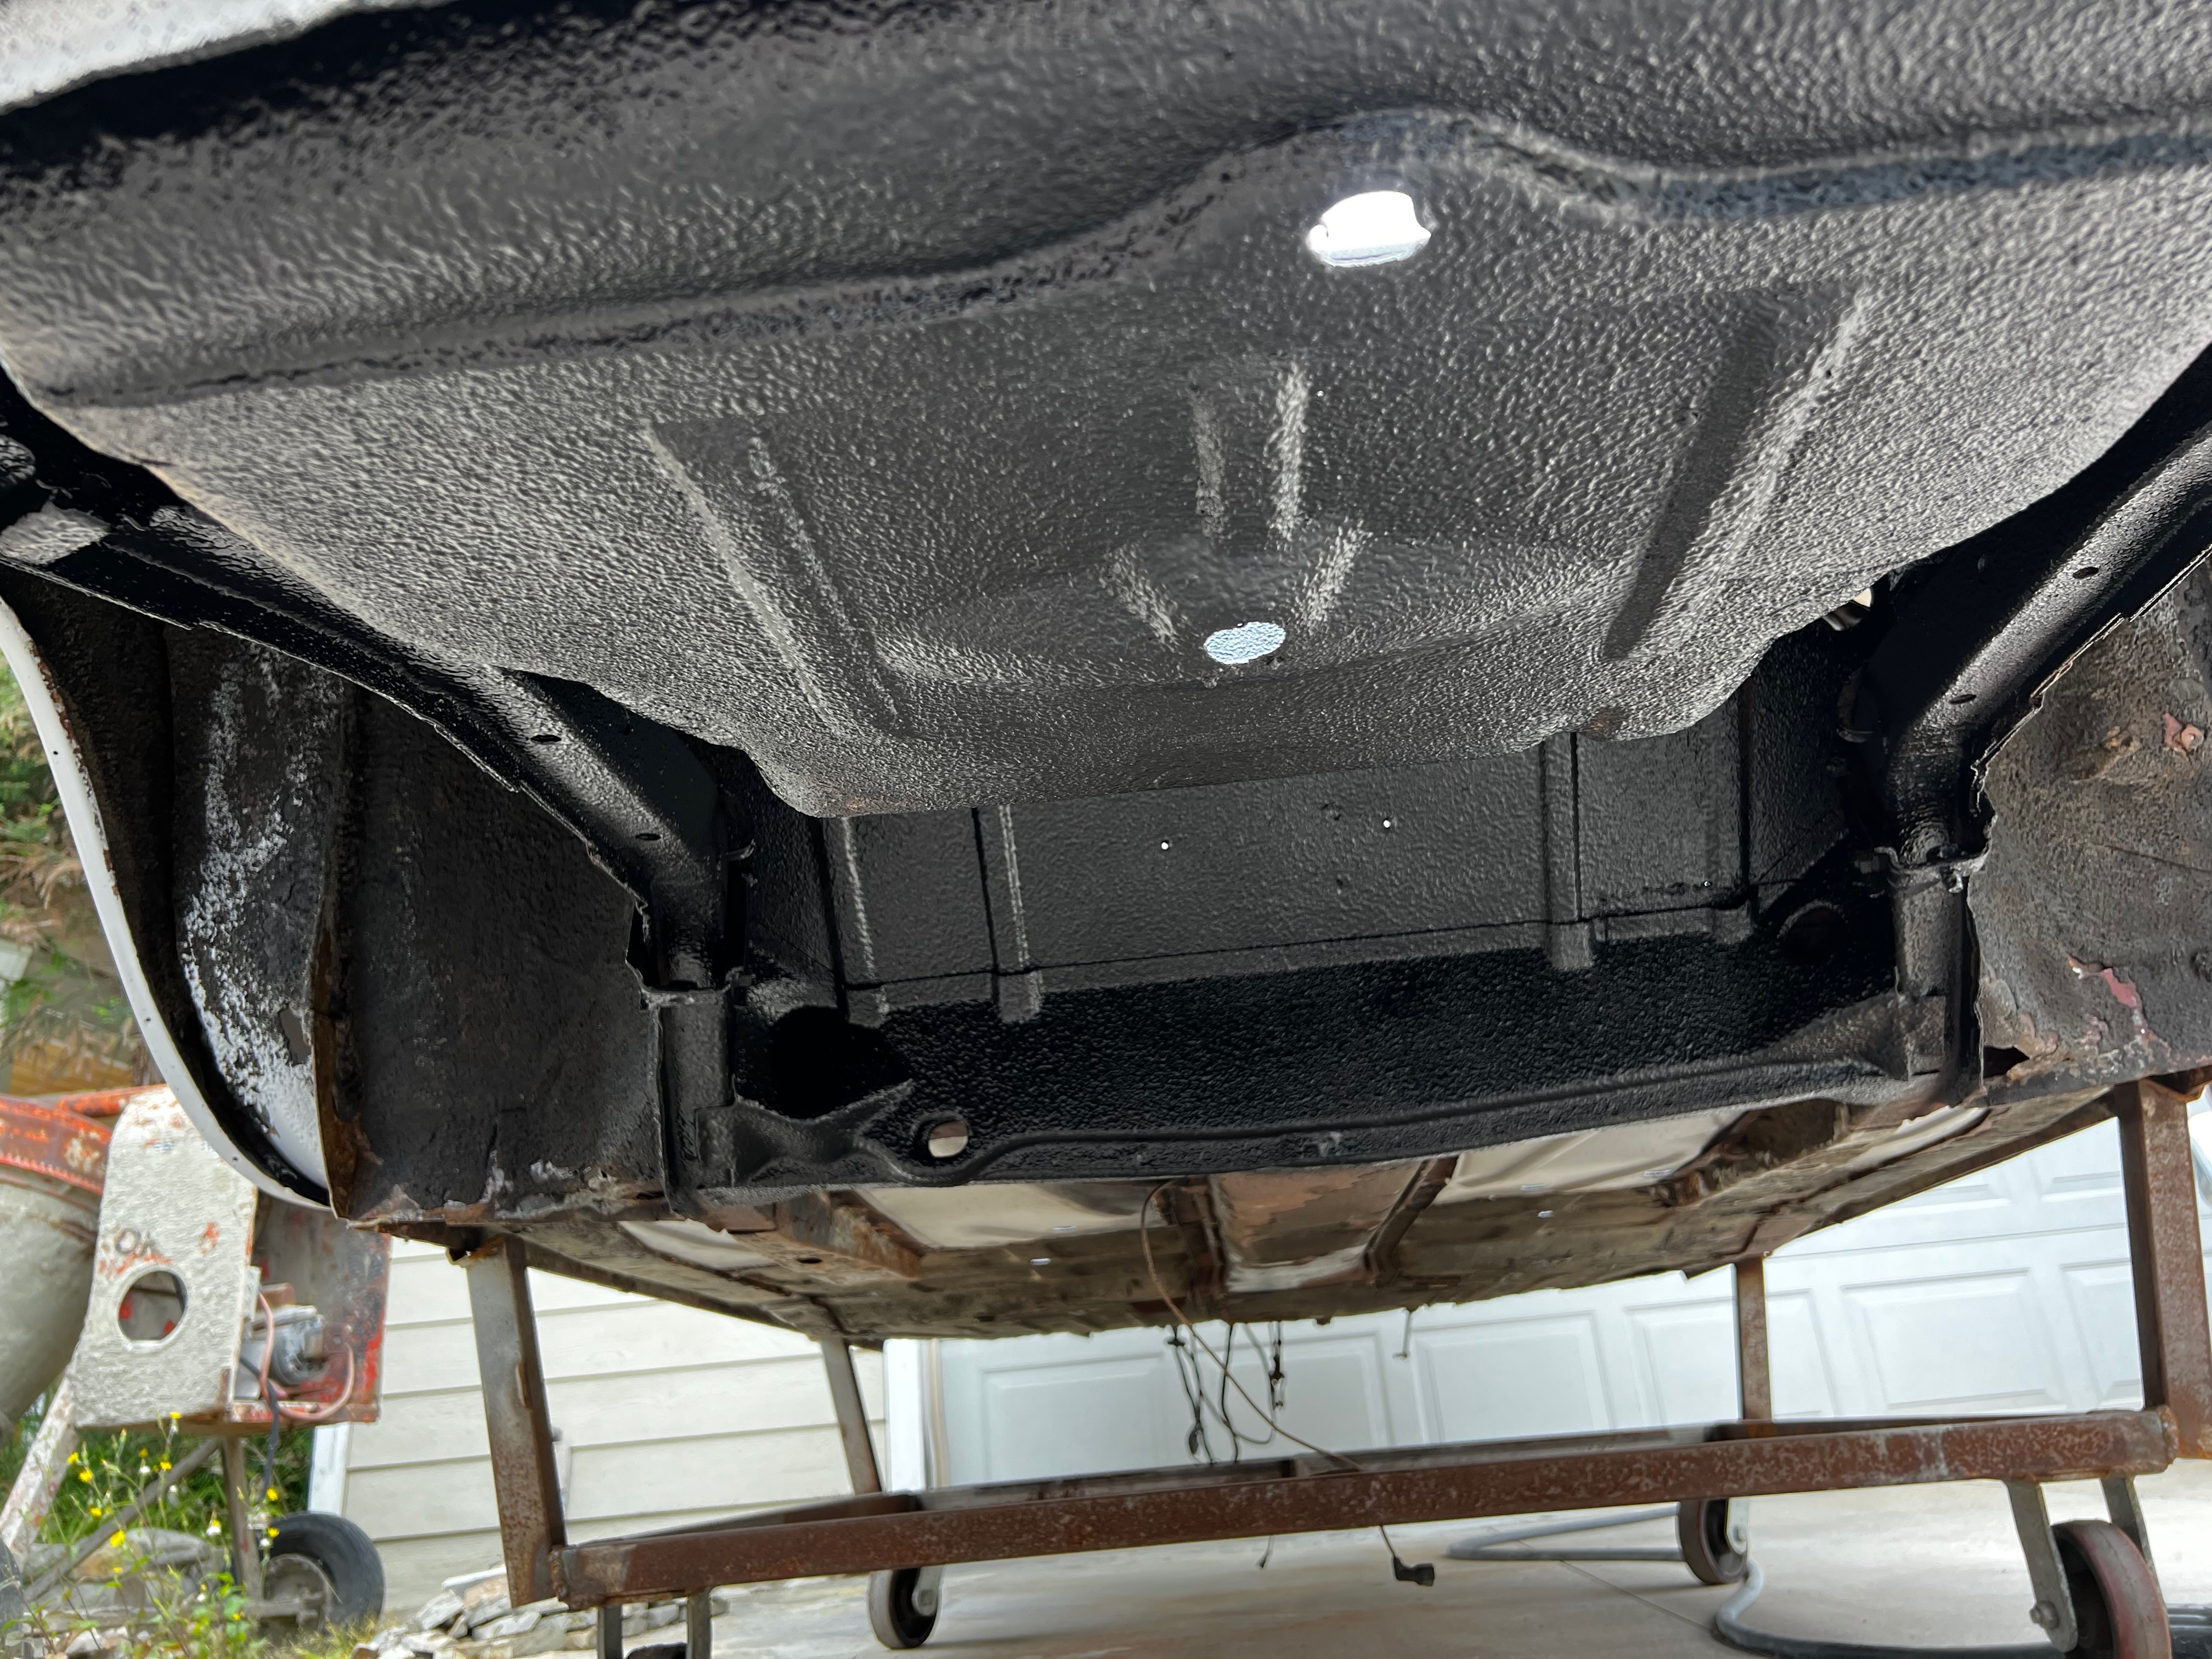
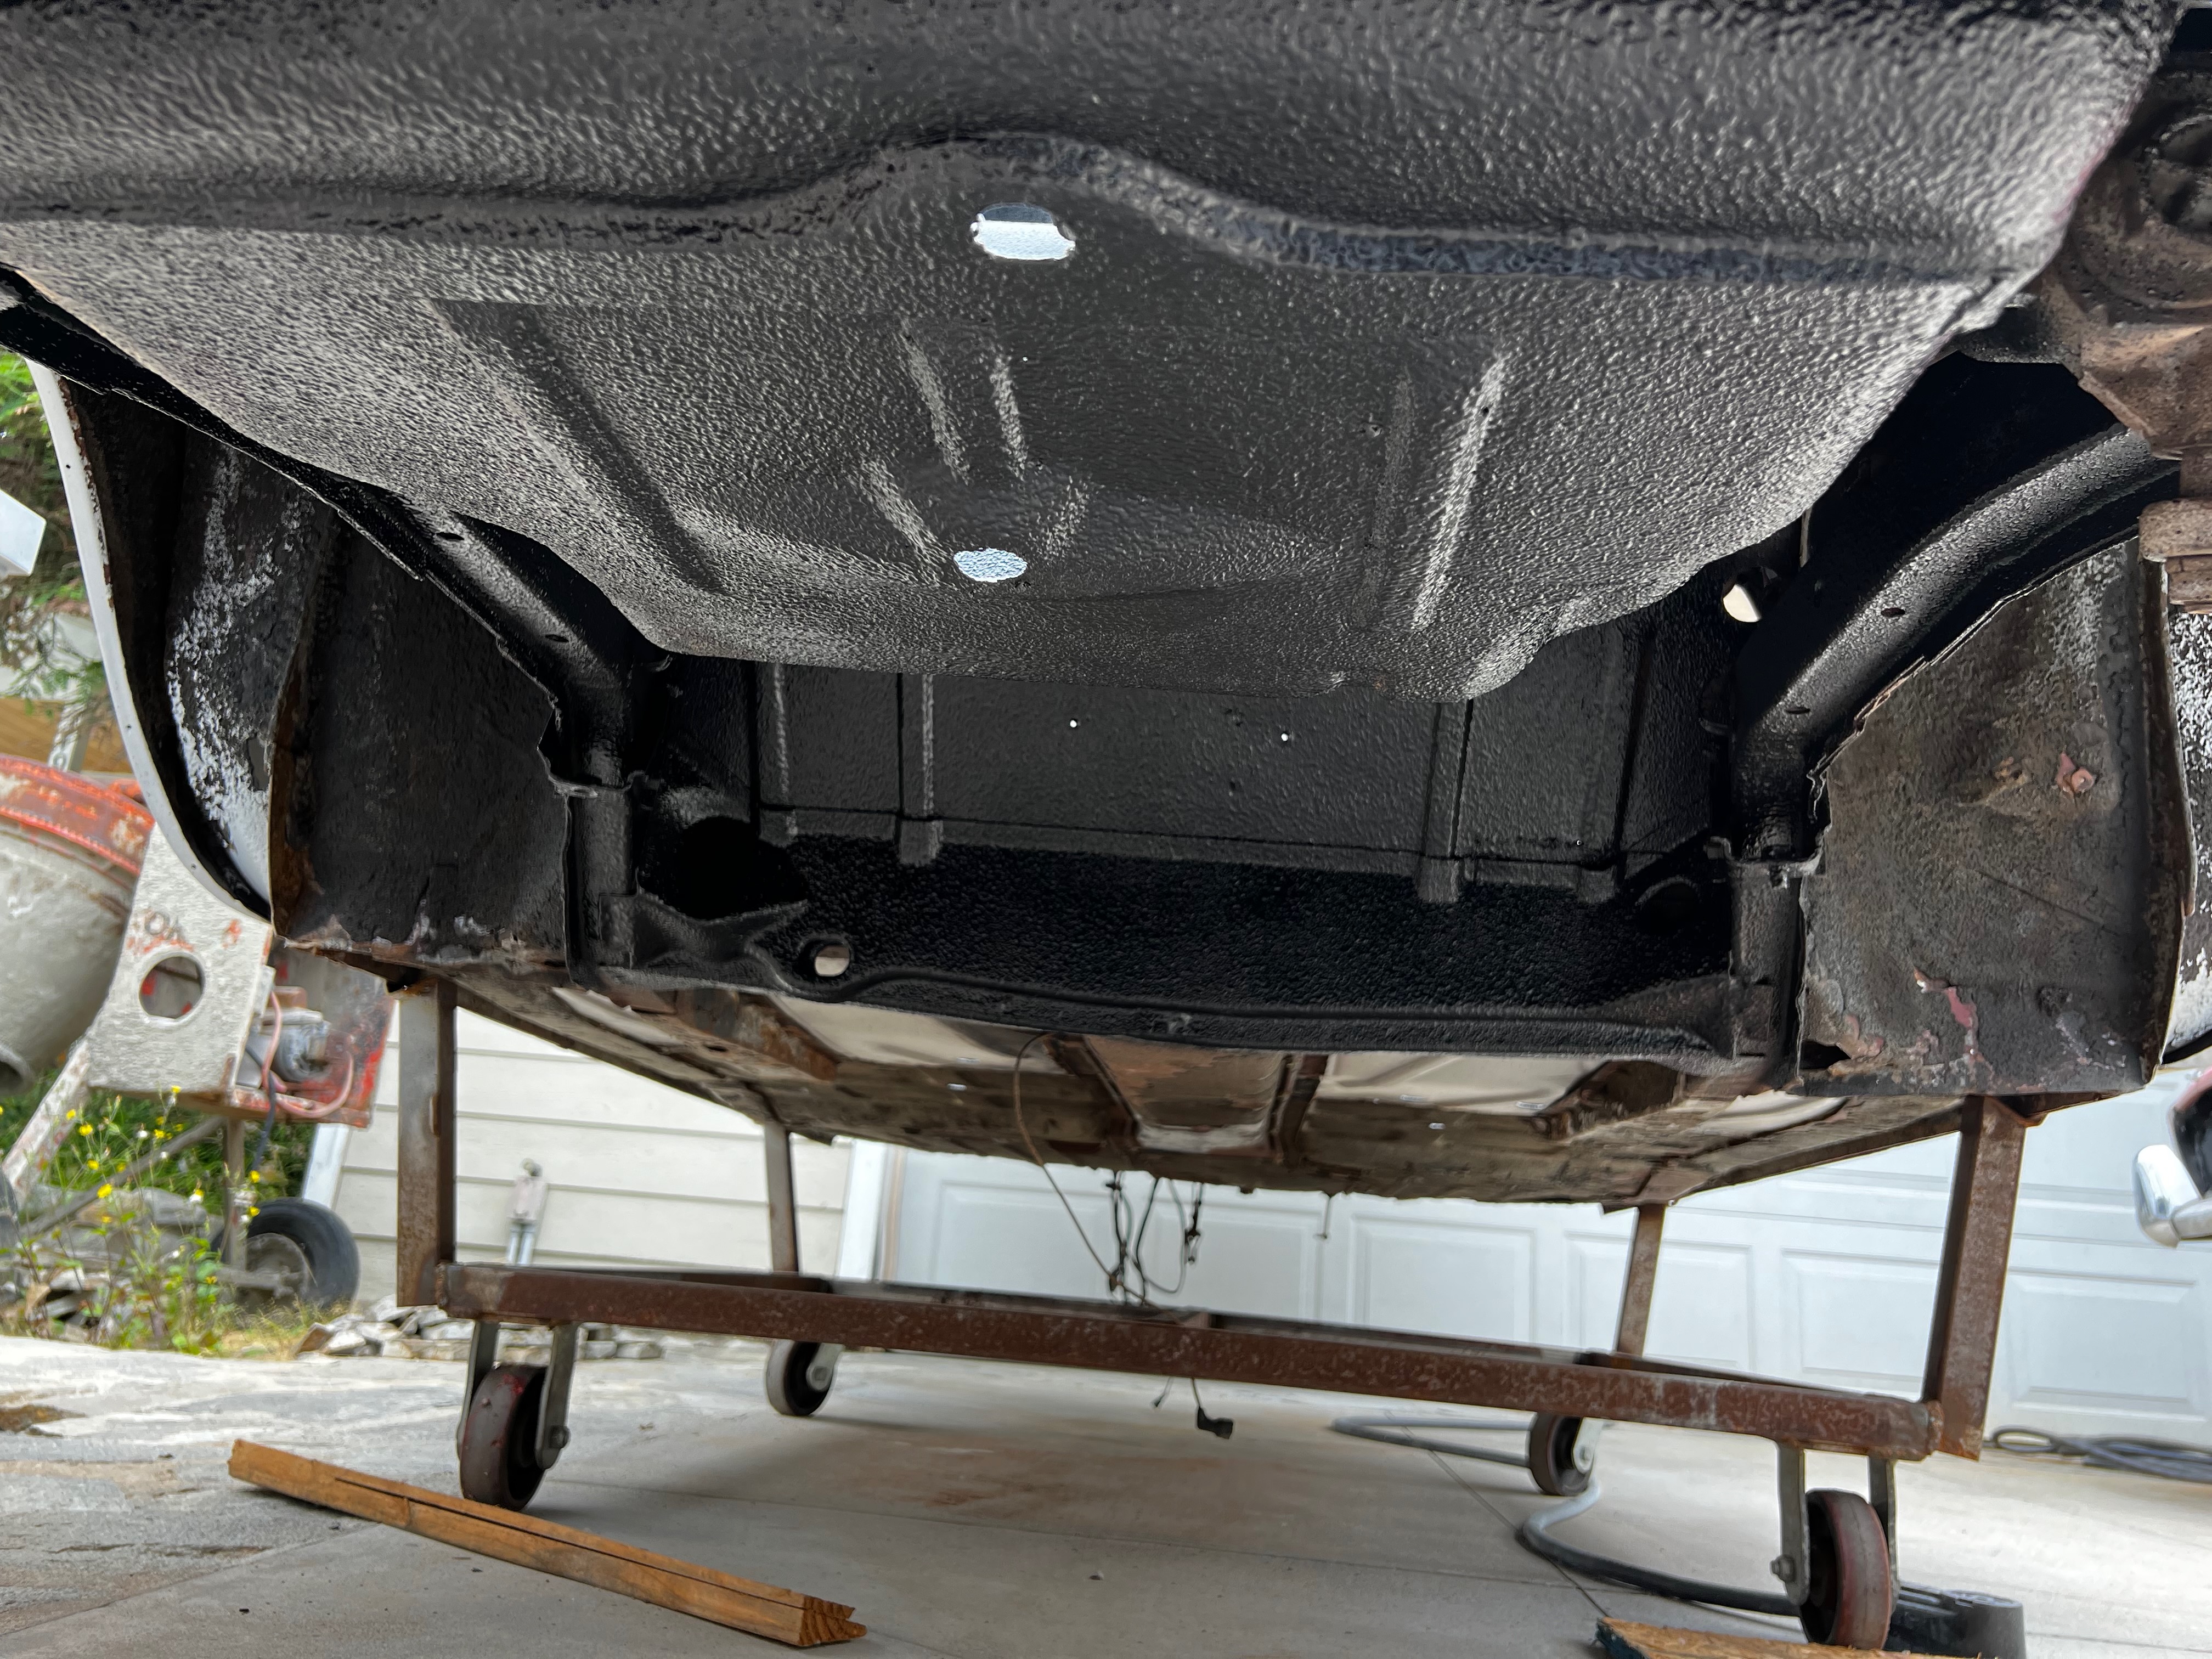
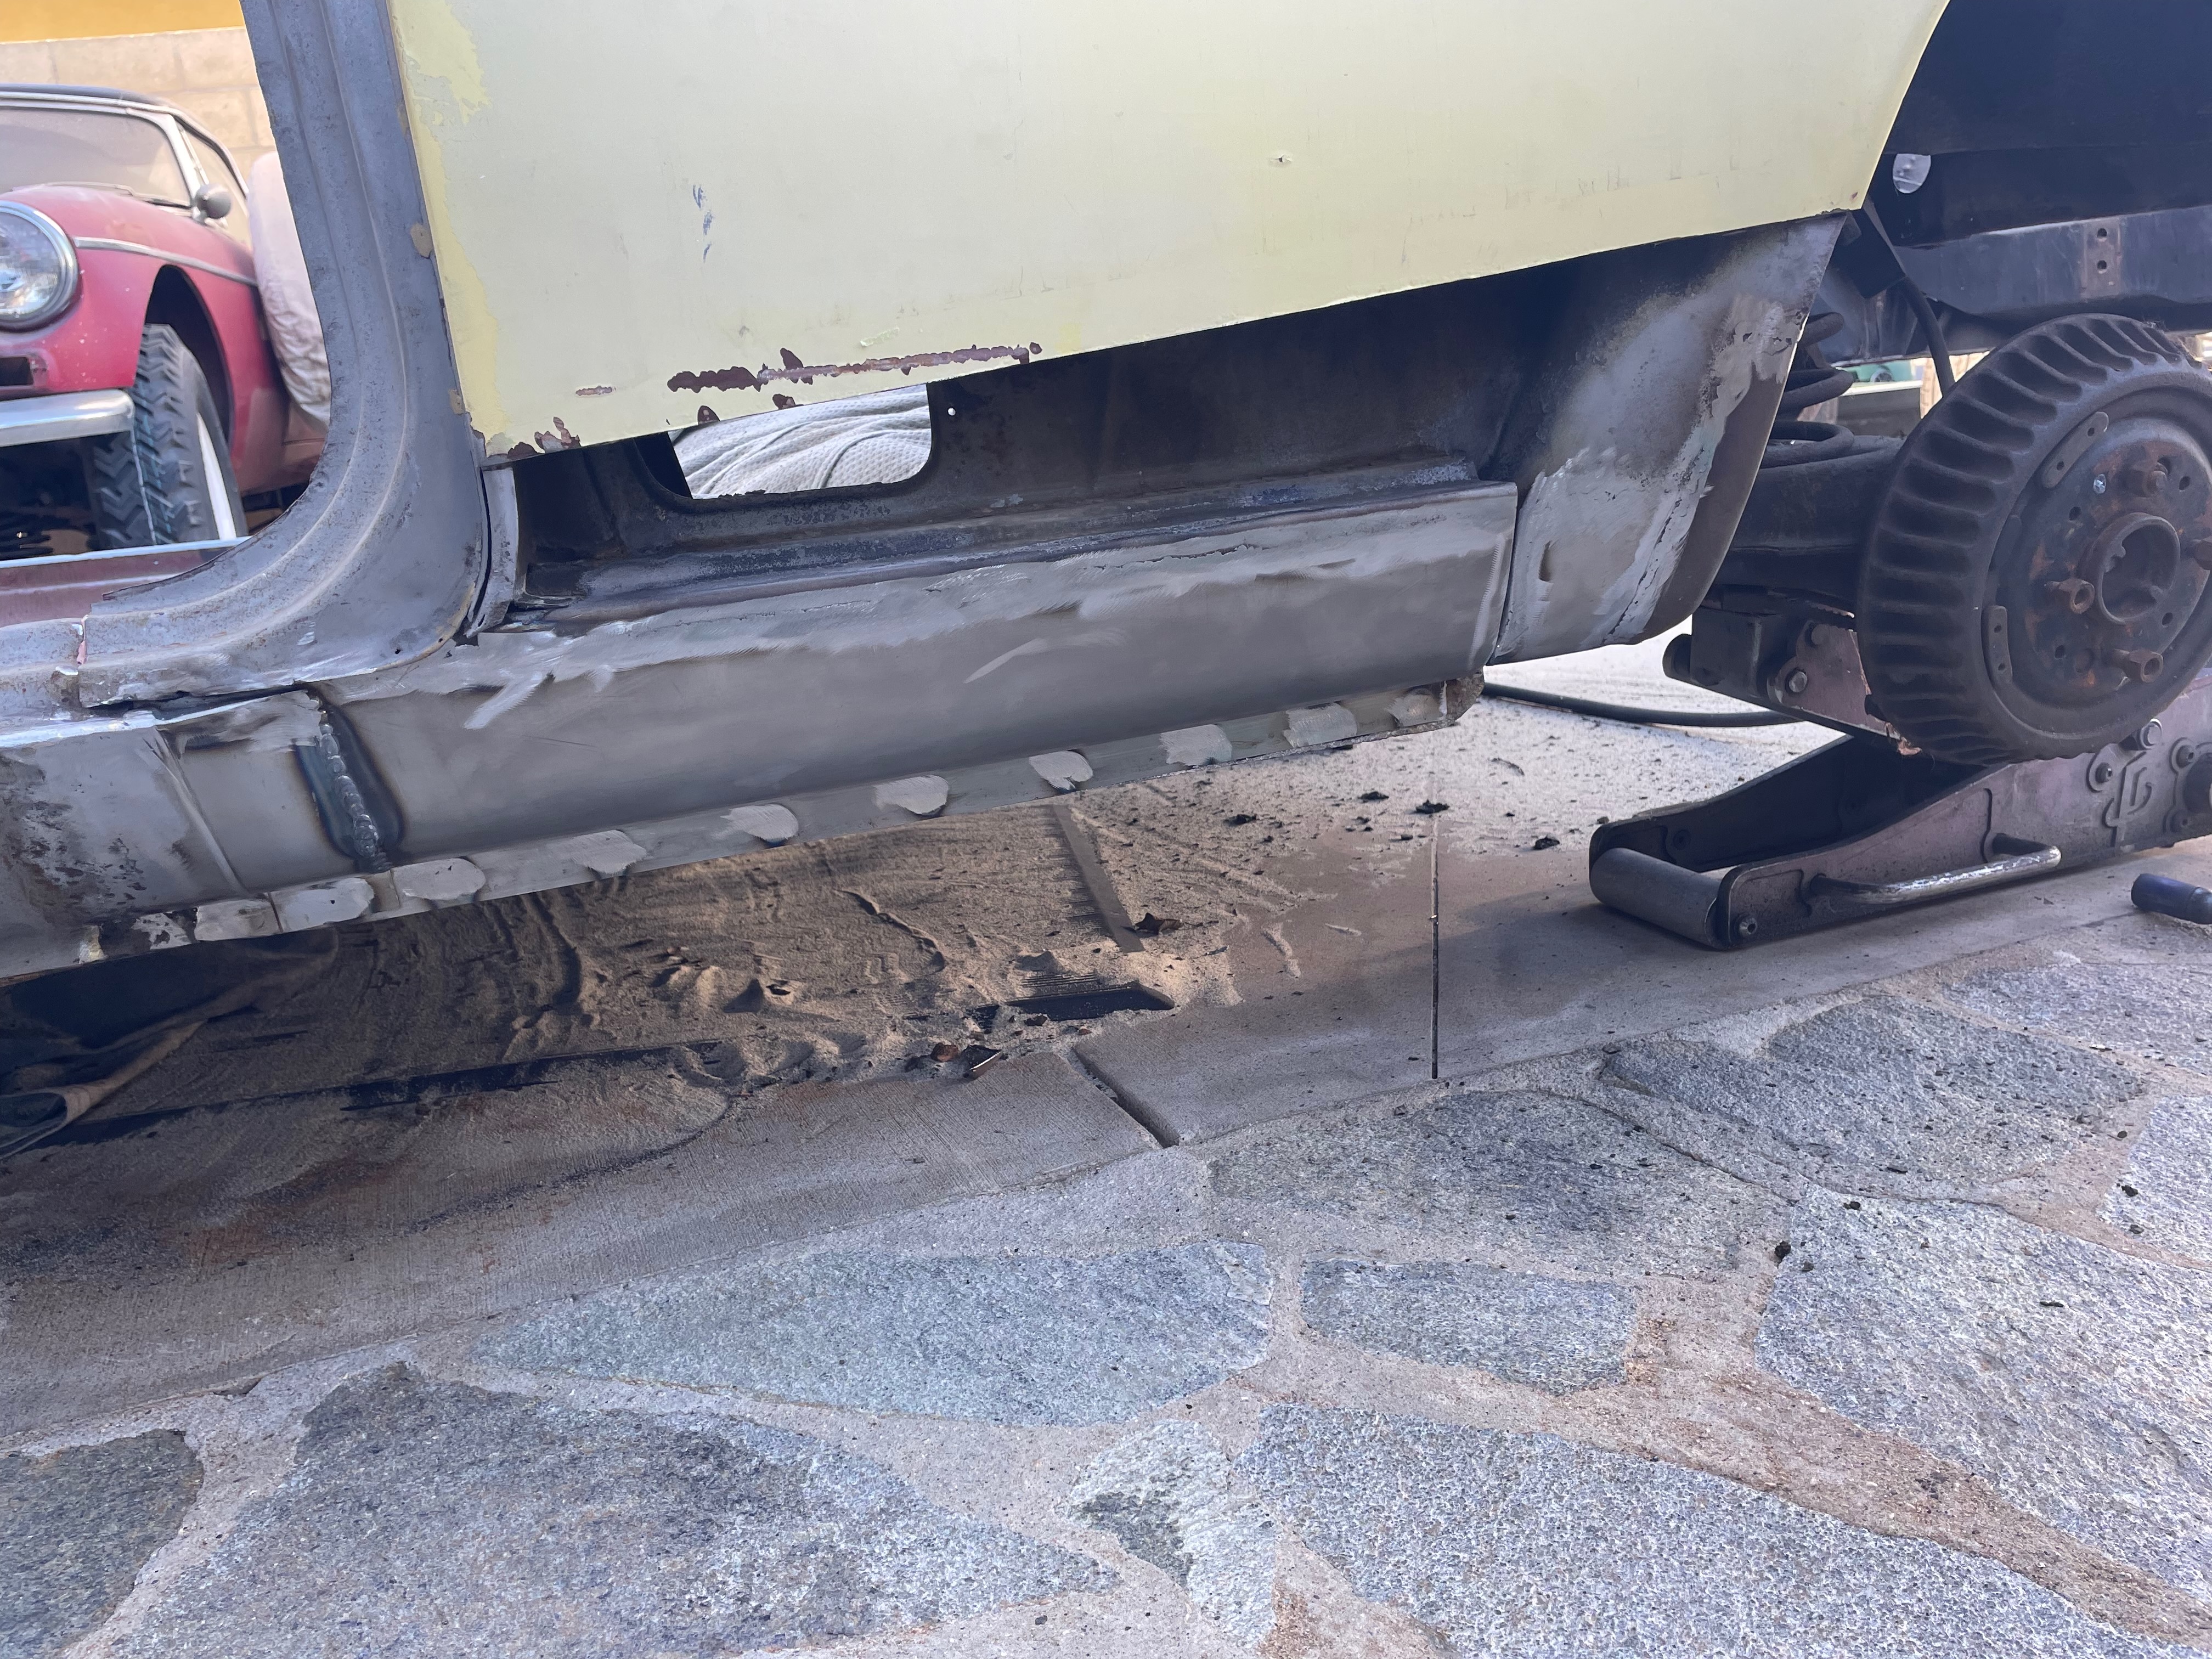
Body-Paint: Floor Replacement Completion
Newly fabricated and installed floor panels after welding, sealed and primed to protect against future rust and ready for interior paint application.
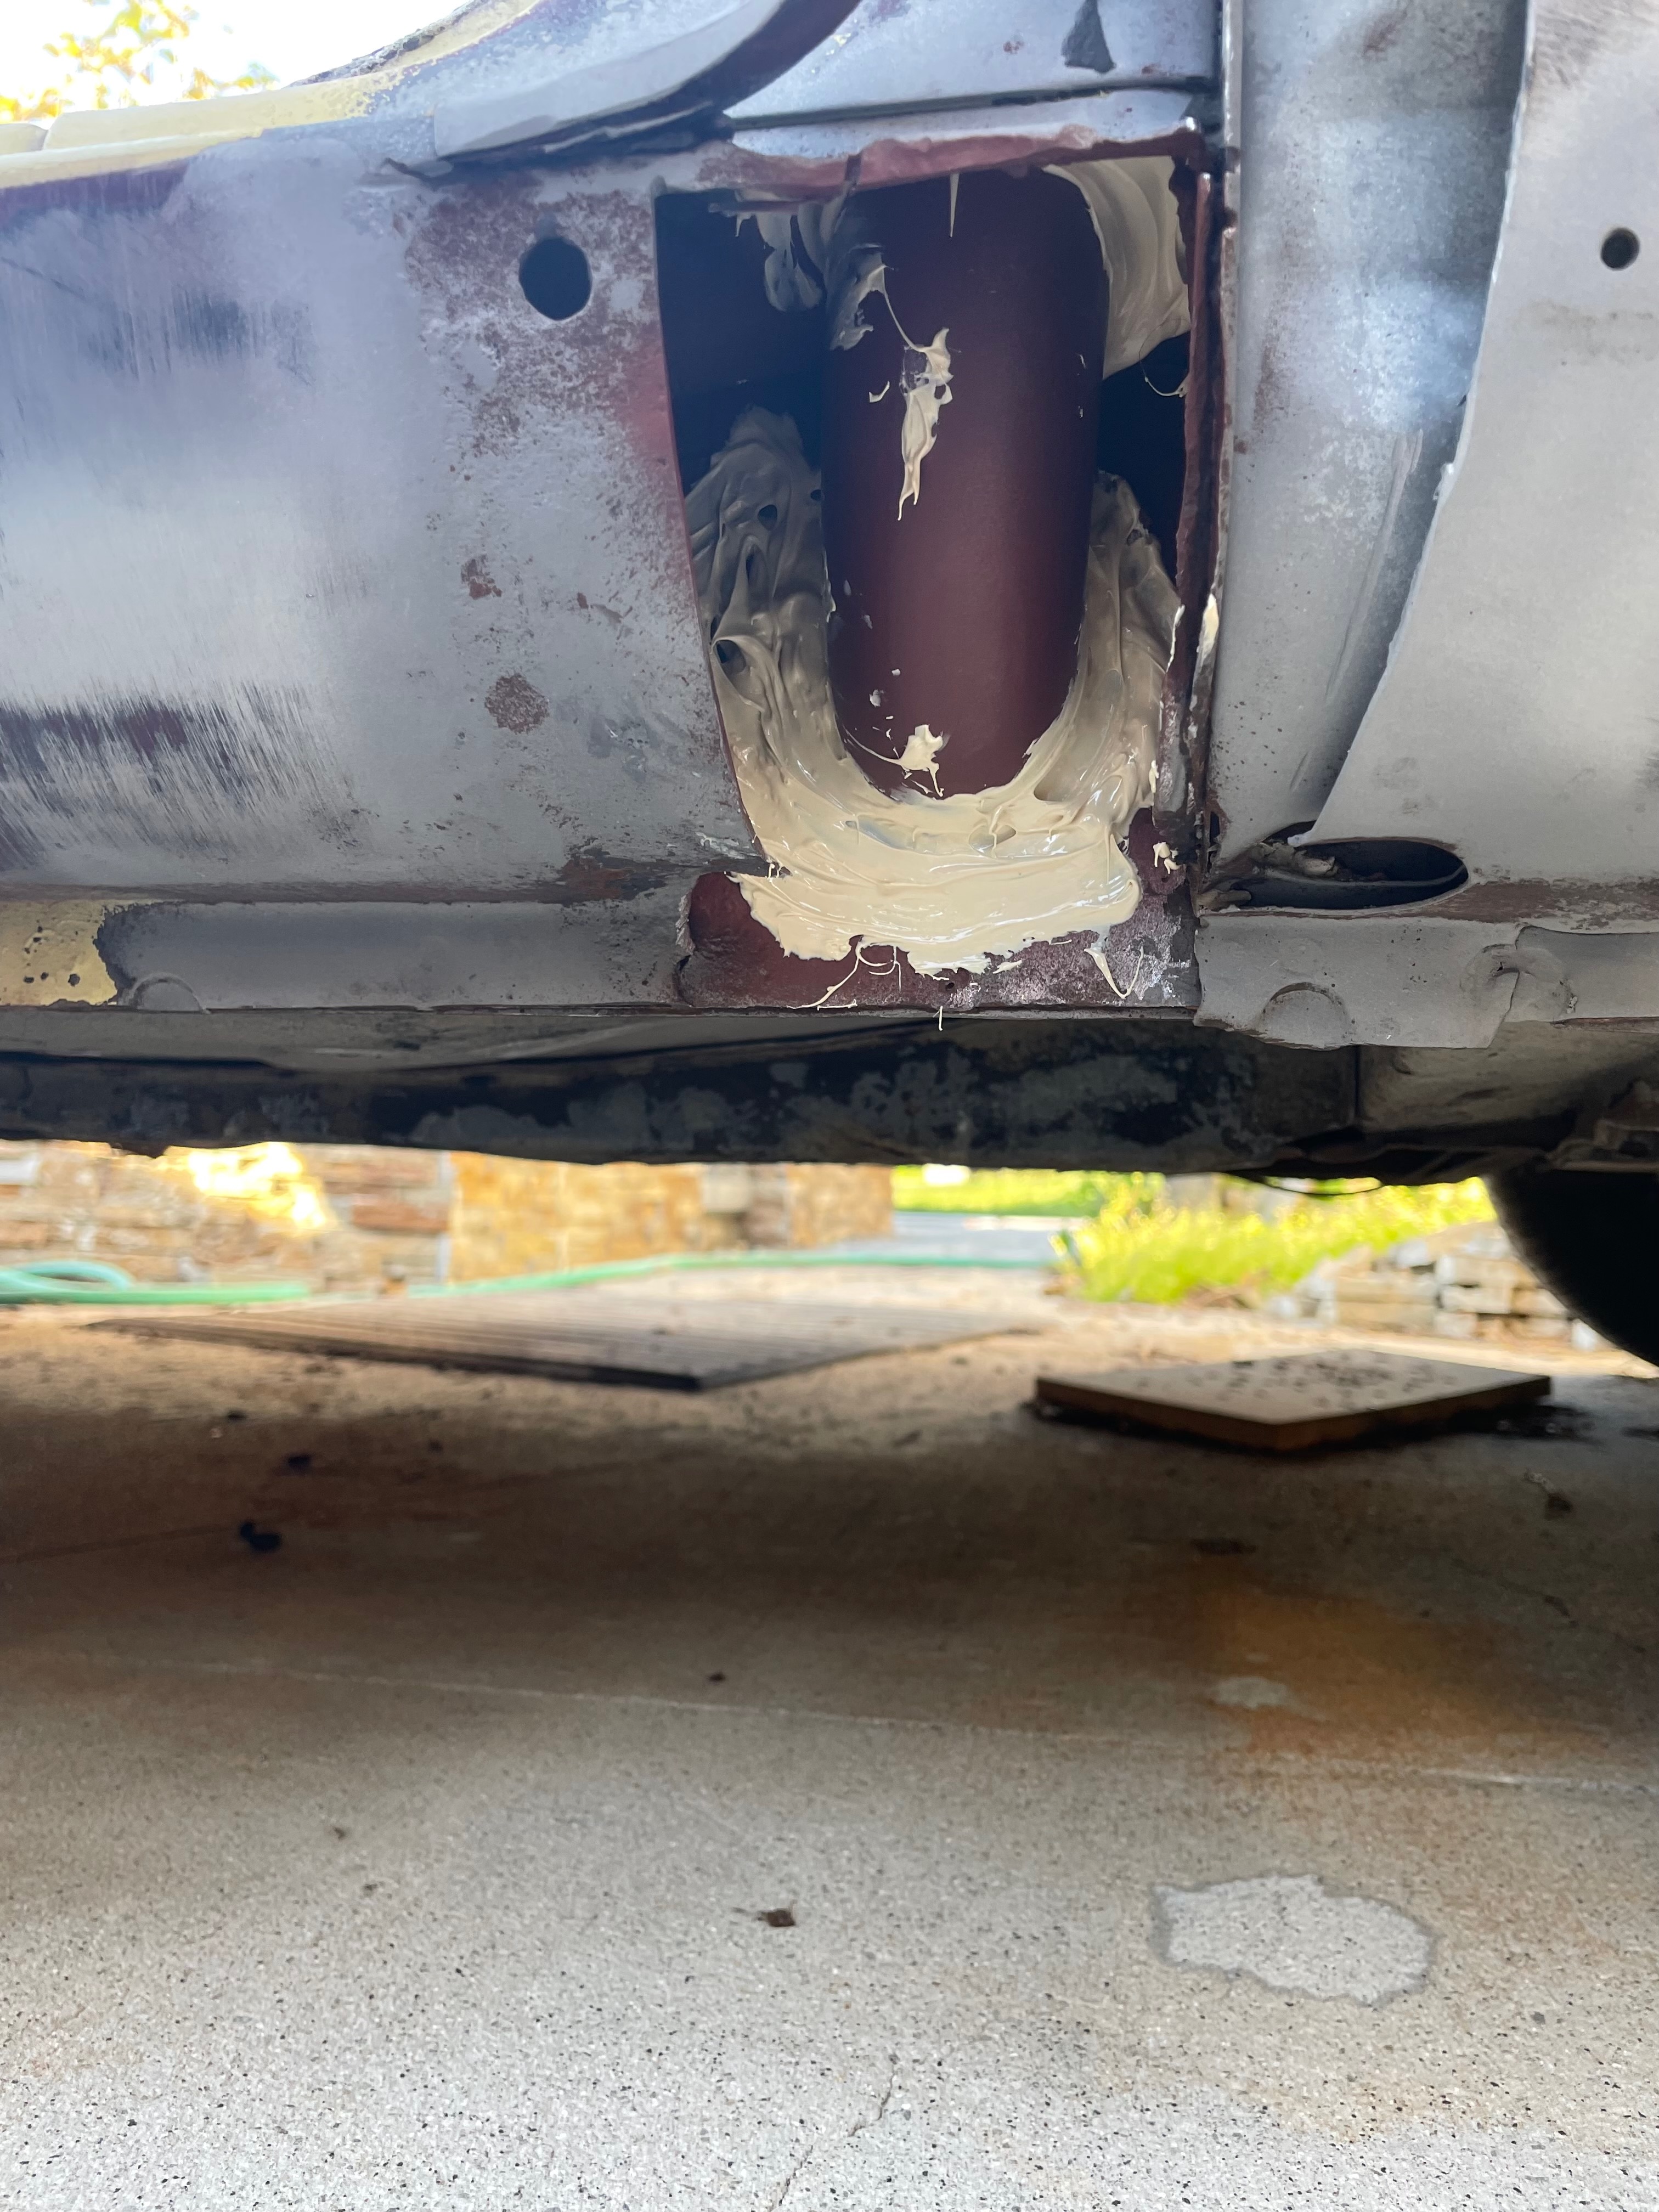
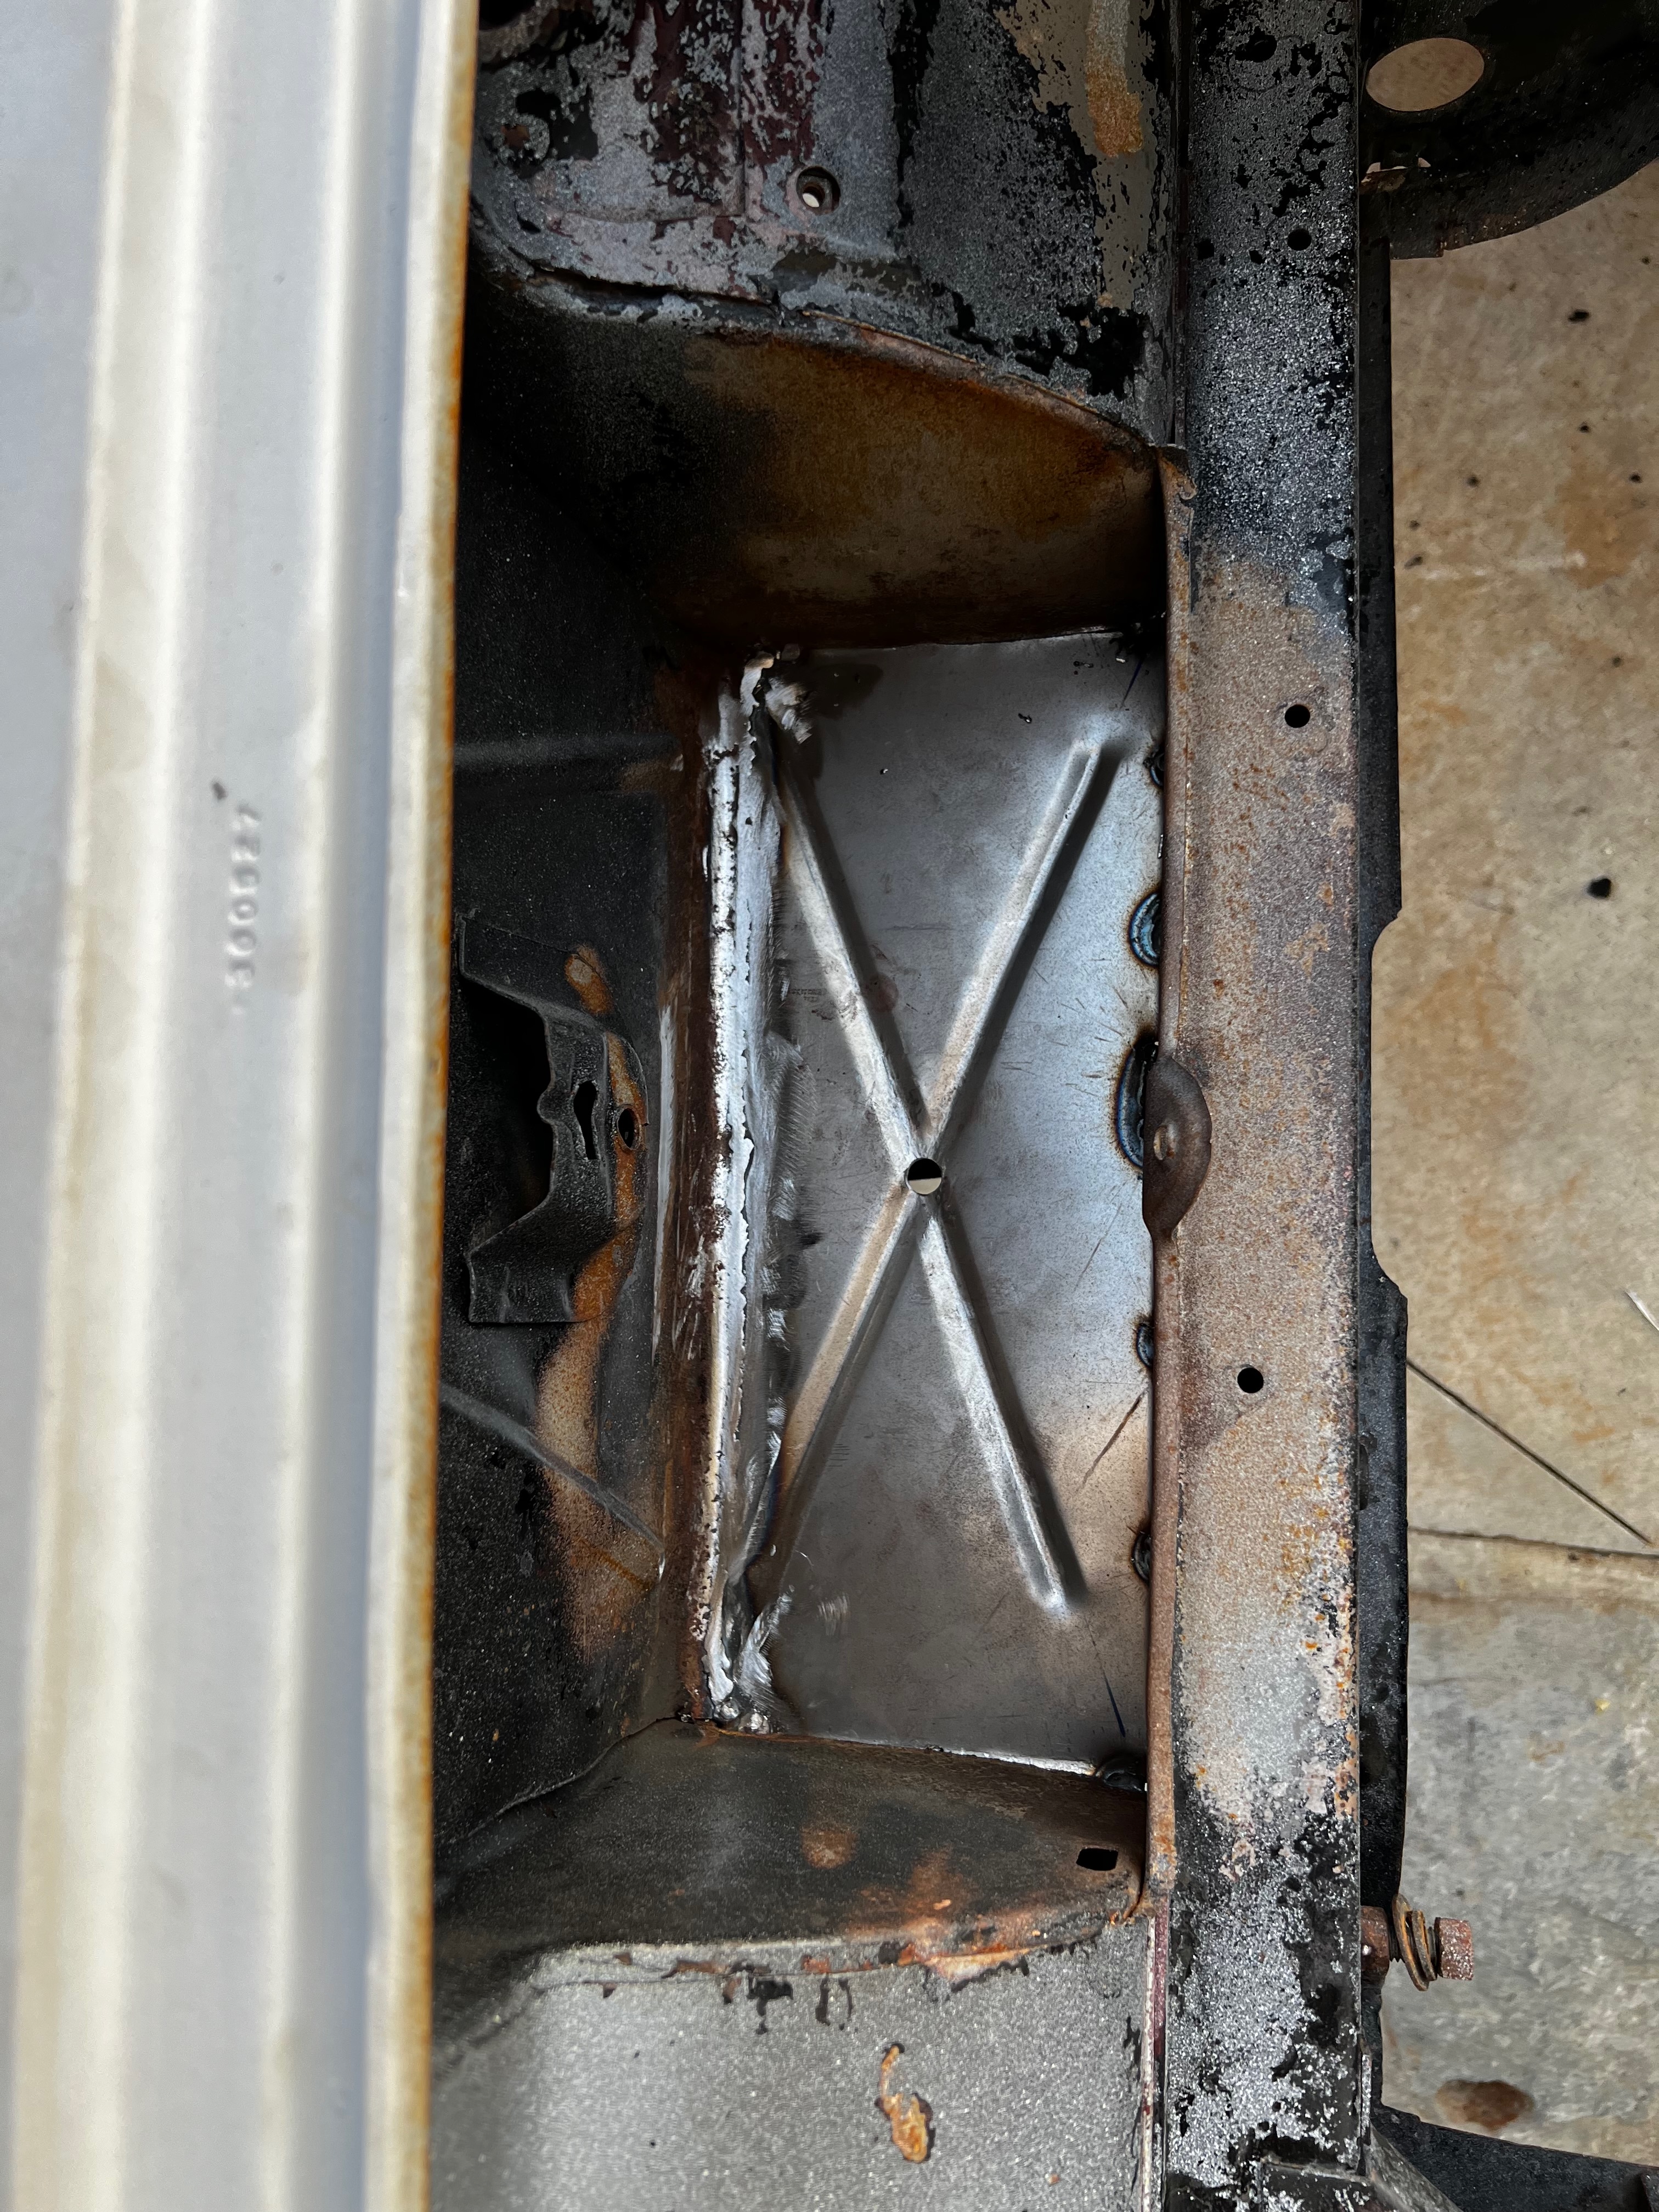
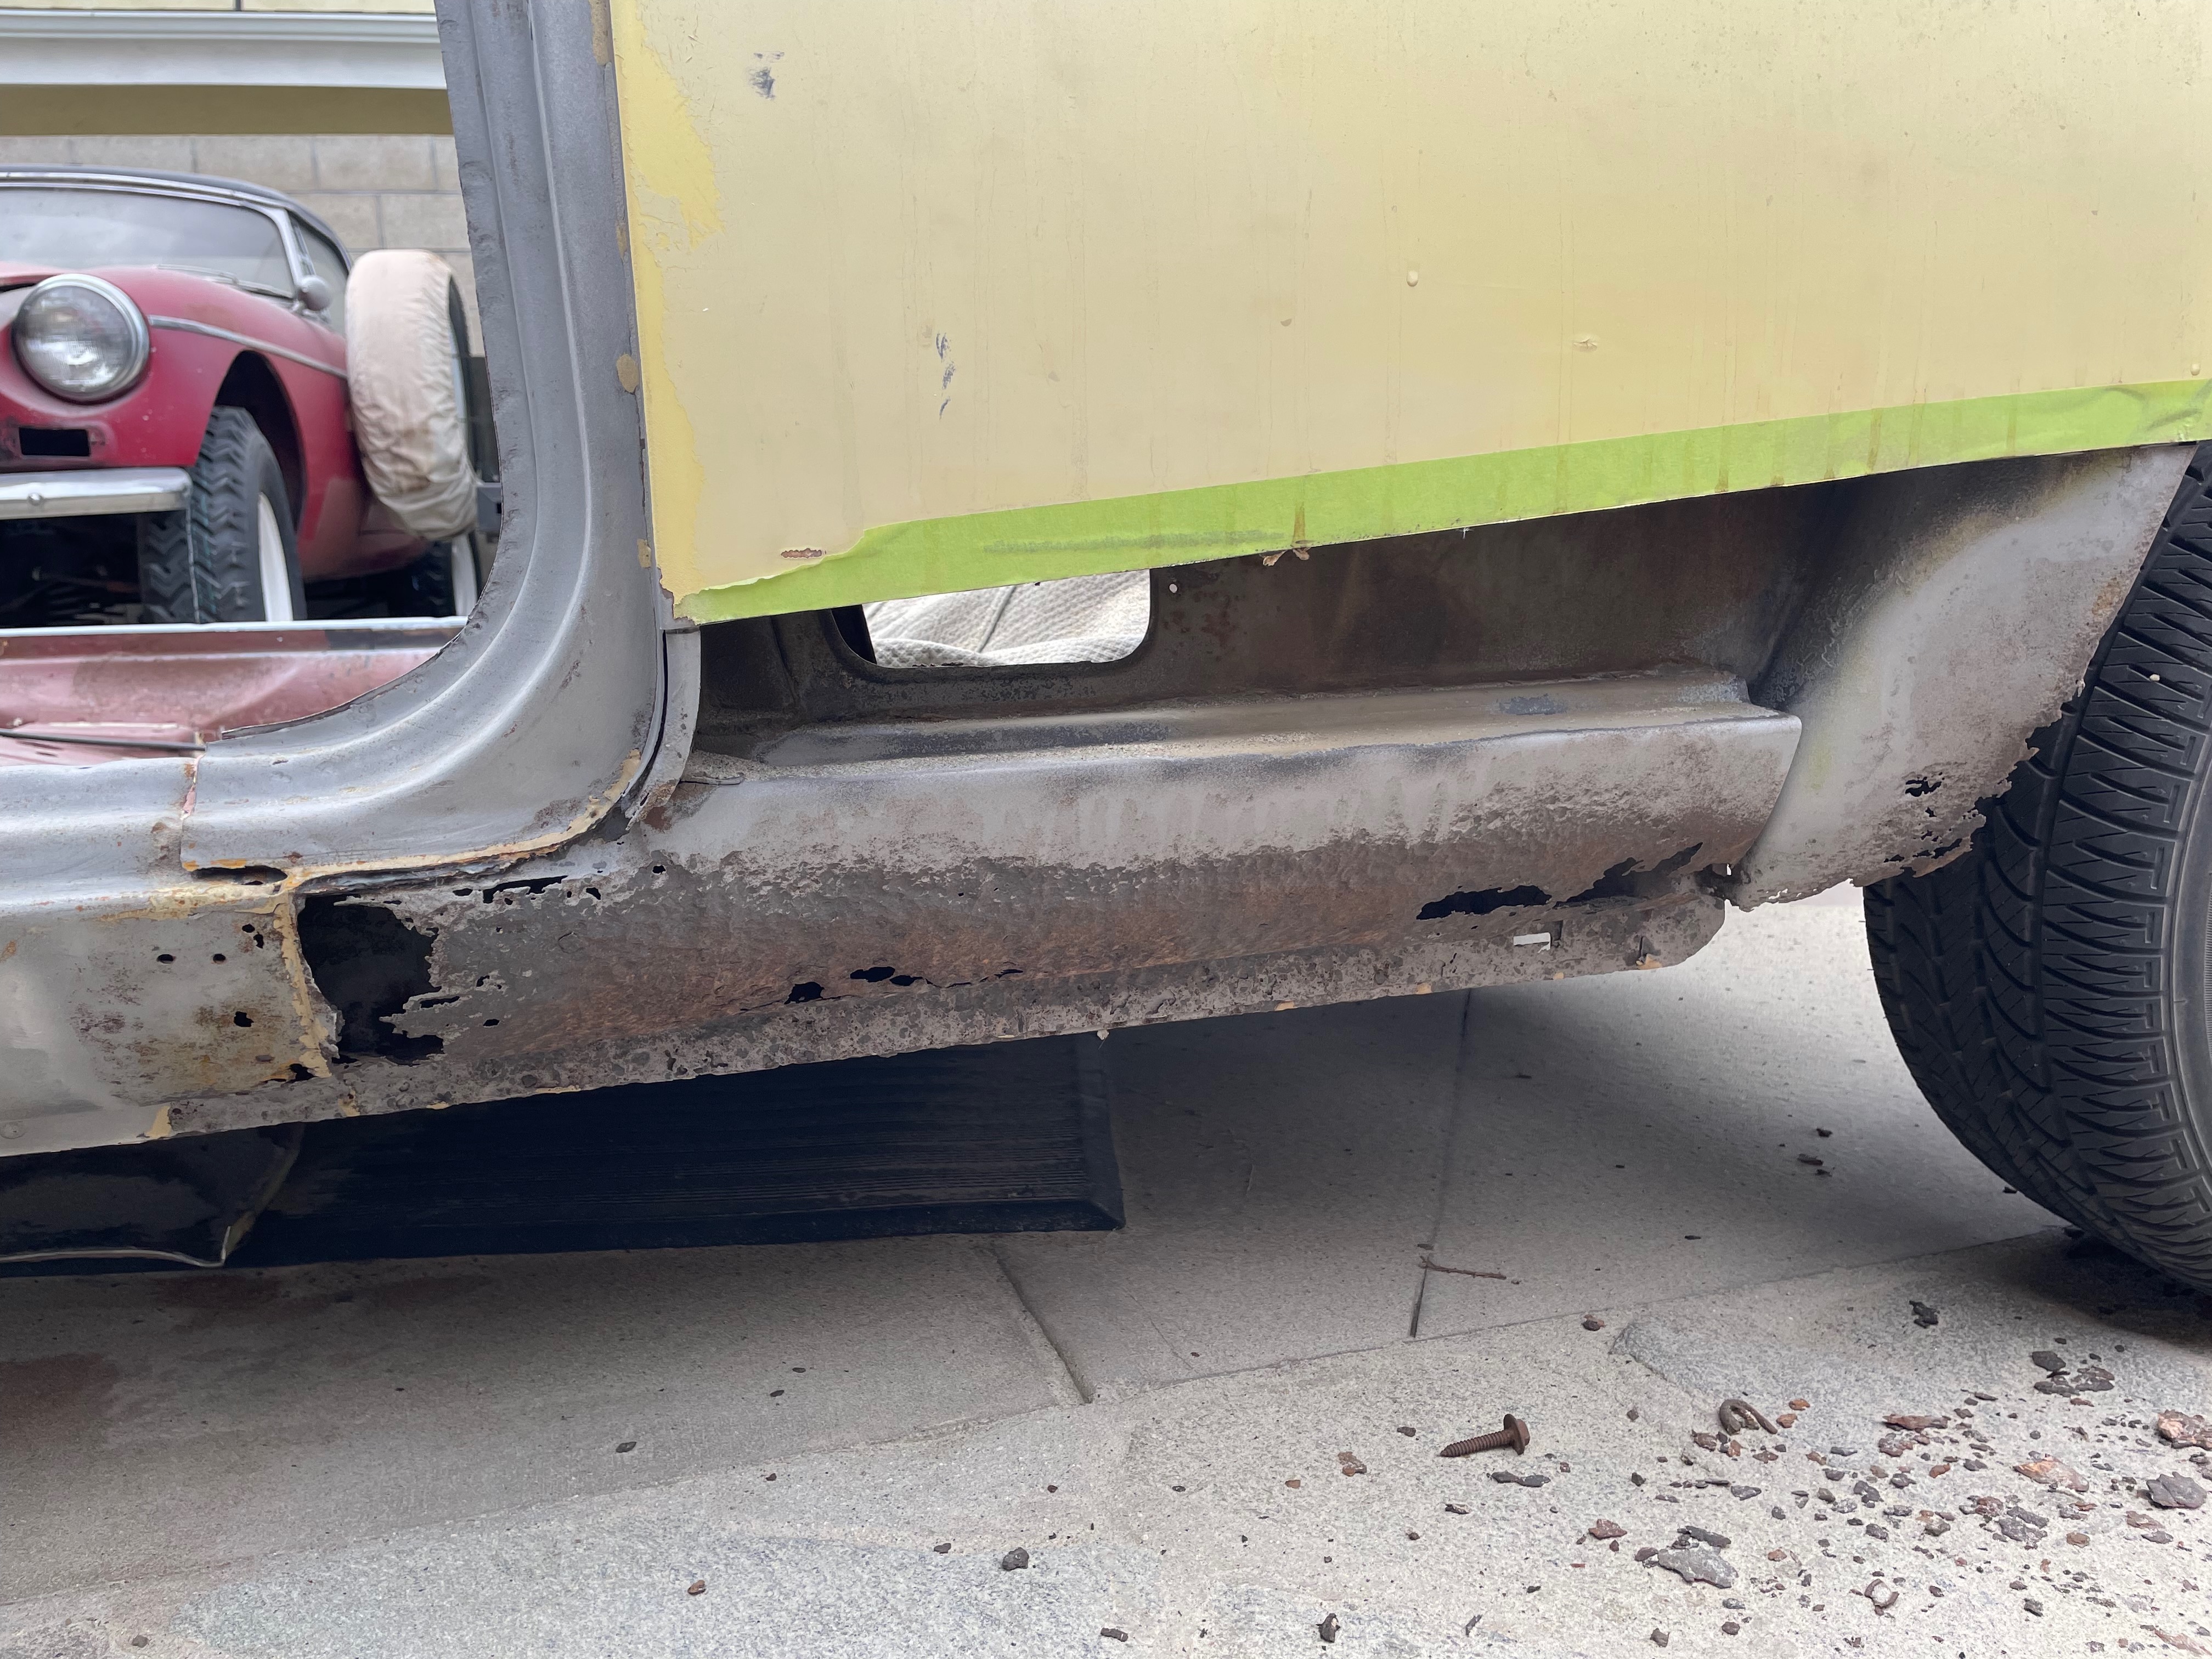
Body-Paint: Structural Repair
Extensive cutting to remove severe rust damage in a critical structural area, preparing for fabrication and welding of replacement frame sections.
Body-Paint: Detail Refinement
Fine-tuning body panel alignment and surface details to ensure factory-correct appearance and proper fit of all exterior components.
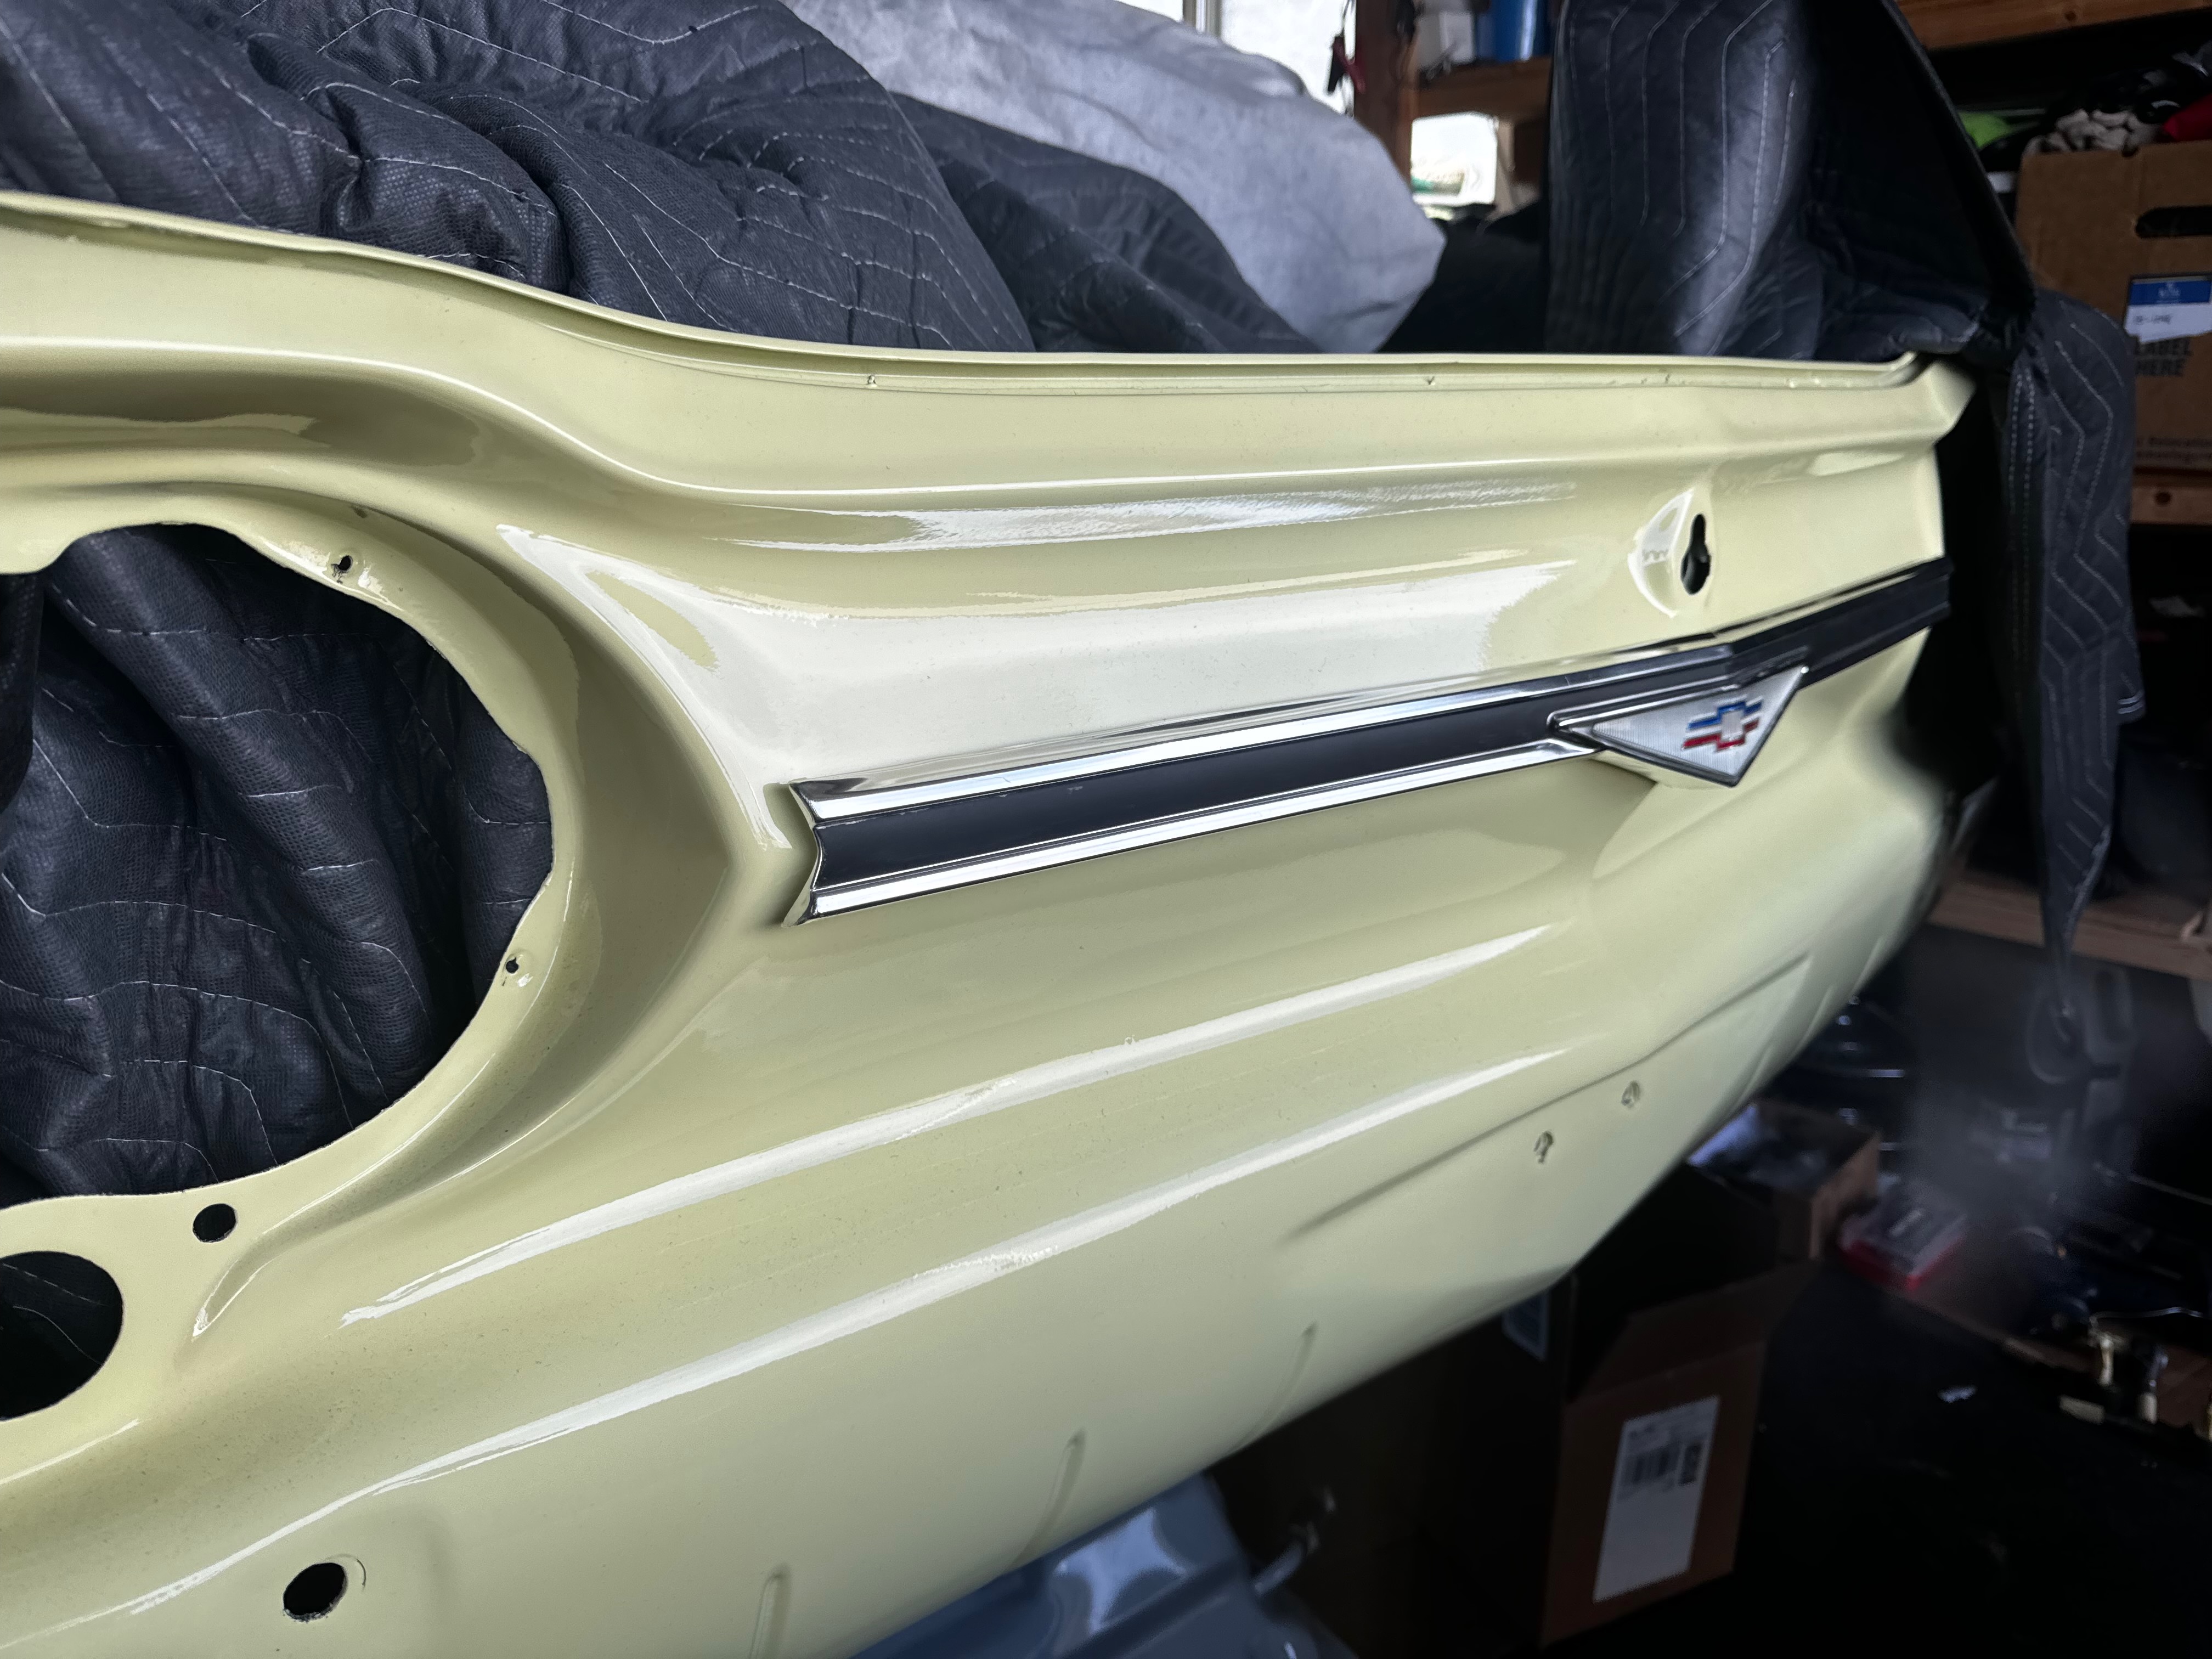
Body-Paint: Chrome Trim Installation
Carefully installing the polished and restored chrome trim pieces onto the freshly painted body, adding the finishing touches to the exterior restoration.
Body-Paint: Final Surface Preparation
Meticulously preparing the body panels with final sanding and cleaning to ensure proper paint adhesion and a flawless finish.
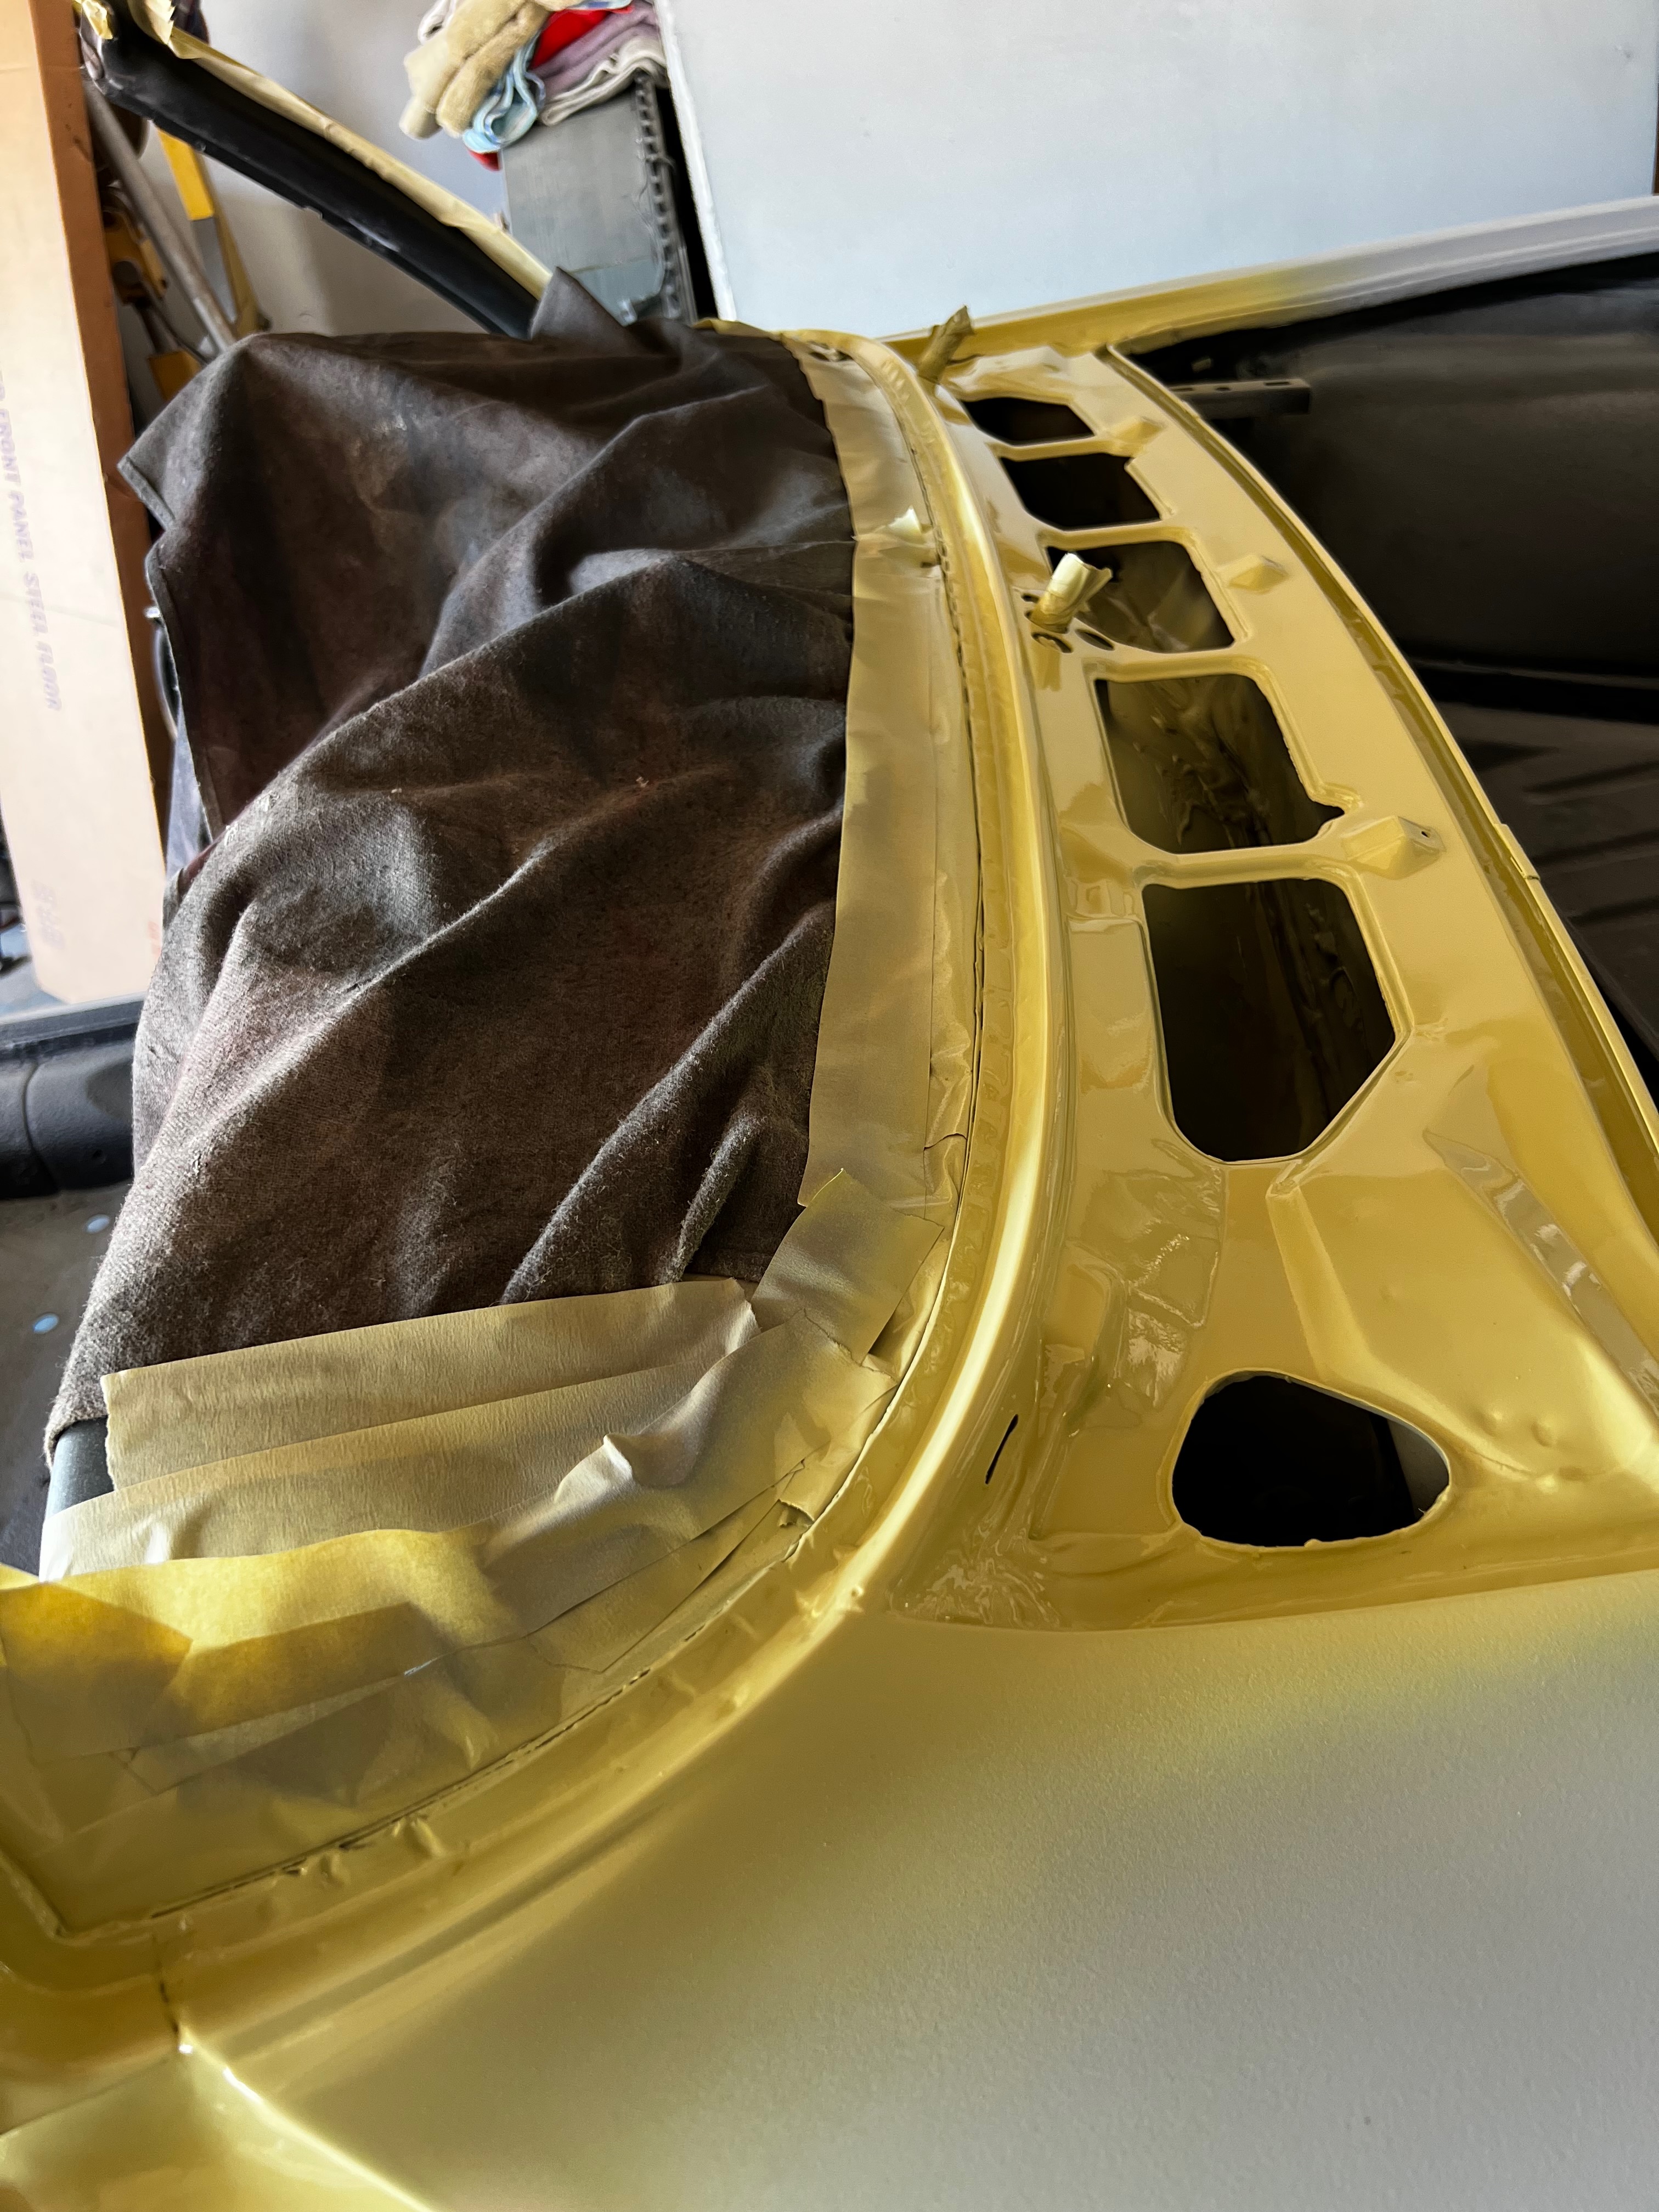
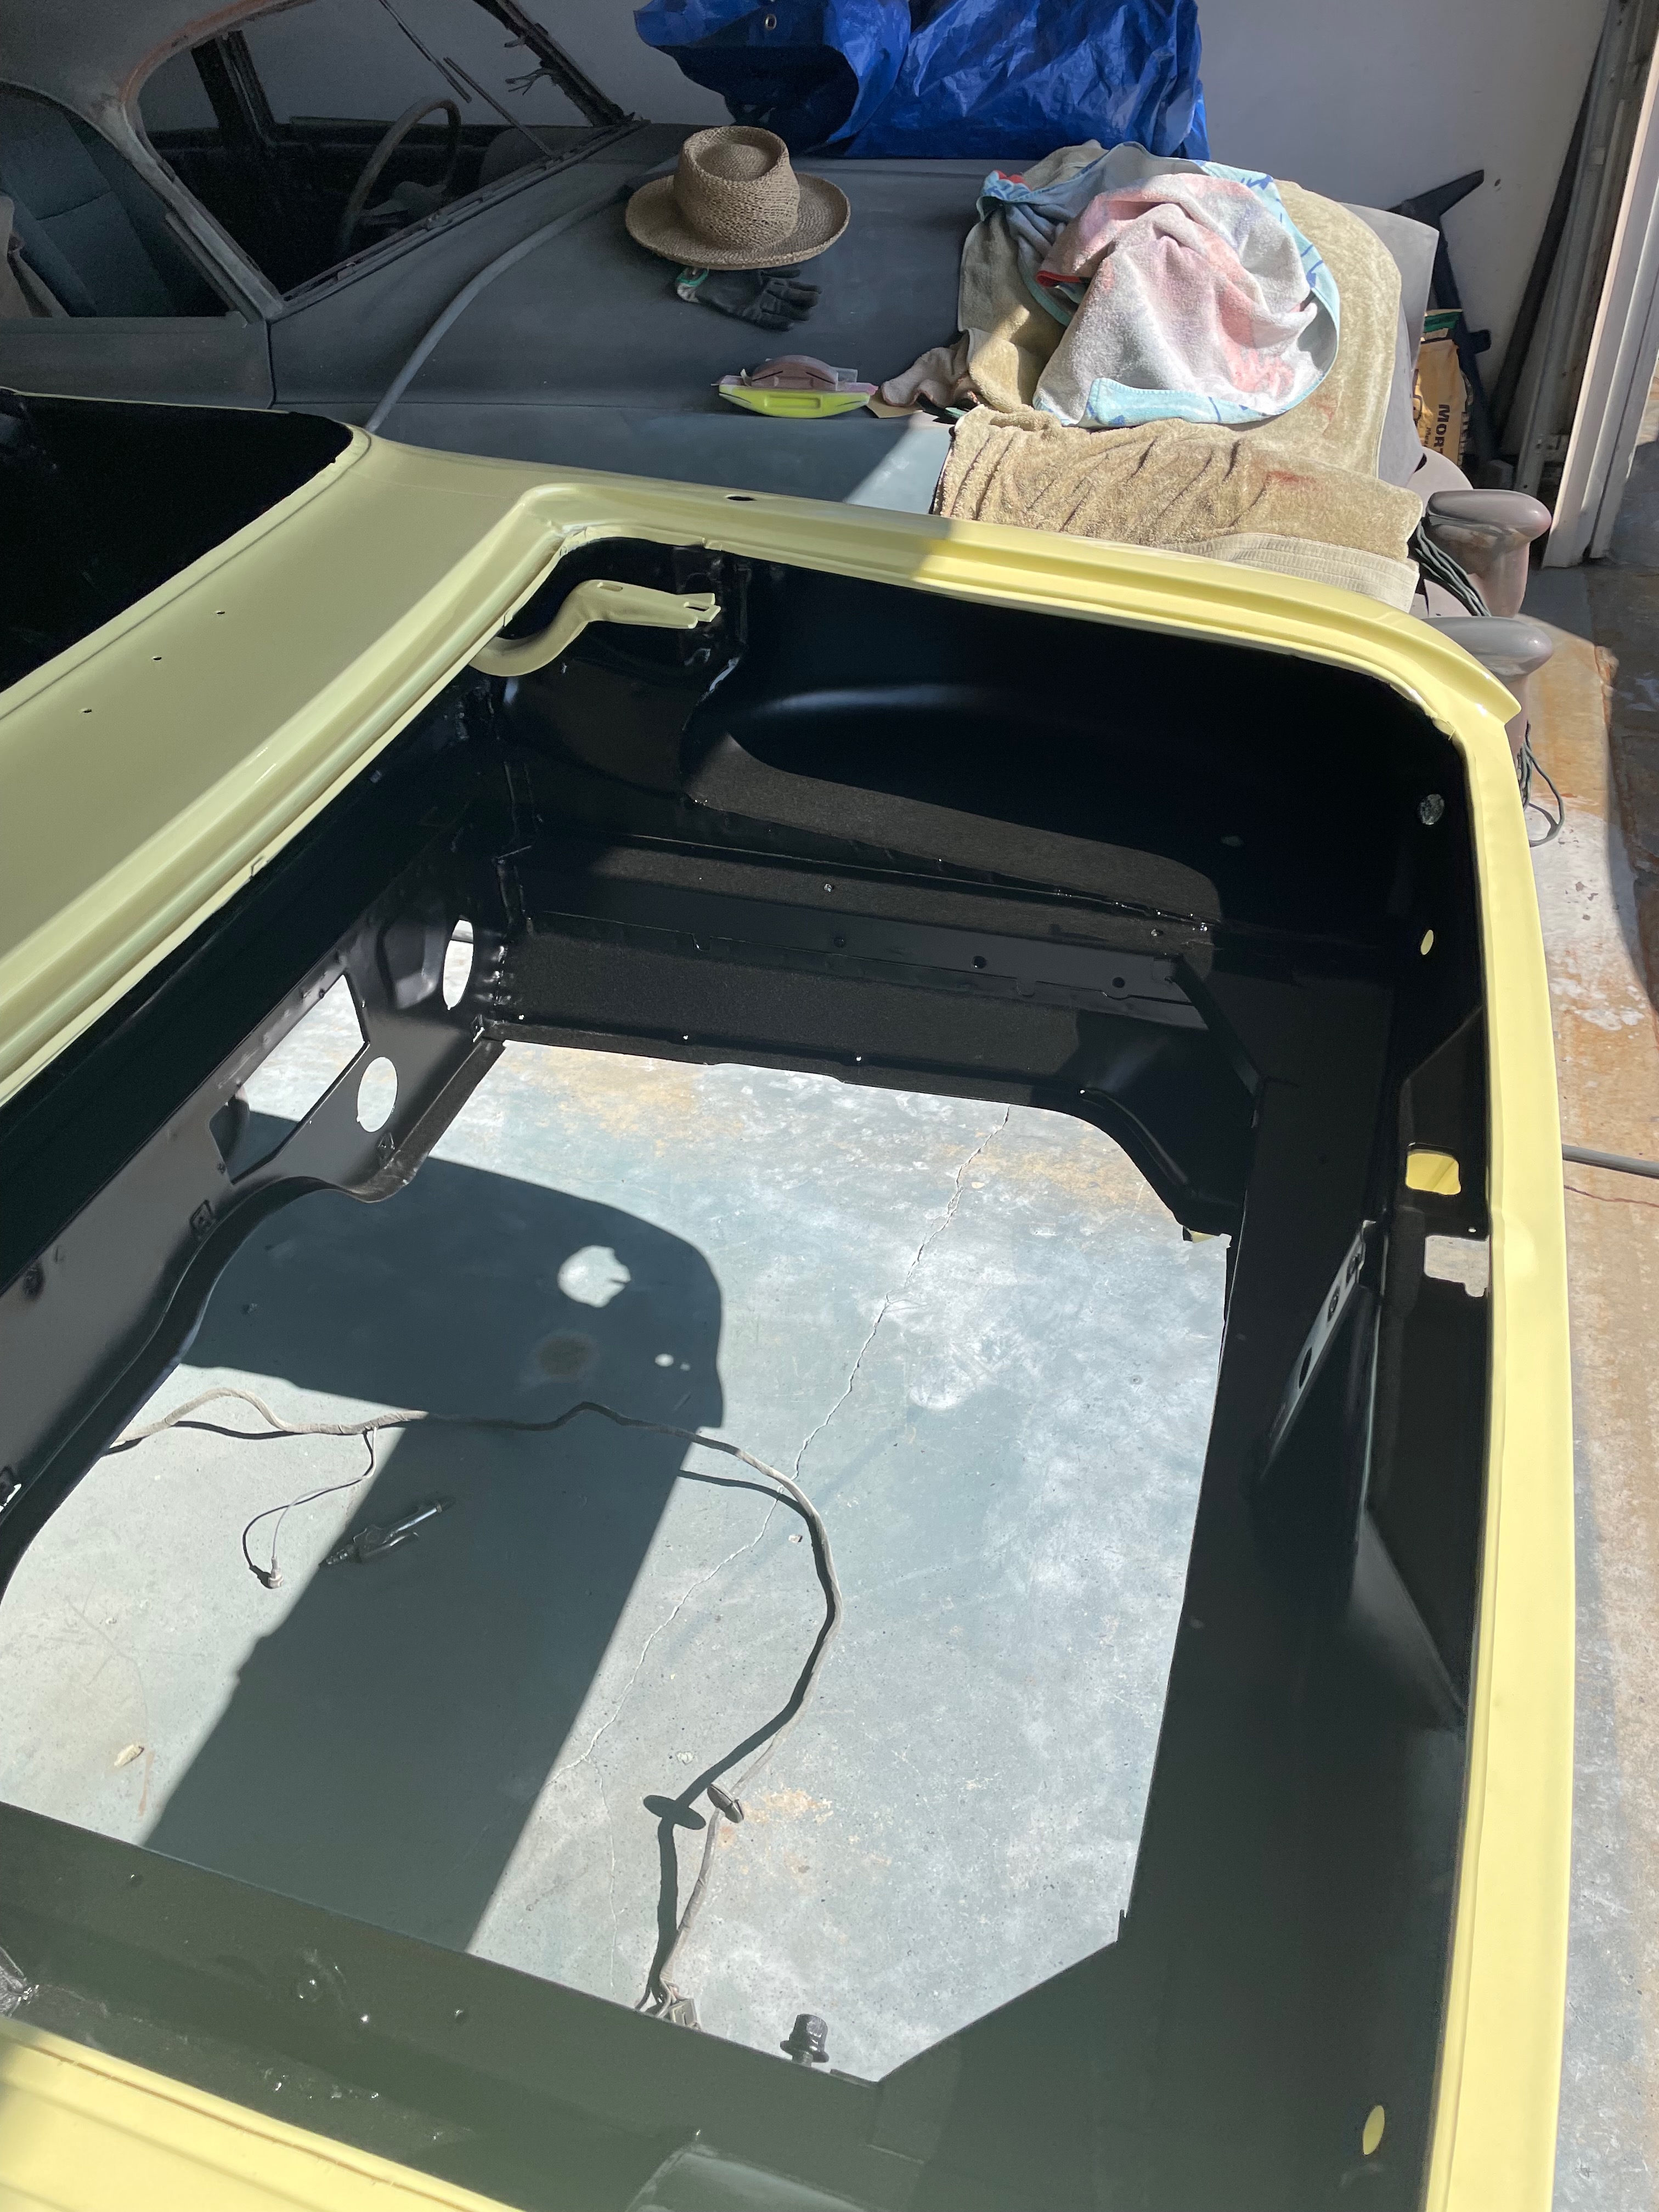
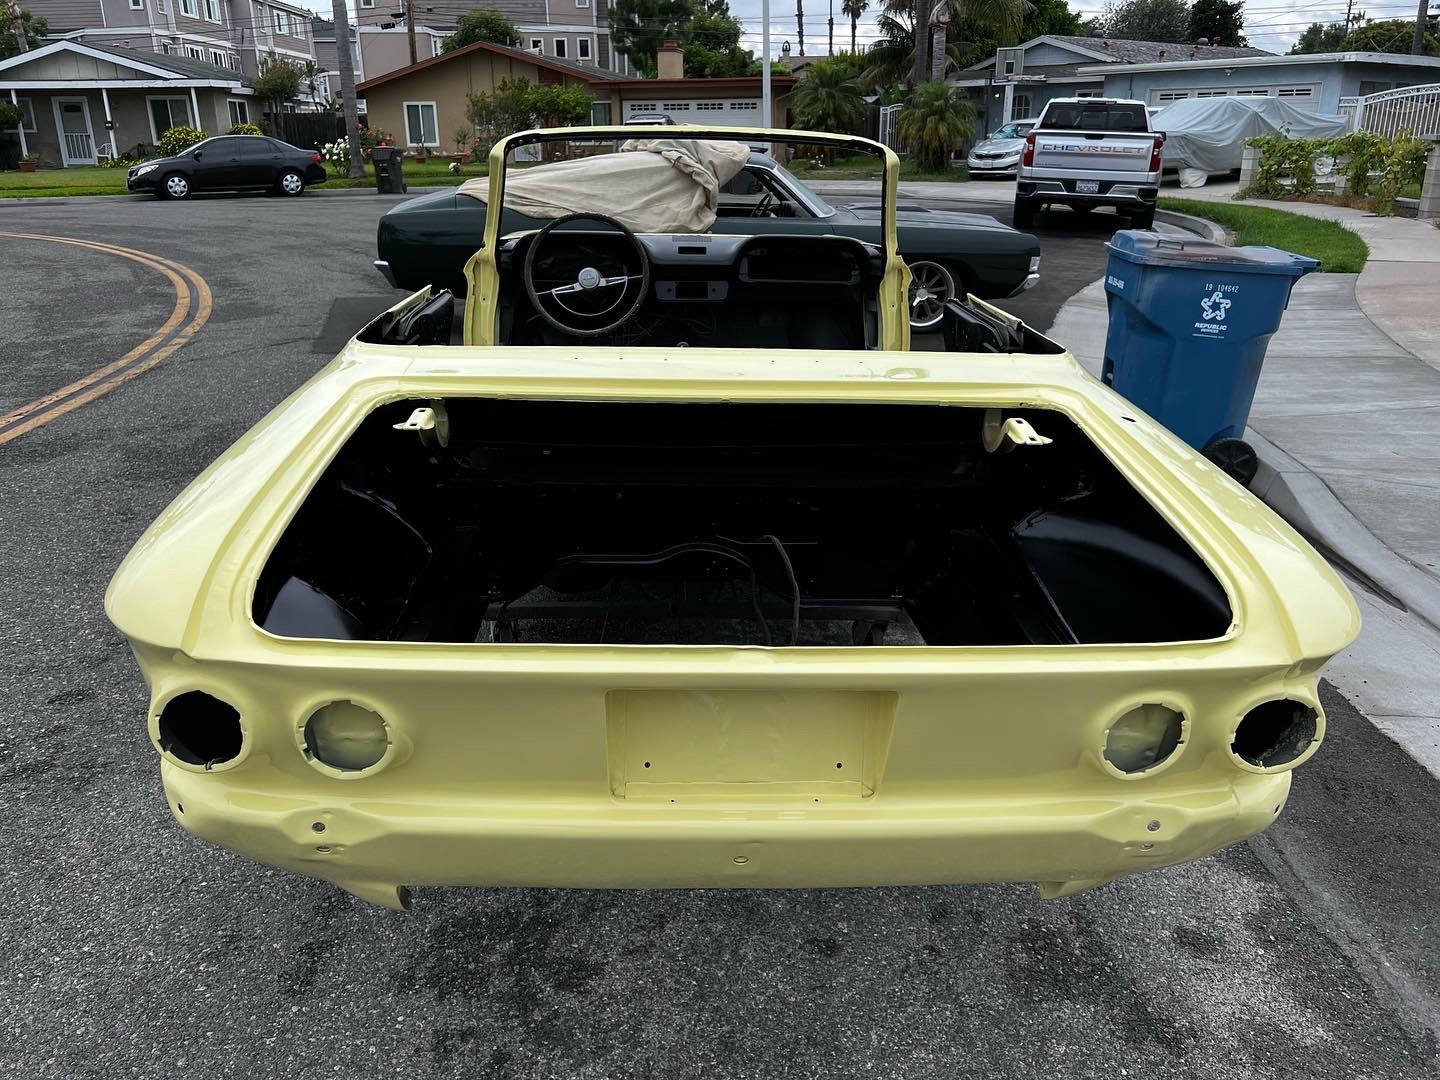
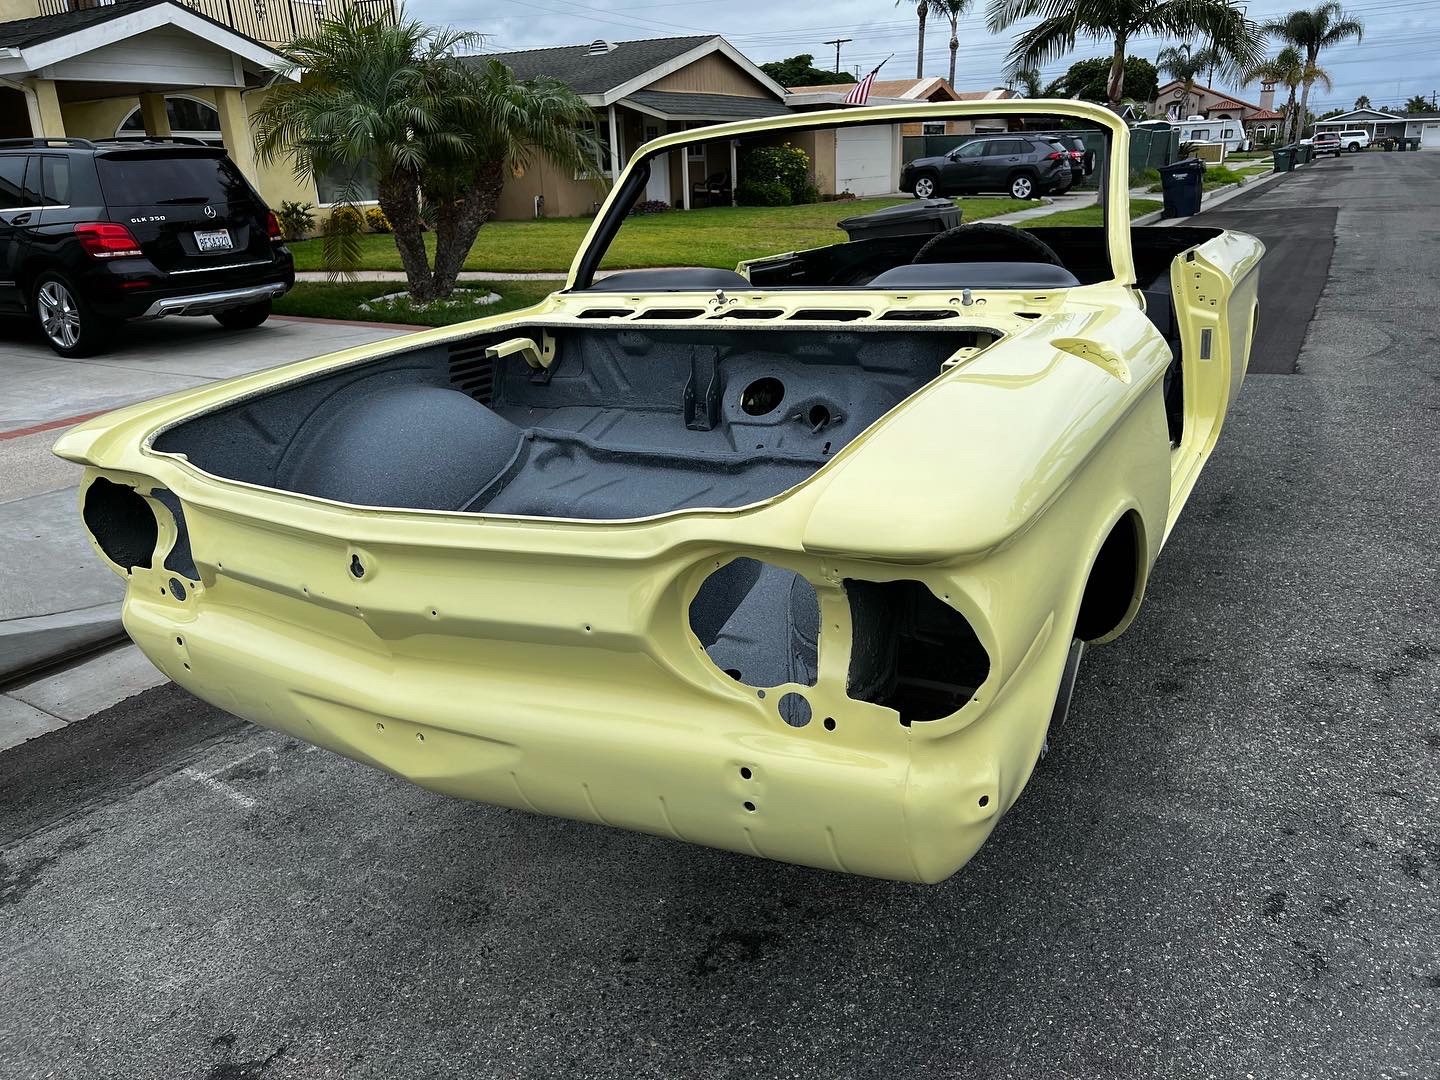
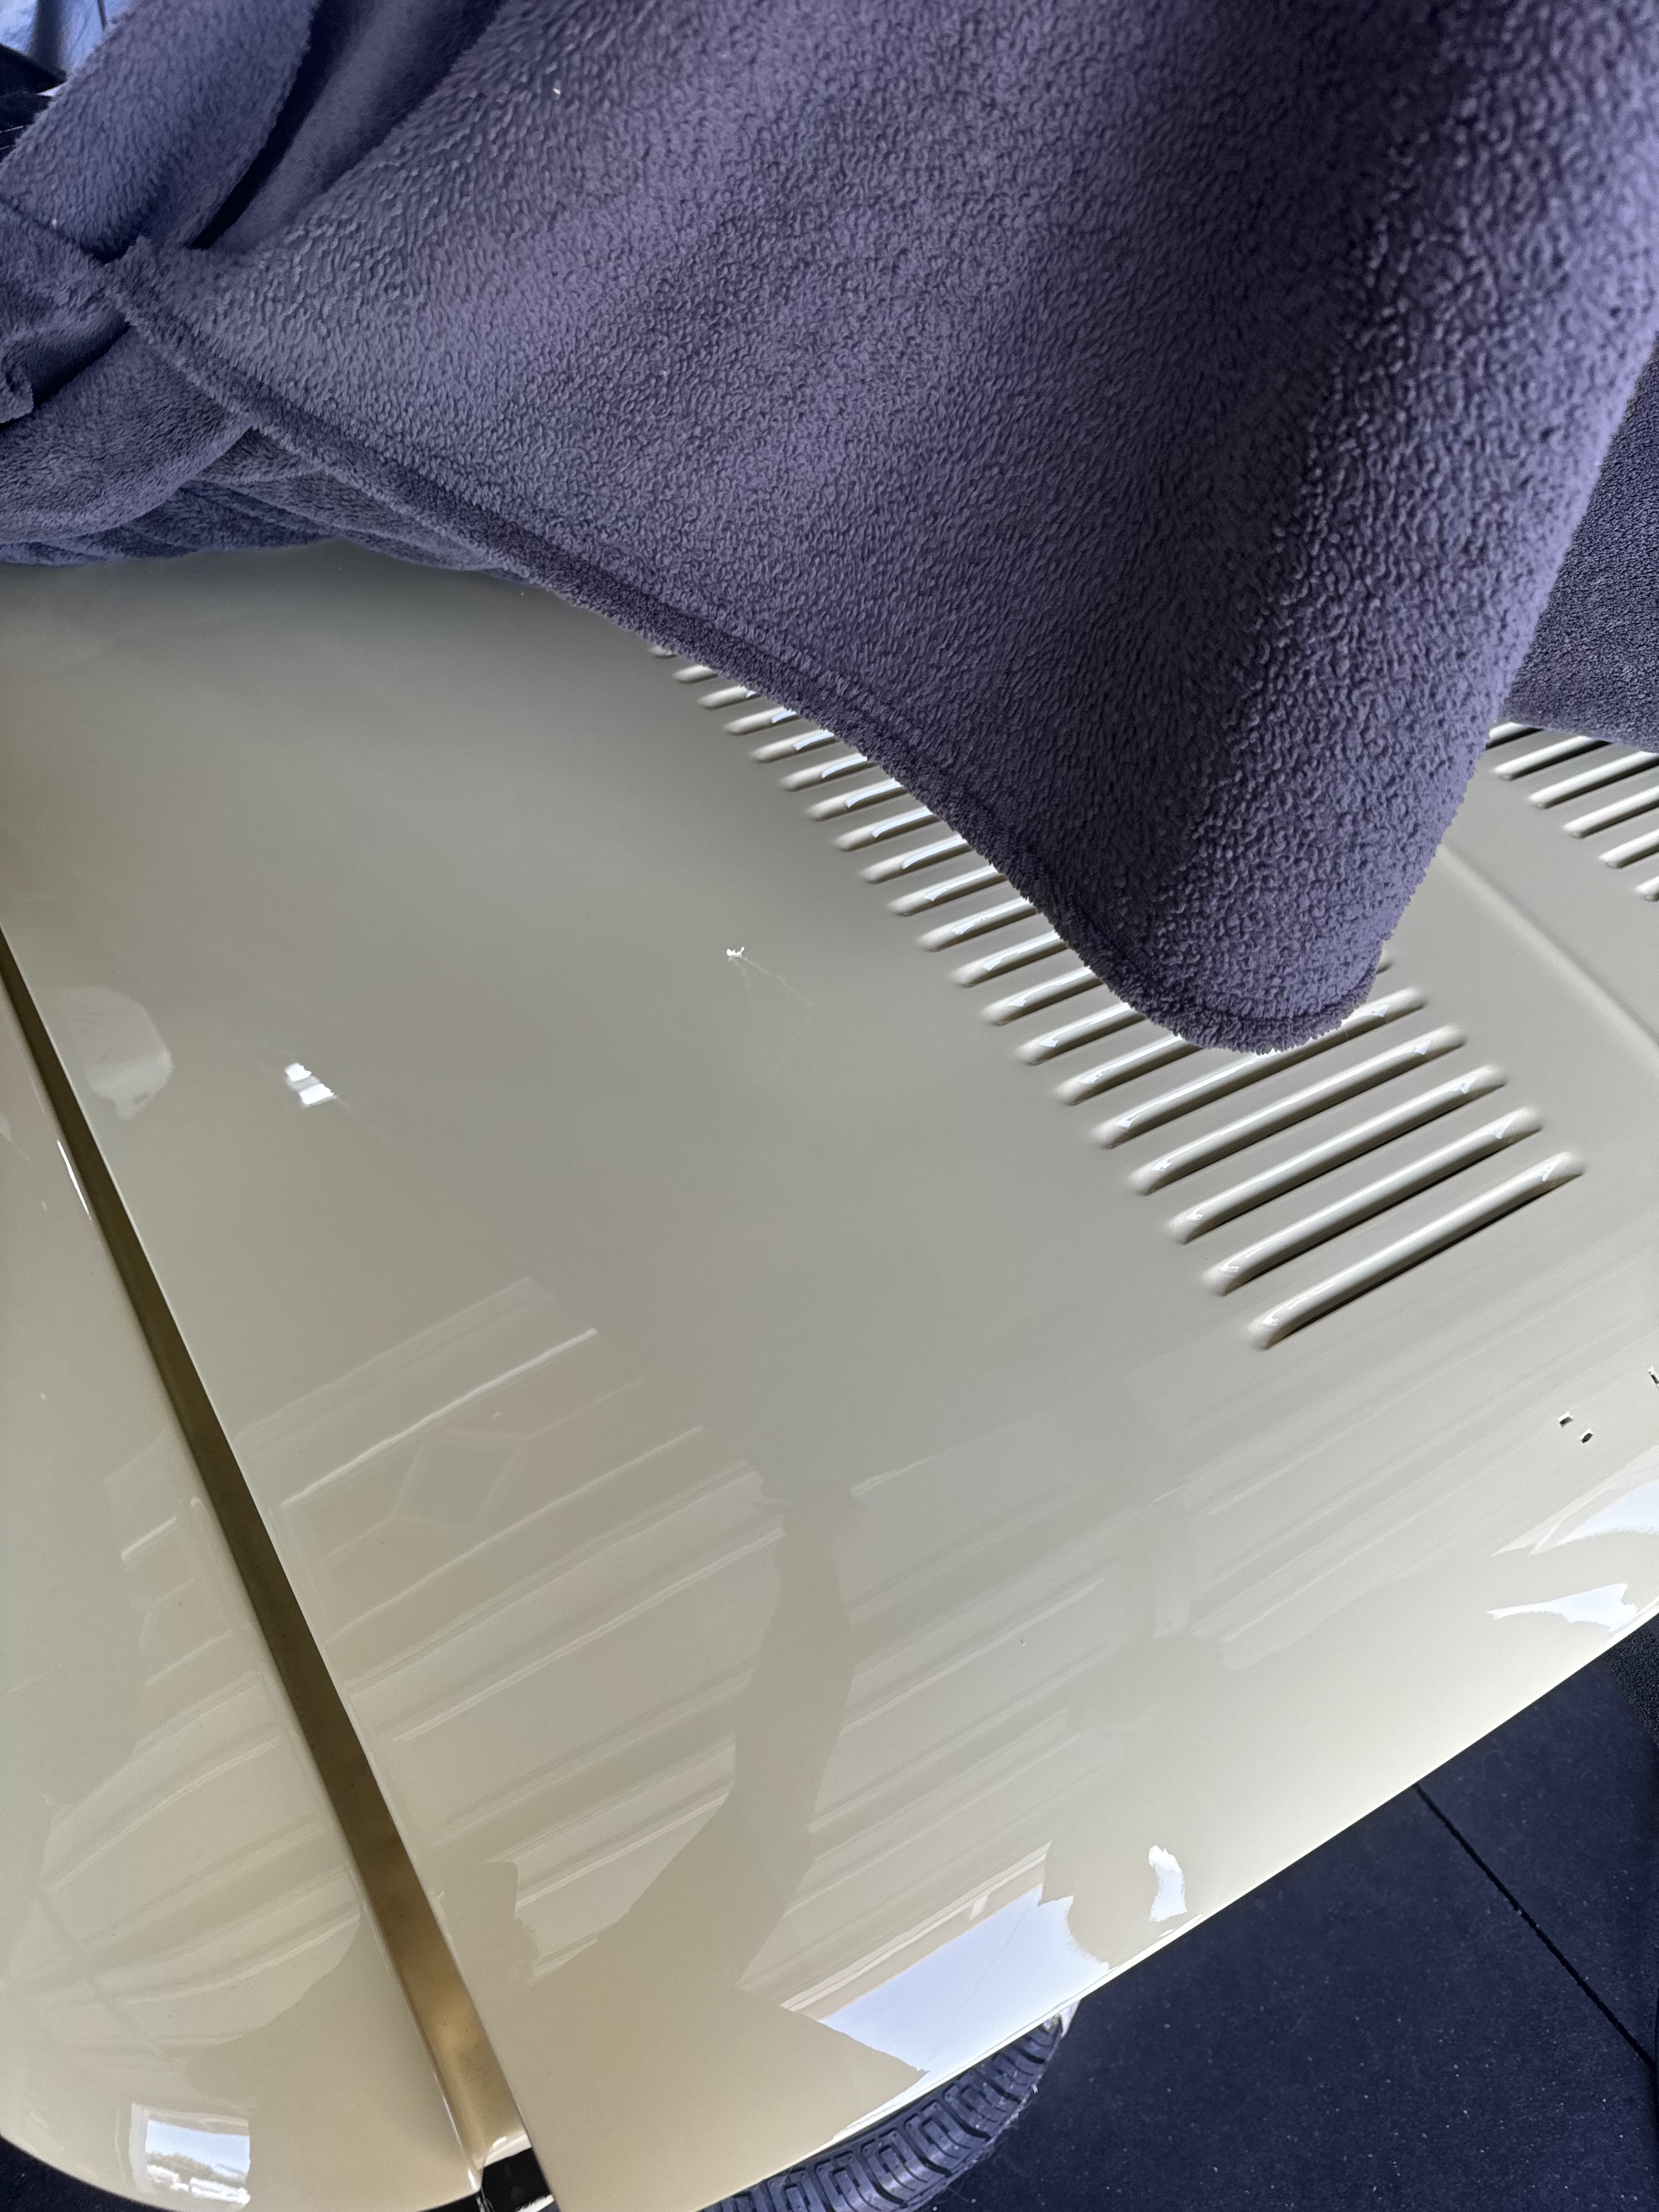
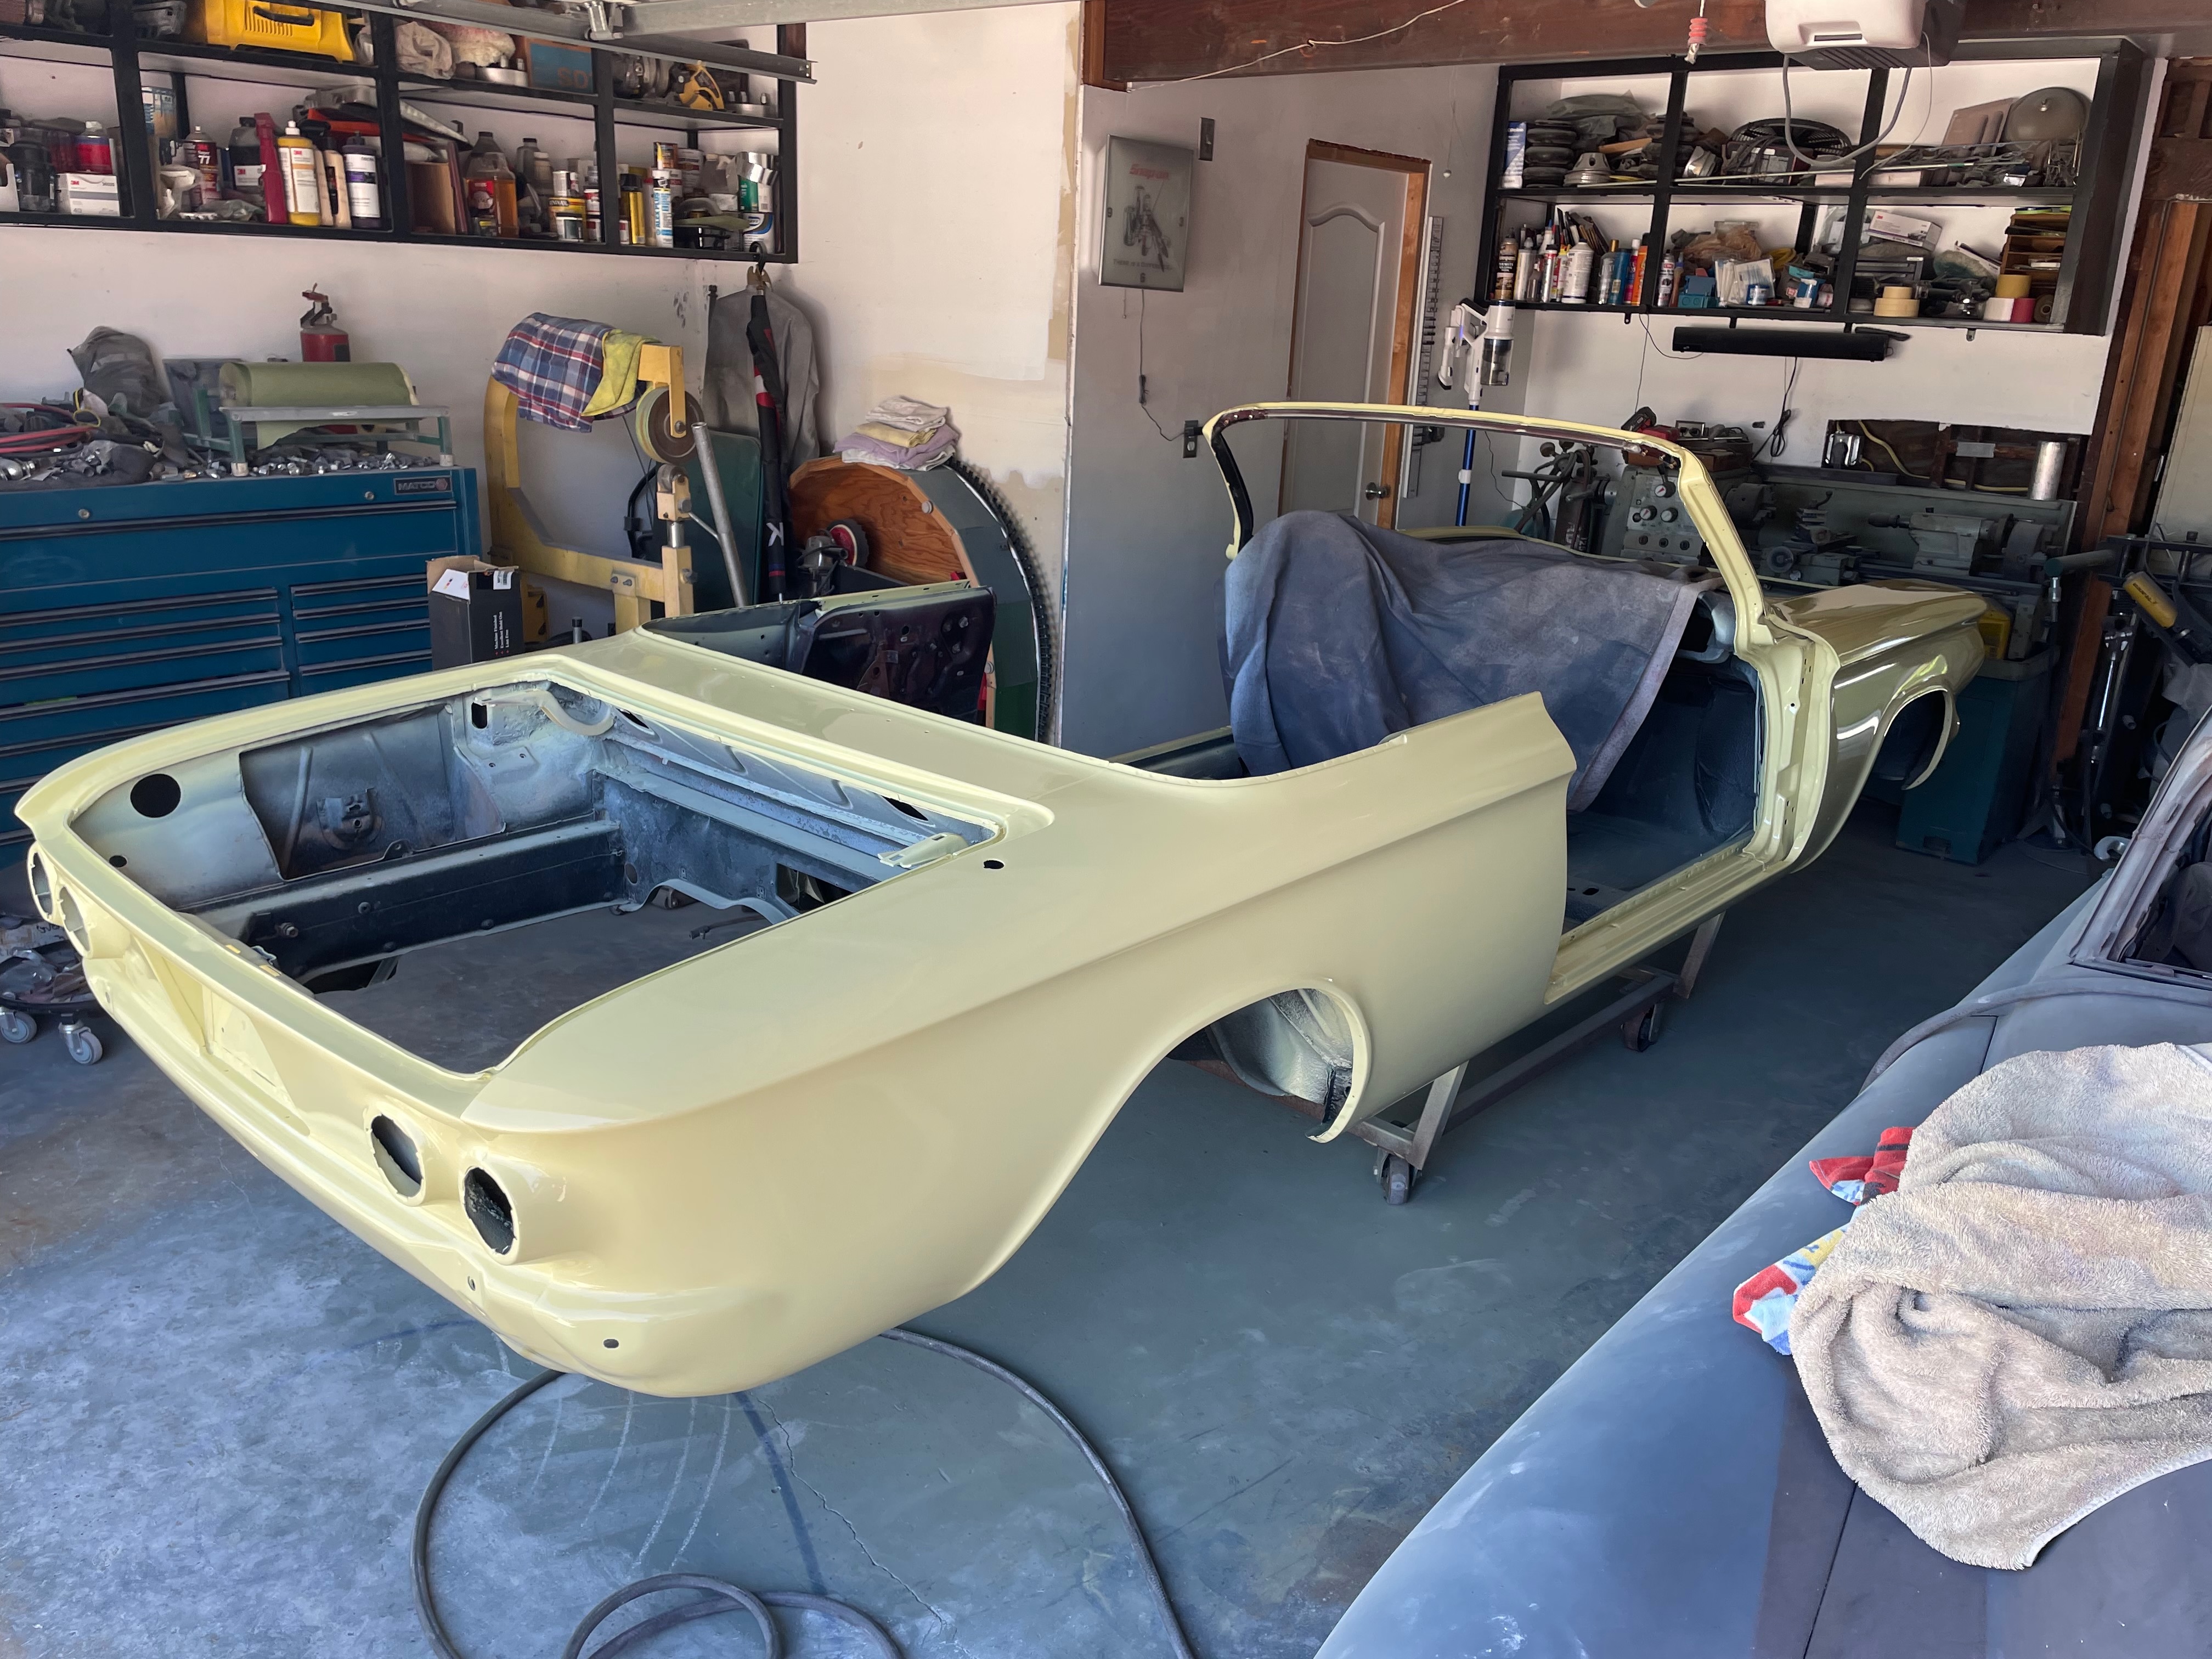
Body-Paint: Color Application
Applying the factory-correct Monza Yellow paint to restore the Corvair's original vibrant appearance, using modern materials for improved durability.
Body-Paint: Post-Paint Detailing
Fine detailing work after paint application to perfect the body finish, including careful inspection for any imperfections that need correction.
Body-Paint: Finish Polishing
Final polishing of the new paint to bring out the depth and shine, using progressively finer compounds to achieve a mirror-like finish.
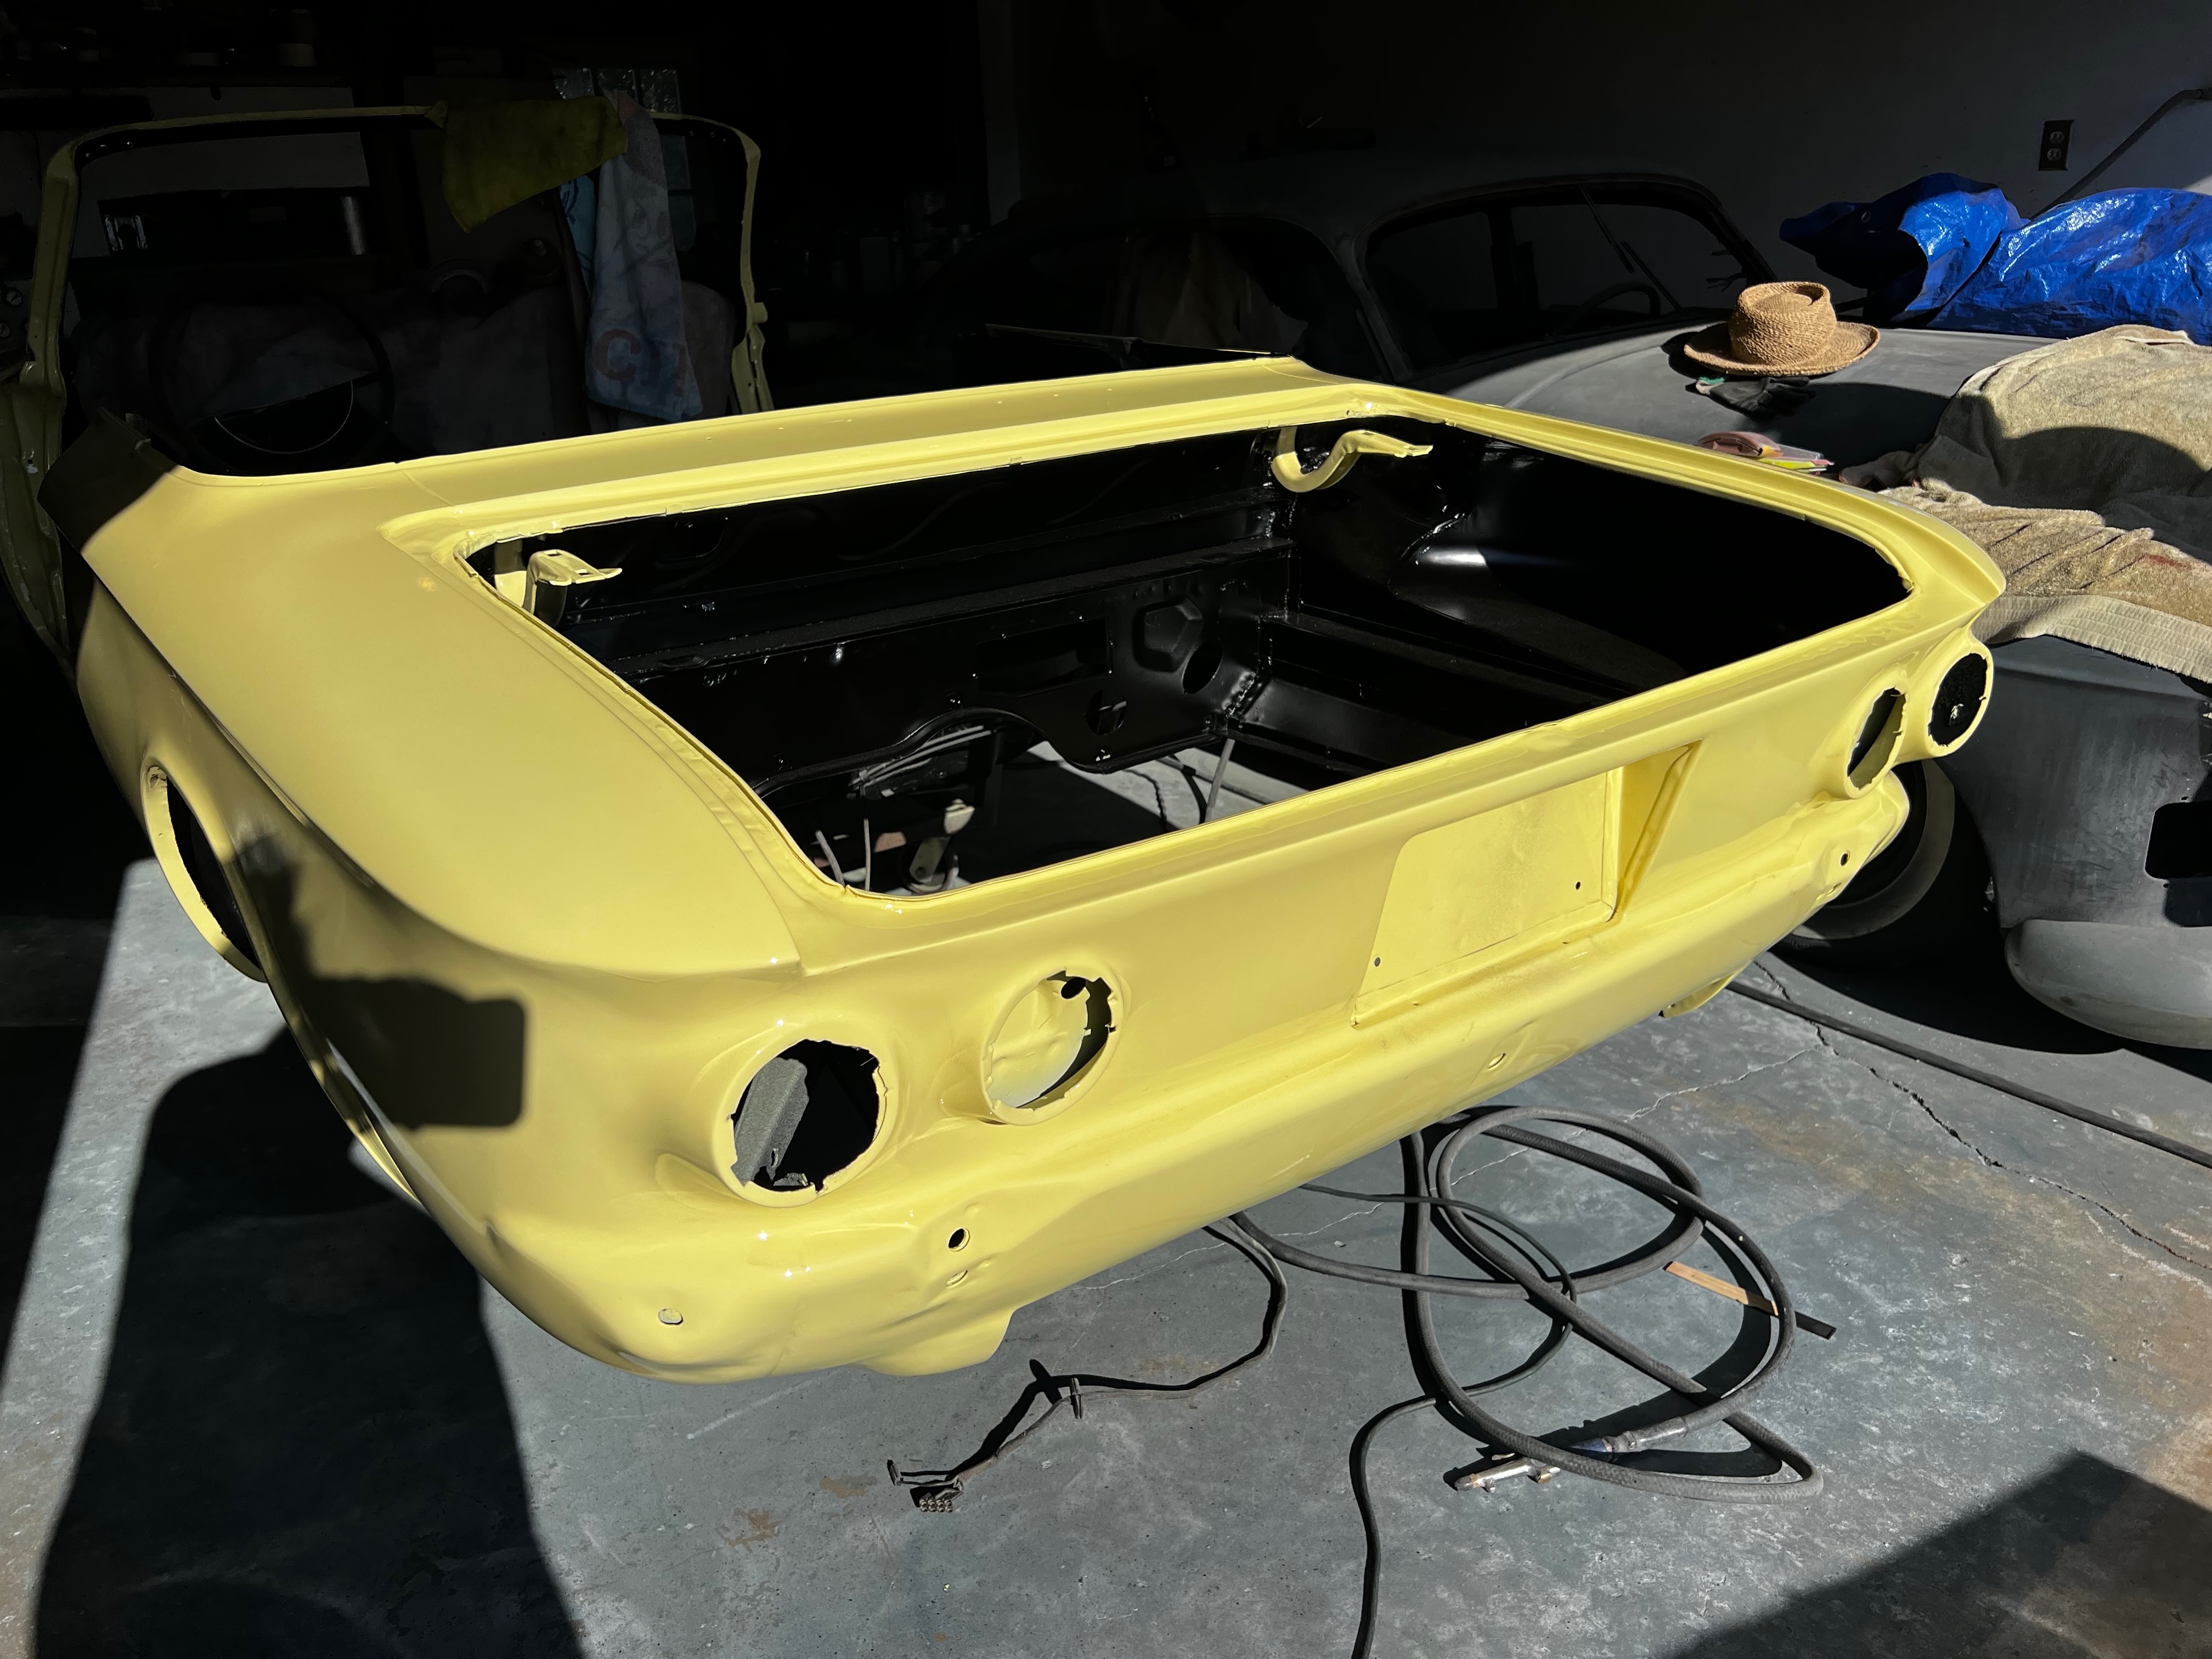
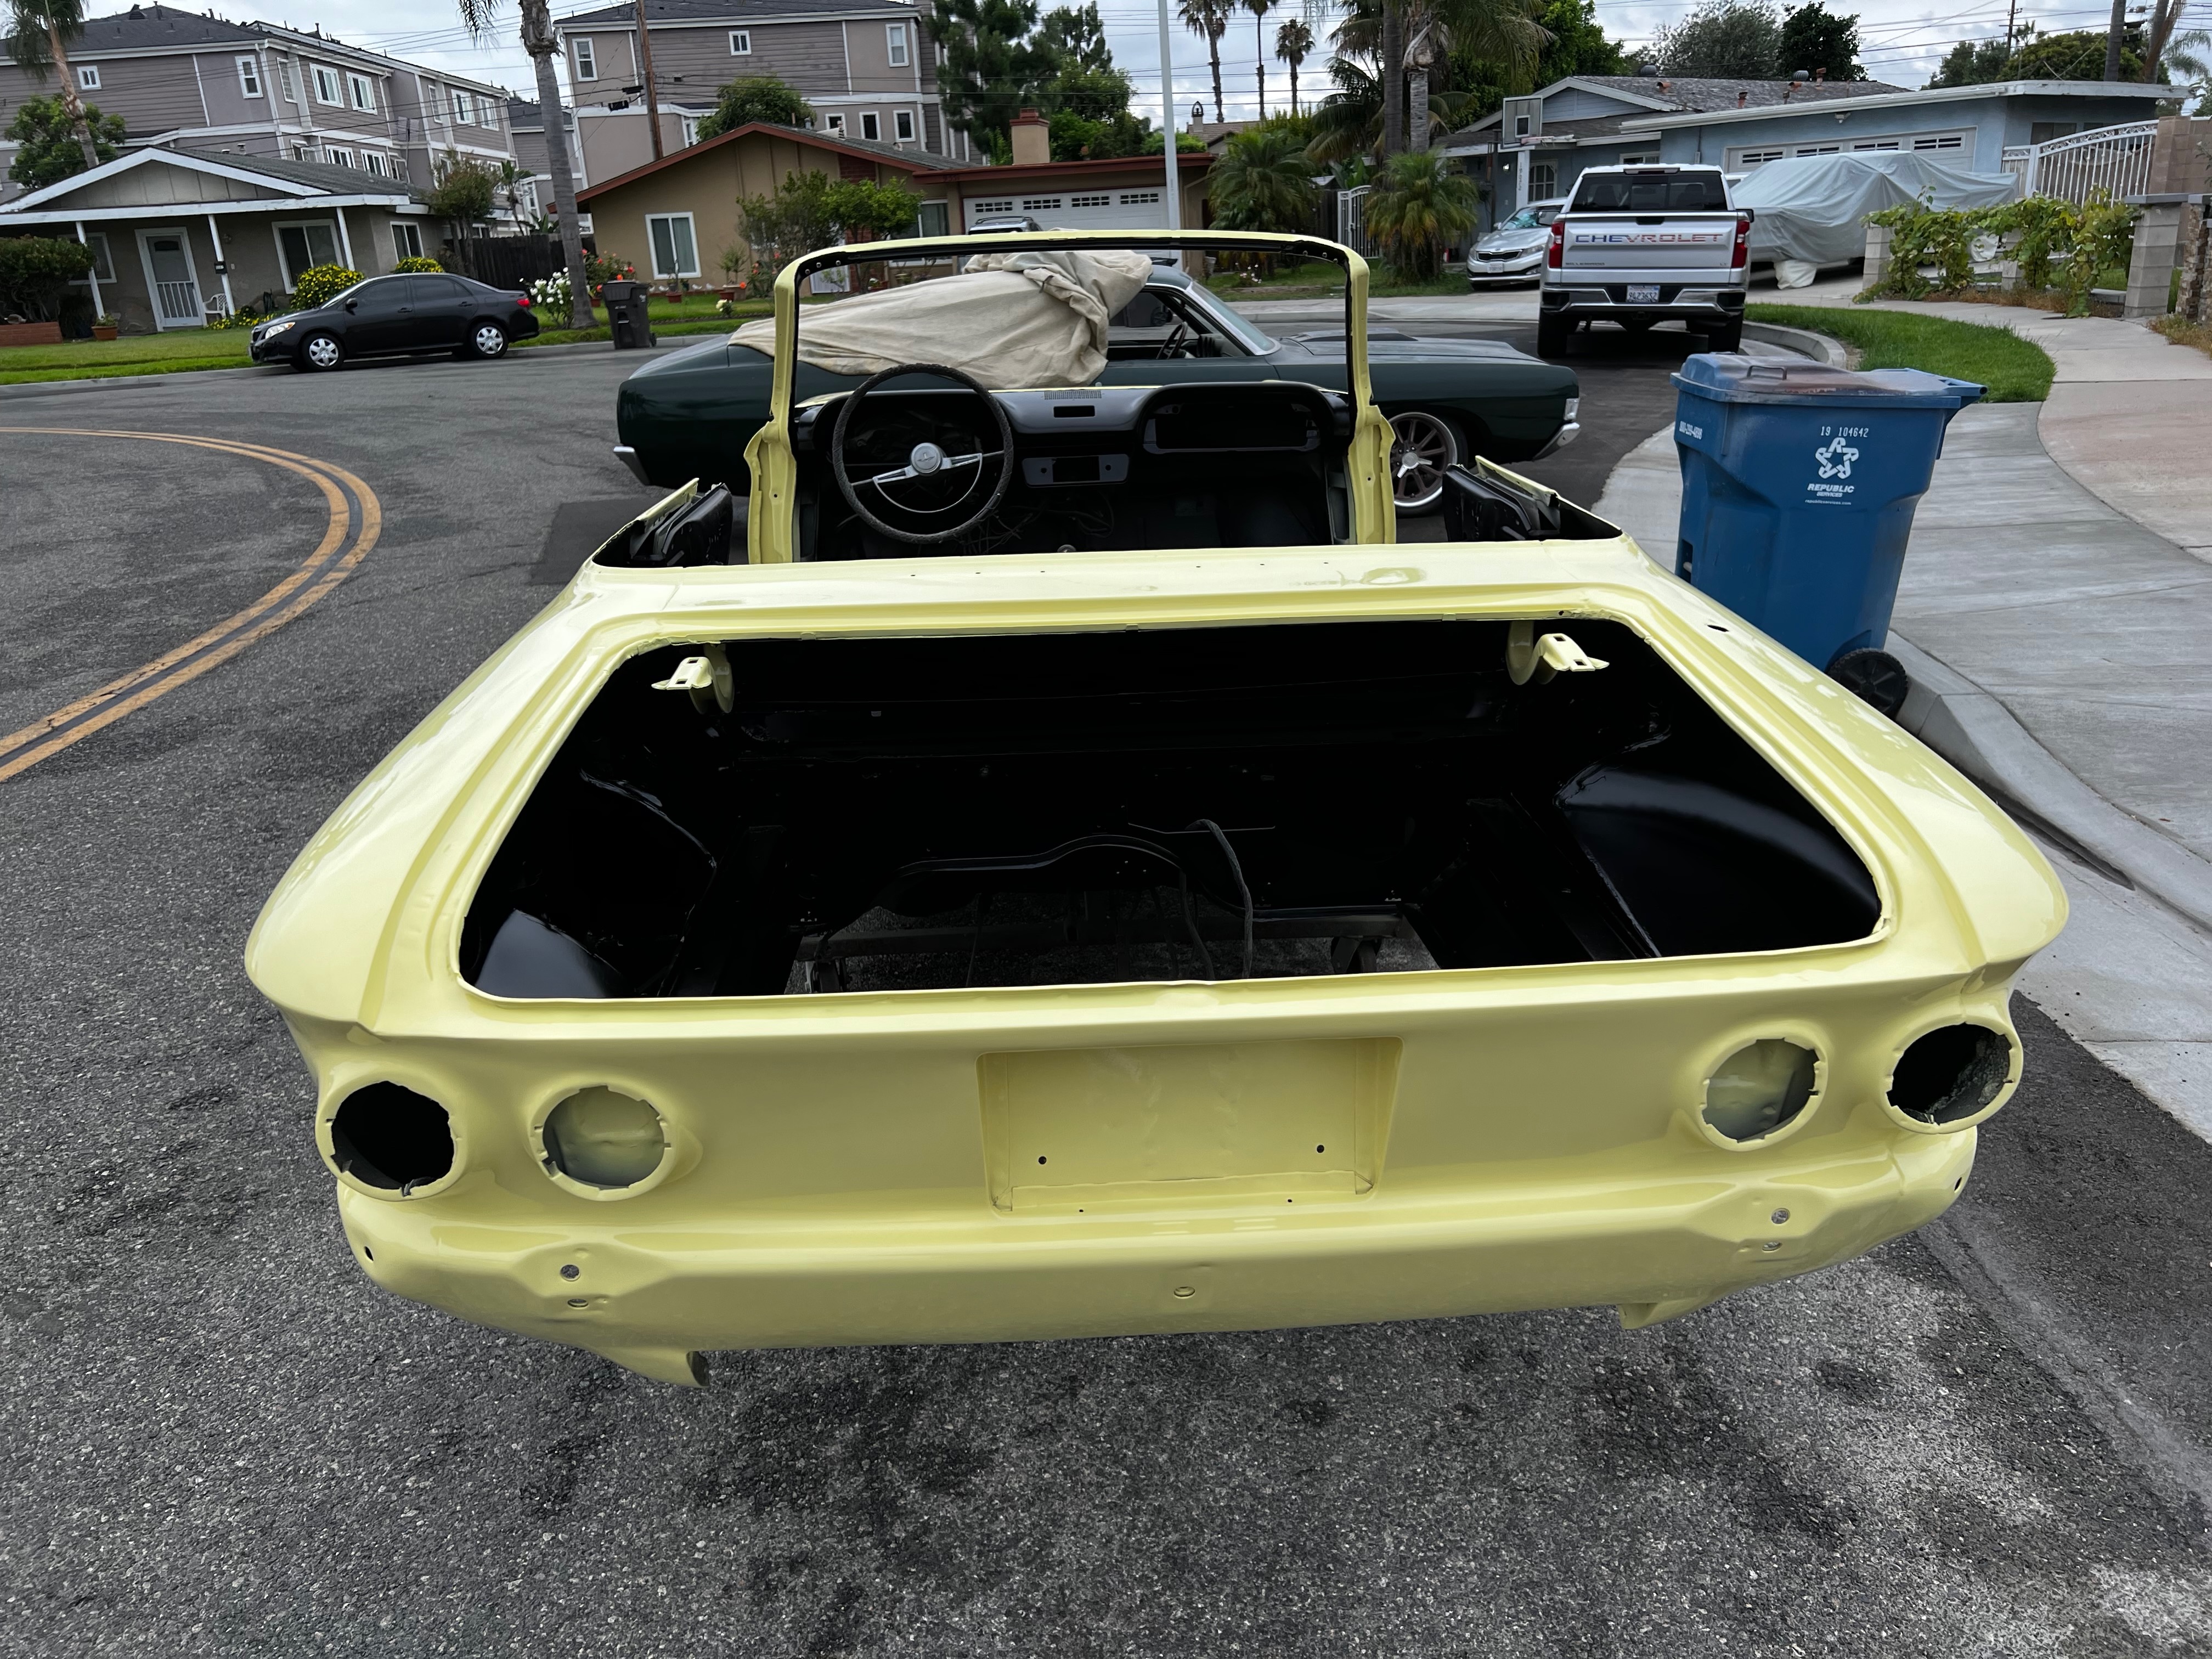
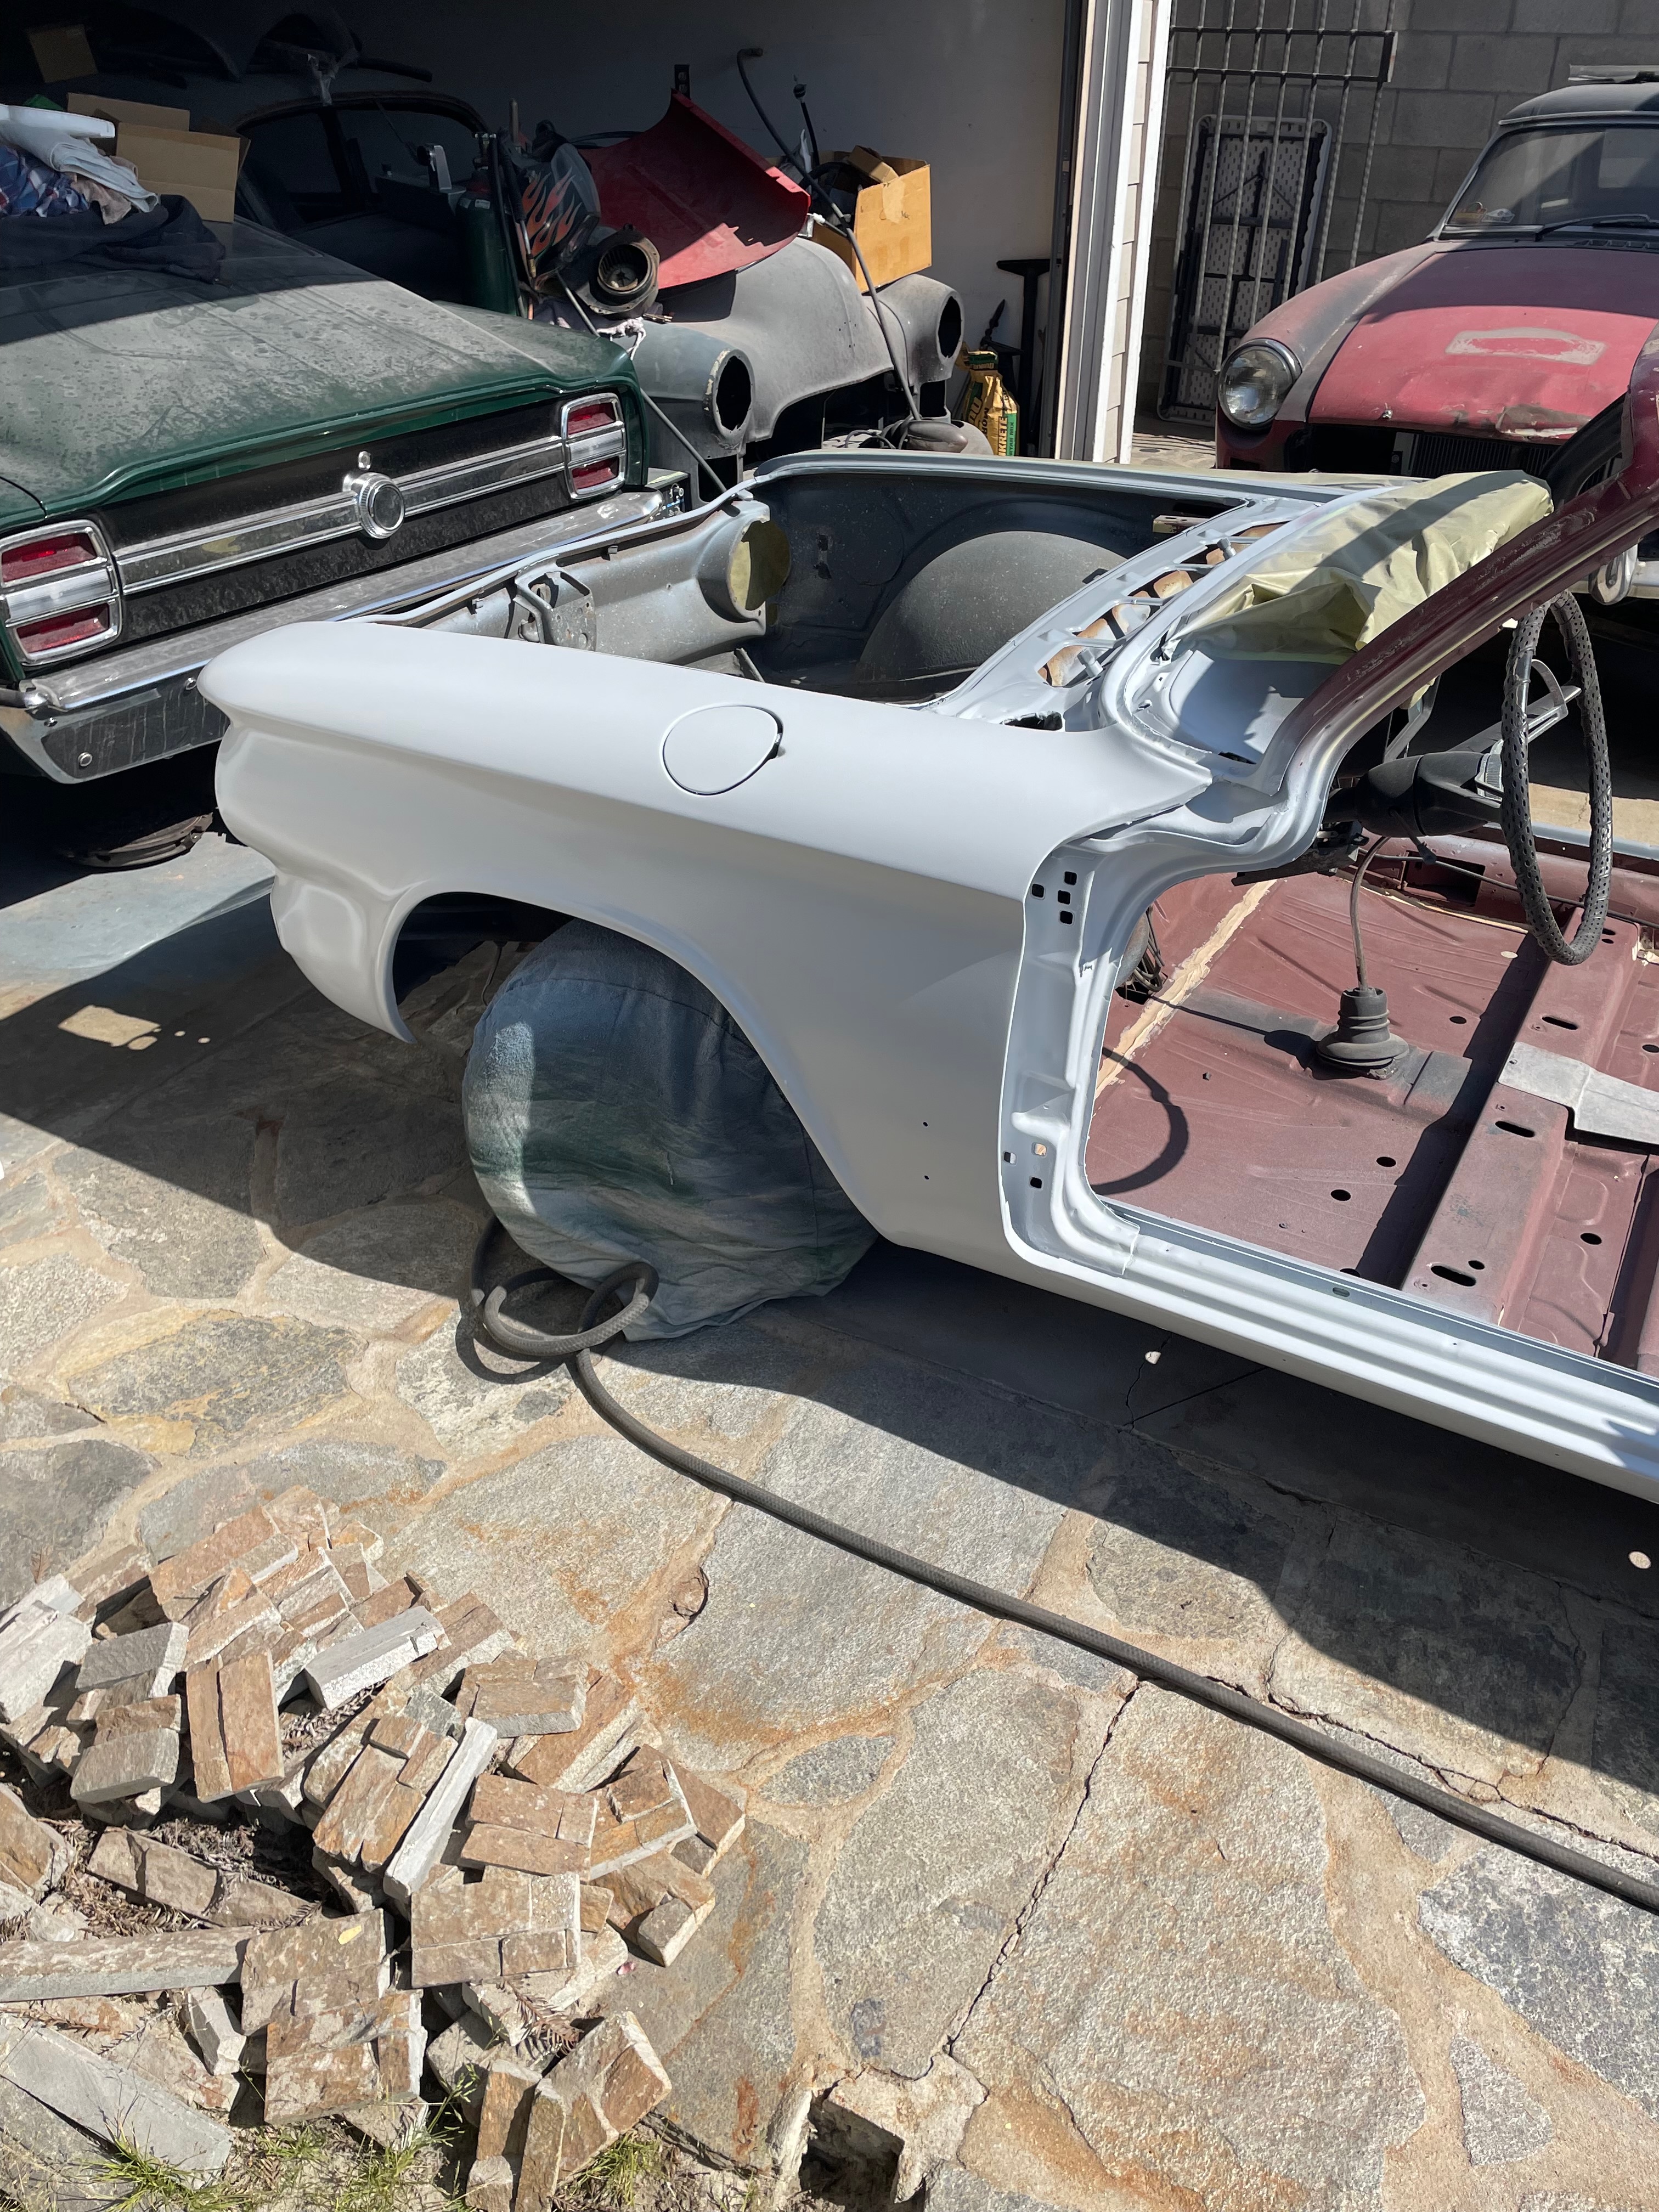
Body-Paint: Restoration Progress
The Corvair body taking shape after extensive metalwork, primer, and paint, showing the transformation from rusted project to restored classic.
Body-Paint: Panel Alignment
Carefully adjusting body panels to ensure perfect alignment and consistent gap spacing, critical for both appearance and proper function.

Body-Paint: Detail Masking
Precise masking and preparation for detailed paint work on specific areas, ensuring clean lines and proper color separation.
Body-Paint: Final Touches
Adding the finishing touches to the body restoration, addressing minor details that make the difference between a good and exceptional restoration.
Body-Paint: Precision Application
Applying paint with careful attention to technique, ensuring proper coverage, thickness, and finish for long-lasting durability and appearance.
Body-Paint: Panel Reconstruction
Repairing damaged body panels using specialized techniques to restore original contours and prepare for a smooth, seamless paint finish.

Body-Paint: Surface Preparation
Meticulously preparing body surfaces through multiple stages of sanding and cleaning to ensure proper paint adhesion and a flawless finish.

Body-Paint: Final Contouring
Adding the finishing touches to the body restoration, ensuring all panels have the correct shape and alignment before final paint application.
Body-Paint: Color Detailing
Performing detailed paint work in specific areas, ensuring consistent color application and proper transitions between different body sections.
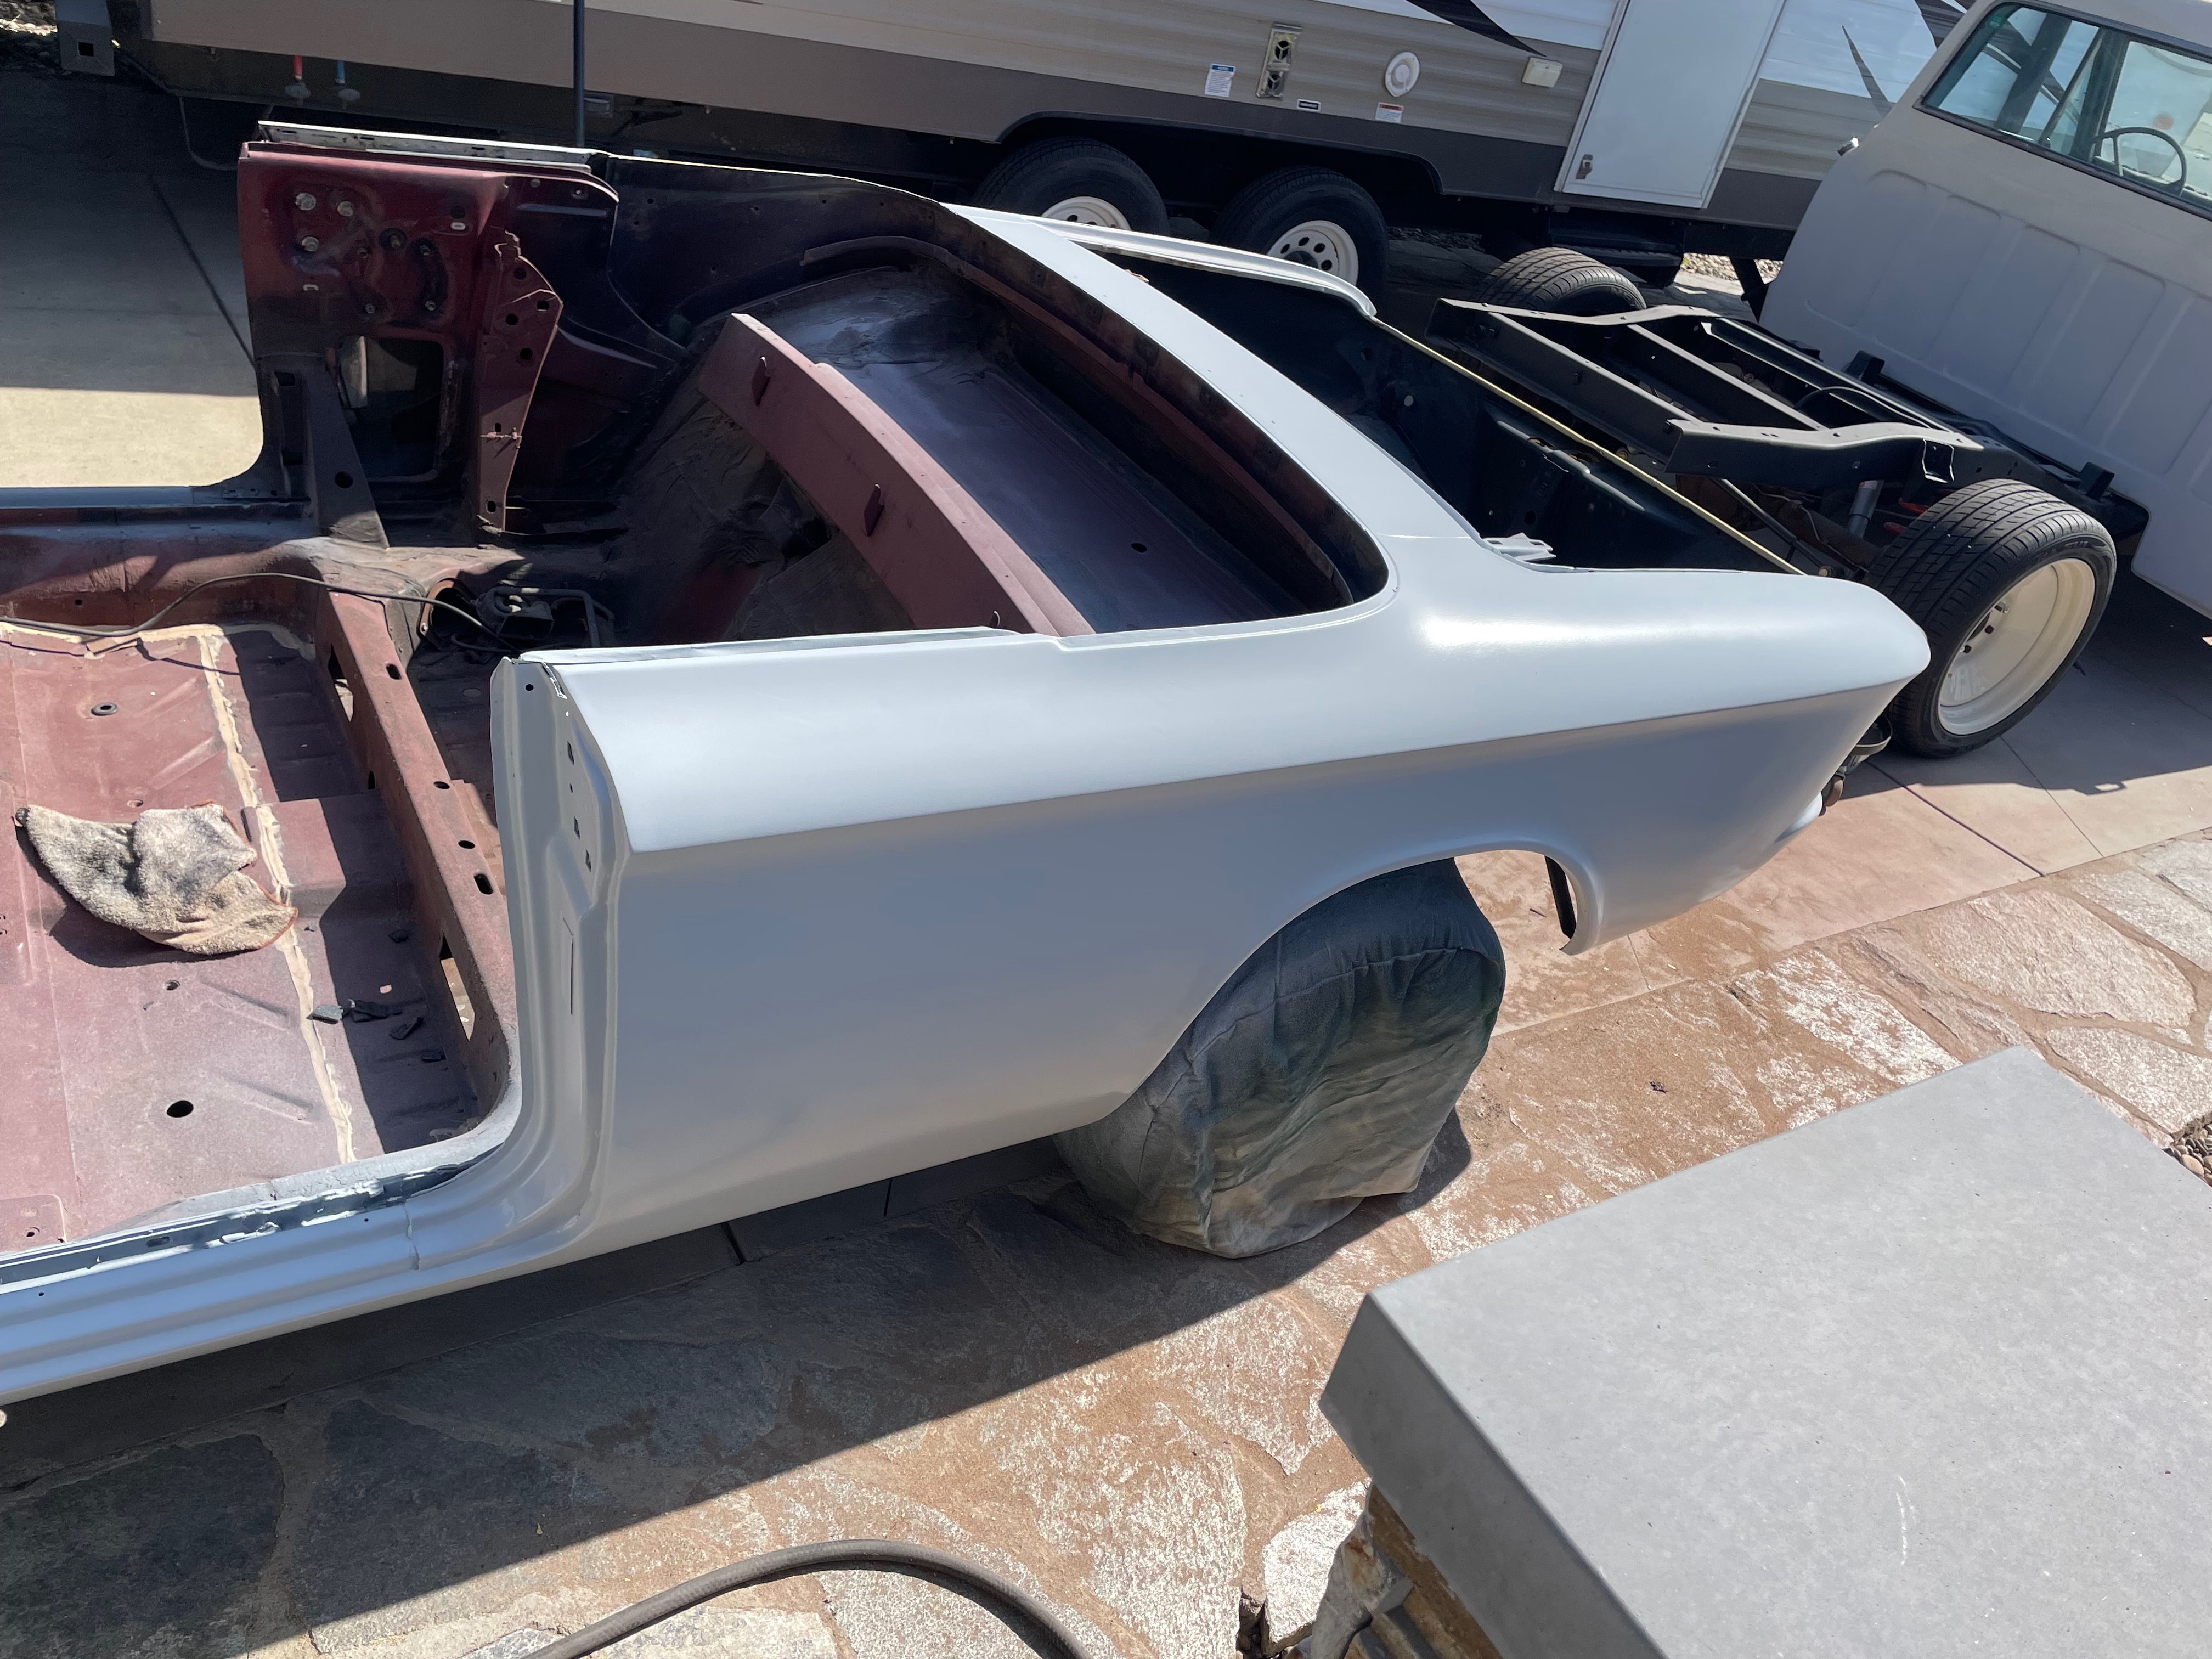
Body-Paint: Transformation Progress
Significant progress in the body restoration process, showing the transition from damaged original to smooth, properly contoured panels.
Body-Paint: Finish Development
The final paint finish coming together after multiple stages of base coat, color coat, and clear coat application for depth and durability.
Body-Paint: Precision Metalwork
Detailed body work requiring precision metalworking skills to restore damaged sections to factory-correct specifications.
Body-Paint: Primer Application
Applying high-build primer to create the foundation for a perfect paint job, filling minor imperfections and creating a uniform surface.
Body-Paint: Detail Refinement
Fine-tuning the subtle details in the body restoration process that make the difference between a good and exceptional restoration.
Body-Paint: Application Technique
Using proper paint application techniques to ensure even coverage, correct thickness, and a flawless finish free of runs or orange peel.
Body-Paint: Structural Integrity
Comprehensive restoration of the body structure, addressing rust damage and ensuring the chassis has proper strength and rigidity.
Body-Paint: Finish Perfection
Fine detailing of the paint work, including wet sanding and polishing to achieve a mirror-like finish with proper depth and clarity.
Body-Paint: Restoration Milestone
Significant progress in the body restoration process, showing the transformation from damaged project car to properly shaped and aligned panels.
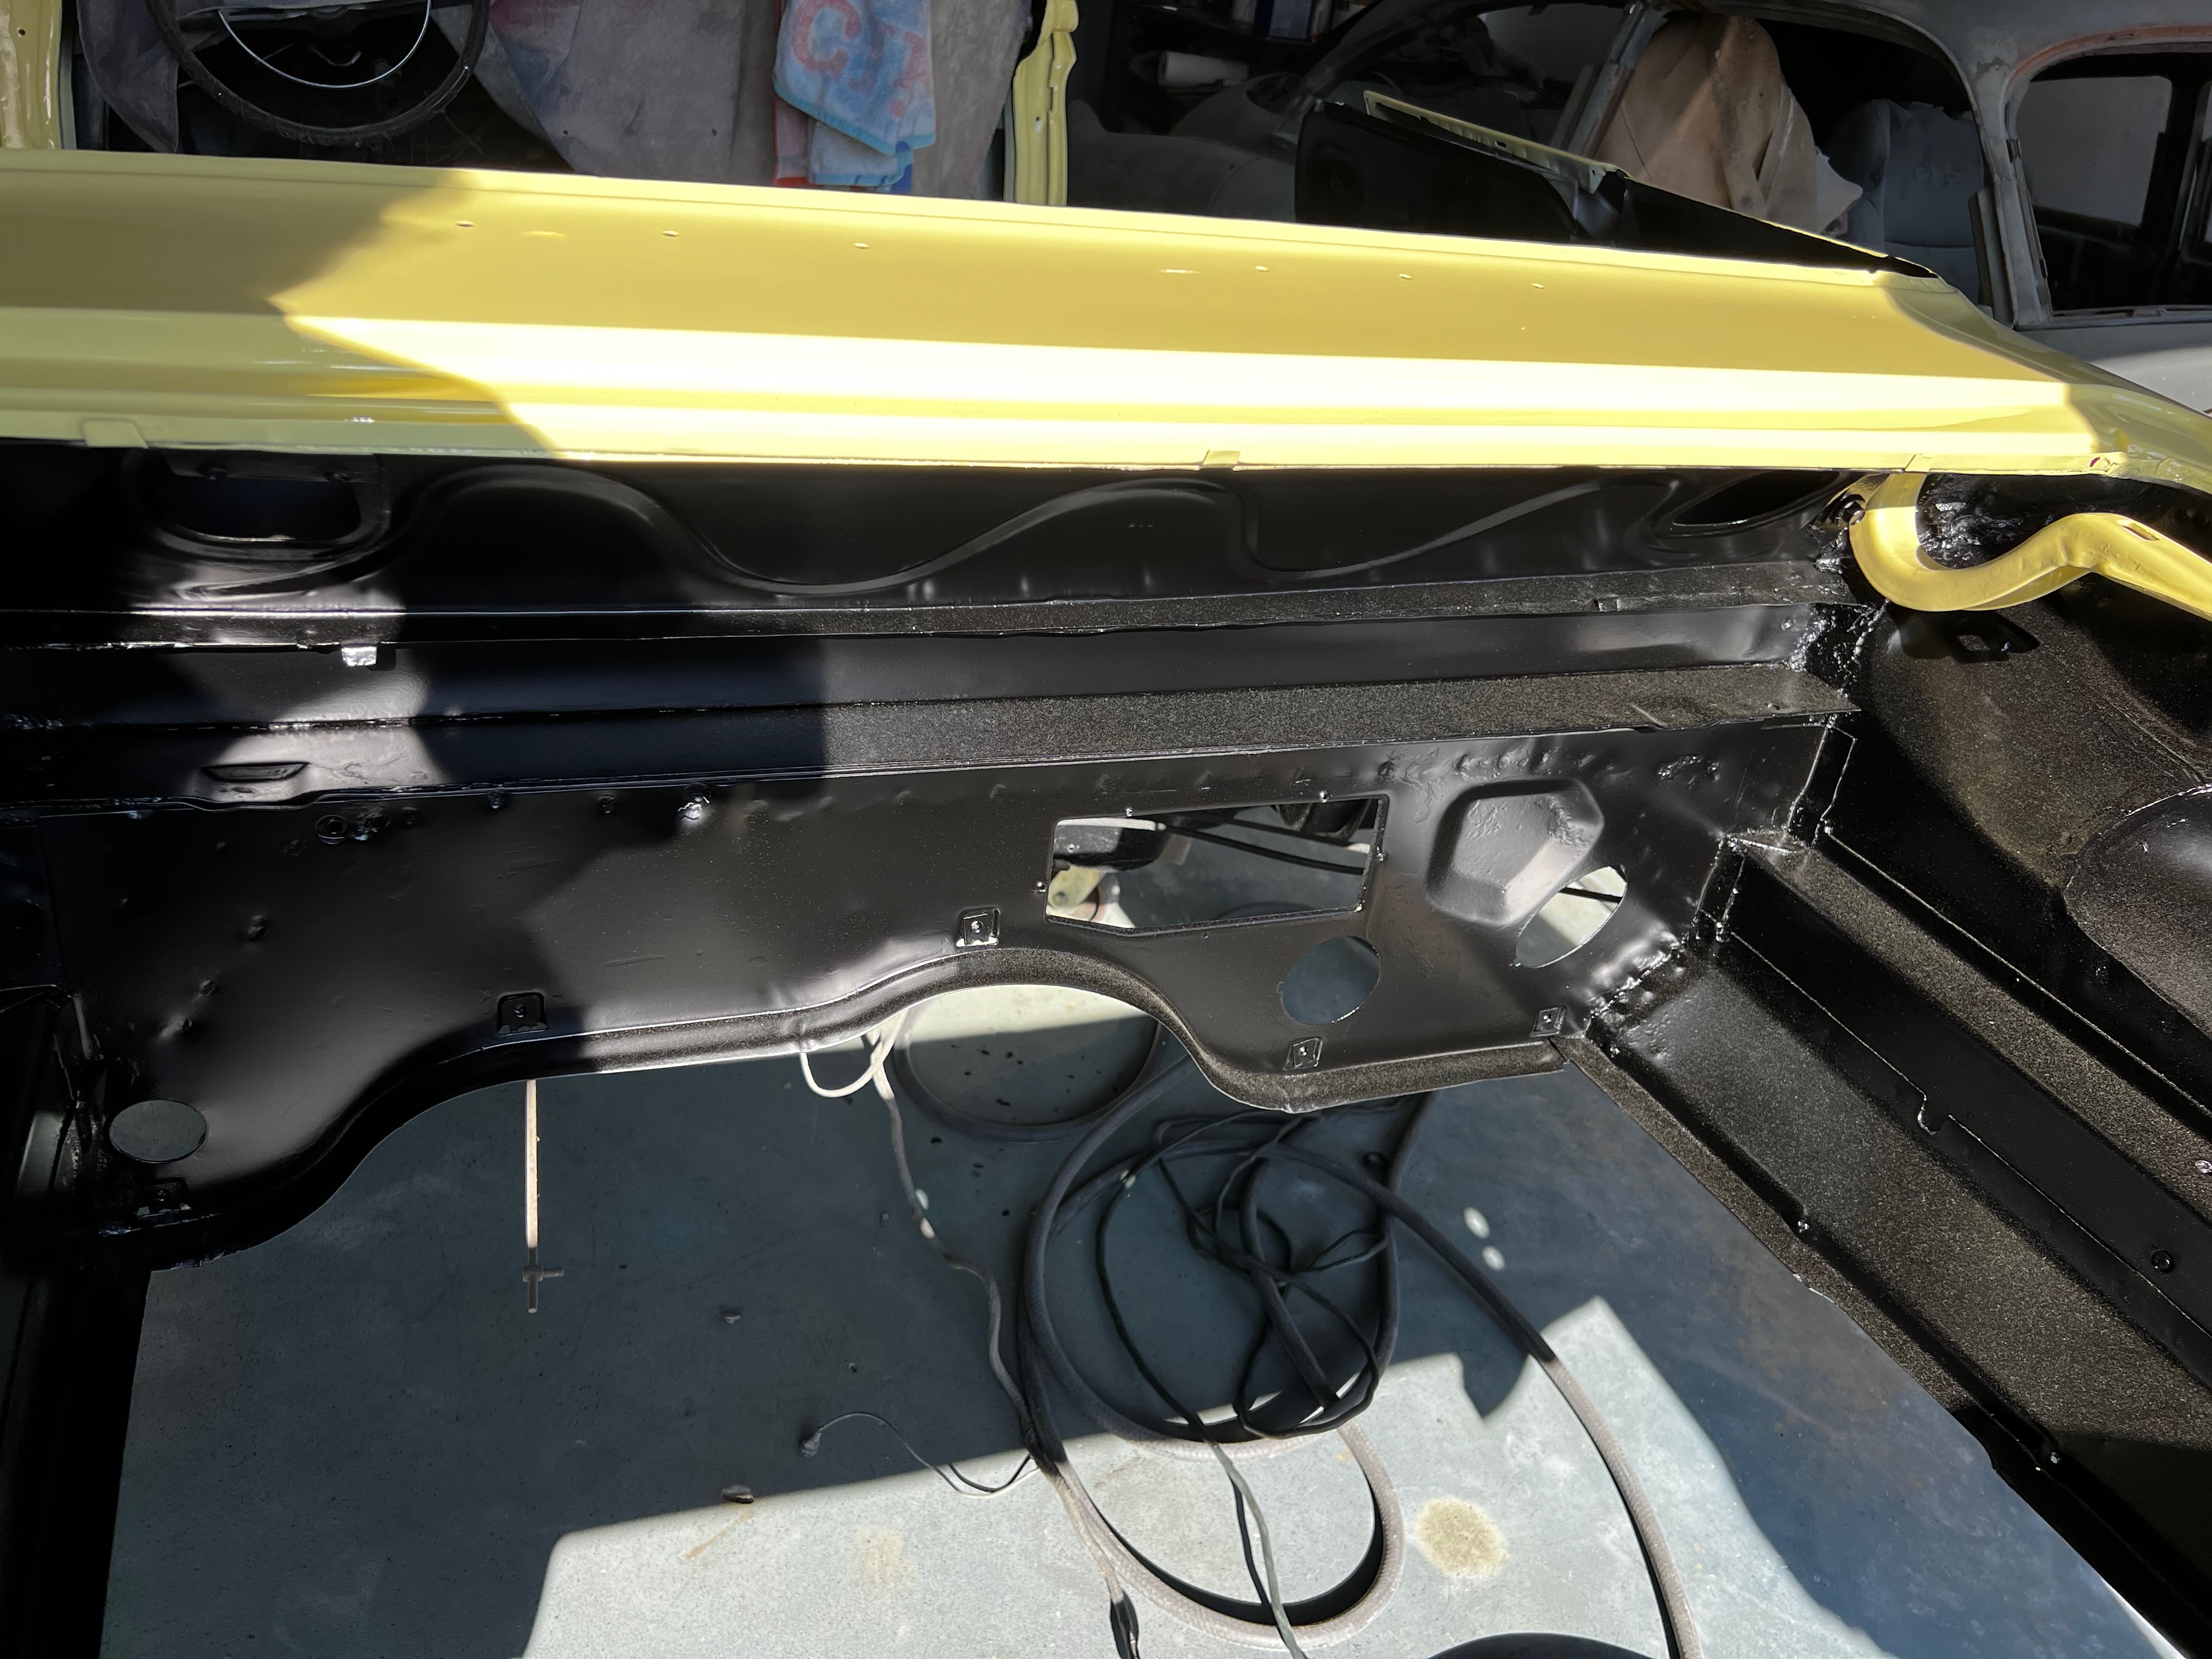
Body-Paint: Color Application
Applying the factory-correct Monza Yellow paint with proper technique to achieve a smooth, consistent finish across all body panels.
Body-Paint: Panel Repair
Using specialized techniques to repair damaged body panels, including metal shrinking, stretching, and welding to restore original contours.
Body-Paint: Surface Conditioning
Carefully preparing the body surface through multiple stages of sanding, cleaning, and masking to ensure optimal paint adhesion and finish.
Body-Paint: Panel Fabrication
Custom fabrication of body panels to replace severely damaged sections, ensuring proper fit and alignment with adjacent panels.
Body-Paint: Color Matching
Detailed work on the paint finish to ensure consistent color matching across all body panels for a factory-correct appearance.

Body-Paint: Panel Alignment
Precise body work to ensure proper panel gaps and alignment, critical for both appearance and proper door and hood operation.
Body-Paint: Masking Technique
Careful masking and preparation of areas not to be painted, ensuring clean lines and proper separation between different surfaces.
Body-Paint: Surface Preparation
Meticulous preparation of body panel surfaces to ensure proper paint adhesion and a smooth, even finish on the Corvair's exterior.
Body-Paint: Color Application
Applying the factory-correct Monza Yellow paint with proper technique to achieve consistent coverage and depth across all body panels.
Body-Paint: Panel Restoration
Comprehensive restoration of body panels to address rust damage and restore the original contours and lines of the Corvair's distinctive design.
Body-Paint: Finish Detailing
Fine detailing work on the paint finish, including wet sanding and polishing to achieve a mirror-like surface with proper depth and clarity.

Body-Paint: Restoration Progress
Significant progress in the body restoration process, showing the transformation from damaged project car to properly shaped and aligned panels.
Body-Paint: Professional Application
Applying the Monza Yellow paint with professional technique to ensure even coverage, proper thickness, and a flawless finish free of runs or orange peel.
Body-Paint: Panel Fabrication
Repairing damaged body panels using specialized metalworking techniques to restore the original contours and structural integrity of the Corvair.
Body-Paint: Surface Conditioning
Meticulously preparing the body surfaces through multiple stages of sanding, cleaning, and priming to ensure optimal paint adhesion and a flawless finish.

Body-Paint: Detail Refinement
Fine-tuning the subtle details in the body restoration process that make the difference between a good and exceptional restoration of this classic Corvair.
Body-Paint: Color Layering
Applying multiple layers of the Monza Yellow paint to achieve proper depth and coverage, with careful attention to technique for a factory-quality finish.
Body-Paint: Shell Restoration
Comprehensive restoration of the Corvair body shell, addressing structural issues and preparing the foundation for a complete exterior refinishing.
Body-Paint: Finish Enhancement
Fine detailing of the paint finish through careful wet sanding and polishing to bring out the depth and luster of the Monza Yellow color.
Body-Paint: Panel Alignment
Precise adjustment of body panels to ensure proper alignment and consistent gap spacing, critical for both appearance and proper function.
Body-Paint: Spray Technique
Using professional spray techniques to apply the paint evenly, maintaining proper distance and overlap patterns for a consistent, run-free finish.

Body-Paint: Rust Remediation
Addressing severe rust damage through careful cutting, fabrication, and welding of replacement metal sections to restore structural integrity.
Body-Paint: Primer Application
Applying high-build primer to create a smooth foundation for the final paint, filling minor imperfections and providing proper adhesion.
Body-Paint: Contour Refinement
Fine-tuning the body contours through careful metalwork and filling to ensure the Corvair's distinctive lines are properly restored.
Body-Paint: Color Blending
Skillful blending of paint between panels to ensure a consistent color appearance across the entire Corvair, despite being painted in sections.
Body-Paint: Structural Integrity
Comprehensive restoration of the body structure, addressing rust damage and ensuring the chassis has proper strength and rigidity for safe operation.
Body-Paint: Finish Polishing
Final polishing of the new paint to bring out the depth and shine, using progressively finer compounds to achieve a mirror-like finish.
Body-Paint: Panel Fitting
Precise fitting and adjustment of body panels to ensure proper alignment, gap consistency, and smooth operation of doors and other moving parts.
Body-Paint: Clear Coat Application
Applying multiple layers of clear coat over the base color to provide depth, gloss, and long-term protection for the Corvair's new paint finish.

Body-Paint: Metal Fabrication
Custom fabrication of replacement metal sections to repair severely damaged areas, ensuring proper fit and structural integrity.
Body-Paint: Surface Masking
Careful masking and preparation of the Corvair's body to protect areas not being painted and ensure clean, sharp lines between different surfaces.
Body-Paint: Line Refinement
Precise work to perfect the body lines and contours, ensuring the Corvair's distinctive styling elements are accurately preserved in the restoration.
Body-Paint: Color Sanding
Wet sanding the paint surface with ultra-fine grit sandpaper to remove imperfections and prepare for final polishing to a mirror-like finish.
Body-Paint: Shell Preparation
Comprehensive preparation of the Corvair body shell, addressing structural issues and creating a solid foundation for the exterior restoration.

Body-Paint: Finish Buffing
Machine buffing the paint finish with specialized compounds to bring out maximum gloss and depth in the Monza Yellow color.
Body-Paint: Panel Alignment
Precise adjustment of body panels to ensure proper fit and alignment, with consistent gaps that match factory specifications.

Body-Paint: Base Coat Application
Applying the base coat of Monza Yellow paint with careful technique to establish the foundation for the Corvair's vibrant exterior finish.
Body-Paint: Panel Welding
Precision welding of replacement body panels to repair rust damage, ensuring structural integrity while maintaining factory-correct appearance.
Body-Paint: Booth Preparation
Final cleaning and preparation of the Corvair body in the paint booth, ensuring a dust-free environment for optimal paint application.
Body-Paint: Seam Finishing
Careful finishing of body panel seams and joints to ensure smooth transitions and proper water sealing throughout the Corvair's exterior.
Body-Paint: Precision Masking
Detailed masking work to protect specific areas during paint application, ensuring clean lines and proper color separation on the Corvair's body.
Body-Paint: Panel Fabrication
Custom fabrication of replacement body panels to match the original Corvair specifications, ensuring proper fit and authentic appearance.
Body-Paint: Finish Inspection
Careful inspection of the paint finish under specialized lighting to identify and address any imperfections before final assembly.
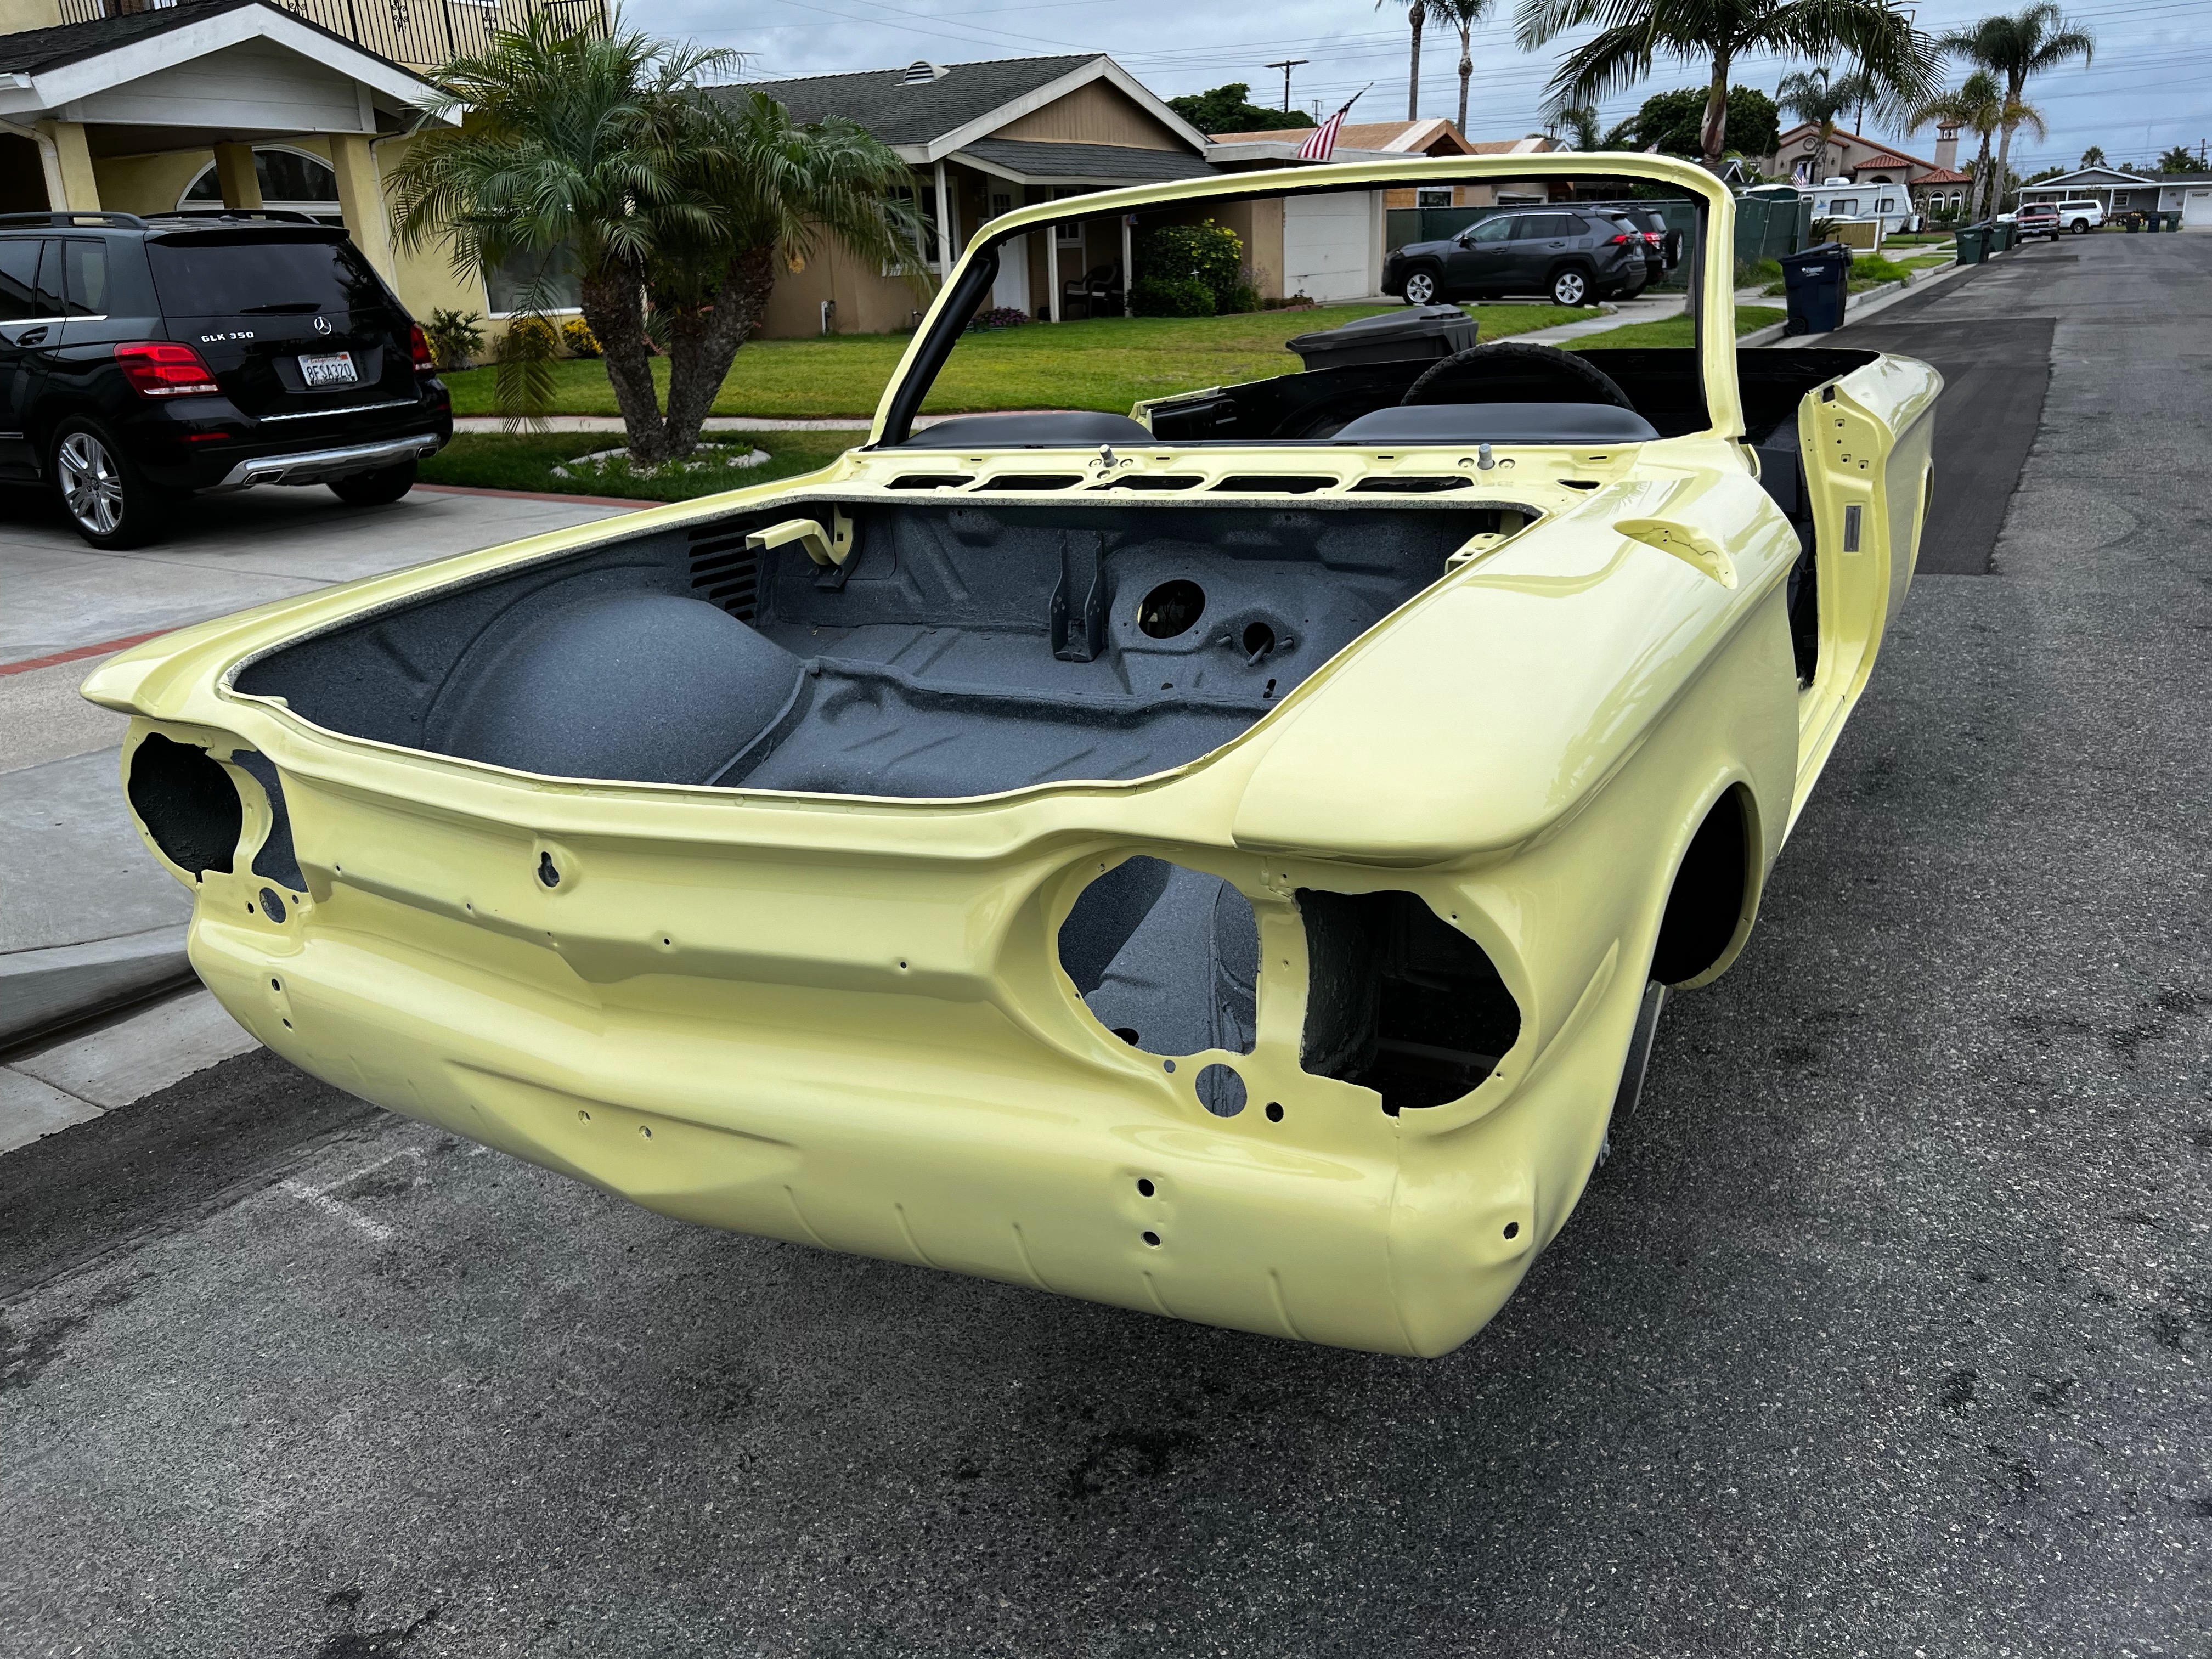
Body-Paint: Restoration Progress
Significant milestone in the body restoration process, showing the transformation from damaged project to properly restored classic Corvair.
Body-Paint: Spray Technique
Professional paint application using proper spray gun technique to achieve even coverage and consistent finish on the Corvair's exterior.
Body-Paint: Panel Restoration
Detailed repair work on body panels to address damage and corrosion, restoring the original contours of the Corvair's distinctive design.
Body-Paint: Surface Preparation
Thorough preparation of the body surface through cleaning, sanding, and priming to ensure optimal paint adhesion and a flawless finish.
Body-Paint: Detail Refinement
Meticulous attention to the fine details of the body restoration, ensuring every aspect of the Corvair's exterior meets exacting standards.
Body-Paint: Color Matching
Precise color matching to ensure the Monza Yellow paint is consistent across all body panels, maintaining the factory-correct appearance.

Body-Paint: Shell Integrity
Comprehensive restoration of the Corvair body shell, addressing structural issues to create a solid foundation for the complete exterior refinishing.
Body-Paint: Finish Perfection
Meticulous detailing of the paint finish to achieve a flawless surface, addressing even the smallest imperfections for showroom-quality results.
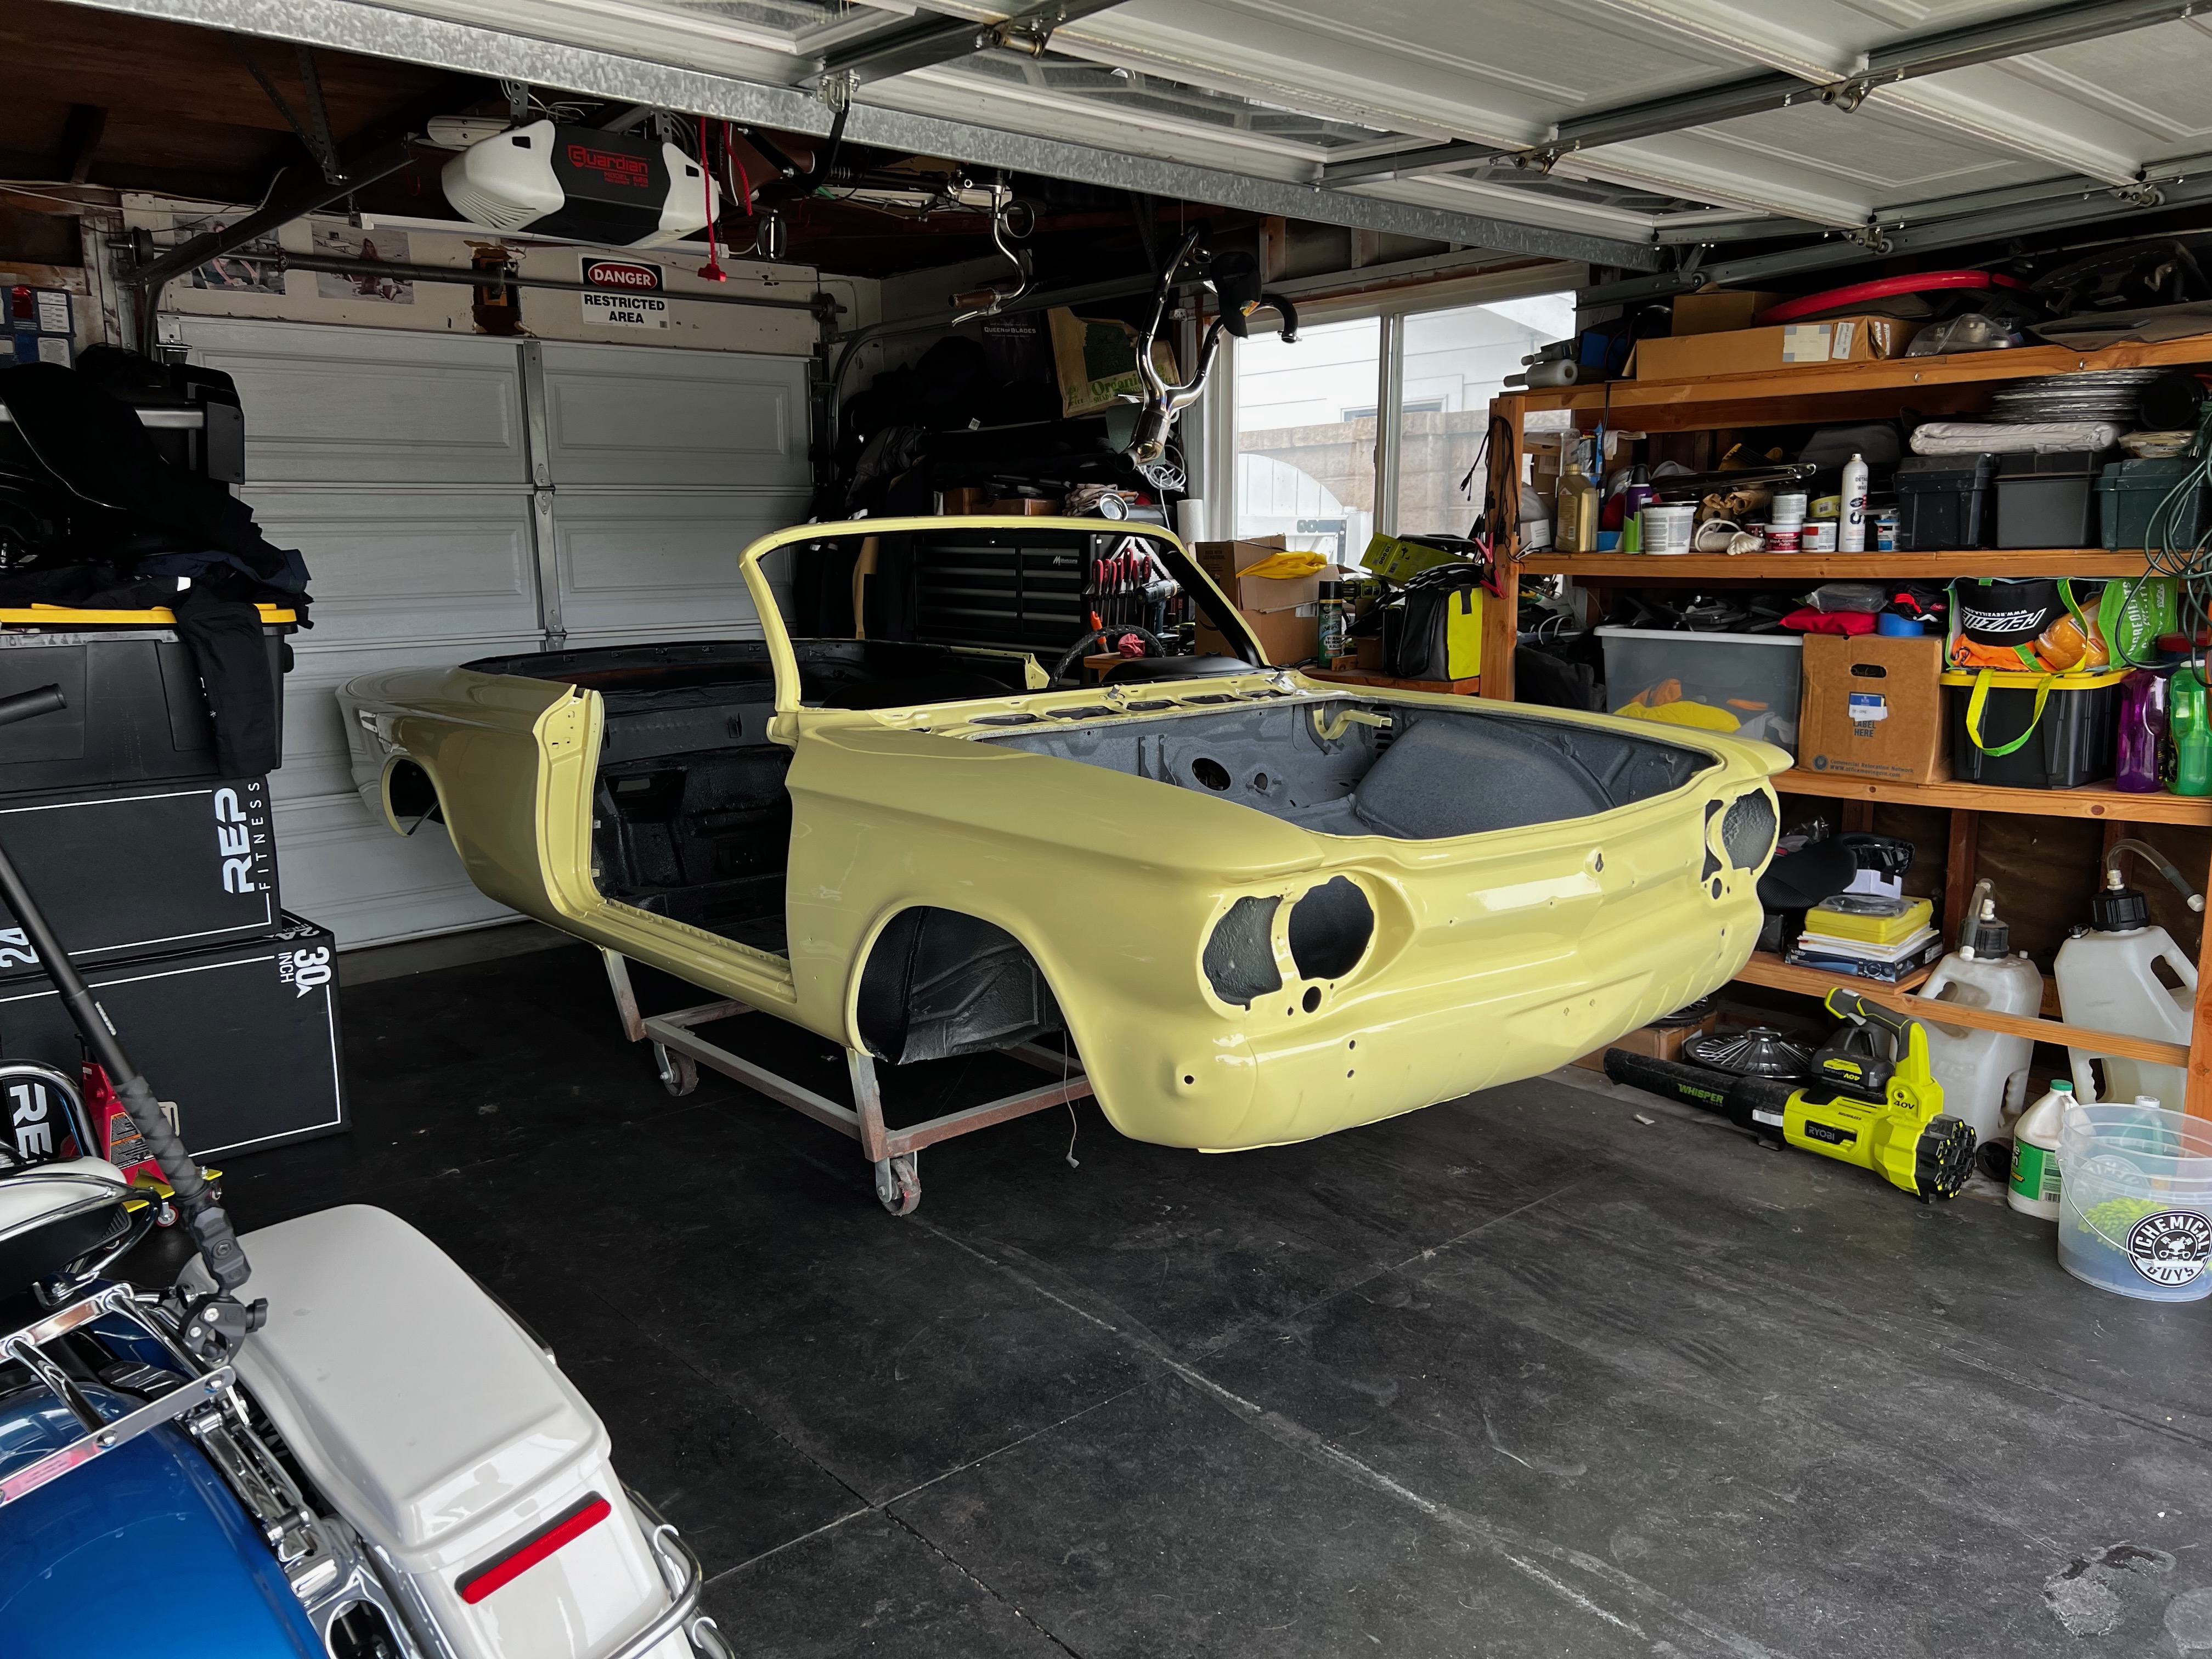
Body-Paint: Restoration Milestone
Significant progress in the body restoration process, showing the transformation of the Corvair from project car to beautifully restored classic.
Body-Paint: Color Layering
Applying multiple layers of paint with proper technique to build depth and ensure complete coverage across the Corvair's body panels.

Body-Paint: Panel Alignment
Precise repair and alignment of body panels to ensure proper fit, consistent gaps, and smooth operation of all doors and moving parts.
Body-Paint: Surface Conditioning
Thorough preparation of the body surface through multiple stages of sanding and cleaning to create the ideal foundation for paint application.

Body-Paint: Detail Perfection
Meticulous attention to the fine details of the body restoration, ensuring every curve and line of the Corvair is properly restored.

Body-Paint: Finish Polishing
Carefully polishing the paint finish to bring out maximum depth and gloss, highlighting the Corvair's distinctive body lines and curves.
Body-Paint: Shell Preparation
Comprehensive preparation of the Corvair body shell, addressing structural issues and creating a solid foundation for the exterior restoration.
Body-Paint: Detail Finishing
Fine detailing of the paint finish, addressing minor imperfections to achieve a flawless surface worthy of a concours-quality restoration.
Body-Paint: Restoration Progress
Significant milestone in the body restoration process, showing the transformation from project car to beautifully restored classic Corvair.
Body-Paint: Spray Application
Professional application of paint using proper spray technique to achieve even coverage and a smooth, consistent finish on the Corvair.
Body-Paint: Metal Fabrication
Custom fabrication of replacement body panels to repair severely damaged areas, ensuring proper fit and structural integrity.
Body-Paint: Surface Preparation
Thorough preparation of the body surface through multiple stages of sanding and cleaning to ensure optimal paint adhesion and finish.
Body-Paint: Detail Refinement
Meticulous attention to the fine details of the body restoration, ensuring every aspect of the Corvair's exterior meets exacting standards.
Body-Paint: Color Application
Applying the Monza Yellow paint with professional technique to achieve consistent coverage and proper thickness for a durable, beautiful finish.
Body-Paint: Shell Restoration
Comprehensive restoration of the Corvair body shell, addressing structural issues to create a solid foundation for the complete exterior refinishing.

Body-Paint: Finish Detailing
Fine detailing of the paint finish to achieve a flawless surface, addressing even the smallest imperfections for a show-quality appearance.
Body-Paint: Panel Fitting
Precise fitting and adjustment of body panels to ensure proper alignment, consistent gaps, and smooth operation of all doors and moving parts.
Body-Paint: Application Technique
Professional application of paint using proper technique to ensure even coverage, correct thickness, and a flawless finish on the Corvair.
Body-Paint: Panel Repair
Detailed repair work on body panels to address damage and corrosion, restoring the original contours of the Corvair's distinctive design.
Body-Paint: Surface Conditioning
Thorough preparation of the body surface through multiple stages of sanding and cleaning to ensure optimal paint adhesion and finish.
Body-Paint: Detail Perfection
Meticulous attention to the fine details of the body restoration, ensuring every curve and line of the Corvair is properly restored.
Body-Paint: Color Blending
Skillful blending of paint between panels to ensure a consistent color appearance across the entire Corvair, despite being painted in sections.
Body-Paint: Shell Preparation
Comprehensive preparation of the Corvair body shell, addressing structural issues to create a solid foundation for the exterior restoration.
Body-Paint: Finish Enhancement
Fine detailing of the paint finish through careful wet sanding and polishing to bring out the depth and luster of the Monza Yellow color.
Body-Paint: Restoration Progress
Significant milestone in the body restoration process, showing the transformation from project car to beautifully restored classic Corvair.
Body-Paint: Spray Technique
Professional application of paint using proper spray gun technique to achieve even coverage and a smooth, consistent finish on the Corvair.
Body-Paint: Panel Fabrication
Custom fabrication of replacement body panels to match the original Corvair specifications, ensuring proper fit and authentic appearance.
Body-Paint: Masking Preparation
Careful masking of areas not to be painted, ensuring clean lines and proper separation between different surfaces on the Corvair.
Body-Paint: Contour Refinement
Fine-tuning the body contours through careful metalwork and filling to ensure the Corvair's distinctive lines are properly restored.
Mechanical: Engine Teardown
The Corvair's air-cooled flat-six engine completely disassembled for thorough inspection, cleaning, and rebuilding with new components.
Mechanical: Cylinder Machining
Precision boring and honing of the engine cylinders to restore proper dimensions and surface finish for optimal compression and performance.
Mechanical: Engine Reassembly
Methodically rebuilding the flat-six engine with new pistons, rings, bearings, seals, and gaskets to ensure reliable performance for years to come.
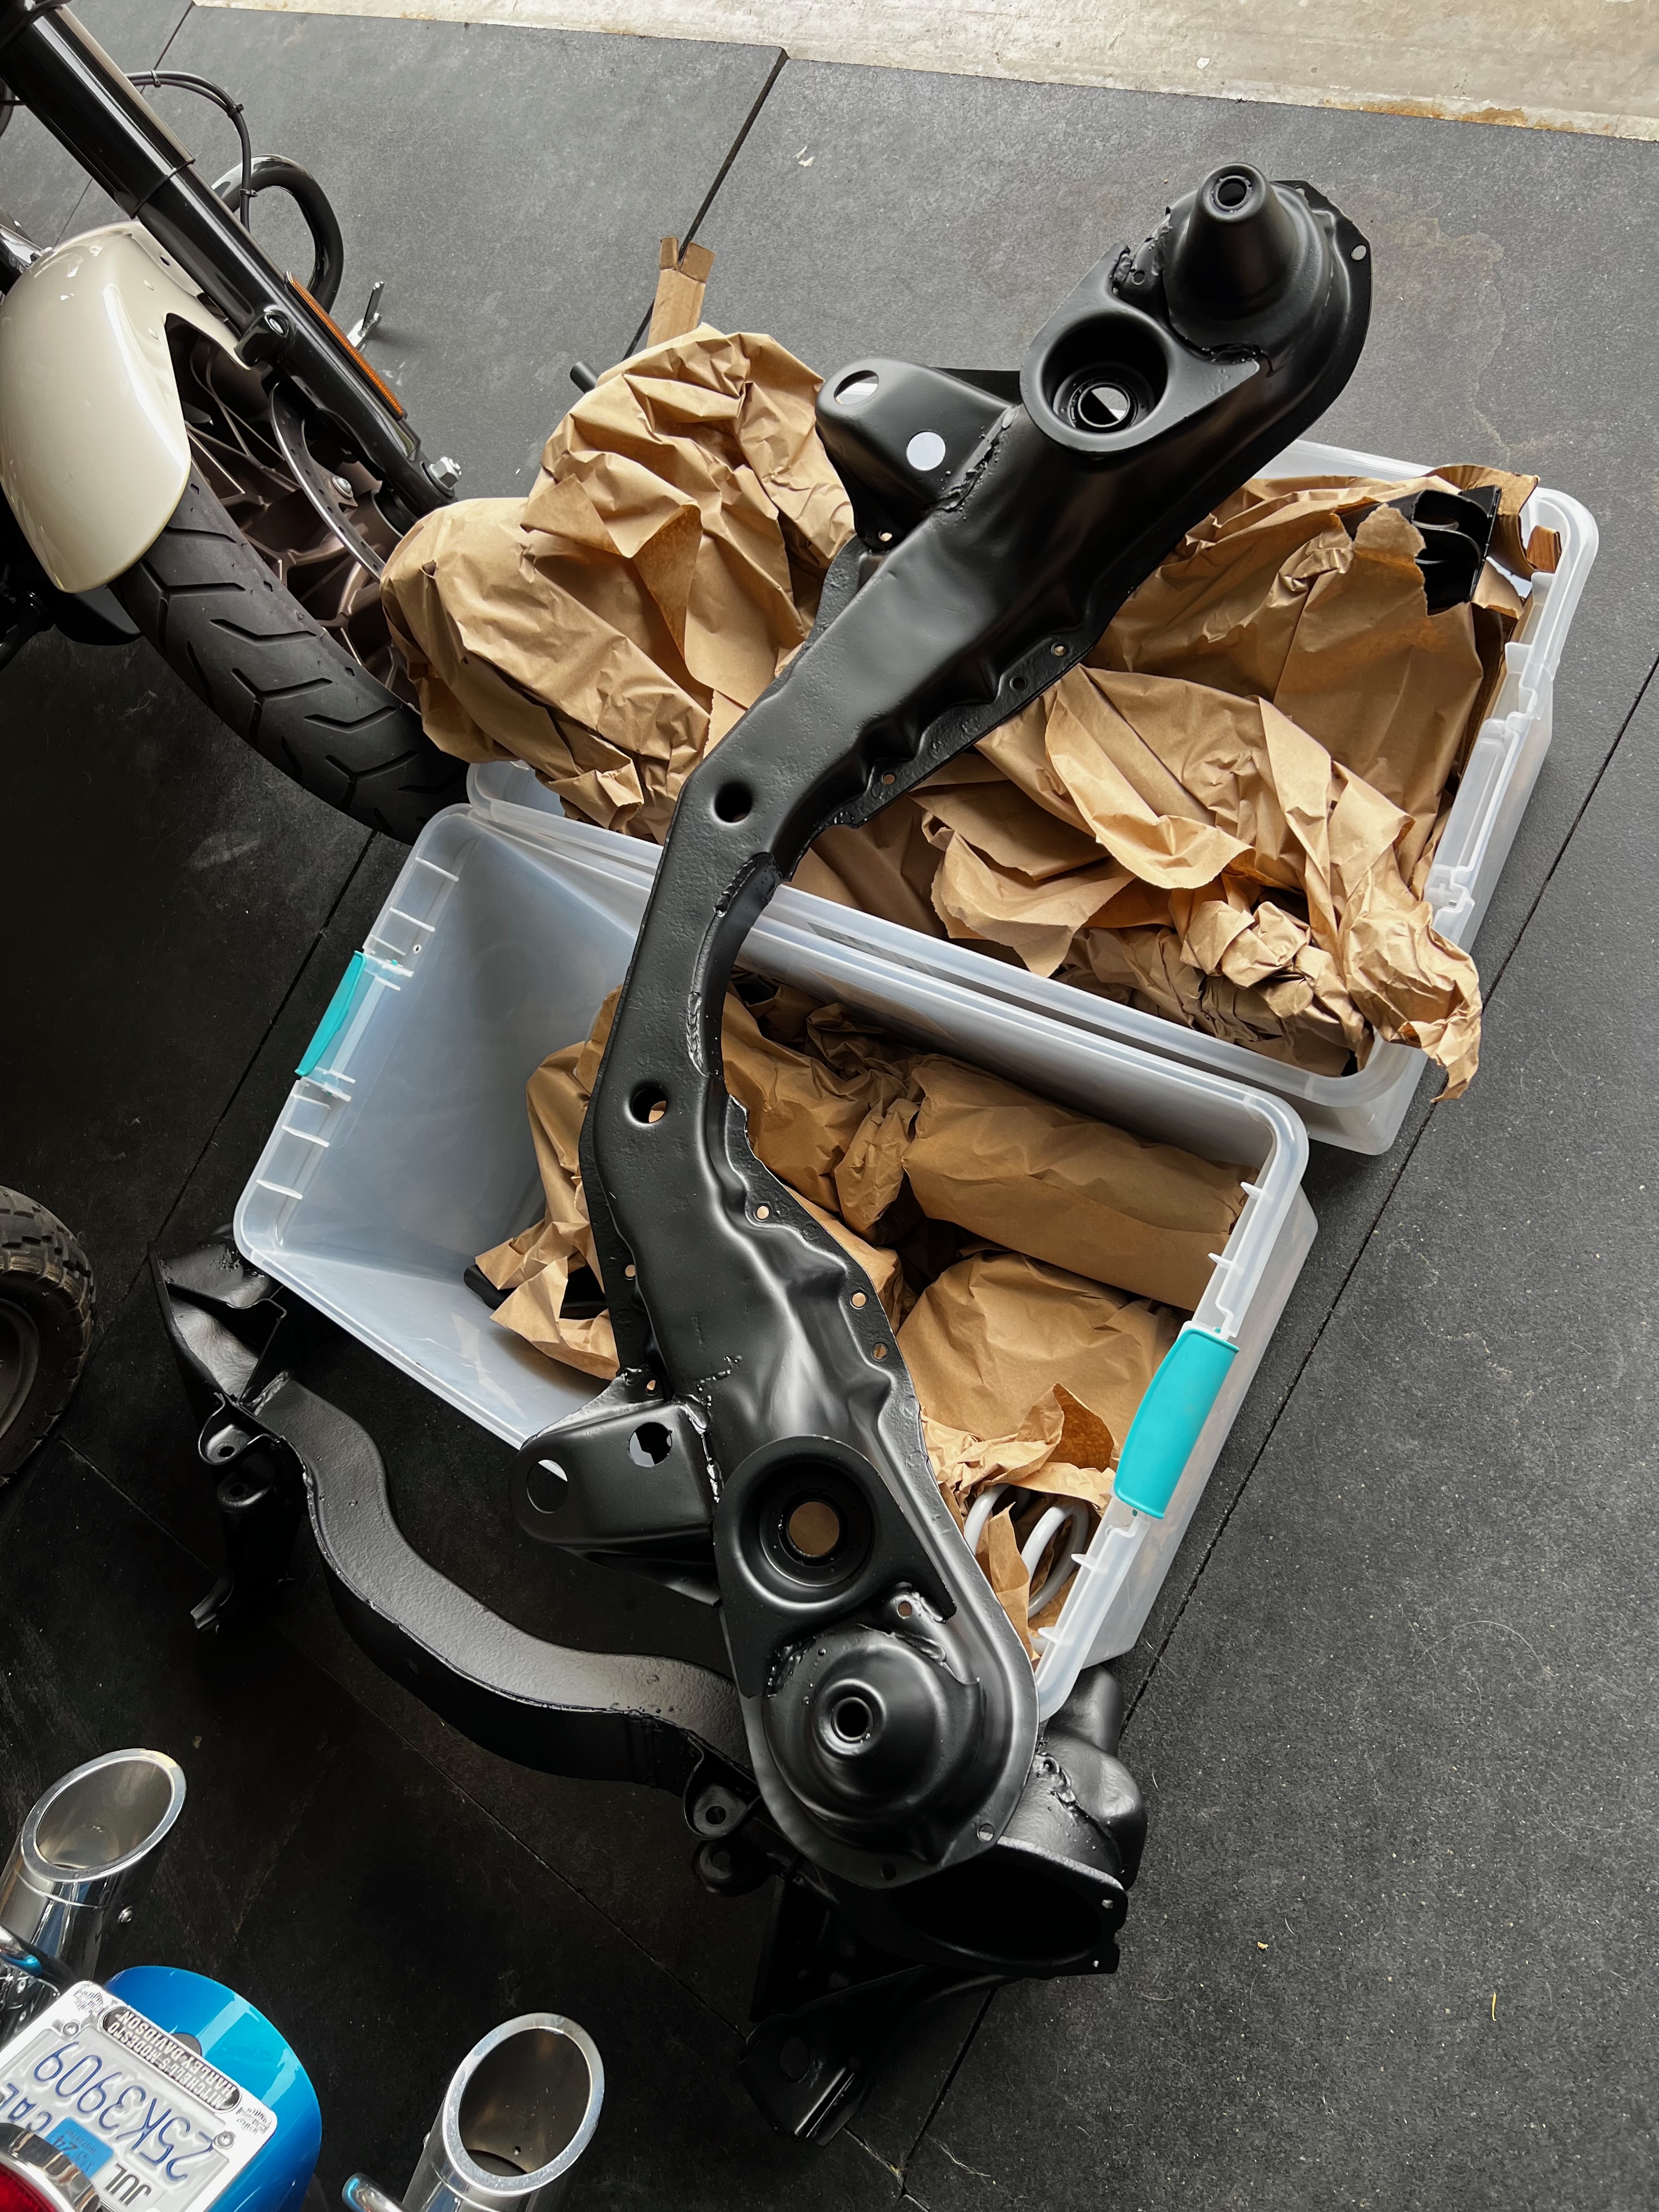
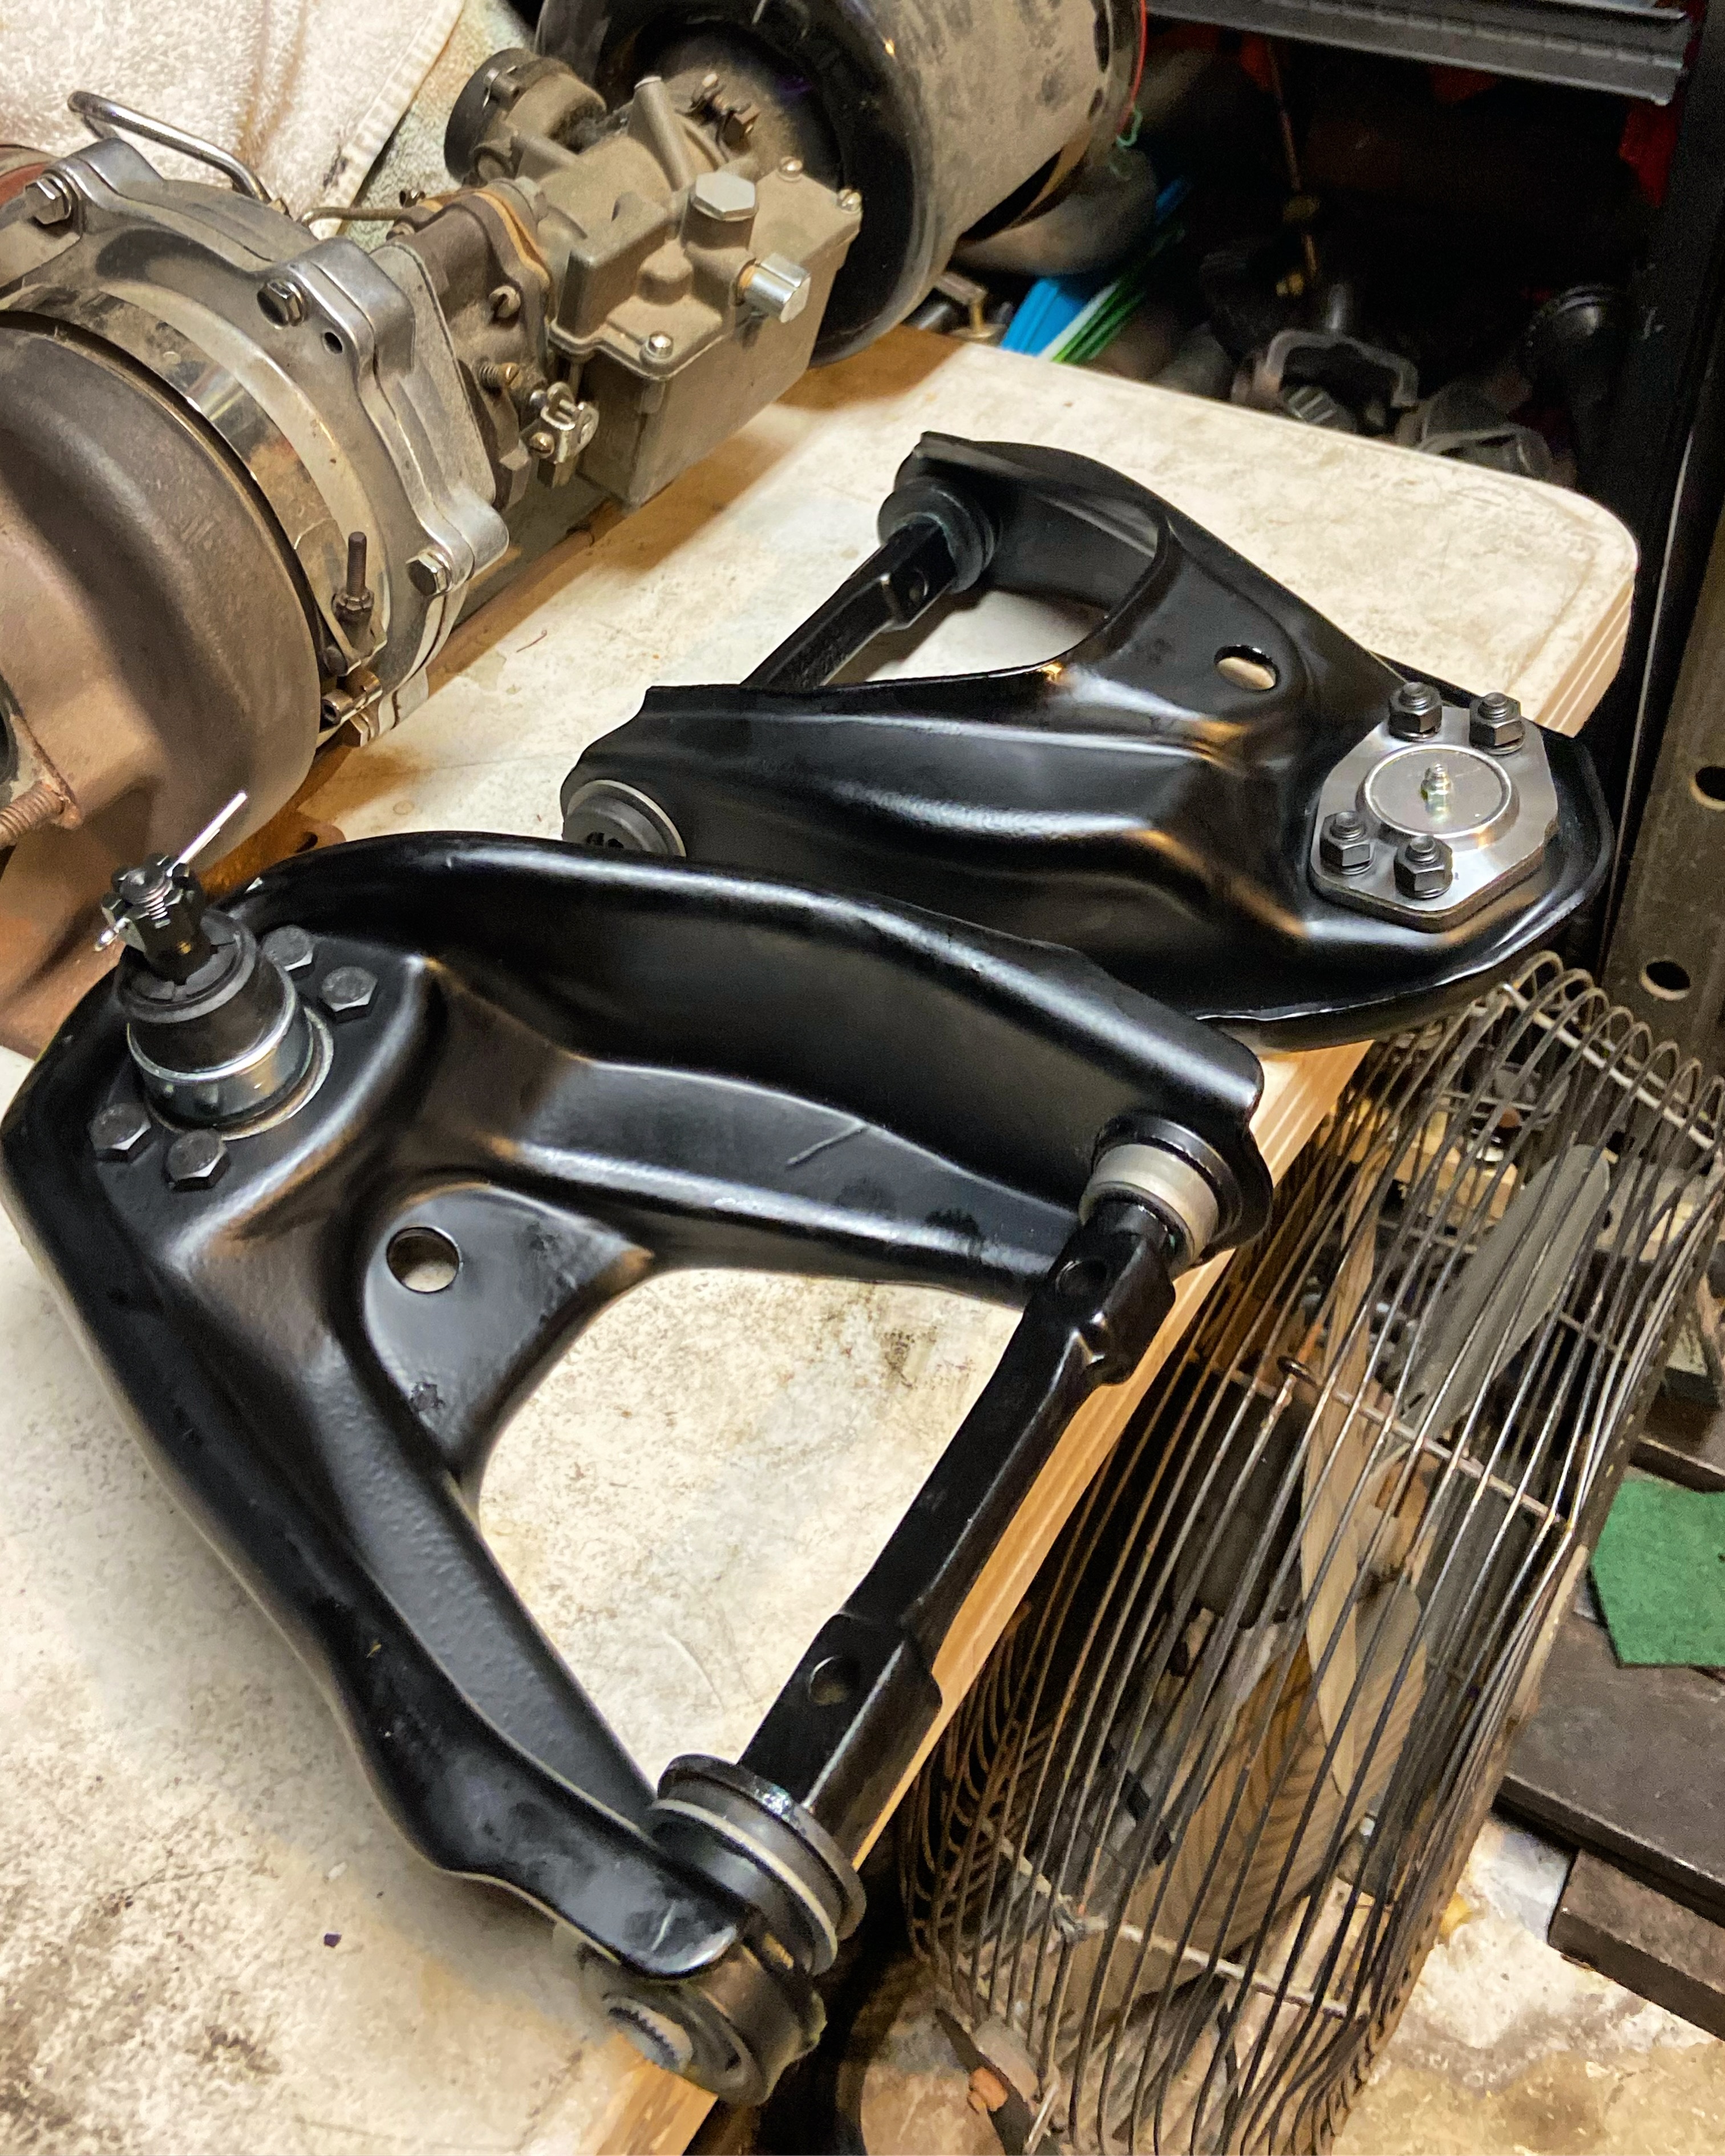
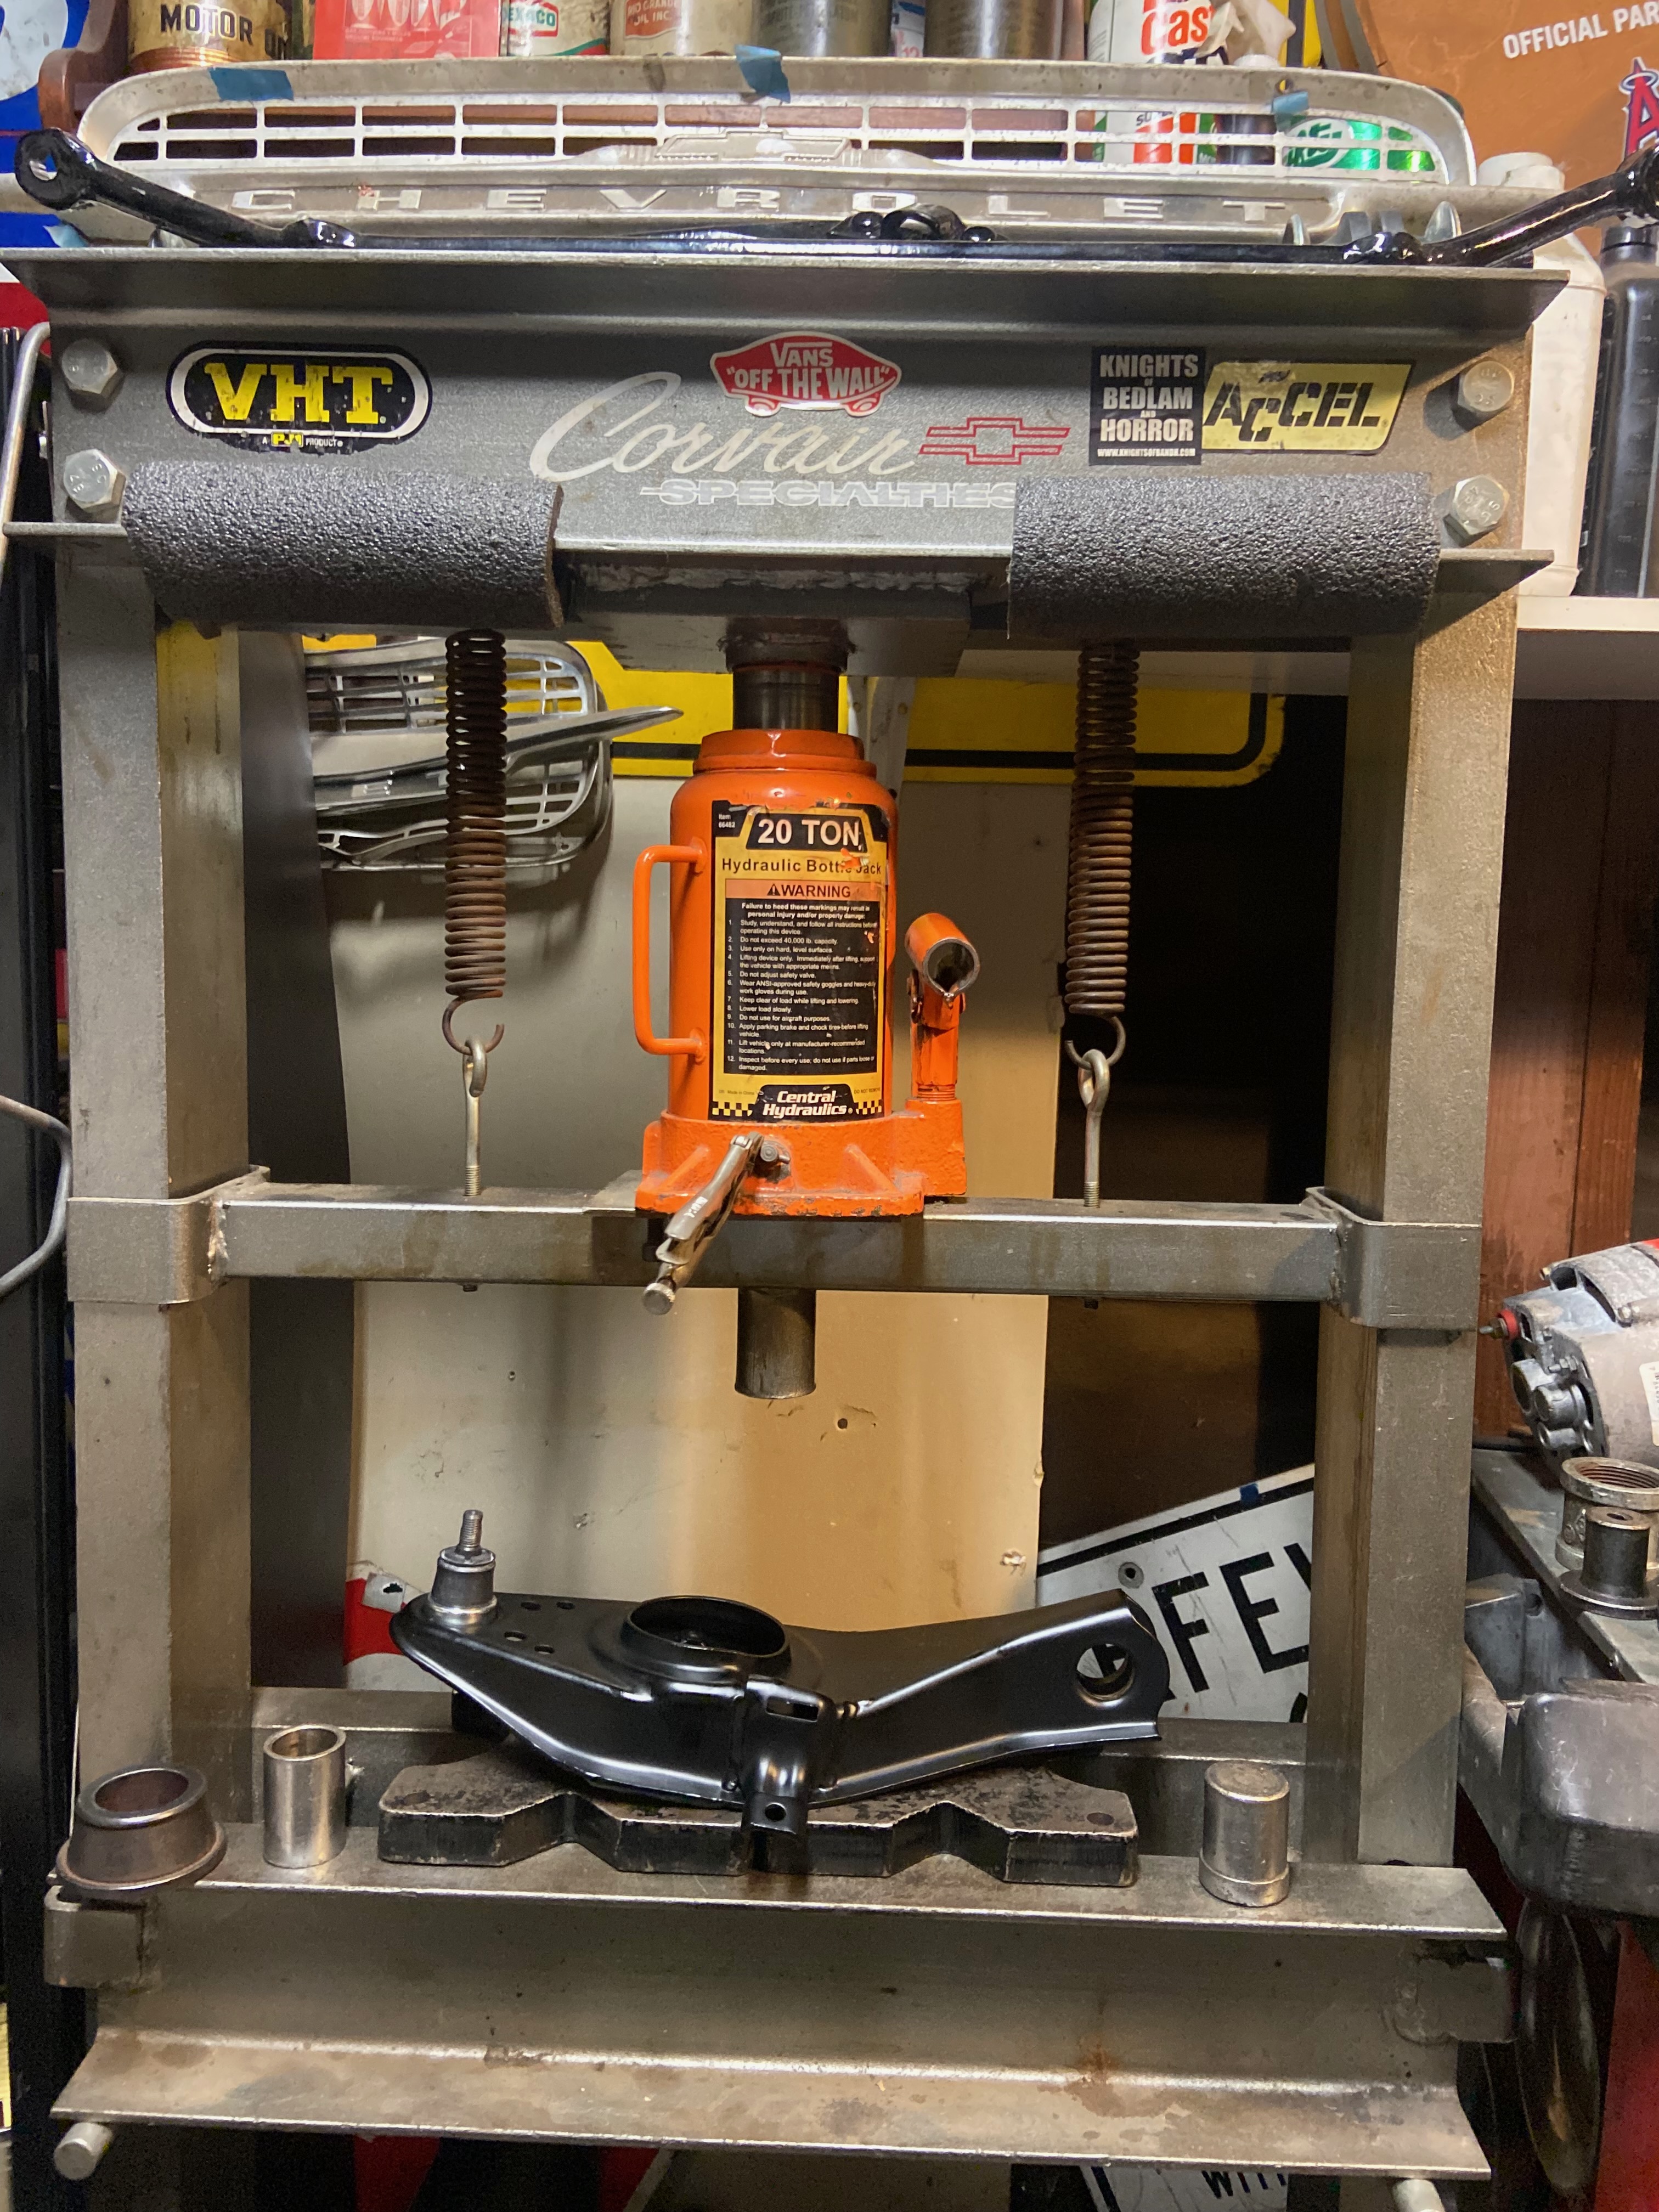
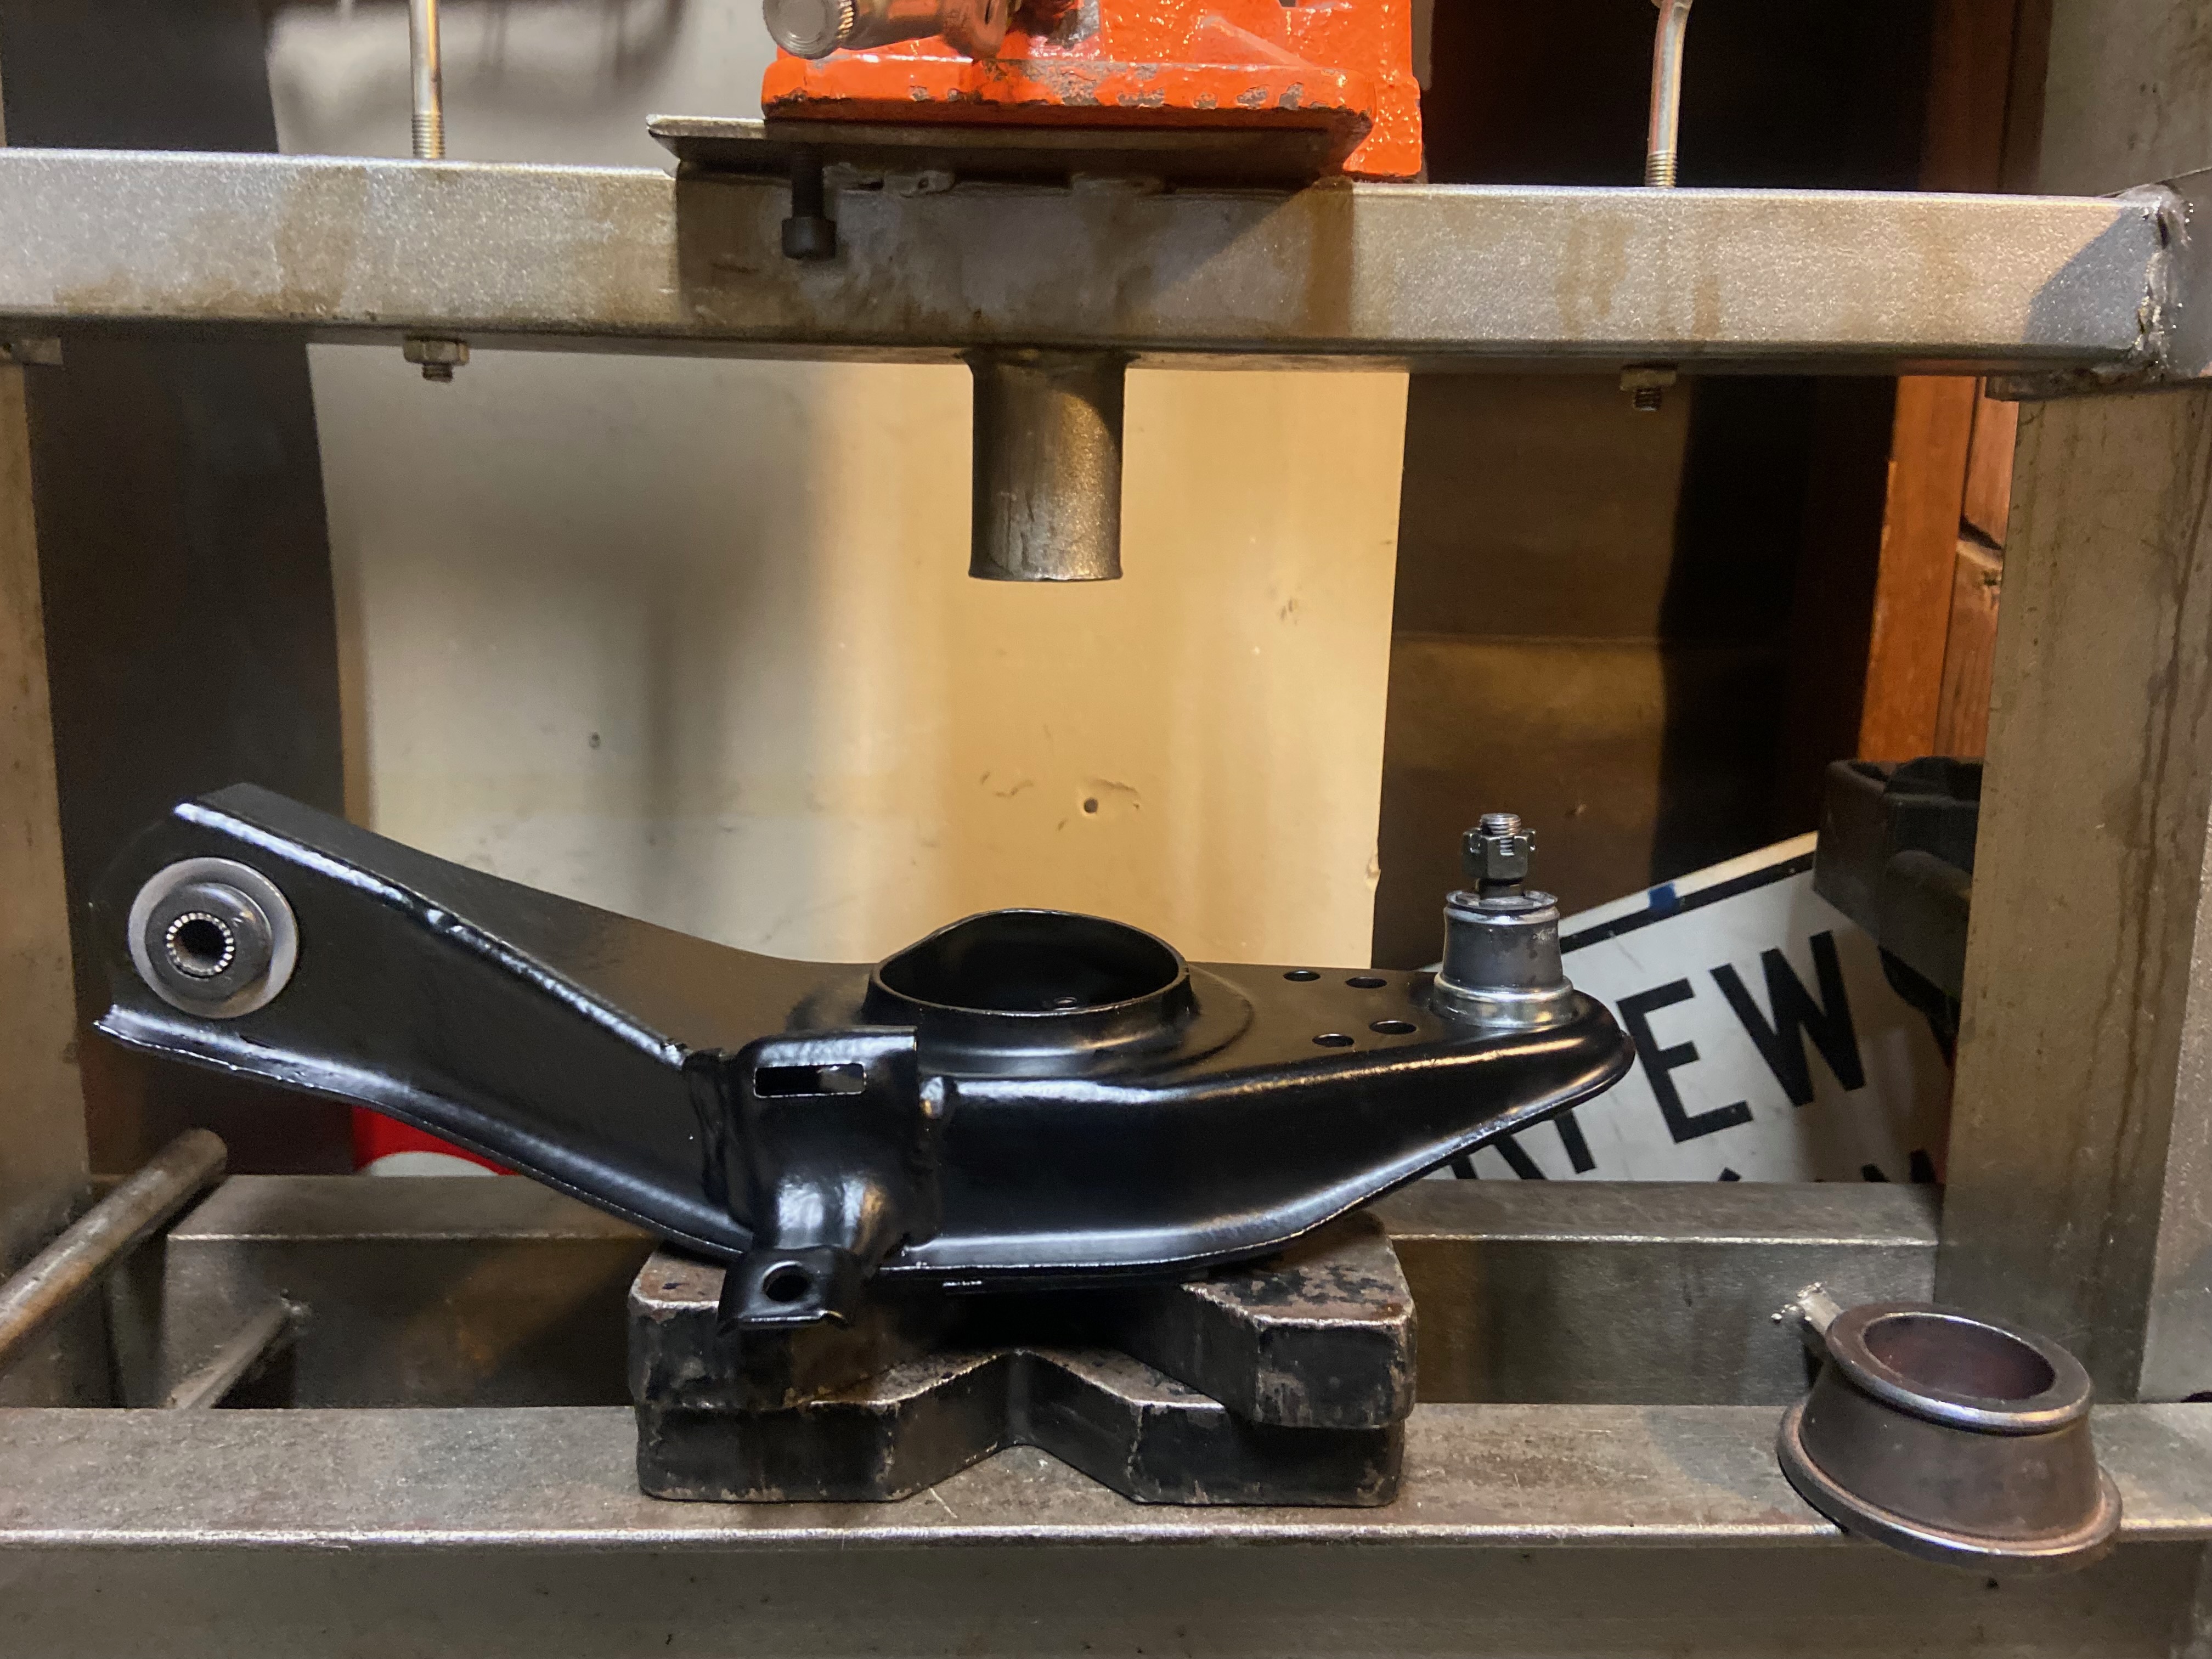
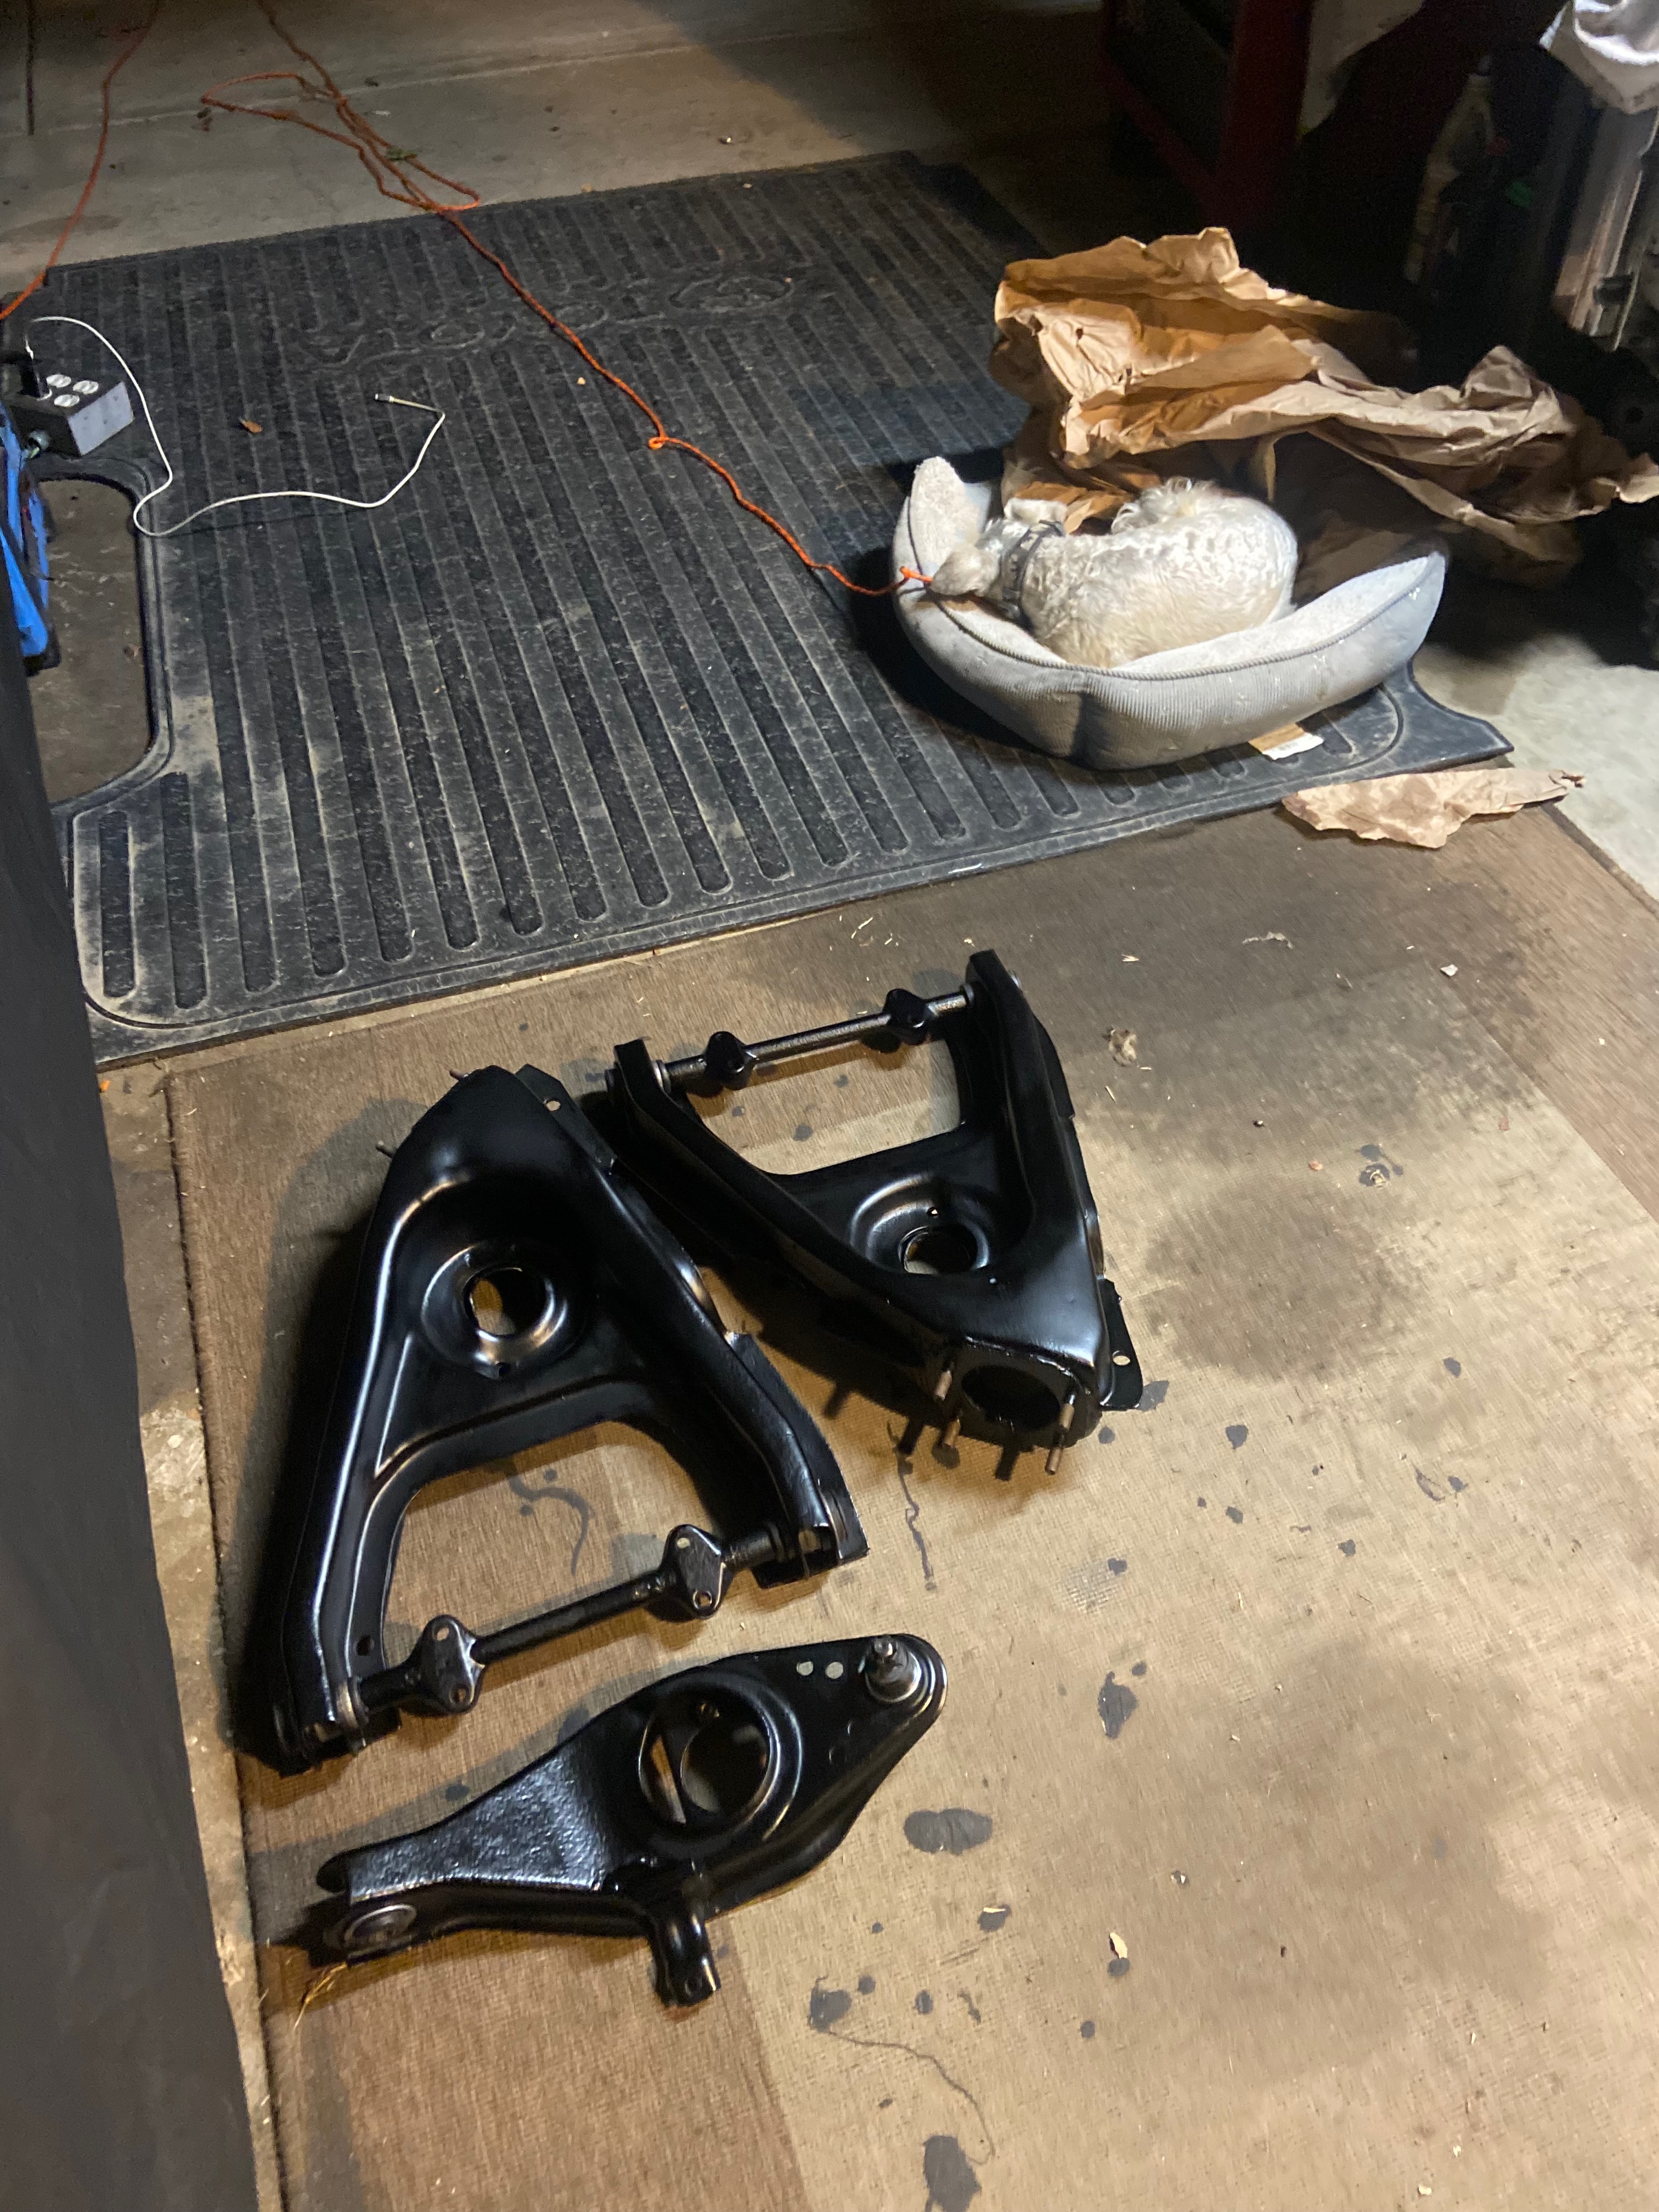
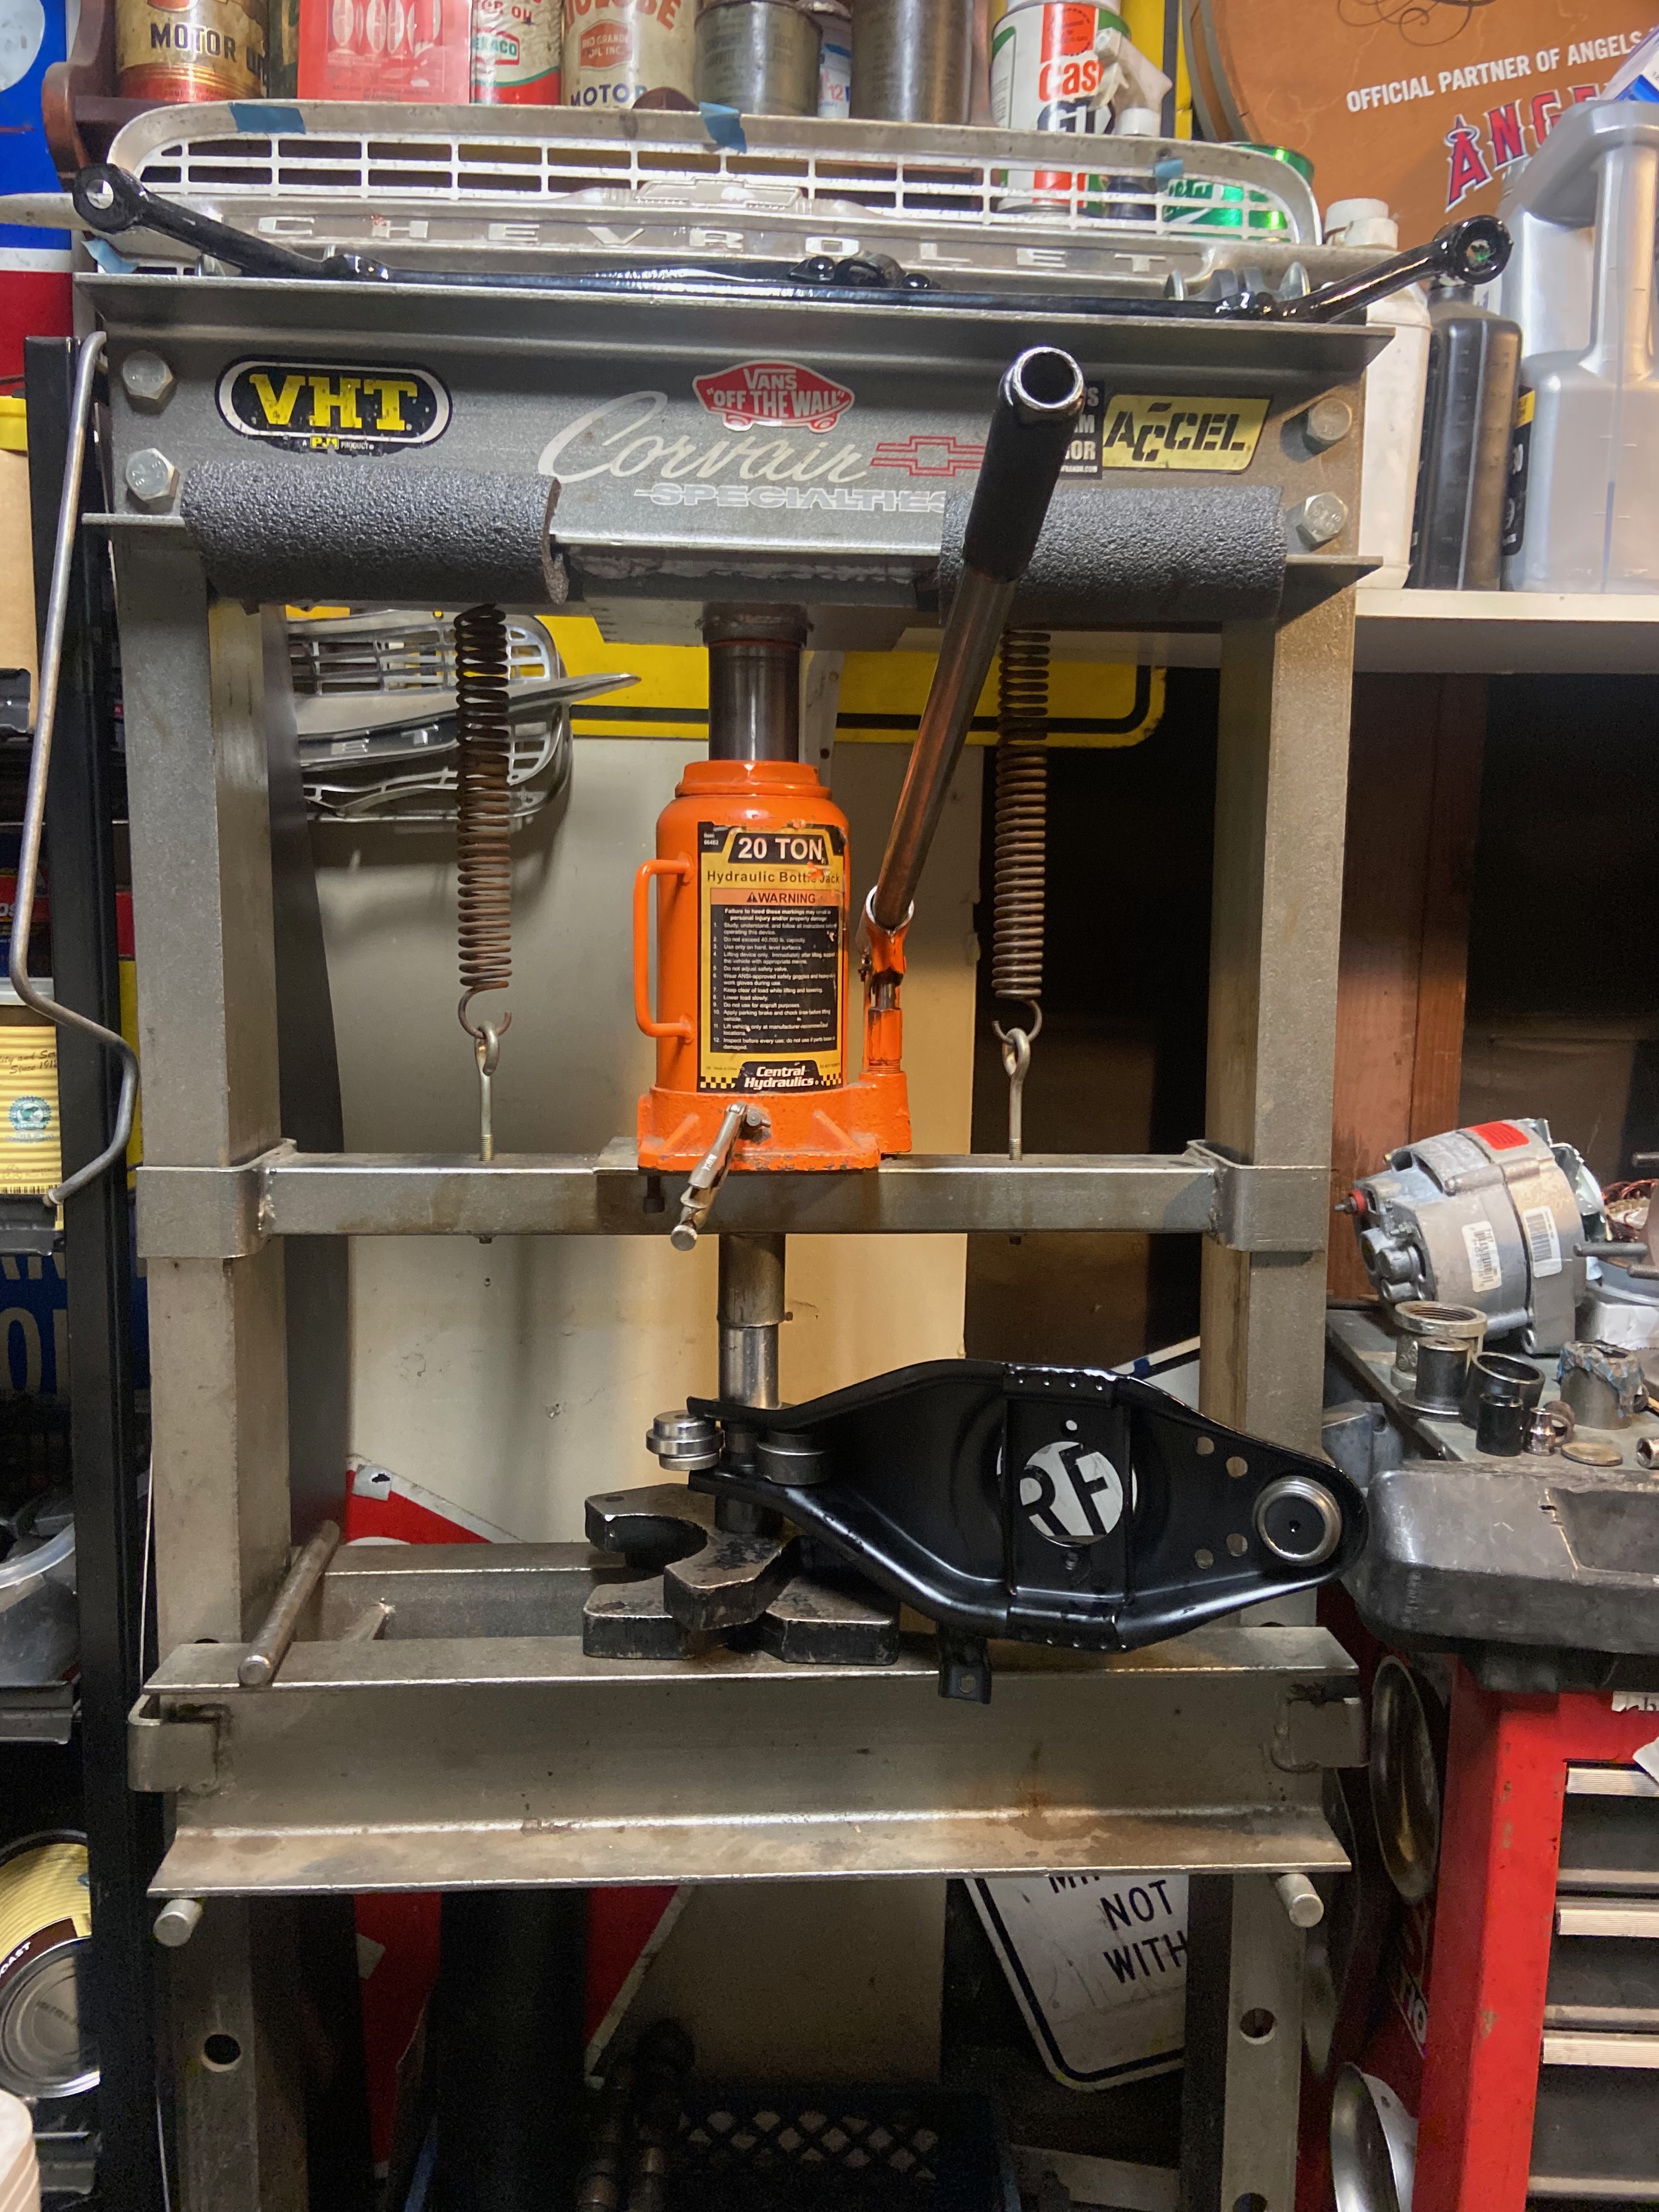
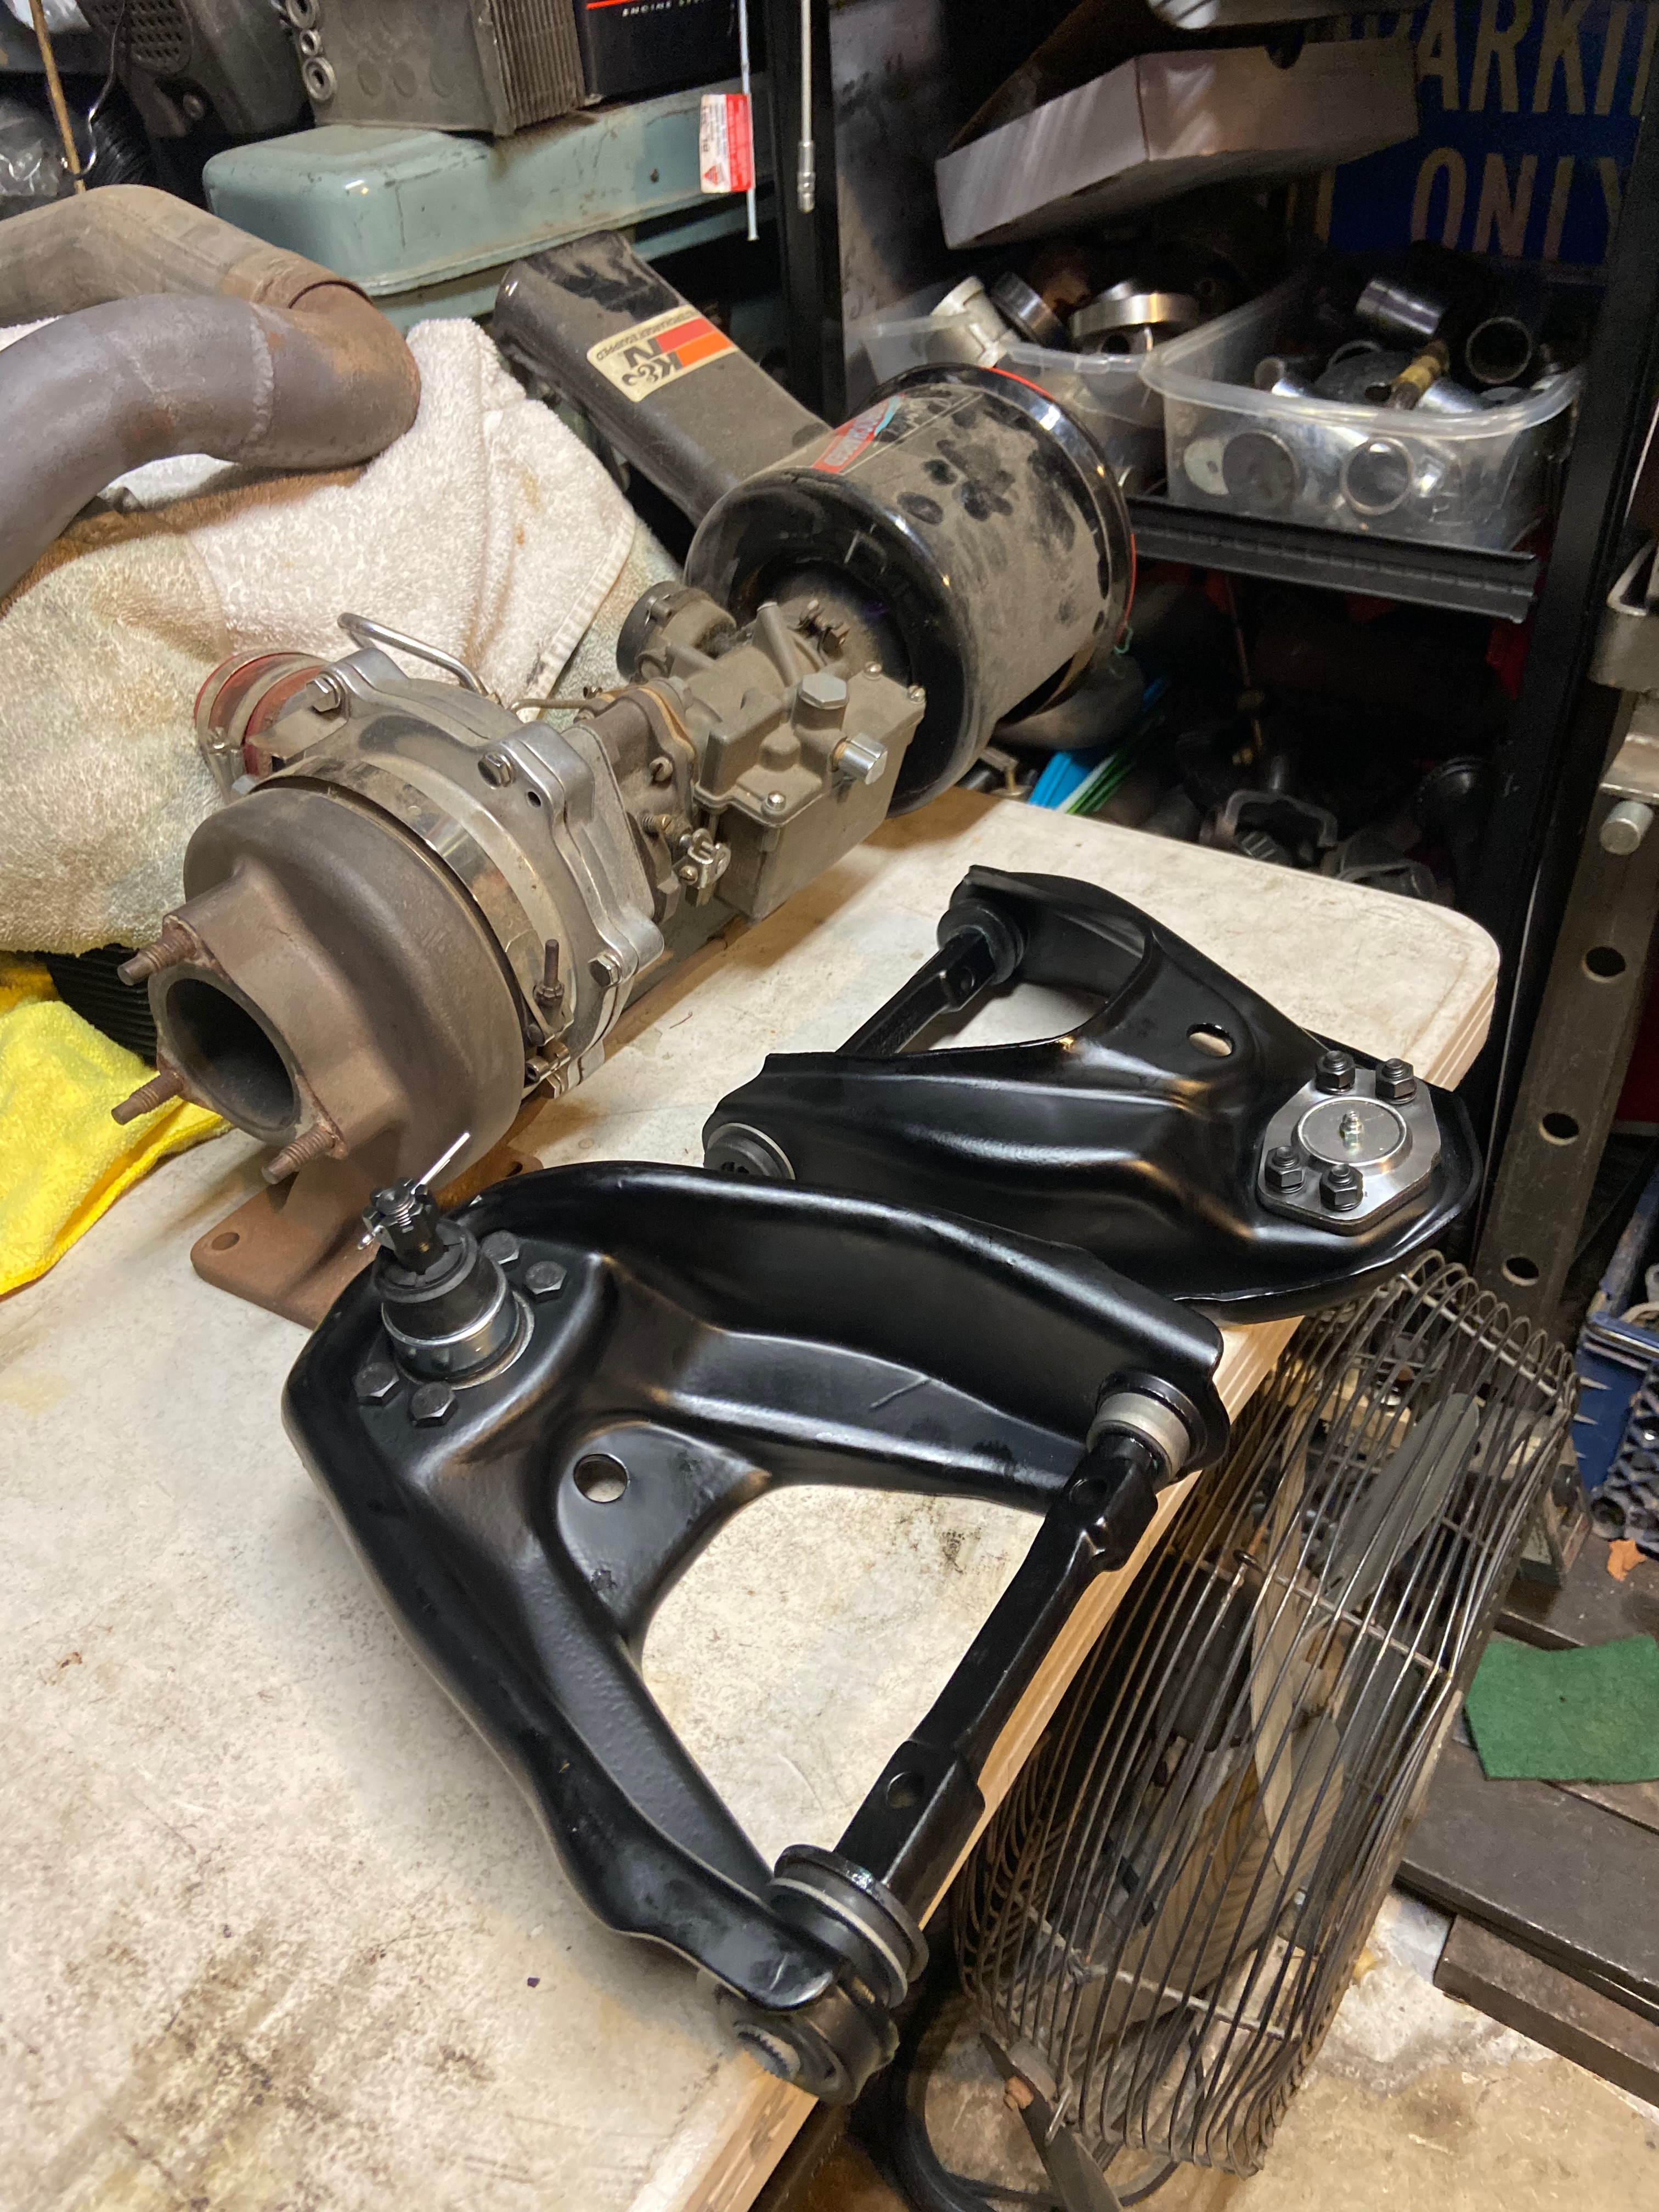
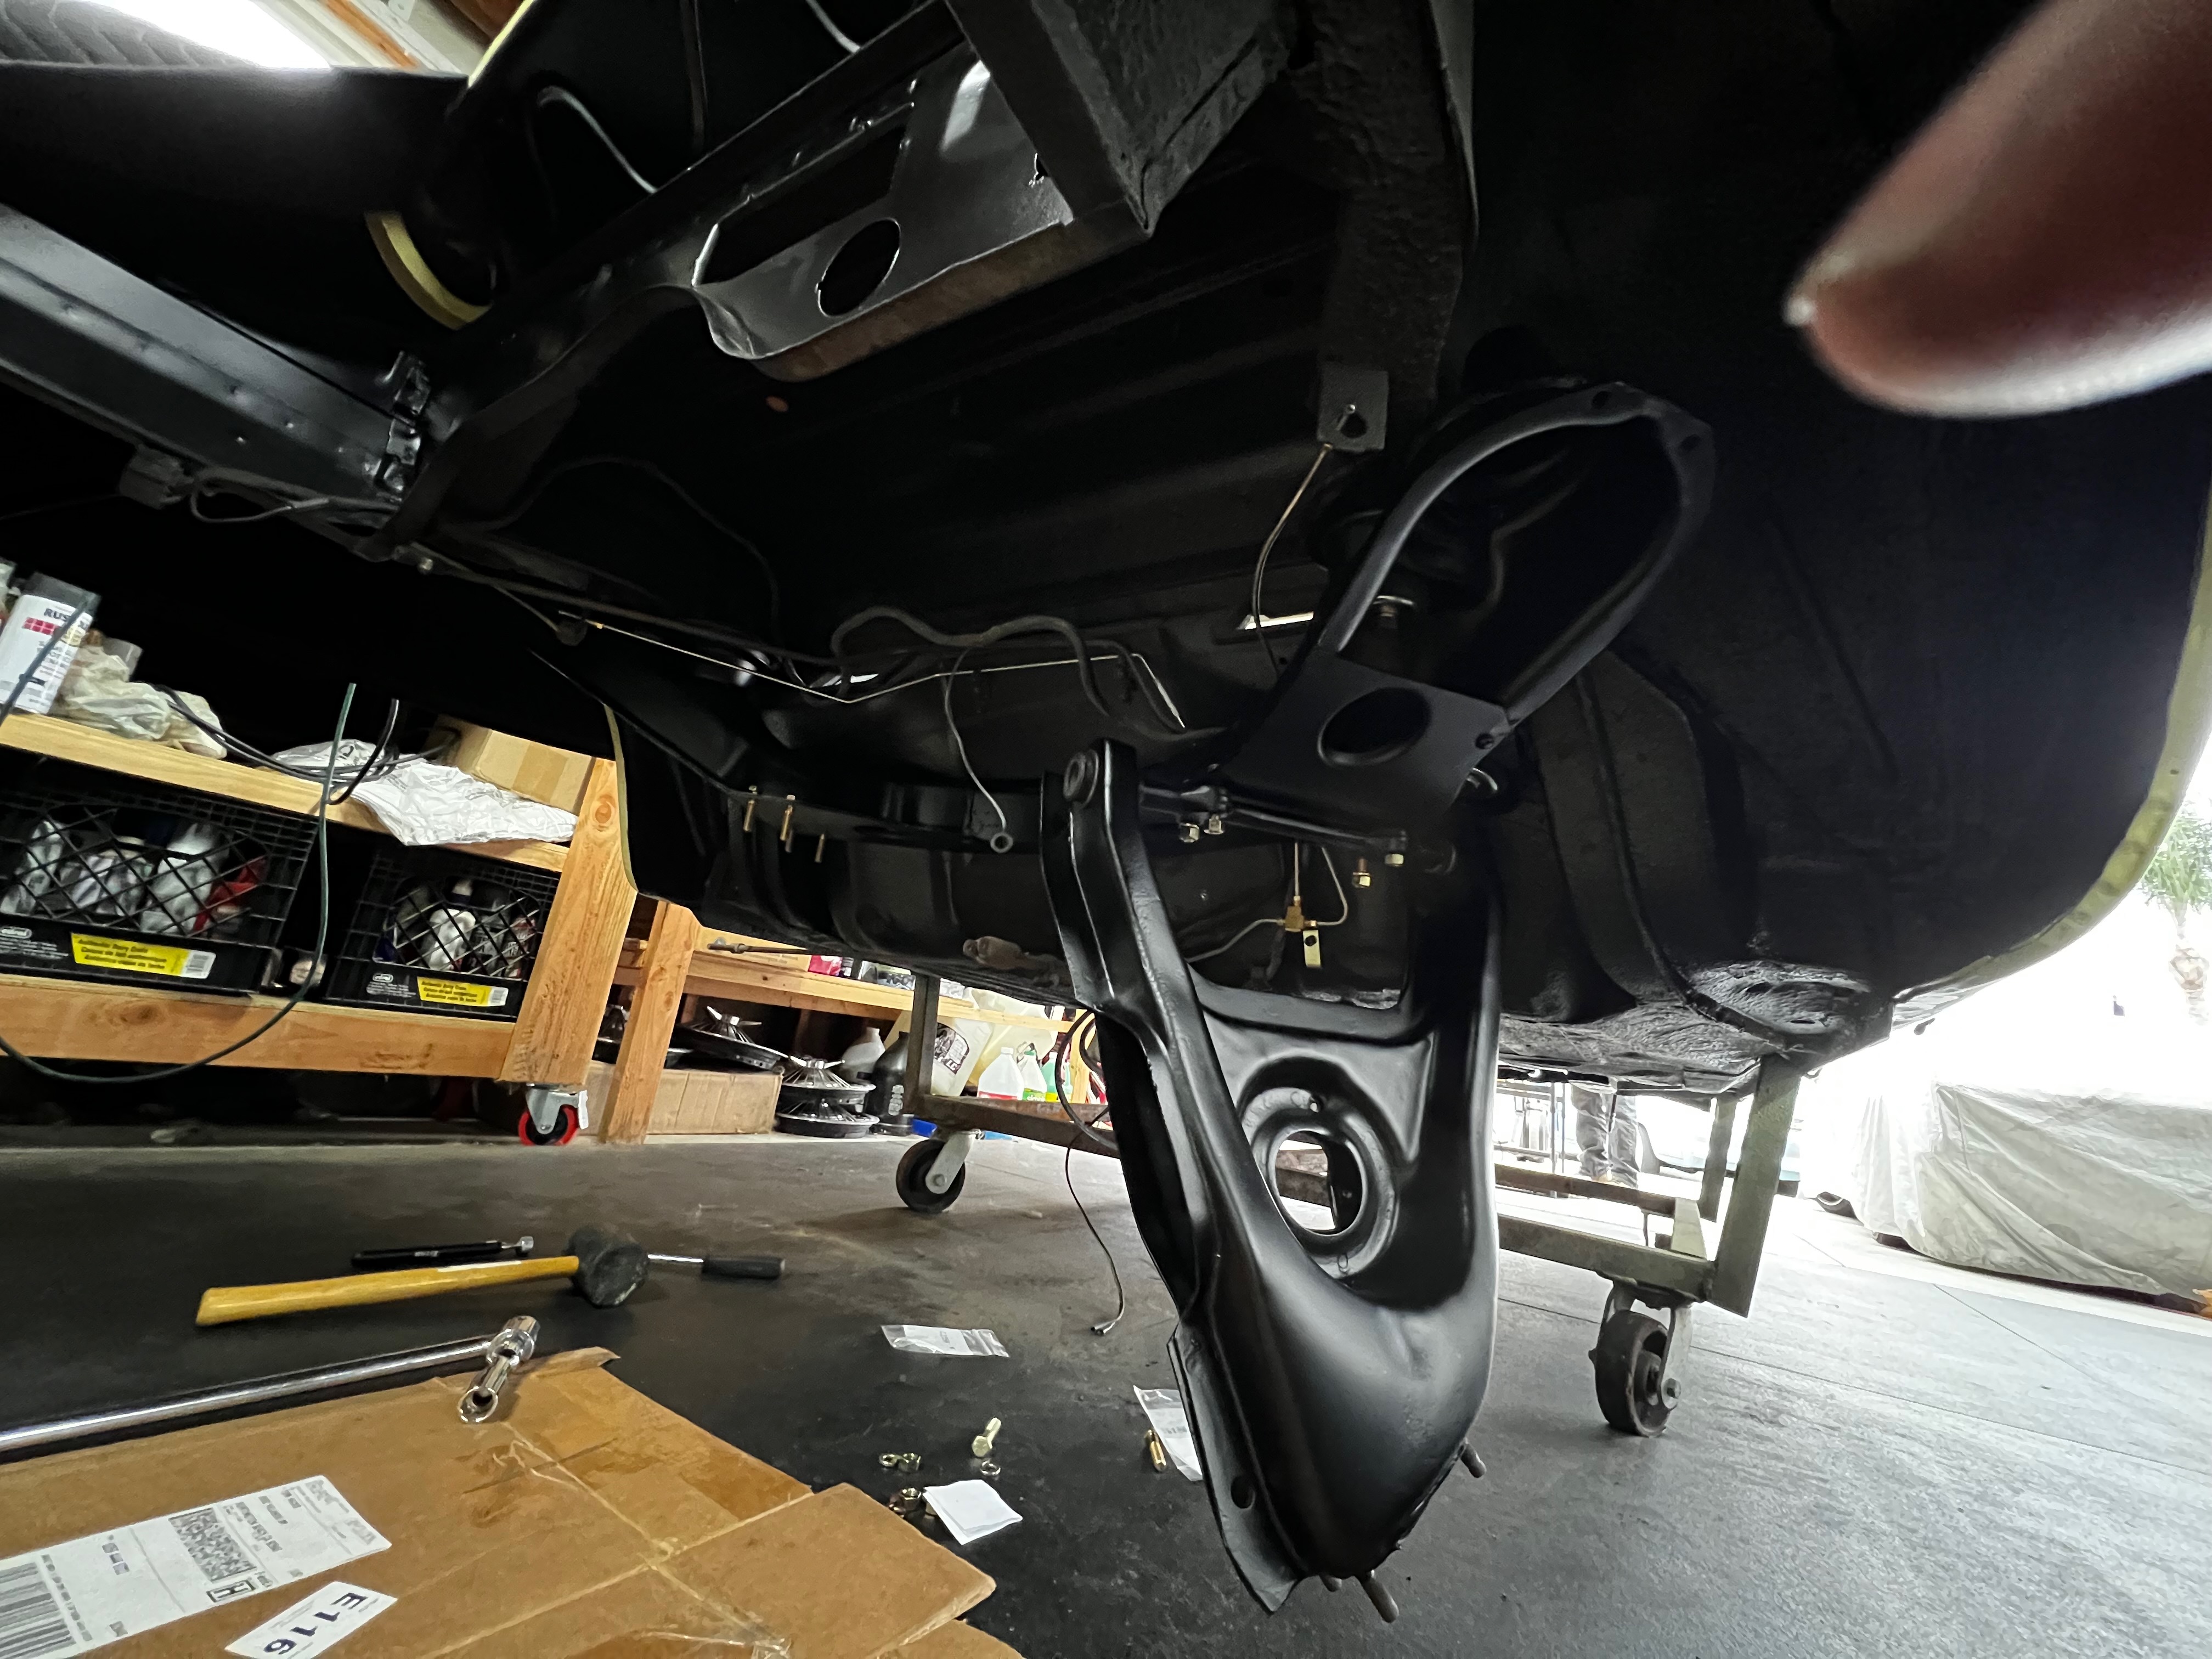
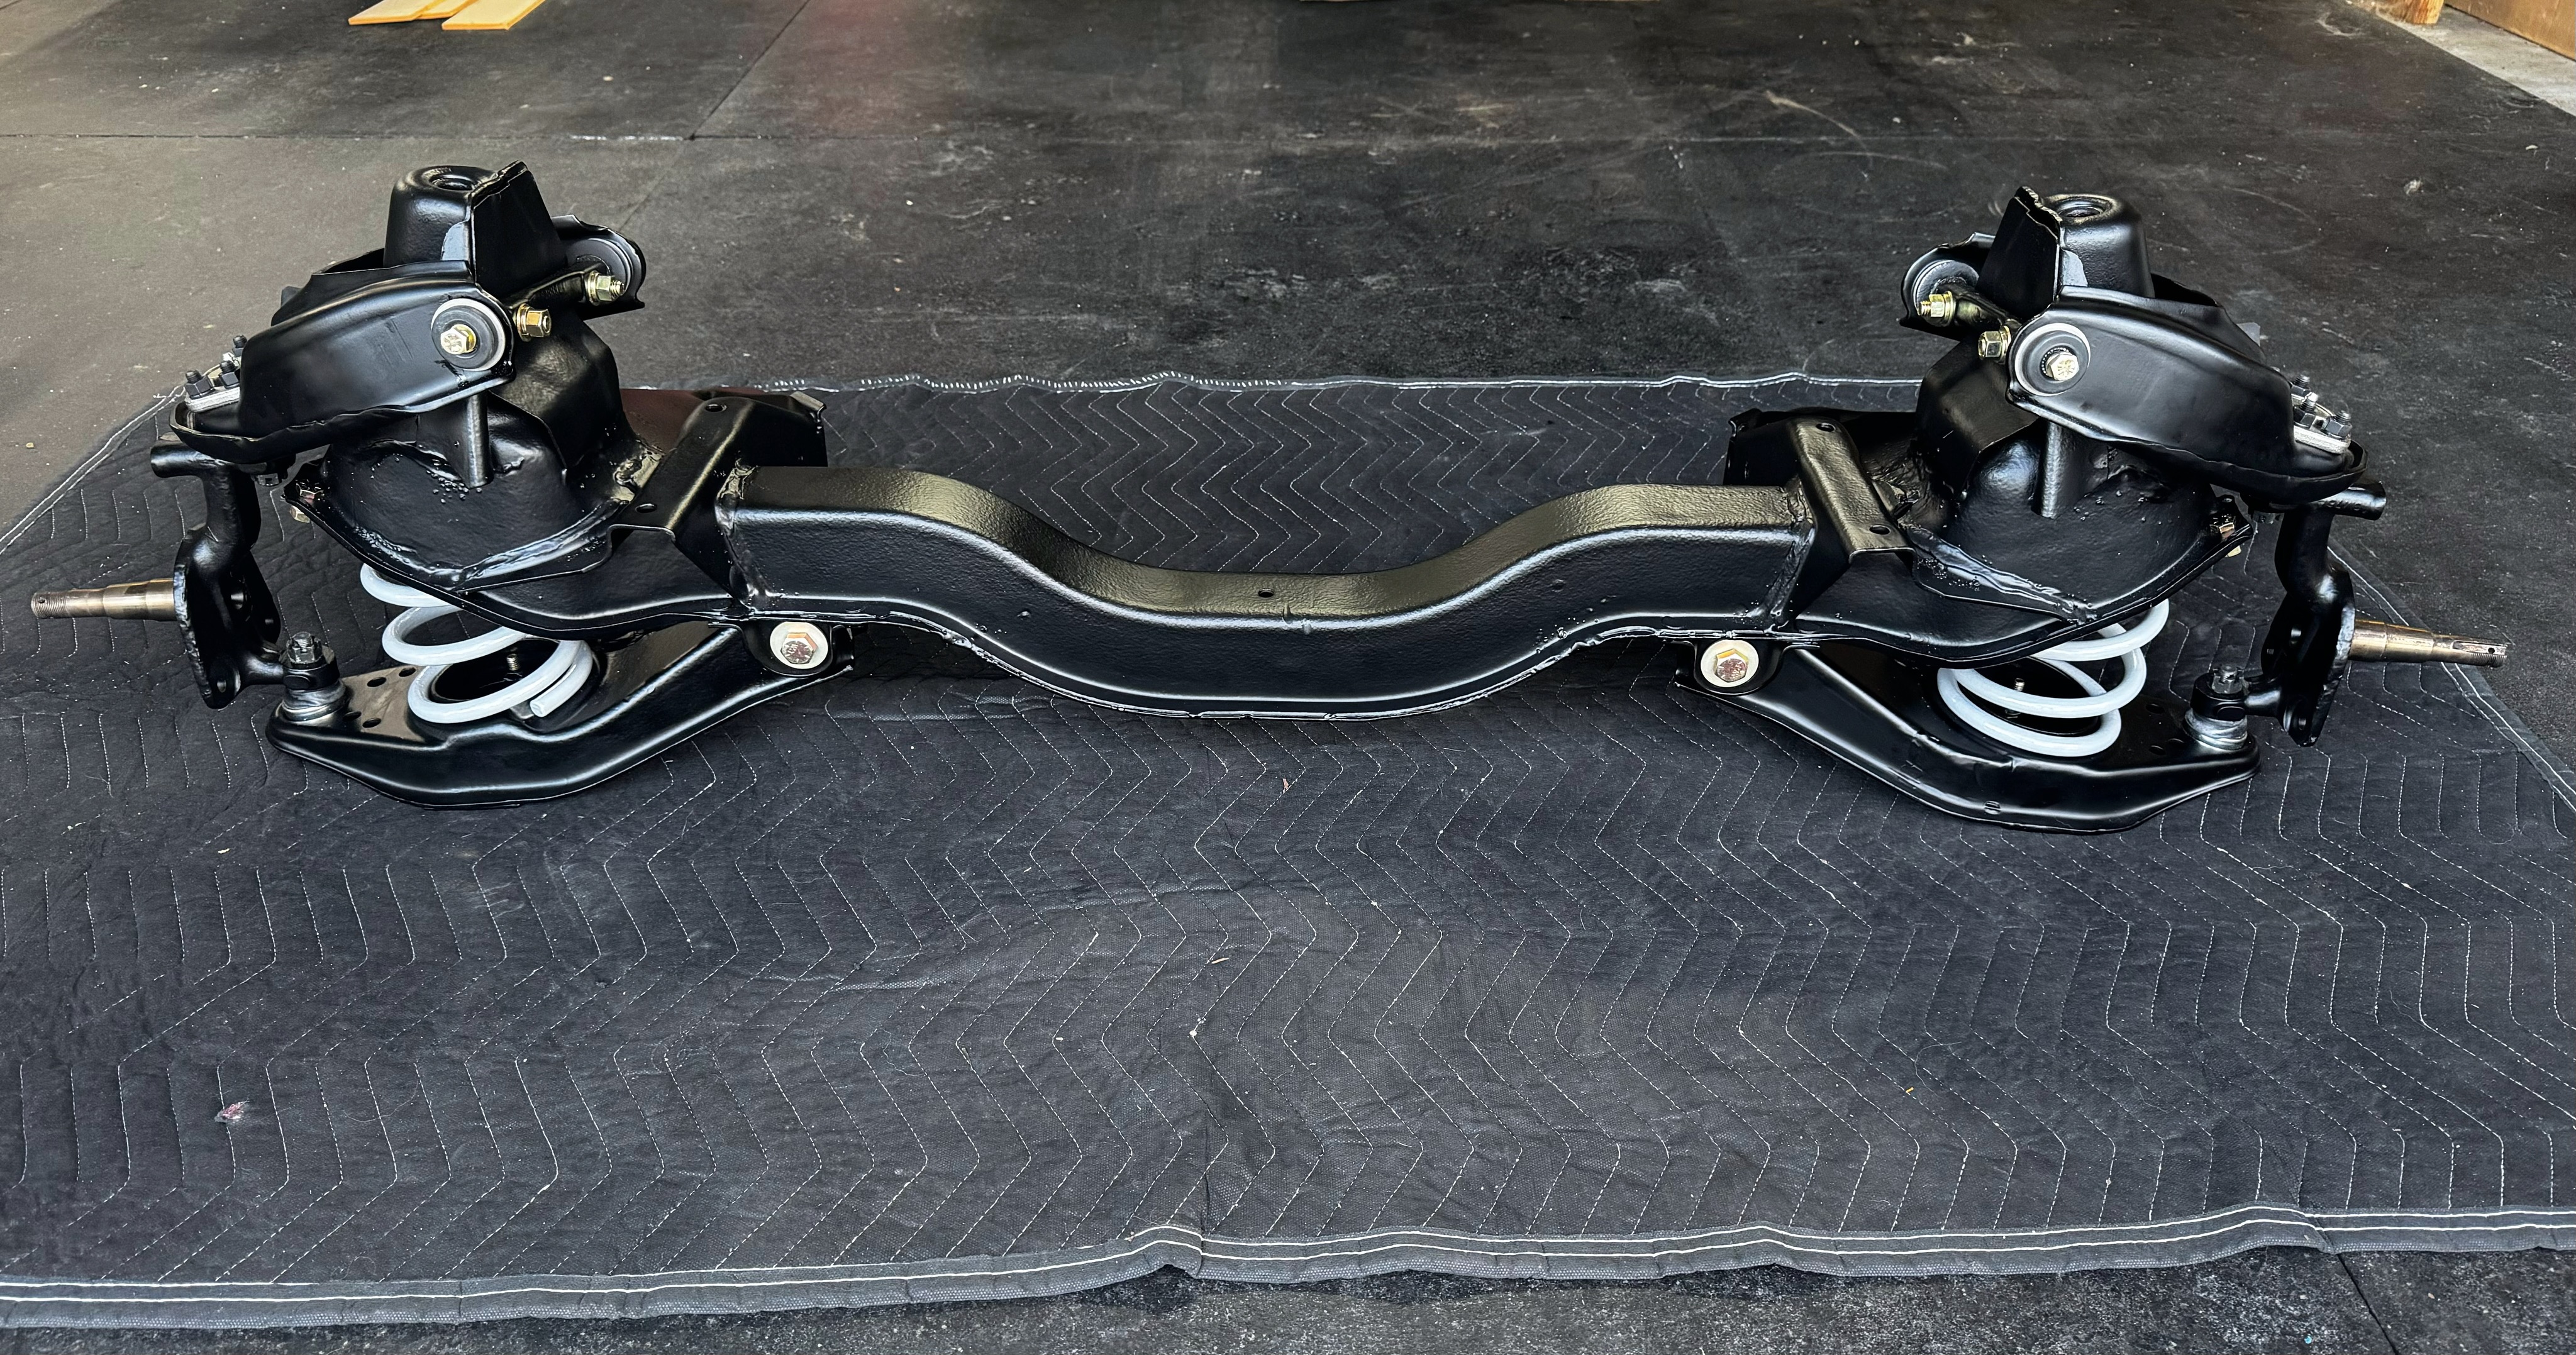
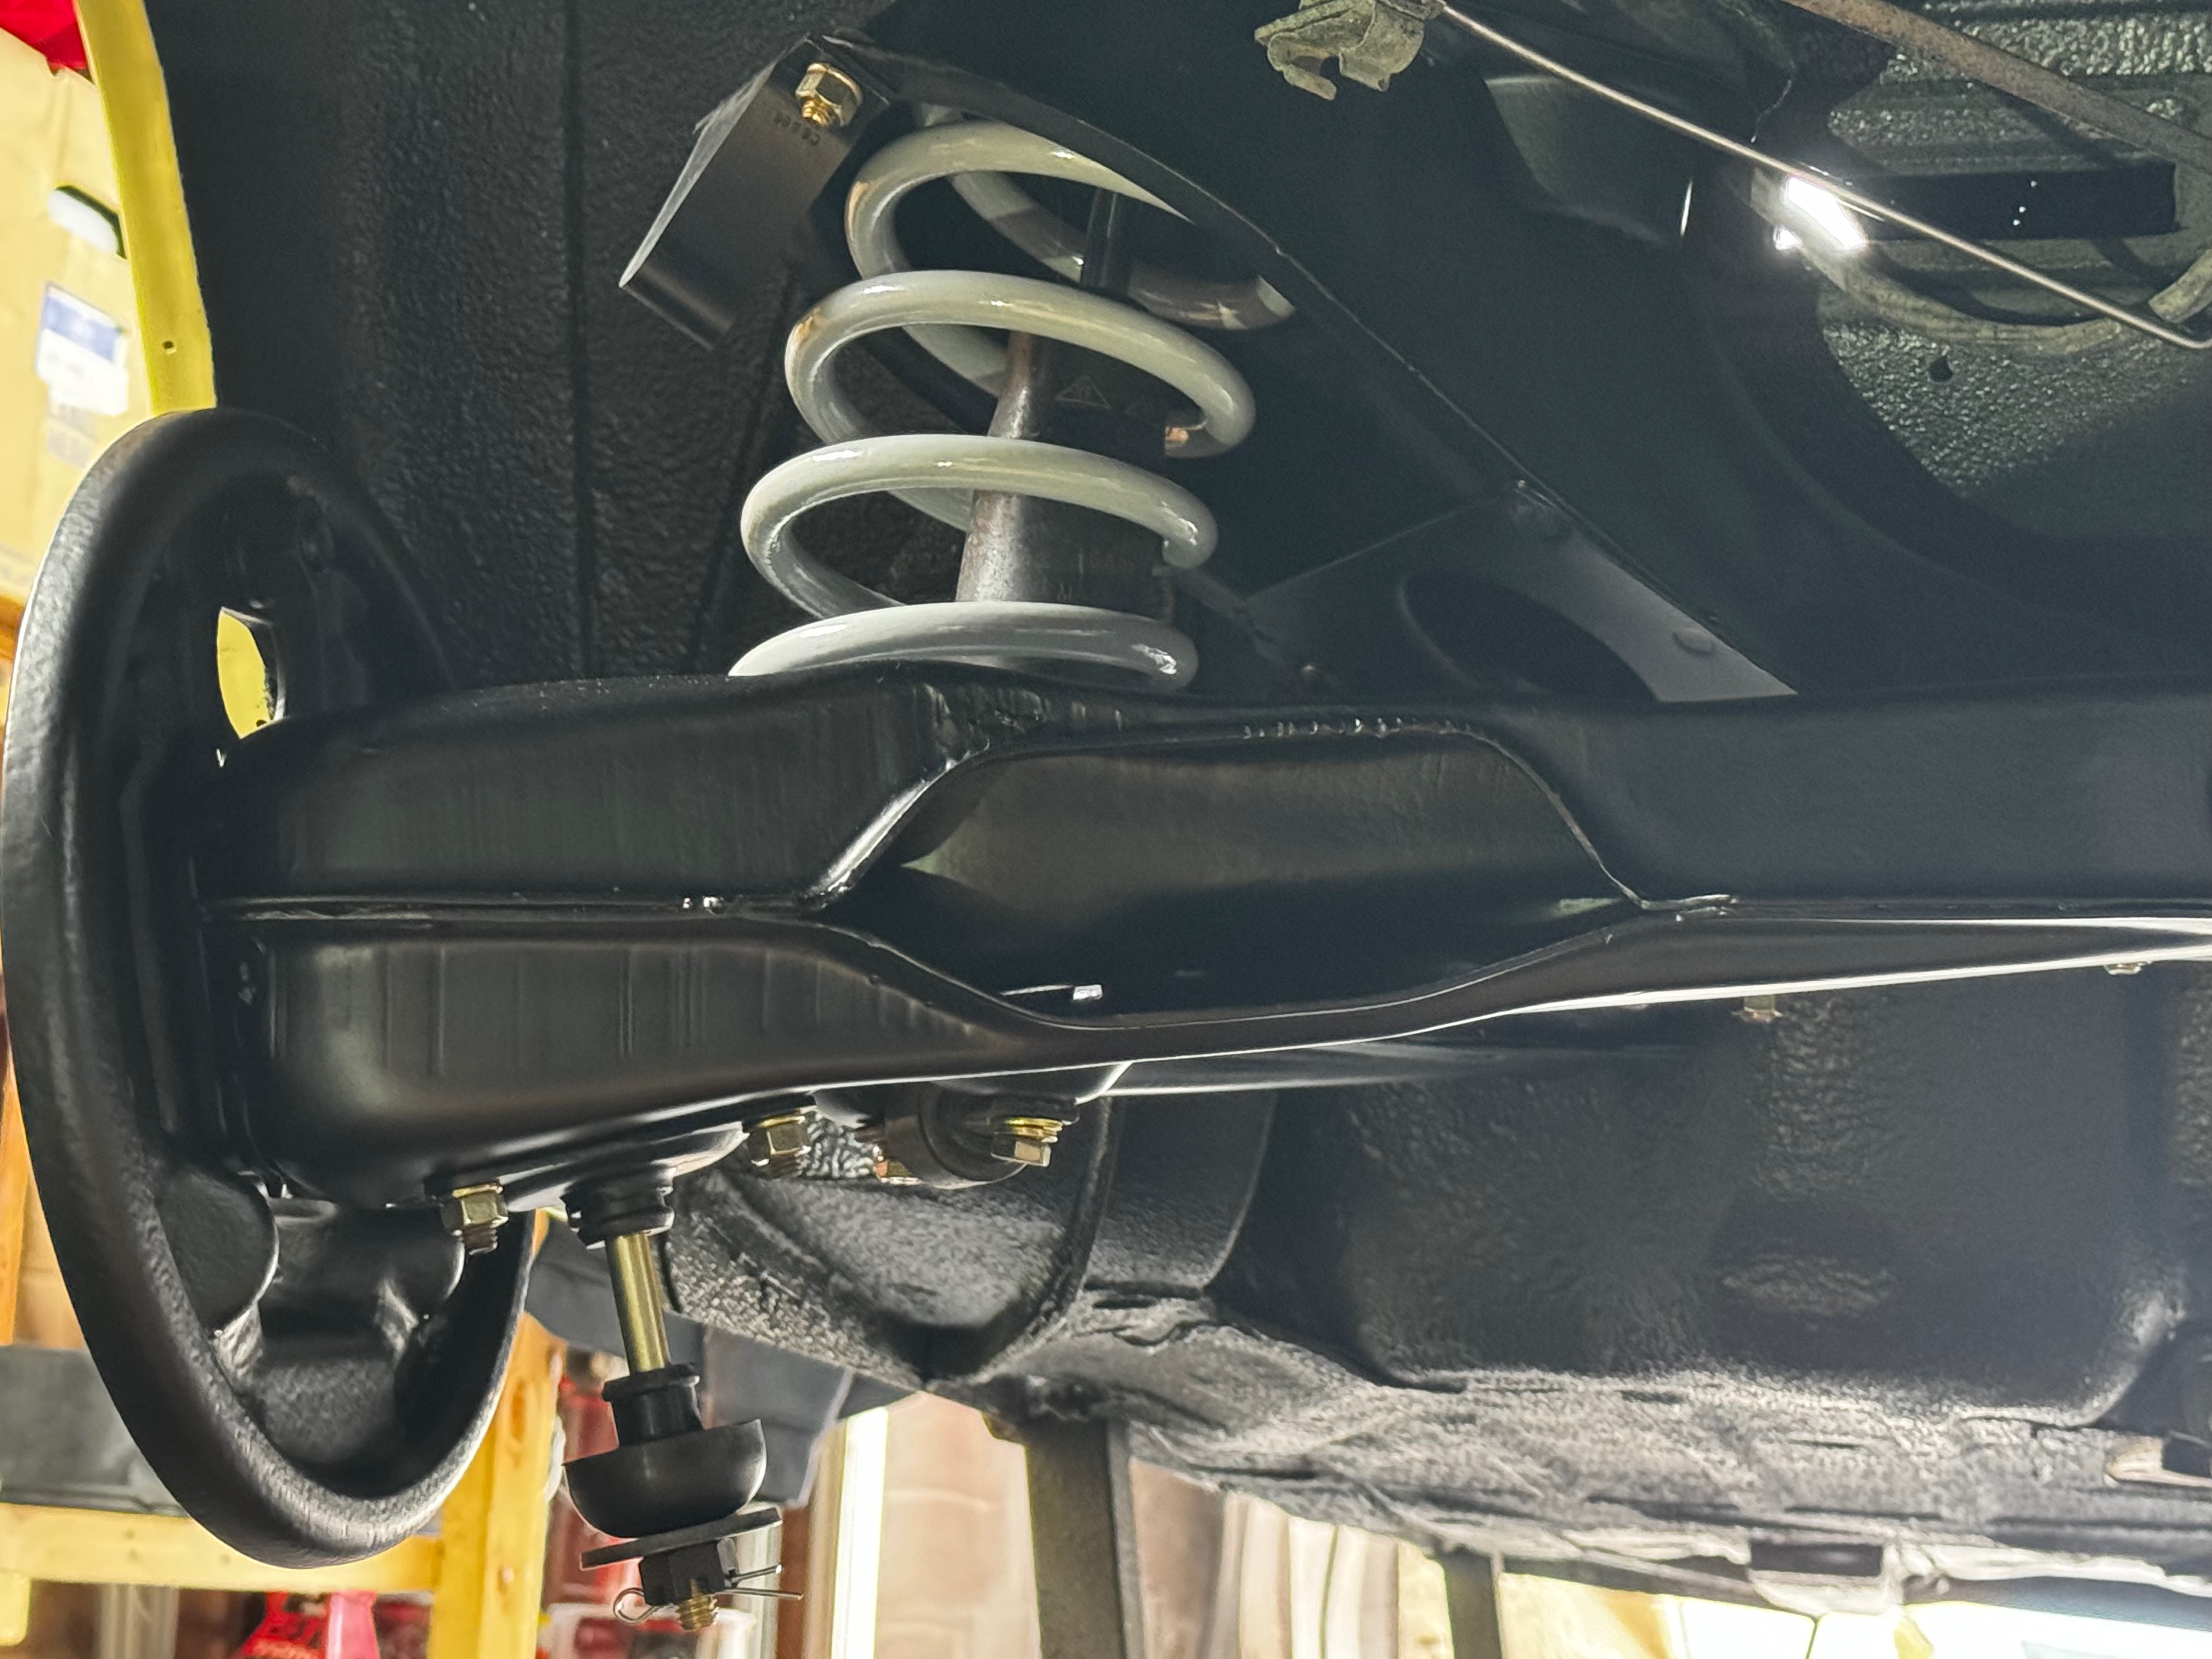
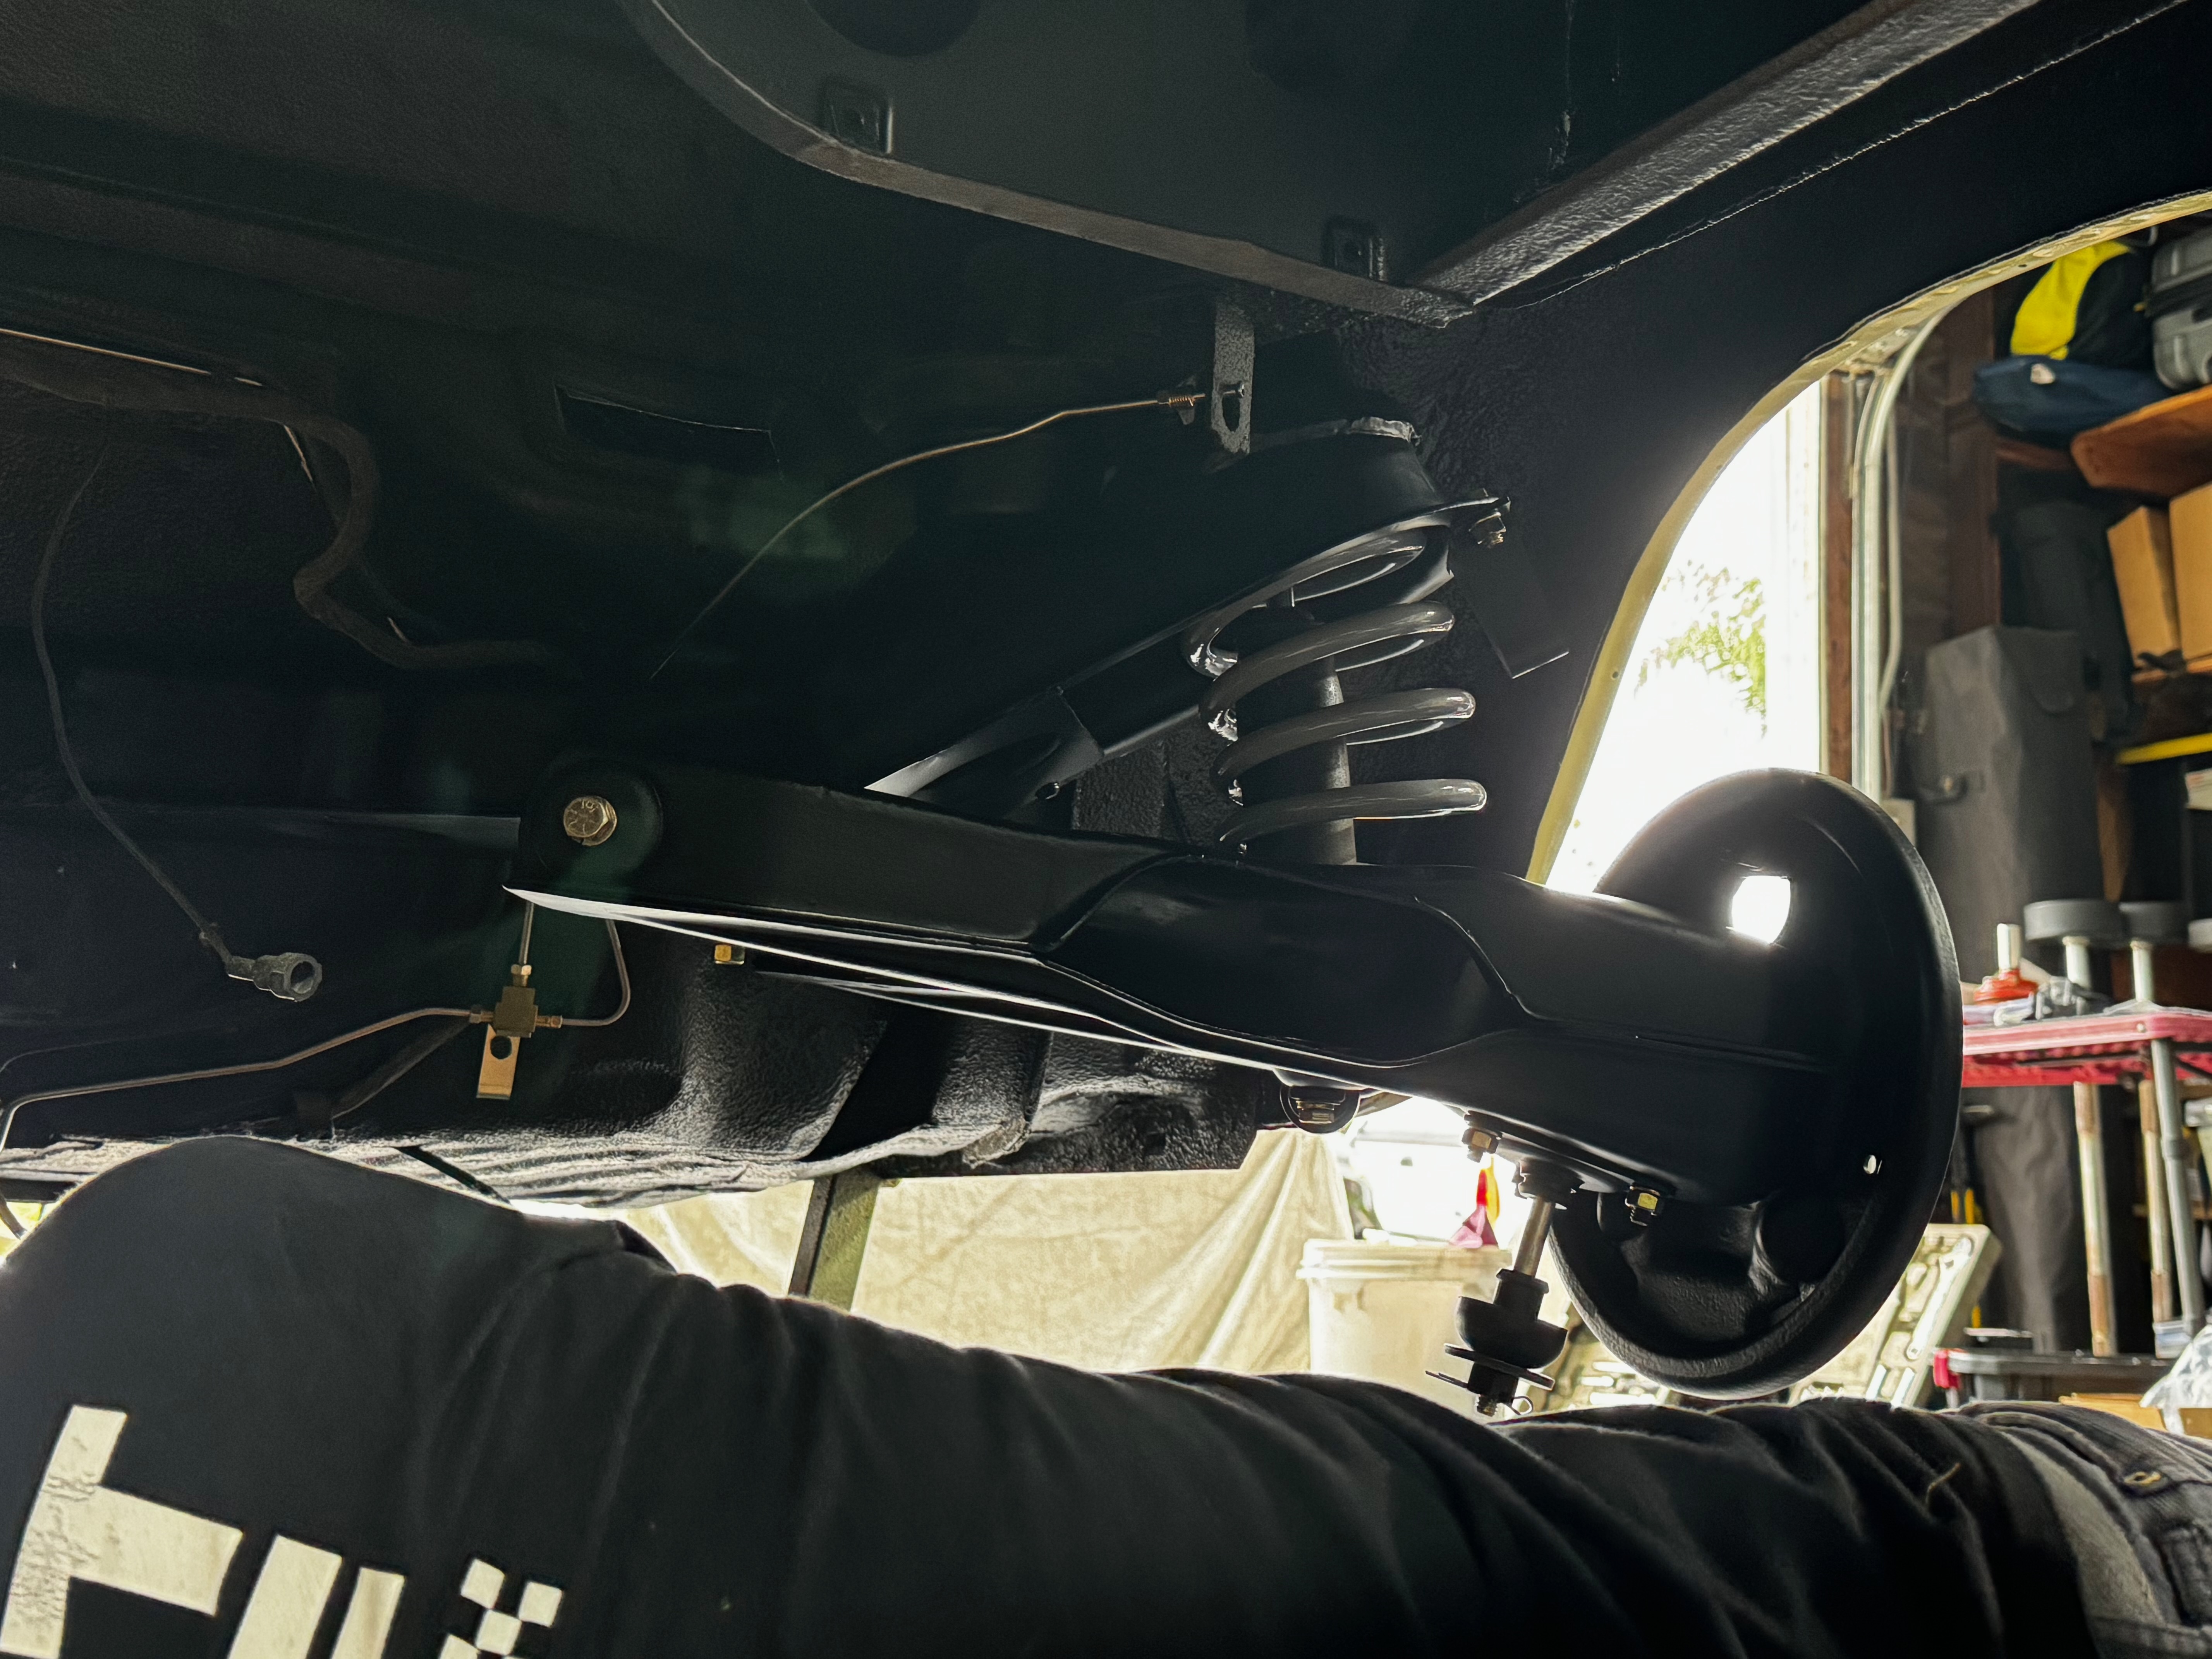
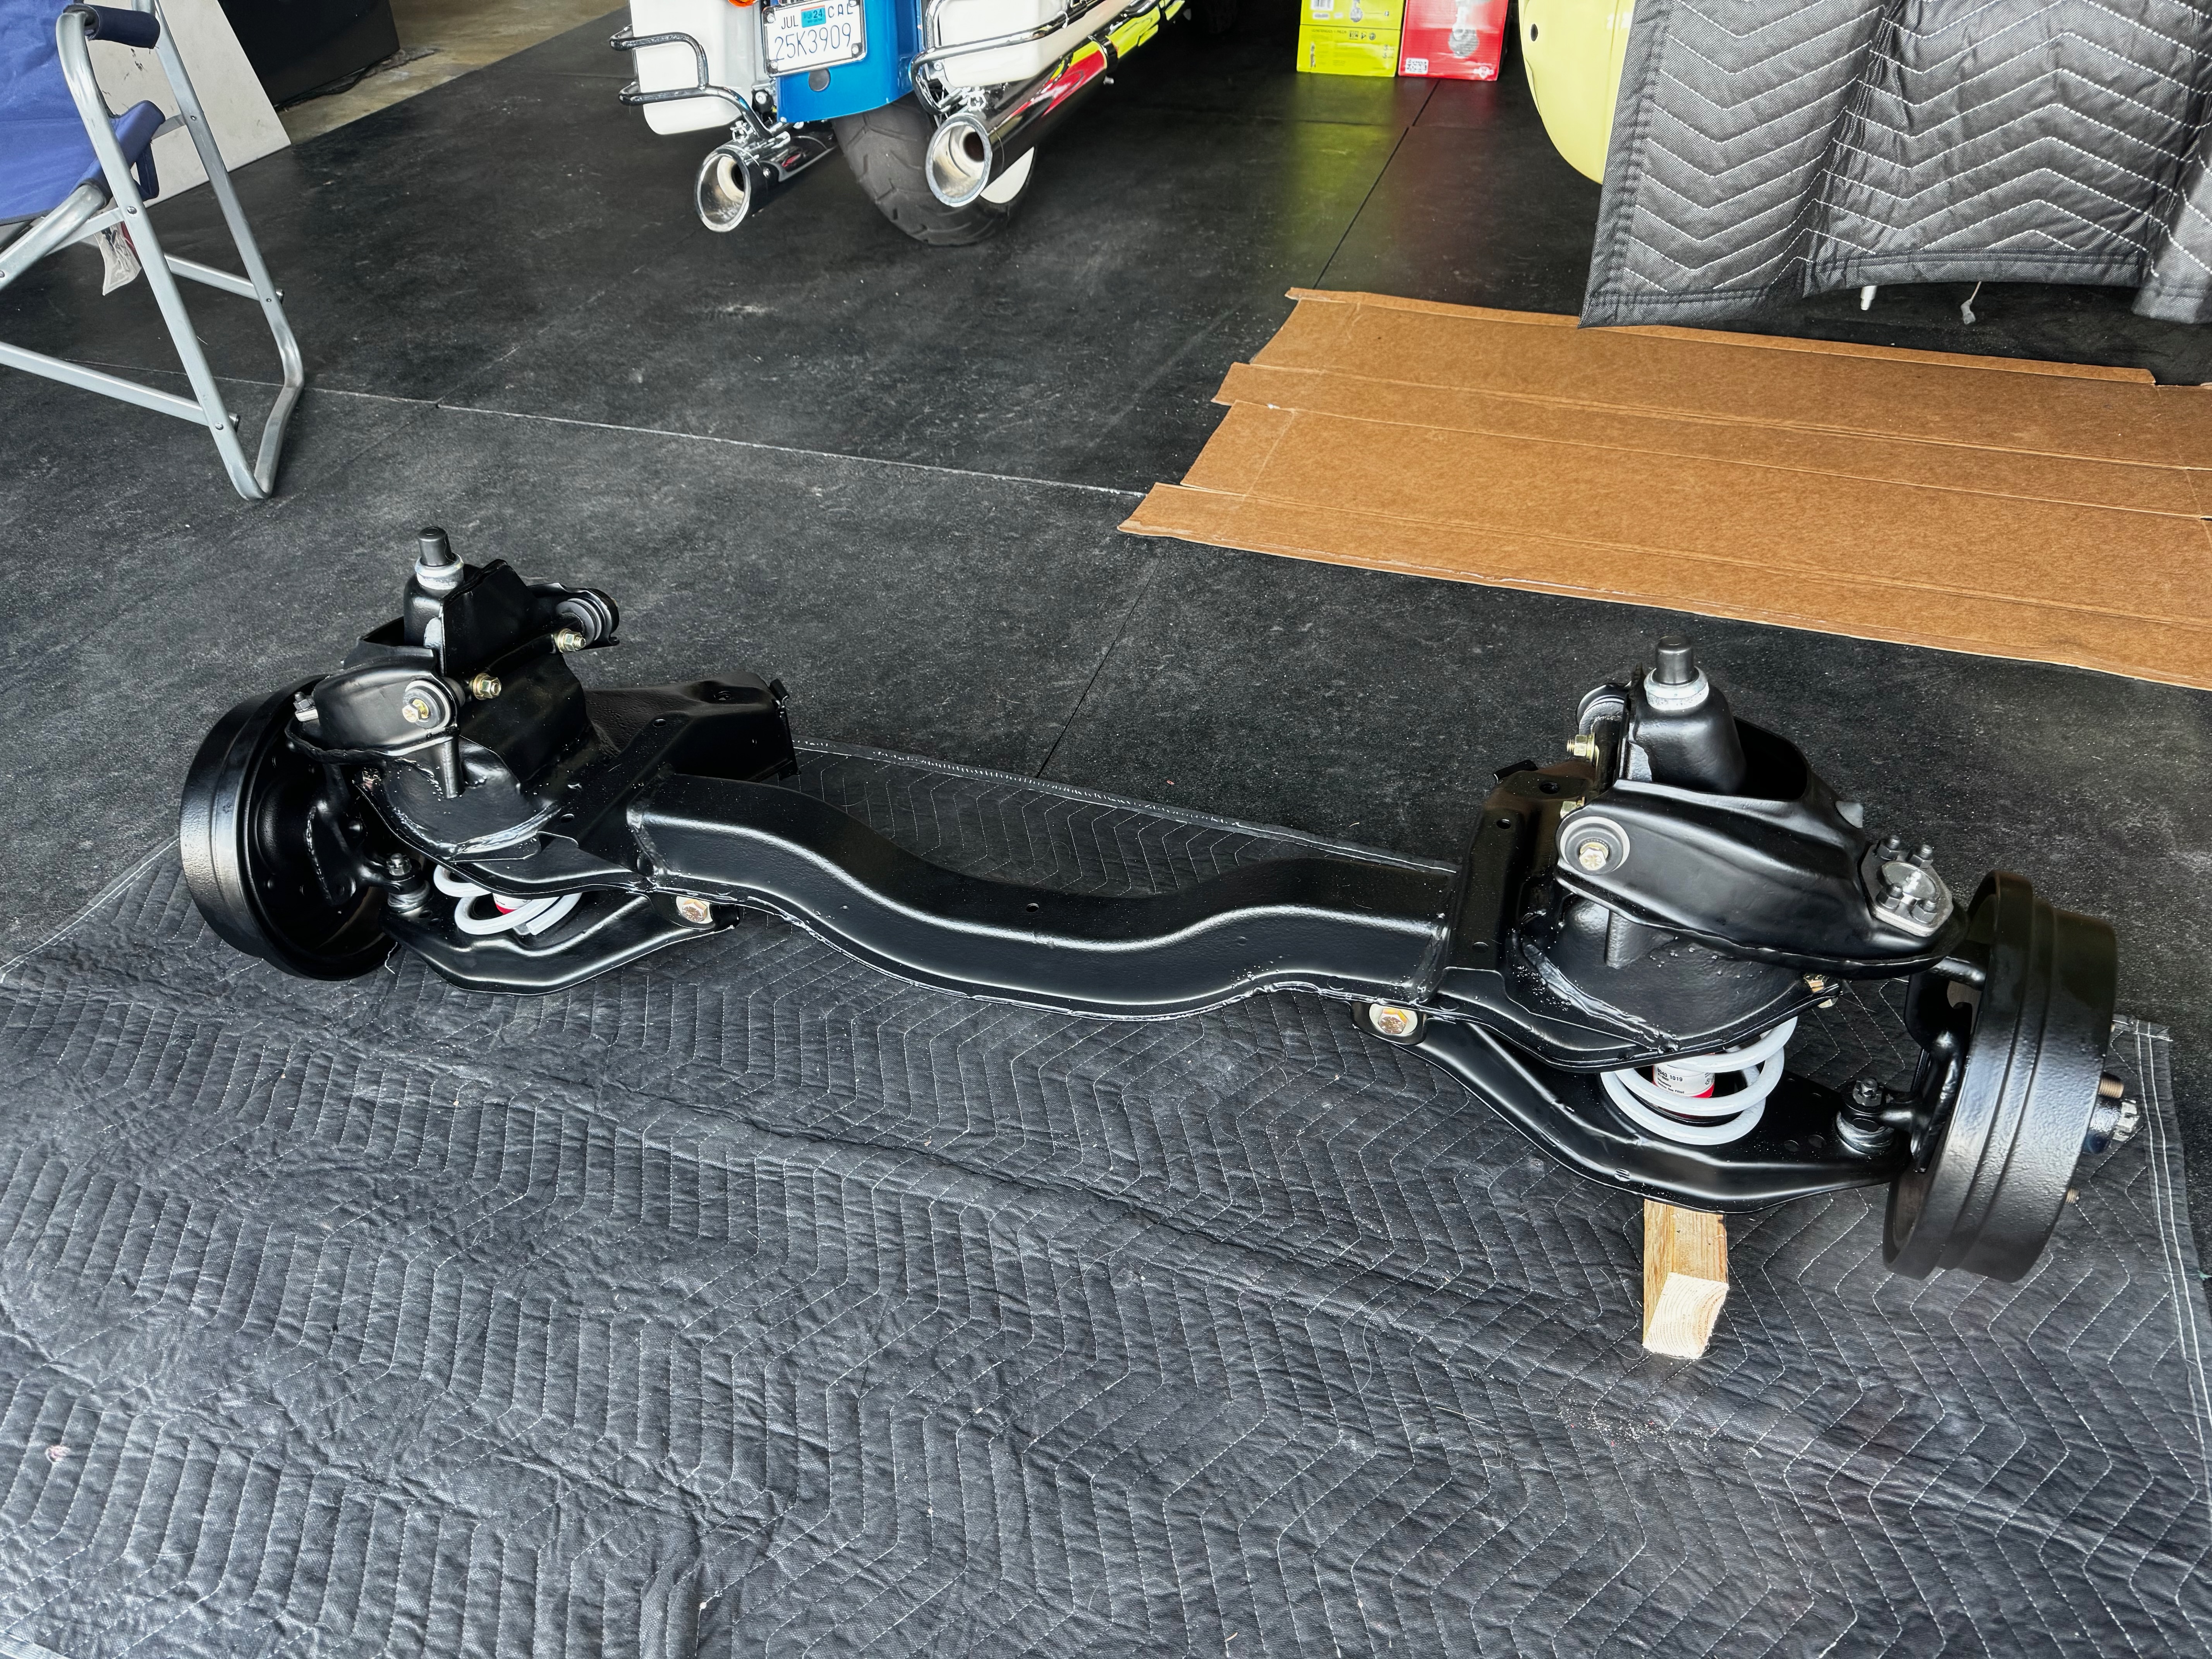
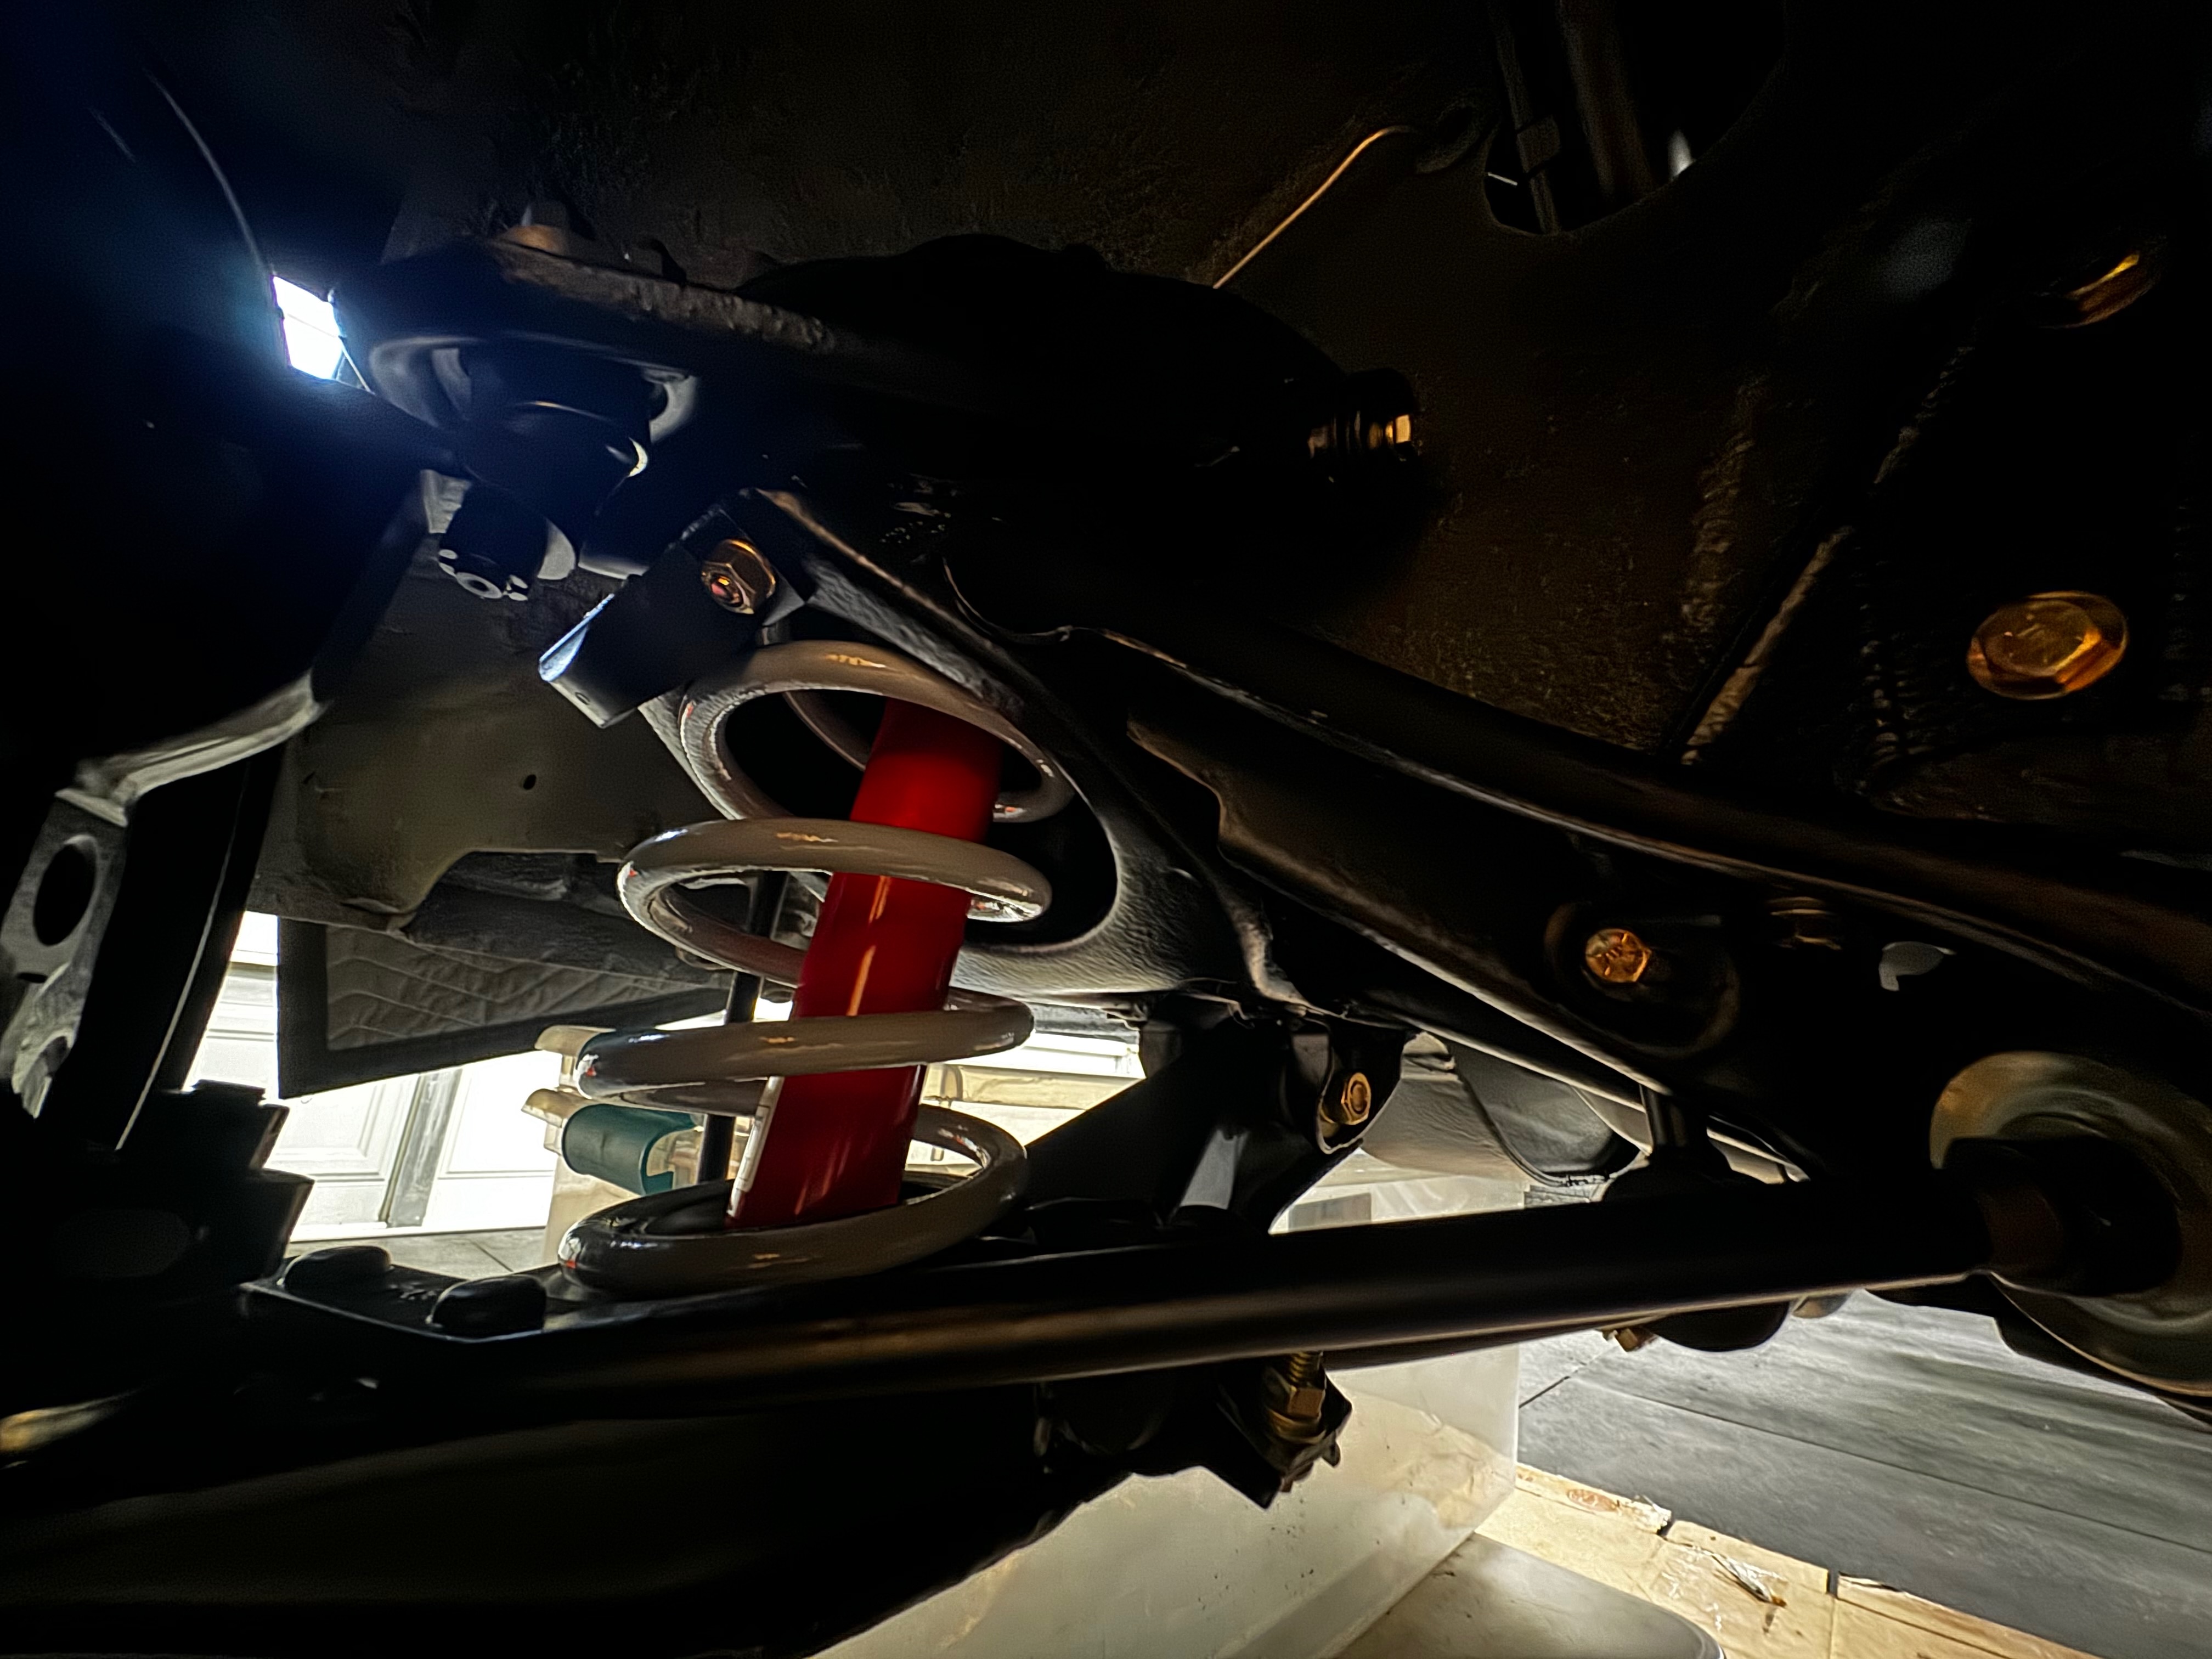
Mechanical: Suspension Overhaul
Completely rebuilding the Corvair's unique suspension system with new bushings, ball joints, and springs for improved handling and ride quality.

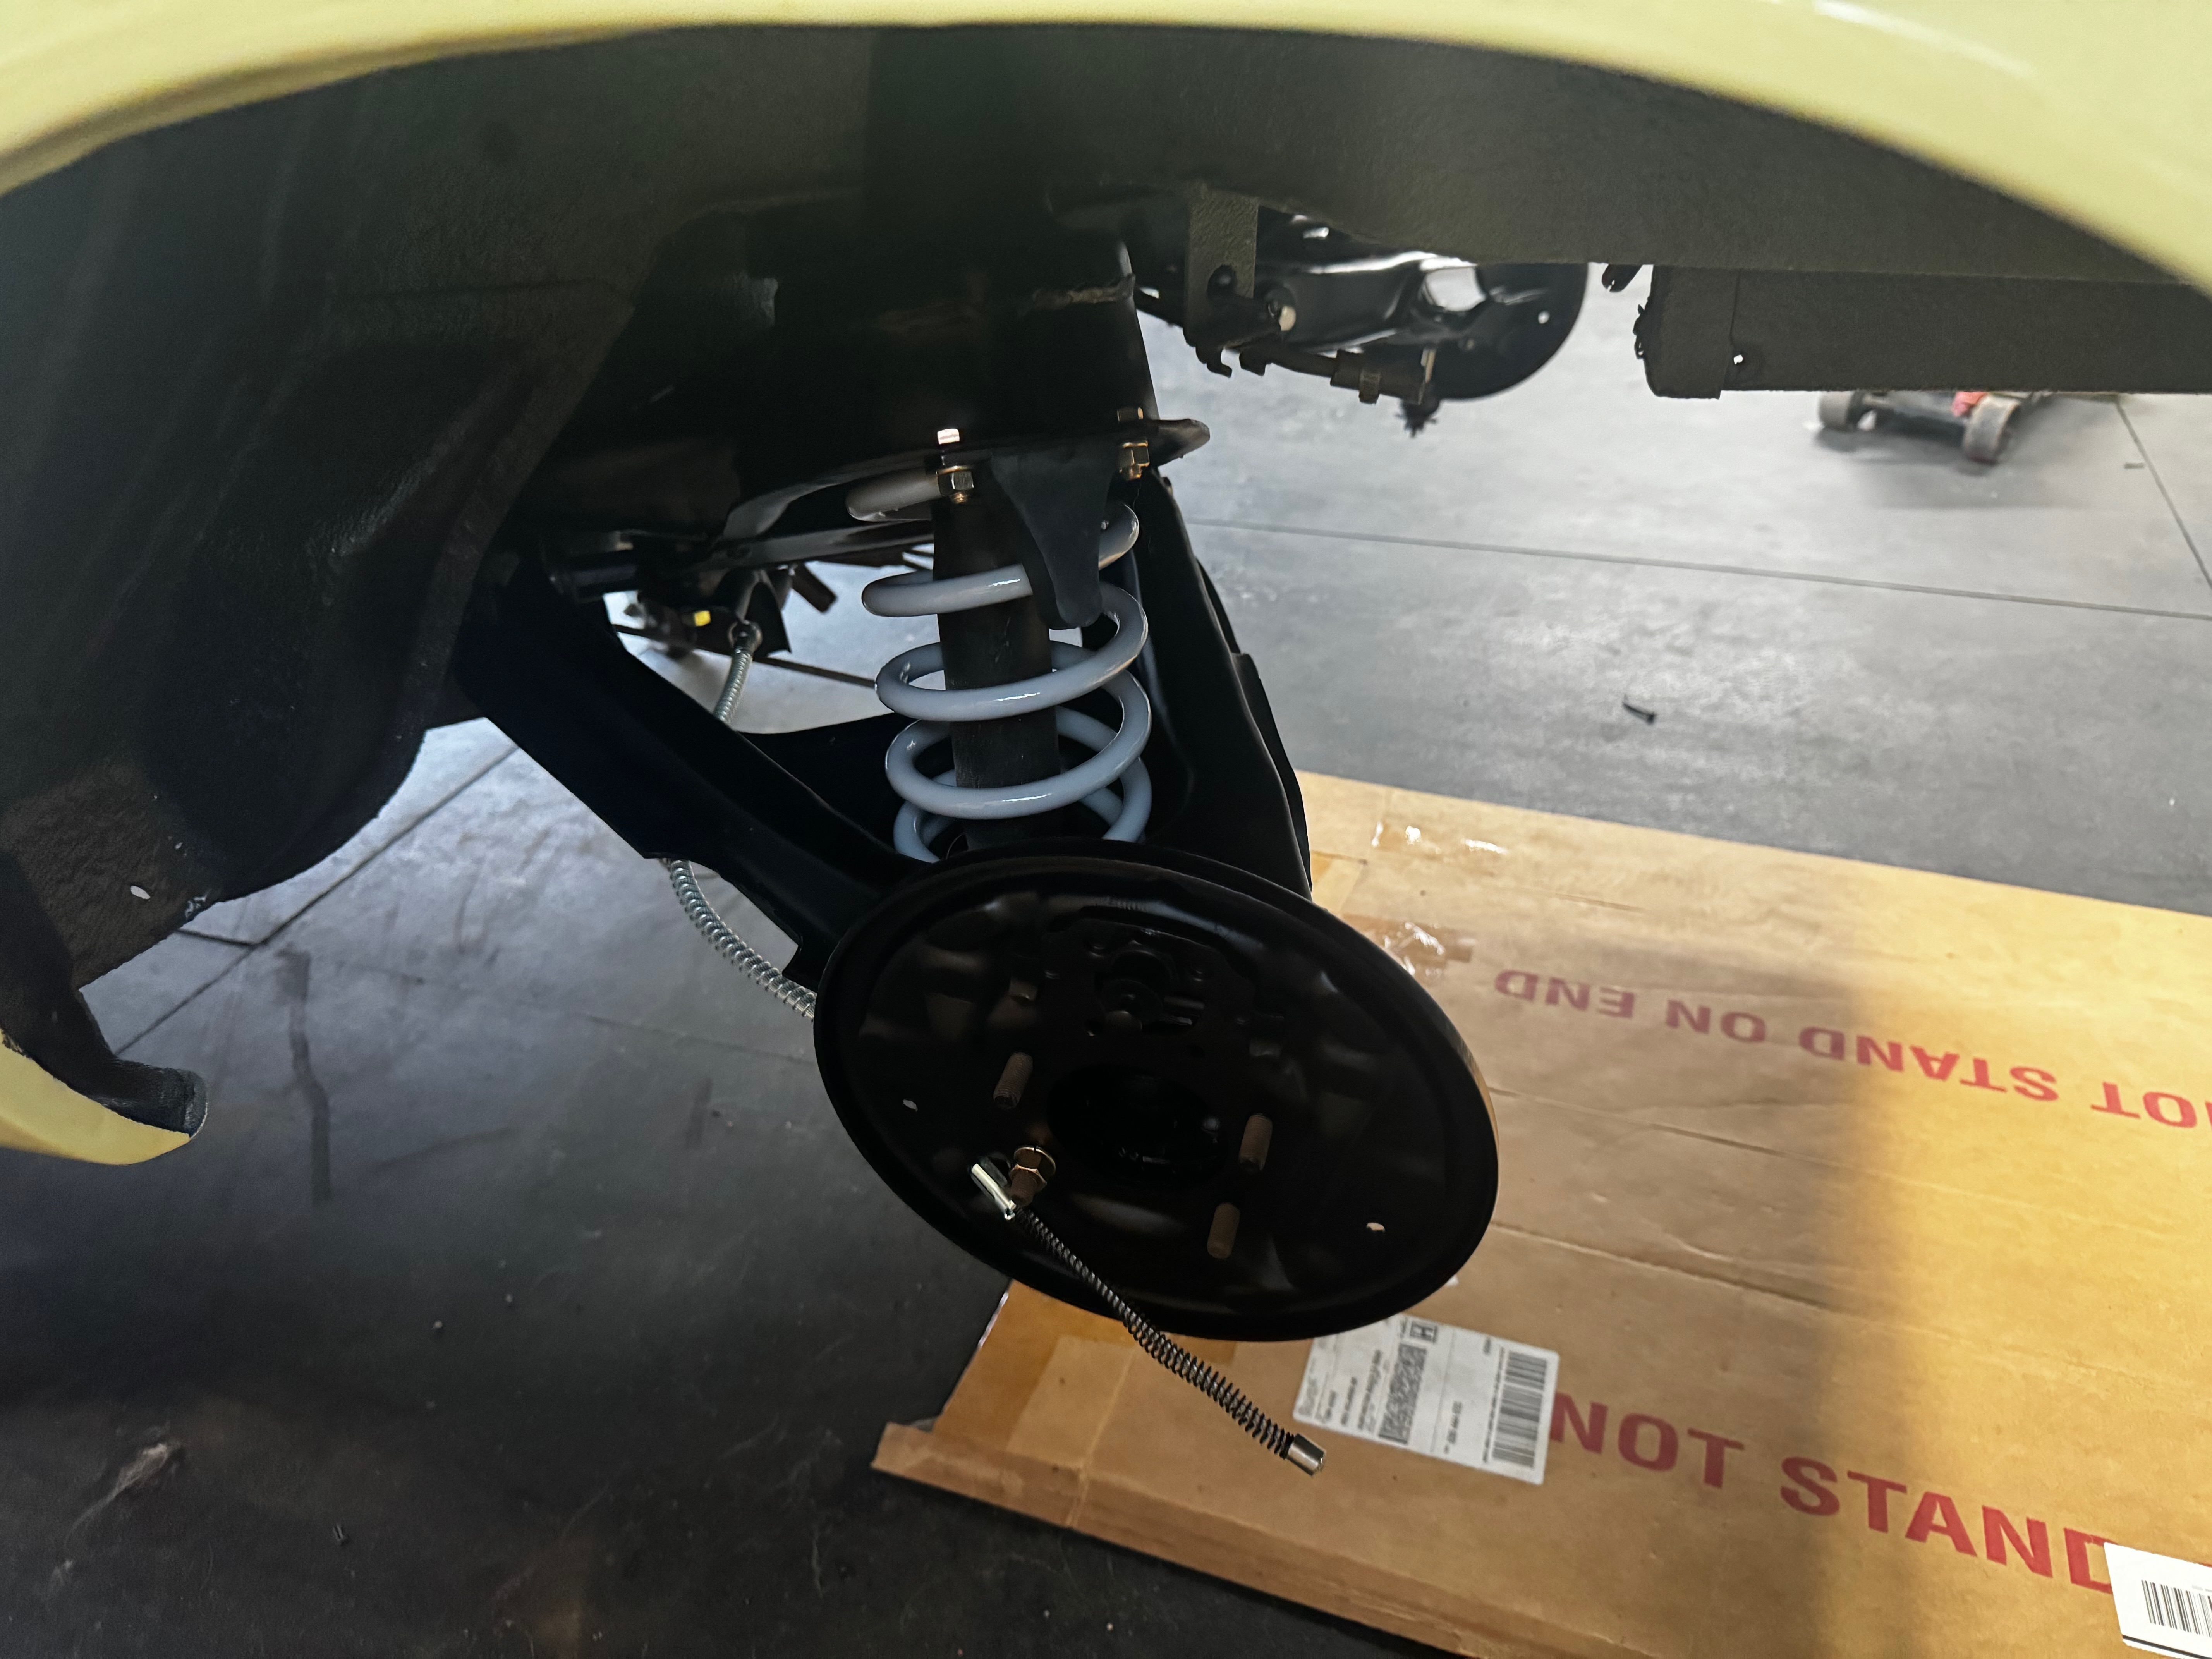
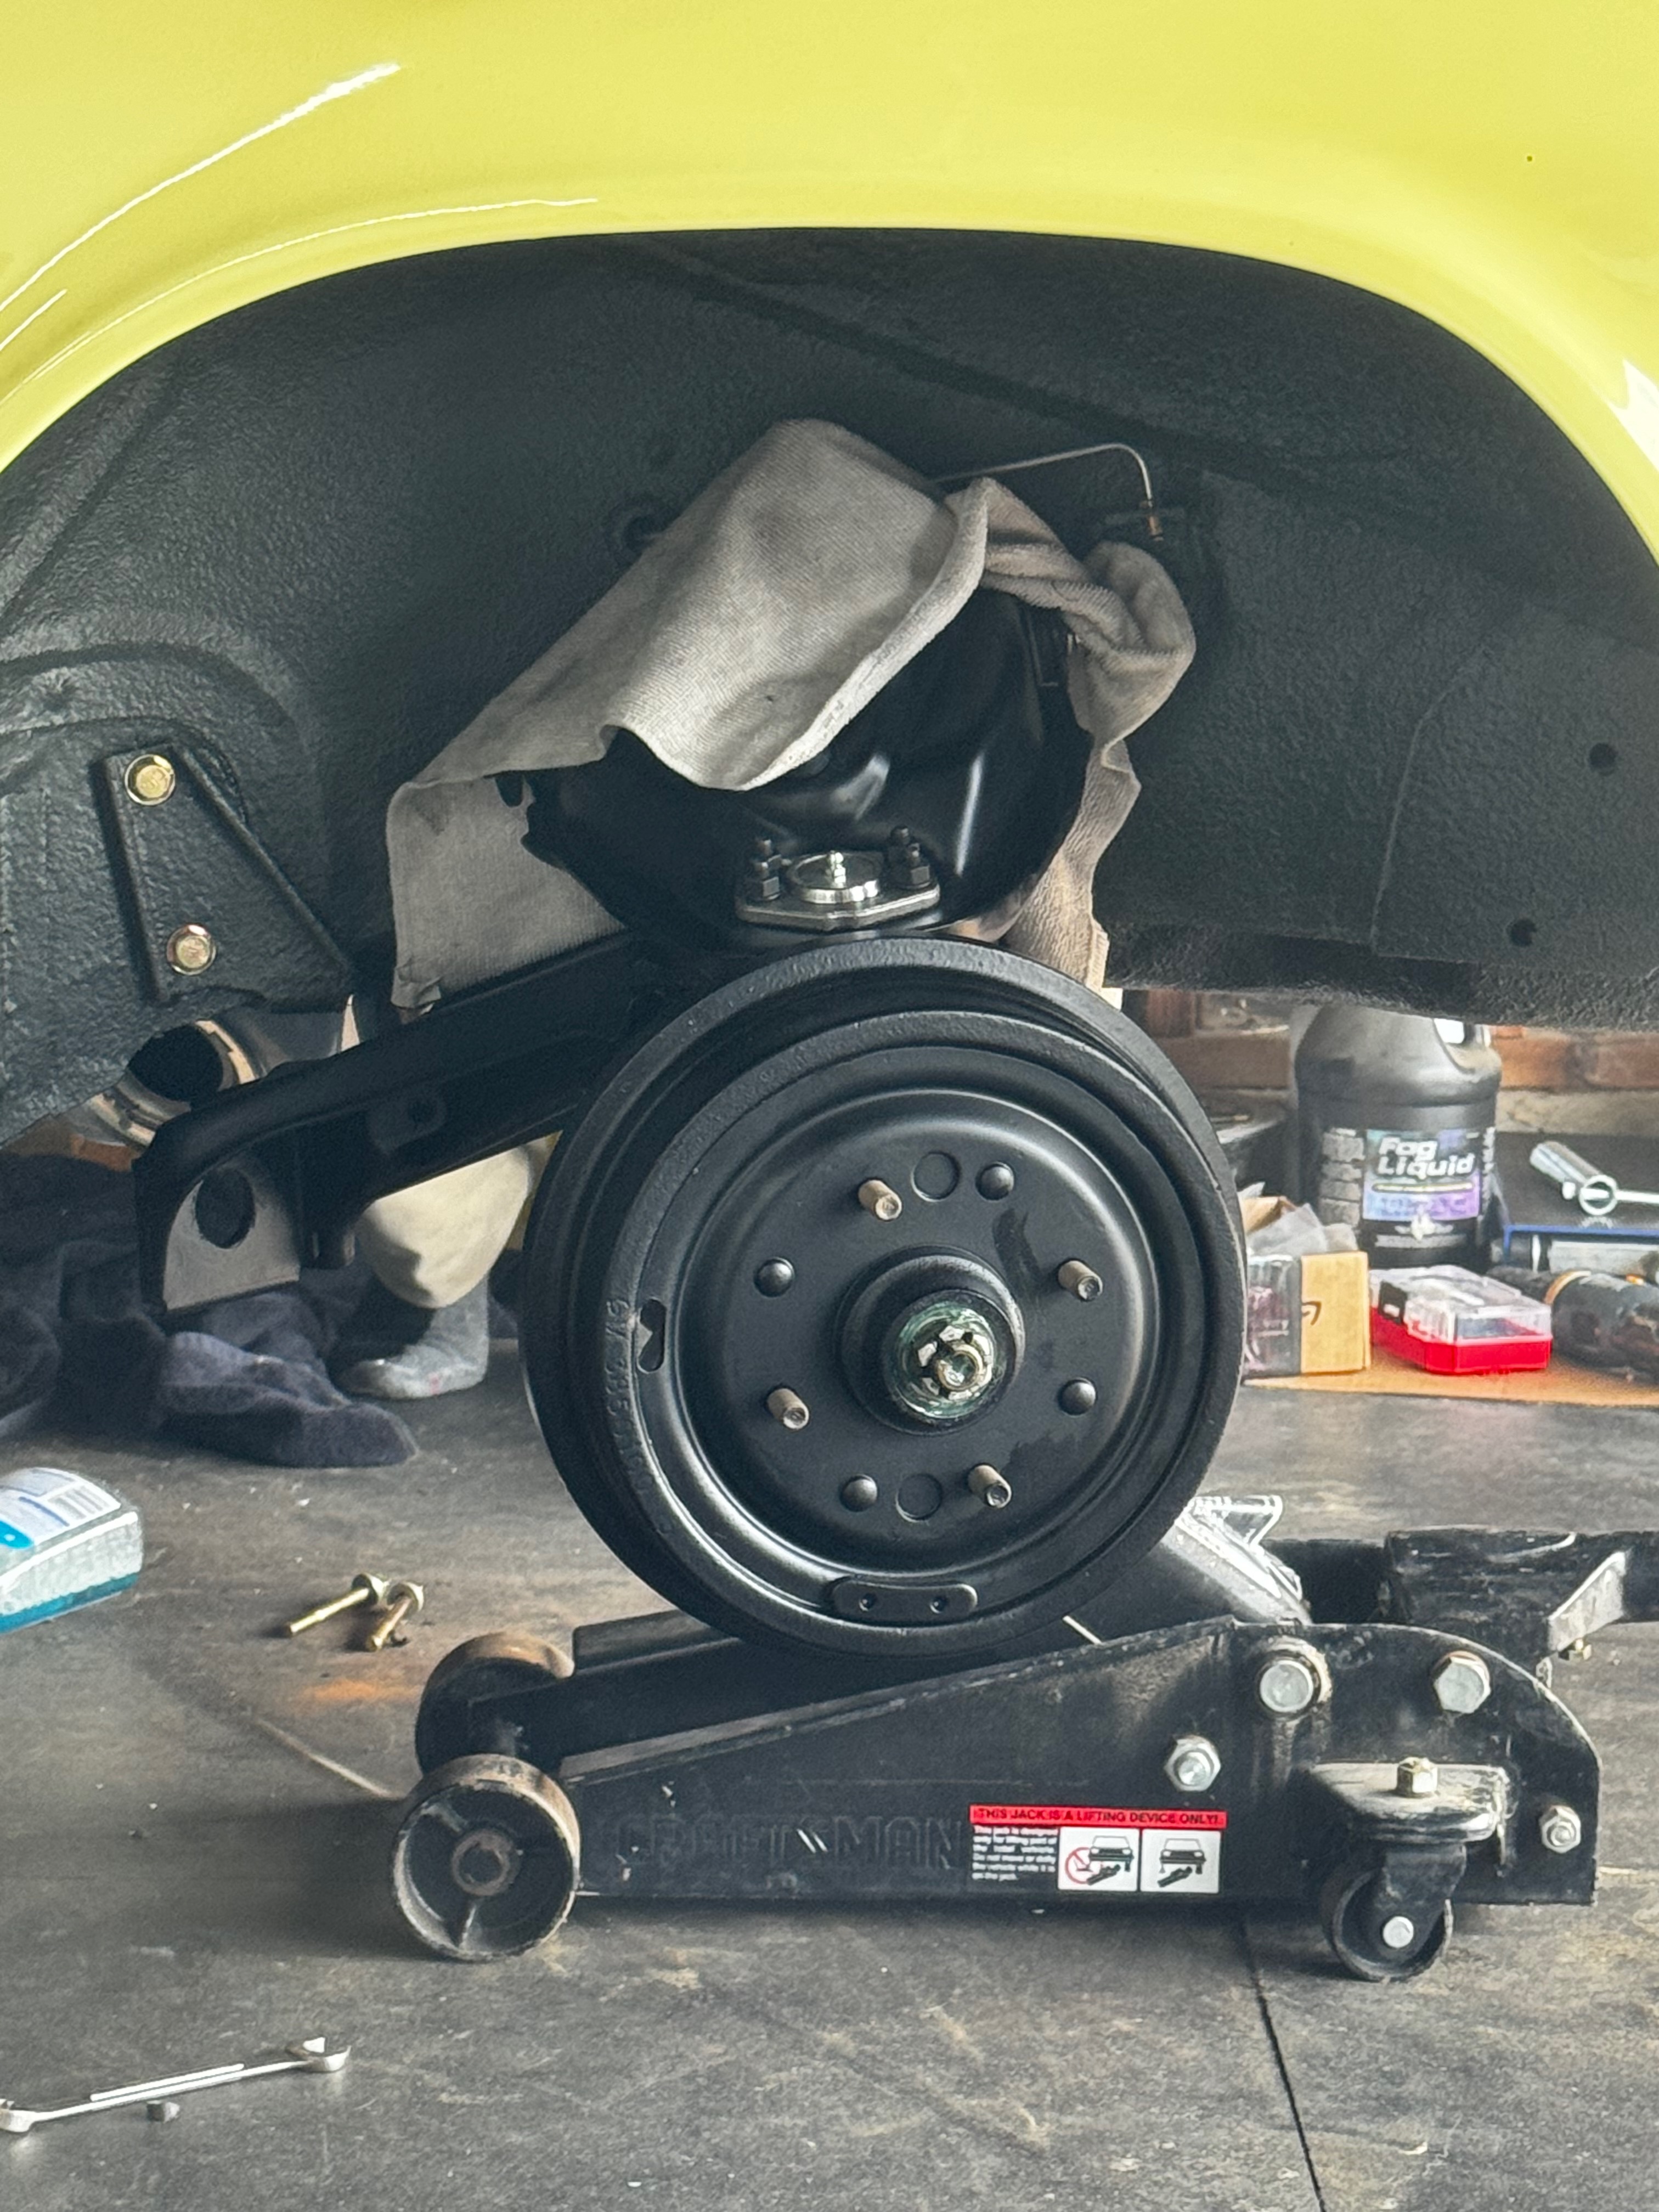
Mechanical: Brake System Upgrade
Installing a modern dual-circuit brake system with new master cylinder, wheel cylinders, and lines for significantly improved safety and stopping power.
Mechanical: Transmission Rebuild
Completely disassembling and rebuilding the manual transmission with new bearings, synchronizers, and seals to ensure smooth shifting and quiet operation.

Mechanical: Carburetor Restoration
Meticulously rebuilding the original carburetors with new jets, gaskets, and floats, then precisely adjusting them for optimal fuel delivery and performance.
Mechanical: Electrical Modernization
Completely rewiring the Corvair with a modern fuse panel and updated components for improved reliability and safety while maintaining a period-correct appearance.
Mechanical: Cooling Enhancement
Installing upgraded cooling components for the air-cooled engine, including improved shrouds, seals, and fan to prevent overheating issues common to Corvairs.
Mechanical: Steering Precision
Rebuilding the steering box and linkage with new components to eliminate play and provide precise, responsive handling for a confident driving experience.
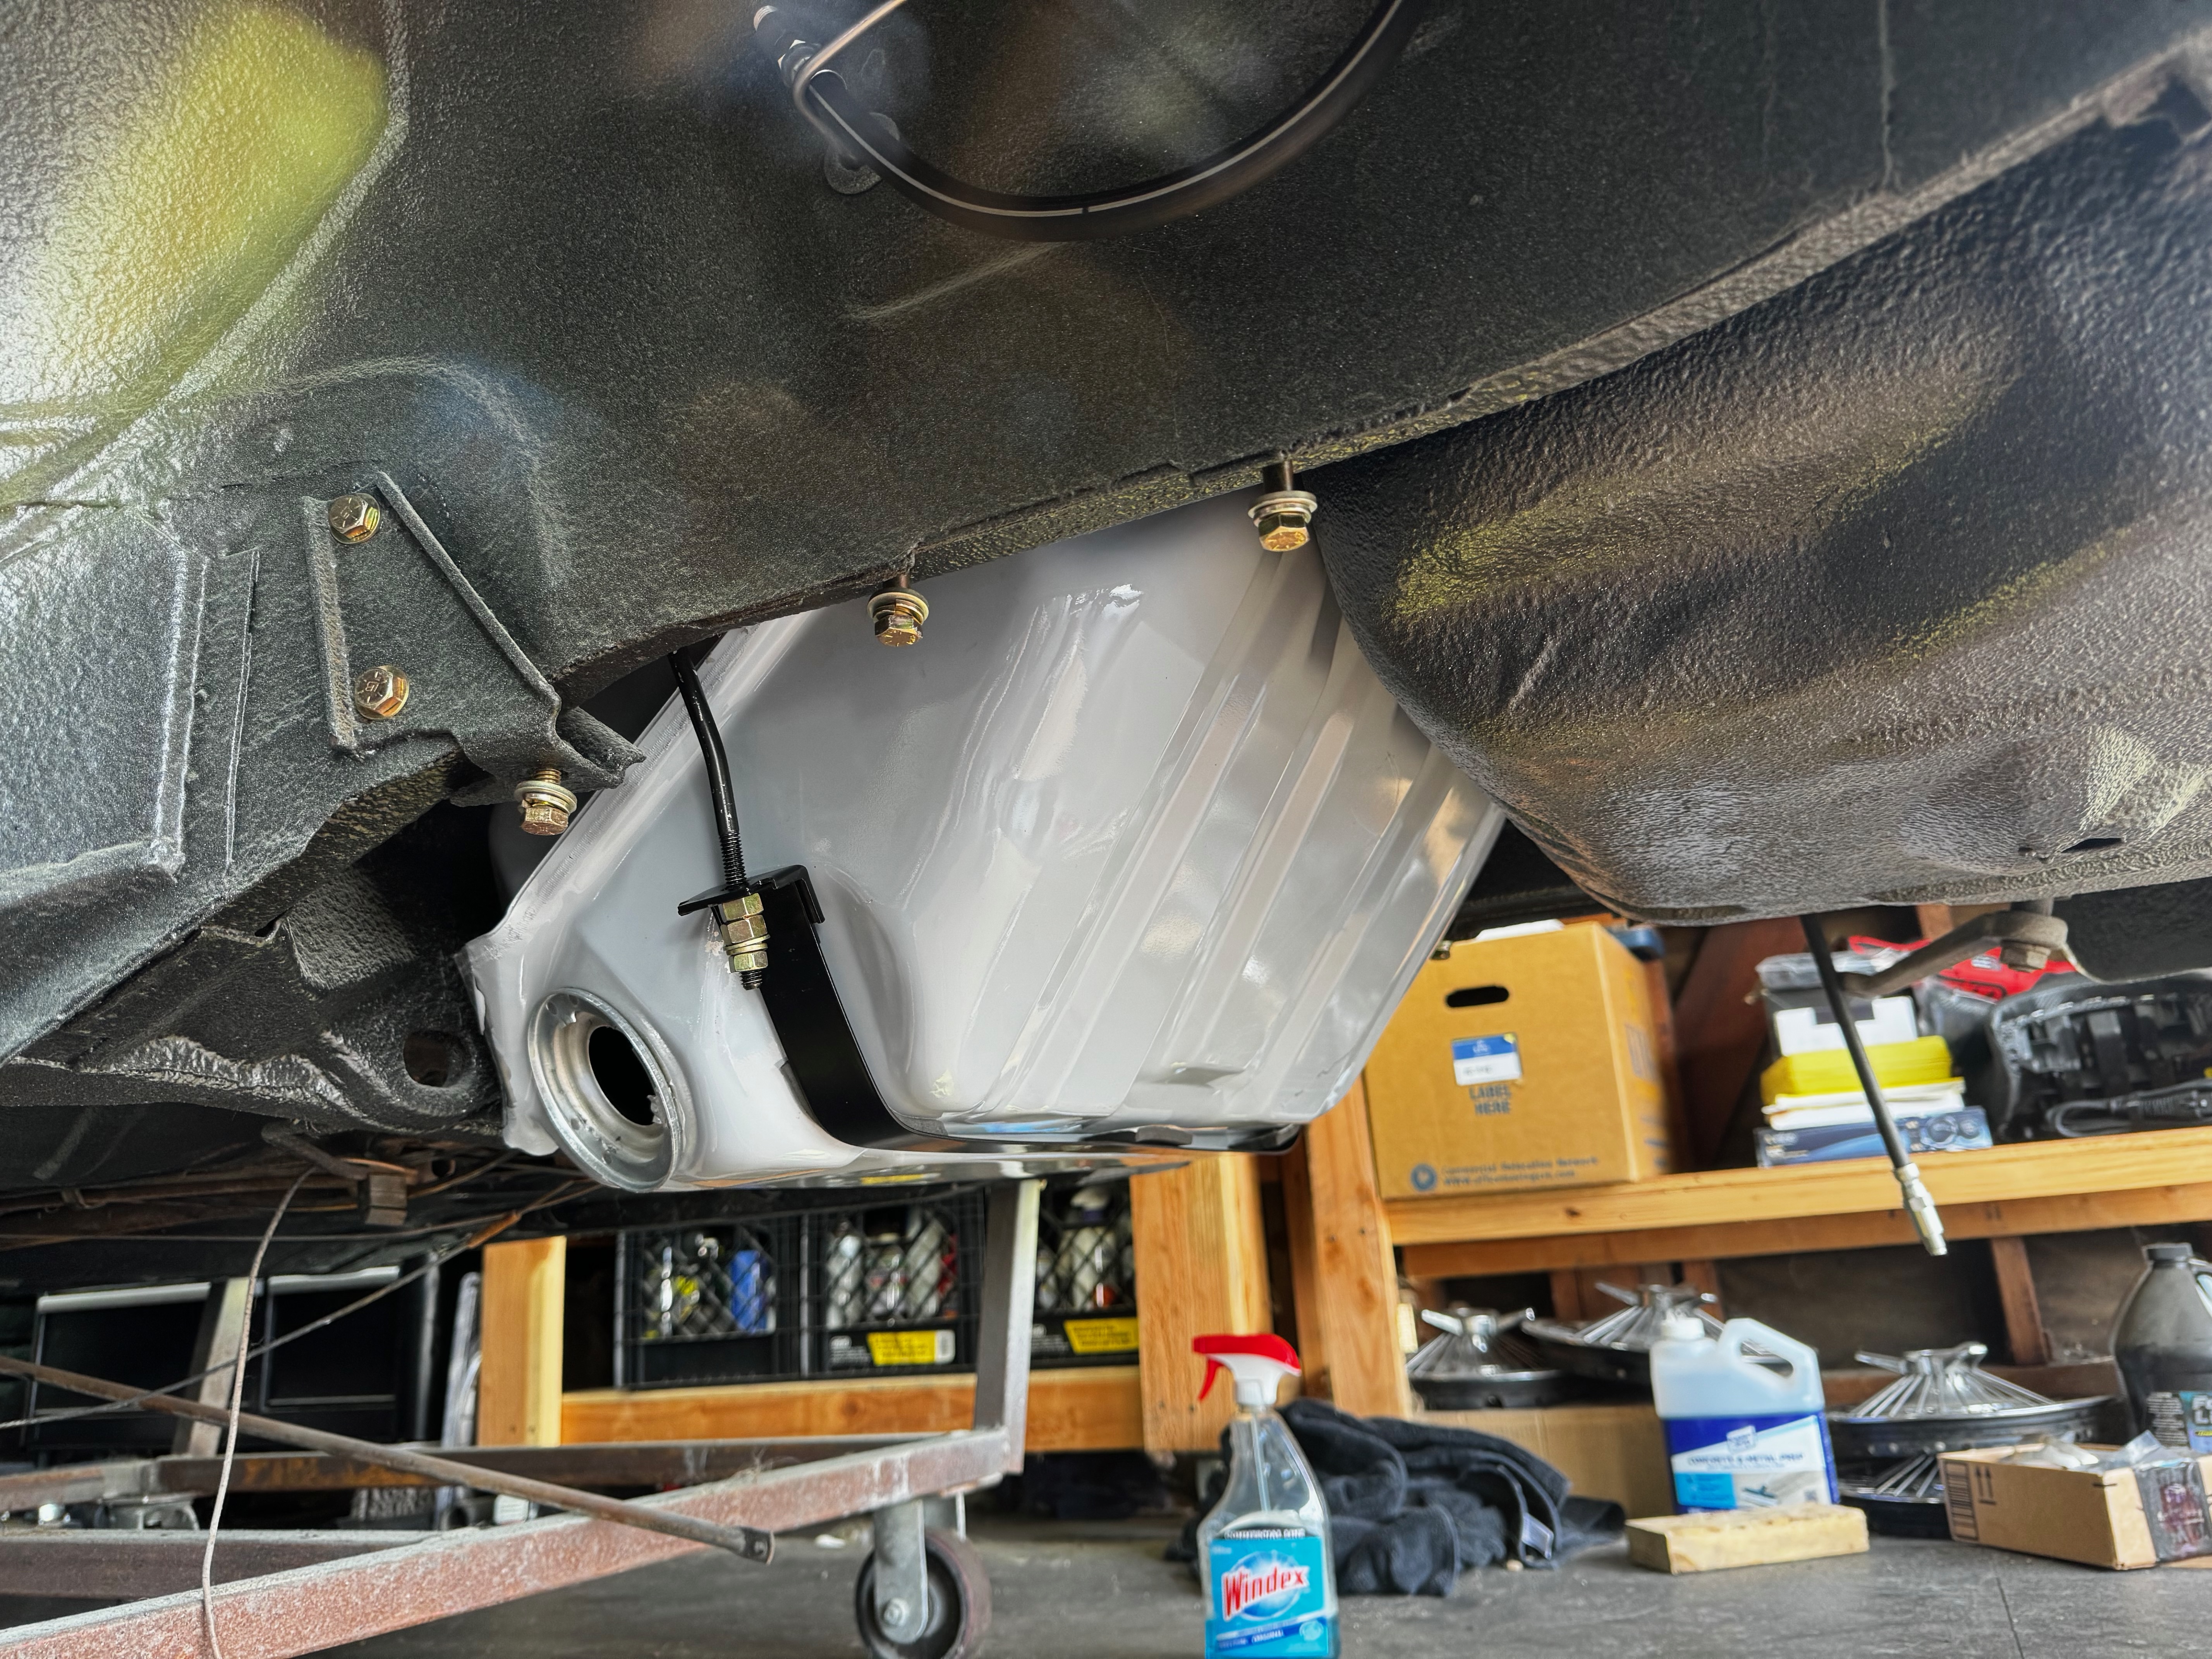
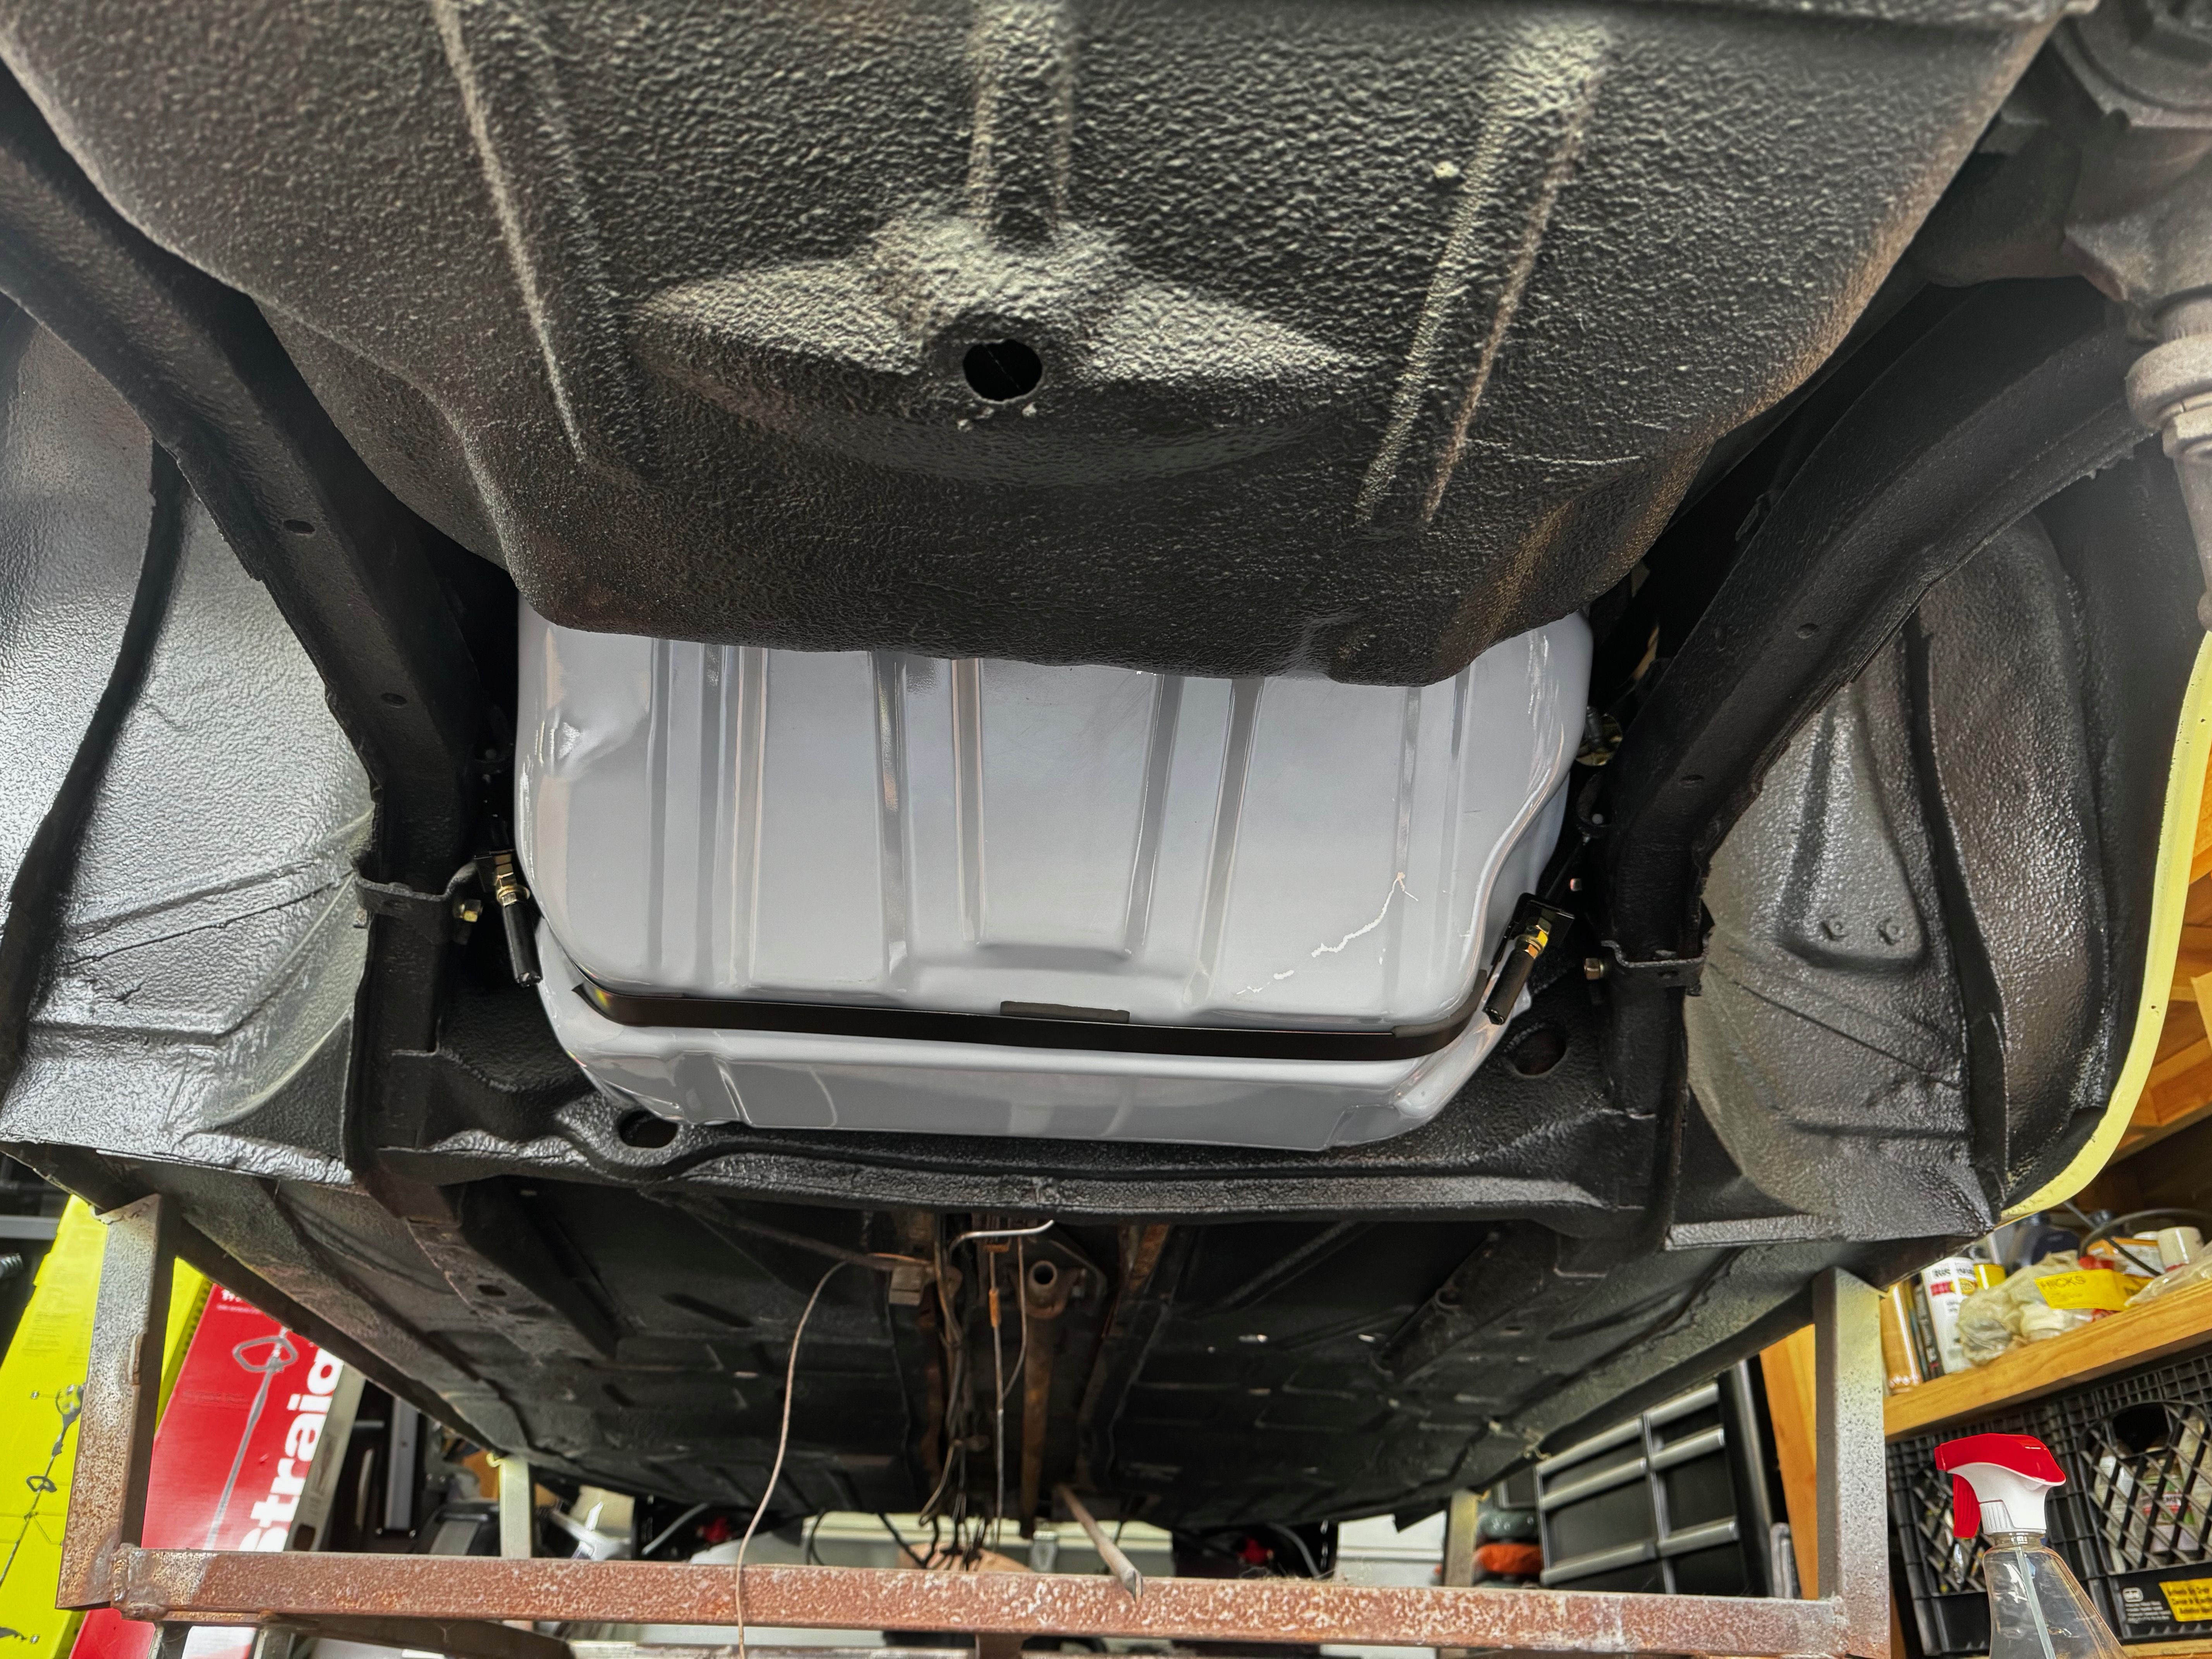
Mechanical: Fuel System Overhaul
Thoroughly cleaning and restoring the fuel tank, replacing all fuel lines, and installing a new fuel pump to ensure reliable, contamination-free fuel delivery.
Mechanical: Exhaust Enhancement
Installing a custom-fabricated exhaust system with improved flow characteristics for better performance and a period-appropriate exhaust note.
Mechanical: Precision Tuning
Fine-tuning the rebuilt engine with precise carburetor adjustments, valve clearances, and ignition timing for optimal performance, efficiency, and reliability.
Mechanical: Component Detailing
Meticulous attention to detail on mechanical components, ensuring proper clearances, torque specifications, and assembly techniques for trouble-free operation.
Mechanical: Engine Parts Preparation
Carefully cleaning, inspecting, and preparing engine components before reassembly, ensuring all parts meet or exceed factory specifications.

Mechanical: Precision Assembly
Assembling mechanical components with exacting attention to detail, using proper torque sequences and assembly lubricants for optimal performance.
Mechanical: Engine Refinement
Performing detailed work on critical engine components to ensure reliable performance and longevity in the unique air-cooled flat-six design.
Mechanical: Component Renewal
Restoring mechanical components to like-new condition through careful cleaning, refinishing, and replacement of worn parts with high-quality alternatives.
Mechanical: Pre-Installation Preparation
Final preparation of the rebuilt engine before installation, including checking all clearances, connections, and fluid systems for proper operation.
Mechanical: Systems Integration
Detailed work integrating various mechanical systems to ensure they function together harmoniously, as they would have when the car left the factory.
Dashboard Restoration
Repairing and refinishing the cracked dashboard.
Seat Reconstruction
Rebuilding the seat frames and installing new foam and upholstery.
Door Panel Refurbishment
Restoring the door panels with new materials while maintaining the original design.
New Carpeting
Installing fresh carpeting throughout the interior.
Headliner Installation
Installing a new headliner to complete the interior restoration.
Instrument Cluster Restoration
Restoring the instrument cluster with new gauges and lighting.
Reassembly: Engine Installation
Carefully lowering the completely rebuilt flat-six engine back into the Corvair chassis, a critical milestone in the reassembly process.
Reassembly: Interior Fitting
Meticulously installing the restored interior components including seats, panels, and carpeting back into the freshly painted cabin.
Reassembly: Convertible Top Mounting
Installing the new convertible top fabric and mechanism, a complex process requiring precise alignment and adjustment for proper operation and weather sealing.
Reassembly: Final Detailing
Adding the finishing touches including emblems, trim pieces, and detail work before the completed restoration is unveiled and ready for its first drive.
Reassembly: Electrical Integration
Carefully installing the new wiring harness throughout the vehicle, ensuring proper routing and connections for reliable electrical system operation.
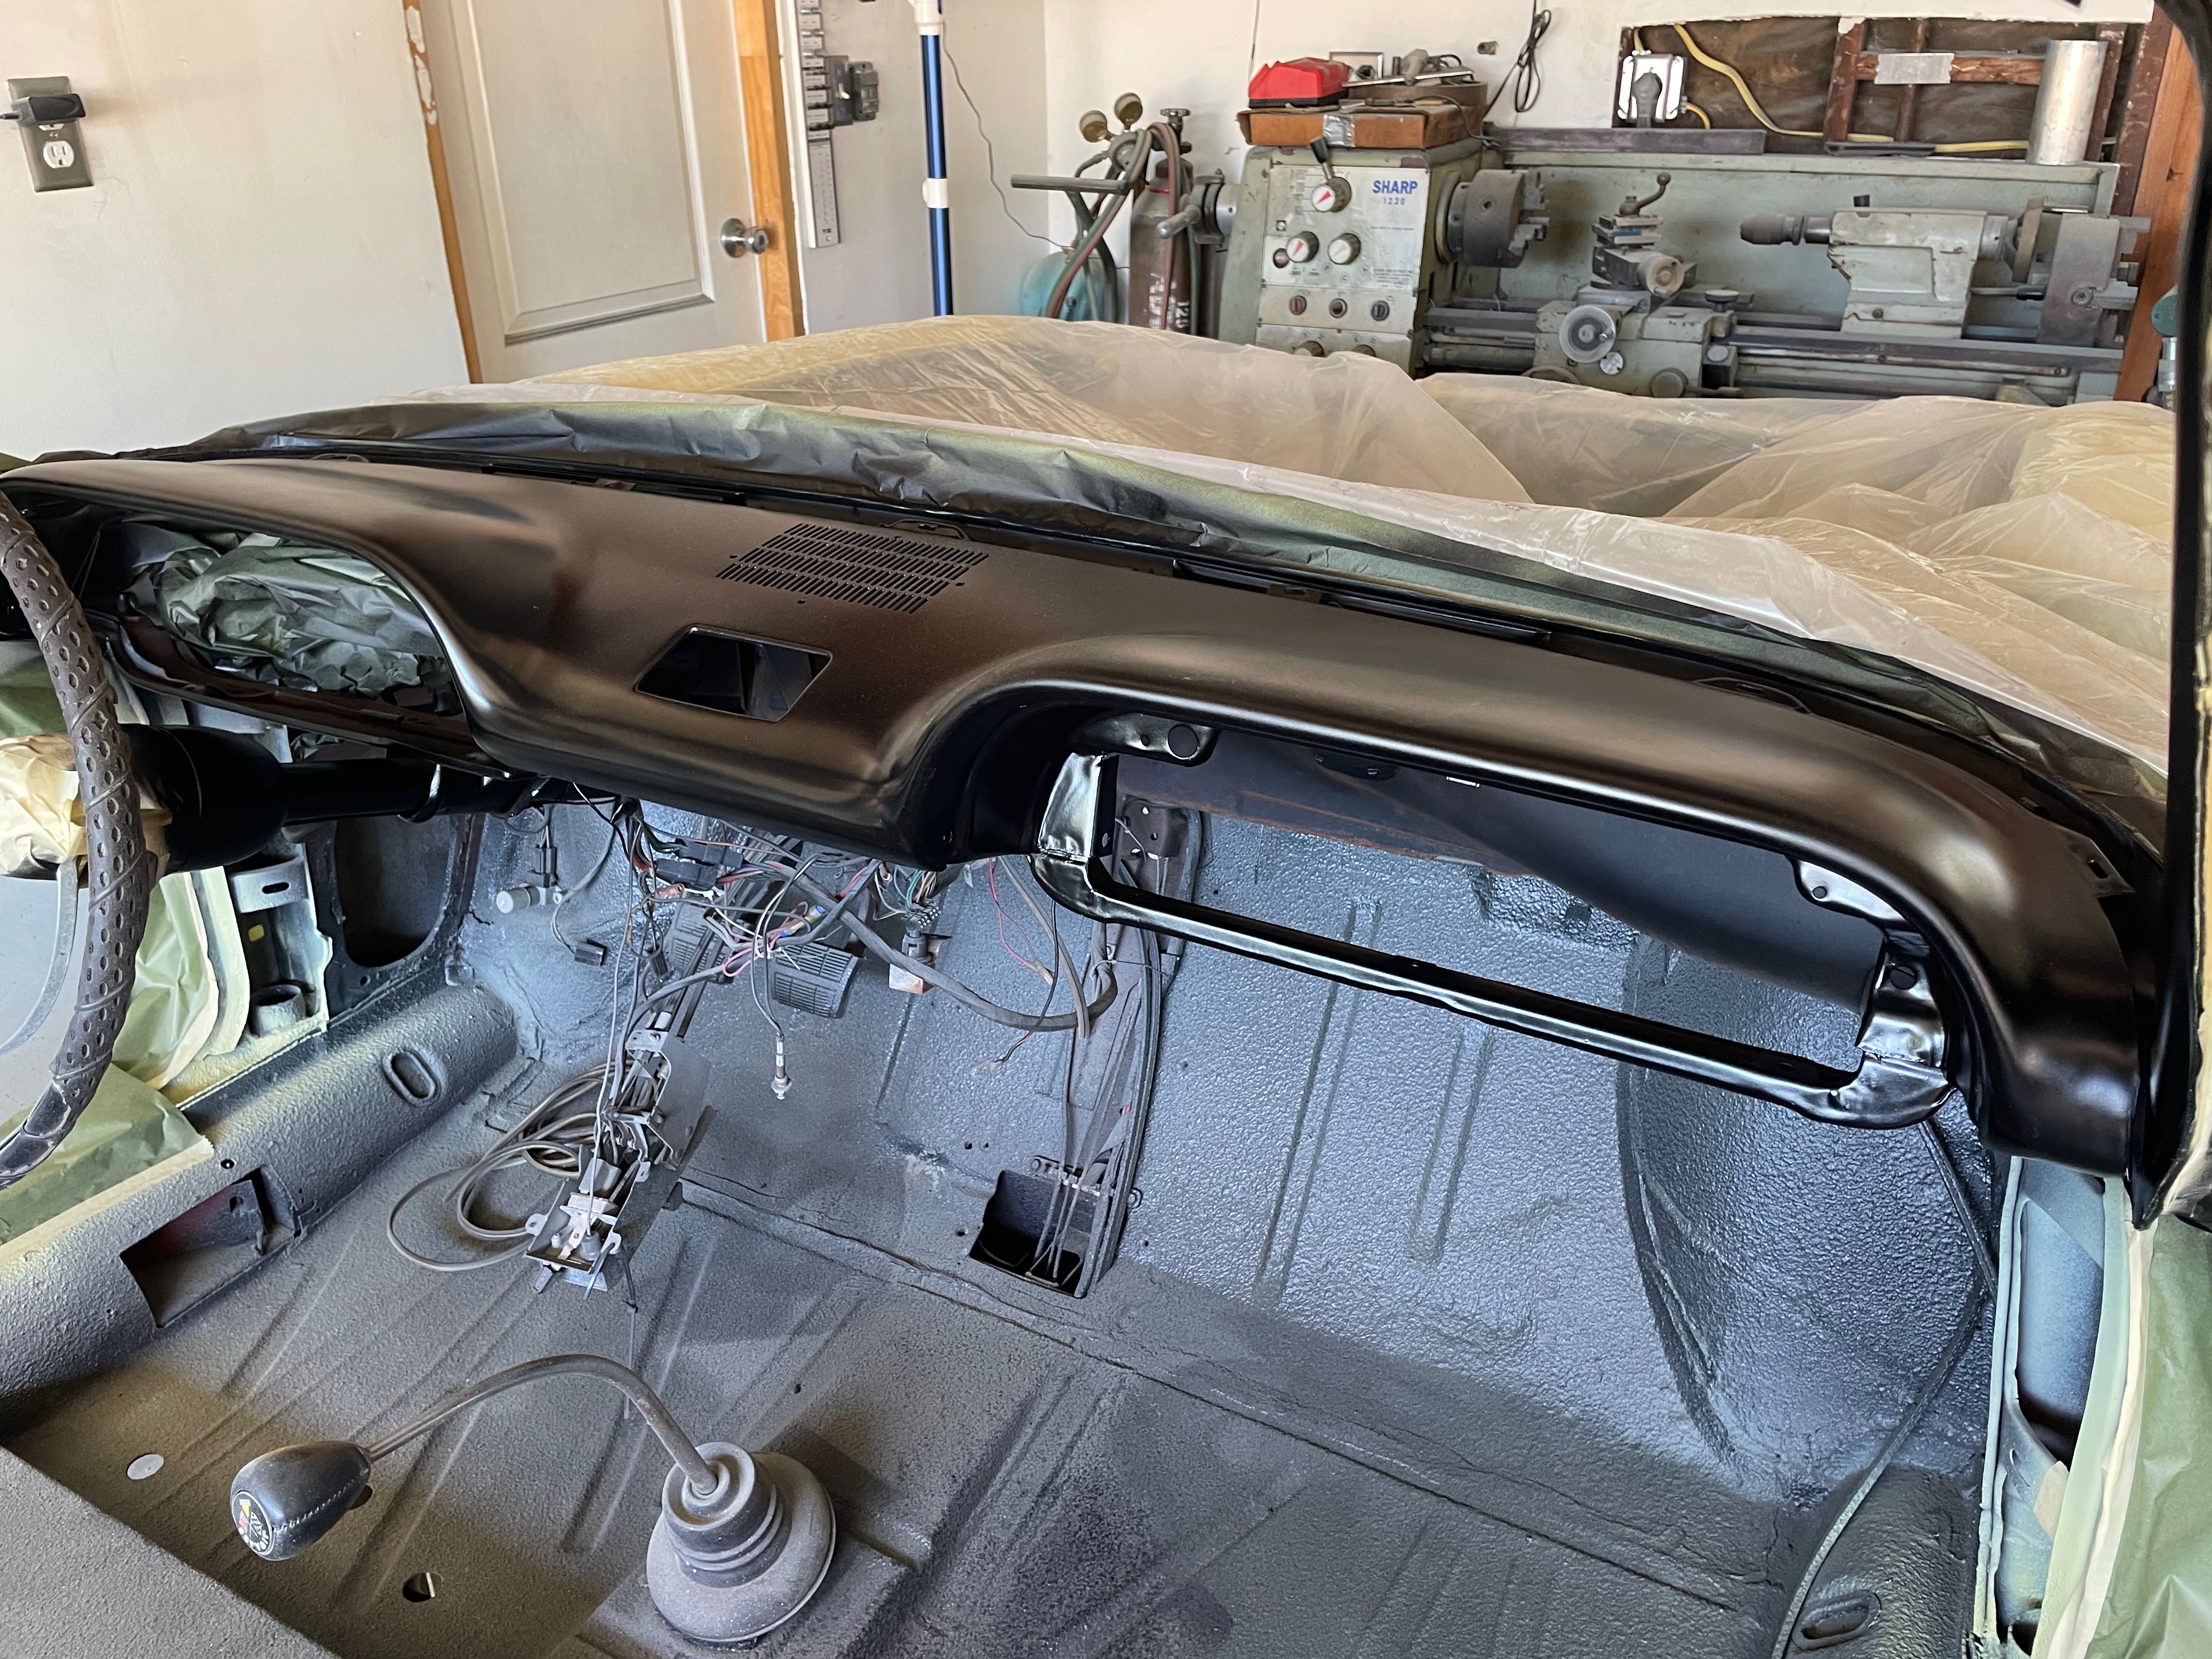
Reassembly: Dashboard Mounting
Reinstalling the completely restored dashboard assembly with new gauges, switches, and wiring to create a functional and period-correct interior.
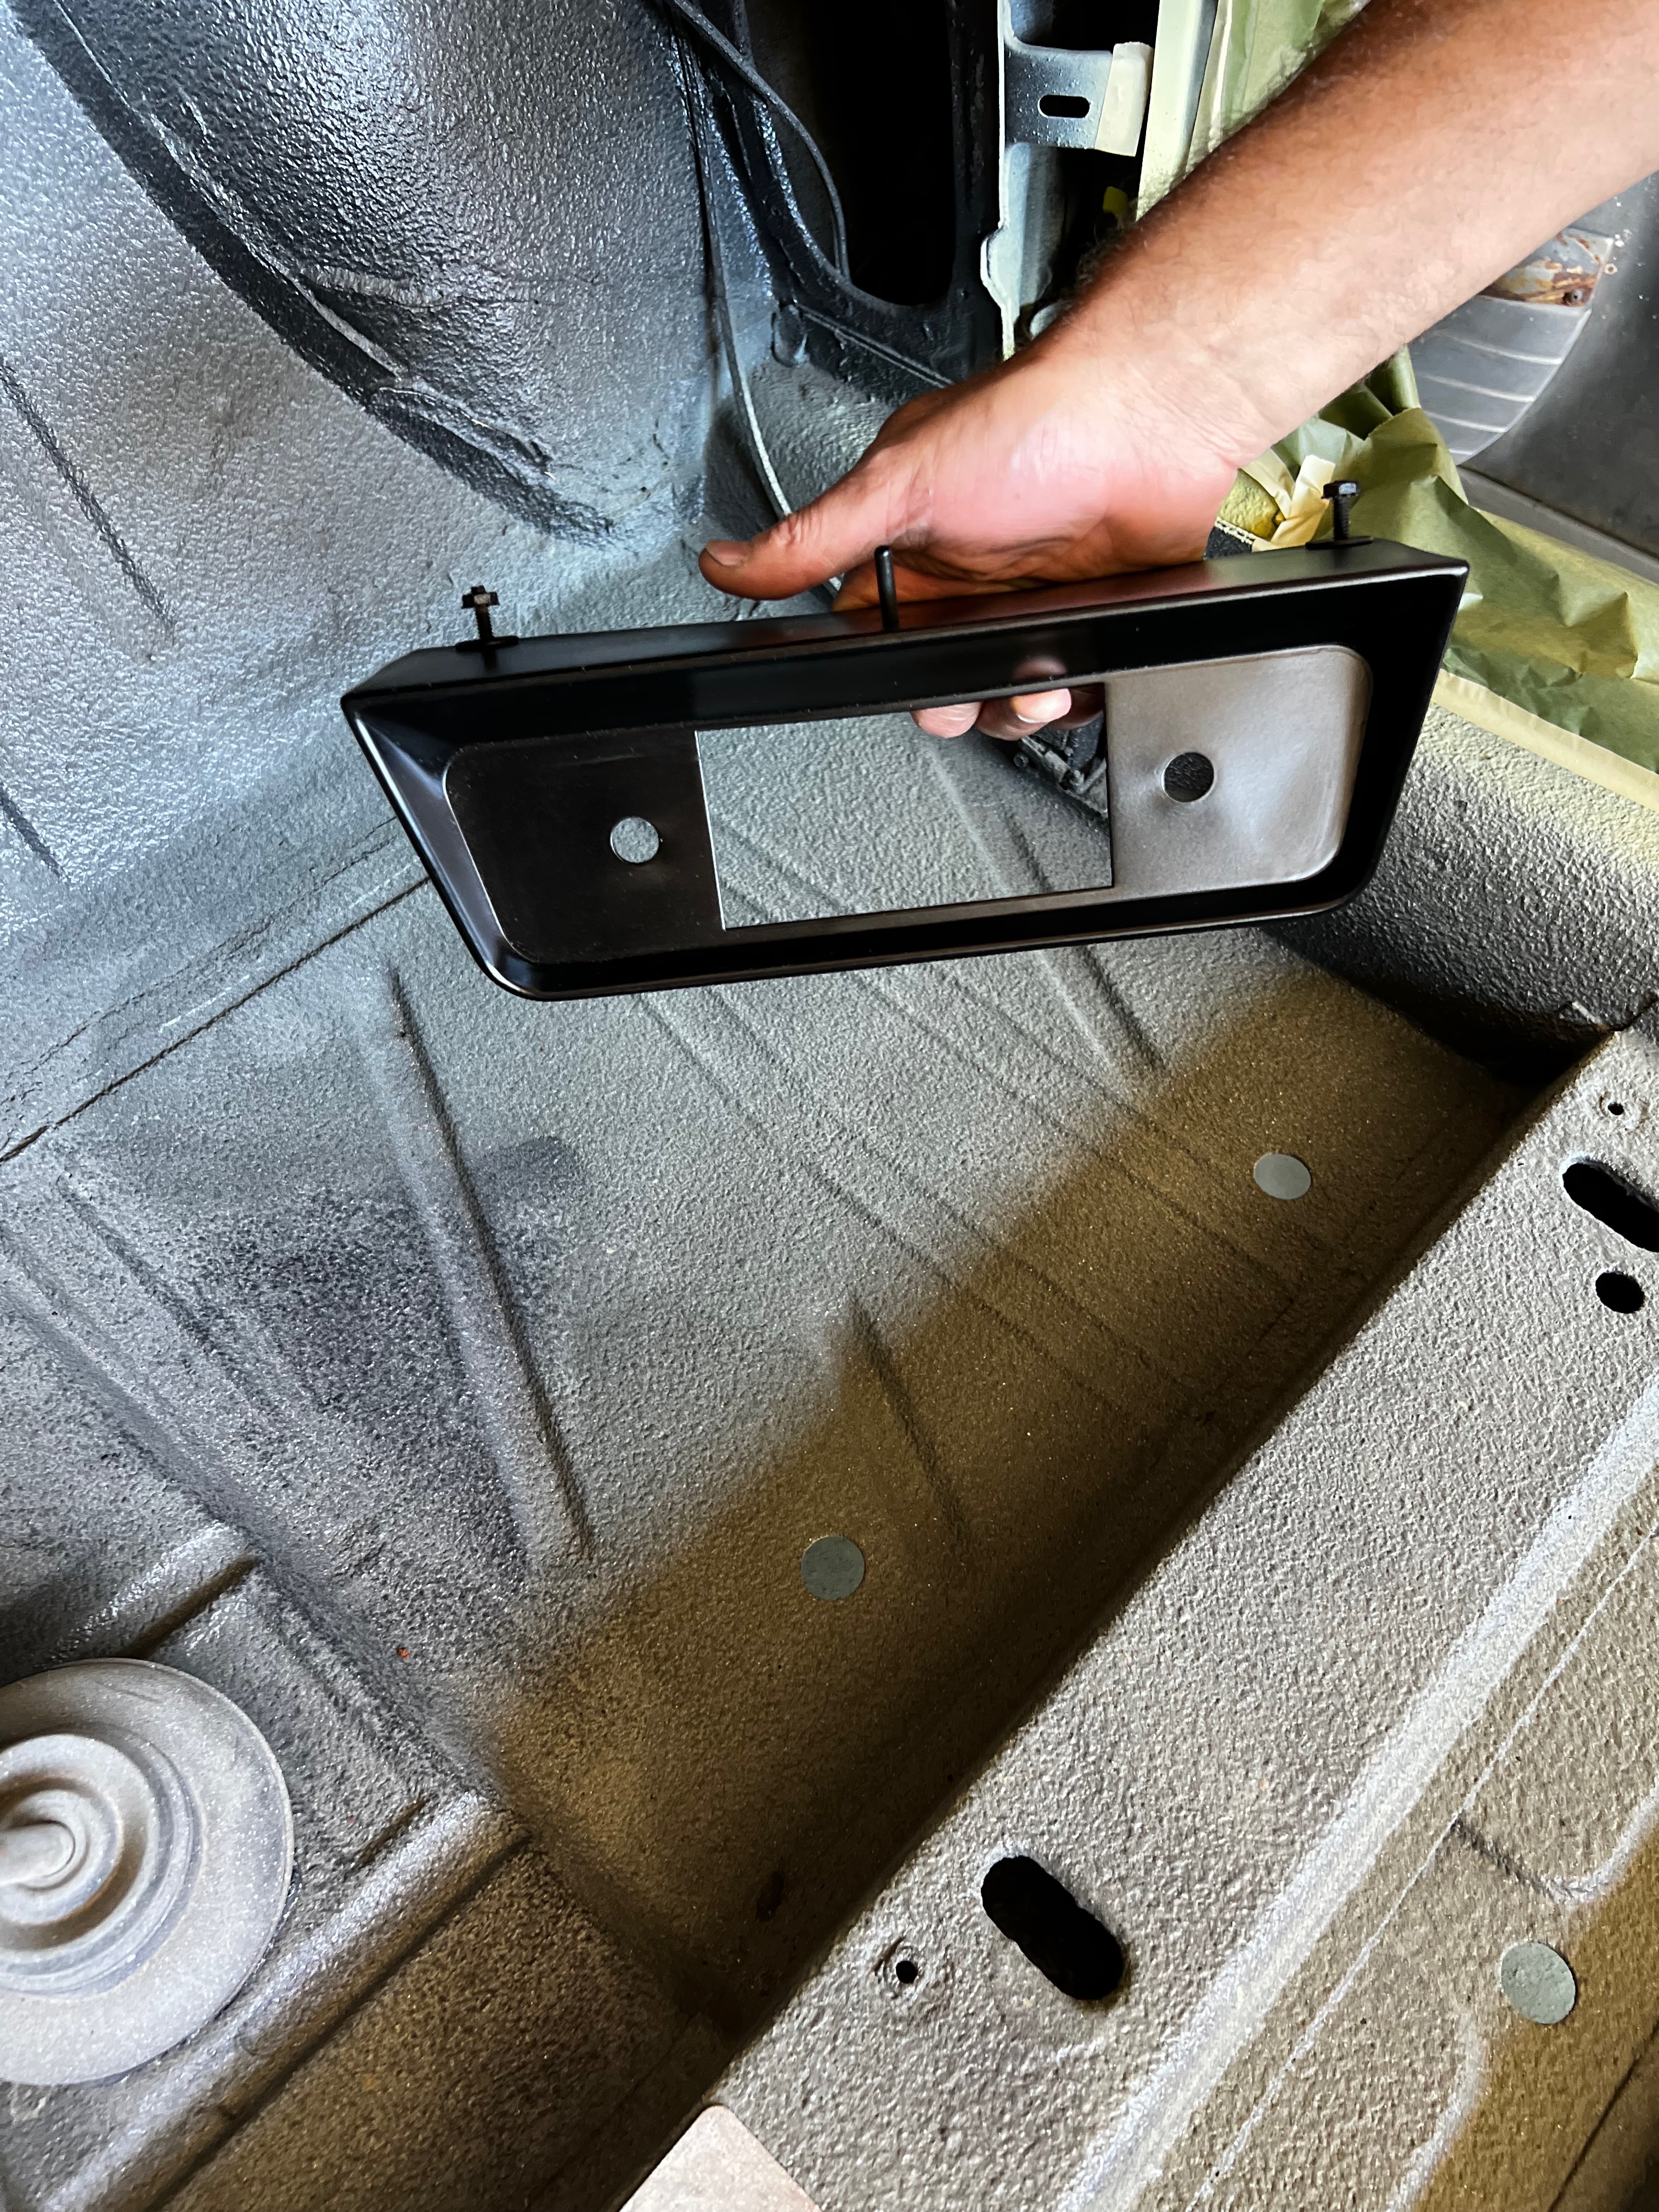
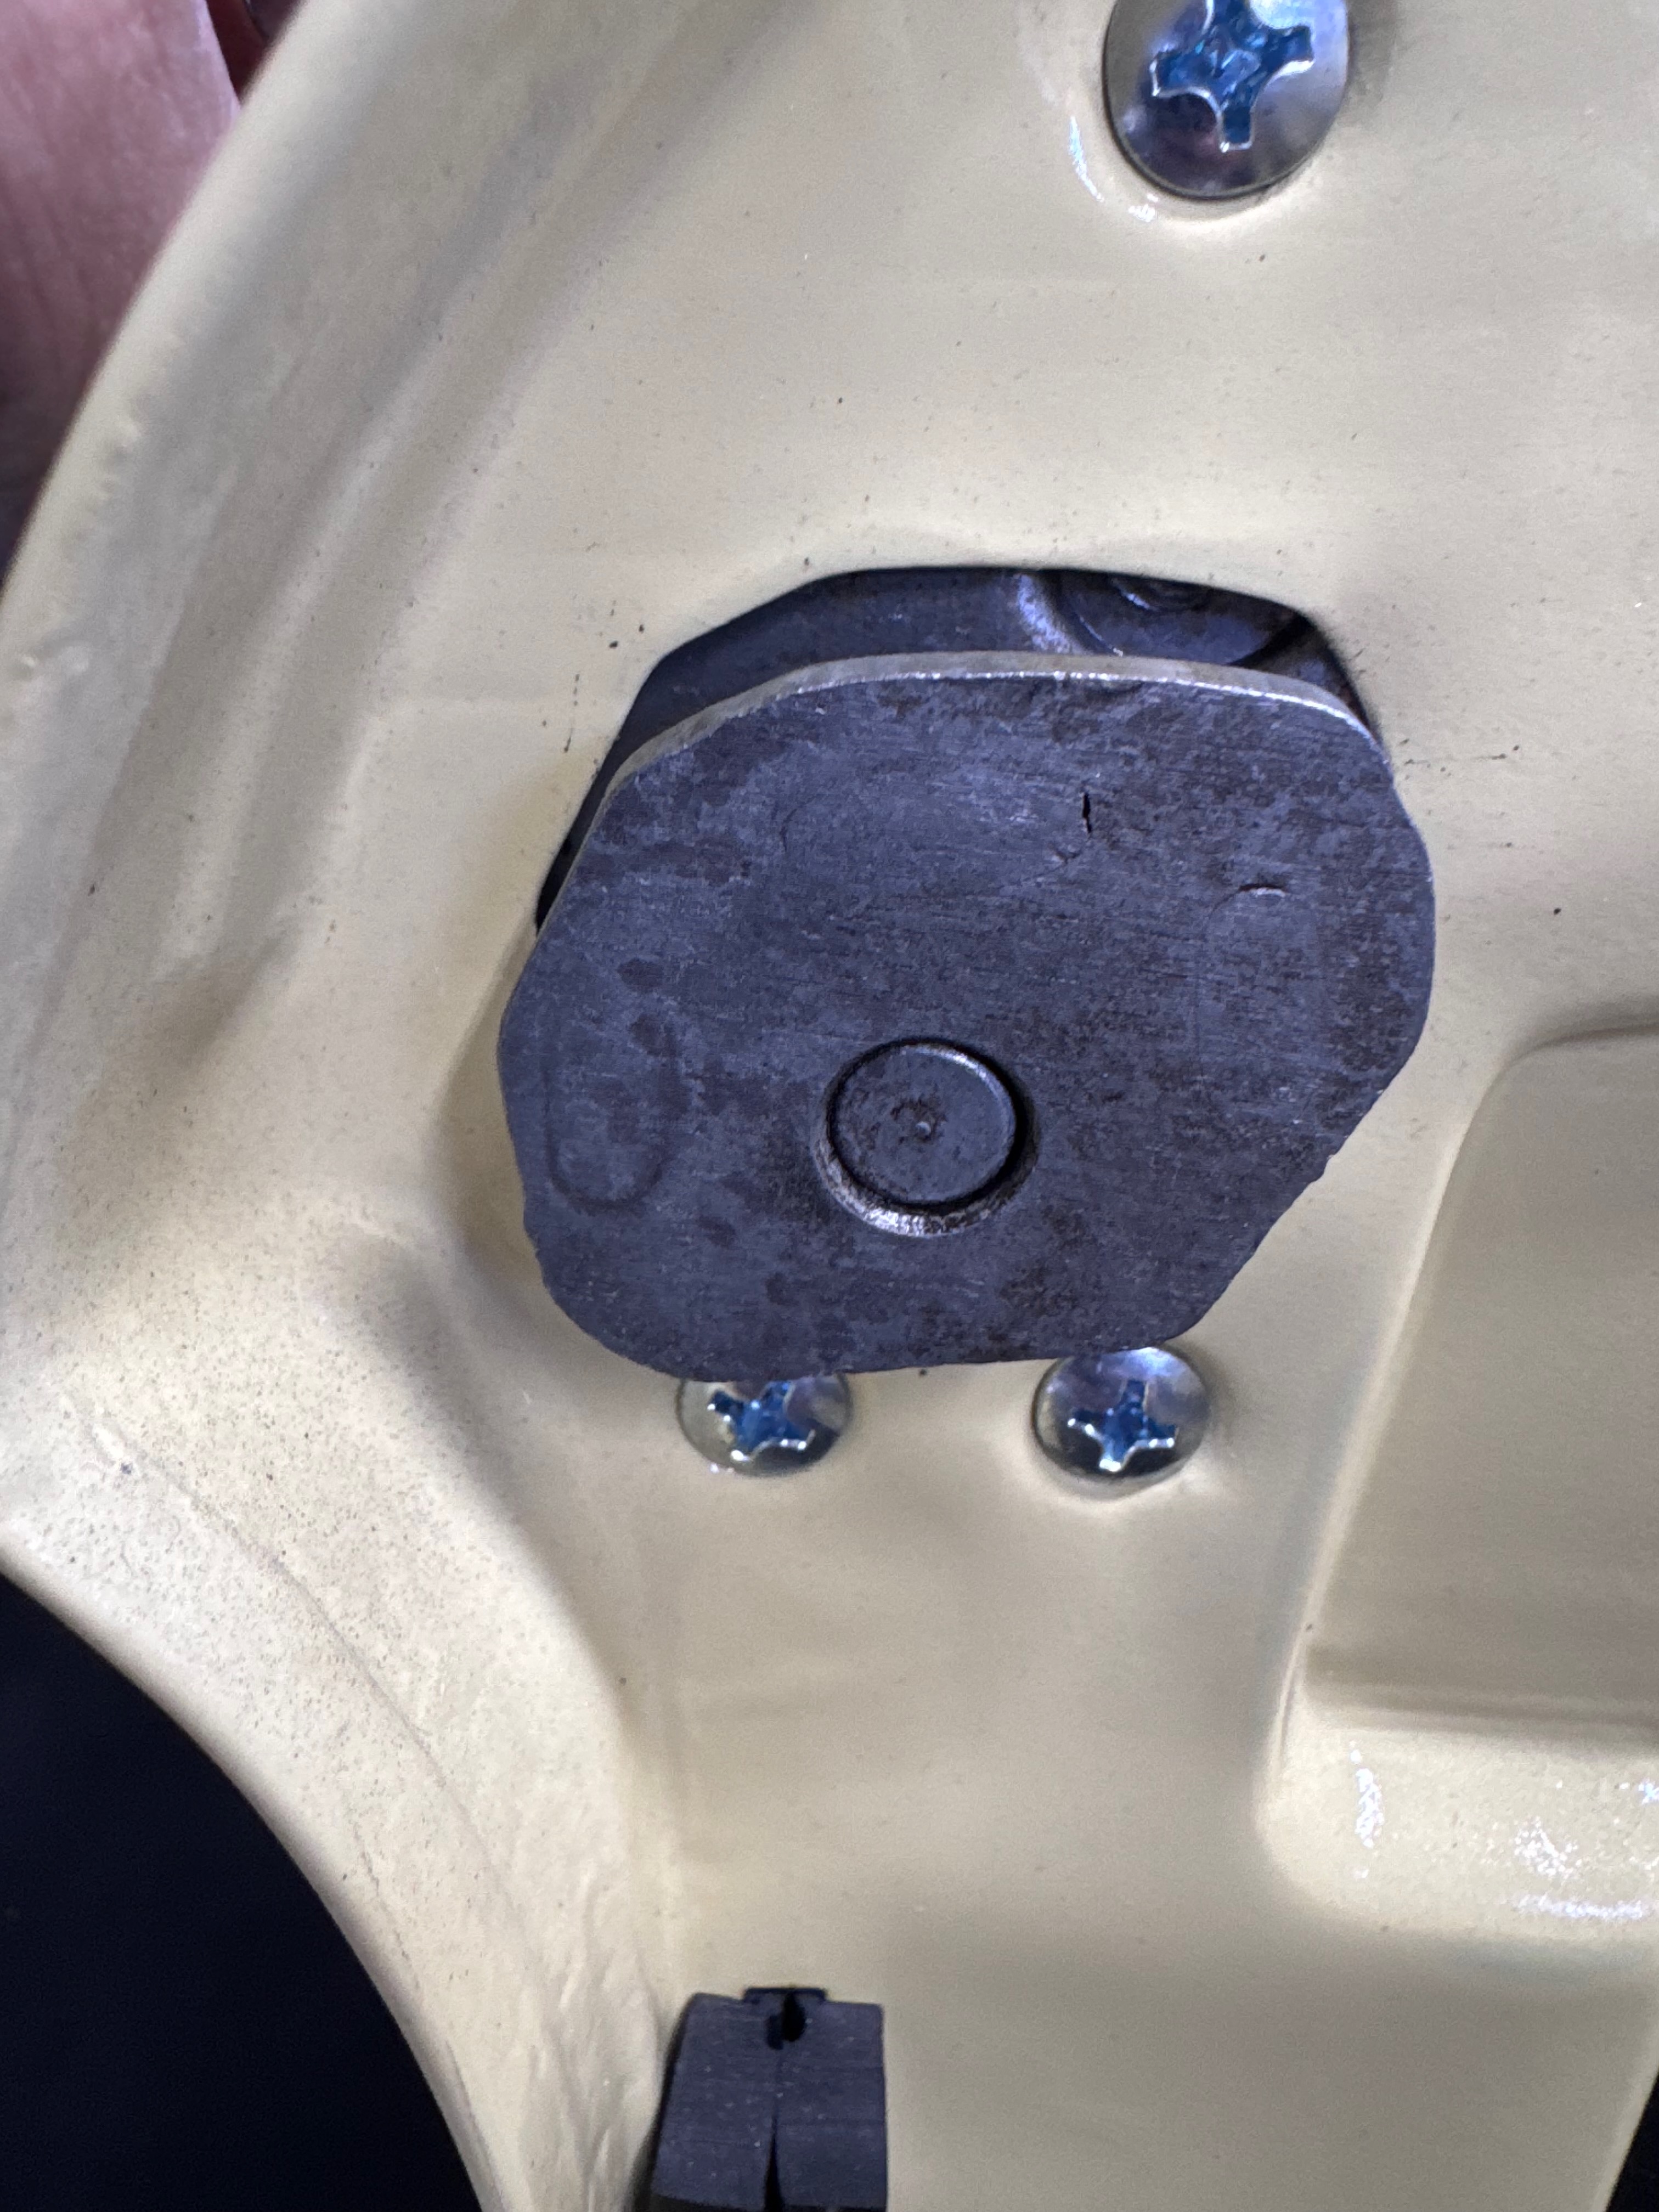
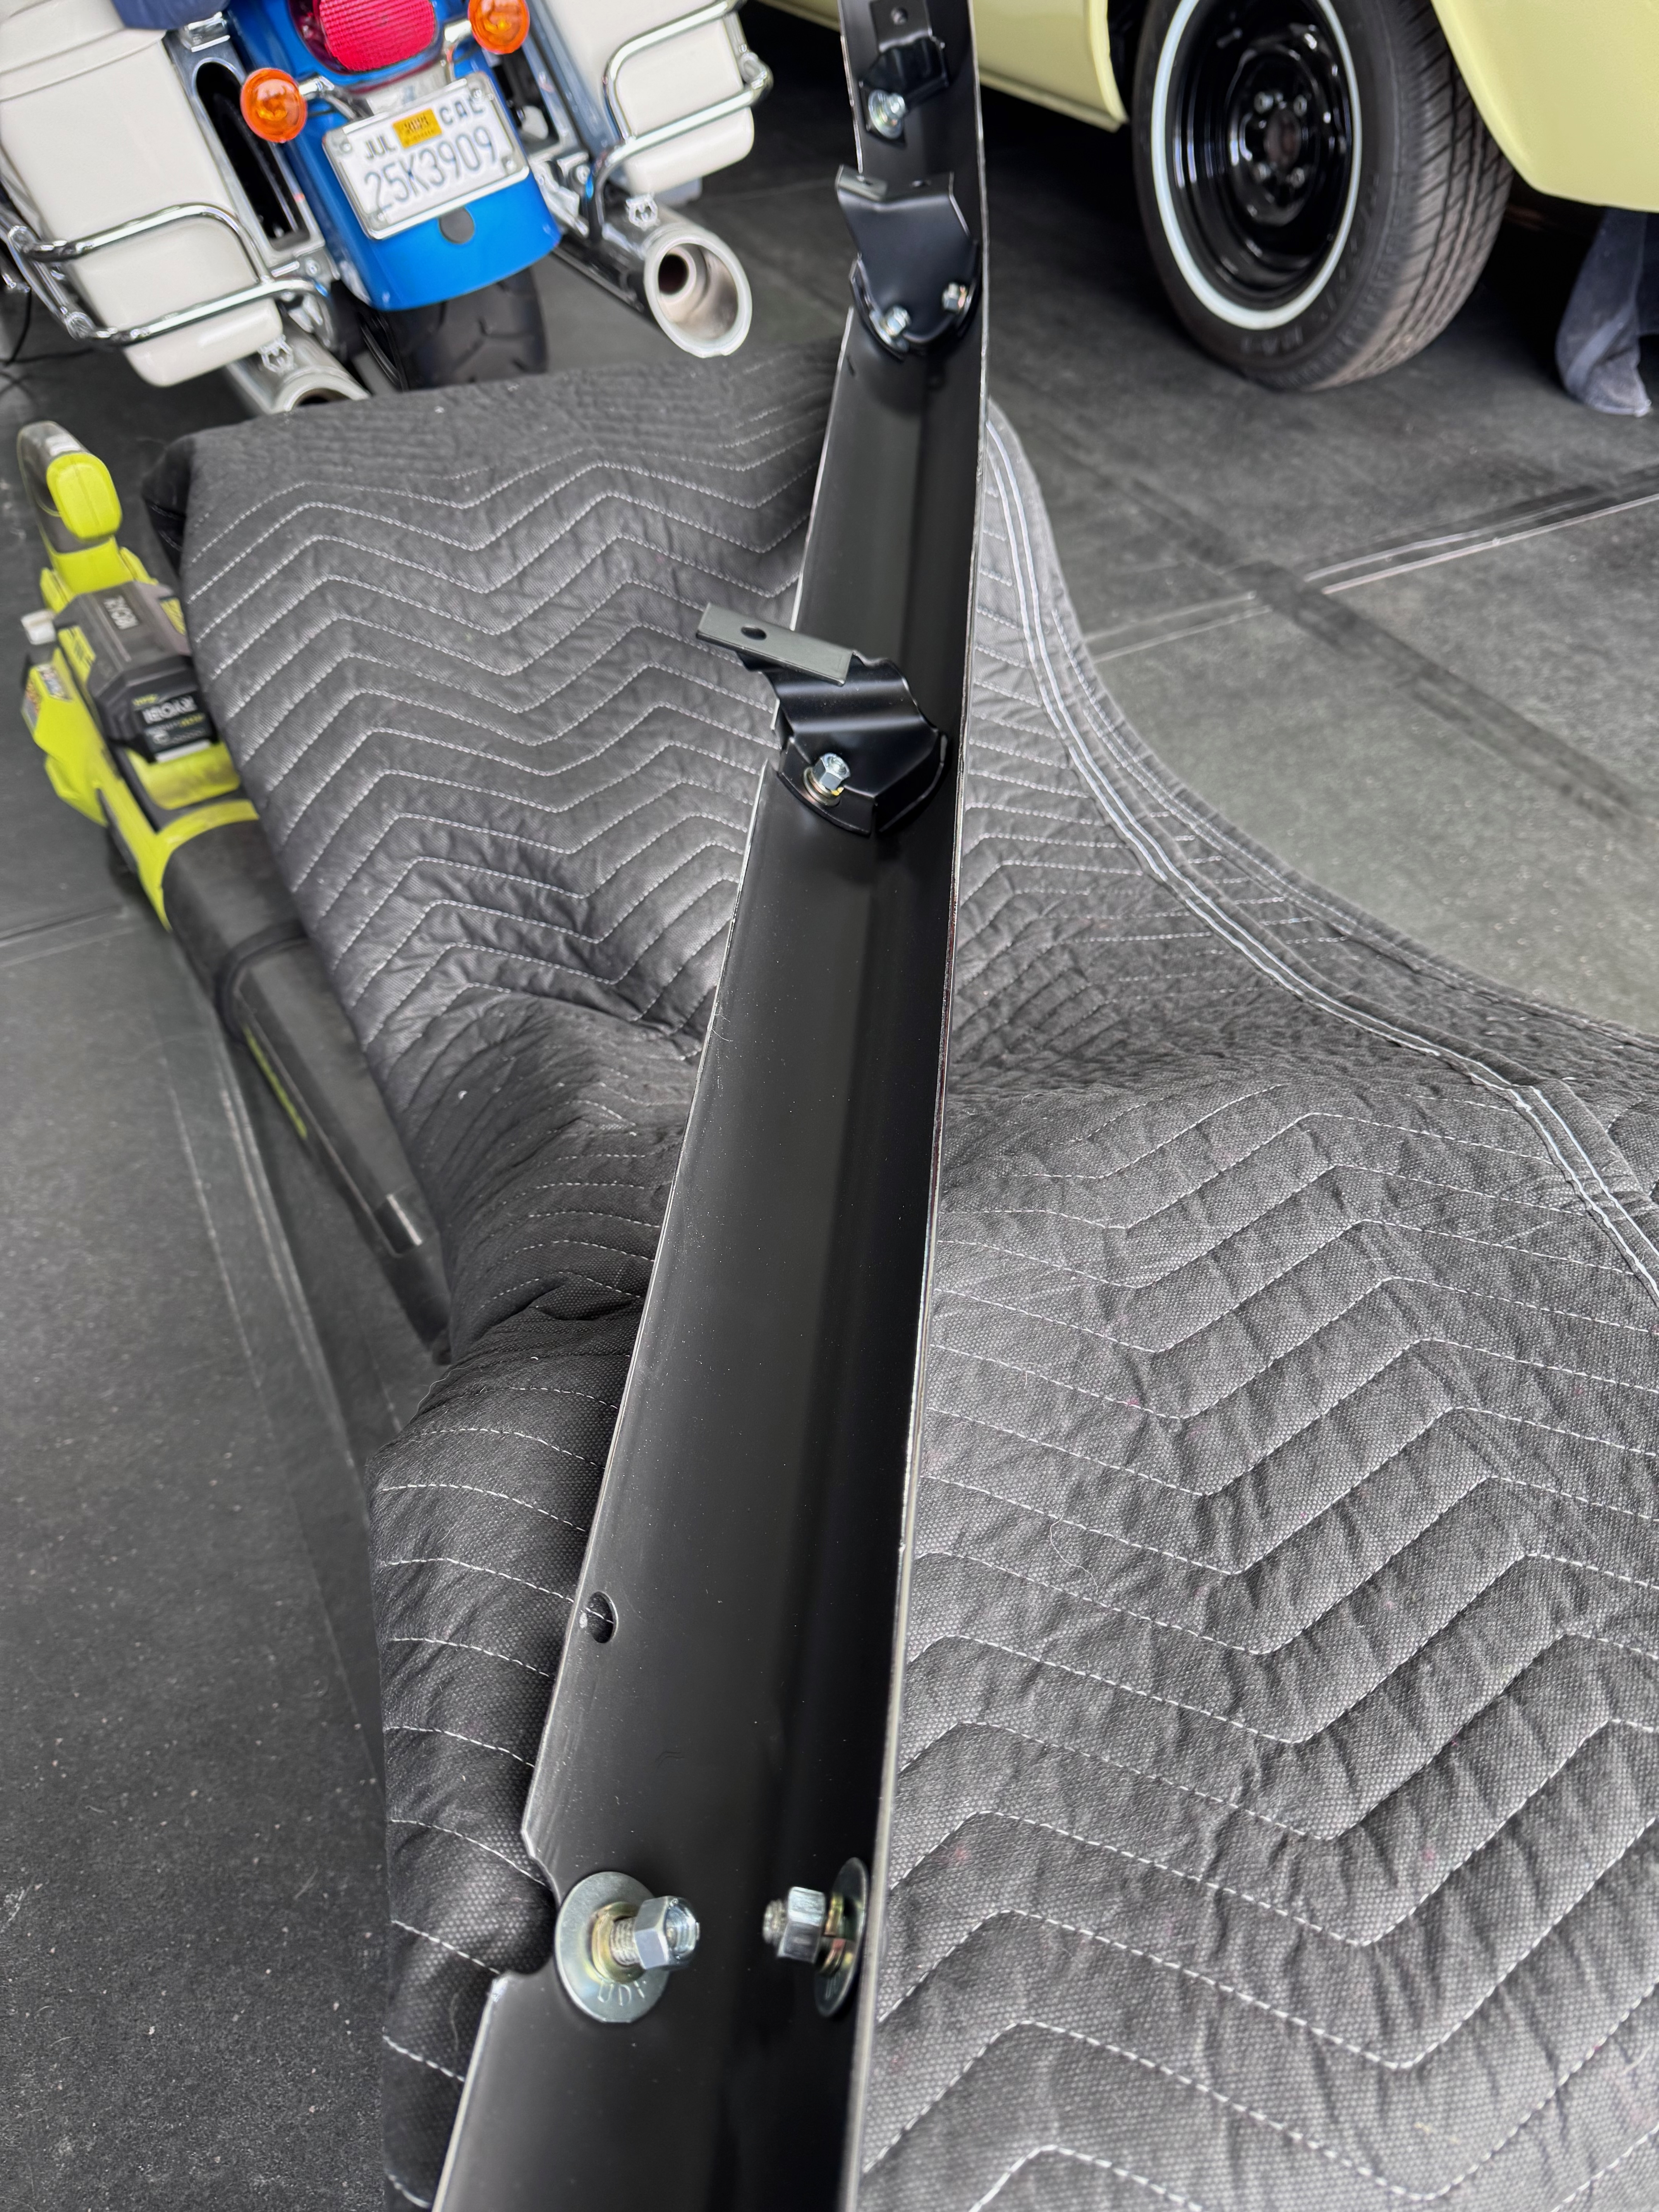
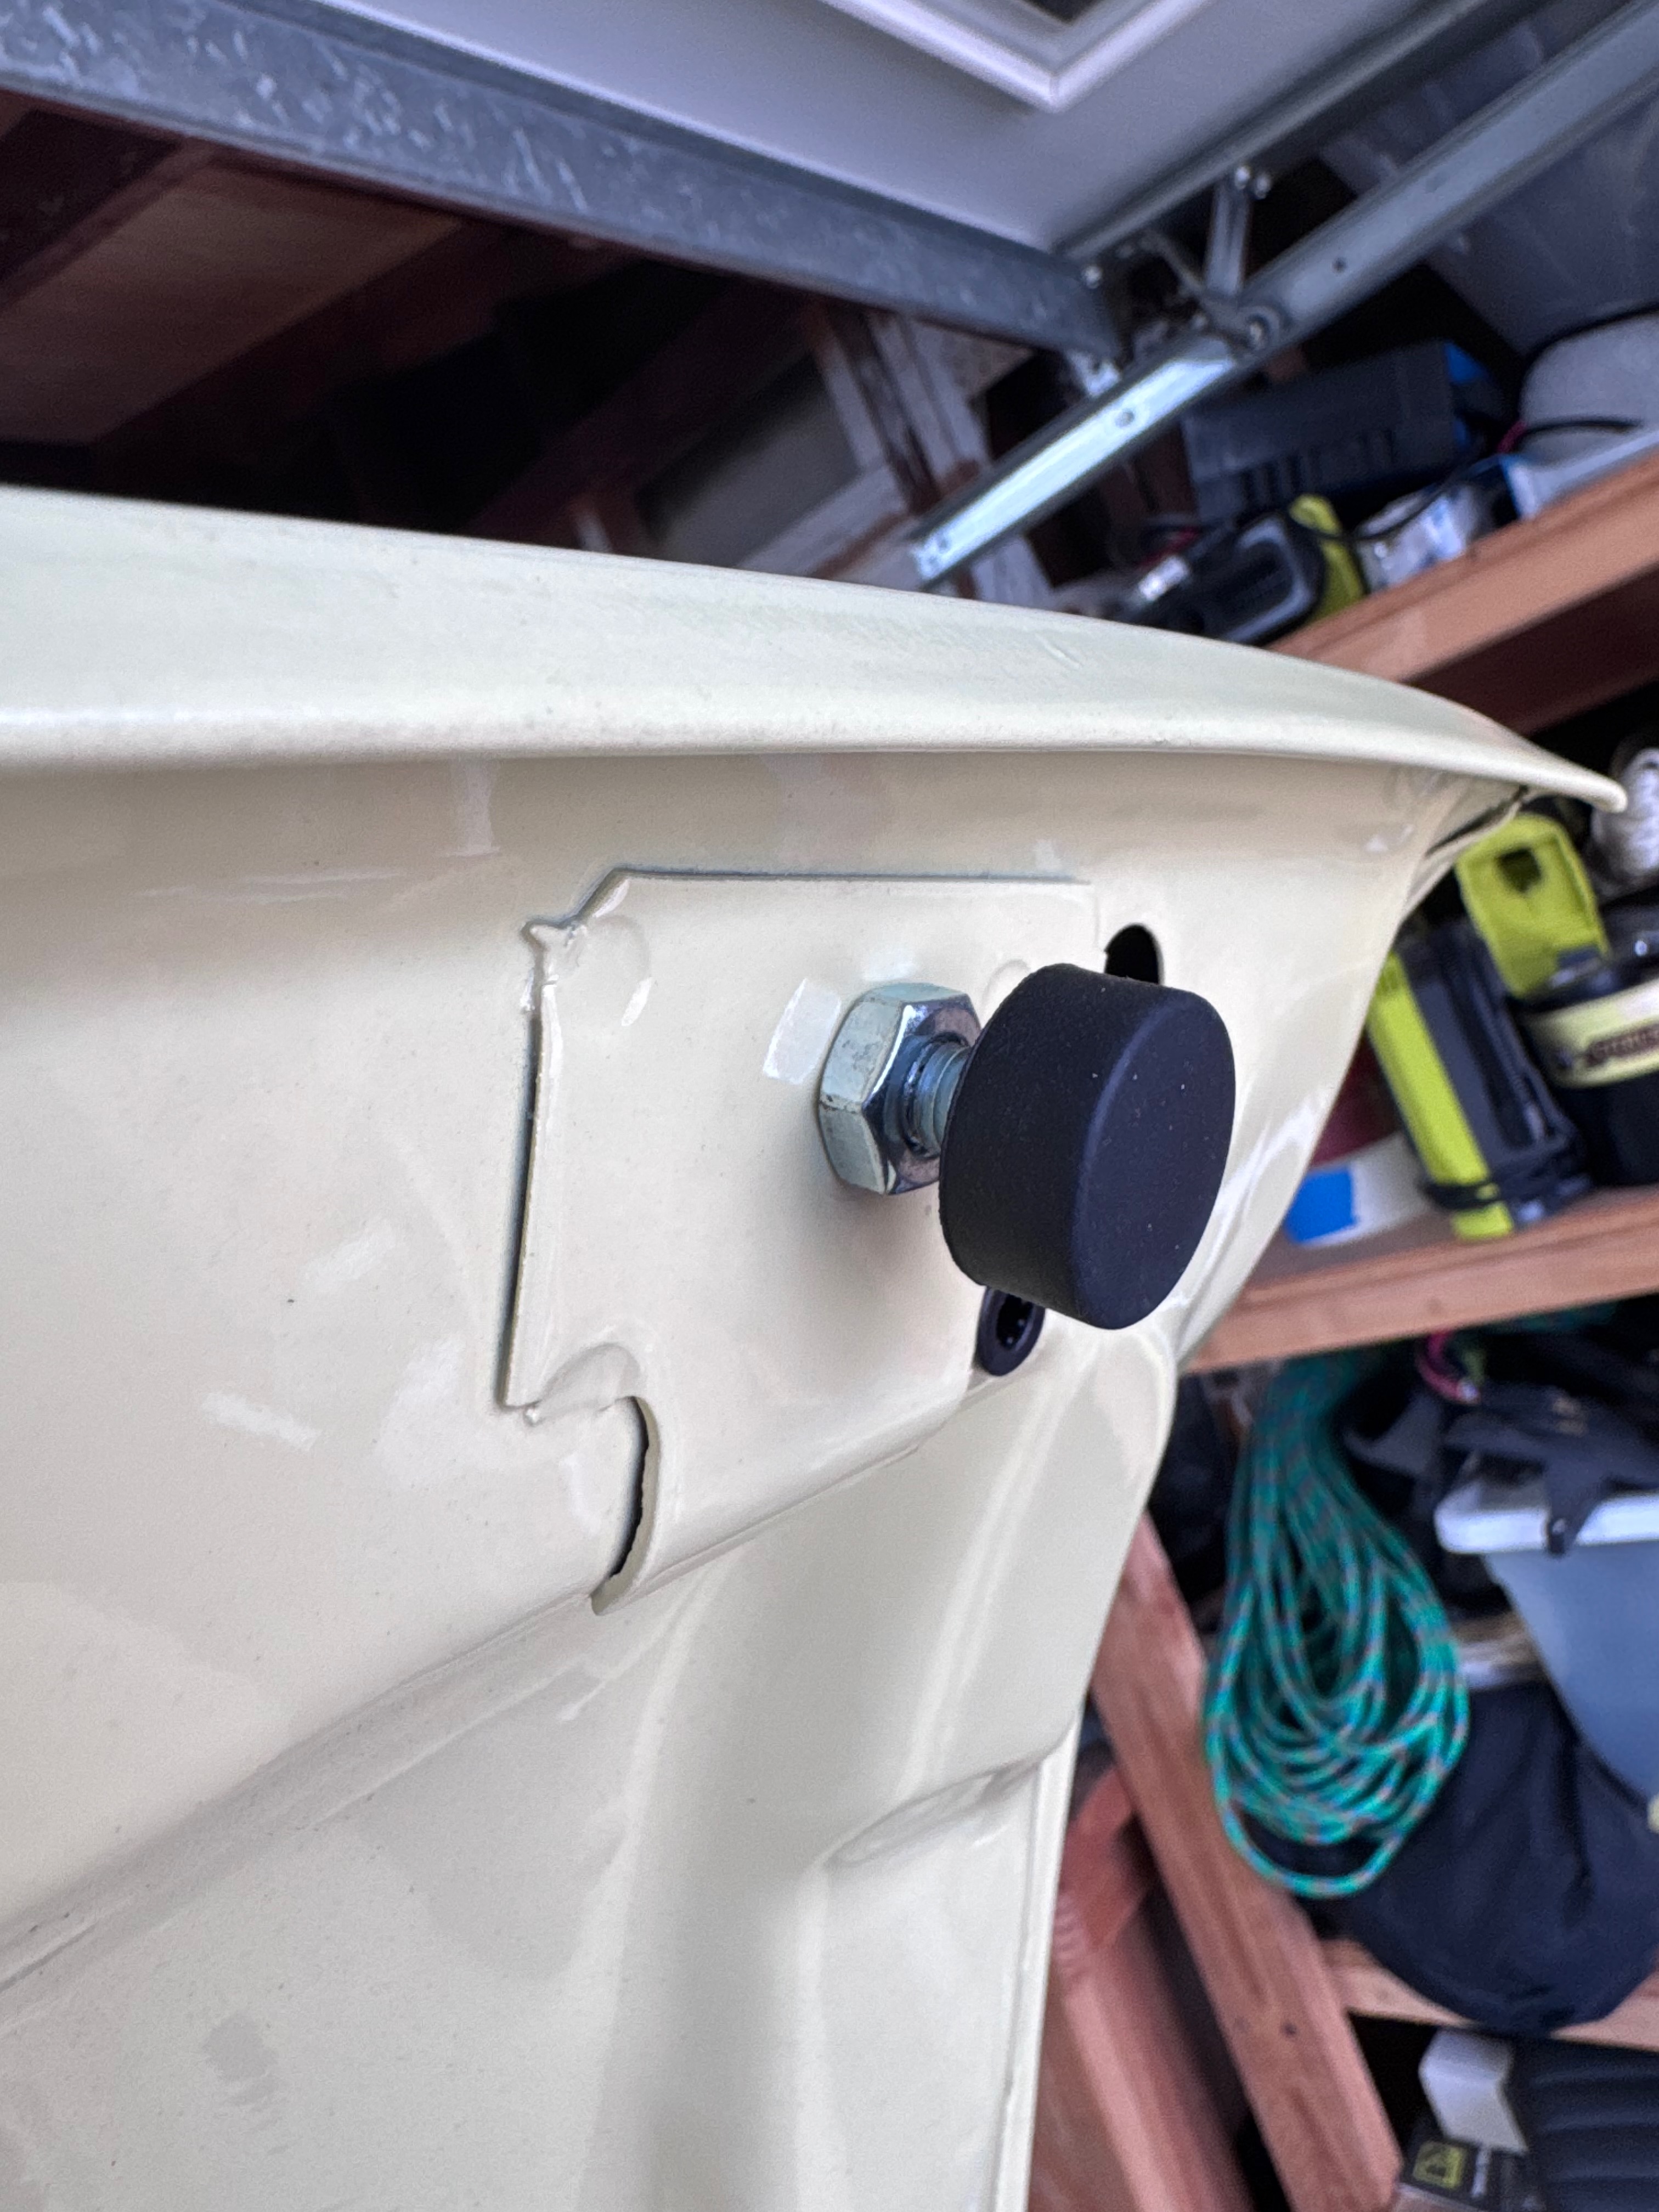
Reassembly: Trim Application
Installing the polished and restored exterior trim pieces, carefully aligning each component to achieve factory-correct appearance and fit.
Reassembly: Glass Fitting
Installing new window glass with fresh weatherstripping and seals to ensure proper fit, operation, and protection from the elements.
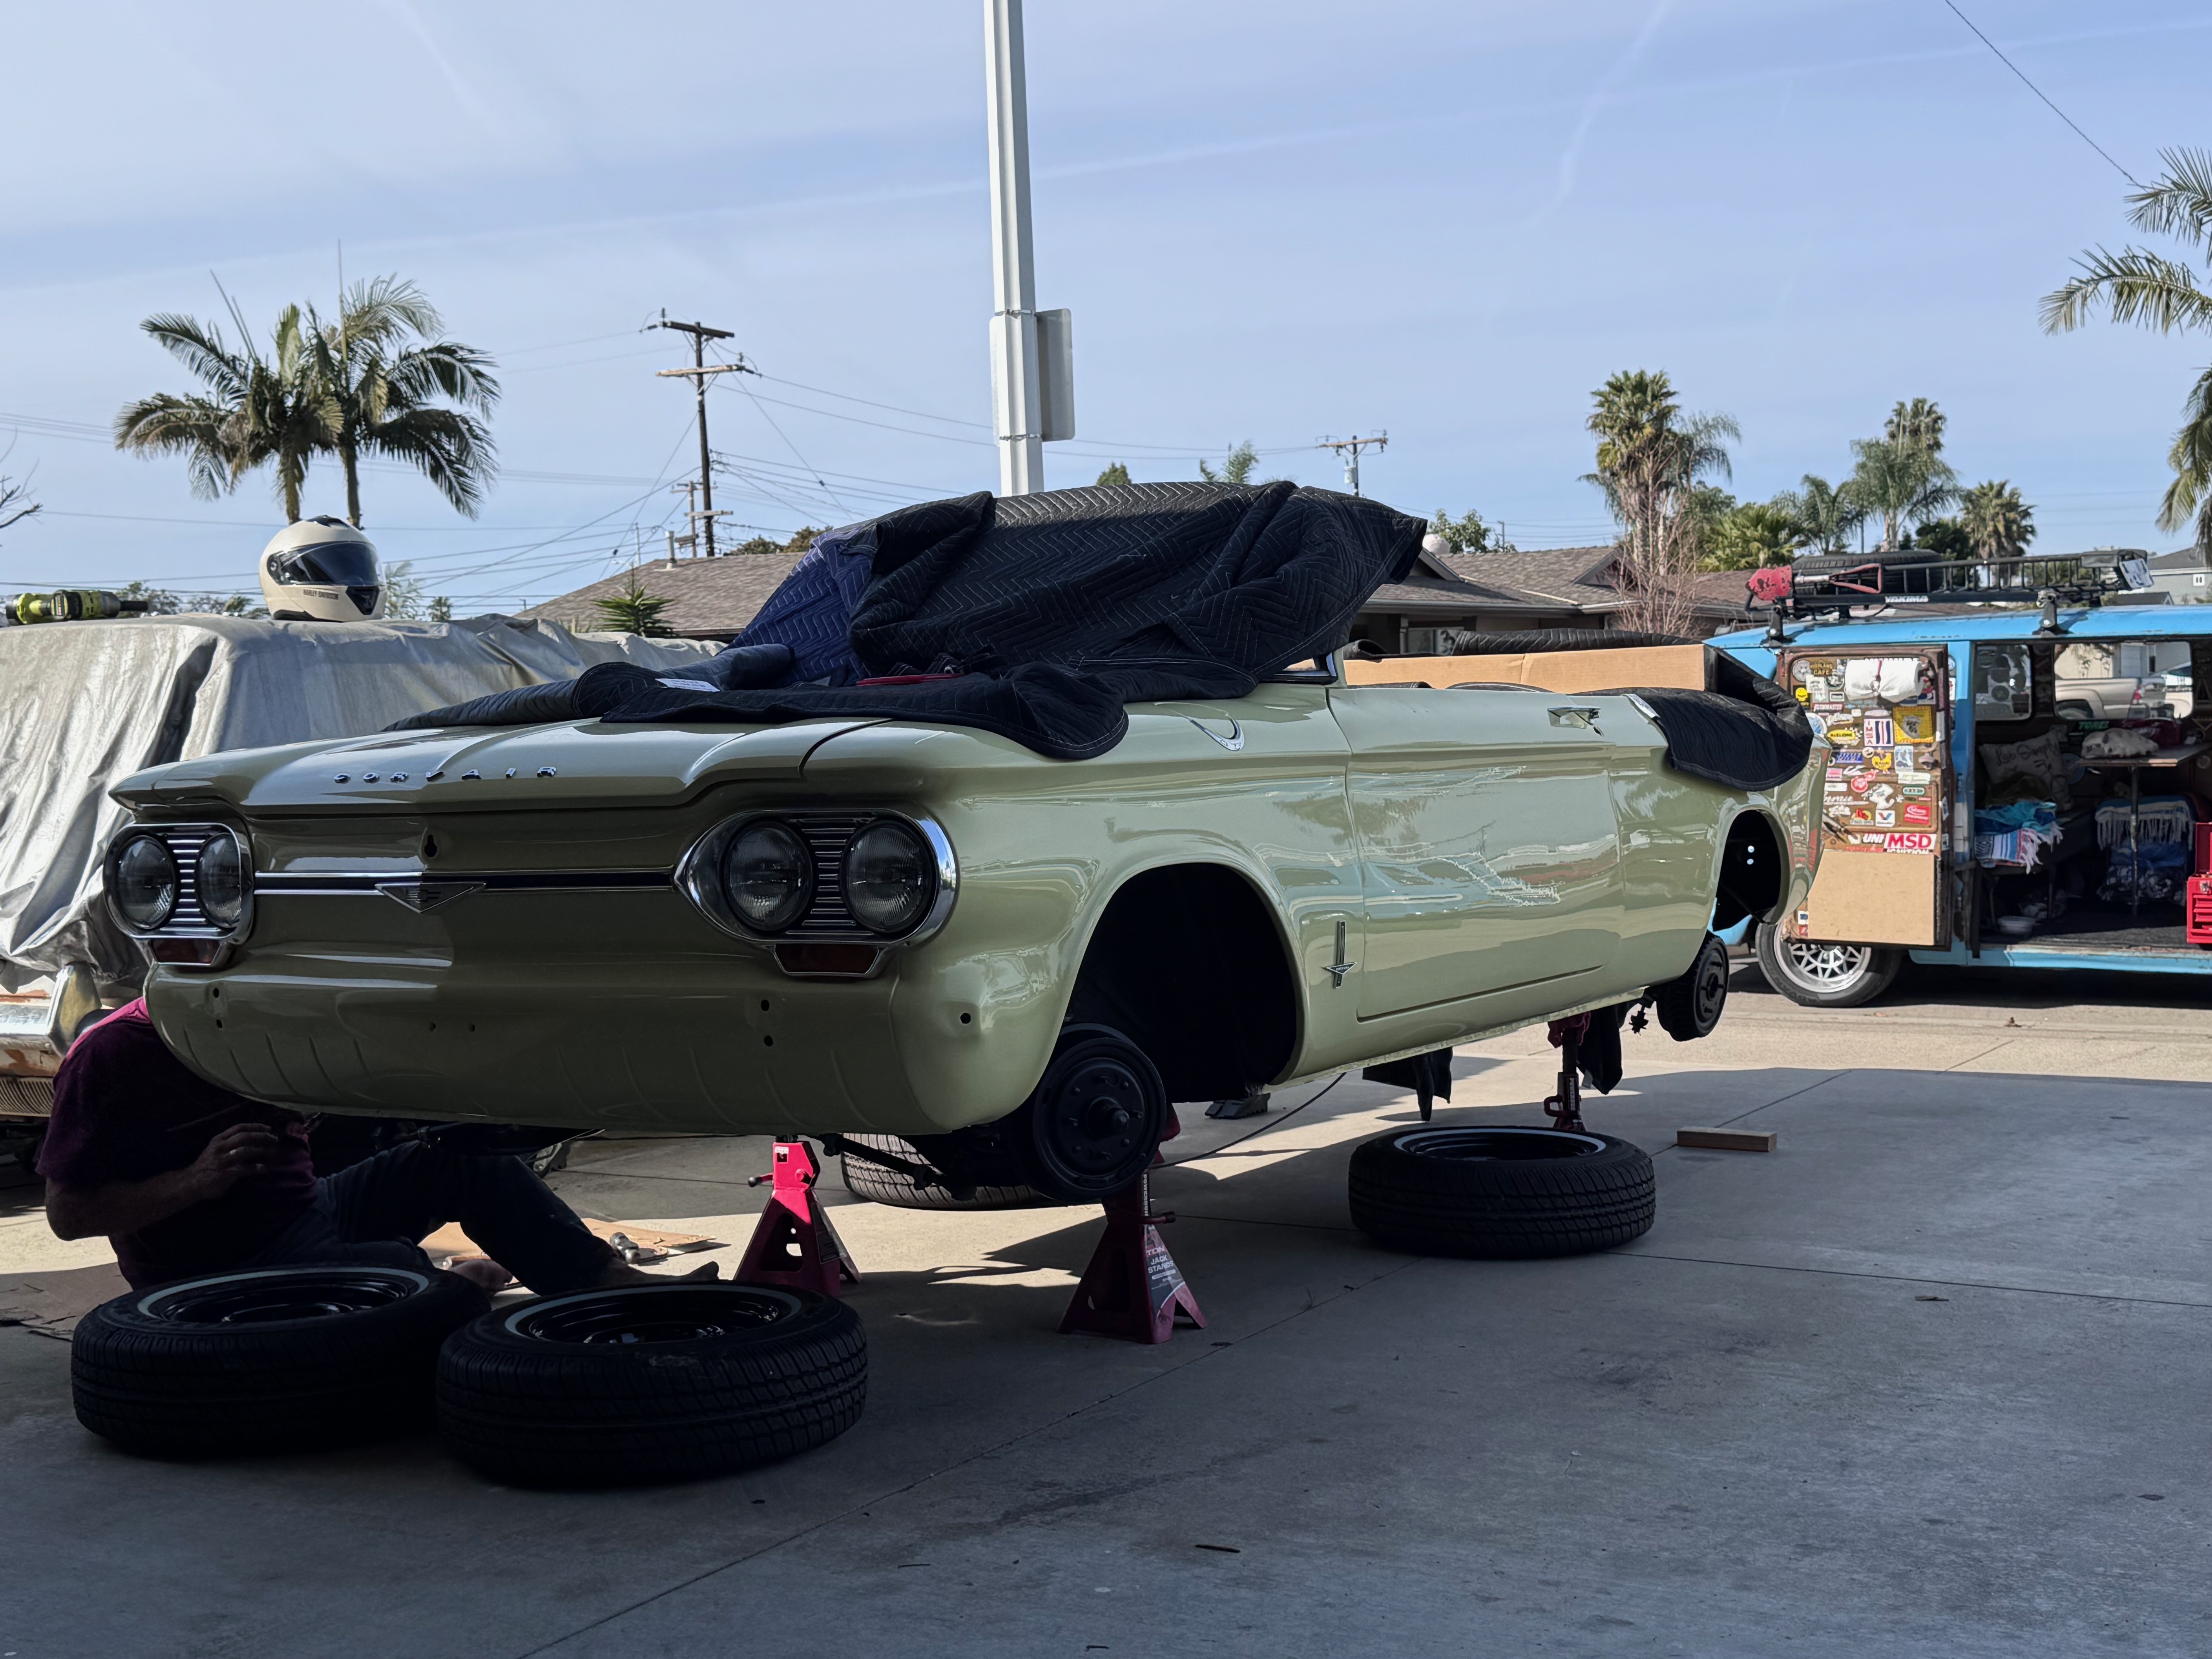
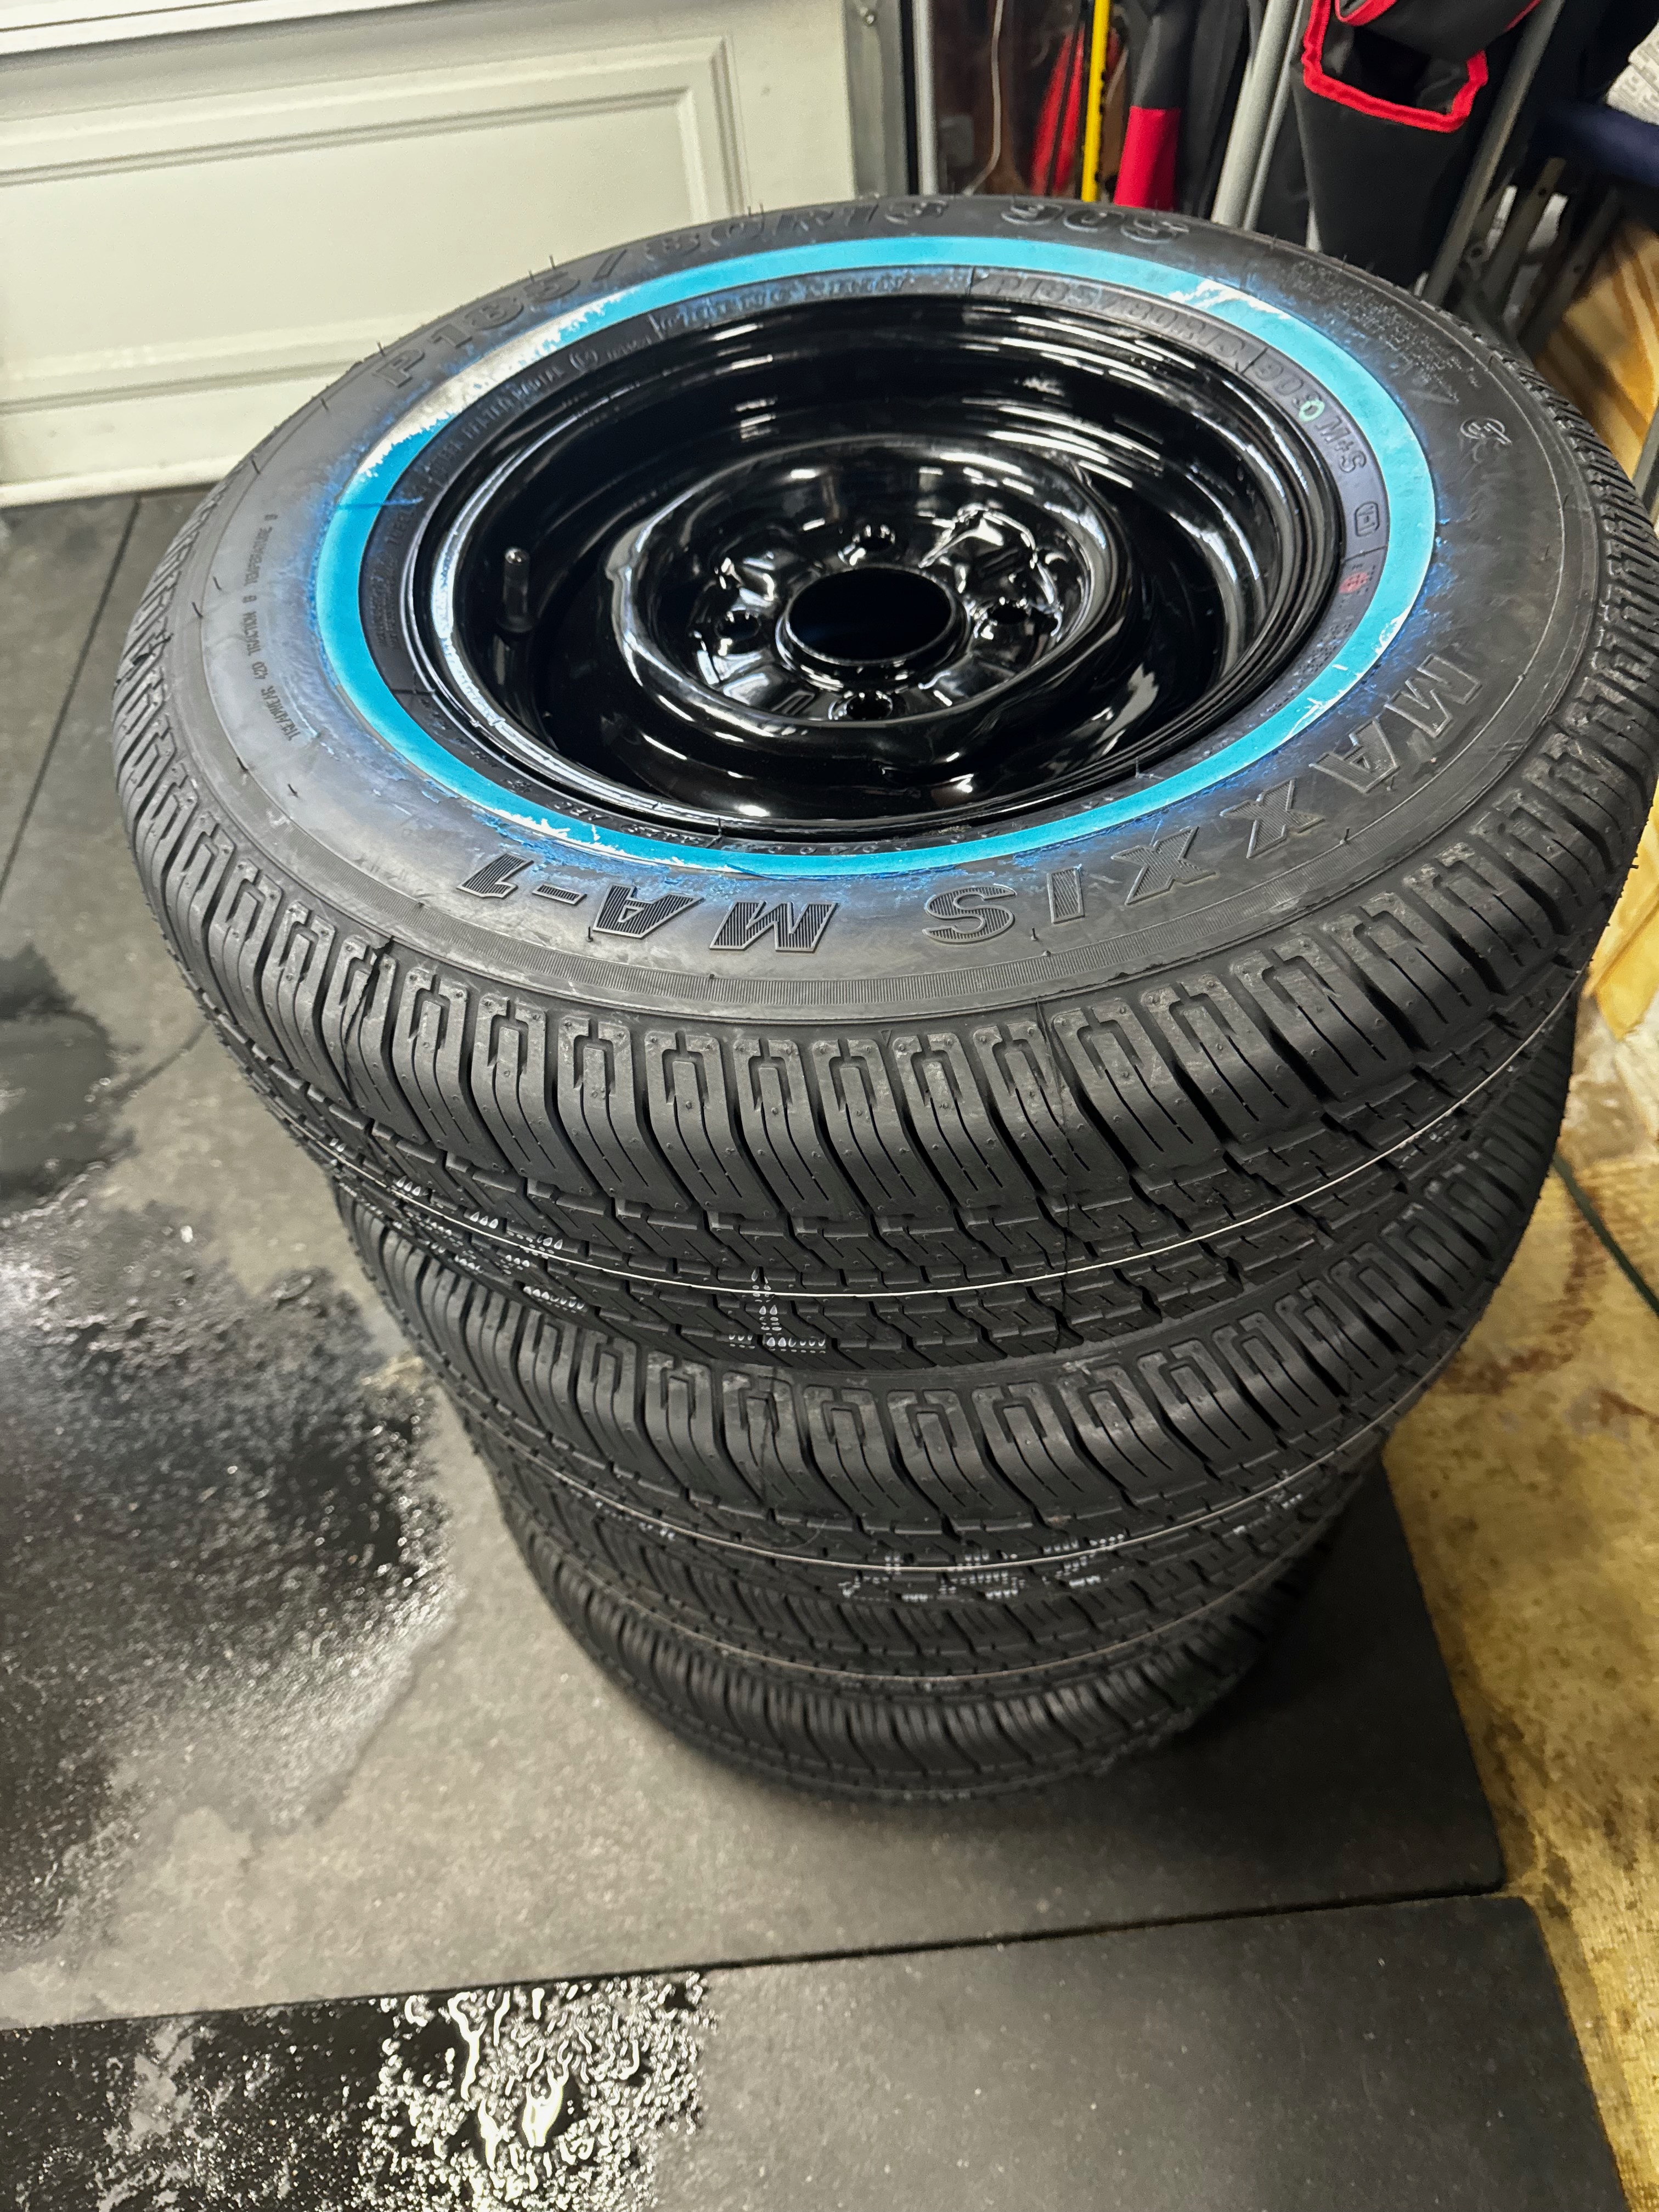
Reassembly: Wheel Mounting
Installing the restored wheels with new period-correct tires, properly balanced and aligned for optimal handling and stance.
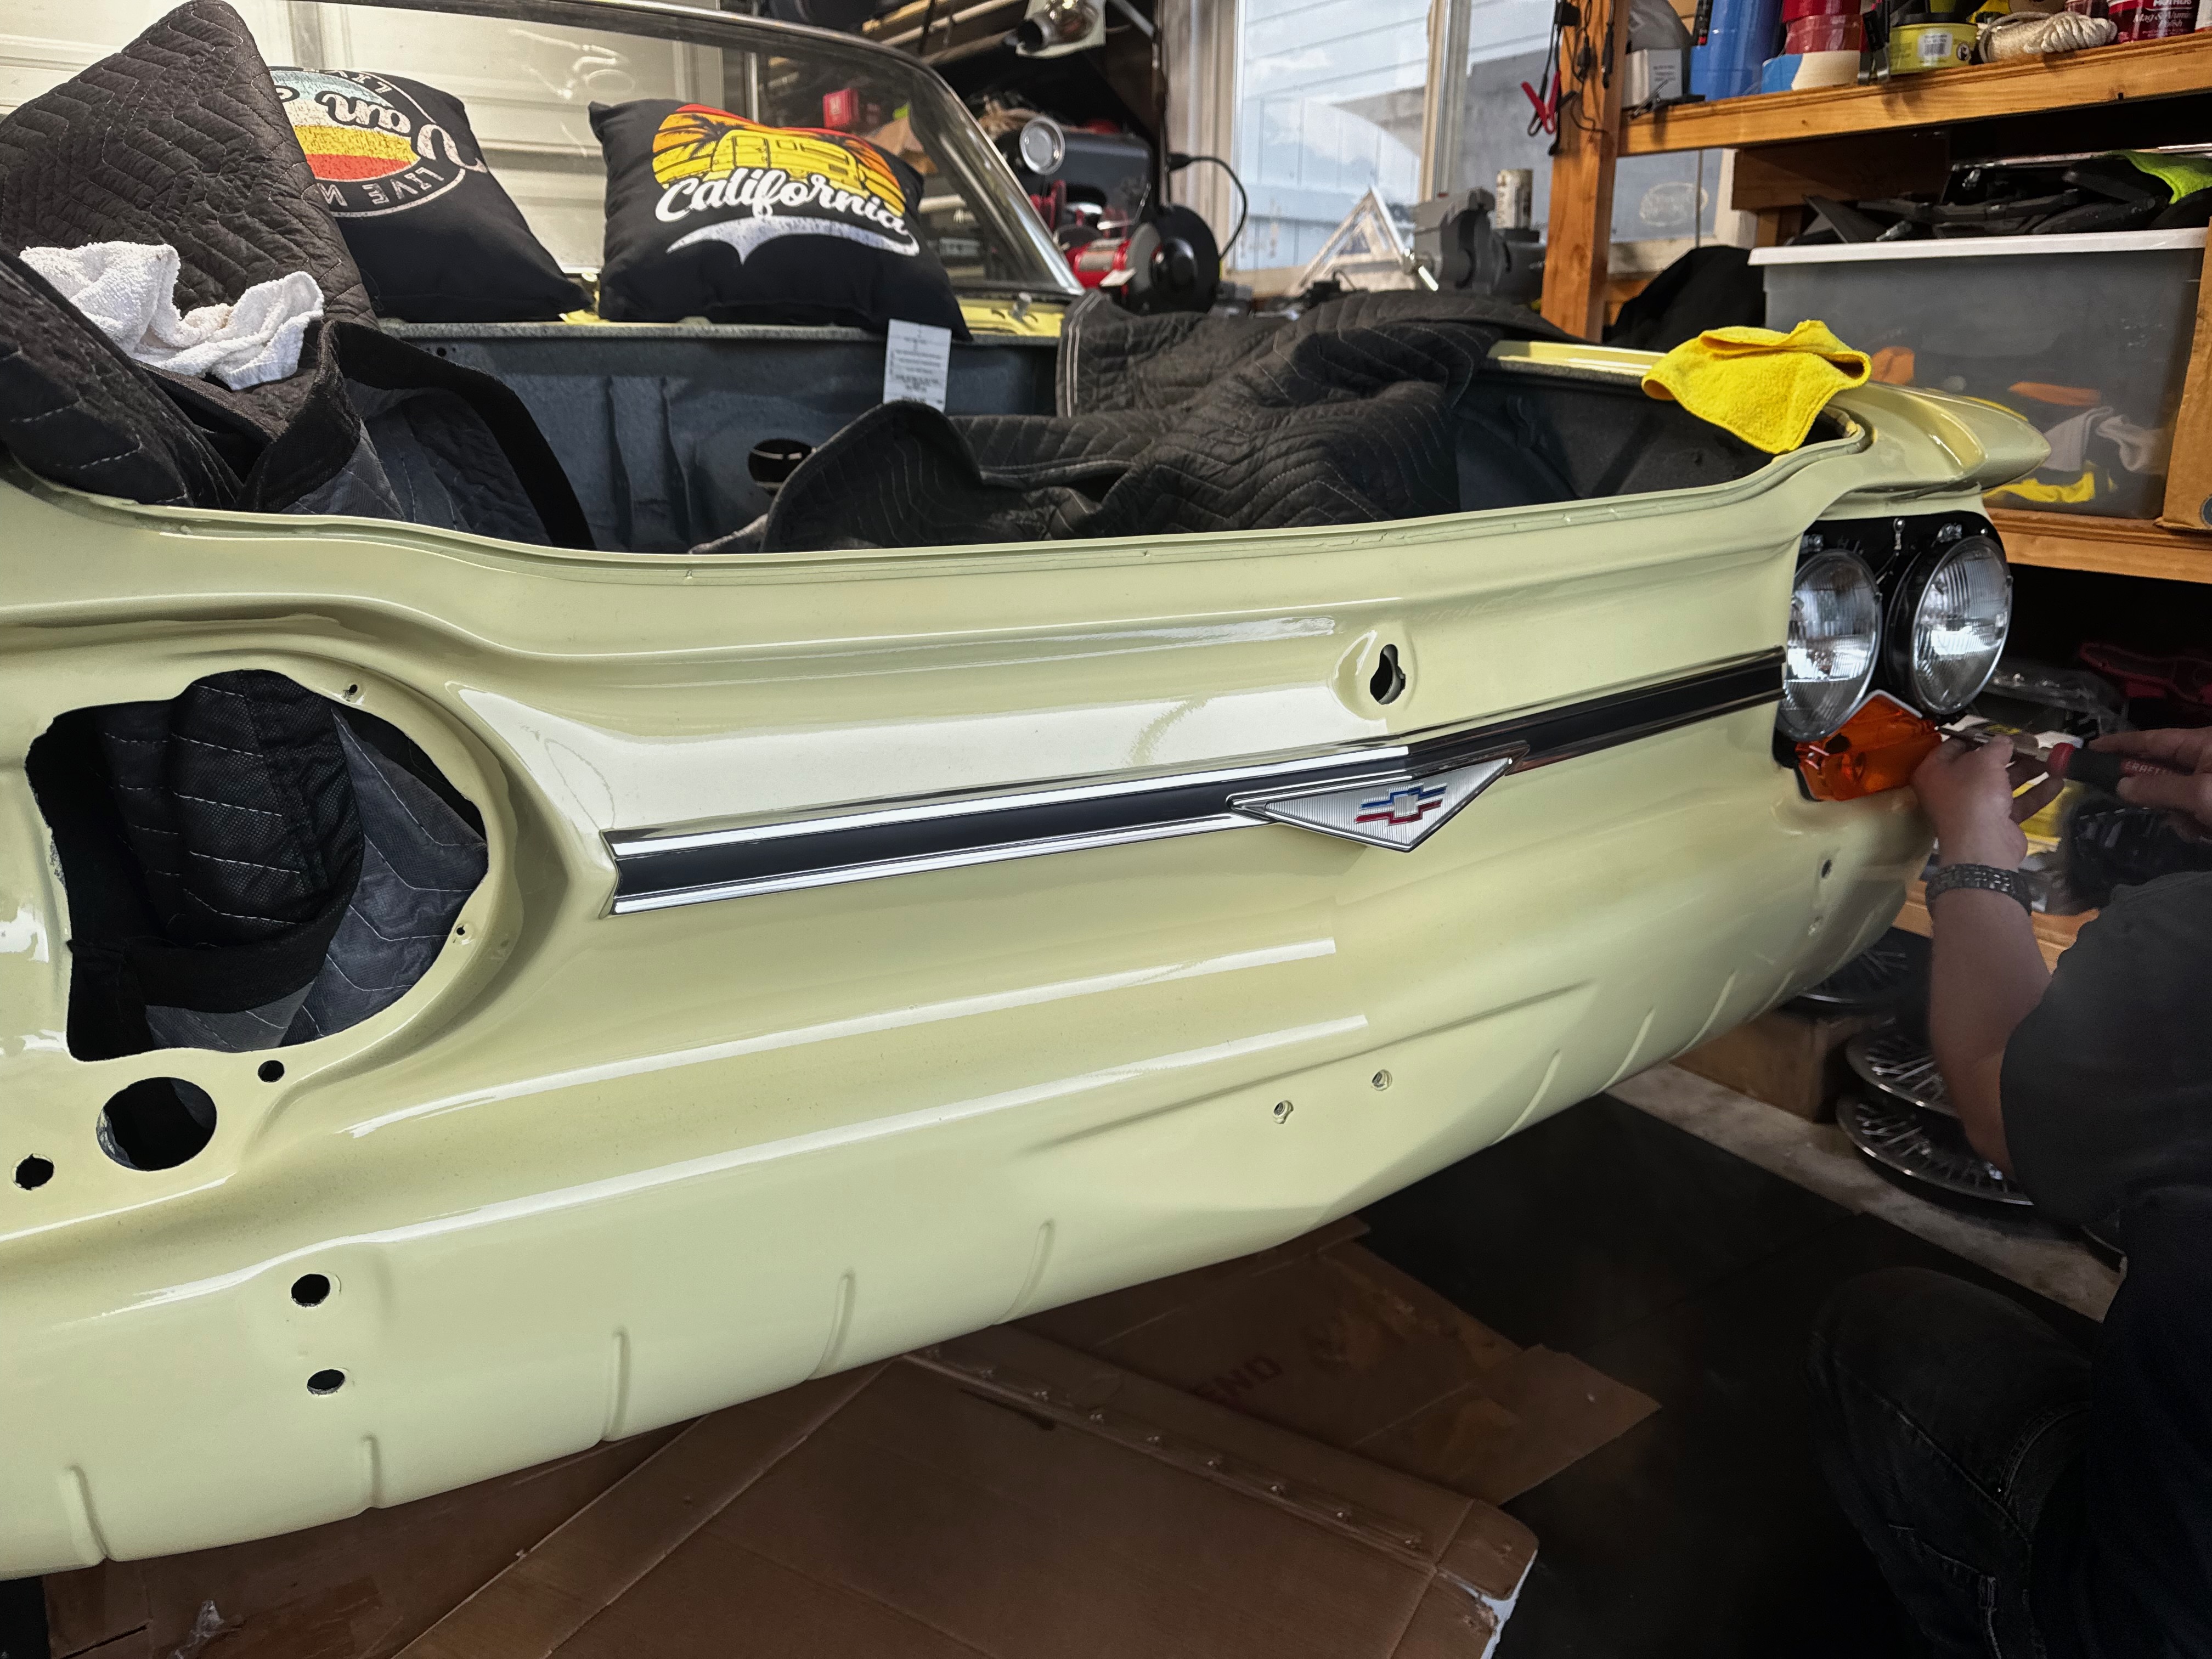
Reassembly: Bumper Attachment
Installing the freshly chromed front and rear bumpers, carefully aligning them to complete the exterior restoration with factory-correct appearance.
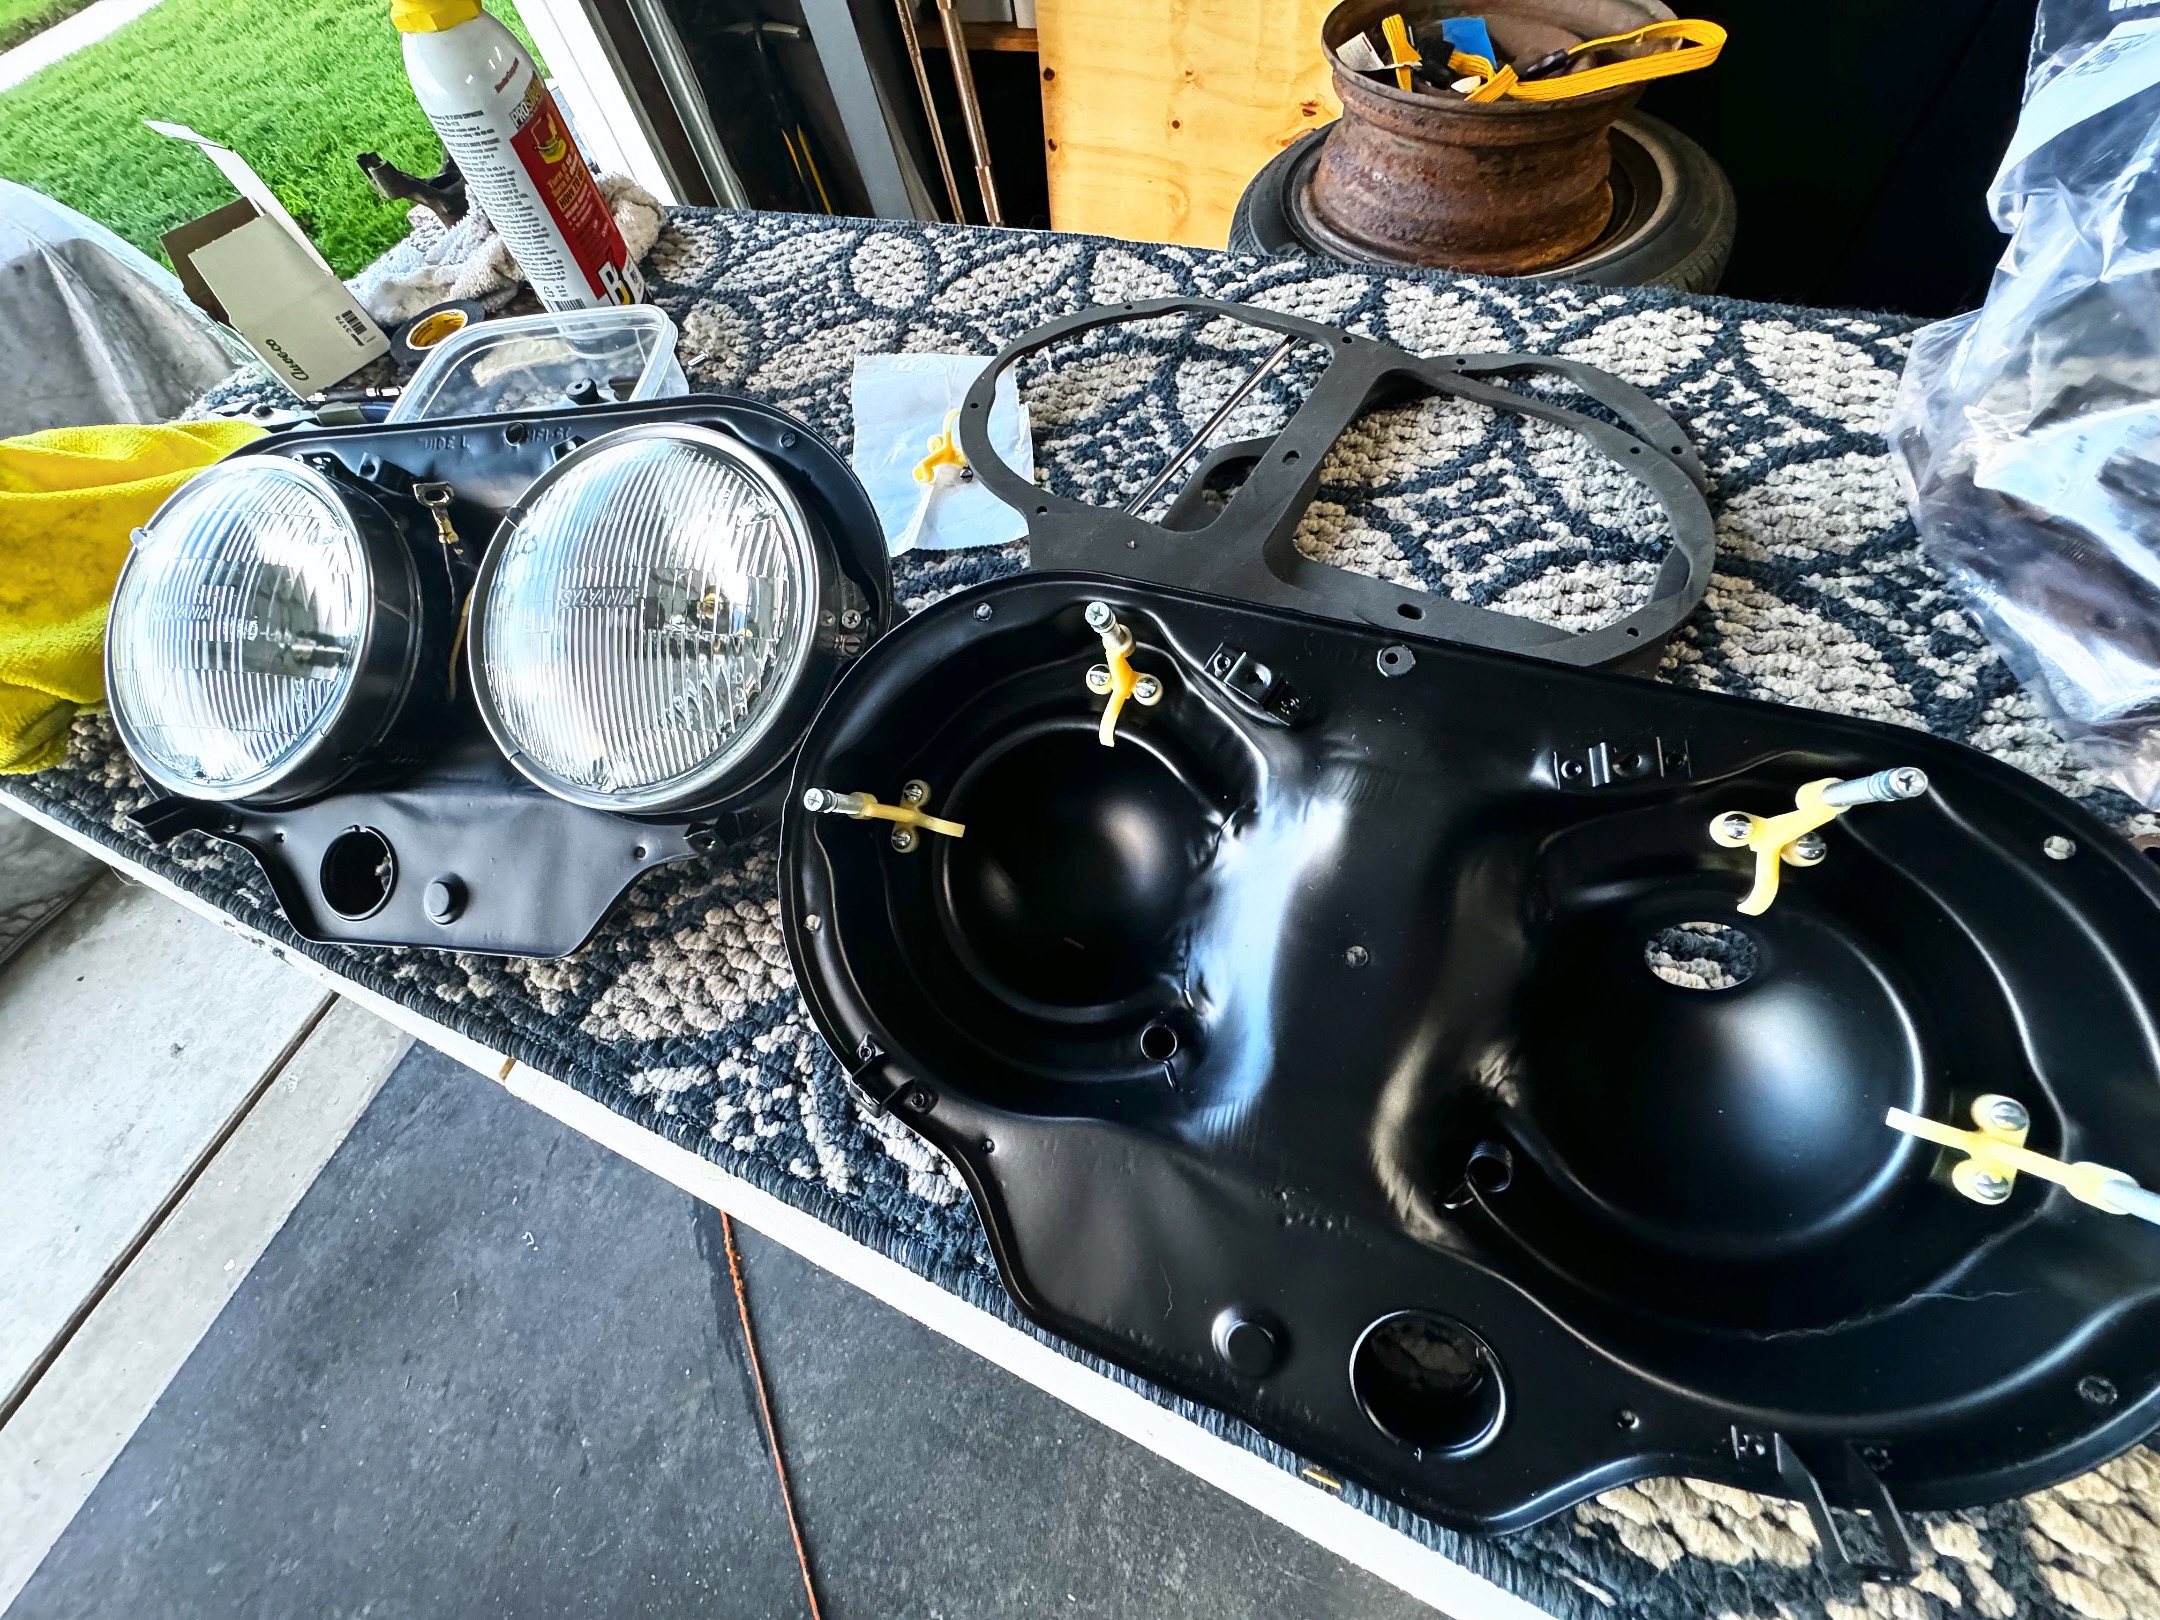
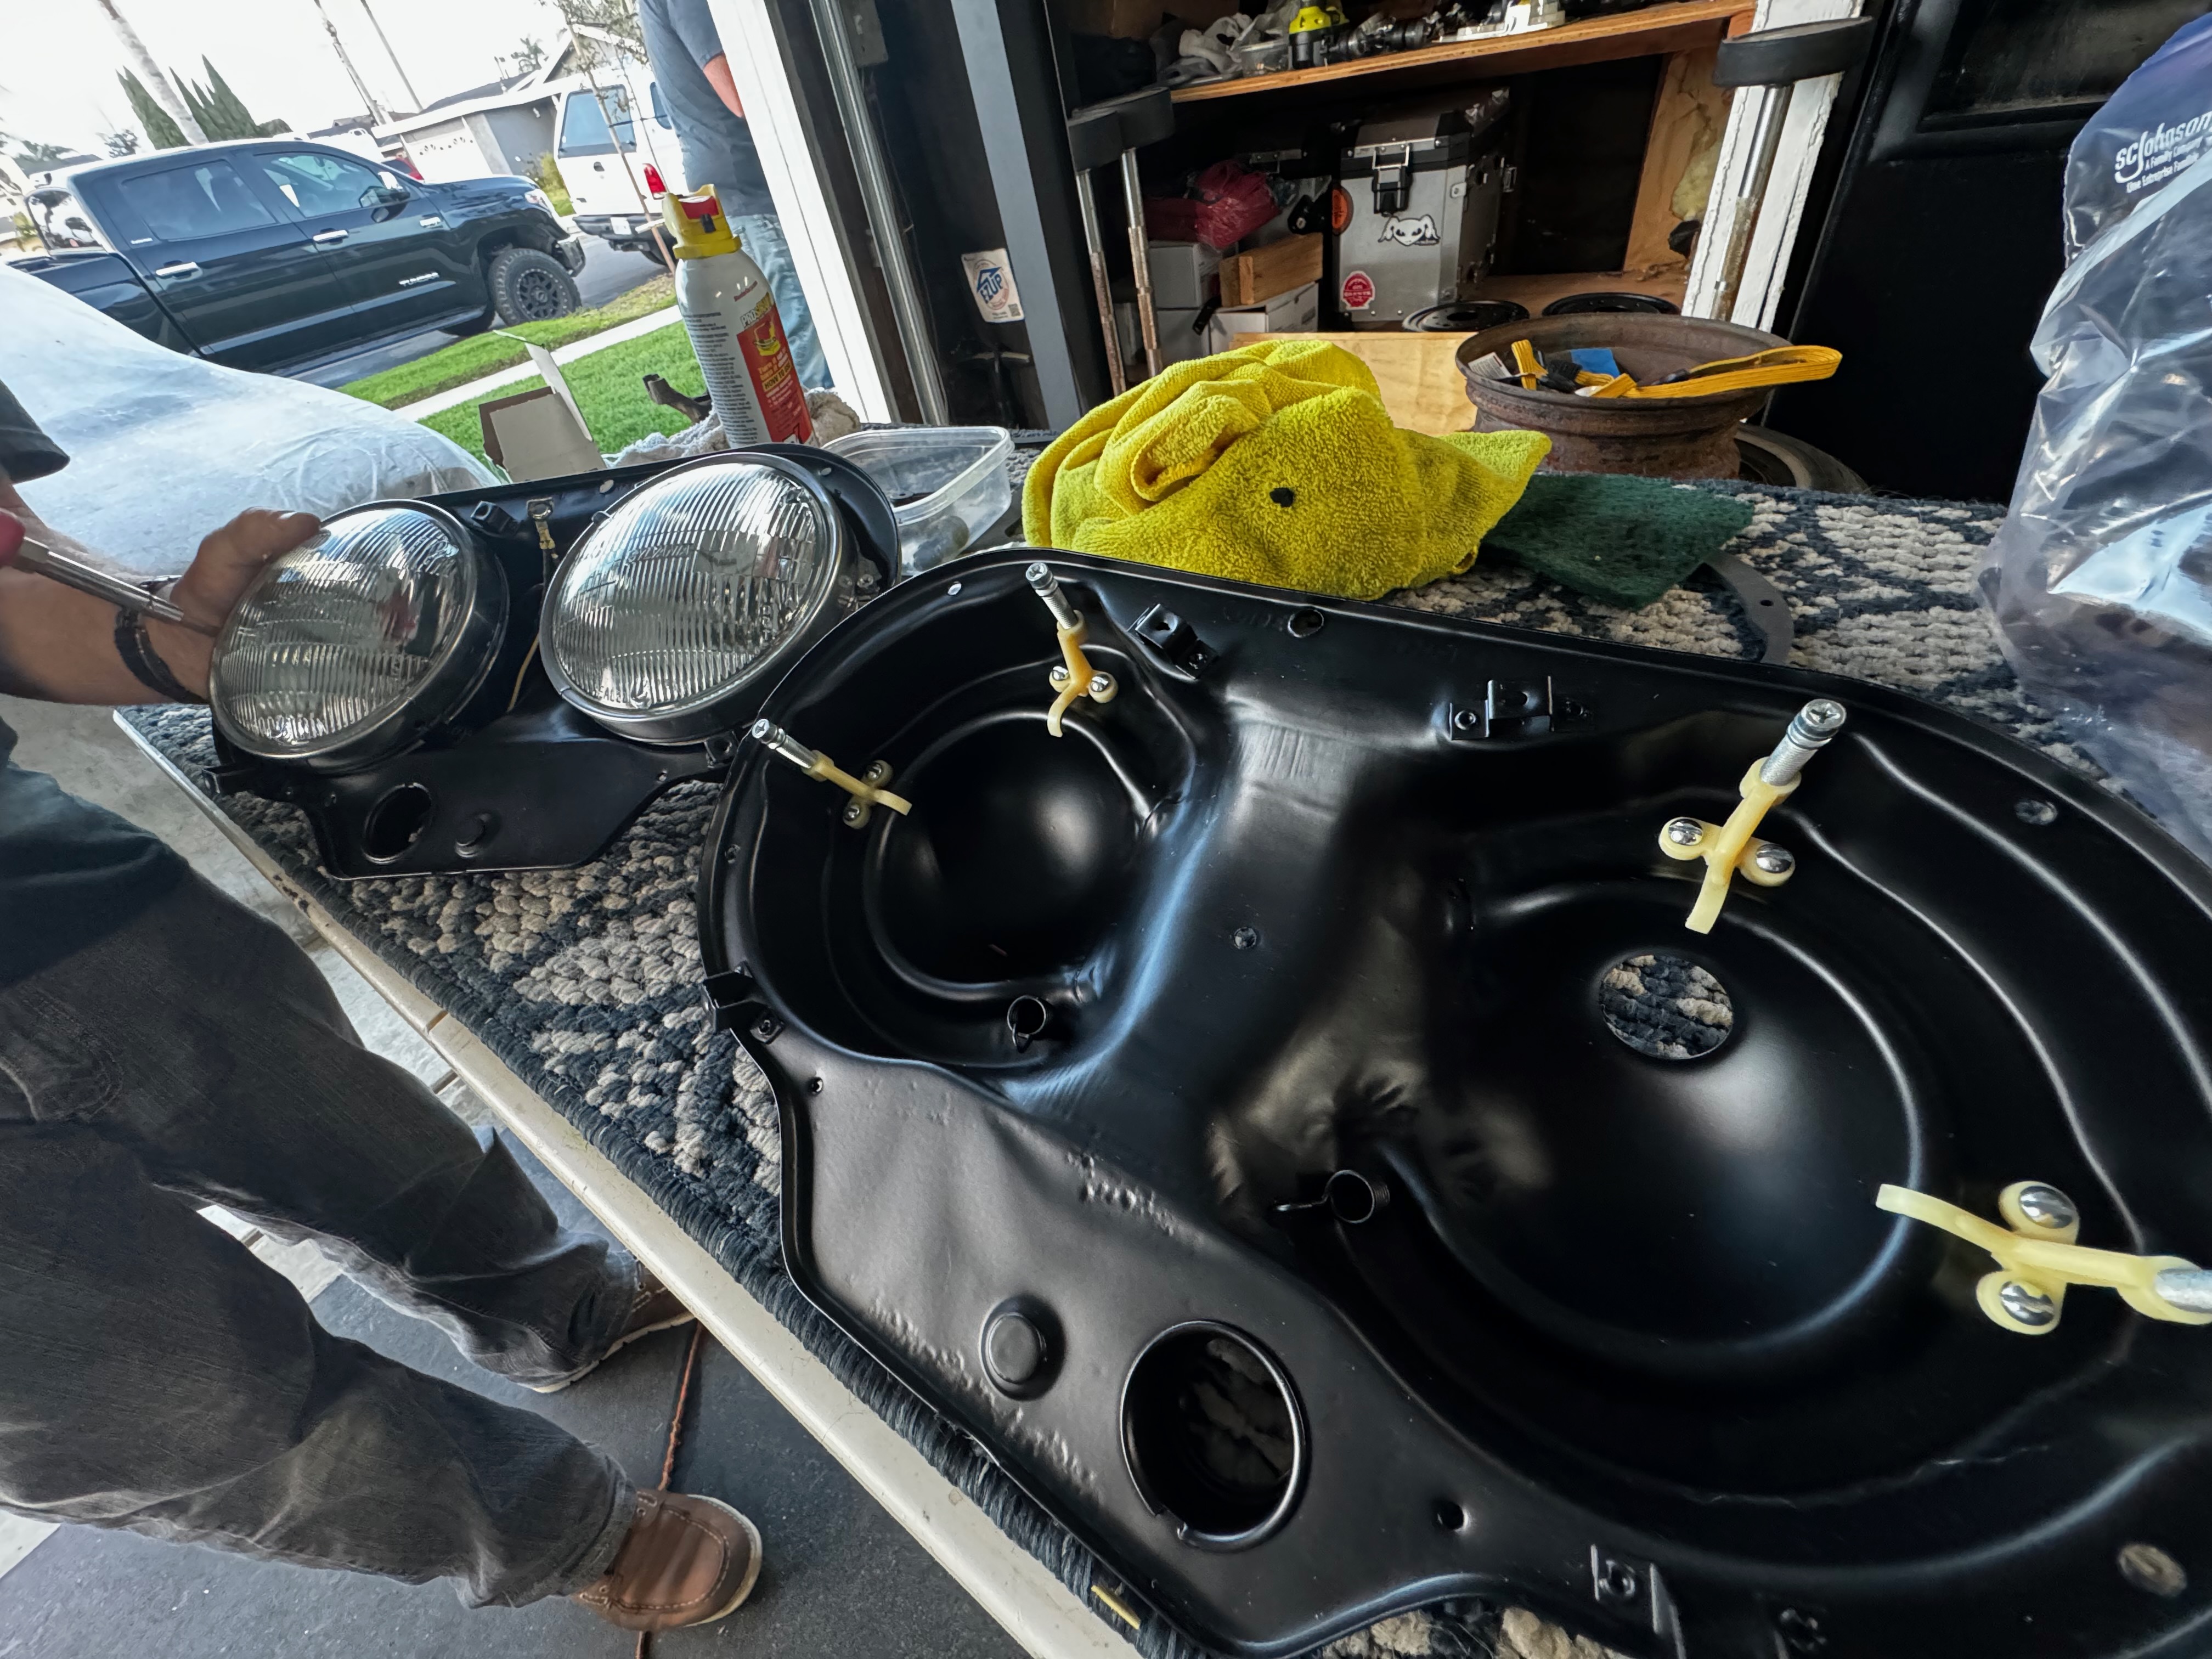
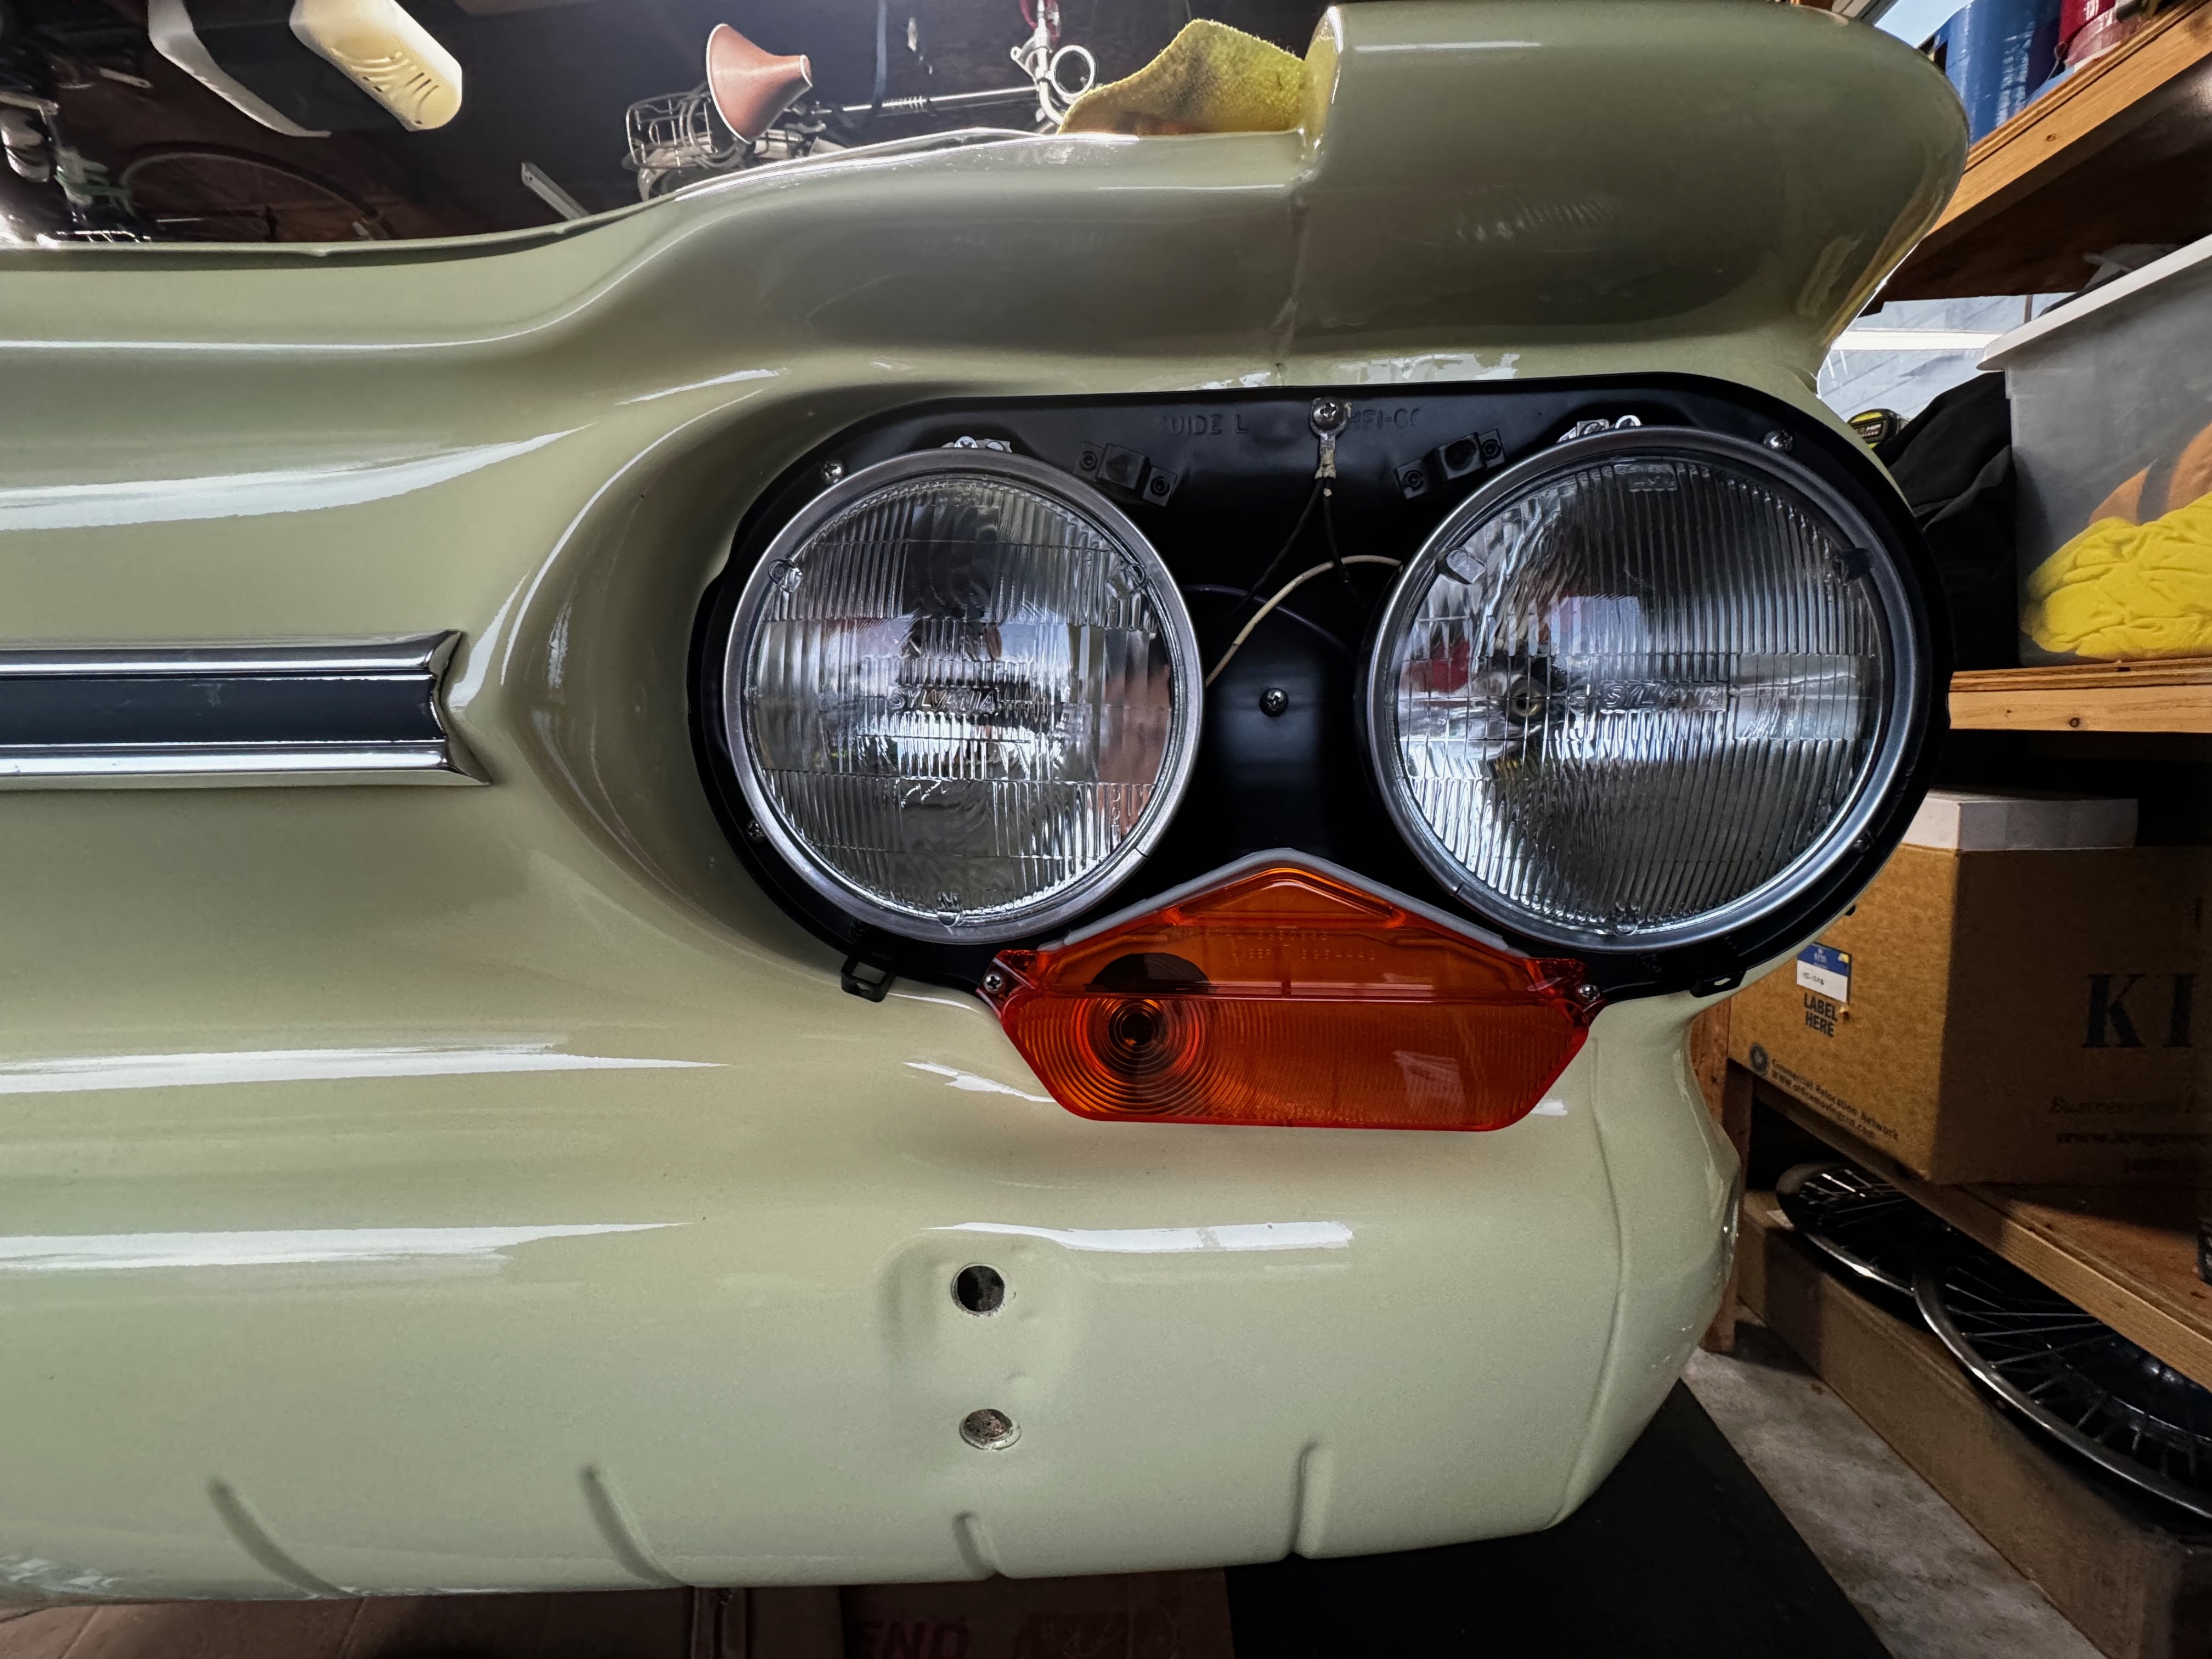
Reassembly: Lighting Systems
Installing all new headlights, taillights, and signal lights with updated wiring for improved safety while maintaining the period-correct appearance.
Reassembly: Completion Phase
The final steps of putting everything together, checking all systems and connections before the momentous first test drive of the restored Corvair.
Reassembly: Detail Integration
Meticulous attention to detail during reassembly, ensuring that even the smallest components are properly installed and adjusted for optimal function.

Reassembly: Component Reintegration
Carefully installing restored mechanical and trim components back into the vehicle, following the detailed documentation created during disassembly.
Reassembly: Visible Progress
Significant progress in the reassembly phase, with the Corvair beginning to take shape as a complete vehicle after months of restoration work.
Reassembly: Precision Fitting
Carefully test-fitting components before final installation to ensure proper alignment, clearance, and function throughout the vehicle.
Reassembly: Interior Details
Detailed work on interior components during reassembly, ensuring every switch, knob, and trim piece is properly installed and functioning.
Reassembly: Exterior Components
Installing restored exterior components including trim, moldings, and emblems with careful attention to factory-correct placement and alignment.
Reassembly: Systems Coordination
Coordinating the integration of multiple vehicle systems during reassembly to ensure they work together harmoniously as designed.
Reassembly: Alignment Precision
Meticulously aligning components during reassembly to ensure proper fit, function, and appearance consistent with factory specifications.
Reassembly: Mechanical Connections
Detailed work on critical mechanical connections and linkages during reassembly, ensuring proper adjustment and operation of all moving parts.
Reassembly: Drivetrain Integration
Installing restored drivetrain components and ensuring proper alignment, torque specifications, and fluid levels for optimal performance.
Reassembly: Major Systems Integration
Significant progress in the reassembly phase with all major systems installed and ready for testing and adjustment before final completion.
Reassembly: Component Alignment
Carefully aligning and fitting components during reassembly to ensure proper clearances, function, and appearance throughout the vehicle.
Reassembly: Final Detailing
Meticulous attention to detail in the final stages of reassembly, ensuring every aspect of the restoration meets or exceeds factory specifications.
Reassembly: Project Completion
The final touches during the reassembly process, marking the transition from restoration project to roadworthy classic car ready for enjoyment.

Completed: Front View Transformation
The stunning front view of the fully restored 1964 Corvair, showcasing the gleaming Monza Yellow paint and immaculate chrome details.
Completed: Rear Perspective
The distinctive rear view of the finished Corvair, highlighting its unique engine-in-back design and beautifully restored tail light assemblies.
Completed: Interior Renewal
The completely restored interior featuring new upholstery, refinished dashboard, and rebuilt gauges, creating a comfortable and period-correct cabin.
Completed: Engine Compartment
The meticulously detailed engine compartment showcasing the rebuilt air-cooled flat-six engine with all components restored to better-than-new condition.
Completed: Road Worthy
The fully restored Corvair in its natural habitat - cruising down a scenic forest road, proving that the extensive restoration has resulted in a reliable driver.
Completed: Pride of Ownership
A proud Sasquatch with his labor of love - the fully restored 1964 Corvair convertible representing countless hours of dedication and craftsmanship.