The Restoration Journey
Blood, sweat, and fur - bringing the Corvair back to life
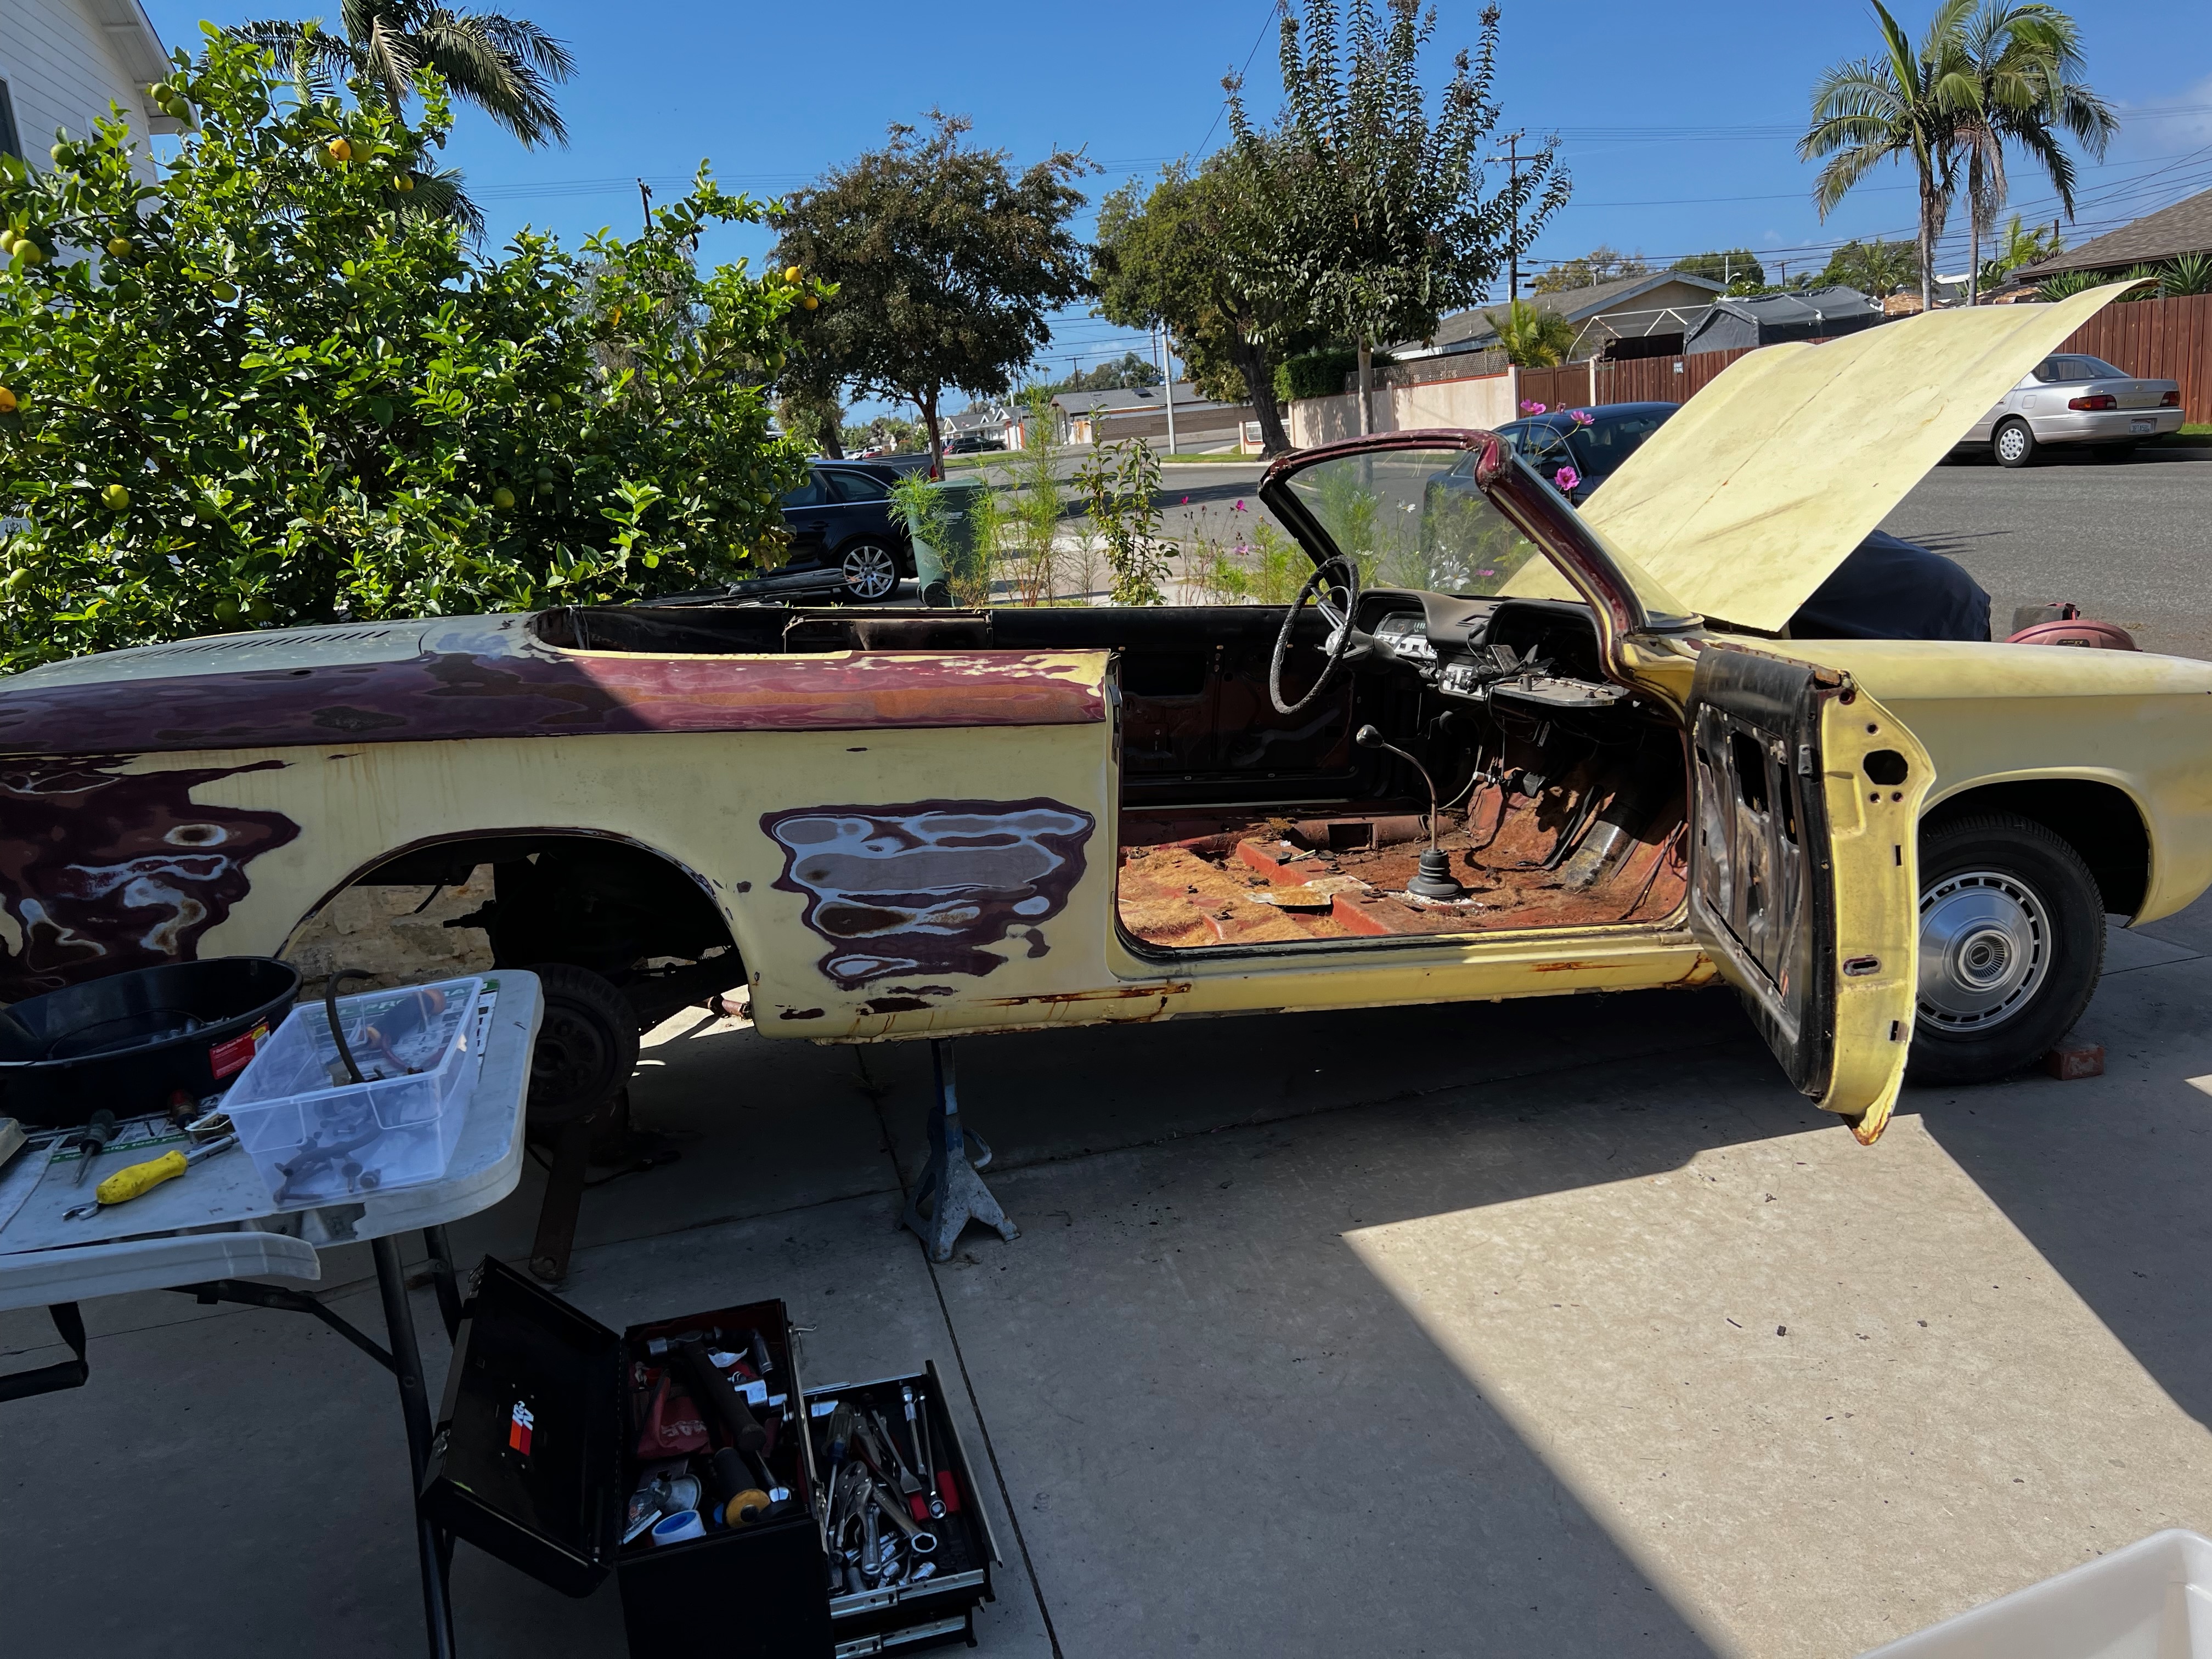
Taking It All Apart
The first step in any restoration is disassembly. Project car life is mainly pain, tears, time, and frustration, but it's also the best hobby ever - especially when you're methodically uncovering the layers of history in a classic machine.
With my trusty camera in one paw and tools in the other, I began the careful process of taking the Corvair apart piece by piece. Every component was photographed, labeled, and stored in clearly marked containers.
As I removed each part, I assessed its condition and made notes about what would need to be repaired, refurbished, or replaced. This meticulous documentation would prove invaluable later in the project.
Disassembly Challenges:
- Rusted bolts that refused to budge (even with my legendary strength)
- Delicate trim pieces that had become brittle with age
- Discovering hidden damage that wasn't visible during initial inspection
- Keeping track of hundreds of small parts and their exact locations
I nearly lost all desire to work on cars because of the lack of time/spare change/energy during this phase, but the vision of the completed Corvair kept me going through the long nights in the garage.
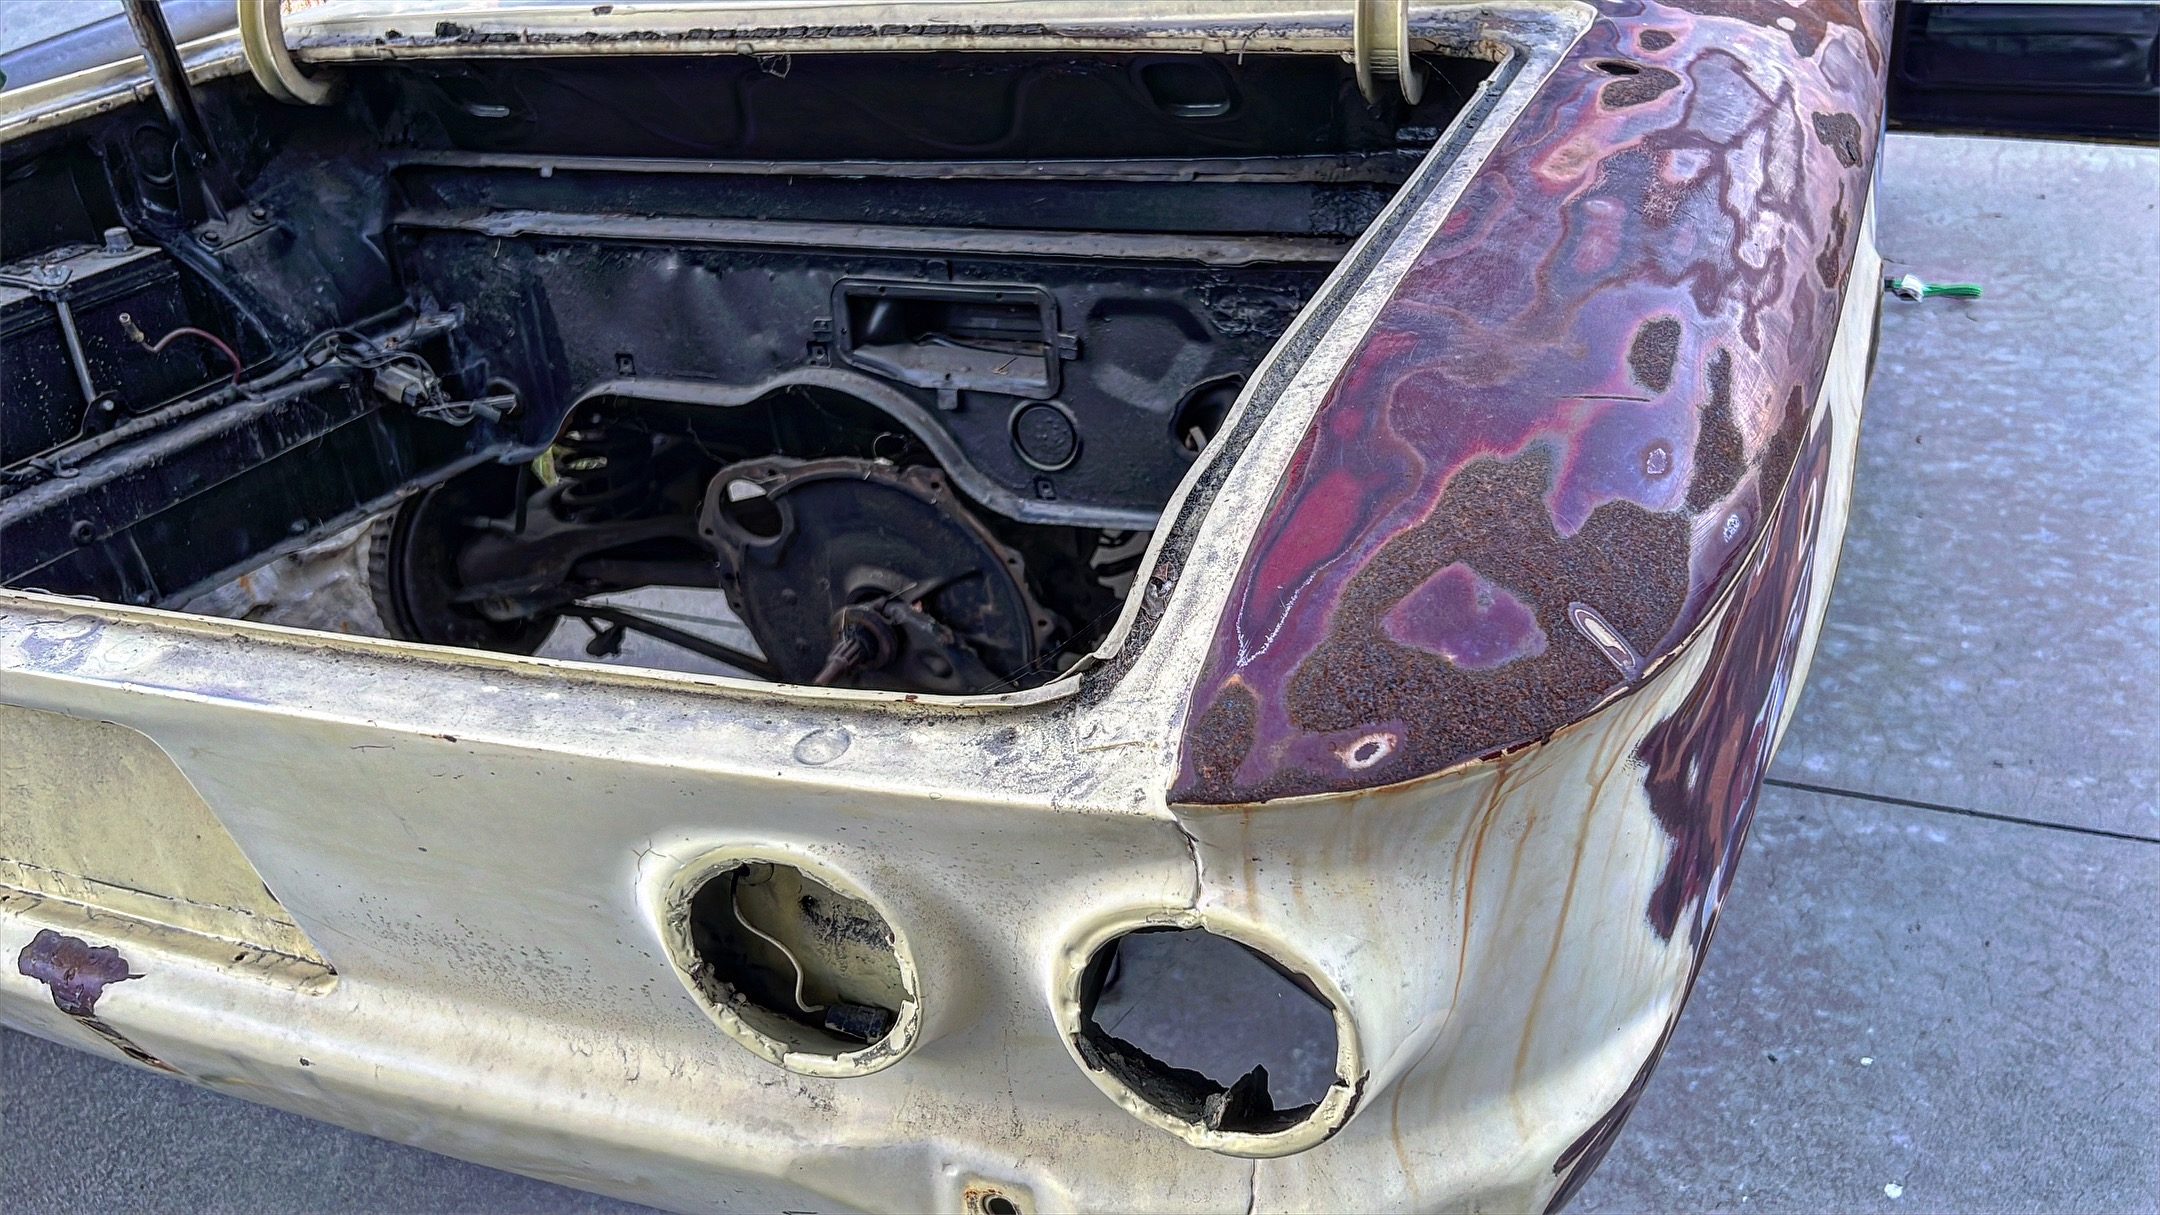
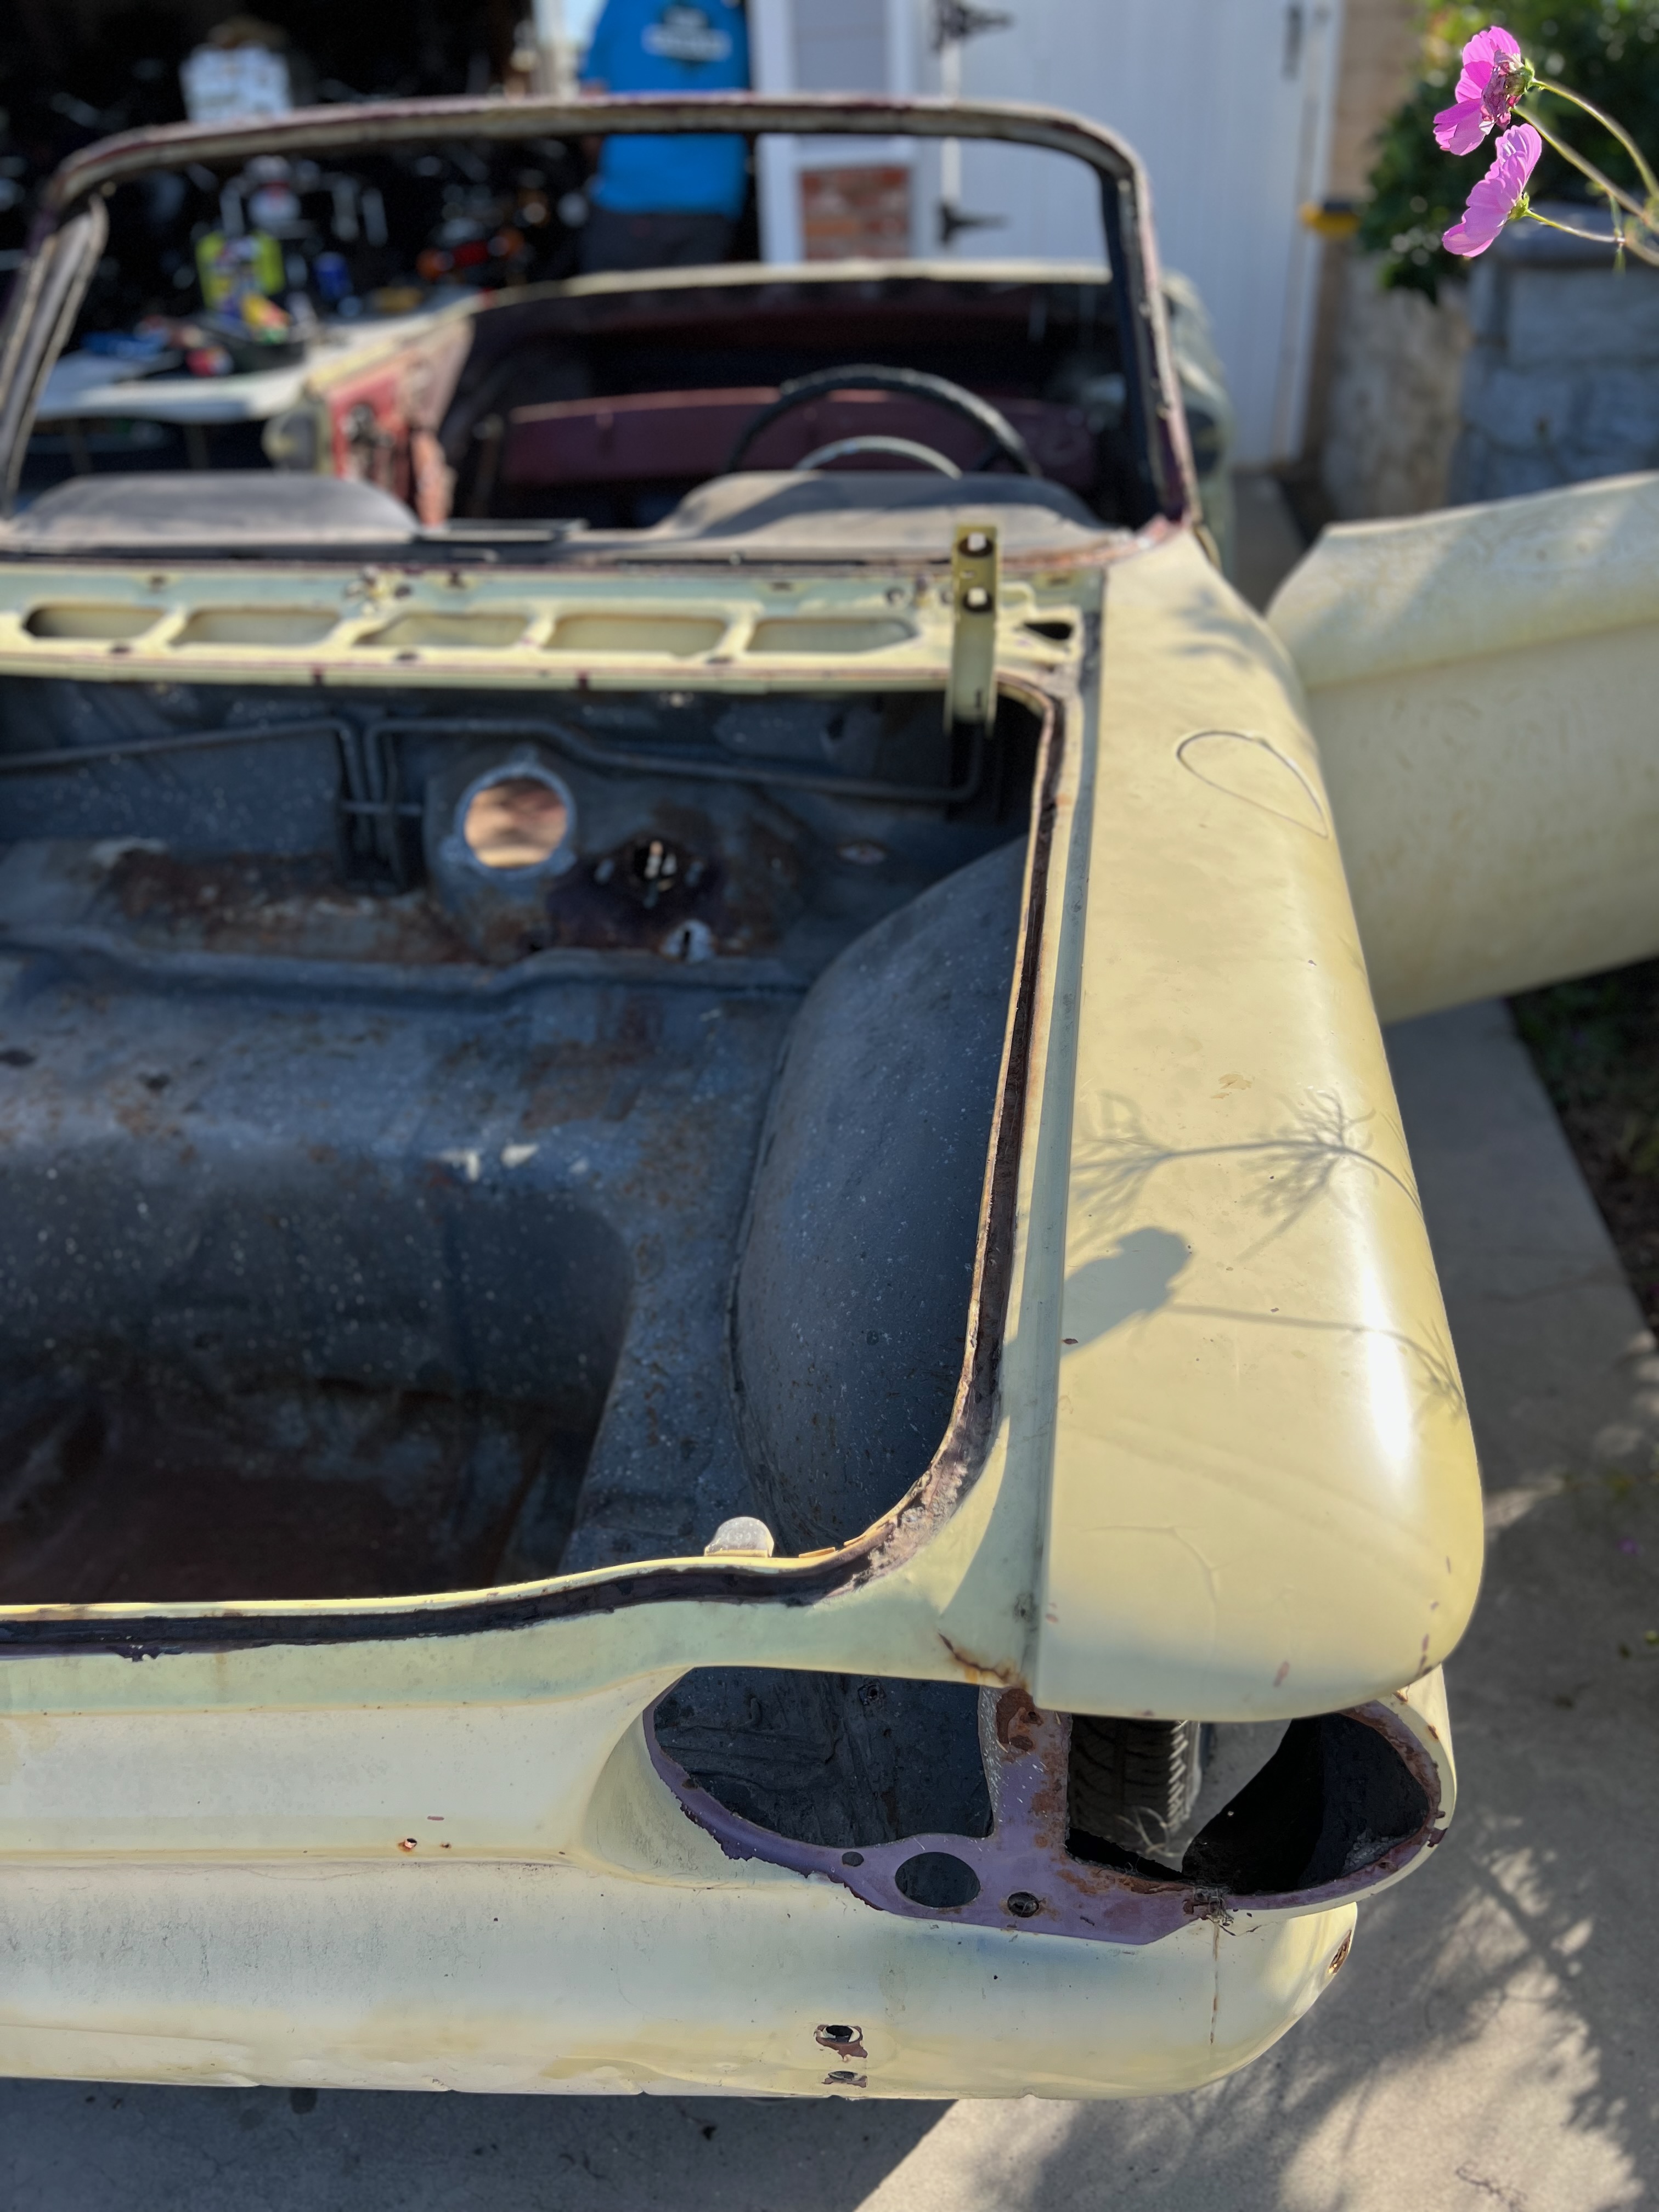
Battle Against the Metal Cancer

Mechanical work is relatively easy; rust is a cancer, very difficult to fully remove, and what you see is almost always the tip of the iceberg. As I peeled back layers of the Corvair's body, I discovered the true extent of the rust damage.
The floor pans were the worst affected, with significant rust-through in several areas. The lower fenders and rocker panels also showed extensive damage from decades of moisture exposure.
I wanted to give up on numerous occasions as it seemed much of the progress was one step forward and then two steps back. Cutting out rusted metal only revealed more rust hiding behind it.
The Rust Repair Process:
- Cut out all compromised metal, going well beyond the visible rust
- Fabricate new panels or install reproduction parts where available
- Weld in the new metal, being careful not to warp the surrounding areas
- Grind down welds and apply body filler where needed
- Sand, prime, and seal to prevent future rust
This phase tested both my patience and my welding skills. My large paws weren't naturally suited for delicate welding work, but I adapted and developed techniques that worked for my unique physiology.
Reviving the Beast's Heart
The Corvair's flat-six engine is a marvel of engineering - compact, air-cooled, and with a distinctive sound that's music to any car enthusiast's ears. After 30+ years of sitting dormant, bringing it back to life would be a significant challenge.
I began by completely disassembling the engine, carefully documenting each step. The internal components showed signs of wear but were surprisingly well-preserved considering their age.
Engine Rebuild Steps:
- Complete disassembly and cleaning of all components
- Cylinder boring and honing to restore proper dimensions
- Crankshaft grinding and balancing
- Installation of new pistons, rings, bearings, and gaskets
- Valve job with new valve guides and seals
- Carburetor rebuilding and tuning
- Reassembly with careful attention to torque specifications
The trials and tribulations of the engine rebuild just increase the value of the reward you feel in the end. When I finally completed the assembly and prepared for the first start-up, I felt a mixture of excitement and trepidation.
Untangling the Nervous System
The electrical system of a classic car can be one of the most challenging aspects of a restoration. Decades of deterioration, previous owners' "creative" modifications, and the effects of moisture had left the Corvair's wiring in a sorry state.
Rather than trying to repair the original wiring harness, I opted for a complete replacement. This would ensure reliability and safety while allowing me to add a few modern conveniences without compromising the car's vintage character.
Electrical Upgrades:
- New main wiring harness with proper fusing
- Conversion to alternator from generator for improved charging
- LED lighting for better visibility (while maintaining vintage appearance)
- Hidden modern radio with Bluetooth (keeping the original radio face)
- Additional accessory circuits for future upgrades
Waiting on parts has turned my non-project cars into project cars during this phase. The specialized wiring harness took months to arrive, but the wait was worth it for the peace of mind that comes with a properly engineered electrical system.
Creating a Cozy Cave
The interior of the Corvair had suffered from years of neglect and exposure to the elements. Rodents had made homes in the seats, the dashboard was cracked from sun exposure, and the carpets were beyond salvation.
This presented an opportunity to restore the interior to its original glory while making subtle improvements for comfort and durability.
Interior Restoration Process:
- Complete removal and disassembly of all interior components
- Restoration of the dashboard with careful repair of cracks and refinishing
- Rebuilding of seat frames and installation of new foam and upholstery
- Replacement of all weather stripping and seals
- Installation of sound deadening material for a quieter ride
- New carpeting and interior trim pieces
- Restoration of original gauges and controls
As a creature who appreciates comfort, I paid special attention to the seats, ensuring they would provide proper support for long drives through the forest. The interior now combines vintage charm with subtle improvements that enhance the driving experience without compromising authenticity.

The Yellow Revival

With the structural repairs complete, it was time to focus on the Corvair's exterior appearance. I decided to restore the car to its original Monza Yellow color, a vibrant hue that perfectly captures the car's playful character.
The painting process was one of the most time-consuming phases of the restoration, requiring meticulous preparation to ensure a flawless finish.
Paint and Body Process:
- Final body work to ensure all panels were straight and properly aligned
- Multiple rounds of block sanding to achieve a perfectly smooth surface
- Application of high-build primer to fill minor imperfections
- More sanding, starting with coarse grit and progressing to fine
- Sealer coat to provide a consistent base for the color
- Multiple coats of Monza Yellow base coat
- Several coats of clear for depth and protection
- Wet sanding and polishing to achieve a mirror-like finish
The transformation was dramatic. What had once been a dull, rusted shell was now a gleaming yellow beauty that caught the sunlight in a way that made my heart race. I can't wait to drive it again once it's fully assembled.
Putting Humpty Dumpty Back Together
With all the major components restored, the reassembly process began. This is where my meticulous documentation during disassembly proved invaluable. Each labeled bag of fasteners, each photograph of component placement, guided me through the complex puzzle of putting the Corvair back together.
Reassembly is both rewarding and challenging. Each completed subsystem brings the car closer to completion, but the process requires patience and attention to detail.
Reassembly Highlights:
- Installation of the rebuilt engine and transmission
- Mounting of the restored suspension components
- Installation of the new wiring harness and electrical components
- Fitting of the restored interior
- Installation of glass, trim, and brightwork
- Mounting of the convertible top mechanism and new top
The car is now in the final stages of reassembly, with each completed step bringing me closer to the moment I've been dreaming of - turning the key and hearing the flat-six engine roar to life.
